• Cart
  • Checkout
  • My Account

Infrared Conversions, IR Modifications & Photography Tutorials | Life Pixel IR

The world leader in infrared conversions, modifications & DIY IR conversion tutorials. Scratched sensor replacement, UV & Full spectrum conversions.

The world leader in infrared camera conversions

866.610.1710
  • Home
  • → Start Here ←
    • 1 – Introduction
    • 2 – Filter Choices
    • 3 – Focus Calibration
    • 4 – Lens Considerations
    • 5 – Camera Considerations
    • 6 – Start Shopping
  • Galleries
    • Infrared Photography
    • Infrared Time Lapse
    • Infrared Cinematography
    • Infrared Stop Motion
    • Ultraviolet Photography
    • Forensic Photography
  • Education
    • Training Sessions
    • How To Shoot Infrared
    • AR Coated Infrared Filters
    • Lens Hot Spot Database
    • Photoshop Video Tutorials
    • Infrared Issues & Solutions
    • IR Basics in Photoshop
    • Camera Quick Start Guide
    • DIY Conversion Tutorials
    • IR Photography Primer
    • Secondhand Cameras
    • Wall Of Shame
  • Workshops
  • FAQ
  • Blog
    • Tutorials
    • Inspiration
    • Locations
    • Gear
    • News
    • Other
  • Why Choose LifePixel?
    • Submit Your Review
  • Contact
  • Shop

6 Ways To Find Your Creative Spark

Every photographer has hit a creative wall at some point in their photography journey. You may just feel disillusioned in general because work isn’t coming through. Or even if you are not a pro, it could just be that you are struggling to capture unique photos when you are on location. Your tested and trusted eye is letting you down and you can’t seem to find the compositions or angles to get the photos you want. What do you do? How do you get yourself out of a slump? Here are 6 ways that you could try to find your creative spark again.

creative_spark

Take a break

It might seem counterproductive but it could just be that you need to take a break from photography altogether. Often taking a break from something can help you clear your mind and re-focus you. This might be an extended break of a few weeks or months. Or even if you are on a shoot, it might mean taking a break for a few hours like taking an afternoon off to just relax. You’ll be amazed how much more determined and re-energized you will be when you have had a break. This might also include taking a break from things like social media which can often increase someone’s anxiety about their own work.

creative_spark

Start a project

Sometimes the reason that you might feel that you are missing your creative spark is that you feel overwhelmed with the pressure of taking great photos. If you are a working photographer this might be because you are constantly taking the same photos over and over again. So you end up in a rut where your photography becomes a mechanical process of pointing and shooting rather than really thinking about the compositions and creative process. A great way to tackle this issue is to start a personal project. It can be something personal, an interest or even something you are passionate about. But a personal project is a great way to help get your creative spark back.

creative_spark

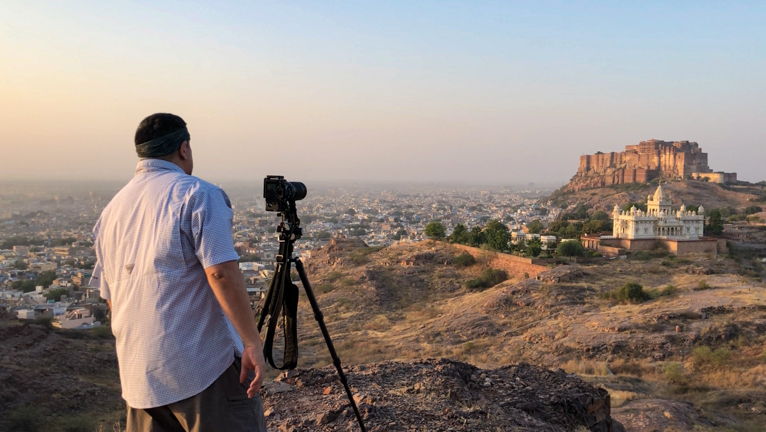
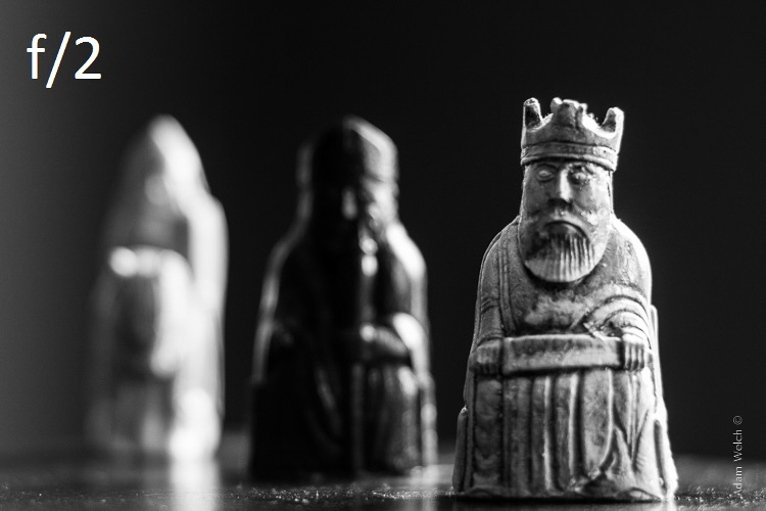
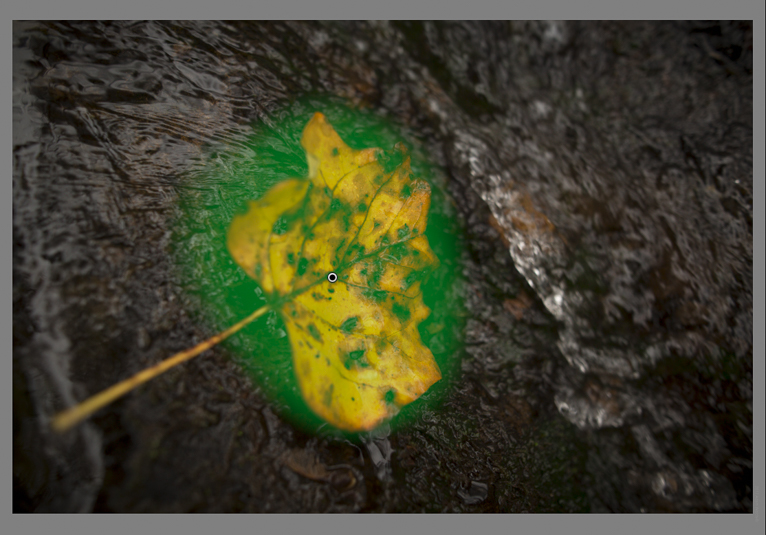
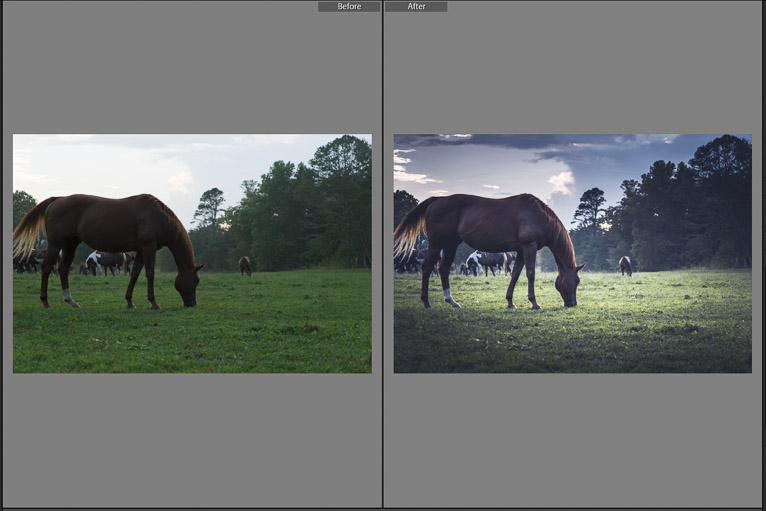
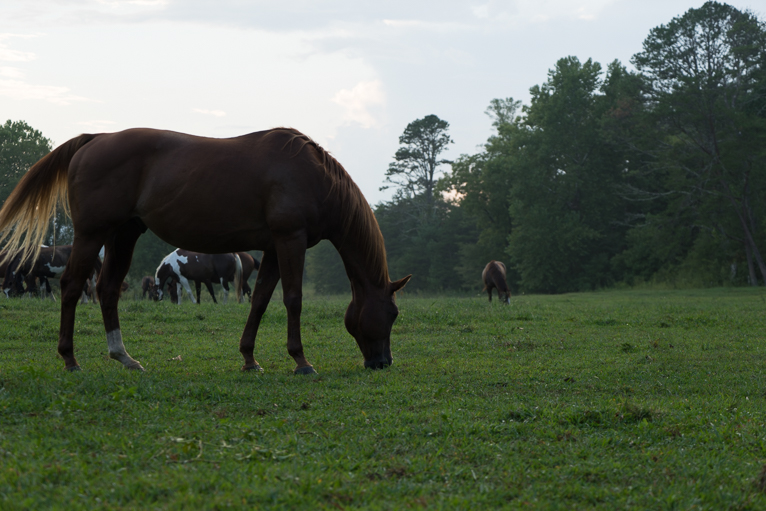
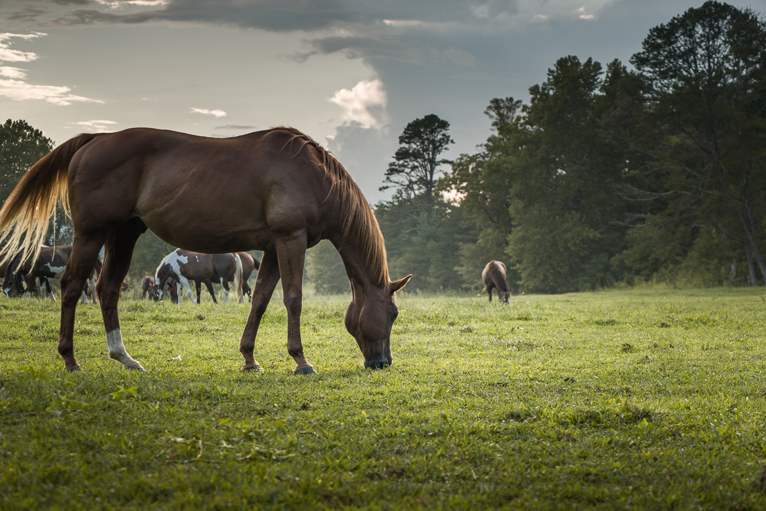
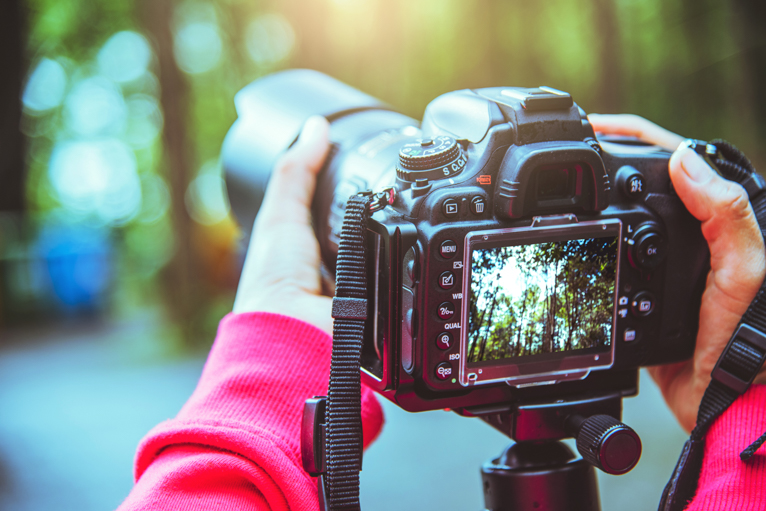
Look beyond the norm

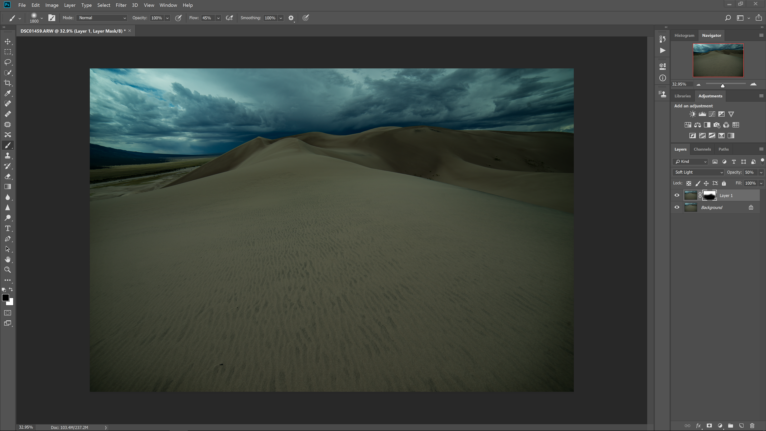
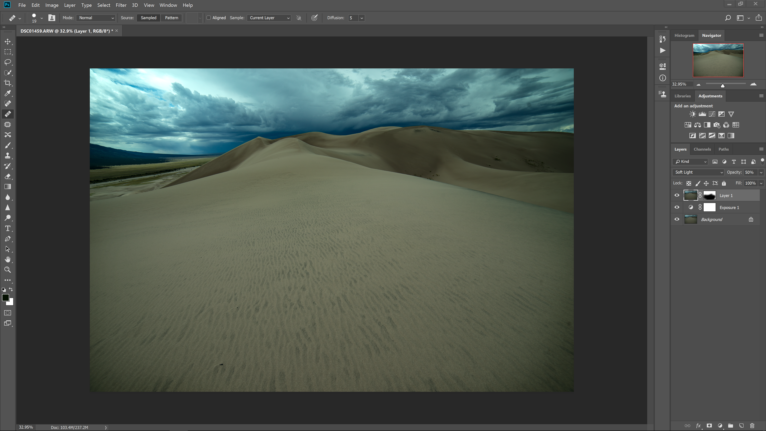
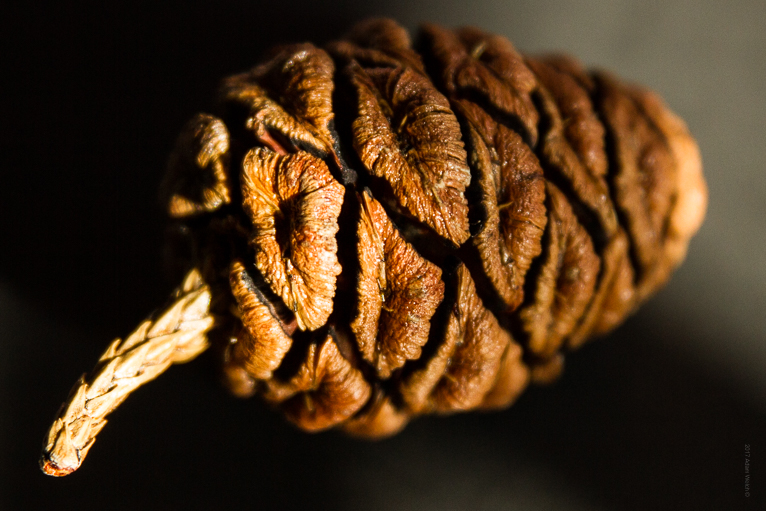
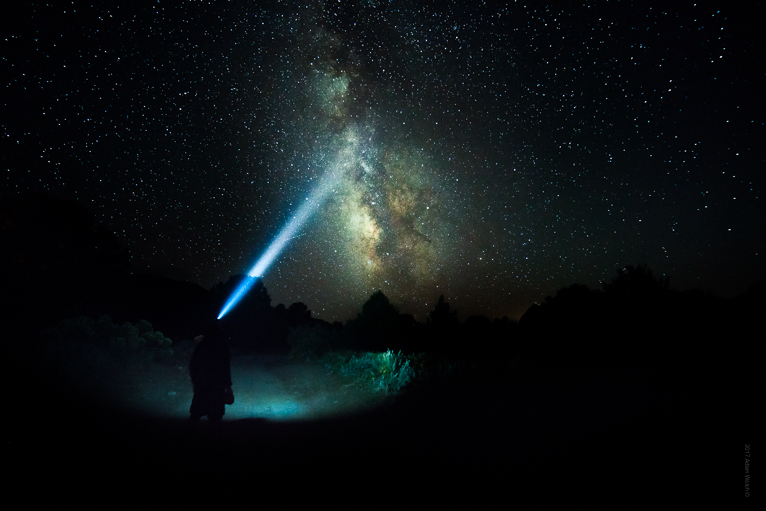
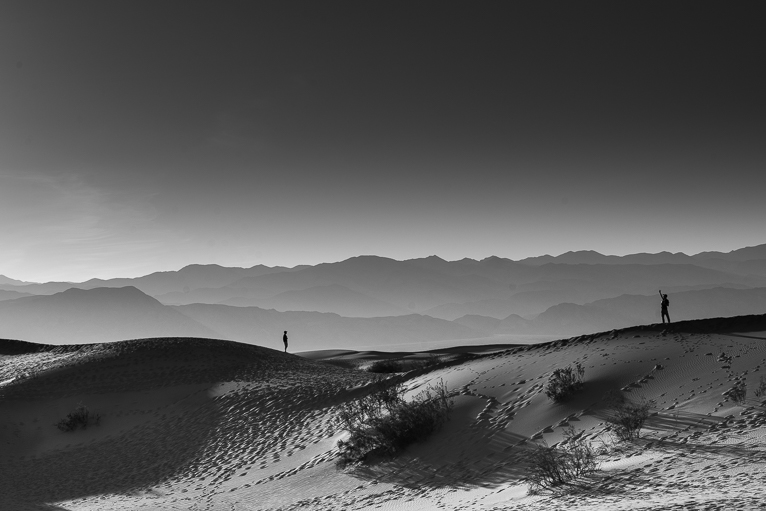
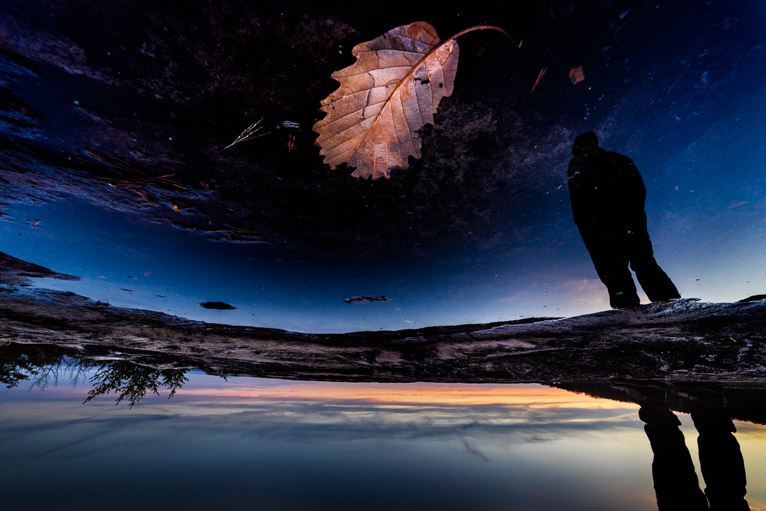
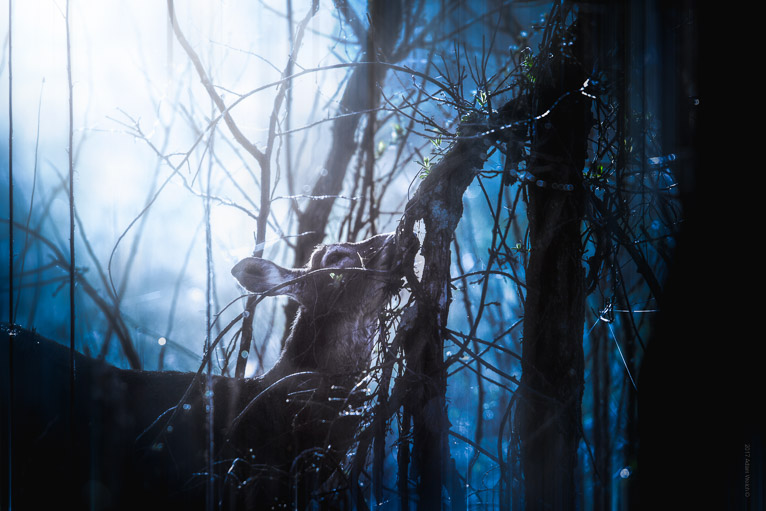
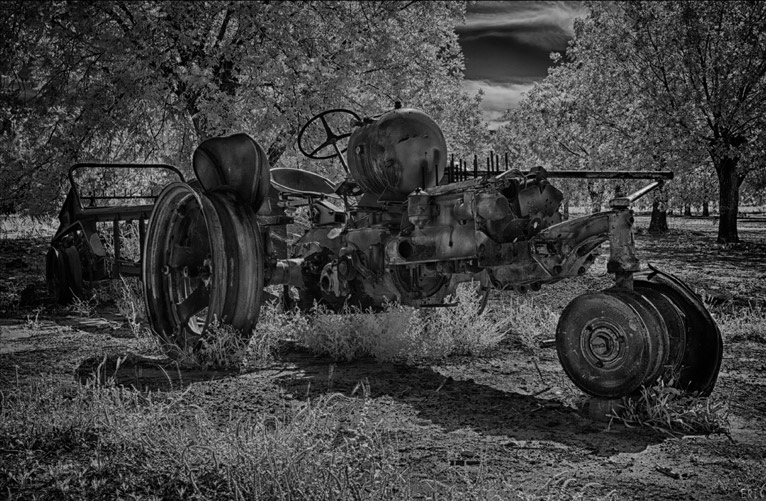
One of the main reasons that you may be lacking that spark is because all your photos are starting to look the same. Every photographer is guilty of taking too many photos at eye level, aiming for the perfect exposure and composition that fits into the rules of photography. Sometimes being a bit more creative in your shots might be enough to get your creative juices flowing again. A really good exercise for this is to avoid looking in the viewfinder to compose your shot. Instead set your camera to “live view” mode and just go and shoot away at different angles and heights. For example, you’ll be amazed at how different things look at low angles rather than at eye level.

creative_spark

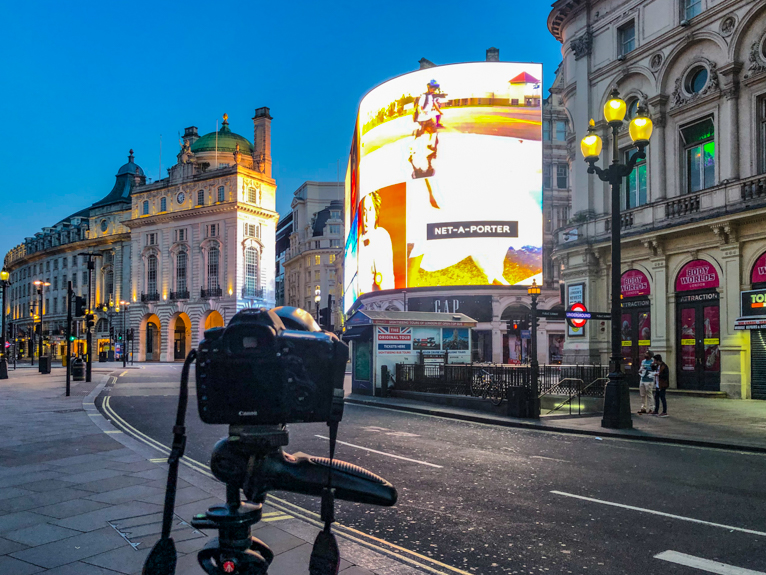
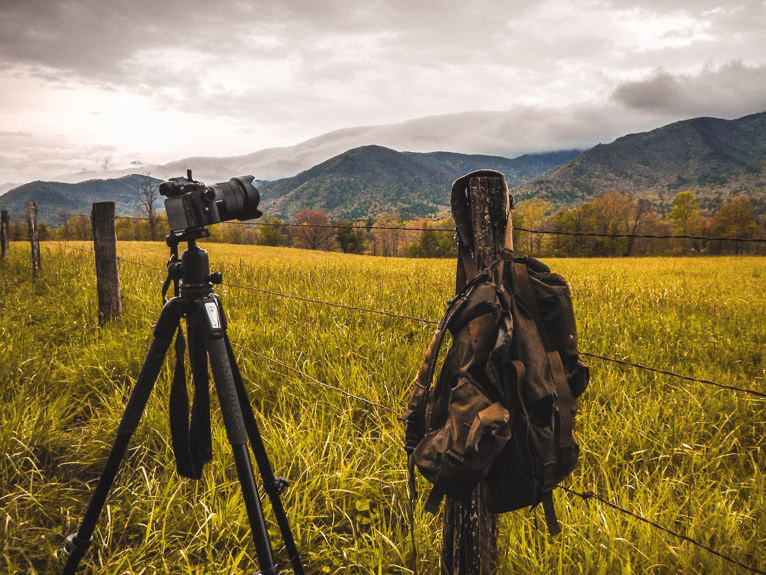
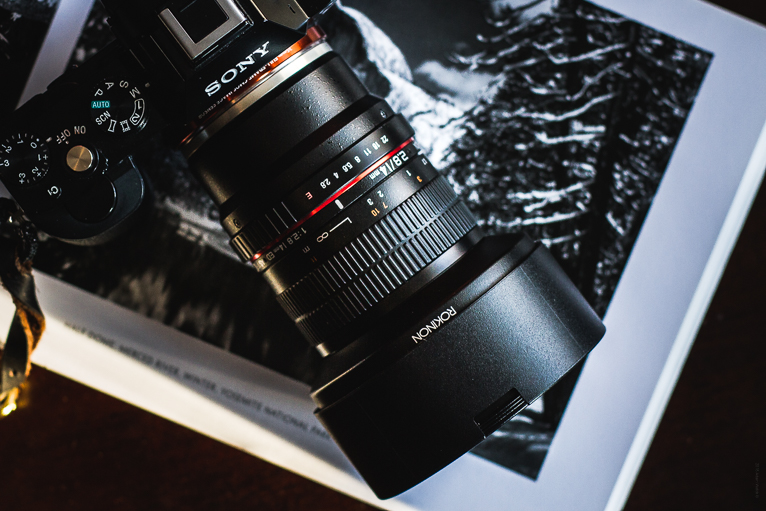
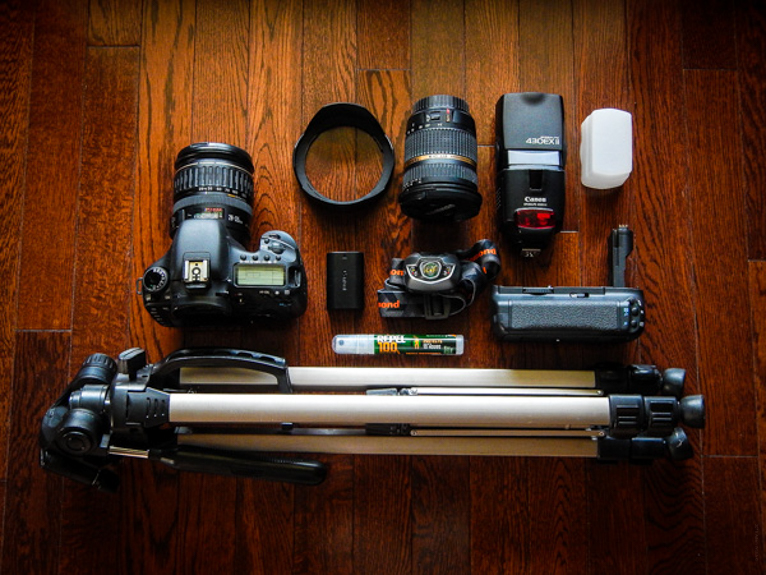
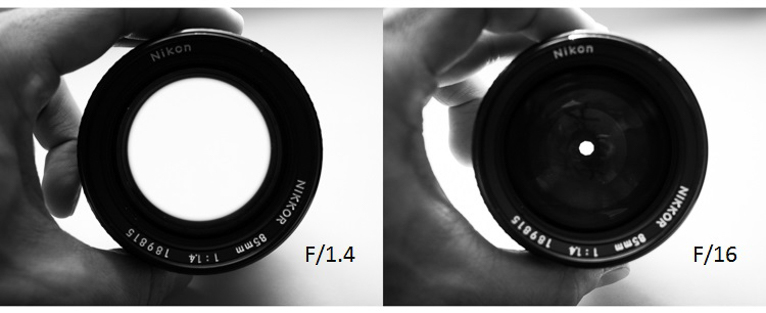
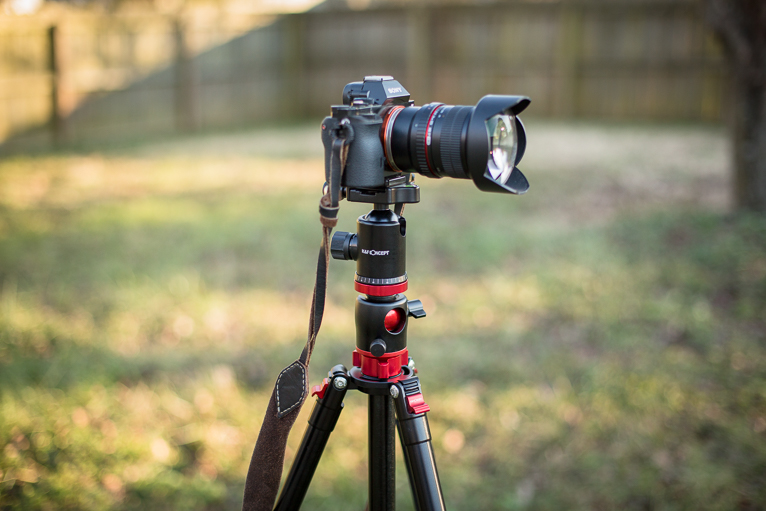
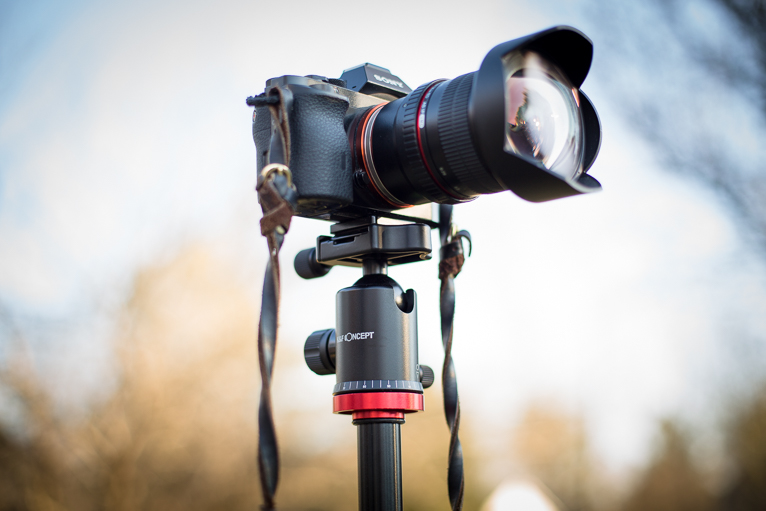
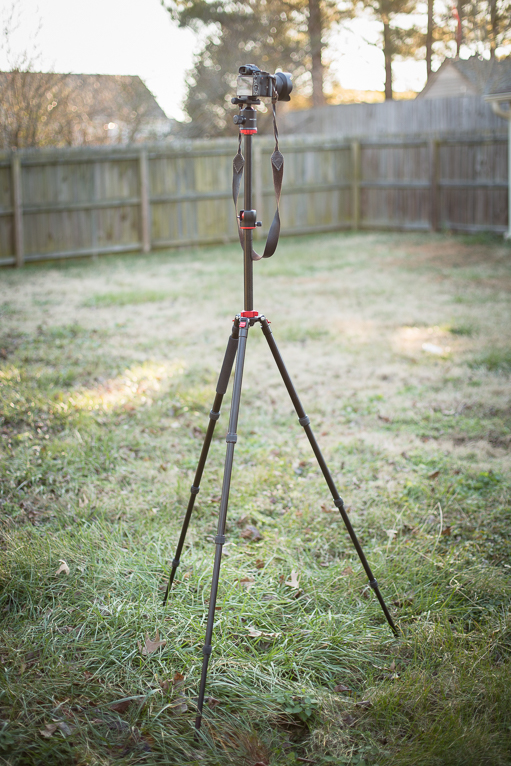
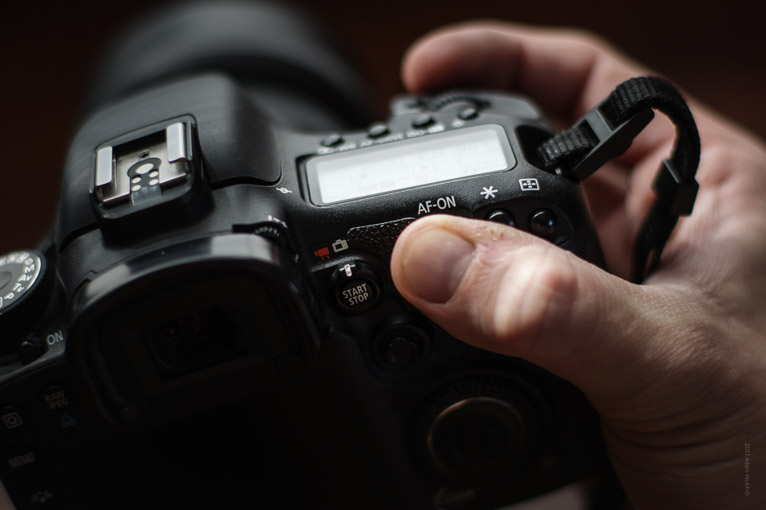
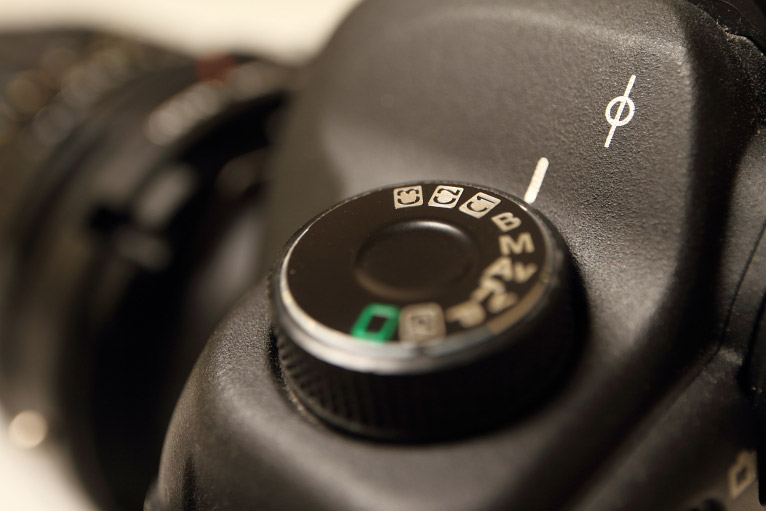
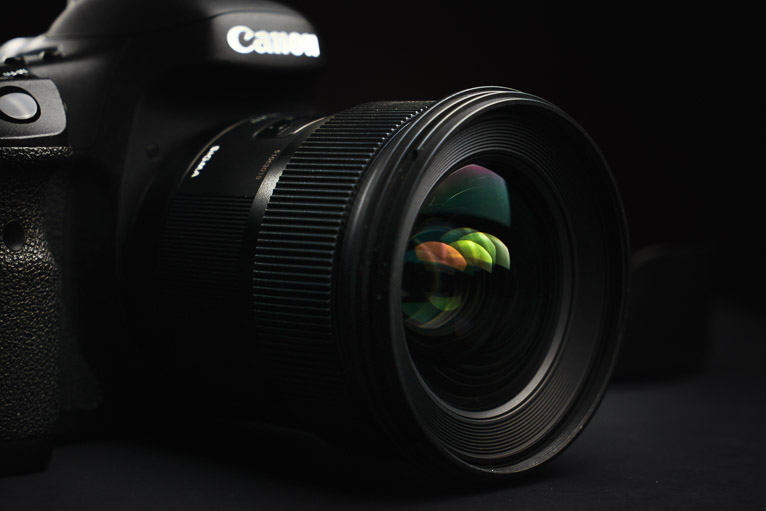
Buy (or rent) new gear

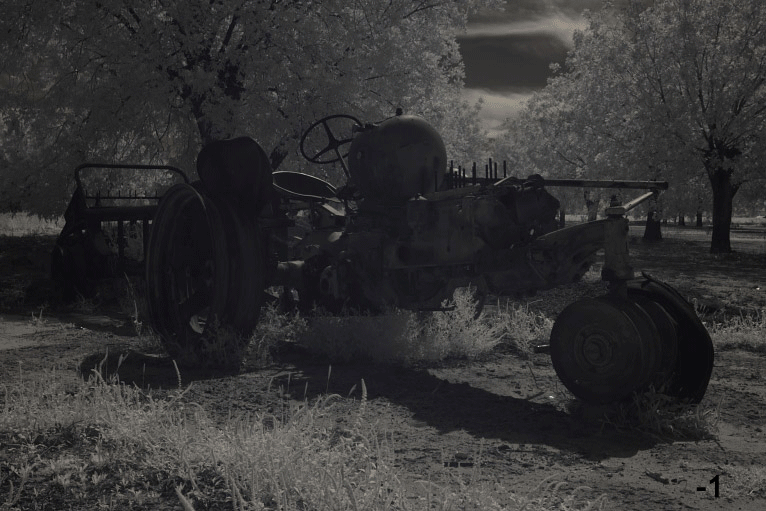
You know that feeling of excitement when you have a new piece of equipment to play with. Well, it is also one of the best ways to get your creativity going again if you are in a slump. Because you will naturally want to test out the new purchase you will be more likely to take photos. Something new doesn’t necessarily mean a new camera or a new lens. For example, you could try infrared photography by converting your camera. Or it could be as simple as a new piece of editing software or even an app. Basically, anything that will get you excited to photograph things again is worth trying out.
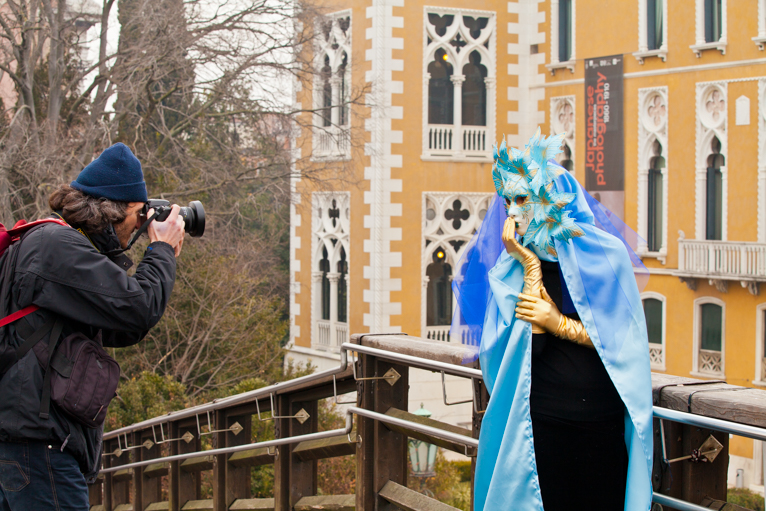
creative_spark

Connect with others

Photography can be a lonely hobby or profession. The only people who enjoy talking about photography are other photographers. A great way to keep yourself motivated but also getting inspired is to surround yourself with other photographers whose work you admire. But don’t stop just at photographers. You could also follow artists, designers, writers and even poets to help inspire your work. The important thing is not to copy other people but to use their work as inspiration for your own creativity. It’s the age-old practice of surrounding yourself with more talented people with the aim of raising the standard of your own work.

creative_spark

Print your work

We live in a digital world, but it is still really nice to see your work printed. There is something about an actual physical copy that always seems to make your work seem more valued. While print opportunities from clients might be limited and becoming more so every year, there is nothing stopping you from printing your own work to sell or even to just hang on your wall at home. It will give you an enormous sense of pride and might just make you want to get out there to take more photos.

creative_spark

Creativity can be fickle and sometimes you may feel that no matter what you try the photos are not turning out the way you wanted. The key is not to get depressed, as every photographer will at some point go through the same thing. Use the tips above to help you get your creative spark back.

Photo credits: Kav Dadfar – All rights reserved. No usage without permission. Dreamstime.

Filed Under: Tutorials Tagged With: creativity, Photography, Photography Inspiration

5 Photography Changes You Should Make In 2020

A new year always brings new resolutions. So why not make some photography resolutions instead this year? Often these only last a few weeks or months but if you can keep to it you may just see a huge improvement in your photos. Photography is like any other hobby. The more you practice the better you will become. So, here are 5 photography changes for you to make in 2020.

Photography-Changes-for-2020

Take more photos

The most obvious change that you can make if you want to capture better photos is to simply take more photos. The more you get out there and practice taking shots the better you will become. Whether that is spotting potential scenarios or being able to select your settings quickly, set yourself a goal of taking more photos in 2020.

But don’t just go and photograph scenarios you are familiar with, instead work on your weaknesses so that you improve the parts of your photography that you struggle with. For example, if you struggle to take photos in low light conditions head to a covered market and practice there for a few hours a week. You’ll be amazed how much you will improve over time by doing this.

Photography-Changes-for-2020

Go somewhere new

Going to new places to take photos is a great way to kickstart your passion for photography. New destinations often mean you are even more alert and ready to capture photos as it is somewhere new and exciting. It’s natural that if you keep going to places that you have been to you will subconsciously become immune to what you see around you. So, set yourself a goal of visiting a few new locations every year to inspire you.

Photography-Changes-for-2020

Revisit somewhere again

Whilst visiting somewhere new is great to kickstart your passion, you should also take some time to visit places that you have been to before. This could be because the places that you visited before didn’t give you the shot that you wanted because of bad weather for example. Or it could be because something has changed. For example, big cities are constantly changing and there might be a new building or landmark to photograph. Or it might just be that you want to try and capture a better photo than what you already have.

The great thing about revisiting somewhere you already know is that you should know where the best spots are for photos. So, you should already have an idea in your mind about that type of shot that you want to take. Whatever your reason is for revisiting old destinations, make a commitment to revisit a few of these in 2020.

Photography-Changes-for-2020

Join a photography club

Photography can be a lonely hobby. There are not many people (other than photographers) who want to hear about your ordeal at sunrise to capture that shot you wanted. Or people who want to discuss camera accessories, settings and even look at your photos. That’s why joining a local camera club is a great way to boost your photography. Not only will you be surrounded by like-minded individuals who would usually be much happier to discuss all things photography, but they will also inspire you to improve your own work. The other benefit of joining a camera club is that they also often have talks and events run by established professional photographers that can help you improve your work. You can then put what you have learned into practice by entering the club’s photography competitions.

Photography-Changes-for-2020

Visit an art gallery

It might seem strange, but a great way to inspire yourself and learn more about photography is by visiting an art gallery. Pay attention to how paintings frame the composition and used colour and especially light to tell a story. After all, these were the photographs of the day and painters had to use a lot of the same principles that are used in photography. You’ll be amazed at how much you can learn about photography by visiting an art gallery.

Photography-Changes-for-2020

Post one picture a week

There has been a lot said about the pros and cons of social media. Whilst you should never believe the hype and also take to heart anything said on there, social media is a good way to showcase your work to your friends, family and the world. Whether it is Instagram, Facebook, Twitter or Pinterest (or any others), make a habit of posting regularly on one of these platforms. Don’t get too hung up on “likes” or “followers” but instead use it as an exercise to constantly share a great photo. The reason is that it will make you get out there and take more photos. But you can also review your work as a collection to see if there is a style and look and feel that is unique to you. So, set yourself the aim of posting at least one photo a week.

Photography-Changes-for-2020

If you are serious about improving your photography, you have to dedicate the time to actually learn and improve. With a new year comes new opportunities so make sure that you set yourself some goals and challenges to improve your work. If you can make these 5 changes for 2020 you will be sure to see an improvement in your work.

Photo credits: Kav Dadfar – All rights reserved. No usage without permission. Dreamstime.

Filed Under: Tutorials Tagged With: Improve Photography, Photography

5 Non Photography Tips That Will Improve Your Travel Photos

One of the most common questions that I get asked from amateur travel photographers is “how can I improve my photos?”. Whilst there is never one solution that will fit everyone’s needs, there are some things that are common amongst all amateur travel photographers. Some are actual photography improvements or tips like getting closer to the subject. But there are also quite a few things that you could try which are not necessarily photography tips. So, if you have never tried these then give it a go, you may be surprised by the outcome.

kav-dadfar-non-photo-tips

1. Travel alone

There’s a reason that travel photography is a lonely profession. Most of the time travel photography is pretty boring. You have to wait around for the best light or keep going back to a location so that you can capture the photo that you want to take. Nothing should get in the way of capturing that stunning photo. The problem with trying to do this when you have other people like friends or family around who are not photographers is that they will usually not have the patience to wait around for you. So whilst you might be happy to wait in the rain for the clouds to clear, your spouse or friend understandably won’t. This will either mean you have to leave with them which will mean missing out on the photo or having to settle for something taken at a time that might not be best. If you want the best possible photos with no distractions, try to travel alone.

If you are going to travelling with someone, maybe try to settle on getting some time alone so that you can focus on photography without distraction. This will mean you can focus on capturing great photos and the other person can do what they want without having to wait around for you.

2. Walk, walk, walk

Often one of the best bits of advice that I can give people is that they should just walk around especially in cities or destinations where there are bustling areas. Being in a taxi, subway or coach means you will miss the daily life that goes on. These are unique moments that will often give you better photos than that famous monument which has been photographed from every angle millions of times. You’ll be amazed how often you will stumble into a scenario that is incredibly photogenic.

But the other benefit of walking around is that you will find potential spots for photography like that dramatic sunrise or sunset shot that every photographer craves. I often find myself walking for hours in cities, exploring places that aren’t in the guidebooks. Most of the time these don’t lead to anything but every now and then you capture something unique.

kav-dadfar-non-photo-tips

3. Hire a guide

There seems to be some sort of taboo amongst the hardened travellers about hiring a guide when travelling anywhere. People usually prefer to be seen to be travelling independently rather than following the flock of other tourists. I must confess that for a long time I felt the same. That is until I started to think of the whole notion of the guide that I have differently. Rather than thinking he or she is your “guide” consider them as your photography “consultant”. Whilst they may not be photographers, you can still bounce ideas off them ask them for their advice on locations or good spots for photos. You can even put them into your photos as a point of interest. I always tell my guides at the start of any trip that I want their advice or opinions. More often than not they can suggest something that I didn’t even know I could do.

The more obvious benefit of a guide is that you have someone who can speak the local language. For people who are shy at taking photos of other people, this can make it a little less daunting.

kav-dadfar-non-photo-tips

4. Say “yes” more often

I always find that wherever I am in the world, the more open-minded I am to trying things or going places, the better my photos are at the end of the trip. Clearly, there has to be some level of caution so that you are not ripped off or even a victim of a worst crime. But if it’s something within reason than try to say “yes” to things more often. This could just be as simple as trying a different food or even listening to a suggestion from your guide to go somewhere that might not be your usual pick.

For example on a recent trip to Bhutan as we arrived into our local village after a long drive my guide asked me if I would prefer to stay in a farmhouse or hotel. For me, it was an obvious choice as I was far more likely to capture photos at a farmhouse than a hotel room. When I arrived at the farmhouse there was a celebration happening because a family member who was a monk had been promoted. So I ended being able not only to experience this unique and religious celebration with the family but also to photograph it as well! Something I would not have experienced had I said “no” to the farmhouse.

kav-dadfar-non-photo-tips

I was lucky to be able to witness and photograph this special family event simply by saying “yes” to staying in a farmhouse.

5. Sleep and rest as much as possible

This might seem like an odd tip. After all, every photographer always talks about getting up in the early hours of the morning and shooting after sunset into the blue hour or even later. But this is exactly the reason that it’s important to get as much sleep and rest as you can when you can. Most of the time you’ll be tired, sleep deprived and not eating very well. All of which can very easily combine to make you ill. The last thing that you will want is to be trying to recover on a trip. The best way to avoid this is by factoring in rest time at say midday when the light is harsh and you won’t be able to capture much. Remember that you will end missing more photo opportunities if you are ill for a few days than you would if you were sleeping for a couple of hours during the day. Being fresh and not tired will also mean you are far more alert to potential photo opportunities.

kav-dadfar-non-photo-tips

Some people will already be doing these things, but if you are not and always wanted to improve your travel photography than try it. You never know what it could bring you.

Note by the author: remember to stay safe

Whilst this might seem like an obvious thing to say, ultimately your safety should always be your main priority. Whilst all of the tips above are good to do, it should never be at the expense of your own well being. So, always make sure you trust your guide fully, know the places you are going to or that you will be safe walking around by yourself. Never take any risks that might endanger you. No photo is worth the price you may end up paying.

Photo credits: Kav Dadfar – All rights reserved. No usage without permission.

Filed Under: Tutorials Tagged With: Photography, Travel photography

A Simple Explanation of Aperture

If there’s one thing about photography that confuses newcomers(and often the rest of us) it’s the idea of aperture. What is it? Why is it so complicated? How does it affect your photos? Well, aperture isn’t complicated or impossible to understand, it’s just unfamiliar. And like most unfamiliar things the more you learn to about it the less intimidating aperture will be.

In this article I’m going to show you just how not complicated aperture can be. You’re going to learn the basics of aperture and how it relates to the focus and shutter speed of your photographs.

Aperture and the Dreaded F-Number

Let’s start off by explaining what aperture is and how it is measured. The idea of aperture in reality is astoundingly simple and there’s honestly only a few things you truly need to know to conquer the subject.

What is Aperture?

OK, let’s just get this out of the way right off the bat…aperture by its very definition is simply a hole. As it pertains to photography, aperture is the hole in the lens where light passes into our cameras. That’s it.

See, not so scary! However, the way aperture is measured is the cause for anxiety in some because, there again, it’s measured in a fashion that most of us don’t readily understand. But don’t worry, much like everything it becomes easy once you understand one fundamental thing….

F-Numbers

Trust me. You are neither the first nor the last  person to be completely perplexed when it comes to understanding the way aperture is measured. The notion of ‘F-Numbers”(sometimes called f-stops) has been the source of a lot of confusion because they simply don’t make much sense in terms of how we normally think about our physical world. In short, the F-Number is nothing more than a ratio between the focal length of the lens and the diameter of the aperture being used. So an aperture of F4 means that the focal length is four times larger than the selected aperture. An aperture of F8 means that the focal length is eight times larger and so on and so forth. Now this is where things get a little weird….The larger the F-Number, the smaller the actual opening. The smaller the F-Number the smaller the actually opening. Look at this quick example:

It’s going to be OK…take a deep breath and realize that it actually makes sense mathematically but you’re not going to have to understand anything more in depth than that for most practical purposes. Just know that it the larger the physical opening of the aperture the smaller the F-Number will be.

Aperture and Depth of Field

There are a surprisingly large amount of factors that determine the final depth of field or your image and aperture size is one of them. Generally speaking, the wider the aperture(smaller F-Number) the more shallow depth of field will become. This means that smaller apertures(larger F-Numbers)  will bring more of the scene into the range of focus than will larger apertures. Take a look at these Chess pieces and see what I mean.

Not only does aperture play a key role in focusing but it also spills over into your shutter speed. Speaking of shutter speed….

Aperture and Shutter Speed

The relationship between aperture and shutter speed is extremely simple and yet extremely important. Simply put, larger apertures allow more light to enter through the lens. More light means faster shutter speeds can be used. This is where the phrase “fast lenses” comes from because lenses with larger aperture allow for faster shutter speeds.

So, faster lenses with wider maximum apertures are capable of shooting more effectively in low light conditions because they allow more light to pass through them.  A lens with a maximum aperture of F2.8 is considered to be “faster” than a lens with a maximum aperture of F4.

Final Thoughts on Aperture

In a way all this might sound like an oversimplification but it’s essentially all you really need to know about aperture. The manner in which aperture selection relates to depth of field and shutter speed will take you a long way in photography. Aperture isn’t scary! Having this simple knowledge will help you better understand exposure, make smarter lens choices and generally control your images much more effectively.

Filed Under: Tutorials Tagged With: aperture, camera, cameras, Getting started, Lifepixel, Photographer, photographers, Photography, photography tips, tutorial

Bare Bones Photography: What Gear Do You Really Need?

What is the end game of photography? To make a photo, right? Not always a print but nonetheless an image of some kind is the final goal of most photographers. The tools needed to complete what can sometimes be a world altering task are simple. At their minimum, you’ll require some type of otherwise light-proof box which has a relatively small opening-i.e. a camera, and some way of recording the incident light which enters-i.e. film or digital sensor. You don’t even truly need a lens(pinhole cameras) to make a photograph but of course that helps immensely.

Now, that list of gear might sound incredibly lacking but when you think about it everything else that we throw into the mix simply expounds on or enhances those basic pieces. There are multitudes of cameras, both film and digital, with equally vast selections of lens and filters for each. Everything else aside, this article will help you if you’re just starting out on your photographic journey in that you will learn what basic photo gear you will actually need…not just what someone might want to sell you.

What You’ll Need

Below is a list of the bare-bones gear that you will need to get rolling in making photographs. Of course there are not real absolutes as you will soon find out but in order to reach the end result, a picture, you will need these few things:

The Most Important Item

The single most important tool you can possess isn’t actually a piece of gear at all but rather the correct mindset. I’m listing this first because everything else is secondary to your ability and to adapt and make the most of whatever camera or lens you have available. When I first started out in photography, eighteen year old me saved $265 and bought a 35mm SLR kit that included one 18-55mm F3.5-5.6. I shot on that one lens for about five years and managed to make some wonderful photographs despite it being a “kit” setup. After I switched to digital photography(I still shoot film as well) the progression evolved much the same way with me beginning with a kit lens and later branching out as I learned more about the craft.

Don’t think that you need incredibly expensive cameras or lenses to get started doing photowork. Granted, there are some things that even the most determined effort can’t make happen without the necessary equipment but you might be surprised how much you can get out of “low end” gear when you approach the problem with creative solutions.

A Camera

The importance of a camera can’t be overstated but that doesn’t mean that it has to be the latest and greatest piece of tech to roll off the line. In fact, if I could back in time I would have spent much less on my first digital camera and much more on the lens. More on lenses in a minute but ironically the camera you use usually plays much less of a role in the final image quality(sharpness/color/contrast) than you might think.

Whether it be film or digital, find a camera that is well built and feels good to you. If you can’t readily handle the camera before you buy then become a review hound and learn everything you can about other users experiences. Luckily, most digital cameras today are so good in terms of ISO performance and build that you won’t really go wrong in most cases. Again, if I can offer a little advice in hindsight, invest more in your glass instead of your camera.

A Lens

The lens is the eye through which your camera sees and there are apparently hundreds of different eyes out there. Like I mentioned earlier, the quality of your lens is a huge factor in the final quality of your photos. If you put a poorly made, blurry and sluggish lens on the most expensive camera in the world you will still get poorly made, blurry and sluggish photos in turn

In short, if you aren’t sure yet which genre of photography you’ll gravitate towards, what’s called a “normal” focal length lens will be the best bang for your buck. The term “normal” refers to a lens approximately equal to the field of view of the human eye which is arguable in the 30-50mm range. Most kit lenses included with cameras hover in the normal range. In any case, find the fastest lens(small F-number/large aperture) that will fit the most situations be it landscape, portraiture or street photography. Fortunately, a fast 50mm lens remains of the cheapest lenses you can currently buy.

Finishing Up

Yes, that really is all you need. While there are a few accessories like film or memory cards that you’ll require the overall basic gear to start making images really is as simply as that.

As you progress you will learn what makes you tick photographically and you can adjust your tools accordingly. Find a camera, find a lens, and start shooting.

Filed Under: Gear, Inspiration Tagged With: camera, cameras, Getting started, inspiration, landscape photography, lens, lenses, Lifepixel, Photographer, photographers, Photography, photography tips, Travel photography, tripod, Wildlife photographer

The Case for Black and White Photography

Brace yourself because here it comes…it’s another discussion about black and white photography. Don’t worry, it’s not going to be the same old “which is better?” or even worse, another “how to convert your photos to black and white” type of articles. Admittedly, I have written on both of those subjects extensively before but this time will be a little different.

Today, we’re going to strip down the idea of black and white photography and attempt to locate how this tried and true area of photography has managed to maintain its status in an arguably over saturated(pun intended) world of photographic modernism.

Monochrome and the Film Difference

It’s not secret that the black and white side of photo work is deeply rooted in film. Still, even though it makes for a solid title for this section, the term “monochrome” has been somehow mismanaged to the point where it is widely considered synonymous with black and white. This is wrong. Monochrome means “one color” or essentially an image made of shades of only one color. This color could be anything from black, yellow, red or pink. Grayscale might actually be a more appropriate term for true black and white. Even then the lines become somewhat blurred because it’s incredibly difficult to completely abolish all color toning from a black and white film negative. Take a look at these images of a 4×5 black and white negative(complete with film borders)and I’ll show you what I mean.

The first photo is a color rendition of the negative. You’ll notice that is is toned quite blue based on the development. This is due to a few factors but the point is virtually all black and white photographs aren’t exactly black and white. Rather, they are toned based on the type of film emulsion and the development techniques used. Now, look at that same piece of film after I have digitally converted it to black and white in Lightroom.

See the difference? I say all of that to say this: modern digital photography often paints a one dimensional representation of black and white images. True black and white photographs aren’t usually black and white at all or not even monochromatic. Instead, they are a carefully mapped presentation of tonal ranges. Remember this the next time you click a button to make your photo black and white. Sure, it might remove the color but the work shouldn’t stop there.

Speaking of color…

Is Color Necessary?

Yes, color is needed. Is it always needed? Absolutely not. There are times when a photo is suited to black and white and times when it is not. Well, who decides? That question is also deceptively simple to answer. It’s you, you’re the one who decides. Does the color play a role in the emotion or feeling you mean to convey or does it get in the way? These are most certainly murky waters to wade.

Today, we don’t even have to approach color or black and white photography the same way as we did thirty or even twenty years ago. Take the very site you’re reading this article on right now. LifePixel specializes in infrared converted cameras that brings the world of color into a new realm of creative exchange. Infrared cameras see light differently than our own eyes. As a result, completely familiar colors become foreign and black and white pictures take on a completely new feel. When you think about color and how it relates to photography you must understand that even the things we see are wholly subjective to our own perception.

Some Closing Thoughts…

If you haven’t been able to tell by now the purpose of this article isn’t to promote the merits of one type of photo over another. There’s plenty of room even now for both color and black and white photography. In fact, a lot of it comes down to personal taste and how we perceive the world around us. At the same time, remember to look deeper into your work and find what gives it meaning to you. Does color play a part? Does it make more of a connection in black and white? Whatever direction you choose just make sure that the original intent of the photo shines through.

Filed Under: Inspiration Tagged With: black & white, blackandwhite, bw, camera, color, inspiration, landscape photography, Lifepixel, lightroom, Photographer, photographers, Photography, photography tips, photoshop, processing, Travel photography, tutorial, Wildlife photographer

Speed Up Your Processing with Lightroom Import Presets

We all know about presets in Lightroom and all the great things they can do your post processing. Presets help make your editing easier and make achieving a constant styling much more efficient. The biggest benefit of using presets is that they speed up your post processing so you can get back to making photographs, baking muffins, building model airplanes, or whatever it is you might rather be doing instead of sitting in front of your computer screen. But did you know you can use presets jumpstart your post processing efforts before you even import your photos into Lightroom?

In this article I’m going to show you how easy it is to apply presets to your photos as they import into Lightroom. These presets aren’t even limited to develop presets…oh no. You can even add in metadata presets like copyright information and keywording along with camera and lens profile information. This is the kind of thing that the pros use and you should as well. If you find yourself editing large batches(weddings, portraits, events) of similar photos then you’re going to love using import presets in Lightroom. Let’s get started.

Applying Presets on Import

It all starts here in the Import screen of Adobe Lightroom.

If you look to the right you’ll notice an ‘Apply During Import’ panel.

This is where all the magic will happen. Click on that tab to open up your options. From here we’ll have a few choices.

Develop Presets and Camera Calibration

Applying develop and camera calibration* presets as you import your photos into Lightroom couldn’t be easier. The process is essentially the same as it is while editing your images in the Develop Module. To begin, make sure you have the photos you wish to import with the preset. Next, click the ‘Develop Settings’ drop down. This will bring up a list of all the develop presets you have currently installed in Lightroom.

From here it’s simply a matter of selecting the preset you want to apply to the images you’re importing.  After you’ve made you’ve made your choice click ‘Import’ and your photos will be brought into Lightroom with the chosen develop preset freshly applied.

**To apply camera calibration settings to your photos on import simply save them in a develop preset and then use the same steps as above.

Copyright and Metadata

Import presets aren’t limited to develop settings. We can also apply keywording and metadata(copyright information/location/creator) to each and every image we import. This helps to better organize or photos and perhaps more importantly, it allows us to protect them from unwanted use. Adding in keywords is super easy as you can type them right into the keyword box. Alternatively, you can add in keywords alongside your other metadata.

Assigning metadata to images is just as easy as applying develop presets. To start, click the ‘Metadata’ drop down arrow.

Select your preset or to add a new one click ‘New’. This launches the new metadata preset dialog box.

It’s here where you can add in virtually any information imaginable. When you’re finished be sure to name your new metadata preset. In the example above I’ve left the title as ‘Untitled Preset’ (I’m lazy) but it’s always a good idea to title any preset you make in such a way that you can immediately know what it contains. Once you’ve created the new preset it will then become selectable from the metadata preset drop down menu. After you’ve applied it, click ‘Import’. Your new metadata information will automatically be applied to each image you selected to import just as the develop settings were in the previous example.

Some Final Thoughts….

Import presets are a great way to easily jump start your processing workflow. By applying certain develop and metadata presets on import you can yourself a lot of time by having the settings you use the most already applied before any work actually begins. This becomes especially useful when you find yourself editing a large number of photos at once. Not only can import presets making editing a breeze but they can also play a big part in protecting your photos by attaching important copyright information to your photos. If you haven’t already give import presets a try and see just how much they can help you and your photography.

Filed Under: Tutorials Tagged With: camera, cameras, landscape photography, Lifepixel, lightroom, Photographer, photographers, Photographing deserts, Photography, photography tips, processing, tutorial

Smarter Sharpening with the High Pass Filter in Photoshop

What if I told you that sharpening as we know it in photography isn’t real? That might be a little hard to believe but the truth is that it is actually impossible to make an image physically sharper after it has already been made. Sharpening a photo is simply an illusion. We can make a photograph appear to be sharper. Our digital images can be made to look sharper by adjusting the contrast of the pixels around the edges of shapes within the photo and this is what we are going to talk about today. We will look at how you can easily make your photos more sharp quickly using the high pass filter in Photoshop.

What is the High Pass Filter?

The high pass filter is just a method of creating a sharpening effect to your photo based on the pixels surrounding the contrasted edges of the elements within the image. While Photoshop has some dedicated sharpening tools(unsharp mask, smart sharpening) the high pass filter is the method I tend to use the most because I love the total control it gives me over my sharpening.

Using the High Pass Filter

To get started with sharpening using the high pass filter it is highly recommended that you complete ALL of your edits prior to performing the sharpening. This means that if you’re like me and do most of your processing in Lightroom and then export to Photoshop for finishing you will leave your high pass sharpening for the very last step. When you’re ready to sharpen, open your image in Photoshop.

Next, duplicate the layer by using keyboard shortcut Ctrl+J(Cmd+J for Mac). This is the layer where the high pass filter will be applied. I’ve renamed it “High Pass Layer” so it’s easier to see.


Make sure the new high pass layer is selected and then click on the ‘Filter’ tab and then ‘Other’ and lastly select ‘High Pass’.

You’ll notice an abrupt change to your image. It will essentially go completely grey. Don’t panic because this is exactly what we want to happen. But we have a choice to make and that is what radius we set for the high pass filter.

The radius controls the amount of pixels which are targeted around the edges where the sharpening will be applied. There’s a lot of wiggle room here and it generally is based on the resolution of your camera. The higher megapixel your camera the higher you can set the radius without causing unsightly effects such as halos and glowing edges. Let me show you what I mean. Here is the high pass filter with a radius of ‘1’…

And now here it is with a radius of ‘36’.

The higher the radius the more of the image will be affected. This particular photo was made with a 36.4 megapixel camera and I find a radius of ‘4’ to be the proverbial sweet spot. Adjust your radius accordingly.

Click ‘OK’ to apply the high pass.

But wait, this still looks horrible and gray and not at all what we want.

The next step is key. We have to change the blend mode of our sharpening layer. There are multiple choices here but the ‘Overlay’ option tends to work best with virtually all images and is the blend mode I use. After the overlay blend mode is selected we have what is essentially our final sharpened image.

Have a look at the difference the high pass filter has made in terms of sharpness. Here is the unsharpened photo….

And now the freshly sharpened version….

Closing Thoughts on Sharpening with the High Pass Filter

Don’t forget, not only can the high pass filter be applied easily but like any other layer adjustment in Photoshop the opacity can be adjusted until you reach the exact level of desired sharpness. Furthermore, adding in a layer mask to the sharpening layer can allow you to take complete control over the sharpening effect and only apply it to the areas of the photo you choose.

The best bit of advice when it comes to sharpening an image using any method is that less is usually more. Always remember that an over sharpened image is often less appealing than one that is slightly soft. Enjoy using the high pass filter in Photoshop!

Filed Under: Tutorials Tagged With: adobe, landscape photography, Lifepixel, lightroom, Photographer, Photography, photography tips, photoshop, processing, tutorial

Review: K&F Concept TM2534T Professional Tripod

Often times I open my photo gear reviews by talking about what a great time it is to be a photographer. Really, I should specify that it’s an excellent time to be a buyer of photography products. There’s just simply so many choices out there these days than there was even ten years ago for the budget conscious shooter to obtain high quality tools to help them and their work. This is especially true when it comes to choosing a tripod.

Enter the K&F Concept TM2534T tripod, which is a recent entry to the budget line, but not necessarily budget quality, world of advanced hobbyist to professional grade tripods. I’ve spent the last few weeks working with the TM2534T. I’m going to show you what I liked and didn’t like about this unique tripod offering from K&F.

Out of the Box

I pleased to immediately see that the tripod comes with it’s own padded transport bag which has an included shoulder strap. The tripod itself looks great with a classy red/black color scheme and discrete logo placement, which I like. For a tripod with an extended height of 72 inches it is quite compact when folded.

It’s feels solid in hand without being overly heavy. All the paint and finishes on the tripod look very well done. The official specifications from K&F are as follows:

  • Folded height: 14.76in/37.49cm
  • Extended height: 72.24in/183.48cm
  • Weight: 3.48lbs/1.58 kg
  • Load rating: 17.64lbs/8kg

Also included is a short center column conversion attachment with bolt and a nifty storage bag for the ball head.

Build

The TM2534T is hefty and it feels quite sturdy with it’s all aluminum construction. The adjustment knobs are solid and lock the ball head in place securely.

Leg locks are the twist variety and feature rubber seals to protect against sand or dirt entering the locking mechanisms. The locks secure the four section legs securely. There are three angle options for the legs at 25, 50, and 80 degrees. These locks also lock crisply and allow for great versatility for low angle work.

One of the legs is padded and this leg is also the removable monopod. This is a great feature which essentially makes this tripod a two for one deal.

The entire center column assembly can also be attached to the convertible monopod which gives a total height of 77.56in(197cm) if you choose to carry it in this configuration.

Speaking of the center column assembly, it is somewhat puzzling. It’s not that the concept of the two piece center column isn’t a good idea, in fact, it adds an extreme amount of articulation especially for top-down product photography. The entire ball head and center column gives the user the ability to cover virtually in angle imaginable.

However, from a practicality standpoint the added stress points in the assembly don’t seem to be a worth while feature when you take into account the added weight and possibly stability issues. That being said, the ball head itself works smoothly and offers great fluid motion for panning.

The feet of the tripod legs give a great compromise between stability and variable surface suitability. They are rubber boots that terminate in a point that can dig into soft ground while protecting fragile floor finishes.

Also worth mentioning is the base plate that included with the tripod. It has rubber cushioning at the attachment surface as well as a “D” ring screw head which makes attaching/removing the plate MUCH easier especially when a coin or screwdriver isn’t readily available.

Real World Performance

This tripod worked as a tripod should during all my uses. The legs locked securely and remained so during shooting. There was no drift in the ball head during long exposures and all the movements worked smoothly. Something I want to again address is the center column assembly and just how much practical use it adds. The overall height the additional length of the column adds isn’t something most photographers of average height will likely need. Even with the added articulations it allows isn’t enough to justify the added chunkiness and bulk it adds to the total package.


In the time I’ve used this tripod it has held up to indoor and outdoor shooting well, with only a small amount of wear being noticed at the angle adjustment locks which is largely superficial.

I feel that the TM2534T should have no problem in terms of durability during heavy outdoor or studio use.

Final Opinion

For all practical purposed the TM2534T tripod from K&F Concept is solid option for those needed a well made platform for a wide range of shooting situations. It offers great looks, incredible articulation and versatility, all wrapped up in a package that’s great to look at and won’t break the bank. The overly bulky center column isn’t something that I feel is exactly worth it’s added weight and ungainliness but that is something the user will need to decide. Check it out for yourself and see if it fits your particular needs. It’s going for under $150US at Amazon* or the K&F Concept website.

*Note* The Amazon description lists the tripod(TM2534T) height incorrectly as 66in.

Filed Under: Gear Tagged With: camera, cameras, Canon, gear, gear review, K&F, landscape photography, Lifepixel, photo gear, Photographer, Photography, review, tripod, Wildlife photographer

A Quick Guide to Local Adjustment Presets in Lightroom

If you use Adobe Lightroom, I’m sure you’ve heard of develop presets and how they can jump start your creativity. But did you know that you can also create and save local adjustment presets just as easily? In this article I’m going to show you how to create and save your own local adjustment presets so you can make the most of your editing time in Lightroom.

What are Local Adjustments?

Local adjustment presets work a lot like develop presets in that they allow you to save certain combinations of edits for quick application later. The biggest difference between the two types of presets is that normal development presets generally work globally(affects the entire image) whereas local presets affect only the portions of the image you choose. These edits are applied either with either the local adjustment brush, graduated filter, radial filter, or a combination of the three. The great thing about local adjustment presets is that each preset can be applied by any of the local adjustment tools in Lightroom.

Here’s an example using the picture above. This is how it looked originally.

Let’s say we want to only lighten the leaf without disturbing the rest of the photo. Not only that, but the area could also use a little bit of a boost in clarity and sharpening. We can use the local adjustment brush and combine all this edits into one and apply them at the same time.

Now, that looks better.

This is an edit you might have use for in the future since adding a little exposure and clarity can might an image really pop. Instead of taking the time to go back in and adjust the sliders each and every time why not save this adjust as a preset? Saving local adjustments is even easier than saving a regular development preset because there’s no new folder to make and name, no check boxes to tick or untick. Everything is already set up for you and all you’ll need to do is make your adjustments and then name your new preset.

Saving the Preset

First, click the ‘custom’ drop down at the top of the local adjustments panel….

Find the bottom of the ‘Save current settings as new preset’ option at the bottom of the drop down menu and click on that.

Now it’s time to name your awesome new local adjustment preset. Just as with any other type of preset it’s a good idea to come up with a descriptive name that immediately tells you what the preset does. For this preset I’ve chosen ‘+Exp Clarity Sharp’.

And that’s it! Your new preset will appear as a freshly made preset name in the local adjustment presets dropdown menu.

Final Thoughts on Local Adjustment Presets…

Like any other preset in Lightroom, local adjustment presets save you time by eliminating the need to change multiple adjustment sliders each and every time you want to use a particular edit. Making a local adjustment preset is one of the easiest tricks you can use to speed up your post processing. Remember, every preset you make can be used with all the local adjustment tools in Lightroom. That means the adjustment preset we made above can also be applied using the radial and graduated filter as well. Local adjustment presets are great. Use this guide and find out for yourself!

Filed Under: Tutorials Tagged With: adobe, camera, cameras, Getting started, landscape photography, Lifepixel, lightroom, lightroom classic cc, Photography, photography tips, processing, tutorial

How to Use the Clarity Slider in Adobe Lightroom Classic CC

If you reach way back to Adobe’s Lightroom 1.1 build you will find the clarity slider. After its introduction wayyyy back then the clarity slider has been a favorite weapon of most landscape and even portrait photographers. This slider is a personal favorite of mine just as it is the professed secret love of many Lightroom users. It adds a little “punch” to your photographs and can work wonders with portraits, landscapes, and virtually any other image that appears to be a little visually flat.  And now in Lightroom Classic CC, the clarity slider is still going strong.

But what does the clarity slider do specifically? In this article we’re going to talk about how the clarity slider works and how you can use it more effectively to bring out the full potential of your images.

How Does the Clarity Slider Work?

When we adjust clarity, we are essentially adjusting the contrast of our photo.The difference is that instead of the entire tonal range being adjusted, the clarity slider targets the midtones only. This give the overall illusion of the image become more clear. Look at this histogram of the image above before the clarity was increased by+60…

Now, look at that same histogram after the boost in clarity

The blacks and highlights haven’t been affected very much but the midtones certainly have. And that’s the great thing about the clarity slider: it is far less likely to wash out detail in the areas which are already bright or already dark. This makes it a great tool when working with textures(insert link to texture article) with scenes which need a good bit more contrast without going into overkill in the shadows and highlights. Speaking of overkill…or rather over’clear’(haha)…the next section will talk about some things to watch out for when using the clarity slider.

How NOT to Apply Clarity

Granted, every photo is going to be different, so there are no real “rules” when it comes to using the clarity slider(or anything else in photography) to adjust your images. That being said, a general guideline that will help you immensely is the good ol’ fashioned “less is more” approach. While there clarity slider works great to add some extra power in your photograph it can also cause some unsightly side effects if abused.

Here’s a photo where the clarity has been cranked to +100. Notice anything?

On top of the entire scene now looking a little unnatural, when we zoom in we can see the real problem with using the clarity slider too liberally.

Zoomed to 3:1

Those dreaded halos. I hate them, and honestly, you probably should as well. They are caused by the pixels around high contrast areas becoming too separated from the pixels surrounding them which adds up to the bright banding around those areas. To remedy this, try adjusting clarity locally using the radial or graduated filter or the adjustment brush. If all else falls, simply back off the clarity a bit. In almost all cases less contrast will be more preferable than that dastardly halo effect.While Adobe has drastically refined the performance of the clarity slider in recent years the over clearing a photo can still be problematic. Also note the halo effect is worsened when coupling too much clarity along with too much sharpening as happened with the image above..

Final thoughts on Clarity

The clarity slider is a great tool. It helps us to increase contrast in the midtone luminosity range while avoiding blown out highlights and burnt out shadows. I use it to some extent in virtually every photograph I process. That being said, as awesome as the clarity slider can be, it can also work against you if you push it too far. Always remember to keep things in the scope of the reality you wish to present to the viewer and don’t over clarify your images. On the flip side of that you should also not be afraid to actually lessen the clarity in some of your images. It can actually smooth out skin tones and impart a nice soft contrast to a landscape. With a little bit of knowledge the clarity slider can open up entirely new post processing opportunities that you might not have considered!

Filed Under: Tutorials Tagged With: clarity, clarity slider, landscape photography, Lifepixel, lightroom, lightroom classic cc, mountain photography, Photographer, Photography, photography tips, post processing, processing, Travel photography, tutorial, Wildlife photographer

How to Add Instant Contrast in Photoshop

Adobe Photoshop is a beautiful thing. It allows an incredibly wide range of artists, designers, creatives, and especially us photographers to inject a little bit of creative juice into their work and see it come to life. And while Photoshop can be enormously complex there are so many simple, straightforward edits you can use to instantly transform your photographs.

One of these goes back to the basics of photo editing: exposure and contrast. There is a great way to quickly add contrast to your images by using PS blend modes, more specifically the “soft light” blend mode. You may be thinking “But why not just add contrast with the contrast adjustment?” Well, you can for sure…but it’s not exactly the same. And why not expand your photographic editing horizons to try something new?

Soft Light Blend Mode

The soft light blend mode is one of seven PS blends that make up the “contrast” group. These modes all use varying mathematical wizardry to accomplish a similar effect which is to make darks darker and lights lighter in relation to one another. While that is an incredible over-simplification it’s not entirely inaccurate.

The soft light blend mode bases itself on whether pixels are lighter or darker than 50% gray. If a pixel in your image is darker than 50% gray it will be darkened further. If a pixel is whiter than 50% gray it will be lightened. The result? More contrast. Not only that, but this contrast is wholly dependent on image and it’s tonal makeup.

Adding Contrast with Soft Light Blend Mode

First, duplicate your base photo layer by using the keyboard shortcut ‘Ctrl+J’(Cmd+J for Mac).

Next, select the soft light blend mode from the blend mode drop down list. Alternatively, use the keyboard shortcut ‘Ctrl+F’ to do the same thing a little faster. You will instantly notice a fairly drastic change to your photo. Namely the increased amount of contrast.

To really control the amount of contrast I highly recommend adjusting your layer opacity until you reach the overall level of contrast for your particular image. In the case of soft light the opacity and fill accomplish the same outcome so it is your choice which to use.

The real fun begins when you decide to add a layer mask. Don’t worry! Masks aren’t something to be afraid of(in most cases) and they allow you to completely take charge of how an edit is applied in PS. You’re about to see how easy it is right now.

Adding a Layer Mask

To add a layer mask to your soft light blend layer simply click on the “add a mask” icon at the bottom of the layer panel.

Guess what? You’ve just added a layer mask! It’s that simple. Now, you’re free to paint in or out the soft light contrast to virtually any degree and location you choose. Just adjust the size and opacity of your brush to achieve the desired effect.

Add in some a quick increase in exposure and we’re left with the finished product. All done within a matter of minutes.

Some Final Thoughts….

One of the fun and interesting aspects of post processing is discovering all the different methods of achieving certain editing effects. Adding contrast to a photograph is one of the most basic edits a photographer can make to instantly add power to a photo. There are many ways to do this and you’ve just learned one. Try using the soft light blend mode technique to add contrast in a smarter, more controlled way. The soft light blend mode in PS makes it easy to quickly and effectively add punch to your images and it is something I use to some extent on virtually every photograph I process.


Filed Under: Tutorials Tagged With: camera, cameras, Getting started, landscape photography, Lifepixel, lightroom, mountain photography, Photographer, Photography, photography tips, photoshop, processing, Travel photography, Wildlife photographer

Making Fall Colors Pop with Adobe Lightroom

Here in the Northern hemisphere Autumn is in full swing. The colors of the leaves are changing and giving their last big show as we head into winter. The frosty mornings and golden hues offer outstanding opportunities for photographers to capture these beautiful Fall colors before they’re gone until next year.

In this article we’re going to talk about how you can make those bright Fall colors really pop in Adobe Lightroom! It doesn’t take much to make your images of the season standout. Let’s get started!

Bringing Out the Color

The main focus of majority of Autumnal photos is of course color. Bright Earth-tones and muted flavors of of brown and gray intermingle together to produce an incredible palate of gold. Here’s how to make all those beautiful tones come to the forefront in your image. We’ll begin with the Vibrance and Saturation sliders in the basic Development Panel of Lightroom.

Vibrance

The vibrance slider brings out the mid tone saturation of colors. It comes in handy when you want only the less saturated colors in the photo to be amplified. Look at this image before the vibrance was adjusted.

And now after

With +50 Vibrance

The key use of increasing the vibrancy of a photo is to maintain a natural and pleasing look to the colors that need to be intensified.

Saturation

Saturation and vibrance are closely related but at the same time affect different aspects of your image. Whereas vibrance boosts the colors which are less saturated, the saturation slider increases the color saturation of all the colors. This means that if a color is already well saturated it will become even more so when this slider is used. Here we have an image with color already well saturated.

If we boost the overall saturation, it leaves the image looking overly saturated with the color appearing fake and unnatural.

With +40 Saturation

The saturation is increased to the point of looking gaudy. So, be very careful when applying the saturation slider to the entire image.

The HSL Panel

If you want to get a little more advanced when edited your Fall photos then look no further than the HSL panel in Lightroom. It’s here where you can take full control of color.

The aptly named HSL panel adjusts the hue, saturation, and luminance of color. This is the master control station for color within your photo. Use this to not only affect the brightness and saturation of specific colors but also their hue. Here’s a photo before any HSL adjustments.

And now with the orange luminance and saturation increased…

The hue adjustments make colors appear more or less true to their original tone. For example, blue can appear more green or more purple; oranges more yellow or more red. Here we’ve changed the oranges to a lighter, more yellow hue.

While here, to a darker red hue.

Some Final Thoughts on Fall Photos…

Fall is a wonderful time of year for photography. If you’re seeking to make your images of Autumn to stand out from the crowd, try these simple tips that will help all those beautiful colors of the season shine through! Don’t be afraid to adjust the hues of the colors until they reflect how you felt about the scene. Likewise, don’t hesitate to actually DECREASE the saturation and vibrance of the colors in order to reach the final look that you want.

Filed Under: Tutorials Tagged With: camera, cameras, landscape photography, Lifepixel, lightroom, mountain photography, Photography, photography tips, photoshop, processing, Travel photography

Working with Texture in Photography

As a word, “texture” carries quite a few meanings. For photographers, texture is a concept that is often difficult to explain. It’s almost as if it has to be shown instead of merely described. Texture is simply the pronounced visualization of the surface feel of an object which is photographed. Now, you may be thinking “well, everything has texture…”. While this is true, the way in which that tactile nature of whatever you’re shooting can play a huge role in the overall mood and expressiveness your final image. Understanding texture in photography means learning how to recognize the importance(or lack of) the portrayal of the physical surface of a substance will impact the viewer.

I know I know…how boring can you get, right? Just hang in there and read on. You might be surprised just how much incorporating and focusing on textures can strike increased interest in a photo. We’ll talk about how the directional properties of light morph the textural feel of a scene and how you can put that to work for you. Let’s get started!

Communicating Texture

How do you transmit a physical sense into a two dimensional photograph? It all comes down to the type of thing you happen to be shooting and how you position your focus and your camera. Generally, there must be some degree of angle involved between the subject and the camera. This essentially places the surface of whatever your shooting into profile and thereby better displays whatever the irregularities might be into sharper relief. Here, have a look at this. It was shot with the camera directly overhead and perpendicular to the cloth.

This is a rather mundane example but it does a good job at displaying the relationship between camera angle and texture. Notice how with the straight on camera position all the texture within the cloth is muted and visually flat. This next image is made after moving the camera to approximately a 45 degree angle to the subject.

This places all the nonuniform attributes of the cloth at an angle and makes its texture more pronounced. If you want to amplify the texture of a scene, try different shooting positions and avoid photographing the subject from 90 degree angles.

The Effects of Light

Extremely closely related to camera position is the directionality of the light falling on your subject. Shadows are key when showcasing texture. The textures of an image will be enhanced by the addition of contrast which is, afterall, the differences between lights and darks in a photo. The direction of the light will determine how and by how much the contrast of the texture will be determined. The more contrast, the more obvious the texture will become. If you’re ready for another effective yet basic example, you’re in luck. These next two images are of the same floor tile. The first was shot under very diffused natural light from above.

The next photo was shot with the window blinds open which produced a much harsher directional light. And the camera angle was lowered to enhance the lighting effect even more.

All the textures within the tile are brought out due to the shadows produced by the side lighting and camera angle. These were not at all evident with the previous lighting conditions.

Using Depth of Field

Photographs that center around textural elements work well when shot in abstraction and/or with shallow depth of field. The small plane of focus adds contrast to the texture by framing it with foreground and background blur. Here’s an image shot using an aperture of F8.

The entire subject is in focus. And while the texture is evident it’s not readily defined. Next have the the same little pine cone but this time shot at a much wider aperture of F2.8.

The softening around the edges help to focus the attention on the textures of the cone and seperate it from the rest of the frame. While not a rule(what are those?) wider apertures generally work well to isolate and draw focus to the evident textures present in a subject.

Final Thoughts on Texture…

Let’s face it, talking about texture in photography isn’t the most exciting thing in the world. Still, ignoring it completely means ignoring one of the most powerful techniques for adding interest to your photographs. Texture is all around us and can be made the centerpiece of your images if you understand how to put it at the forefront. Using textures effectively will open up so many more shooting opportunities that you might not have considered before now.

Filed Under: Tutorials Tagged With: camera, cameras, landscape photography, Lifepixel, perspective, Photographer, photographers, Photographing deserts, Photography, photography tips, texture

Previsualziation: Knowing Before the Shot

Previsualization, or simply “visualization”, is one of the most simply yet alarmingly difficult aspect of making your own photograph become more than just the some of their parts. When we “previsualize” our images it means that the appearance of the final outcome before we ever click the shutter button. The method of previsualization was championed by the photographically indomitable Ansel Adams who believed the best way to convey wholeness within a photograph was to strive to see it in your minds eye from the get go. Everything else would then be a matter of what needs to be done in order to reach your personally desired outcome.

But how is it done? Or more importantly, how can you learn to do it yourself? Ansel gave us a lot to go on and we can learn a lot from his legacy. At the same time, we can mesh together with modern digital techniques and expound into something I like to call dynamic visualization. We’ll get more into that in just a minute. But first, let’s talk about how you can begin to visualize the finished photograph before you actually make it manifest itself from your camera.

Learning to “See”

Teaching yourself to see the finished product on the front end of the process isn’t an easy thing to accomplish, especially not right out of the gate. The ability to visualize a finished photograph is somewhat paradoxical due to the fact that a large component of the skill involves shooting a lot of photographs. This means that visualization is a product of repetition. Each time you make a photograph, you see the effect of shooting at the technical factors you have selected. Pay close attention to what settings you use!

Once you begin to mentally catalog the cause and effect relationship between your techniques and their respective outcomes you will then gradually learn to approximate the particular look of a finished image before it is actually shot.

Be Patient

The largest detriment in learning how to visualize your finished photos is that confidence-killing frustration that often sneaks in from perceived failure. Will you be able to anticipate the exact outcome of your photographs each and every time? Of course not. Failure is an incredible teacher and this is especially true when it comes to learning the skill of photographic visualization.

So, don’t allow yourself to be discouraged by the tedium. Shoot as often as you can, practice seeing the finished photo in your mind, observe the results, and then apply those outcomes to future photographs. I assure you that being able to see a finished photo(or close approximation) will slowly begin to happen on its own.

Dynamic Visualization in the Digital Age

I want to speak briefly on the progression of the visualization process as it pertains to today’s digitally integrated world of photography. The technique is one I have coined as “Dynamic Visualization” and is a direct evolution of the visualization idea of Ansel Adams. It involves the instant feedback we now are capable of achieving with our digital photographs. As we no longer have to wait for development of our film to be completed before we see the results of our efforts, the process of visualization changes. We can now allow the readily displayed outcome of our photos to directly impact the mechanism of visualization in a much quicker and more dynamic fashion.

What I mean here is that we immediately view the image we have just captured and that quick feedback can organically spur our creativity in real-time. This can lead to alternative compositions and exposure combinations that we might not have otherwise considered, thusly changing the final visualized image in our minds. This dynamic visualization could in fact be the continuation of Ansels visualization method. We first visualize the finished photo we want to make, receive real-time feedback from our digital displays, and then use that information to mold alternate(possible better) visualizations.

Final Thoughts on Visualization

The hard truth about learning visualization is that it takes time, effort, and patience. There are no real shortcuts when it comes to teaching yourself to “see” a photograph before it’s made. Shoot as much as you can and observe the results carefully. See the results of your work and study your own work. Visualization happens as much by physical labor as it does by mental flexibility. The key is to keep trying until that visualization “aha” moment makes its way to you. Just keep shooting!

Filed Under: Inspiration, Tutorials Tagged With: black & white, camera, cameras, Getting started, inspiration, landscape photography, passion, perspective, Photographer, Photography, photography tips, Travel photography, visualization, Wildlife photographer

Editing Secrets Revealed!: Five Lightroom Tricks

Adobe Lightroom is one of the most widely used software programs out there. When it comes to editing your digital photos it’s extremely difficult to beat Lightroom when it comes to ease of use, versatility, and powerful post processing tools. It’s safe to say that most of you reading this likely have had some experience using Lightroom but do you know about some of the hidden capabilities of the software? Well, maybe I shouldn’t say hidden. Perhaps “lesser known” is a better way for my point to be phrased.

In this article, we’re going to show you five lesser known tricks to be found in Adobe Lightroom. You might even wonder how you’ve managed without them for so long!

#1: Direct Histogram Adjustments

You know how to adjust exposure using the adjustment sliders in Lightroom but did you know that you can make exposure adjustments directly to the histogram?

Yeah, really! Not only that, but you can work with the blacks, shadows, and highlights independently. To do it, simply hover over different areas of the histogram and pay attention to the bottom left corner of the histogram. This tells you which area of the histogram you will be adjustment. At the far left is the blacks region…

And to the far right will be the whites region.

To adjust an area, click on it and hold as you drag left or right on the histogram.

In the middle areas you will have shadows highlights and overall exposure. All independently adjustable in the exact same way.

#2 Visualizing Spots in Clone/Heal Mode

The clone and healing tools are a great way to remove unsightly dust and dirt specks that show up on your finished digital photo. It’s easy to just make some of those things go away with a click or two.

Did you know that there’s a super easy way to make removing those spots a lot more precise? It’s aptly called the “visualize spots” mode and to access it click…you guessed it, the visualize spots box at the bottom of the view window when in clone/heal mode. You can also use keyboard shortcut (A).

Your image is instantly converted to a black and white relief. Spots show up in white.

You can control the sensitivity of the spot revelation by using the slider.

#3 Sharpening Mask

Don’t introduce unwanted noise by sharpening your entire photo! There’s a smarter way and it’s by using the masking slider when sharpening your images in Lightroom.

Holding down the ‘Alt’ key(Option key on Mac) while adjusting the masking slider sensitivity will convert the image to a black and white relief similar to the visualize spots mode from earlier.

Now it’s just a matter of healing or cloning out the spots!

#4 Developing Video

For some, the downside of Lightroom is that it doesn’t work well with video editing. Video isn’t supported in the Develop Module so you have to rely on quick develop settings and presets to process any of your video files. Or do you? There is in fact a work around to help you edit your videos more precisely in Lightroom. First, make an image capture from your video.

Then make any adjustments to that image capture just as you would a normal photo. When finished, go back to the Library module. Then hold down the ‘Ctrl’ key(Command on Mac) and be sure both your edited image capture AND the video thumbnail are selected.

Now, click on ‘Sync Settings’

A dialog box will appear showing the available settings which can be synced. Make your selections and click ‘OK’. And boom! You’ve just developed your video.

#5 Custom Name Plate

This last trick is possibly the easiest…and the most arbitrary. You can customize the “name plate” in Lightroom along with a couple other things. The name plate is that little bit of text in the upper left hand corner of the view window.

Here’s how to change it. Simply right click on the name plate and choose ‘Edit identity plate’ from the drop down.

This will open the identity plate edit dialog box.

Select ‘Personalize’ from the dropdown at the top left.

Now change the font color, style, and size to whatever you want! You can even upload a custom logo image form here as well!

Final Thoughts…

Lightroom, as powerful as it is, offers some hidden gems if you just know where and how to find them. The secrets of Lightroom aren’t limited to just the ones we’ve shown here! Have your own tricks that you’d like to share with the class? Post them in the comments below!

Filed Under: Tutorials Tagged With: camera, cameras, editing, Lifepixel, lightroom, Photographer, photographers, Photographing deserts, Photography, photography tips, post processing, processing, tutorial

Four Ways to Rekindle Your Photographic Spark

As you progress more and more on your photographic journey you will encounter problems and challenges. Some of those challenge you expect while some can take you fairly by surprise. You will go through ups and downs, strikes and gutters. This cycle of peaks and valleys can affect you creatively, financially, even physically. Most common of these is the fact that sometimes we lose a little bit of our enthusiasm for the craft. This is normal and most definitely a problem you can overcome through all kinds of ways. In this article, we’re going to talk about a few ways that can help you rekindle your photographic spark.

Understand that it Happens to Us All

The first step to overcoming any problem is to understand that you have one and that it’s a natural part of growing as a photographer. Simply realizing that your loss of photo making zeal isn’t the end of the world can actually snap you out of your slump.

An important thing to remember is that whatever the reason you’ve lost your spark, you can get it back. The opposite is also true. If you continually find yourself dreading a shoot or not getting excited to get home to edit an awesome sunset image, ignoring the problem will only make it worse. Take a breath and work to identify what’s happening.

Learn about Great Photographers

We all have reasons why we got into photography. And the majority of us have certain “icons” whose work speaks to us especially loudly. The giants of the photography not only produced legendary photos but they also left behind lessons that we can learn from in order to strengthen our own craft. Take the time to learn the methods of the established masters.

Find books they’ve written and invest as much in your learning as you do in your gear…well, maybe not that much. When I get a little less that spritely to get out and make images, I open up a book of Ansel Adams photos. After seeing a few images of Half Dome and Taos Pueblo and I’m ready for action!

Shoot Something Different

If you find that you’ve grown tired of shooting, maybe you’re just tired of shooting the same things over and and over again. Sometimes it helps enormously to take a refreshing dip into another end of the creative pool.

Break the monotony and give yourself a fresh pair of eyes. If you shoot a lot of landscapes, then try some portraits. Shoot a lot of portraits? Try some landscapes. Changing things up a bit can open up entirely new creative outlets for your work.

Leave the Camera

Completely ceasing your shooting might sound counter intuitive but at times we can can photographic burnout. If this is happening to you try leaving your camera at home. Just focus yourself on the events, people, and environment around you without viewing everything through a viewfinder.

Live and breathe without making photos for a few days or even a few weeks. Much like switching up your shooting material, walking away from the camera for a while can hit your reset button and jump start your enthusiasm for making photographic once more.

Final Thoughts….

Whether most of us will admit it or not, we aren’t always super excited about making photographs 24 hours a day, 7 days a week. We have highs and lows of creativity and artistic energy levels. At some point you will experience this reduction in your photographic spark to some extent. Just remember that when it happens, and it will, that there are ways to combat the lack of motivation. While it all depends on your situation, some type of healthy change is usually the best remedy. This change can be taking a break from shooting or reading an autobiography about your favorite photographer’s life. Recognize that things just don’t feel right and take steps to bring yourself back into the photographic fold.

I love helping people overcome their hurdles so check out a couple more of my articles here at LifePixel, How To Be Successful in Photography and Real Talk: Reasons Your Photography Isn’t Improving. They deal with similar situations and can give you that lift that you need to get back into the game.

Filed Under: Inspiration, Tutorials Tagged With: camera, cameras, Canon, inspiration, landscape photography, Lifepixel, passion, perspective, Photographer, Photography, photography tips

Bracketed Exposures for IR photography

What are bracketed exposures? If you’re familiar with this term, you know how useful they can be. There are multiple uses for bracketed exposures, but they are especially helpful in IR photography. Shooting bracketed exposures is where the camera is set-up to shoot the same scene, but at different exposures.

Nearly all stock cameras are meant to shoot in color. So when we get into the optics and start removing filters or adding other filters, the camera doesn’t work the same. The one area that really takes a beating is the metering. After a modification, the metering will still be fairly close. But shooting in IR or full spectrum will definitely change the way the camera’s metering system sees the world. I find that my full spectrum modified Canon 5D Mk II with a 740nm filter will usually meter a ½ to 1 stop (usually denoted by EV) brighter than a normal scene. Most of my other modified cameras were the same.

The shows a series of 3 bracketed exposures at -1, 0 +1 EV

When I shoot IR photos, I shoot bracketed exposures as a rule. I’ve had too many IR photos where I thought the metering was accurate only to find that there are highlights in the scene that are blown out (camera’s histogram is clipped on the RHS). Shooting bracketed exposures nearly always helps me recover these highlights or even allows me to process a different shot that is at the + or – end of the bracket.

How do you begin doing this? Well, most cameras these days will allow the use of bracketed exposures. This is where the camera will shoot 3 or more exposures for each image. Depending on how you set it up, the camera will typically shoot a normal exposure and one under exposed and another that is over exposed. Some cameras will shoot additional over/under frames and also allow you to skew how these different exposures are framed in the overall bracket.  I like to set my camera to shoot the bracketed exposures in high speed mode, so I can get the 3 images in rapid succession with a single shutter button press.

This is the menu option for setting bracketed exposures on a Canon 7D.  This one is set for -1, 0 +1 EV

My cameras (as to many) have several programmable settings where I can set f/stop, ISO, exposure mode, bracketed exposures, etc. So I have 2 custom settings that shoot only bracketed. On my camera, C1 is set up for 1 stop over and under. The camera will record 1 normally metered frame, one frame that is one stop under and one frame that is one stop over. C2 is the same operation except for 2 stops over/under. This makes it quick and easy for me to change the camera to different situations where 1 or 2 stops might be needed.

Many DSLR’s have the ability to set custom settings.  This one is a Canon 5D MkII

So why else would I shoot bracketed exposures? One great feature is HDR. If you’re shooting a scene that has both bright and dark elements or the scene spans more dynamic range than a single shot can record, HDR or some other technique of exposure masking or blending is the way to do this. It’s also very helpful to have multiple exposures when shooting on the shadow side of the Sun, or toward the Sun.  Many times you won’t see the need for HDR until after you return and are processing your images. It’s too late to do an HDR at that point. So by shooting bracketed exposures, you have the ability to do HDR or exposure blending on shots, after the fact.

This is an HDR of the 3 images shown above.

Isn’t shooting bracketed exposures going to wear out my camera? Won’t it take more memory? Yep, for both. Your shutter is now clicking 3 or more times for each scene. All of these shots have to be recorded on the memory card. Of the 7 modern DSLR’s I’ve owned, I’ve only replaced the shutter on one camera (my 30D), and that was at about 3700 clicks, for sure an anomaly.  Most prosumer DSLR’s are good for 100k -150k shutter clicks. I’ve never shot 100k shots on any of my cameras. But I’m not a professional photographer. I venture to guess that most other casual shooters are the same. As for the memory consumption, memory cards are cheap.

Another example of scene that benefited from having more than a single exposure

There is a little good news. If you focus and shoot your IR like I described in my last blog, focusing through live-view, the mirror will stay locked up. So the wear associated with the mirror flipping up and down is removed from this operation.  It also helps to use a tripod when shooting bracketed exposures, especially if you’re going to be using them for HDR. You can still align the images in post-processing. But it’s easier if the images begin with good alignment. I prefer to shoot all my IR with a tripod.

Scenes that are shot toward the Sun typically have a high dynamic range that benefit from having bracketed exposures

If you’re comfortable with shooting regular exposures with your IR photography, by all means proceed. I find that shooting bracketed exposures helps save many images that might have otherwise been unusable. Happy shooting.

Filed Under: Tutorials Tagged With: 5d Mark II, 5DII, Bracketed Exposures, Eric Chesak, full spectrum, HDR, Infrared, IR, Photography

Understanding Basic Lens Anatomy and Terminology

The lens is the eye through which a camera sees. No matter what kind of camera you use, the lens is one of the single most important investments you will make. So in the spirit making wise decisions and minimizing buyer’s remorse the gear-savvy photographer will make it a point to understand the basics of lens anatomy. Not only with understanding the basic ins and outs of your lens make you a better technical shooter, but it will also enable you to squeeze every last drop of performance from whatever glass you happen to be using.

Without a doubt the numbers, markings, and terms often associated with camera lenses can be confusing. The good news is that they don’t have to be! Generally speaking, all those numbers and symbols are actually quite simple to understand. Let’s begin with some terms and names of common lens components you will likely encounter with most camera lenses.

Basic Lens Anatomy

Barrel-The physical outer body of the lens which houses the internal components.

Elements-A term used for the individual internal pieces of glass which make up the optics of a lens.

Bayonet-The end of the lens that attaches to the camera body. Bayonets are designed in different “mounts” based on the camera they are intended to fit.

The bayonet of a Canon EF Mount lens

Zoom Ring-A circular ring which allows the photographer to control the zoom of zoom lenses.

Focus Ring-A ring present on virtually all lenses which allows the shooter to manually adjust focus.

Focus and zoom rings on a modern lens

Aperture Ring(manual lenses)-On fully manual lenses, the aperture ring controls the physical size of the aperture with no selection being made by the camera.

Fully manual lenses often sport an aperture adjustment ring

Basic Lens Terminology

Some of the most confusing aspects about lenses isn’t their physical operation but the terminology used to describe their characteristics. Here is a breakdown of some common terms and phrases you will encounter when talking about camera lenses.

Focal Length-At the risk of oversimplifying the concept, think of this is simply the magnification strength of the lens measured in millimeters. Shorter focal length lenses are deemed “wide-angle” while long focal length lenses are considered “telephoto”.

Prime-When we say that a lens is “prime” it means that the lens is a fixed focal length. Basically speaking, the lens doesn’t “zoom”.

Lens Speed-The speed of a lens is directly connected to aperture. The wider the maximum possible aperture a lens is capable of the “faster” the lens is considered to be. This means that the lens is capable of shooting in lower light situations at faster shutter speeds. Remember, the smaller the F/number of the wider the aperture. Check out “Aperture Simplified”  ,another one my articles here at LifePixel, for a nice and simple breakdown of aperture that will help make since of F/numbers….

What the heck is this symbol ⌀ anyway???-You will likely find this symbol located around the outside front of your lens along with lens speed and focal length information. Fear not, that little guy is just the indication of what circular filter(polarizer, neutral density, etc.) size your lens accepts. It will be accompanied by a measurement in millimeters. If you see a “⌀77” then you will need a 77mm filter. What’s more, if you lose a lens cap, that is also the size for the replacement.

The face of a modern lens showing aperture, focal length, and filter size information

And always remember….

Your lens and camera work as one piece of gear along with you and your creative spark.

Understanding how your lens functions and the basics of lens anatomy will not only make you a better photographer but also a more competent when it comes to acquiring the gear you need.  Arm yourself with all the information you can and build on the basics. Knowledge is power when it comes to lenses.

Filed Under: Tutorials Tagged With: cameras, Canon, gear, Getting started, lens, lenses, Lifepixel, photographers, Photography, photography tips

Going Vintage with Adobe Lightroom

Retro Made Easy

When we think of “vintage style” photographs what we may be actually envisioning is a photo that bears many of the characteristics of analog film photography. These characteristics include subtle nuances in film grain and development, toning, and contrasts. The variations and combinations of these traits are quite literally too many to count but generally most vintage style photo-looks can be accomplished with just a few ridiculously simply edits in Adobe Lightroom. Generally speaking, vintage looking photographs are slightly faded with significant contrast. There are also some very slight color tones that are thrown into the mix in order to give a finished photo that has that great earthy feel of a analog photograph.

We’ll show you how to go from a RAW image file to a fully processed final image that has a nice vintage vibe. Here’s the before and after to give you an idea of just how impressive the results can be using just a few quick edits.

For this particular tutorial, we will look at a basic editing workflow for producing images with a vintage feel. But remember, this is just one look you can achieve. Don’t be afraid to experiment with color tones and contrast or even adding grain to your photo. The results can be fantastic!

Basic Edits First

We begin with a simple, and let’s face it, quite lackluster RAW file. Before we start with the vintage processing let’s do some basic edits to bring the image up to par for further processing. It’s always a good idea to do this before any other changes are made.

The edits applied here included some adjustments to color temperature and highlights as well as some adjustments to contrast and clarity. A couple of graduated filters were also used to even out the exposures of the sky and foreground. Here’s our processed RAW file that is now ready to go vintage.

Tone Curve

The tone curve has an undeserved bad reputation for being complicated to use. Nothing could be further from the truth once you have a basic understanding of how it affects your photo. For our vintage photo, most of the effects will be made using the tone curve adjustment. In most cases, begin with the tone curve set in “RGB” mode and the click the points to roughly an “S” shape with the curve. To add more fading, slightly drag the left most control point straight up the graph. In the case of this edit, I also moved the control point a small amount to the right to achieve the look I wanted.


I want to add a little bit of blue tone to the entire image. While still in the tone curve panel switch to the blue channel by selecting the dropdown menu below the graph. Keep in mind that you certainly don’t have to tone YOUR image with blue. The blue hue simply adds another element to the photo especially in the shadows which gives it a more vintage style. You could even use red or green if you like!

Final Tweaking in the Basic Panel

Now that we’ve reached a happy place with our tone curve it’s time to switch back to the Basic panel for a few final adjustments. In this case I increase the contrast while also reducing the highlights. After that I bring up the shadows. The colors in the photo are still a little too bright for me taste so I reduce the vibrance slightly. The color temp is just a slightly on the cool side so I also increase the temperature to warm the entire image a bit.

Vignette or Nah?

Our final step in the vintage conversion is to apply a slight vignette to help draw the viewers eye into the image. In come cases the vignette might not be desirable as in others. With this photo the darkening of the corners adds more appeal to the moody nature of the frame.

Careful not to go overboard here. Be sure to experiment with the feathering and shape of the vignette as well in order to get just the right look.

And here is the final vintage-styled photo. A considerable change from the dull and flat RAW file we started off with at the beginning of the article.

The fun thing about manufacturing vintage style photos in Lightroom is the shear enormity of the editing possibilities at your fingertips. Try out different combinations of color and toning to give different washes to your photographs. It’s definitely an easy way to add a little unique charm to your images without spending hours at the computer.

Filed Under: Tutorials Tagged With: adobe, landscape photography, lightroom, Photography, photography tips, Travel photography, Wildlife photographer

  • 1
  • 2
  • Next Page »

Blog Topics

  • Tutorials
  • Inspiration
  • Locations
  • Gear
  • News
  • Other/Misc

What our customers say:

Life Pixel has been a life-changer for me. Continue reading
Eric GConnecticut
Read more reviews
I am more than satisfied with the service I received Continue reading
Christopher JCanada
Read more reviews
I am more than pleased with the conversion job that you did Continue reading
LOUIS MWaco, Texas
Read more reviews
I am VERY impressed with his knowledge of your products and his patience in explaining it to a novice like me. Continue reading
Lynn FEssex, Maryland
Read more reviews
Things will only get better from here thanks to all of you. Continue reading
Phillip FRedding, California
Read more reviews
The Lifepixel newsletter reminds me of not having expressed my gratitude for the excellent job you made. Continue reading
Michael GGermany
Read more reviews
Your staff went above and beyond the call of duty to make sure everything was handled in an excellent manner. Continue reading
Paige RPearland, Texas
Read more reviews
It has given my old camera a new life, I will enjoy using it again. Continue reading
William PAustralia
Read more reviews
Excellent service and the camera works just great Continue reading
Hans FairhurstAustralia
Read more reviews
I just got my converted camera back from you guys. THANK YOU!!!! Continue reading
Anne CutlerForest Knolls, CA
Read more reviews
infrared_filter_choices_sidebar
ir_conversions_explained_sidebar
----------- Watch More Videos -----------
infrared_quick_start_guide

Ready to start shooting Infrared?

Convert My Camera

Subscribe To Our Newsletter

Receive updates, tips, cool tutorials, free stuff and special discounts.

Learn the Basics

  • Video
  • Start Here
  • Filter Choices
  • Focus Calibration
  • Lens Considerations
  • Camera Considerations
  • Place Your Conversion Order

Resources

  • Galleries
  • Lens Hot Spot Database
  • IR Tutorials
  • FAQ
  • Infrared Filter Choices
  • Infrared Photography Guide
  • Infrared DIY Tutorials

Company

  • Why Choose Us
  • Get In Contact
  • Job Openings
  • Write For Us
  • Affiliate Program
  • Terms of Use
  • Privacy Policy
  • Home
  • Start Here
  • Galleries
  • Tutorials
  • FAQ
  • Blog
  • Why Choose LifePixel?
  • Shop
  • Contact

Copyright © 2023 Life Pixel Infrared - All rights reserved - LifePixel Infrared Photography IR Conversion, Modification & Scratched Sensor Repair