• Cart
  • Checkout
  • My Account

Infrared Conversions, IR Modifications & Photography Tutorials | Life Pixel IR

The world leader in infrared conversions, modifications & DIY IR conversion tutorials. Scratched sensor replacement, UV & Full spectrum conversions.

The world leader in infrared camera conversions

866.610.1710
  • Home
  • → Start Here ←
    • 1 – Introduction
    • 2 – Filter Choices
    • 3 – Focus Calibration
    • 4 – Lens Considerations
    • 5 – Camera Considerations
    • 6 – Start Shopping
  • Galleries
    • Infrared Photography
    • Infrared Time Lapse
    • Infrared Cinematography
    • Infrared Stop Motion
    • Ultraviolet Photography
    • Forensic Photography
  • Education
    • Training Sessions
    • How To Shoot Infrared
    • AR Coated Infrared Filters
    • Lens Hot Spot Database
    • Photoshop Video Tutorials
    • Infrared Issues & Solutions
    • IR Basics in Photoshop
    • Camera Quick Start Guide
    • DIY Conversion Tutorials
    • IR Photography Primer
    • Secondhand Cameras
    • Wall Of Shame
  • Workshops
  • FAQ
  • Blog
    • Tutorials
    • Inspiration
    • Locations
    • Gear
    • News
    • Other
  • Why Choose LifePixel?
    • Submit Your Review
  • Contact
  • Shop

A Quick Guide to Local Adjustment Presets in Lightroom

Share
Pin
Tweet
Email
Share

If you use Adobe Lightroom, I’m sure you’ve heard of develop presets and how they can jump start your creativity. But did you know that you can also create and save local adjustment presets just as easily? In this article I’m going to show you how to create and save your own local adjustment presets so you can make the most of your editing time in Lightroom.

What are Local Adjustments?

Local adjustment presets work a lot like develop presets in that they allow you to save certain combinations of edits for quick application later. The biggest difference between the two types of presets is that normal development presets generally work globally(affects the entire image) whereas local presets affect only the portions of the image you choose. These edits are applied either with either the local adjustment brush, graduated filter, radial filter, or a combination of the three. The great thing about local adjustment presets is that each preset can be applied by any of the local adjustment tools in Lightroom.

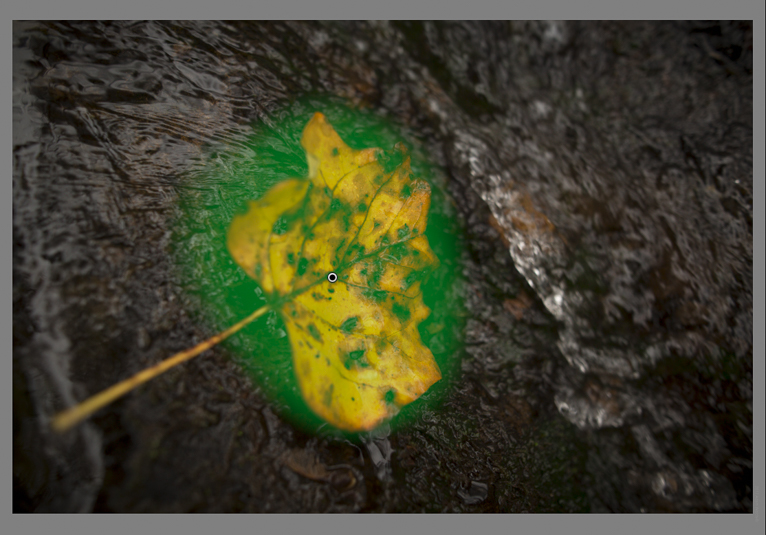
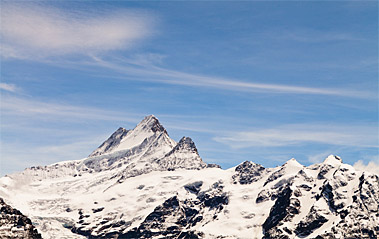
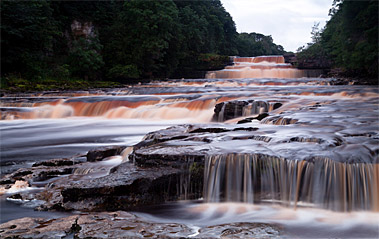
Here’s an example using the picture above. This is how it looked originally.

Let’s say we want to only lighten the leaf without disturbing the rest of the photo. Not only that, but the area could also use a little bit of a boost in clarity and sharpening. We can use the local adjustment brush and combine all this edits into one and apply them at the same time.

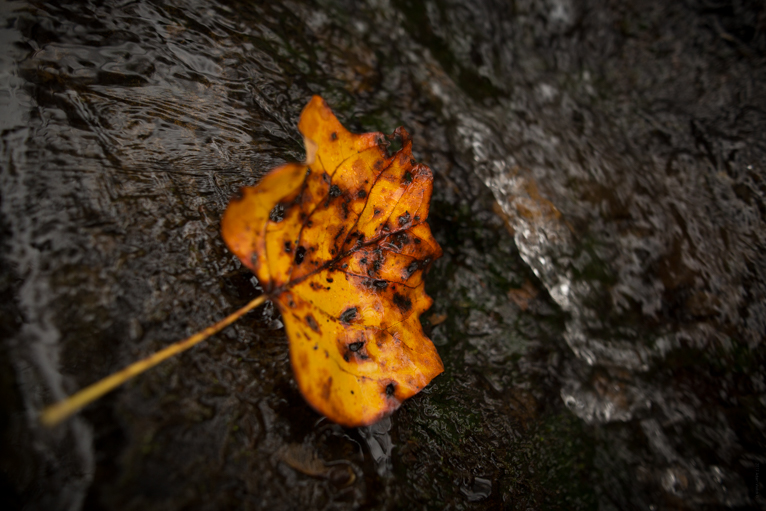
Now, that looks better.

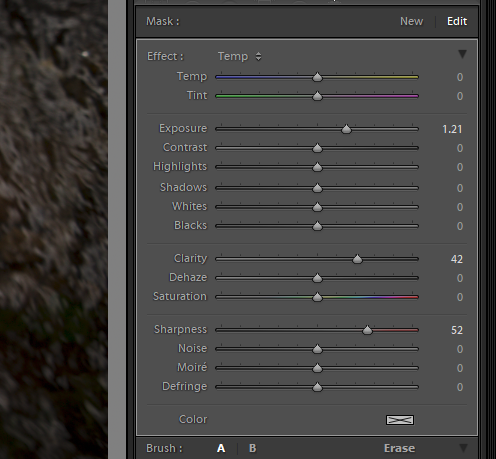
This is an edit you might have use for in the future since adding a little exposure and clarity can might an image really pop. Instead of taking the time to go back in and adjust the sliders each and every time why not save this adjust as a preset? Saving local adjustments is even easier than saving a regular development preset because there’s no new folder to make and name, no check boxes to tick or untick. Everything is already set up for you and all you’ll need to do is make your adjustments and then name your new preset.
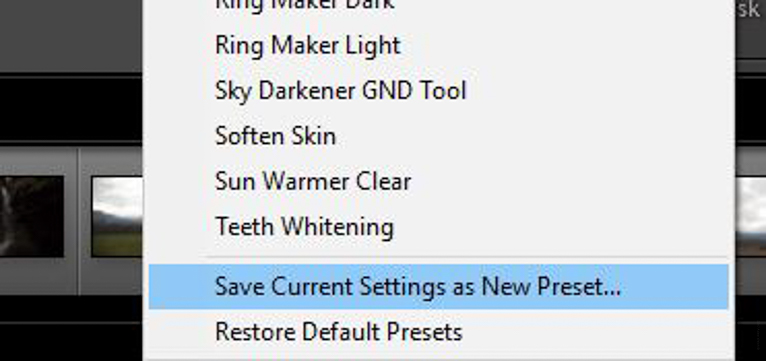
Saving the Preset

First, click the ‘custom’ drop down at the top of the local adjustments panel….

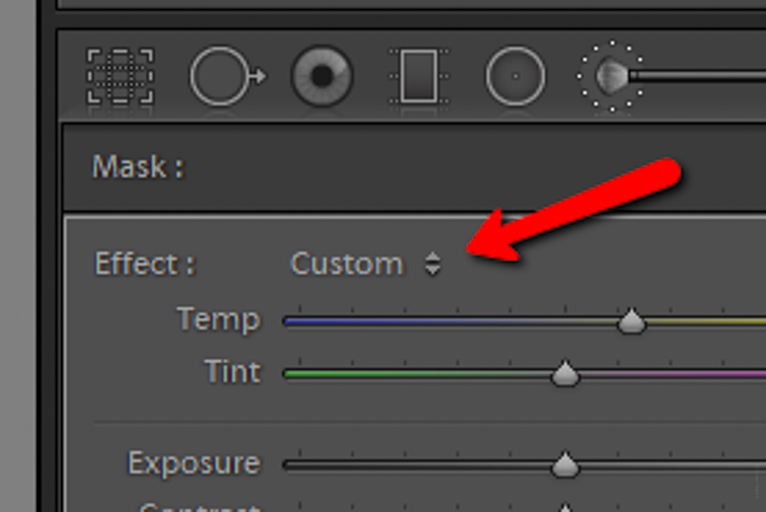
Find the bottom of the ‘Save current settings as new preset’ option at the bottom of the drop down menu and click on that.

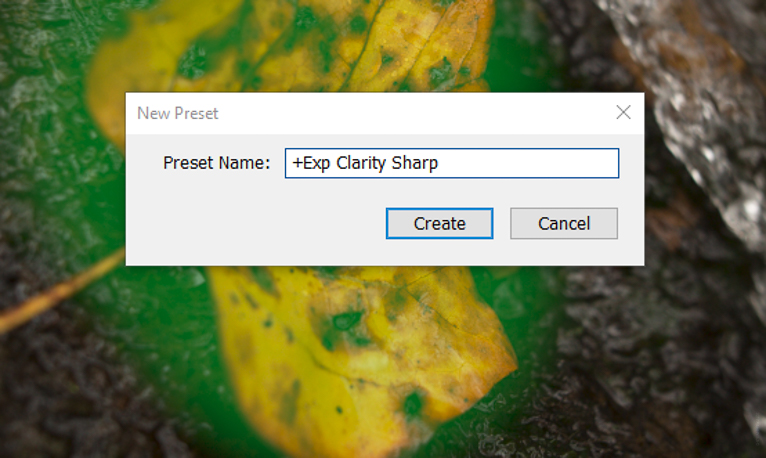
Now it’s time to name your awesome new local adjustment preset. Just as with any other type of preset it’s a good idea to come up with a descriptive name that immediately tells you what the preset does. For this preset I’ve chosen ‘+Exp Clarity Sharp’.

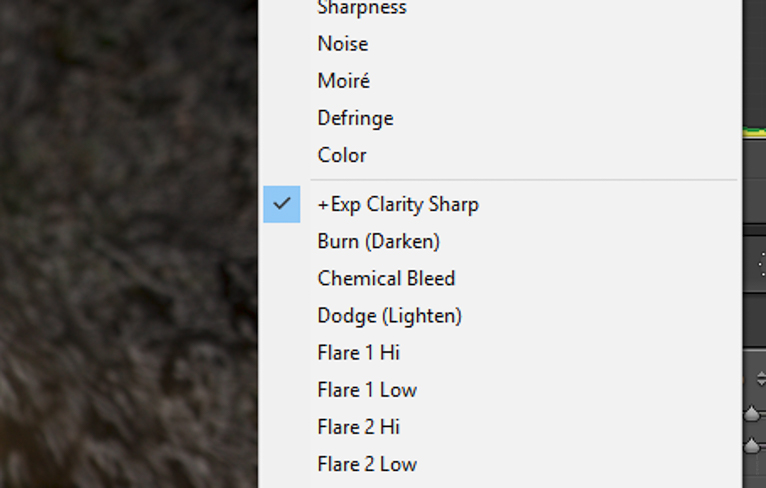
And that’s it! Your new preset will appear as a freshly made preset name in the local adjustment presets dropdown menu.

Final Thoughts on Local Adjustment Presets…

Like any other preset in Lightroom, local adjustment presets save you time by eliminating the need to change multiple adjustment sliders each and every time you want to use a particular edit. Making a local adjustment preset is one of the easiest tricks you can use to speed up your post processing. Remember, every preset you make can be used with all the local adjustment tools in Lightroom. That means the adjustment preset we made above can also be applied using the radial and graduated filter as well. Local adjustment presets are great. Use this guide and find out for yourself!

  • Latest Articles
  • Author Bio
Adam Welch

Latest articles by Adam Welch (see all articles)

  • Bare Bones Photography: What Gear Do You Really Need? - May 13, 2018
  • A Simple Explanation of Aperture - May 13, 2018
  • The Case for Black and White Photography - May 13, 2018
Adam Welch

Adam Welch

Photo maker, author, and adventurer currently based in the western portion of his home state of Tennessee. You can usually find him on some distant trail making photographs or at his computer writing about all the elegant madness that is photography. Follow his sometimes controversial Blog on everything related to photography and then check out his cozy home on Instagram.

Adam has also authored one of the most comprehensive guide books on using Adobe Lightroom Classic CC.  You can get your copy of Lightroom Mastery:
A COMPLETE GUIDE TO WORKING IN LIGHTROOM CLASSIC CC HERE!


See All Articles by Adam Welch
Share
Pin
Tweet
Email
Share

Related Posts

  • 10 Tips to Help You Get Started in Photography
    10 Tips to Help You Get Started in Photography
  • 8 Tips to Improve Your Mountain Photos
    8 Tips to Improve Your Mountain Photos
  • 6 Tips For Photographing Waterfalls
    6 Tips For Photographing Waterfalls
  • Using the “3 Picture Story” Technique to Improve Your Story Telling Images
    Using the “3 Picture Story” Technique to Improve Your Story Telling Images

Filed Under: Tutorials Tagged With: adobe, camera, cameras, Getting started, landscape photography, Lifepixel, lightroom, lightroom classic cc, Photography, photography tips, processing, tutorial

Leave a Reply Cancel reply

Your email address will not be published. Required fields are marked *

Blog Topics

  • Tutorials
  • Inspiration
  • Locations
  • Gear
  • News
  • Other/Misc

What our customers say:

Life Pixel has been a life-changer for me. Continue reading
Eric GConnecticut
Read more reviews
I am more than satisfied with the service I received Continue reading
Christopher JCanada
Read more reviews
I am more than pleased with the conversion job that you did Continue reading
LOUIS MWaco, Texas
Read more reviews
I am VERY impressed with his knowledge of your products and his patience in explaining it to a novice like me. Continue reading
Lynn FEssex, Maryland
Read more reviews
Things will only get better from here thanks to all of you. Continue reading
Phillip FRedding, California
Read more reviews
The Lifepixel newsletter reminds me of not having expressed my gratitude for the excellent job you made. Continue reading
Michael GGermany
Read more reviews
Your staff went above and beyond the call of duty to make sure everything was handled in an excellent manner. Continue reading
Paige RPearland, Texas
Read more reviews
It has given my old camera a new life, I will enjoy using it again. Continue reading
William PAustralia
Read more reviews
Excellent service and the camera works just great Continue reading
Hans FairhurstAustralia
Read more reviews
I just got my converted camera back from you guys. THANK YOU!!!! Continue reading
Anne CutlerForest Knolls, CA
Read more reviews
infrared_filter_choices_sidebar
ir_conversions_explained_sidebar
----------- Watch More Videos -----------
infrared_quick_start_guide

Ready to start shooting Infrared?

Convert My Camera

Subscribe To Our Newsletter

Receive updates, tips, cool tutorials, free stuff and special discounts.

Learn the Basics

  • Video
  • Start Here
  • Filter Choices
  • Focus Calibration
  • Lens Considerations
  • Camera Considerations
  • Place Your Conversion Order

Resources

  • Galleries
  • Lens Hot Spot Database
  • IR Tutorials
  • FAQ
  • Infrared Filter Choices
  • Infrared Photography Guide
  • Infrared DIY Tutorials

Company

  • Why Choose Us
  • Get In Contact
  • Job Openings
  • Write For Us
  • Affiliate Program
  • Terms of Use
  • Privacy Policy
  • Home
  • Start Here
  • Galleries
  • Tutorials
  • FAQ
  • Blog
  • Why Choose LifePixel?
  • Shop
  • Contact

Copyright © 2025 Life Pixel Infrared - All rights reserved - LifePixel Infrared Photography IR Conversion, Modification & Scratched Sensor Repair