• Cart
  • Checkout
  • My Account

Infrared Conversions, IR Modifications & Photography Tutorials | Life Pixel IR

The world leader in infrared conversions, modifications & DIY IR conversion tutorials. Scratched sensor replacement, UV & Full spectrum conversions.

The world leader in infrared camera conversions

866.610.1710
  • Home
  • → Start Here ←
    • 1 – Introduction
    • 2 – Filter Choices
    • 3 – Focus Calibration
    • 4 – Lens Considerations
    • 5 – Camera Considerations
    • 6 – Start Shopping
  • Galleries
    • Infrared Photography
    • Infrared Time Lapse
    • Infrared Cinematography
    • Infrared Stop Motion
    • Ultraviolet Photography
    • Forensic Photography
  • Education
    • Training Sessions
    • How To Shoot Infrared
    • AR Coated Infrared Filters
    • Lens Hot Spot Database
    • Photoshop Video Tutorials
    • Infrared Issues & Solutions
    • IR Basics in Photoshop
    • Camera Quick Start Guide
    • DIY Conversion Tutorials
    • IR Photography Primer
    • Secondhand Cameras
    • Wall Of Shame
  • Workshops
  • FAQ
  • Blog
    • Tutorials
    • Inspiration
    • Locations
    • Gear
    • News
    • Other
  • Why Choose LifePixel?
    • Submit Your Review
  • Contact
  • Shop

Profiled Photographers – Tim Bird

Tim Bird Photography

Pro photographer Tim Bird first got really interested in photography when he arrived in Finland 40 years ago. For Tim, Finland was “a completely clean visual slate where everything was novel and alien.” He says “Finland then felt as close to its eastern neighbour, the Soviet Union, as it did to western Europe. So I started to see things through the 50mm lens of my first film camera, a Russian Zenit, totally manual, built like a little tank, ideal for learning the basics. So I was completely self-taught, except for a few very instructive courses and workshops later on.” But it wasn’t photography that first pulled Tim to Finland…

Originally from the South East of England, Tim moved to Finland to work as an English teacher. But what he really wanted to do was to work as a freelance journalist. He says “I made contact with English language outlets in Finland, including the magazine of the Finnish Tourist Board and the inflight magazine of Finnair, Blue Wings, the latter being my most regular outlet for travel material over the last three decades.”

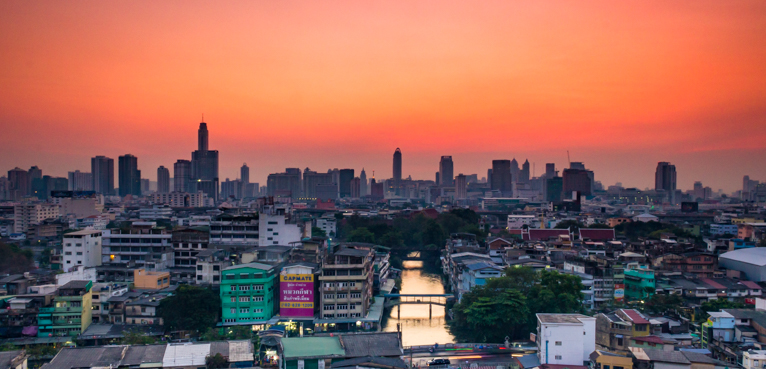
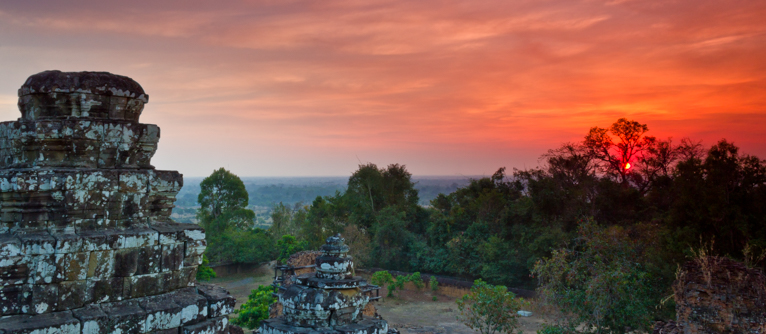
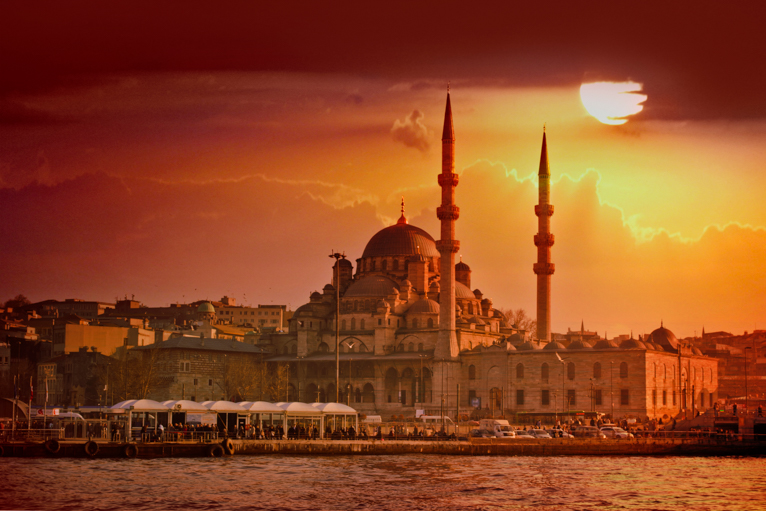
But rather than just supplying copy, he found that he could accompany his articles with his own pictures, although in his own words “it took him a long time to feel confident enough to call himself a photographer as well as a writer”. Since then Tim has had several coffee table books published and contributed words and photos to dozens of books and magazines. Finland and the Baltic and Nordic regions are his specialities, but he has also had the chance to travel widely on commissions, to Southeast Asia (especially India), right across Europe, Africa, and North, South and Central America.

Tim Bird Photography

Tim, where are you from?

I’m from Southeast Kent in England. I haven’t lived there since I was in my early 20s (I’m now 65) but I visit my family there whenever I can.

Where do you currently live?

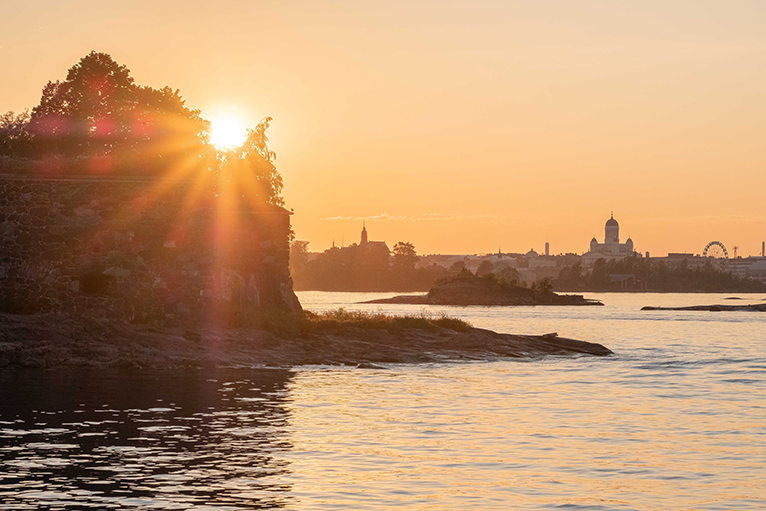
I’ve lived in Helsinki, the capital city of Finland, since 1982.

Tim Bird Photography

What genre of photography do you specialise in?

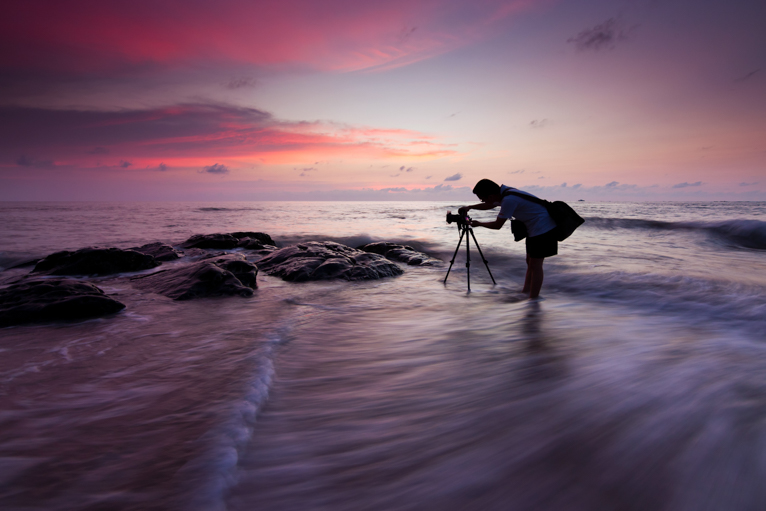
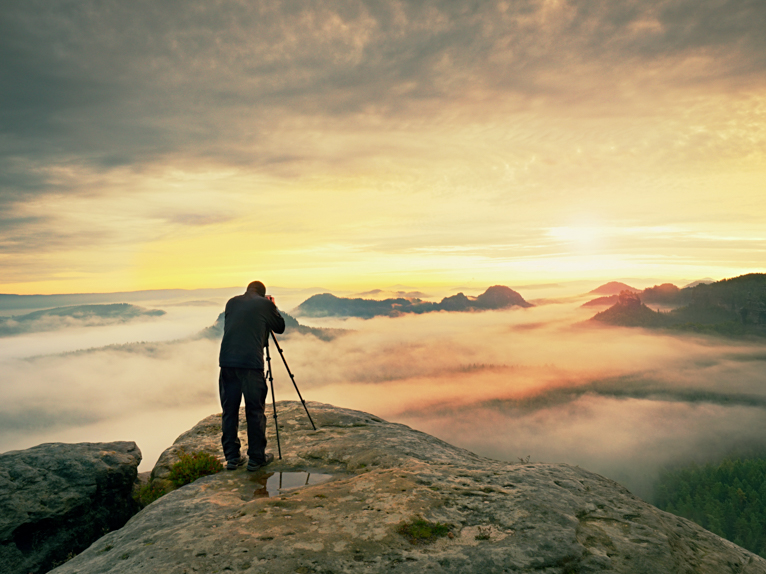
I’m a travel photographer, and that covers portraits, landscapes, wildlife, food, festivals and events!

Describe your style of photography?

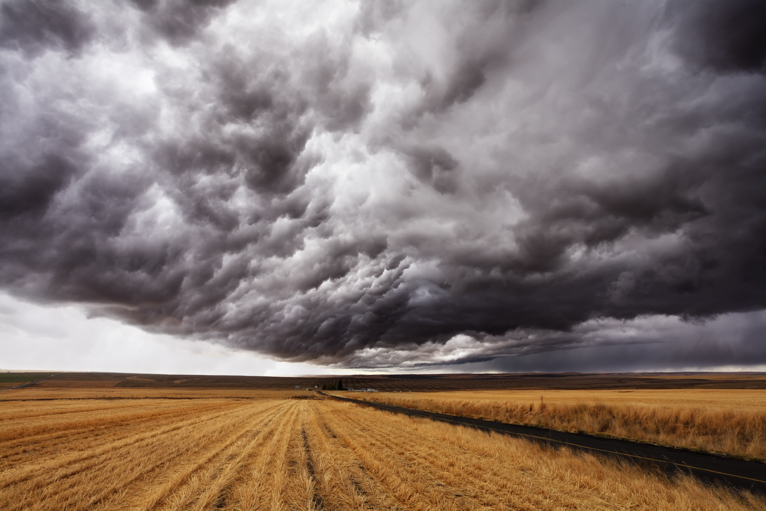
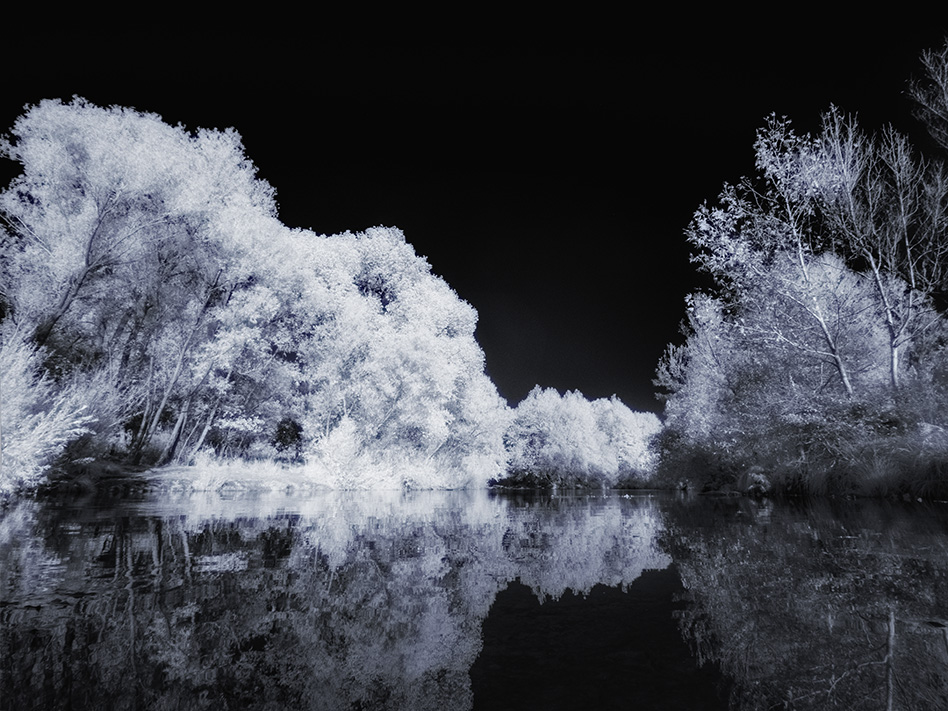
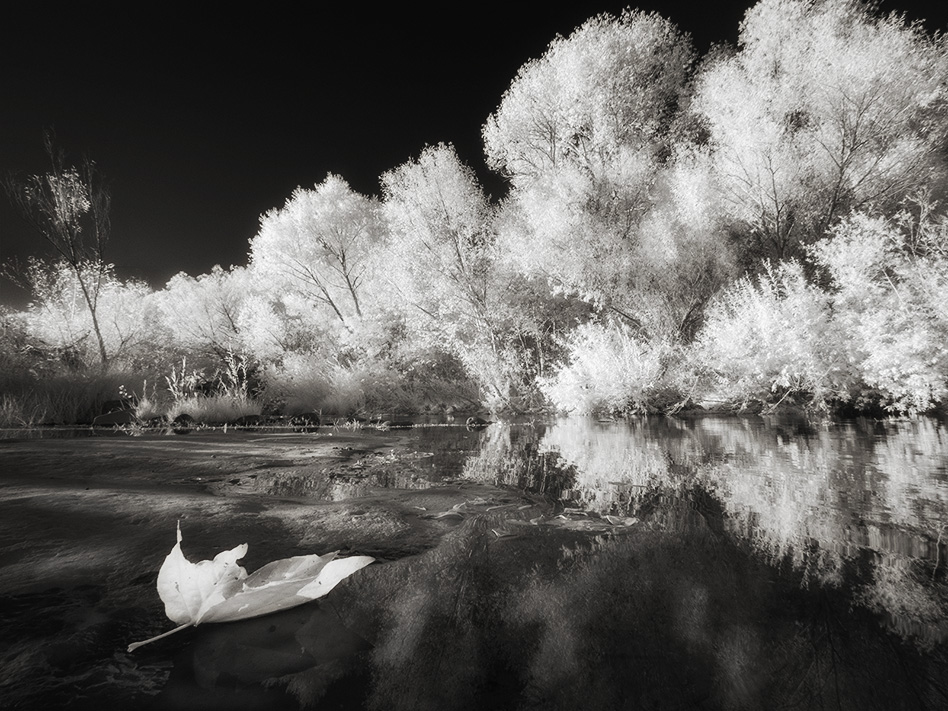
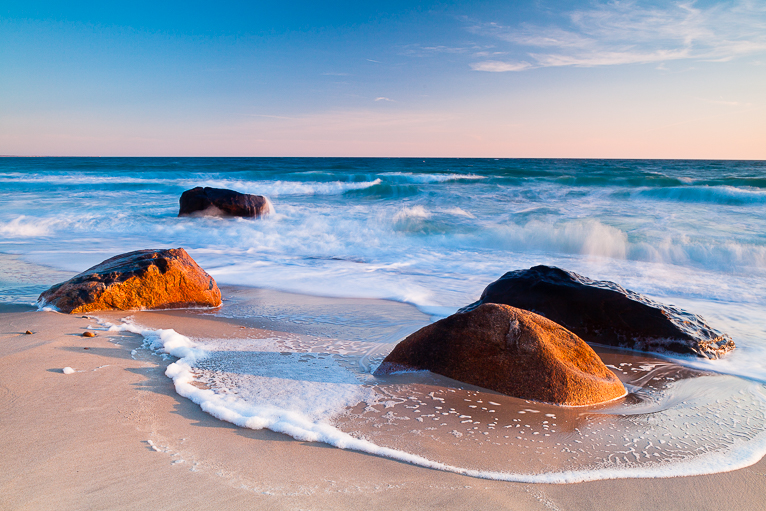
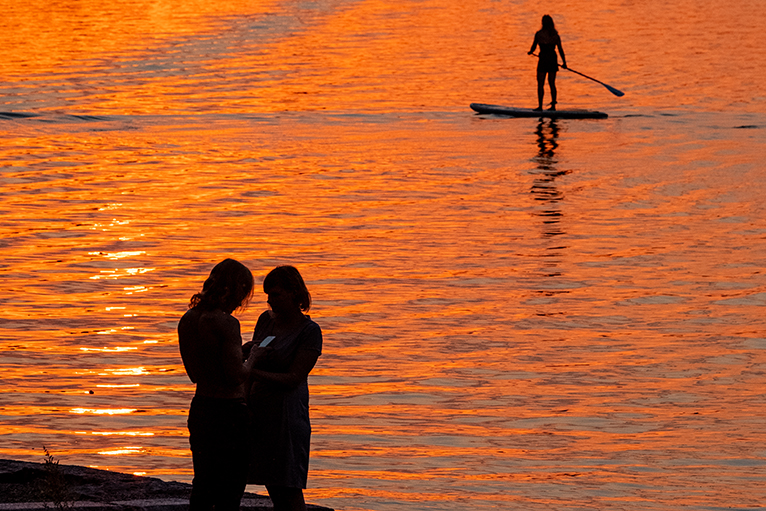
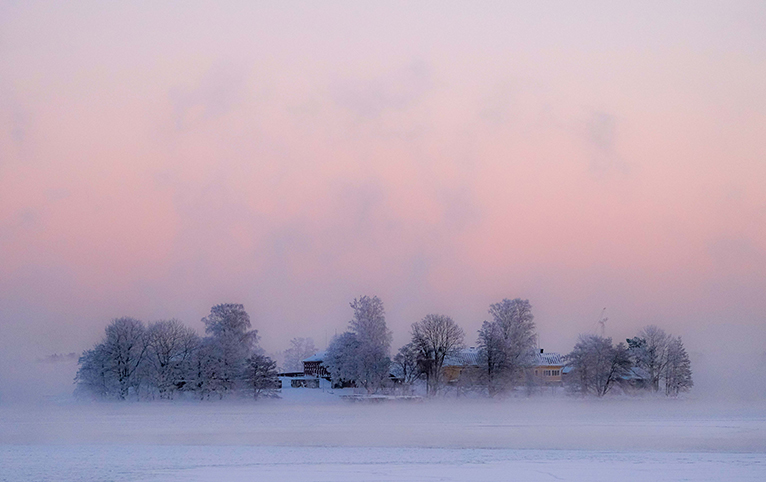
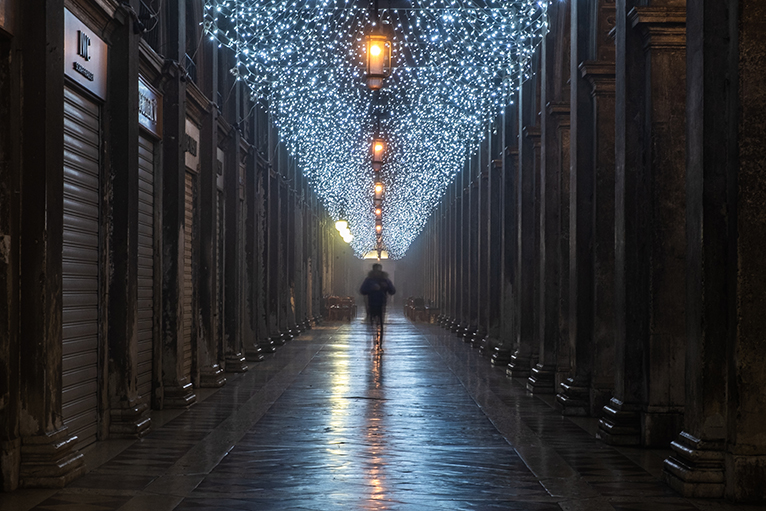
Hmmm, I think that’s up to others really! But I realise that I am increasingly following the concept that photography is an art of exclusion, consciously and subconsciously trying to leave out superfluous detail from shots. I love shooting people, including children, and I think it’s a great shame that we can’t do that without attracting suspicion anymore, although I understand the reasoning. I like to make a connection, however fleeting, with the people I shoot, trying to make sure they are not intimidated by the camera. I’m attracted to extremes, in events, in climate and weather, in cultures, but also to extreme calm, and I love the escapism, the thrill and the total immersion of shooting the Northern Lights, for example, or foggy mornings on the river near my Helsinki home.

Tim Bird Photography

What are you working on at the moment?

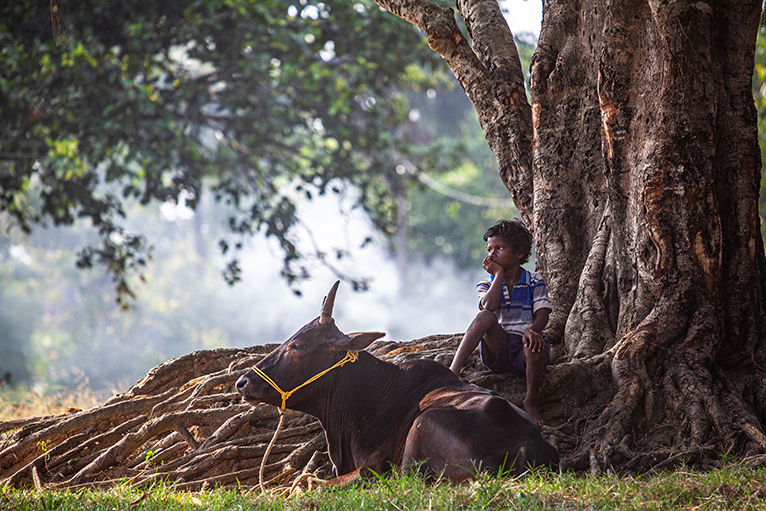
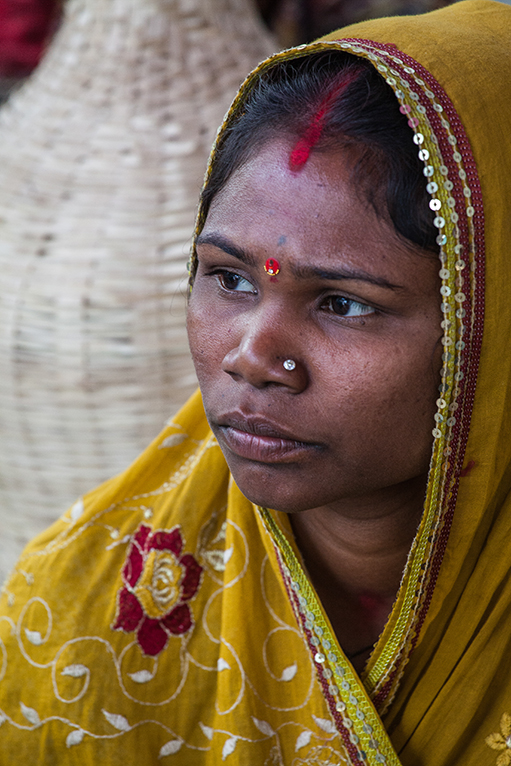
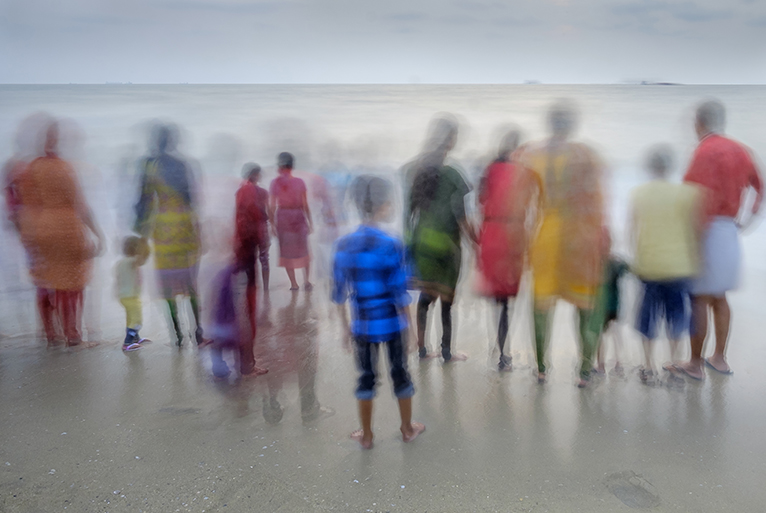
My ongoing Women of India project, telling stories of women from different Indian regions, cultures and backgrounds, has been interrupted by Covid! But I recently held an exhibition on that theme in Helsinki. I’ve been rediscovering Finland with my camera over the last 18 months, not having been able to leave because of travel restrictions.

What is your next project or assignment?

Things have been very quiet on the commission front, so I’m trying to use the time to do some archiving and to make and maintain contacts for when things – hopefully – return to “normal”. I continue to contribute articles and photos, including ‘slide show’ galleries, to a website called This Is Finland, published by the Finnish Foreign Ministry.

Tim Bird Photography

Are there any photographers whose work/style you admire?

The Indian photographers Raghupir Singh and Raghur Rai; Sebastião Salgado; Steve McCurry; Tiina Itkonen, a Finnish photographer who specialises in Greenland.

What is your favourite memory of your experiences?

The first time I saw the Northern Lights on a frozen lake in Lapland. Jumping around and yelling like kids with a couple of mates, not quite believing that anything so incredible could be possible and not knowing in which direction to point my camera.

What’s the biggest photographic challenge you overcame?

Escaping the crush at dawn on the main bathing day of the Kumbh Mela Hindu festival in Allahabad, India in 2013, when untold millions gathered to bathe in the Ganges. I managed to escape to a pontoon on the river from which I could get a view back towards the banks of the river. Terrifying.

Tim Bird Photography

What’s in your camera bag?

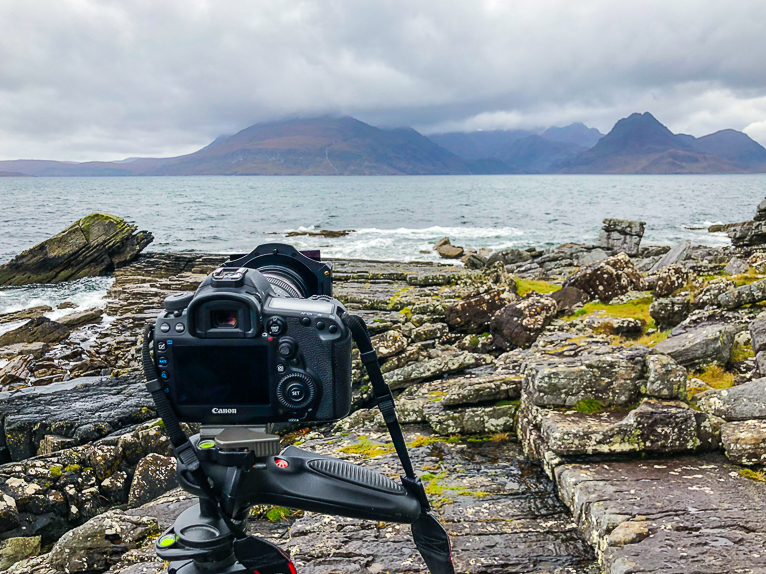
Fujifilm XT3, 18-55 zoom, 55-200 zoom, Zeiss 50mm macro, Samyang 12mm, Sirui travel tripod, ND500 filters, polarising filters, several spare batteries, several spare SD cards.

What photographic equipment would you never leave home without?

Fujifilm X100V.

Tim Bird Photography

What advice you would give anyone who is starting out?

Look at as much photography as you can but follow your own instincts and develop your own ‘voice’. Experiment. Know the rules, break the rules. Get to know your camera. Be bold and persistent if you want to sell or publish your photos. Identify the best competitions and enter them. Don’t give up!

Any pitfalls they should avoid?

Try not to get sucked too deeply into social media! Instagram is a great way to show your photos, but it can become too time-consuming and too much of an end in itself rather than a means of raising your profile – at least, that’s what I think. Be careful about what rights you give away if your pictures are published or entered into awards. It’s not always possible and it’s getting harder, but try to stick to the general principle of getting paid for your work!

Tim Bird Photography

Lastly… if you weren’t a photographer what would you be doing?

Not an option. I’ll always be a writer but I can’t imagine not doing both!

To see more of Tim’s work visit www.timbirdphotography.com.

You can follow Tim on Instagram.

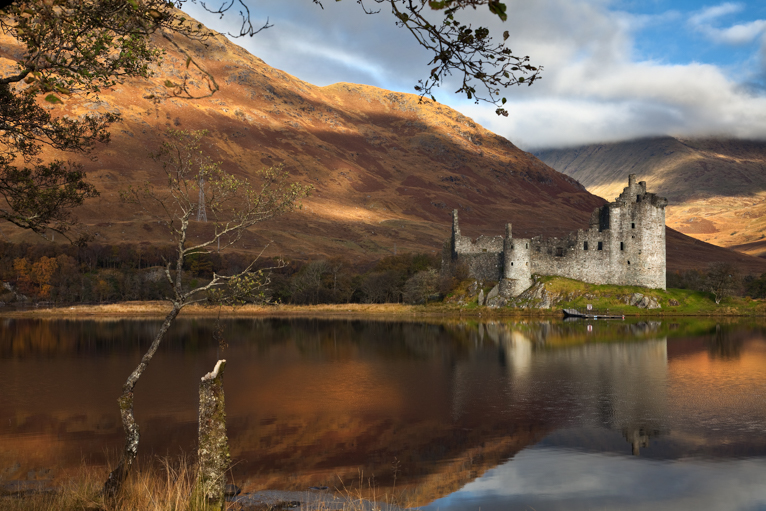
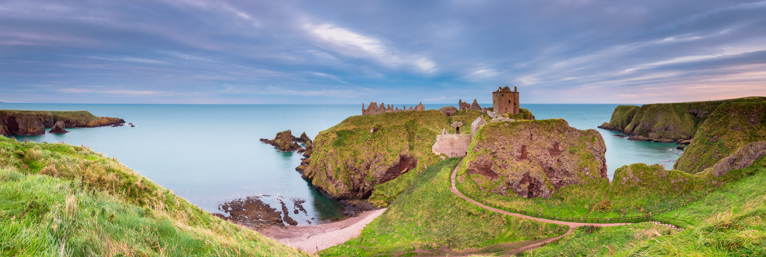
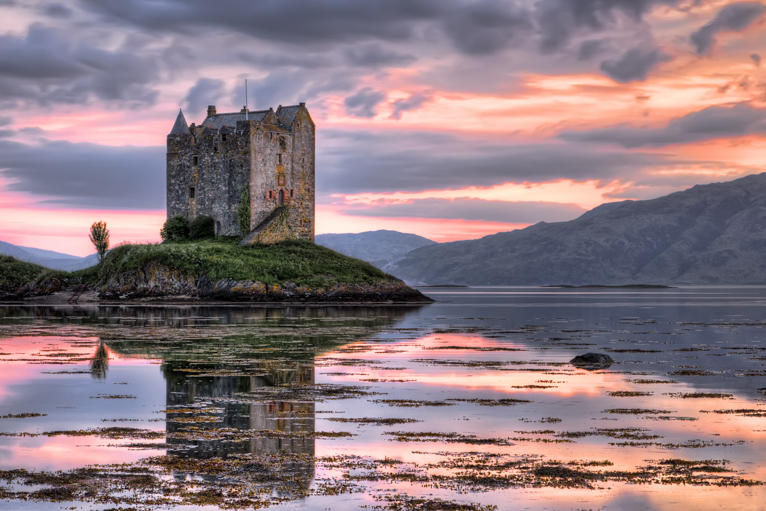
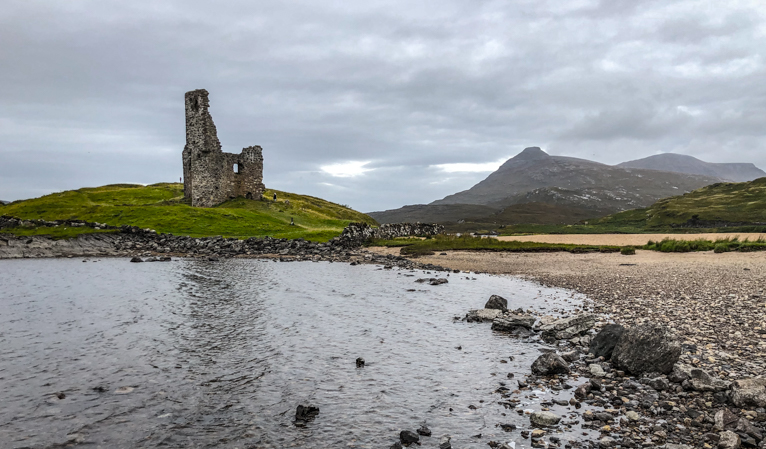
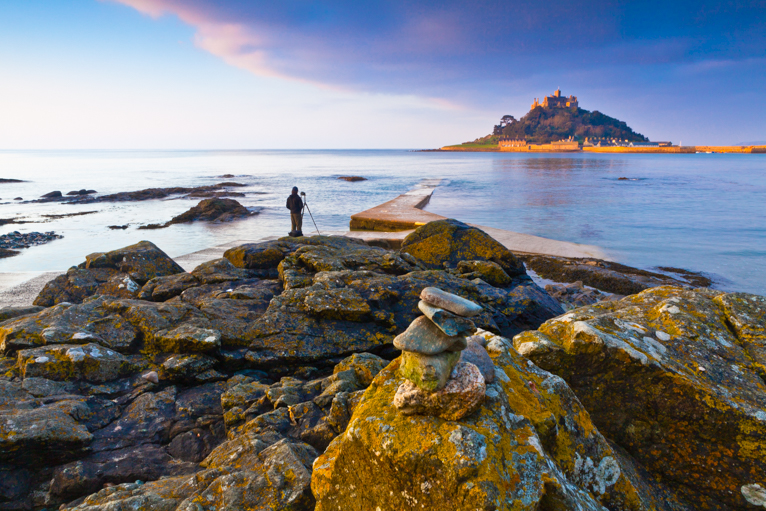
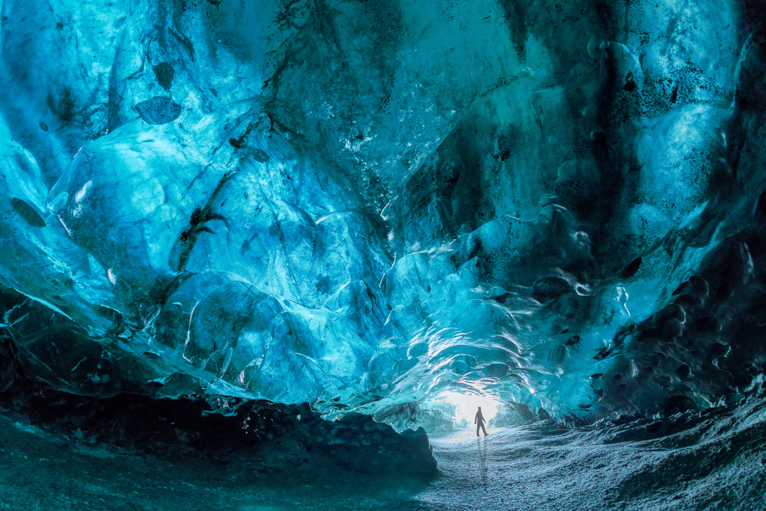
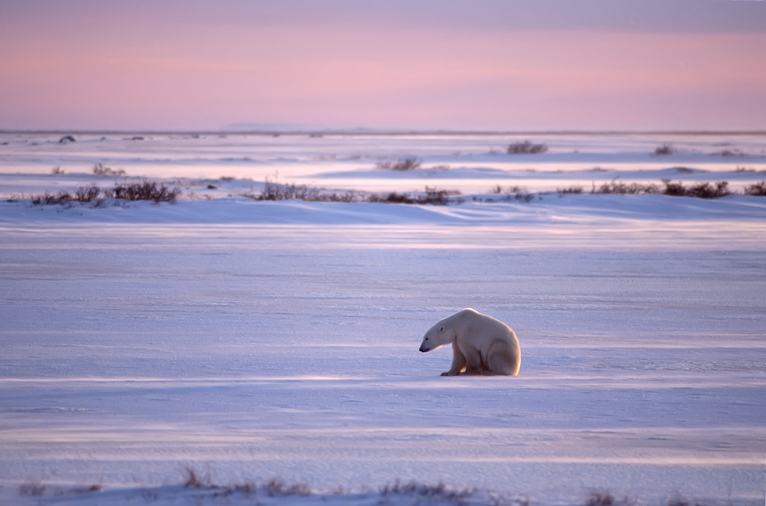
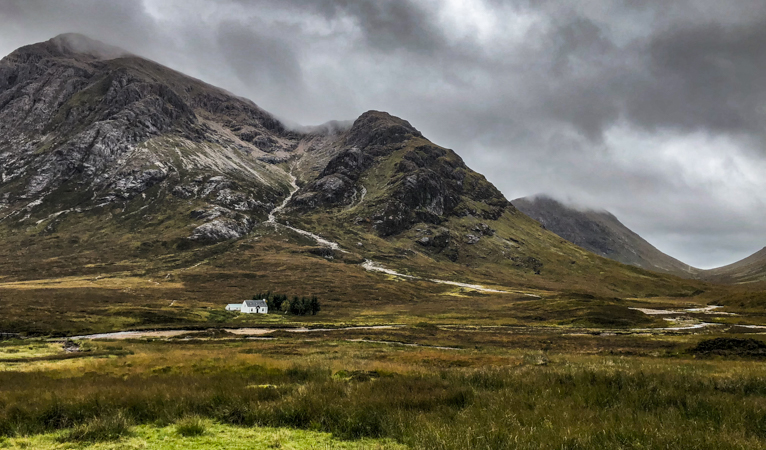
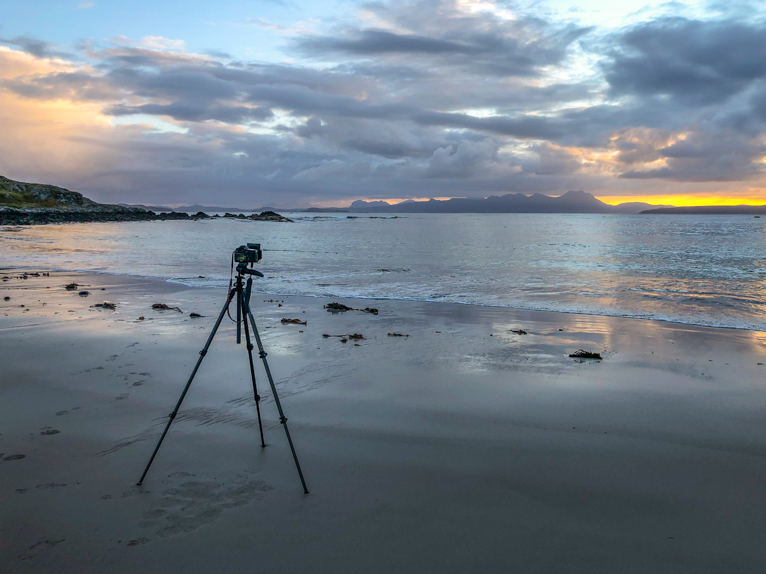
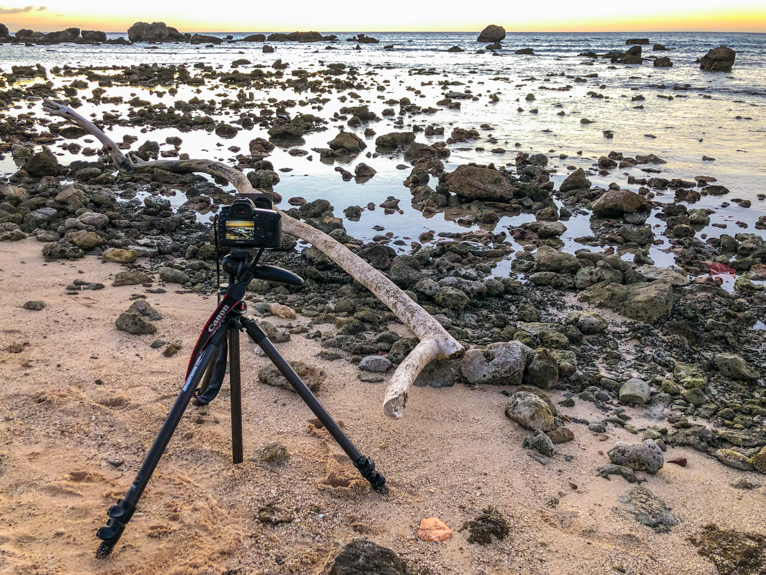
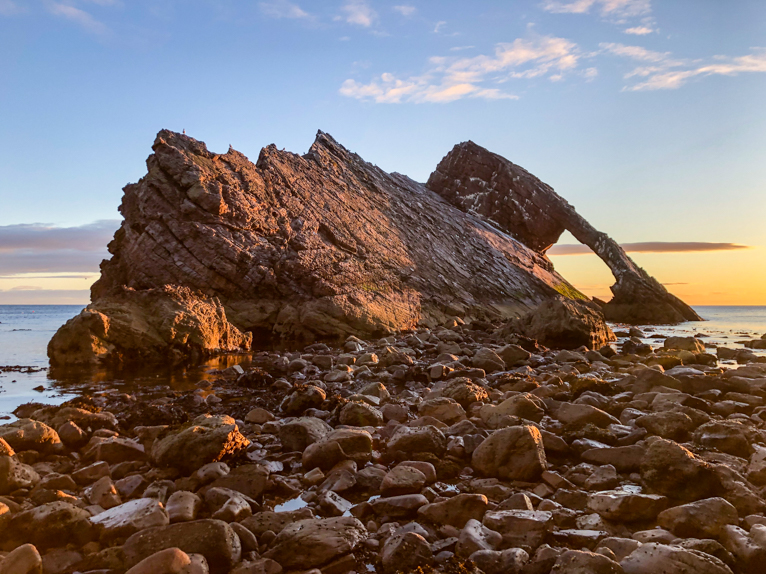
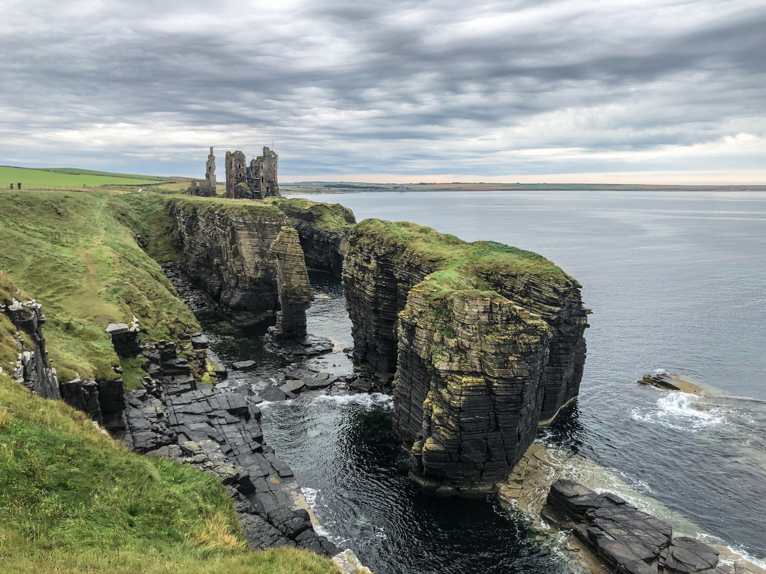
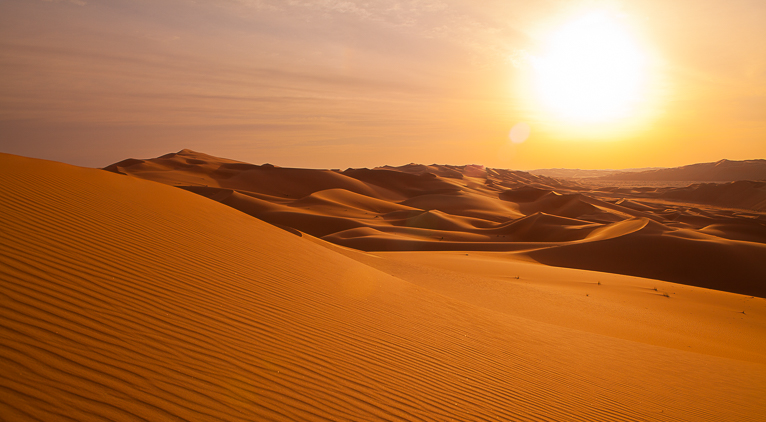
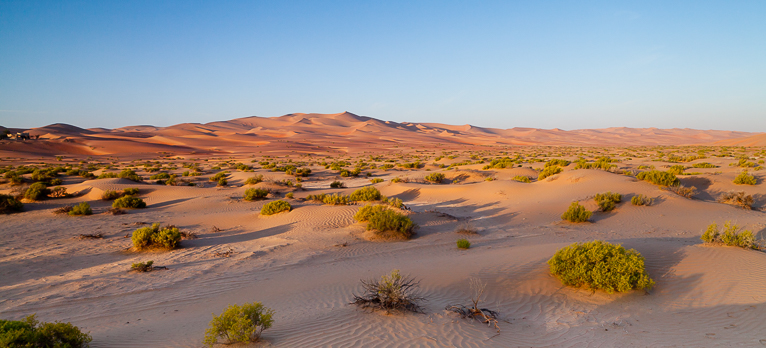
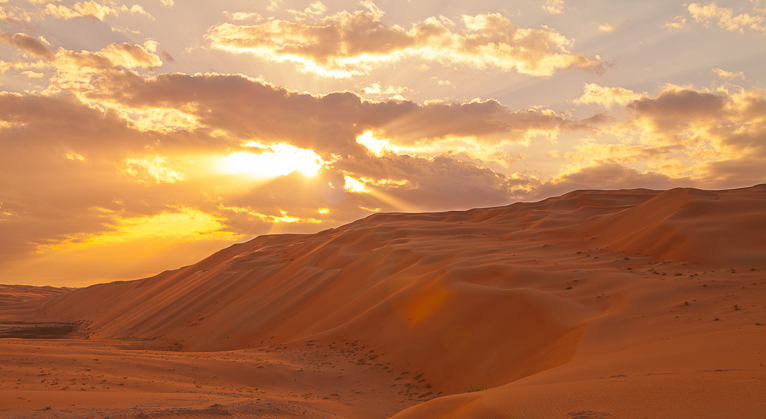
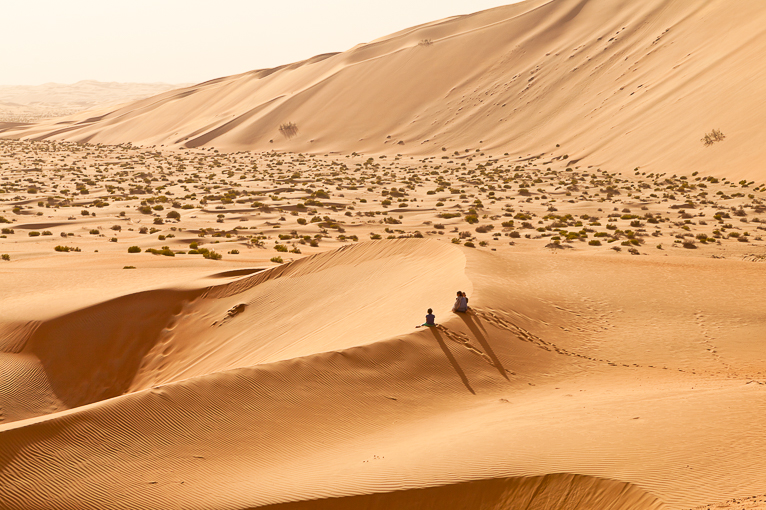
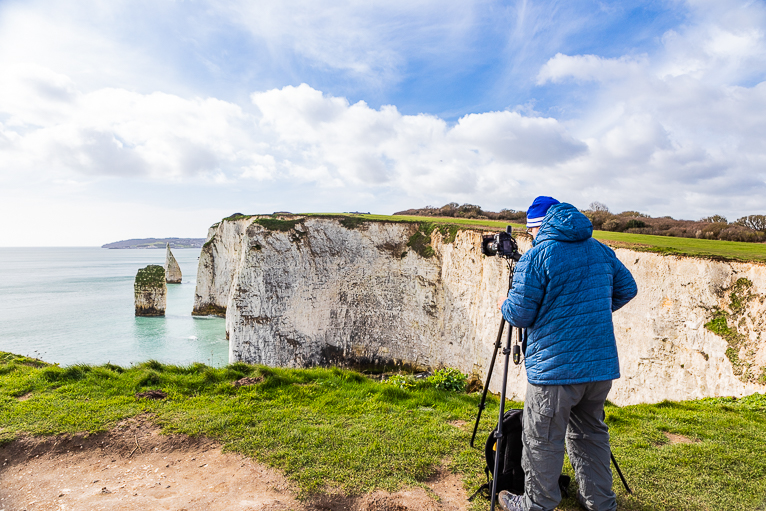
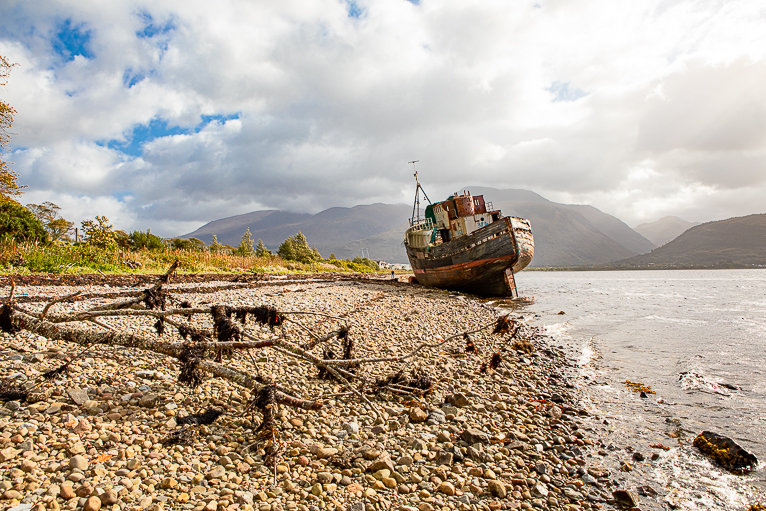
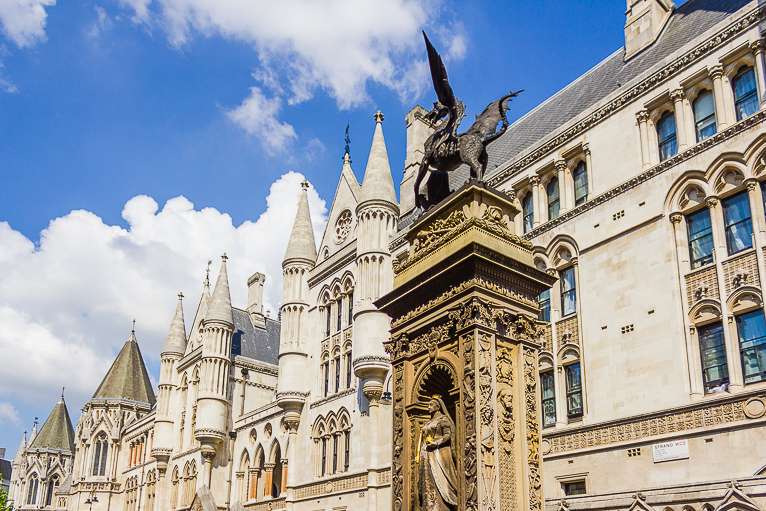
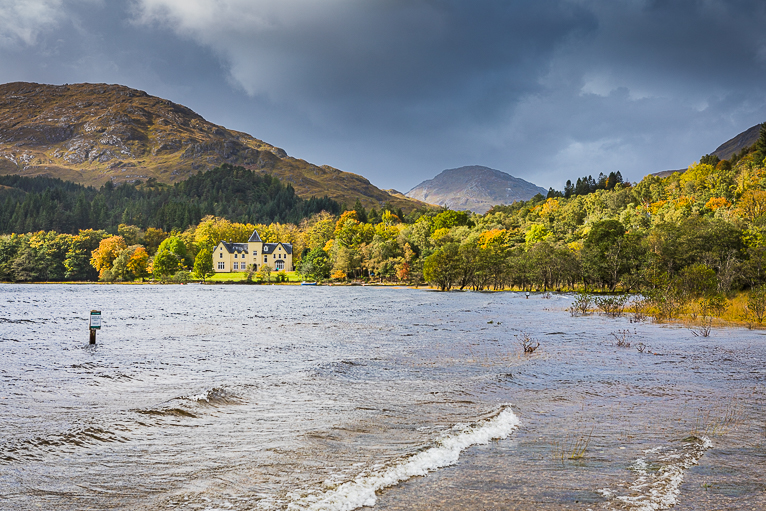
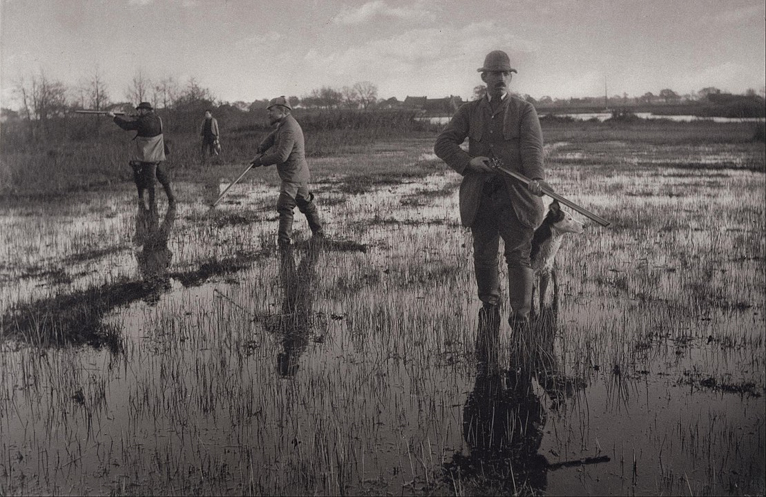
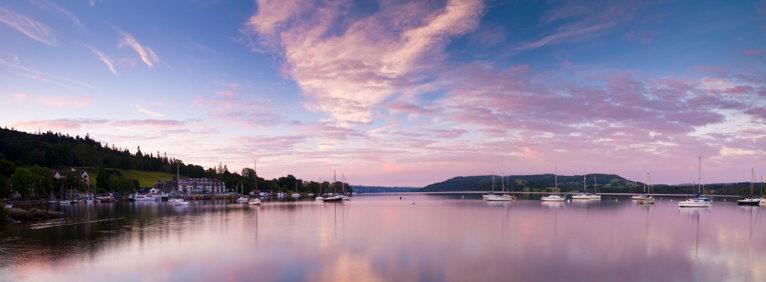
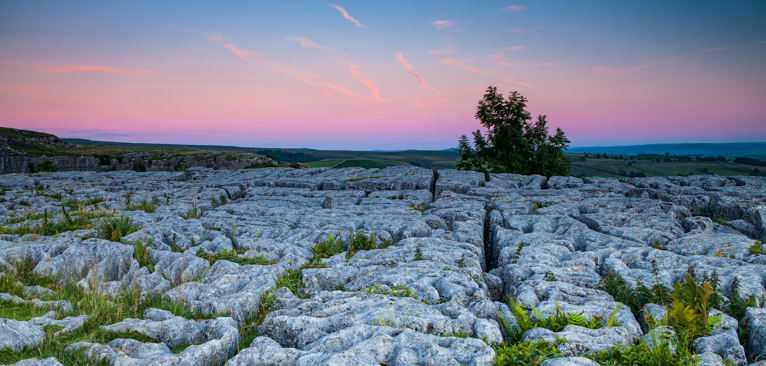
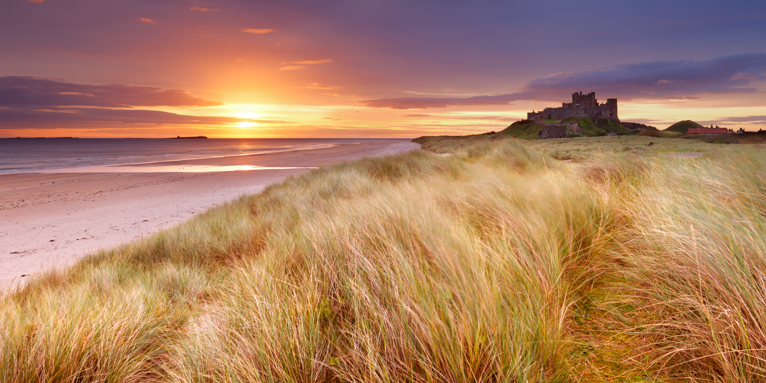
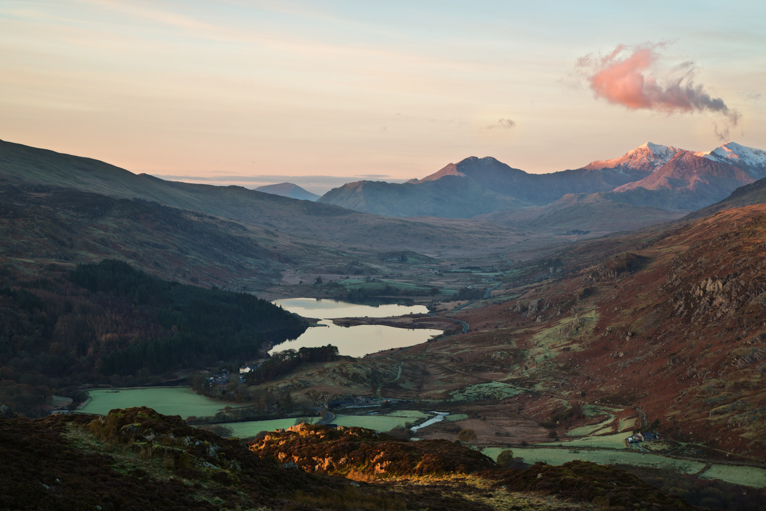
All images by Tim Bird. All rights reserved. No usage anywhere online or in print without permission.

Interview by Kav Dadfar.

Filed Under: Inspiration Tagged With: documentary photography, interview, landscape photography, travel photographer

How To Predict Dramatic Sunsets For Photography

One thing virtually every photographer has in common is a love of beautiful sunsets.  Predicting where and how to capture a sunset of stunning quality is not always luck; it is a skill that can be acquired with a little know-how and some experience.

The following factors are helpful in helping you predict if a sunset will be beautiful or not. The air should be clean with relatively low humidity, and the best sunsets typically happen when you have mid and high-level clouds covering around 25% to 60% of the evening sky.

Having some quick tips in your photographer’s tool belt is good but getting stunning shots comes from leveraging the basics into a robust process. And knowing what you expect from your sunset photography is the other half of the equation. Some of the best sunset photographs have been taken before, and even after, the actual sunset itself so always be prepared to hang around for a bit after the main event.

Dramatic_Sunsets

The golden hour

You may have heard this term before. It refers to that special time of day when the light is softer and more golden than at other times. The period referred to is after sunrise and before sunset. This time frame does not mean that wonderfully rich and beautiful shots cannot be had at other times. But the golden hour is a good time to be at a location and begin your preparation and shooting. It also gives you plenty of time to be ready for sunset itself.

Dramatic_Sunsets

Seasonal considerations

Seasons play a huge part in the type of sunsets you get so doing some research on the location you are shooting will help you immensely. If you are working to capture sunsets in and around your familiar stomping grounds, then you will have an excellent working knowledge of what to expect from season to season. Knowing this is incredibly beneficial to your photography because you have built-in your predictive process unconsciously. If you are on a trip or are shooting somewhere new, be sure to access the local weather apps and do some research as they will fill in some blanks for you. You may already be doing this on your home front, which is always good practice.

Most professional photographers agree that winter is the best time to capture sunsets. The reason for this is that for one, the sun is low in the sky for the majority of the day which gives a beautiful low light extenuating shadows. It also means that sunset is at a reasonable hour rather than late at night. But most importantly the crisp, cold air helps air quality which has a huge impact on sunset shots.

Dramatic_Sunsets

Air Quality

Air quality is essential for a good sunset shot. Ensure you plan your shoot when the air quality at your location is high. The lower the level of pollutants, the longer the visibility and the better quality of shot you are likely to get. Photographing a sunset after rainfall helps to clear the air of pollution and haze which makes those dramatic colours of sunset skies pop out more.

Dramatic_Sunsets

Humidity

A good rule of thumb to follow when predicting an excellent sunset for photography is that when the humidity in the ambient environment is comfortable for you, it is ideal for photography. Too much or too little humidity can make for challenging situations. But that’s not to say you won’t get dramatic sunsets.

Dramatic_Sunsets

Cloud Cover

Cloud cover is different from humidity and is a leading indicator for whether you will experience a beautiful sunset or not. Ideally, you will want some clouds in the sky so that the light from the sun bounces off them and creates the striking colours that you see. A clear sky will usually not give you the best sunsets. A great time to capture great sunset shots is after a storm or rainfall. If the clouds disperse enough you could end up with some incredible colours in the sky at sunset.

For the best sunsets, ideally, you need broken, scattered mid to high-level clouds. Low clouds, especially ones that are over the horizon line may end up blocking the light from the sunset so you don’t get the sunset that you wanted. But it’s important to persist as even just a few minutes of the sun peeking through the clouds can provide amazing colours.

Dramatic_Sunsets

Know Your Clouds

You do not need to be a meteorologist but having a basic knowledge of clouds, especially for the types of clouds that commonly help make a sunset spectacular will help you predict the quality of the sunset.

  • High-level clouds hover in the 5 – 13 km range and are named cirrocumulus, cirrus, and cirrostratus. These are the wispy and delicate clouds that always appear to be pressed against the top of the sky.
  • Mid-level clouds float between 2 – 7 km above sea levels, such as altocumulus, altostratus, and nimbostratus. The mid-level clouds can appear fluffy like cotton balls to uniform grey such as in overcast skies to those which provide imminent rain

Dramatic_Sunsets

Location, location, location

Though we initially touched on this subject, it is important to stress that the location you pick directly adds to your shot’s quality. Provided you have scouted out one area or several, you have given yourself a leg up on when and where to set up for a perfect sunset shot. The more locations you have scouted, the better your chances of success; you will understand its microclimate and position relative to the sunset you would like to capture.

Moreover, the location adds depth and interest to the shot. Exciting features such as a scraggly old tree, or a run-down barn, or even a distant major city, can add a fantastic array of depth and texture to your creation. Because a sunset by itself isn’t that exciting for a viewer to look at. They need a point of interest as the main focus of your shot.

Dramatic_Sunsets

Luck

“There is no such thing as luck”. Only, there is, but it is called preparation. Suppose you make a habit of carrying your camera with you daily. In that case, you are likely to stumble on a beautiful sunset that even your most intense preparation might not have delivered for you.

Whatever you decide, you will thank yourself one day when you realize that unexpected perfect shot. It is essential to ensure that you have charged batteries and a spare set as well. Don’t forget your tripod.

Dramatic_Sunsets

Other suggestions for sunset photography

NOAA, the National Oceanic and Atmospheric Administration, has a free app that delivers weather and sunrise/sunset times for the area you select. There are also many sunset apps that you can download to your smartphone which try to predict the quality of sunsets in your area. But keep in mind that weather changes all the time and sometimes a prediction for a beautiful sunset doesn’t come to fruition.

Dramatic_Sunsets

A beautiful sunset shot is often something that all outdoor travel and landscape photographers crave. These are often the shots that are the most striking and can wow the viewer. Whilst all the preparation and predictions in the world can’t guarantee when you will get that perfect sunset, they can certainly help narrow down the chances of it happening. But ultimately what makes great sunset photos so satisfying to capture is their unpredictability.

Photo credits: Kav Dadfar – All rights reserved. No usage without permission. Dreamstime.

Filed Under: Tutorials Tagged With: landscape photography, Sunset, Sunset photography tips

How To Capture Great Landscape Photos In Overcast Conditions

Landscape photography like all kind of outdoor photography is reliant on the weather. Great conditions will enhance your chances of being able to take a great photo. But as anyone who is interested in landscape photography has discovered, for every day that you get great weather, there are plenty of days where you are faced with overcast conditions and flat light. So what do you do on these kinds of days? You can either head inside and wait for better conditions or you could keep taking photos. You may have to try a little harder to capture great photos but you may just be surprised by the results. To help you here are a few tips that you could try out.

Landscapes_on_overcast_days

Use filters

Filters (along with a tripod) are by far the most important accessory that I carry with me. In great conditions, they are invaluable in helping you achieve the photos that you want to capture. But they can be equally useful in overcast conditions. The big problem when trying to photograph landscapes in overcast conditions is trying to make them interesting enough for the viewer. The flat light makes scenes seem uninteresting and colours muted. Filters can give you some creative options in these scenarios. For example, by using a graduated filter you may be able to pull out some shades of grey in the clouds. This can make your sky seem a little more interesting than just the same colour all over.

Another option is to use a neutral density filter to be able to take long exposure shots. Take a shot at several seconds and you might capture the movement of the clouds, people, cars and water. This sense of movement and motion can make your image more interesting. There are also other creative filters such as mist filters, coloured filters and more that you can use to bring to life a mundane scene.

Landscapes_on_overcast_days

Take flight

One of the best innovations of the last few years for photographers has been drones. These now offer opportunities to photograph places in ways never before possible. They are also useful to use when you have overcast conditions as you can focus the attention on looking down rather than up. The obvious way to do this is to be directly over the subject so that you are looking down on it. But you can also position your drone so that you are capturing more of the ground and less of the sky. Because you are higher up this is easier to do but also more interesting for the viewer. Your angle of view is creating the interest so can worry less about the light in the scene.

Landscapes_on_overcast_days

Go black and white

The lack of colour and light means most landscape scene will look fairly muted. So one way to combat this issue is to convert your photo to black and white and changing the importance to contrasts rather than colours. Black and white photos on overcast days can look very good, but they do still need the same level of attention as colour photography. Try to take the photo with black and white in mind rather than just taking a photo and then later deciding to convert it. Look for interesting textures, patterns, lines and shapes to bring your black and white photos to life. Your subject and the composition becomes even more important in black and white photography, so take your time and really think about the shot before taking it.

Landscapes_on_overcast_days

Find the right treatment

There are times that you can still have a colour photo but just need to treat it differently in post-production. You need to accept the conditions you are working with and tweak your photo to match the scene. For example, if your scene is lacking colour and contrast, dull the colours down even more to just off white. This can give a nice surreal feel to the image. Or alternatively, if you have got a blanket of white cloud, crop your image down so that you are making more of the foreground. You may also add things like vignettes to make even more of the moody conditions.

Landscapes_on_overcast_days

Do something creative

Another option to you for photographing a landscape in poor conditions is to try and do something different. For example, if you have a pet you could take a photo looking through their legs. Or if you are travelling with a companion you could ask them to put on a colourful pair of wellies or clothes to stand out in the muted scene. You could also try zooming in or out slightly as the camera is taking a shot for a but wonderful effect. There is also a technique called tilt and shift (which is achieved naturally by using tilt and shift lenses) whereby you can mimic the effect of a miniature model scene. You’ll need something which will be your main point of interest like a person or a building. By blurring the image apart from a strip or a circular area on your point of interest, it will look unusually small in the scene. Almost like you are looking at a miniature scene.

There are plenty more techniques and styles you can try, so don’t be afraid to try something different, you never know, the result might surprise you.

Landscapes_on_overcast_days

Ultimately though, nothing will replace great conditions. Whether that is a beautiful light, a dramatic sunset or even some moody storm clouds, these will give you the best photos. But these conditions don’t always happen and sometimes you have to make the best of what you are given. When that happens use the tips above to see if you can come up with a great landscape photo, even in poor conditions.

Photo credits: Kav Dadfar – All rights reserved. No usage without permission. Dreamstime.

Filed Under: Tutorials Tagged With: Beginner landscape photography, landscape photography, landscape photography tips, overcast photography

10 Scottish Castles That You Should Photograph

It’s hard to believe that a small country nestled in the north of Europe can be such an incredible photography destination. Even harder to believe is that there are so many picturesque castles that are just perfect for any photographer. It’s almost as if these castles were built all those centuries ago for today’s photographers. It is estimated that once there were 3,000 castles in Scotland. How many there are today is debatable as some estimates include houses where the tag castle was added and ruins which are no longer visible. What is for certain is that there are plenty of castles to satisfy your photography needs. So here are the 10 most picturesque castles in Scotland to photograph.

Scottish_Castles

1. Eilean Donan Castle

Probably the most photographed castle in the whole of Scotland and seeing it with your own eyes, you’ll understand why. It has appeared in countless movies over the years and is visited by hundreds of thousands of visitors every year. Legend has it that the castle was founded by the warrior blessed with the ability to talk to birds due to him taking his first drink as a baby from a raven’s skull.

The more likely explanation is that the castle was founded in the 1200s due to its strategic position to defend from Viking invaders. Seeing the castle now, you may not believe that it was completely destroyed in 1715 by the British Navy. For 2 days they bombed the castle to suppress an uprising. It wasn’t until almost 200 years later (after WWI ended) that the castle was rebuilt by Major John MacRae-Gilstrap and was finally re-opened to the public in 1955. It is a truly beautiful castle that deserves its rightful place amongst the most picturesque in Scotland and the world.

Scottish_Castles

2. Kilchurn Castle

Sitting at the head of Loch Awe, this castle is another of the famous spots where you’ll often find photographers, especially at sunrise. The castle was built by Sir Colin Campbell in the mid-1400s. But later (in 1689) the main tower house was converted into accommodation for officers while barracks were built in the courtyard for the soldiers. The castle was eventually abandoned late in the 17th century.

Today, even though the crumbling facade of the castle doesn’t have the same majestic presence that it once did, it arguably adds to its photographic appeal. The famous spot for taking photos of this castle is from across the loch next to the A819. If the conditions are right early in the morning, you will be treated to a beautiful light and mist across the lake.

Scottish_Castles

3. Dunnottar Castle

One of Scotland most spectacular castles, Dunnottar translates from Scots Gaelic to “fort on the falling slope”. It is one of the most important castles in Scotland history. It was besieged by William Wallace and was once the resting place of the Scottish crown jewels. The castle is around 20km south of Aberdeen next to the town of Stonehaven. It is perched on a clifftop surrounded by the North Sea and was once connected to the mainland by a causeway. This was deliberately destroyed and replaced by a route along the cliffs to make it more difficult for invading armies.

The position of the castle on the east coast means it can be photographed throughout the day from various angles. Sunrise and sunset can produce stunning results if the conditions are right. If you own a drone and the fierce Scottish wind allows you, aerial shots from the sea can also look magnificent.

Scottish_Castles

4. Castle Sinclair Girnigoe

Situated on the east coast of northern Scotland near the town of Wick, this castle ticks all the boxes for photographers. From its stunning location to the crumbling ruins of the castle itself, the effort of getting to this castle is worth it. It is believed that the castle was built by William Sinclair who was the 2nd Earl of Caithness in the late 1400th century. The castle was repeatedly extended until it was damaged beyond repair in a siege in 1680 and was never inhabited again.

The best shots of the castle are from the east side of it along the clifftop. But you can also get some nice, closer shots from before the footbridge and even underneath it looking up. But this castle is another that can be photographed throughout the day.

Scottish_Castles

5. Castle Stalker

It is believed that Castle Stalker in its present form was built by Sir John Stewart in the mid-14th century. It is a four-story tower house that sits on an Islet on Loch Laich. The name “Stalker” comes from the Scots Gaelic word “Stalcaire” which means “hunter” or “falconer”. Over the years the castle changed hands many times and was finally abandoned in 1840 when it lost its roof. In 1908 Charles Stewart of Achara purchased it and carried out some conservation work. It wasn’t until 1965 when Lieutenant Col. Steward Allward bought the castle that it was fully restored.

Unless you are on a boat, there is only really one area that you can capture good photos of Castle Stalker from. That is from the bank of the loch along the A828. As you are looking west, sunset is a natural time to be photographing the castle if the conditions are right. But sunrise and early morning will allow you to take photos of the castle as it’s being lit by the sun behind you.

Scottish_Castles

6. Ardvreck Castle

Driving along the A837 in whichever direction, you will soon see ruins of yet another beautifully positioned castle on a loch. Ardvreck Castle dates back to around 1490 when the region was owned by the Macleods of Assynt. The castle is infamous for the ultimate betrayal of “Highland hospitality”. In 1650 the Marquis of Montrose lost the battle of Carbisdale and fled to Ardvreck Castle where he sought sanctuary. Neil Macleod of Assynt was away so his wife tricked Montrose and locked him in the castle dungeon. She notified government troops who took Montrose to Edinburgh and executed him. The castle changed hands many times and was replaced by the more modern Calda House a stone’s throw away. Calda House itself burnt down in 1737 and before it could be rebuilt, the Mackenzie estates were seized by the Crown in 1745 for their support in an uprising. The castle has been in ruin ever since.

All of the photography locations for this castle are along the A837. There are several places that you will be able to stop to capture shots of the castle and Calda House throughout the day.

Scottish_Castles

7. Urquhart Castle

Around 2km south-west of Inverness is perfectly perched, Urquhart Castle. Sitting on a cliff, overlooking the most famous of lochs in Scotland – Loch Ness, it would understandable if this castle would shy away and play second fiddle. But instead, it is another great old Scottish castle that deserves to be photographed. The castle was founded in the 13th century and played a significant part in the Wars of the Scottish Independence in the 14th century. It was even held as a Royal Castle and was further strengthened until in the middle of the 17th century when it was abandoned. In 1692 the castle was partially destroyed to prevent the Jacobite forces using it and subsequently decayed until it was placed in state care as a monument in the 1900s.

Due to its position and the fact that it is a managed site (in that there is an entrance fee and there are opening times), it can be difficult to photograph the castle. Your best bet might actually be to book a cruise on Loch Ness to capture photos in the morning. Photographing the castle from land will be best done late in the afternoon when the sun will be behind you. Morning shoots will mean you will be looking directly into the sun so you will have to be creative or use filters to suppress the contrast.

Scottish_Castles

8. Old Keiss Castle

This old castle now in ruin was built by George Sinclair (5th Earl of Caithness) in the late 16th or early 17th century. It was one of the three fortifications that controlled this territory along with Ackergill Castle and Girnigoe Castle. As with many Scottish castles, Old Keiss Castle was in many battles and was badly damaged in the 1600s and while some restoration work was carried out, it wasn’t extensively rebuilt to its current form until 1860. During World War II Keiss become an important military location and its defence was a priority for the UK. Due to the German occupation of Norway, Caithness was particularly vulnerable to invasion. So the long flat beach was supplemented with anti-tank obstacles, machine-gun pillboxes and mines. The remnants of these pillboxes are still visible today.

As for photographing the castle, the best spots are from the beach. Try to get there during high tide where the water meets the coast and can create a beautiful silky effect. Also, be on the lookout for seals that often rest on the rocks on the foreground that can be used for added interest.

Scottish_Castles

9. Dunrobin Castle

While the other castle above are all relatively small or in ruins, this mighty castle stands proud and as beautiful is it did in its heyday. It has been the home to the Earls and Dukes of Sutherland since the 13th century. The Sutherlands were one of the most powerful families in Britain. The Earldom of Sutherland was created in 1235 and it is believed that the castle was built around that time. The original castle wasn’t as big as additions were made over the years.

The best shots of the castle are from the gardens or further back along the coast. Depending on the time of year the shots from the garden can be taken throughout the day. Also, be on the lookout for the falconry show that takes place daily in the gardens.

Scottish_Castles

10. Edinburgh Castle

No list of Scottish castles will be complete without the mightiest of them all. There has been a Royal Castle here on Castle Rock since the 12th century. But from the 15th century, the castle began to be used less as a residential place and in fact, by the 17th century it was used primarily as a military barracks. It is an icon of the city and of Scotland and dominates the city skyline. Photos of the castle are possible from all around the city, but the classic shot is from Calton Hill where you can capture the city skyline and Edinburgh Castle in the background.

Scottish_Castles

These are just some of the amazing castles that Scotland offers photographers. There are plenty more such as Sterling Castle, Balmoral, Inverness and more. The one thing that you will be sure of in Scotland is that there will be a castle close enough to you wherever you are.

Photo credits: Kav Dadfar – All rights reserved. No usage without permission. Dreamstime.

Filed Under: Tutorials Tagged With: inspiration, landscape photography, Photographing castles, Scotland, Scottish Castles

How To Use Scale In Landscape Photography

In landscape photography, one of the most challenging things to get right is to capture the scene so that it looks like it did to the naked eye. For newbie photographers, this can prove extremely frustrating as you take photograph after photograph of a jaw-dropping landscape and not capture the awesomeness. Not knowing how to capture the depth or the scale of the scene is the most common mistake. This is not always easy to do as you’re essentially trying to depict a 3-dimensional scene in a flat, rectangular image.

Here are some tips and tricks on using the scale in landscape photography that will go a long way to making your photos capture what you witnessed and felt. Essentially, what you need to learn is how to put the size of the scene into perspective.

Sense_of_scale

Use people

The easiest way of adding perspective to a landscape is by including a person or people in the shot. Some regard this particular technique as being overused, but that’s because it is the simplest method to show the size of a majestic landscape. The other reason is that people are generally easy to find. The exact scale of a scene can be difficult to judge but, because people are similar in height, having a person in the picture will instantly give the viewer an idea of the landscape scale. The farther away from the person, or people, are from the camera, the larger the landscape will look. Some of the most dramatic landscape photographs are ones where the people in the picture are only just visible, making it easy for the landscape’s vastness to be perspective for the viewer.

Sense_of_scale

Find wildlife

Capturing wildlife in a landscape photograph has the same effect as having people in the picture. They provide a point of reference and thus make it easier for the viewer to judge the landscape scale. The problem with wildlife is that you can’t exactly ask a lion or buck to stand where you want them to stand. So, although animals help provide scale, it is rare to capture them and the picturesque landscape in the same frame. Or rather exactly when and how you want to. Of course, when you are presented with this opportunity, your picture will be far more ‘natural’ or less staged than one with humans. Trees and other natural objects can also provide scale to a photograph but, because trees and plants, and rocks vary in size, they are not quite as effective as people or animals.

Sense_of_scale

Include manmade structures

Non-living, manmade structures can help add scale to a scene. However, the size of a manmade structure can be deceiving because they vary in size and don’t offer a definite scale. As a result, they make it possible to add depth and scale to a landscape photograph but it may not be as easy as using people or wildlife. Roads, houses, buildings, signs, fences, and other inanimate objects included in a landscape image will provide perspective and add to the overall composition of the photograph.

Sense_of_scale

Use a drone

Drones have been a great addition to many photographers. The great thing about drones is that they allow you to capture new angles but also get up high to capture a view that can often help give a sense of scale. For example, an imposing mountain range from the ground may not seem that huge. But by capturing it from above with drone everything else in the scene will appear smaller whilst the mountains will keep the size. This help extenuate the sense of scale. The downside of drones is that there are many places that they are not allowed (such as US National Parks). But if there are no restrictions in place, think about flying a drone and see how it can add a sense of scale to your photos.

Sense_of_scale

Think about your composition

Although some landscapes are impossible to reflect the scale, unless a person or animal, or building is included, many landscapes can be given perspective by how the photograph is composed. You can show the size of the scene by framing it carefully. One way is to keep more sky in the picture. A wide-angle shot of a vast sky, especially if there are some large clouds included, will give the viewer a good perspective of the landscape scale. Try to use leading lines such and cliffs and rivers to help the viewer navigate the scene and also to add scale as well.

Sense_of_scale

Use different lenses

Camera lenses have different focal lengths. The longer the focal length, the more magnification there is because the viewer’s angle is narrowed. The shorter the focal length, the less magnification there is because the angle of view is wide. Different focal lengths can show scale in a landscape. Wide-angle lenses can make a landscape appear more expansive and more extensive than telephoto lenses.

A telephoto lens is a great lens to use when capturing a distant landscape scale. Many photographers may baulk at this idea as the traditionally wide-angle lens is considered the best option for capturing vast landscapes. However, that is the beauty of photography. There are no hard and fast rules, and some of the most memorable images are captured when experimenting. A long lens magnifies the subject and makes the scene larger-than-life because it shortens the distance between the background and the foreground. It also allows you to focus on a particular feature, like a waterfall or a farmhouse and makes the focal point more prominent.

Sense_of_scale

Wrapping up

It must be remembered that it is sometimes impossible to capture the magnificence of the scale of a landscape. In this situation, the inclusion of a person, an animal, or a manmade structure is your only hope of capturing scale. If nothing can be used to demonstrate the depth and scale of the scene, then use a telephoto lens to magnify a distant object like a mountain.

Sense_of_scale

Adding depth and scale to a photograph is not an exact science, and sometimes it is simply impossible to capture the grandeur of a landscape in a two-dimensional image. However, by employing and experimenting with some of the techniques outlined in this article, you are far more likely to capture a landscape scene’s drama and magnificence in a photograph.

Photo credits: Kav Dadfar – All rights reserved. No usage without permission. Dreamstime.

Filed Under: Tutorials Tagged With: landscape photography, landscape photography tips, scale

Lumix GH4 upgrade to infrared

For a few years I have been using a Lumix G6 which had been converted to IR by LifePixel. It’s been great. But, I decided I wanted a pro level camera. As new models came out from Lumix such as the G9 and Olympus OM-D E-M1 Mark III I saw my Lumix GH4 starting to gather dust on the shelf. I sold my G6 and sent in the newer camera to be converted.

Conversion

I’m kind of old school when it comes to IR so I opted for the 720NM on both conversions. The traditional IR look that I can create that replicates my experiences from the film days. Of course with live view cameras and the ability to see the image in black and white are wonderful. In addition, not having to reset focus and seeing the BW result is a far superior IR capture experience. If you have a camera collecting dust an IR conversion puts it back into play.

While I’m not a big fan of color IR I do like to tone my images for a different feel. This is a cyan tone vs the image below which is sepia tone.

Oak Creek

I found some time to go shoot what I thought was going to be the last of the fall colors nearby on Oak Creek here in Sedona, AZ. Fortunately I brought the IR camera ‘just in case’ and was quite glad I did. The fall color was past prime and I probably would have headed home. The IR converted camera came to the rescue to allow me to keep shooting.

This is my favorite image from the day. The lone leaf in the corner is what makes it for me.

Platypod tripod

I now always carry a Platypod tripod from a carabiner clip attached to my shooting lens pouch. It acts as a second tripod when I want to do time lapse images , when I want to get really close to the ground, or when I don’t want to have haul my regular tripod. The low angle helped me get the composition and reflections right where I wanted them. A flip screen on your camera is perfect for using this configuration. Keeps you from doing the lay on the belly thing.

Platypod Ultra resting on the rock shelf near the creek. If there was a more uneven surface there are machined bolts that can help level the plate.

If I can answer any questions, let me know. In the not so distant future I’ll show you haw I processed these images in Adobe Camera RAW, Photoshop and NIK Filters.

Yours in Creative Photography,      Bob


Filed Under: Gear, Inspiration, Tutorials Tagged With: Infrared photography, landscape photography, Lifepixel, tripod

Photogenic Places – A Simple Guide To Photographing Yosemite NP

Yosemite National Park is located in California and has an area of 3,027km2. It has a large number of iconic landmarks and views which people travel from all over the world to see and photograph. As a national park, it was first protected in 1864 and became increasingly better known by photographers.

yosemite_photo_guide

A brief history of Yosemite National Park

There is a long history behind this, now massive, tourist attraction. A large and significant part of Yosemite is that it is expected that Native American tribes could have inhabited the land for around 6,000 years before it began to be explored and known by anyone outside of these tribes. The Native Americans that lived on this land lived in the Sierra Nevada, and they moved around seasonally to make the most of hunting and gathering wherever they were and whenever they could. Generally, they would move between villages at the bottom of mountains and then move to higher-elevation camps throughout summer. Some of the paths and trails made by the Native Americans can still be hiked by tourists and visitors today, and include some trading routes.

Creations made by the Native Americans in Yosemite can still be seen as they’re exhibited in museums in the national park. An example of this is the basketry and needlework made by the Miwok and Paiute tribes. Behind one of the many museums in Yosemite, there is a reconstructed version of how a tribal village would have appeared. This feature is there as a commemoration to the Ahwahneechee people, who were led by Chief Tenaya. It is known that the Ahwahneechee tribe was initially called the Yosemite Valley ‘Ahwahnee’, which can loosely translate into the phrase “Place of a Gaping Mouth.”

In 1848, there was gold discovered in the Sierra Nevada foothills. The result of this was that many gold-seekers came to the area. This sudden influx of people meant that the land began to be taken over by people outside the tribes. By 1851, much of the Native American land had been stolen away, and there was too much murder, which caused the Mariposa War. After this, the first tourists arrived in 1855. During the American Civil War, some people who had a considerable influence in California managed to convince Congress and President Lincoln to make Yosemite Valley and the Mariposa Grove the country’s first public preserve, which happened in 1864.

yosemite_photo_guide

John Muir by Frances M. Fritz (creative commons)

What to photograph in Yosemite National Park

When you begin planning your trip to Yosemite National Park to take amazing photographs, there’s plenty of research you should do and things you need to consider before leaving for your trip. The first of these is that you will have different results, experiences, and scenes depending on which season you decide to visit the park. As you know, winter and summer will often be entirely different. Therefore, you need to know what sort of images you’re trying to capture. In summer, there is likely to be a much higher number of visitors, causing some problems when trying to take clear photos of the environment and surroundings.

Additionally, you may likely struggle to find accommodation close to where you want to be, especially if you don’t book early. However, in winter, there are likely to be very few tourists, and you may even get to witness a snowstorm in Yosemite, which could add to the beauty and dimension of your photographs. Despite these apparent positives, some areas may be closed until April, including Glacier Point Road and Tioga Pass Road.

The second thing you’ll want to consider is which areas of Yosemite National Park You want to photograph as this is a big park and unless you have plenty of time, trying to cram in too much will leave you disappointed. There are many beautiful areas and landmarks within the park which may appeal to you; below is a list of some of the best locations.

Vernal Falls

Vernal Falls is a waterfall that is part of the Merced River within the national park. It measures 317-feet and is best viewed from two main areas of the park. These areas are Glacier Point, which is if you want to get a photo with a bit of distance and more surroundings in it. However, if you want to get a closer photograph with more detail, then visit it from the Mist Trail. This waterfall cannot be seen from the floor of the valley while in your car, unlike Yosemite Fall or Bridalveil Fall, meaning it is necessary to walk a trail to see it.

Half Dome & Glacier Point

If you mention Yosemite NP to someone, the chances are that this is the image they will have in their mind. The dome is part of the east end of Yosemite Valley in the park, and it is made of granite, and it appears to look like a dome cut in half as it has one flat side while the other is smooth and round. Half Dome rises to nearly 5,000 feet above the Yosemite Valley, and the most common way to hike up it is to use the cable route at the top, which can aid hikers with the final 400 feet to the summit. From a photography perspective, there are many places you can view the Half Dome from; the best of these is Glacier Point, as the view is unobstructed.

Other places you can view it from are; Cook’s Meadow, Washburn Point, or Mirror Lake.

yosemite_photo_guide

Yosemite Falls

Another of the famous features is Yosemite Falls which can be seen from much of the valley. There are three waterfalls that make up the falls with the middle one not visible from the ground. The best places to photograph the falls are from the Lower Yosemite Trail and Swinging Bridge. Be sure to pack your tripod so that you can capture slow exposure shots. To avoid the crowds head to the falls early in the morning when you may also be able to see a rainbow in the spray of the water.

Eagle Peak

Eagle Peak is one of the Three Brothers, a rock formation above the Yosemite Valley, and the peak is the highest out of the three rocks in the formation. The other rocks which make up this formation are known as the Middle and Lower Brothers. Once you’ve climbed the 3,500 feet to the summit, the view was described as the “most comprehensive of all the views” available from the north wall by John Muir, who was known as “Father of the National Parks”. This is a good enough reason to climb to the peak to capture the best photographic view you get at the top.

But if the hike to the top seems too strenuous you can also capture a shot of Three Brothers instead from Merced River. Head to Cathedral Beach picnic area and walk east for 5 minutes for an unobstructed view of the Three Brothers. If you get a calm day and a beautiful sunrise or sunset, the three peaks and the colourful sky will be perfectly reflected in the water.

yosemite_photo_guide

Mirror Lake

This lake is a relatively small one, located on Tenaya Creek, but it provides some of the most beautiful views and opportunities for photography. The Mirror Lake is the last left of the massive glacial lake, which used to fill a large majority of the Yosemite Valley at the end of the last Ice Age. It is possible to swim in Mirror Lake, and as a result of this, if you don’t want to have many people in your photographs, it is best to either visit outside of the peak season in summer or to go early in the morning around sunrise.

Olmsted Point

Olmsted Point is a place within Yosemite, which gives some of the best views with minimal effort as it is only elevated by 100 feet. This point is just off the Tioga Pass Road, and it allows you to see multiple notable places around Yosemite. Being able to see these is great for photography as it gives you the chance to take a picture of these areas in the broader context of nature and Yosemite National Park itself. Some key places you can see from Olmsted Point are; Tenaya Canyon and Tenaya Lake, in addition to the northern side of Half Dome and Clouds Rest.

yosemite_photo_guide

Taft Point

This is another spectacular view that should be a must on your Yosemite shot list. It is a pretty easy 2 mile round trip to the unfenced cliff edge. If you suffer from vertigo head over to the railed lookout which gives a stunning view. The best time for photos is at sunset but be prepared for big crowds even in the low season. If you want a quieter visit, then sunrise will be a better option.

Tunnel View (Inspiration Point)

One of the most popular views in Yosemite NP and due to the easy access to this viewpoint don’t expect to have the place to yourself. The view is spectacular (possibly the best in the whole park) and you can see the entire valley including El Capitan, Half Dome and Bridalveil Falls all in the same shot. In the right conditions, sunrise or sunset are both great times for photography. The added benefit of early morning is that you may also get some low fog in the valley which will enhance the scene even more.

For an alternative view walk the 2.5 miles (1,000 ft elevation) round trip to Inspiration Point and you will get a similar view as Tunnel View but without the crowds. The view is slightly more obstructed but you will find very few people there.

yosemite_photo_guide

El Capitan

The huge granite face of El Capitan is as iconic as it is beautiful. The best spot for the grand photo of El Cap is from Tunnel View. But also try to get up close and capture some photos of the fearless climbers who scale this immense mountain face on a daily basis (in the summer). From El Capitan Meadow on the road into the valley, you can get great views (just make sure you pack a telephoto lens). But for the real close-up shots of the climbers head to the Yosemite Valley Loop.

Bridalveil Falls

This is one of the most beautiful waterfalls in the park. Again for the grand view, Tunnel View will offer a good shot. For more of a close-up make the short and easy walk to the falls. But this will bring you right up to the falls which might be too close. There are several other good spots around the valley floor which offer good views of the falls. These include Sentinel Beach picnic area, the fields near Bridalveil Creek and arguably the best, from El Capital viewpoint on the Merced River.

yosemite_photo_guide

Keep in mind that these are just some of the amazing locations on offer. You should try to set some time aside to explore the park and find some of your own unique locations. This is one of the world’s great photography locations and if you give yourself the time to explore it fully you won’t be disappointed.

Photo credits: Dreamstime – All rights reserved. No usage without permission.

Filed Under: Tutorials Tagged With: landscape photography, Photo guides, Photography Guides, US National Parks, Yosemite NP

Photogenic Places – A Simple Guide To Photographing Yellowstone NP

Whether you plan on scrapbooking your family vacation, you’re a nature lover looking to share your experiences with others, or you’re trying to get amazing travel and landscape photos, Yellowstone is always a great place to go to. There are hundreds of opportunities to take incredible photos if you’re quick enough, patient enough or plan hard enough. Although we won’t be able to cover every location this amazing national park has to offer, this guide will show you where to find and photograph some of the many natural wonders that Yellowstone offers. The first five locations are typically areas that are easy to locate from the Grand Loop Road. The second half includes places that may be more difficult to get to but will undoubtedly yield incredible chances at unique photos.

Yellowstone_NP_photography_guide

Mammoth Hot Springs

Depending on the time you arrive, you could get a wide variety of pictures. Early in the morning, you can capture photos of the light shining off the steam of the springs. During the day, there are several chances to get spectacular images of erupting geysers and otherworldly mud pools and ultramarine pools. In the evening, you can get incredible sunset photos in Mammoth’s Lower Geyser Basin. It’s also a great place to spot some wildlife. Often the bison will gather in the grassy areas of the basin as the sun sets.

Yellowstone_NP_photography_guide

Artist Point

Artist point is a spot that overlooks a waterfall in the Grand Canyon of Yellowstone. Sunrise is the best time to capture stunning shots of the falls and the valley. The sun rises just over the valley allowing the falls to reflect the sun’s hues as it begins to increase. Be sure to pack your telephoto lens as you may want to zoom into the waterfall to capture the rainbows that sometimes show up.

Yellowstone_NP_photography_guide

Great Fountain Geyser on Firehole Lake Drive

Another fantastic geyser point, this time for sunsets. It is one of the most famous geyser photography sites thanks to its accessibility and easy to obtain wonder-shots. The sun sets directly behind the geyser each night allowing for stunning sunbursts if your aperture is stopped down to f/16 or f/22. You can also try in incorporate some foreground interest like people which will look great with the steam of geysers in the background.

Yellowstone_NP_photography_guide

Bacterial Mats

As off-putting as this sounds, they are quite gorgeous. Thanks to bacteria that thrive in Yellowstone’s geysers, there are massive buildups of encrusted microorganisms, found in most geothermal areas of the park. These mats look like small areas of exposed geodes, varying wildly in colour, depending on where the mats originated. In other cases, they look similar to the salt buildups on the sides of exposed rocks in the sea, just far more colourful.

Yellowstone_NP_photography_guide

Old Faithful

As far as easy to access photography points, we’ve saved the best for last. Most of us who know what Yellowstone National Park is, know precisely what Old Faithful is. This geyser is still the most active in the park, shooting superheated water hundreds of feet into the air for up to 5 minutes at a time. And this is every 35 to 120 minutes. With just a little patience, you won’t have any trouble capturing at least one action shot of this marvel. If you want to catch an impressive image, try to travel to the park when the temperature is lower, this allows the billowing steam to be seen even clearer in the crisp air. Anyone trying to show off the geyser’s impressive height, just add someone or something to the photo to capture its insane scale.

Yellowstone_NP_photography_guide

The following five destinations vary in difficulty to reach. However, if you are looking for a small hike and some quiet serenity, the trek to these spots will be worth it.

Blacktail Plateau Drive

We’ll start with an easier one where you’ll be able to stay in your car. Blacktail Plateau Drive is a 6 mile stretch of one-way road that compresses all that Yellowstone offers. This place includes vast meadows and dense forests. While a drive through Blacktail Plateau will always provide incredible serenity, the best times to take the drive are in the morning and evening, when the local wildlife is most active. During the day, it is a beautiful spot to capture a photo of fields of wildflowers in full bloom. However, Blacktail Plateau Drive is often closed for one of many reasons at any given time, including an increased number of bears entering the area, so be sure to check with the park before planning on taking this drive. Otherwise, you may be disappointed.

Yellowstone_NP_photography_guide

Lone Star Geyser

You know we had to add one more geyser to our list. However, Lone Star offers something that most others cannot; it’s an isolated location. Located two miles off of the Grand Loop Road, Lone Star is another predictable geyser. The big advantage of this one is that it isn’t visited by as many tourists so you’ll have fewer people to have content with.

Yellowstone_NP_photography_guide

Trout Lake

Now we start getting into more challenging to reach places. Trout lake is one of the most scenic lakes in the park. The clear water is framed by mountains reflected off the water on calm days. Unfortunately, to make it here, you have to make a half-mile steep trek through a Douglas fir forest. The trailhead is located on Highway 212, between the Northeast entrance and Tower, 1.5 miles south of Pebble Creek Campground. But if you are willing to make the journey you will be rewarded with some amazing photo opportunities.

Yellowstone_NP_photography_guide

Dunanda Falls

Although not the most challenging hike to access, it is a little out of the way to start with. The Bechler River area of Yellowstone isn’t accessible from the Grand Loop Road. Instead, you’ll need to access it through Idaho. Taking the Boundary Creek Trail North, you’ll eventually make it to the 110-foot tall Dunanda Falls. The hike is 16 miles round trip, which may sound like a lot to handle. However, it is easy terrain with an incredible view of the Dunanda Falls flowing over dark volcanic rocks. As a bonus, as scenic as the trail is, you’ll undoubtedly see some sort of wildlife on your way.

Old Gardiner Road

This stretch of road is best saved for last. It’ll take you to the Park’s North Entrance, running parallel to the North Entrance/Mammoth road, yet it feels like you’re a world away. This one-way road is another hot spot to observe wildlife early in the morning or near dusk. It’s a wonderful chance to snap simple photos of a road to nowhere.

Yellowstone_NP_photography_guide

Some other great spots…

There are literally hundreds of great photography locations in this park. One of the great attributes of this park is that it lends itself to different times of year and conditions. So here are some other notable great photography locations:

Hayden Valley – A great place to see the winding Yellowstone River as well as an abundance of wildlife. Early morning is the best time to spot wolves, bears and bison roaming. But even if there is no wildlife, the early morning light is a great time to capture this beautiful valley.

Mount Washburn – If you are after an amazing dizzying view, then look no further than Mount Washburn. It is the highest point in Yellowstone National Park and gives you a 360-degree view. But this is a long and tough hike (4 – 5 hours round trip) so if you want to get there for sunrise or stay for sunset it will mean walking in the dark. Be sure to have some bear spray with you as black bears and grizzlies roam this area.

Lamar Valley – This is another great spot to see wildlife with the added advantage of a beautiful setting with mountains in the background. Keep in mind that you will need to be a fair distance away from wildlife so for a close-up photo you are going to need a telephoto lens (200mm +). Even without the wildlife, this is another wonderful photo spot.

Grand Prismatic overlook – One of the most famous spots in Yellowstone for photography, but also one that doesn’t offer much in terms of alternative angles. You can get a close-up view from the boardwalk that leads to the hot spring but the better view is from the overlook. Try to head there on a cold day where visibility will be better and the steam from the spring more impressive.

Yellowstone_NP_photography_guide

Lamar River, Lamar Valley

Depending on the type of photography that you enjoy, there are plenty of other locations other than this list. These are just some of the main highlights but in reality, you could spend months or even years just photographing Yellowstone national park. There is a reason why it is considered as one of the world’s best photography locations.

Photo credits: Dreamstime – All rights reserved. No usage without permission.

Filed Under: Tutorials Tagged With: landscape photography, Photo guides, wildlife photography, Yellowstone National Park, Yellowstone NP

Take Your Landscape Photos To The Next Level With These Tips

Landscape photography can be a frustrating genre of photography to be involved in. If the conditions are right you can capture some remarkable photos. If not, it can be demoralizing and a waste of time. But then, that is often the case whenever you are relying on outdoor conditions. As important as the conditions and light are to a landscape photo, there are other elements that also need to be considered. If you can get all these aspects correct, you will end up with a photo that you will be proud of.

landscape_photography

Start with your location

Landscape photography is as much about being in the right place as it is about being there at the right time. Where you are taking a photo from can make a whole world of difference to the end result. That is why research and planning are so vital in landscape photography. But nothing compares to actually being at a location and seeing it for yourself. So if possible always try to get to locations and scout them out before shooting. This is also something that is very useful to do on those days when the weather isn’t great and it means when the conditions are right, you’ll know exactly where you need to be.

landscape_photography

Have an idea of what you want to achieve

Be honest, how many times have you turned up at a location at the worst time possible (in terms of light and conditions) and taken a photo even though it wasn’t what you had in mind? That’s not a bad thing because you will rarely get the exact conditions that you had imagined. The point here is that you had something in mind originally. So if you don’t get that shot straightaway, be prepared to wait or even come back another day so that you are able to capture a shot as closely to your vision as possible. Of course, sometimes you get lucky and you end up with a better photo, but if you don’t, never settle for something if you have a chance to do it better.

landscape_photography

Get some quality filters

Filters are one of the most important accessories that you will need for great landscape photos. Almost every landscape shot that I take, would be with at least one filter. I use Lee square filters as they allow for greater flexibility of positioning than screw-in filters. The reason why filters are so important in landscape photography is that they will help you be able to manipulate the light within a scene to give you the shot that you want to take. There are lots of different filters out there but the most commonly used ones for landscape photography are graduated neutral density filters. These will help you ensure the bright areas in your photos (like the sky) and dark areas (like the foreground) are exposed evenly.

You can mimic this effect in post-production or even by stacking different exposures (HDR), but I personally find the end result lacks some of the contrast of a photo taken using filters. Plus it’s a good habit to get into to capture photos correctly when you are out in the field.

landscape_photography

Simplify your composition

One of the big challenges in landscape photography is being able to keep your scene interesting but at the same time avoiding too many distracting elements. That’s one of the reasons why landscape photographers, for example, prefer the smooth water effect in coastal scenes. As it helps clear up the scene for a cleaner image. When you are not photographing near water you can still look for ways to get a clean composition. Use some of the commonly known composition techniques such as the rule of thirds or golden ratio to ensure you frame your point of interest carefully. Try to frame your shot so that you avoid distracting elements within your scene.

landscape_photography

Shoot in RAW and edit

To be perfectly honest, I don’t know why anyone would want to take photos in anything other than RAW file format (if their camera can do so). Sure if you are shooting in JPEG you can save a ton of memory card space not to mention quicker editing. But that comes at the price of the quality of the photo not being as good. So why would you want to compromise that amazing view for the sake of saving memory card space?

If you shoot in JPEGs, your camera will automatically add its own editing to the photo (which is irreversible). RAW files are the most flexible for editing and produce a sort of “digital negative”. You can then adjust everything from white balance to exposure, contrast, saturation and more. This is important because every photo will benefit from some level of editing even if it is some basic adjustments. So don’t be lazy about this part of the process.

landscape_photography

Change your angle of view

One of the common pitfalls of landscape photography is that because you often have your camera mounted on a tripod, you end up with all of your photos from the same “eye view” level. Most of the time that is fine. But there might be occasions when just a different angle of view will give you a completely different photo. So don’t be afraid to get down low or even raise your camera higher by placing your tripod on a wall. Because you might just end up with a view that people often don’t see.

landscape_photography

Landscape photography is an enjoyable branch of photography and one that most people will try out at some point in their life. Even if it just holiday photos, it is still worth remembering the points above to ensure that your photos stand out. With a bit of practice and a lot of patience and persistence, you will be sure to end up with landscape photos that you can be proud of.

Photo credits: Kav Dadfar – All rights reserved. No usage without permission. Dreamstime.

Filed Under: Tutorials Tagged With: landscape photography, landscape photography tips

6 Reasons Why Scotland Is The Ultimate Landscape Photography Location

There are many countries that would claim to be the ultimate destination for a landscape photographer, so what makes Scotland so special? Well, it might not have the mighty mountains of the USA. Or the volcanoes of Iceland or even the endless views of New Zealand, but there’s a reason that every year thousands of photographers flock to this tiny country and are captivated enough to return. Here X reasons why that might be.

scotland_landscape

Castles

The one thing that sets Scotland apart from all of the other countries above is its castles. No other country can mix as many incredibly historic castles with amazing landscapes. It is estimated that there were once up to 3,000 castles in Scotland. The many that still remain are all in various states of degradation. Some are still standing as proudly as when they were built, others are mere ruins like a blot of on the landscape. Even the ruins still mix with the landscape to provide some of the most unique and iconic scenery a photographer could ever wish for.

scotland_landscape

Unique mountains

Scottish mountains (Munro) are unique and seem just blend into the landscape, unlike the more striking mountains you will find elsewhere. There are no mighty peaks such as you’ll find in North America or the Alps. In fact, the highest mountain in the whole of the United Kingdom is Ben Nevis in Fort William at only 1,345 meters height. Yet these mountains still feel grand and walking or driving through them makes them seem like giants. Undoubtedly one of the main reason why they look so different from other mountains is the gentle way they slope into the valleys. This as well as the unique green and brown colours makes them incredibly photogenic. You will also often find that your composition will be helped with a lonely old cottage sitting in the shadow of an imposing Munro providing the perfect point of interest.

scotland_landscape

Magnificent lochs

You won’t have to travel far in Scotland to come across a loch. Each loch is a haven for birds and local wildlife as well as fish. One of the things that often hits people is the sheer size of some of the lochs. These lochs will often be flanked by mountains, cottages and even old castles. You will sometimes also find locals fishing by or in the lochs which again help to add a point of interest to the scene. If you are lucky you may even encounter some early morning mist just to add a bit more mystery and atmosphere to an already magnificent scene.

scotland_landscape

Beaches and coastline

You wouldn’t necessarily associate Scotland with incredible beaches. But you’ll be amazed at some of the beautiful beaches and coastline you’ll encounter. The thing that makes these beaches so photogenic is that there are often striking cliffs or mountains in the background. Or they might be the odd sea stack for you to use as your point of interest. But for those who want golden sand beaches that you’ll expect to see in the Mediterranean, well, there are plenty of those as well.

As for the coastline, it is amongst the best for photography in the whole of the United Kingdom. From the incredibly photogenic Duncansby Stacks to gorgeous lighthouses, the Scottish coast has it all.

scotland_landscape

The weather

Sunshine followed by rain followed by sunshine followed by hail followed by sunshine. This might be a typical day of weather that you’ll encounter in the Scottish highlands. But while in many other countries photographers would despair at the sight of clouds and rain, for some reason it just seems to work in photos of Scotland. In fact, a photo of a Scottish castle or the Munros just doesn’t look right in glorious sunshine. This means that as a photographer you can worry less about the weather and more about your composition and photos. Even when you do encounter bad weather, there is a chance that it will pass quickly. But then there is also a possibility of prolonged spells of rain. So make sure you pack waterproof clothes and something to cover your camera with.

scotland_landscape

Historic cities

Once you have had your fill of landscape photography you can pop into one of the many historic cities in Scotland. Whether it’s Inverness or Dundee, Sterling or Aberdeen, or even the big two Glasgow or Edinburgh, there is no shortage of cityscapes, castles, old churches or even the odds Scotsman to capture in photos. These cities are some of the most photogenic in Europe and you should make time to explore them. The great thing about Scotland is that just a short drive from any of these cities will take you out into the wilderness.

scotland_landscape

Scotland is one of the world’s best photography locations and once you visit, you will understand why. There really is everything that any landscape photographer could want. The close proximity of the locations to one another also means that you can easily change your plans to suit the weather conditions if need be. So why not make Scotland your next landscape photography destination, you won’t regret it.

Photo credits: Kav Dadfar – All rights reserved. No usage without permission. Dreamstime.

Filed Under: Tutorials Tagged With: inspiration, landscape photography, photography locations, Scotland photography

Pro Secrets To Capturing Stunning Sunrise and Sunset shots

For most landscape photographers, the holy grail is capturing amazing images of sunrise or sunsets. These are often the “wow” factor shots that will look great anywhere. From magazine spreads to prints on a wall. But capturing great sunrise or sunset shots isn’t easy or straightforward. But fear not as there are various ways in which you can ensure that your sunrise and sunset shots look stunning.

Landscape_Pro_Secrets

Find your location

One of the biggest mistakes that people make when it comes to sunrise or sunset photography is to do with the location. I have seen endless photos of sunsets from the beach with no real point of interest. Frankly, they are pretty boring because let’s be honest sunrises and sunsets are not that exciting in a photo. What makes the scene spectacular is the elements within it or in other words points of interest.

For example on a beach, this might be rocks in the foreground. So it’s really important to choose your location carefully. Try to think of the sunrise or sunset as the backdrop to the main focus of your scene. Whether that is a mountain range, a city skyline or even people.

Landscape_Pro_Secrets

You need clouds

The best sunrise and sunset shots also unusually involve some clouds. Ideally, look for days where there is broken and scattered low or mid-level clouds. These conditions will mean that during sunset you get a beautiful sky when the colours from the sun reflect off the clouds. That is not to say you can’t capture a great sunrise or sunset shots when there are no clouds. You will just end up with a more interesting photo if there are clouds in the sky.

Obviously, this does mean that you will have to be lucky or more often, wait for the best conditions for photography. But this is exactly why these types of shots are so special because you may have to wait for them to happen.

Landscape_Pro_Secrets

Compose your shot like a painting

By this I mean you need to really think of every inch of your photo like a canvas. In a painting, you wouldn’t just leave a part of your image blank or just fill it with a random colour. That’s the same with sunrise and sunset shots. Try to examine every inch of the composition and place your element in relation to the sky. For example, if you have a dramatic sky and a boring foreground, place the horizon line lower so you are showing more of the sky. On the other hand, if you have got interesting elements in the foreground that can lead the viewer’s eyes into the horizon, show more of the foreground and less of the sky. As I mentioned above, try to use the sunrise or sunset as a backdrop to your image.

Landscape_Pro_Secrets

You need to use filters

Filters can be one of your biggest aids when it comes to sunrise or sunset shots. These times of the day present big challenges in terms of getting your exposure right. Because you are dealing with a bright sky and a dark foreground, you might find either your shadows or highlights being clipped. If you expose for your sky, your dark areas will suffer and if you expose for the shadows your highlights will be blown out. This “clipping” occurs when there are no pixel details in these areas so you end up with pure white in bright areas or black in dark areas.

You can of course bracket your shots and merge them together in post-production. But I prefer getting my shots correct in post-production which means using Graduated Neutral Density filters. By darkening the sky without affecting the foreground you can get a more even exposure across your image. Not only will this make your photos look better but will enhance the colours and contrast of the scene.

Landscape_Pro_Secrets

Arrive early, stay late

How often have you turned up at a location just as it’s getting to sunset, taken a few shots and then left? If this sounds like you then you are potentially not getting the most out of a location and shoot. One of the best ways to improve your sunrise or sunset shots or in fact all photography is to take your time. The more time you have at a location, the more you can look around and try out different compositions until you find the one that you feel works best.

Of course, for a sunrise shot this might mean arriving in the dark, so if possible scout the location out the day before so that you can turn up ready. But don’t just pack up and head off once you have captured your shot. Explore the scene further to see if you can find other interesting compositions or angles. Even if the time isn’t right at that point, you’ll then have other spots that you can come back to another time. Very rarely do I ever find that my best shots from a new location I haven’t been to before are from a spot that I first envisioned taking a shot from.

Landscape_Pro_Secrets

Sunrise and sunsets photos have the power to captivate the viewer. You are reliant on the weather conditions but if you are willing to do your research and plan your shoot accordingly, and use the tips above, you may just end up with some of the most stunning photos you have ever taken.

Photo credits: Kav Dadfar – All rights reserved. No usage without permission.

Filed Under: Tutorials Tagged With: Golden hour photography tips, landscape photography, Sunrise photography tips, Sunset photography tips

5 Landscape Photography Tips

One of the most common questions that I get asked by newbie photographers is if I can give them any landscape photography tips? Landscape photography is a popular genre of photography and one that most people will dabble in at some point. But being able to capture a great landscape shot isn’t straightforward or always possible. Often your success or failure will come down to the conditions. But there are ways to increase your chances of a great landscape shot by learning a few techniques. So to help you on your way, here are 5 quick and easy bits of advice on landscape photography.

landscape_photography

Take the viewer on a journey

When it comes to a great landscape photo, your composition is one of the most important elements. It is also something that often beginners don’t spend as much time thinking about as they should when on location. It is easy to carried away when you first see that amazing scene and begin to just snap away. But if you allow yourself a bit of time to really think about your composition your photos will turn out much better.

Start by thinking about your main point of interest. It might be a lighthouse or a mountain range in the distance. Then try you build your composition around it from the foreground all the way to the distance. This might mean looking for leading lines to take the viewer into the distance or various elements like rocks to help their eyes navigate around the image. So take your time and experiment with different composition and never settle for your first location. You will almost always find that your second or third locations will yield better results.

landscape_photography

Try to find your style

One of the best things about landscape photography is that it allows so much variety that you can easily find your own style. Think of it as your calling card that people will instantly recognise. Your style doesn’t have to conform to the norm. For example, you may love stormy conditions and muted colours whereas another photographer might prefer bold or striking colours.

So try to come to a style that you feel represents you best and aim to get your photos to look like they are part of that set. Not only will your portfolio look more in sync but possibly also make you stand out from the crowd.

landscape_photography

Tripod and filters are a must

There are very few landscape shots that I would take where I don’t use a tripod and filters. There really isn’t a valid reason for not using a tripod when it comes to landscape photography other than being lazy. A landscape photo will almost always require a long depth of field which will mean a small aperture and so less light entering the camera. So straightway you are looking at slower shutter speeds. If you then factor in that most landscape photos will be taken early in the morning or late afternoon (to take advantage of the best light), a tripod becomes an absolute must to avoid having to raise your ISO to be able to handhold a camera.

Filters are the other essential accessory when it comes to landscape photography. The reason that filters are so important in landscape photography is that you very rarely encounter conditions that just allow you to shoot without manipulating the scene somehow. Often this will have to do with light. For example, you may find that you need to balance the bright light in the sky with the darker foreground using a graduated neutral density filter. Or it might be that you need to reduce bright reflections on surfaces like water with a polarizer. Learning to use filters effectively is one of the best ways in ensuring your landscape images look great.

landscape_photography

Use a telephoto lens

If you look through all your landscape photos, the vast majority would have been taken with a wide-angle lens. That is natural as most of the time you will want to capture the depth and vastness of the epic landscape in front of you. But a really great way to make your images of landscapes unique is to use a telephoto lens. Not only does a telephoto lens help to narrow in on a small part of the image, but it can also compress distances between things to create a really nice effect in landscape photography. So if you have a telephoto lens try it out for your next landscape photoshoot and you may just be really surprised by the results.

landscape_photography

Invest in a drone

Drones have become a great addition to a lot of landscape photographer’s set of equipment. A drone allows you to capture shots and angles that were never possible before. You are able to not only capture aerial shots of locations but also for example from over a cliff edge. These shots allow for far more creativity than standard viewing spots. Even though drones don’t have the same quality as DSLRs and mirrorless cameras, what they offer makes them invaluable to landscape photographers. So, if you don’t own a drone it might be worth seriously considering investing in one for your landscape photography. Just be aware of where you are allowed to fly drones (for example they are banned in US National Parks) to avoid getting into trouble.

landscape_photography

So, there you have it. These 5 bits of photography advice might not seem revolutionary but they will certainly make a huge difference to your photography. Try them out and next time you are heading out on a landscape shoot and you will notice an improvement in your landscape photos.

Photo credits: Kav Dadfar – All rights reserved. No usage without permission.

Filed Under: Tutorials Tagged With: landscape photography, landscape photography tips

6 Beginner Tips For Photographing Sand Dunes

Sand dunes can be incredibly challenging to photograph. With the right lighting and subject, your sand dune photos can be brilliant and intriguing. But there are compositional challenges as well as general safety issues when photographing near sand. Good composition can be difficult because of the lack of points of interest in places like the desert. You also have to constantly be aware of not leaving behind footprints as well as keeping your camera safe. Fear not because here are 6 tips to help you when photographing sand dunes.

Photographing_sand dunes

Know the dangers

The first thing that you should always be aware of is the weather. It may be pretty hot or possibly even cold (at nights) in deserts so make sure that you are appropriately dressed. Early morning is better than sunset due to the extreme heat conditions. But sunsets will also provide a wonderful light. Sand and especially dunes are also challenging to walk on and can be very tiring and hard work, especially in hot conditions. So make sure you carry plenty of water and take regular breaks under shade if possible. It is also vital to pay attention to your route, so you know how to find your way back in the dark.

It’s not just your safety that you need to be aware of either. But also your sensitive, expensive equipment. Sand can be incredibly destructive for modern-day DSLRs so be very careful. Dust or sand can easily get blown into unsealed consumer-grade lenses and onto your sensor if you are changing lenses and scratch them. Weather sealed cameras are best and if you have two camera bodies take both to avoid changing lenses. Remember that even on a calm day the slightest gust of wind will blow sand around.

Photographing_sand dunes

Be prepared

If it’s your first time photographing sand dunes start somewhere easy to get to and accessible so that you can practice. Going to Death Valley on your first attempt might not result in successful shots. Dunes can differ in shapes and other features based on wind or water differences. As a result, your composition will have to constantly change based on the scene you are faced with.

Photographing_sand dunes

You also need to ensure that you bring the right equipment with you as it might be a long way back to the car if you haven’t packed something. As with any type of photography, a tripod is a must if you are planning on photographing early morning or late afternoon. Graduated ND filters will also be invaluable along with a polarizing filter. A towel or cloth is also useful to wrap or cover your camera with to stop any sand getting onto it. Use a UV filter attached to the front of your lens to protect the glass from sand and other flying debris. Finally, it’s a good idea to purchase insurance for your equipment.

Besides camera equipment safety, you should also wear sunscreen, and dress in layers. Remember that the weather changes drastically so bring a large-brimmed hat, sunscreen, and long-sleeved layers. These items may seem counter-intuitive when the weather is hot, but the long sleeves keep you cooler. There is also the extra benefit of additional sun protection. Being prepared for the elements will prevent losing a good shot due to discomfort.

Photographing_sand dunes

Decide what you want

If you want a unique shot, you need to work for it. Finding a different vantage point or an unexpected angle will make a better picture. If the image is important enough, be prepared to have walk, hike or even camp to get it. But try to have an idea of what you are looking to capture. Is it the vastness of the desert? Is it the size of a sand dune? Or maybe you want to show activity like a car driving on sand dunes? It could be flora or fauna on sand dunes on a beach. The reason this is important is that all of these shots will require different types of planning and execution. For example, a photo of a 4×4 driving in the desert will need much faster settings than an empty landscape. By knowing what types of shots you want before you start you’ll have a better chance of capturing them.

Photographing_sand dunes

Create a plan

Do not plan to take all your shots on the same day you first view the site. Explore the day beforehand, then plan your routes to avoid walking where you later wish you had not. For example, try to avoid walking on the ridge of a sand dune which will spoil those sharp edges. Instead, walk on the smooth sides where if you need to remove your footprints in post-production it is easier to do so.

When you get to the location you want to shoot, just pause for a few minutes and think about the composition, position of the sun and any other points of interest. Work out the different shots and angles before you start walking around.

Photographing_sand dunes

Try to have a point of interest

Some scenes will be easier than others to photograph. For example, sand dunes on a beach might have rocks, boulders, buildings or flora and fauna to help you build your composition around. If there are elements like this, try to incorporate them into the shot. But if you are in the desert with nothing but endless sand, what do you do?

Well; for one, you can put a person (even yourself in the shot). This is a really great way to get a sense of scale across. For example, someone standing at the foot of a huge sand dune will immediately get across its size. Sand dunes themselves can also be your point of interest and you can also use the leading lines from them (or even on the sand itself) to help the viewer navigate the scene. The key is to have something within the shot that immediately catches the eye.

Photographing_sand dunes

Lens and settings

There is no specific lens for photographing sand dunes. It really depends on what you want to achieve. A wide-angle lens is ideal for those epic landscape shots. But using a telephoto lens can also provide some wonderful result by compacting distances. It’s best not to take too many lenses as you should avoid changing lenses when you are near sand as much as possible.

Your settings will also be determined by what you are photographing. A typical landscape shot will require a long depth of field achieved through a narrow aperture. If you are shooting handheld, then a minimum shutter speed to avoid camera shake has to be considered. As does what you are photographing. For example, if you are photographing something moving like a person, animals or a vehicle than their speed will determine your shutter speed.

Photographing_sand dunes

Sand dunes are often naturally in beautiful places. But they can also be difficult to capture well. The best way to improve your sand dune photography is to practice. Which can, unfortunately, be difficult for many who may not have any near them. But if you do get a chance to photograph sand dunes, be it in the desert or on beaches, use the tips above to guide you in getting those awesome shots.

Photo credits: Kav Dadfar – All rights reserved. No usage without permission.

Filed Under: Tutorials Tagged With: deserts, landscape photography, Photographing deserts, Sand dunes

How To Take Great Photos At The “Wrong” Time

“There is a perfect time to photograph anything”. It is one of the earliest things that I was taught as a photographer. But for anyone photographing outdoors, you will certainly know that you can’t always photograph things at the perfect time. Be it the weather or even a lack of time, sometimes you have to try and do your best to capture the best possible photo you can in the conditions you are presented with. So if you have struggled to capture the photos that you want to take at the “wrong” time, then this short guide will help you.

wrong_time_photography

What is the “wrong” time?

One of the common questions that I get asked is “what do you mean by the wrong time”? This can mean several things. For example, the wrong time can be at a certain time of the day when the light doesn’t fall correctly on the subject. Or it could be at the wrong time of the year when for example the conditions are not right (i.e. flowers haven’t blossomed). There’s also the factor around the colour and intensity of light that changes throughout the day. All of these are an example of when you may potentially be photographing something at the wrong time.

wrong_time_photography

Point away from the harsh light

One of the issues of photographing during what might be perceived as the wrong time is the harsh light that you might encounter. This is something that you might experience, say around the middle of the day. With the sun being overhead, it creates a harsh light that will wash out shadows and create a flat scene. But you can still capture good photos during this time. You just need to ensure that you are pointing away from the light source. For example, if the sun is overhead but slightly to one side, photograph something so that the sun is behind you. You can often still capture nice shot if you do this but just avoid looking in the direction of the harsh light.

wrong_time_photography

Bring out details in the clouds

A real bugbear of any outdoor photographer is overcast cloudy conditions. The blanket of cloud acts as a diffuser that mutes colours and removes shadows and so it can make a scene seem flat and uninteresting. Incidentally, this is a great time to take photos of food and also portraits of people. The flat light allows you to capture an even exposure across the subject which is perfect for food and people photography where you want to avoid harsh shadows. But if you are photographing a landscape scene for example the flat light can be very frustrating.

One way that you can liven the scene up a little is by trying to bring to life the details in the sky. Often overcast skies will have tones of greys which can help you add some depth to your image. If you are lucky enough to have some storm clouds, then even better. The best way to bring out the details of the skies is to use graduated neutral density filters to darken that area whilst keeping for foreground brighter. You can then push this a little further by selectively editing in post-production.

wrong_time_photography

Switch your composition

While a blanket of white cloud can be frustrating, so can a completely clear sky in the sunshine. You often have to think carefully about your composition when there is no interest in the sky. In this case, your foreground becomes more important as you may have to position your horizon line near the top of your image (to minimise the sky). This will help eliminate the boring blue sky and hopefully allow you to feature some interesting foreground points of interest. Things like rivers, rocks, buildings, trees, people and even roads can be more interesting than just a blue sky.

wrong_time_photography

Go for a really long exposure

A good technique for some occasions when the conditions are not perfect is to look at doing something more creative. Long exposure photography is a really interesting way of adding some extra dynamism to your images. For example, you may be able to get some streaks in the clouds which can bring the sky to life. Or if there is moving water in the scene, the long exposure will blur and soften it out. Even the movement of cars and people can help add an extra element to your photos.

wrong_time_photography

Zoom into a section

One way that you can almost take the conditions out of the equation is by zooming into a small section of a bigger scene. This works well if you some interesting colours or patterns like the image below. The colours of the trees make this image interesting even when the light was pretty flat.

wrong_time_photography

Give your photo a different treatment

If you are efficient in using photoshop, Lightroom or any other post-processing software, you can always look to give your photo a different treatment to what you do normally. For example, you can mute colours so that only certain ones pop out. You can convert to monochrome or even bleach a photo to give it a different look. Don’t be afraid to play around in post-production on your images, you never know, you may just turn a photo that you didn’t think much of into something great.

wrong_time_photography

In an ideal world, you will always be able to photograph things at the best time in the best possible light. However, that isn’t always possible for an outdoor photographer. Even as a professional photographer you won’t have unlimited time to be able to capture the shots you need. So sometimes you just have to try and make things work. The good news is that you can take great pictures in any condition. Use the tips above and you’ll begin to discover how.

Photo credits: Kav Dadfar – All rights reserved. No usage without permission. 

Filed Under: Tutorials Tagged With: landscape photography, Outdoor photography, Travel photography

6 Great Landscape Photography Tips That You May Have Not Tried

Landscape photography is one of the most popular genres of photography. People all over the world are drawn by the prospect of those magical landscape shots that look stunning anywhere. But a great landscape photo isn’t always easy to capture. Firstly you are completely reliant on the weather. But there is also a fine margin between a great shot that captivates the viewer and one that looks a little dull. So if you have struggled to capture those great landscape shots, here a few less obvious tips to try that you may not have done already.

Landscape_photography_tips

Bad weather can be a good thing

Most landscape photographers yearn for that golden early morning or late afternoon sunlight that transforms a scene. But whilst you will often see many photographers out and about when the weather is “good”, you won’t see too many in “bad” weather. When it comes to landscape photography there is no such thing as “bad weather”. You can pretty much take good shots in any condition. More important than the weather is light. For example, a stormy sky with moody clouds can give you far more stunning photos than clear blue skies. So if you have always stayed away from conditions that are not “bright and sunny” now is the time to change that.

Landscape_photography_tips

Shoot in verticle mode

The vast majority of landscape shots are taken in a horizontal format. This is natural as it lends itself to the panoramic view that our eyes see. Whilst you shouldn’t forego the horizontal shots, try experimenting with more verticle shots. Not only will these give you completely different photos that will help diversify your portfolio, but they will also get you to think differently about the scene and your composition. In a verticle shot, your foreground or sky becomes even more important and you need to avoid dead space. Also, the narrower width of the photo means you have to really think about your composition carefully (i.e. where you place your main points of interest).

Landscape_photography_tips

Take a selfie

Before you run out and get yourself a selfie stick, that’s not the sort of selfie I’m talking about. But rather a shot that shows you as part of the scene (i.e. hiker, walking, sitting etc). One of the biggest challenges in landscape photography is being able to get across that sense of scale. Often, an amazing vista doesn’t look the same in a photo as it does in real life. By putting yourself in the photo, you can help the viewer see that scale of the scene. To put yourself in the photo firstly you need to ensure that you have a tripod and set your camera on a timer. Nowadays, there are also apps that allow you to control the camera from your phone making it easier to position yourself correctly. Not only will these shots help you capture the sense of scale, but they will also tell a story.

Landscape_photography_tips

Use a telephoto lens

One of the great attributes of telephoto lenses is that it allows you to compress the distances in a landscape scene. This can give a pleasing result in landscape photography. In addition to this, you can also use your telephoto lens to actually crop into a scene rather than showing a big wide-angle view. This again can help give the viewer a completely different view of a scene. So if you have a telephoto lens, then try it next time you are out taking landscape shots. You may be surprised by the results you end up with.

Landscape_photography_tips

Low down or up high

Another great way to give your landscape photos variety is to change your angle of view to something more unconventional. Most people tend to take photos from eye level. But if you get really low down to the ground not only does it change your perspective but also give you completely different types of photos. This is also a great technique to use with leading lines into the distance. For example, set your camera low to the ground along a path and it will lead the viewer’s eyes into the distance.

An alternative to this is to get up high by using a drone. Like them or not drones are a huge part of photography nowadays and many landscape photographers are taking advantage of the angles that drones offer.

Landscape_photography_tips

Play around with your depth of field

For landscape photography, the normal settings require most of the scene to be sharp. So that means selecting a narrow aperture to give you a greater depth of field. But now and again if the scene lends itself, try taking a landscape photo with a shallow depth of field. This works best if you have a point of interest in the scene like for example a building or even a person. By focusing on the main point of interest with a shallow depth of field, your foreground and background will be blurred resulting in an unusual, surreal photo. But the key is to ensure that your main subject is in focus and sharp otherwise the photo won’t work.

Landscape_photography_tips

These are just some simple ways in which you can capture different types of landscape shots. Don’t think of them as ways to replace what you already know and use, but instead as additions to your skillset.

Photo credits: Kav Dadfar – All rights reserved. No usage without permission.

Filed Under: Tutorials Tagged With: Beginner landscape photography, Landsape photography tips, landscape photography

Photogenic Places – A Simple Guide To Photographing Badlands National Park

One of the most breathtaking National Parks in the United States is the Badlands. For more than 11,000 years, the Lakota have called this beautiful place home and used it as their hunting grounds.  Many different animals inhabit the park, such as mule deer, prairie dogs, bighorn sheep, and bison.

It will be difficult not to fall in love with this National Park. The encouraged exploration, the easy to moderate selection of trails, the stunning views, the rampant wildlife…it really has everything that people are looking for in a national park adventure. This is the true American Heartland. Fossils of prehistoric animals, legends of Native American Warriors, ghost dances, bison, rocky spires, and so much more make this a trip that everyone should try and experience.

It’s an absolute must for anyone who loves photography. Visitors are encouraged to crawl all over the countless mounds, but where do you start? There are literally dozens of trails throughout this massive national park, so it can be difficult to figure out which are worthwhile and which are a waste of time, especially if you have a list of animals and formations that you want to see. To help you navigate this sprawling landscape, we’ve noted some of the top hiking trails throughout Badlands National Park.

Photographing_badlands_NP

Medicine Root Trail

This is a short, four-mile trail along mostly flat terrain that gives people a great opportunity to walk among the prairie dogs. As you drive through the park to get to trailheads, you can’t help but notice the thousands of tiny heads popping themselves up from below the surface, watching your vehicle drive by. There are simply scores of these cute little creatures all throughout the park, but this trail probably gives visitors their closest look at the animal’s natural home. Just be careful of cactus and the occasional rattlesnake sunning itself on the boardwalk! While visitors are allowed to go off trail throughout the park, for the Medicine Root Trail, you likely won’t need to explore off-trail very much to get great images of prairie dogs to take home.

Photographing_badlands_NP

Notch Trail

While short (just a mile and a half), the Notch Trail is deceptively strenuous. This is a good trail for anyone who wants to experience the ruggedness of the national park. You walk through canyons until you reach a log ladder, and then you hike along the edges of the canyons until you see a stunning view of the White River Valley. The ladder is quite memorable and really fun to climb. It’s about fifty steps and just makes you smile as you climb for a nice change of pace. This trail is recommended for a quick sojourn, especially for anyone who wants to feel like they’ve really explored the canyons, but without having to hike all day to do it. You might see some small ponds formed and maybe even white-tailed deer, mountain goats, and bighorn sheep.

Photographing_badlands_NP

Cliff Shelf Nature Trail

This short, half-mile trail along a boardwalk is a fun little family hike that just takes a few minutes to conclude. At the end of the trail, you’ll see a spectacular view of the White River Valley, as well as Eagle Butte. Not only is this a quick, family-friendly trail, but you can see more than fifty plant species and potentially more than a hundred bird species along the way. This is mostly due to the proximity of a bowl-like area that retains water within the Cliff Shelf itself. When it collects water, you may see bighorn sheep having a refreshing drink.

Photographing_badlands_NP

Sheep Mountain Table Road

For the more serious hikers out there, this trail is a pleasant moderate difficulty with a little length. At just over fourteen and a half miles long, the Sheep Mountain Table trail will weave you through the National Park to see beautiful wildflowers. It’s lightly trafficked, so you likely won’t be bumping into all of the families that will opt for shorter trails. It’s a hard-packed dirt road that you could also traverse using a bicycle or appropriate off-road vehicle, but hiking it will definitely give you the most satisfaction. It has limited views due to being in the centre of the plateau, but a few are truly gorgeous. Many people prefer to drive up to a certain point and then hike the rest of the way.

Photographing_badlands_NP

Fossil Exhibit Trail

Kids always have a good time on the Fossil Exhibit Trail thanks to the plaques spread along the trail that indicate what kinds of things have been found here before. It’s a short quarter-mile hike along a boardwalk, so while it’s not a serious hike for more experienced visitors, it is still worth the visit to see the bronzed casts of impressions and fossils that have been discovered.

Sage Creek Loop

For anyone looking for a real challenge, this nearly twenty-three-mile loop is perfect. Located near Wall (about twelve miles away, but relatively speaking, close enough compared to the vast emptiness of the area), you can expect scenic views as you tread across this difficult trail. Plan to spend some time on this trail, likely up to three days, which is fine since there are camping spots for backpackers (no designated sites, but many natural clear areas that suit camping perfectly). If you want an almost guaranteed sighting of bison and pronghorn, then hike this loop. Surrounding rock pinnacles will remind you why they call this park the Badlands in the first place. You’ll climb gravel mounds, enjoy natural amphitheatres, sit through juniper stands, cross ridges, and hit a high point of nearly three thousand feet.

Photographing_badlands_NP

The Door Trail

This is a wonderful trail to hit right around sunrise. Not many people will be there (it’s heavily traversed throughout the day) and the natural lighting really elevates the terrain’s appearance. There’s a short boardwalk that leads to a practical rocky playground full of ashy spires that you can climb up and over. It would be easy to spend an entire day photographing through this trail. The surreal view of rock formations sets the scene for why most people come to visit the Badlands in the first place. Why is it called the Door Trail? Because it leads right up to a break in the Wall referred to as the Door, hence the name!

Photographing_badlands_NP

The Window Trail

Another great small trail with a short boardwalk, this easily accessible quarter-mile trail will take you up to a natural window in the Badlands Wall. You’ll see a wonderful view of eroded canyons, but try to get there around sunset for a sight you will never forget. It’s a great way to end your adventure in the park and can be traversed by people of pretty much any age.

Photographing_badlands_NP

Saddle Pass Trail

This is a moderately difficult trail, but with a little help and encouragement, most people can do this just fine. This trail leads through the Badlands Wall and takes about an hour. Make sure to bring water and sunblock as you climb the terrain to a decent elevation, at the pinnacle of which you can easily see the majority of the surface area in the park. As you climb the narrow trail (which has slightly alternate routes along the way, depending on whether or not you want to climb a little more than you have to), you’ll come across some very tricky drop-offs. Stay steady and make the climb, because when you get to the very top the payoff is fantastic. There’s a very narrow trail up to a tall spire, with a little nest area perfect for a picture of the National Park. The trail actually ends where others begin; you can hop over to the Medicine Root Trail here or even the Castle Trail, depending on how much longer you feel like hiking before getting back to the car.

Photographing_badlands_NP

Castle Trail

Reported as one of the harder trails in the Badlands, the Castle Trail actually only take about two hours to complete. The trail is ten and a half-mile long and is actually a loop that begins fairly close to the town of Interior. The best time of year to experience the Castle Trail is probably between April and October. The elevation is only about 314 feet, but the distance is what makes most people think that this is a harder trail than what it actually is. It will give you a very expansive view of the Badlands, starting with the typical rocky terrain and then a few miles in turning over to the tall grassy areas, or prairie land. If it rains right before you’re about to go on the trail, make sure you have heavy boots that can handle the mud that is sure to build up.

Photographing_badlands_NP

Badlands National Park is a wonderful area to photograph. Aim to do the vast majority of your shooting early morning or late afternoon when not only the golden soft light illuminates the landscape beautifully. But also because it will be cooler and easier to walk than during the heat of the day. As with any sort of landscape photography always pay attention to the weather forecast and make sure you stay safe.

Photo credits: Dreamstime – All rights reserved. No usage without permission.

Filed Under: Tutorials Tagged With: Badlands National Park, Badlands NP, landscape photography, Photography Guides

A Brief History Of The Start Of Landscape Photography

For most people, landscapes are often the shots that wow them. Think of those backgrounds or your computer screen or even default background wallpapers that come with new phones. It is easy to take landscape images for granted, but for those that are passionate about landscapes, the landscape is not only a passion but also a way of life. But just how did landscape photography come to be? What inspired photographers to capture these on film?

Landscape-photography-history

By Ansel Adams – This media is available in the holdings of the National Archives and Records Administration, catalogued under the National Archives Identifier (NAID) 519914. (Public Domain).

The inspiration

People have been fascinated by landscapes long before photography technology came to be. This is proven by the number of landscape paintings that already existed before the earliest camera equipment was even conceived. When photography technology first emerged in the 19th century, early photographers seemed to decide that landscapes made the perfect subject because they were static. So, there was no danger of the subject moving about as they waited for photographs to be exposed. Can you imagine how challenging wildlife photography would have been back then?

It’s a bit harder to pinpoint when landscape photography began. According to records, the earliest known evidence of a landscape photograph was taken between the years of 1826 and 1827. It was an urban landscape photo taken by a French inventor by the name of Nicephore Niepce. It was noted this first exposure took him a mere 8 hours, so perhaps it made sense for him to choose a still subject. A few years later, around 1835, an English scientist named Henry Fox Talbot entered the scene and introduced innovations in photography.

It was quite revolutionary back then because this allowed people a much faster way of rendering reality into a two-dimensional format that they were previously only able to do by way of painting. This process took much longer than taking a photo.

Landscape-photography-history

By Joseph Nicéphore Niépce – Rebecca A. Moss, Coordinator of Visual Resources and Digital Content Library. College of Liberal Arts Office of Information Technology, University of Minnesota (Public Domain)

Landscape photography makes a mark

Photography certainly proved popular with users back then, and a slew of images and portraits were taken and developed during the Victoria era. However, it wasn’t until 1904 that landscape photography made its mark with the help of Edward Steichen and his photograph called Moonlight: The Pond.

One fascinating thing to note about his artwork was that it isn’t a straight-up photograph but rather a juxtaposition of photo and painting techniques. Steichen added the black and white photo with the painted elements in the form of a bluish tone. He also included a moon in the background. Now, he wasn’t trying to pull a fast one on anyone but instead practised what was called pictorialism; a technique that photographers used back then to make their works unique from those of amateurs.

At a time when handheld cameras were new and sold at low prices, everyone had one, and these photographers innovated and managed to elevate their artform. While some may argue that painting on a photo isn’t at all fair, this still makes for a fascinating point in the history of landscape photography.

Landscape-photography-history

By Edward Steichen – American Photography-MoMA (Yale Visual Resources Collection). (Public Domain)

Pioneers in landscape photography

As the 20th century began rolling in, the world saw American photographers at the forefront of landscape photography, and this was because they had a rather vast and varied array of landscapes to photograph. There are many notable names in landscape photography, and one of the most legendary ones is Ansel Adams. He was an ardent environmentalist who advocated for the natural world and inspired people to show love for the planet by showing love and respect for it. He has produced some spectacular images of canyons and rivers, which have become a sort of inspiration point for photographers that followed.

Landscape-photography-history

By Ansel Adams – This media is available in the holdings of the National Archives and Records Administration, catalogued under the National Archives Identifier (NAID) 519881. (Public Domain).

Another notable American to take landscape photos is William Henry Jackson, who is most well-known for taking images of the American West. Aside from being a skilled photographer, he was also a painter, a geological survey photographer, and an explorer. Jackson wasn’t always a photographer and spent most of his time drawing while serving in the Union Army. It was in 1866 that he travelled to the West with his brother and got into the photography business once they settled in Omaha.

Jackson worked with Union Pacific in 1869, where he documented sceneries along various railroad routes, which were to be used for promotional purposes. Ferdinand Hayden discovered Jackson’s work and asked Jackson to join one of their expeditions to the Yellowstone River region.

One of Jackson’s most famous works is called Mountain of the Holy Cross, taken in Colorado, which shows a naturally formed cross feature on the mountain-side. It doesn’t appear like much at first glance, but it becomes increasingly engrossing the longer you look and does inspire a sense of wonder.

Landscape-photography-history

By William Henry Jackson – U.S. National Archives and Records Administration, (Public Domain)

Landscape photographers across the pond

There were a lot of Americans leading the pack when it came to landscape photography, but a revolution was happening across the pond at this time as well. For instance, Peter Henry Emerson was a British photographer and writer who passionately argued about what the meaning of photography was. His main point was that it was an art form and not just something to be used for technical or scientific means. He drew inspiration from naturalistic French paintings and so started his photography journey by taking images of country life. His first photography album, called Life and Landscape on the Norfolk Broads, was published in 1856, but his best work was published in 1895 and was called Marsh Leaves.

Landscape-photography-history

By William Henry Jackson – U.S. National Archives and Records Administration, (Public Domain)

Another one was a maverick called Luigi Ghirri, an Italian photographer that dared to shoot in colour just when black and white photography was only becoming recognized. The use of colour in his photos gave them a sense of human engagement and was known to evoke subtle but beautiful emotions in viewers.

Landscapes may be considered static subjects, but when looked at by different eyes and viewpoints, they can take on various forms and can be very dynamic. These early photographers and their works have paved the way for landscape photography as it is today. As the years moved on, the advancements in photography made id possible for more people to take up photography. But it was these trailblazers that started it all.

Featured image: By Peter Henry Emerson, British Library (Public Domain)

Filed Under: Tutorials Tagged With: History of Landscape Photography, landscape photography, Photography History

Which filters do you need for landscape photography?

Landscape photography is one of the best and most rewarding genres of photography to be involved in. Yes, it can be frustrating waiting around for hours for the right light, but when you do capture a stunning shot it makes all the waiting worth it. The other great thing about landscape photography is that you actually don’t need a lot of equipment to be able to capture great photos. Unlike say portrait photography where you need lights and even a studio, besides your basic camera, wide-angle lens and a tripod, the only other thing you need is a set of filters. Often amateur photographers are daunted by the prospect of using filters. Or they don’t even see the point of them. Filters can transform an image and are a must for any landscape photographer. But like anything these days, the choice of filters seems to be endless. So here are the only filters that you will need for landscape photography.

landscape-photography-filters-7

Not all filters are made equal

Before talking about the filters that you need, a quick word on quality. You may have seen that filters can vary hugely in price. From just a few dollars to hundreds, you might be wondering why you need to pay that much for a filter. The reality with filters is that like any sort of glass that is put in front of your lens, the better the quality of it is, the better the quality of your image is going to be. But remember by quality I mean the resolution and sharpness and not the composition. For example, better quality filters are often made from nano-coated glass (and not plastic) which helps avoid reflections. Or they may be scratch resistant and waterproof. So if you are looking to buy filters it does pay to try and purchase better quality ones rather than cheap ones. After all, why would you want to put a cheap piece of plastic in front of your expensive lens?

landscape-photography-filters-7

Graduated neutral density filters

If you just wanted to buy one set of filters for landscape photography then look no further than graduated neutral density filters. These filters are dark at one end and clear at the other end. The main purpose of these types of filters is to help balance out the light in a scene where you have bright areas and dark areas. For example, if you are photographing in the early hours of the morning or late afternoon when the sun is low in the sky, often you will have a bright upper part of the image and a dark lower part. To be able to expose for both of these parts of the photo and ensure even light across the image will be impossible without a graduated filter. If you look to keep your highlights from being clipped by underexposing then you will probably find that your shadows will be too dark and possibly clipped. If you look to do the reverse you will find that your bright areas or highlights will end up being clipped. By using a graduated filter you can ensure that there is an even exposure across your image.

But of course, the intensity of the light can vary which is why you will see that there are a vast array of different filters. They will vary from very dark in the upper part to ones which are not as dark. There is a whole variety of different levels to look to initially purchased but two or three to cover a broad spectrum should suffice. For example, a set to include ND2, ND4 and ND8 or ND10 should cover you for most scenarios. These filters are by far the most commonly used filters for landscape photographers.

landscape-photography-filters-7

Neutral density filters

Neutral density filters are similar to graduated ND filters, but instead of being clear at one end they are tinted all the way through. The main benefit of these filters is for situations when you want to limit the amount of light coming into the camera. Sounds strange right? Trying to block light coming into the camera. But for example, if you’re photographing during the day but you want to have a slower shutter speed to be able to capture the movement of water or clouds then you will need to have a neutral density filter so that you can have a long enough shutter speed to allow you to capture this movement. You may think you could do this by decreasing your ISO and increasing your aperture (f/number). But in bright conditions, this is often not enough to be able to give you a slow enough shutter speed.

As per graduated neutral density filters, there is a whole variety of different levels of filters. For example, you can get a filter that is the equivalent of 10 stops. You can also purchase circular filters that screw into your camera whereby twisting the filter changes the amount of light entering the camera i.e. giving you five or six different levels of a graduated filter in one.

Whatever you decide to purchase it’s a good idea to look to purchase good quality neutral density filters. Poor quality or cheap ones can give you unwanted effects in your images which can be detrimental to the quality.

landscape-photography-filters-7

Polarizing filter

Polarizing filters tend to be the first filter that most people buy. The great thing about polarizing filters is that is it is cheap to purchase and one should last you for a long time. But they that can instantly give you solutions to some landscape photography problems. The main purpose of these filters is to reduce unwanted reflections on things like glass or water. But it can also help reduce the amount of haze that you might get in a landscape scene by bringing out more contrast. Blues and greens are also often enhanced to give a much more striking and vivid image.

Polarising filters will usually screw onto the front of your lens and subsequently rotating them will give you different levels of polarization.

landscape-photography-filters-7

The photo on the left was taken without a polarizing filter. You can see how the reflection on the water has been dramatically reduced by using a filter for the image on the right.

If you want to improve your landscape photos, one of the best ways to do so is to learn how to use the filters above effectively. Of course, a lot of this can be replicated in post-production. But the problem with this is that you can’t actually see how the photo would look like when you’re taking the photo. For example, by using a filter you can adjust your composition or even the filter to capture the perfect photo. But if you wait until you get in front of the computer you are stuck with what you have. The other benefits of using filters are that it reduces the amount of work you have to do in post-production which can only be a good thing as a photographer.

So there you have it a quick guide to the must-have filters for landscape photography.

Photo credits: Kav Dadfar – All rights reserved. No usage without permission.

Filed Under: Tutorials Tagged With: filters, landscape photography, landscape photography filters

10 UK Spots That Are Perfect To Practice Landscape Photography

The United Kingdom may not be the first country you think of when considering the best landscape photography destinations. Sure it may not have the scale of the landscapes in North America or wild nature of Iceland or New Zealand. But you could argue that there aren’t many countries that pack in so much variety to such a small space. There are tranquil rolling hills and valleys. Striking mountain ranges. Not to mention epic coastlines. So here are 10 UK spots that are perfect for a landscape photographer.

Glencoe

Sitting in the Scottish Highlands, Glencoe shot to fame a few years ago after appearing in the James Bond film, Skyfall. It’s no wonder that this stunning setting has been pulling in landscape photographers for years. Set amongst the imposing mountains are lonely cottages, beautiful waterfalls and serene lochs. But what makes Glencoe even more special is that it often looks even more dramatic in bad weather. A few storm clouds and low mist and suddenly the valley transforms into a moody scene that wouldn’t be out of place in a disaster movie.

Isle Of Sky

Further on from Glencoe is arguably the jewel in the crown of the beautiful Scottish landscape. The Isle of Skye feels like a different world. Maybe that is why it has been the setting for many sci-fi movies. Plan on at least 3 full days on this island because anything less will not be enough. The Isle of Skye has everything a landscape photographer could ever want. There is the stunning landscape of the Quiraing. The striking coast at Elgol. The iconic Old Man of Storr and the beautiful Neist Point with its own picture-perfect lighthouse. There’s also the miniature Fairy Glenn. If all of that is not enough, there is also the magical Fairy Pools that will keep you captivated for hours.

Cornwall

Heading west toward the tip of the United Kingdom will soon bring you to the county of Cornwall. An area teeming with history, myth not to mention some of the most stunning coastlines anywhere in the world. From Land’s End to the Lizard Peninsula, from the small fishing towns and villages to the impressive Bedruthan Steps, Cornwall is a landscape photographer’s dream destination. There are also endless beaches to explore as well as the unique Bodmin Moor. If that isn’t enough to convince you, how about age-old mines, ancient stone circles or the mighty St Michael’s Mount?

Jurassic Coast

The Jurassic Coast sitting along the southern coast of the United Kingdom is a world heritage site. This diverse landscape is as historic as it is beautiful. A rugged and unique coast where dinosaurs once roamed, it is shrouded in mystery and beauty alike. This coastline really is a landscape photographers dream with its beautiful light and endless views. The most famous photography subject here is Durdle Door (pictured below). A natural limestone arch sitting in the sea. But that’s just one small location on this 95-mile stretch of coastline that covers Dorset and East Devon.

Brecon Beacons

The Brecon Beacons are a mountain range in South Wales. It is said that they are named after the ancient practice of lighting signal fires on the mountains to warn of attacks by invaders. With its stunning walks offering beautiful views some amazing waterfalls and even the odd cave or two, Brecon Beacons National Park is one place that might not be top of your photography list, but it will surprise you.

Lake District

You won’t find many UK landscape photographers who haven’t photographed the beautiful Lake District. Sitting in the North West of England, it is also known as the Lakes or Lakeland due to its many lakes. There are sixteen lakes in total with the largest being Windermere. If you are looking for those beautiful shots of tranquil lakes with a jetty leading to boats sitting on the water, look no further than this lake. But the other lakes are also worth photographing. Often these are surrounded by imposing mountains that add to the setting even more. When you have had enough of photographing lakes, head up on one of the many hikes up the mountains to get a glimpse from above. One of the most iconic of these views is Striding Edge!

Yorkshire Dales

The moors, valleys and hills of Yorkshire Dales are as quintessentially English as you could wish for. The area is teeming with natural sights like the limestone pavement of Malham Cove. Southeast, on the River Wharfe, the Bolton Abbey Estate includes the ruins of a 12th-century monastery. Malham Village features a towering cliff, and a footpath leading to Gordale Scar, a limestone ravine with waterfalls.

Northumberland

Heading to the North East of England will take you to the county of Northumberland. Filled with ancient castles, stunning coastlines, rugged moorland and friendly little market towns, it should be a must on any landscape photography trip in the UK. There is also the famous Hadrian’s Wall which became a Unesco World Heritage Site in 1987. It stretches 73 miles across the country and was built under the orders of Emperor Hadrian in AD122 and took 6 years to complete.

Snowdonia

Situated on the west coast of Wales and covering 823 square miles of diverse landscapes, Snowdonia National Park is the largest National Park in Wales. Snowdonia also boasts the highest mountain in the UK outside Scotland. With mountains, lakes as well as a wealth of picturesque villages like Betws y Coed and Beddgelert, Snowdonia is an area steeped in culture and local history. It is also an area of the United Kingdom that lends itself beautifully to landscape photography especially in autumn and winter.

The great thing about the United Kingdom as a landscape photography destination is that it packs a huge variety of landscapes into a small area. In just a few weeks you could conceivably cover a pretty large area. So the next time you are thinking of a landscape photography destination why not give the United Kingdom a try. It may just surprise you.

Photo credits: Kav Dadfar – All rights reserved. No usage without permission. Dreamstime.

Filed Under: Tutorials Tagged With: landscape photography, Photography guide, UK

6 Tips To Help You Capture Stunning Coastal Shots

There’s something magical about photographing near the coast. Striking cliffs and silky-smooth water can give you truly stunning results. The great thing about coastal photography is that it isn’t difficult, and you will often find yourself with plenty of time to be able to execute the shot that you want. To get you started here are 6 tips to help you capture stunning coastal shots.

Coastal-Photo-Tips

Choose the right time

Even if you are new to photography you have probably heard of the “golden hour”. There is a reason that experienced photographers will always tell you that you should aim to shoot at these times. This is when the light is soft and golden in colour and as a result, provides a pleasing composition. Typically, these times are an hour after sunrise and an hour before sunset.

This doesn’t mean that this is the only time that you should take photos. In fact, before sunrise and after sunset and even during the blue hour can give you amazing photos. Because the sun is low in the sky, with the right conditions you may also find you get a beautiful or dramatic sky. If you can take photos in these conditions, you will immediately see an improvement in your photos.

Coastal-Photo-Tips

Pre-visualize your shot

One of the key things about capturing a great coastal shot is that you need to have an idea of the type of photo you want to capture. This might sound like an obvious thing to say but so many people take photos without really thinking about what they are photographing.

Knowing what your final photo will look like (known as pre-visualizing) will give you a better chance of being able to execute a great photo. Sure you can look at a coastal scene and think it’s just a beach scene, but if you really think about the small details you can dramatically change the photo you create.

Are you looking to capture smooth water effect or freeze those crashing waves against the rocks? Do you want to include the footprints in the sand or somehow crop them out? If you can work out all of these small details in your head, you will be able to form the photo in your mind before even setting up a camera.

Coastal-Photo-Tips

Think about your foreground

Often one of the main problems with photographing coastal scenes is avoiding them looking uninteresting. This usually occurs when you photograph something with little interest as there is a repetitive colour or pattern. Like for example a photograph of a beach looking into the distance.

But by simply composing your shot with a point of interest in the foreground, you will often see a dramatic improvement. That’s why your foreground is so important when it comes to coastal photography. So always be on the lookout for rocks, driftwood or even people that can add a point of interest to your shots.

Coastal-Photo-Tips

Look for a different perspective

Photographers always strive to find new ways of showing things that have been photographed lots of times. A coastal scene is no different. Usually, the big limitation for things like beaches is that they are pretty flat and so there’s isn’t the obvious opportunity for different angles or compositions.

But even in these sorts of places if you are willing to put some effort in you will find ways to capture unique angles. For example, on beaches look for a place where you may be able to get an elevated view. Rocks or even high sand dunes might be enough to give you a view that often might not be seen.

Coastal-Photo-Tips

Brave the cold and wet

The majority of the time the pictures that grace the front covers of magazines and guidebooks are taken in beautiful sunshine with blue skies. But actually some of the best coastal photos you will ever capture will be taken during the times where people don’t want to be near the coast. Like cold or snowy weather or stormy skies.

These conditions not only show the viewer a vision of coastal areas that they often don’t see themselves, but they can look incredibly dramatic. So, don’t be afraid to get yourself wet in the rain or be cold to be able to capture those stunning photos.

Obviously, the most important thing is that you stay safe so make sure you are aware of any weather warnings and also tide times. Be extra careful of your own well-being and your equipment if you are high up on cliffs when there are high winds. A strong gust of wind can knock over a tripod really easily.

Coastal-Photo-Tips

Make sure your settings are right

The good news is that getting your settings correct for coastal photography is not difficult. You can make life even easier for yourself by using a tripod. Which you really should be doing if you want to capture the best possible photos at the best time.

With any sort of landscape photography, you need to keep your image sharp all the way through so naturally this means using a smaller aperture for greater depth of field. Start at around f/8 and raise your f/number for the desired depth of field. Be very careful at extremely small apertures such as f/22 as these can actually have an adverse effect on the sharpness of the photo

If you are using a tripod, then your shutter speed can be determined by your aperture and won’t be an issue at slower speeds. The only other factor that might affect your shutter speed is if you are wanting to freeze the action or capture movement. If you are using a smaller aperture and faster shutter speed, you will probably need to raise your ISO to be able to achieve the shot. But only raise the ISO as much as you need to. Remember that the higher your ISO is the more noise will appear in your photo (which will make the photo lack sharpness).

Coastal-Photo-Tips

A word on keeping your equipment safe…

Sand and salt water are two of the biggest threats to modern DSLRs. Just a grain of sand can wreak havoc with your sensor meaning a costly repair. So, keeping your equipment safe shouldn’t be taken lightly. Avoid changing lenses unless absolutely necessary. If you are going to change a lens do it quickly with your back against the wind. It’s a good idea to have a towel with you to wipe your camera dry if you get sea water splashed on it. If there is a lot of water spraying from the waves or it’s raining use a plastic bag with a hole cut at the end to protect your camera.

Coastal-Photo-Tips

A well composed coastal scene, taken in beautiful light will look stunning whether it’s a screen saver on your computer or hung on a wall. The great thing about coastal photography is that you’ll have lots of time and space to set your shot up and subsequently take the photo. Follow these tips and you will be on your way to capturing great coastal shots.

Photo credits: Kav Dadfar – All rights reserved. No usage anywhere online without permission.

Filed Under: Tutorials Tagged With: coastal photography, landscape photography

  • 1
  • 2
  • 3
  • Next Page »

Blog Topics

  • Tutorials
  • Inspiration
  • Locations
  • Gear
  • News
  • Other/Misc

What our customers say:

Life Pixel has been a life-changer for me. Continue reading
Eric GConnecticut
Read more reviews
I am more than satisfied with the service I received Continue reading
Christopher JCanada
Read more reviews
I am more than pleased with the conversion job that you did Continue reading
LOUIS MWaco, Texas
Read more reviews
I am VERY impressed with his knowledge of your products and his patience in explaining it to a novice like me. Continue reading
Lynn FEssex, Maryland
Read more reviews
Things will only get better from here thanks to all of you. Continue reading
Phillip FRedding, California
Read more reviews
The Lifepixel newsletter reminds me of not having expressed my gratitude for the excellent job you made. Continue reading
Michael GGermany
Read more reviews
Your staff went above and beyond the call of duty to make sure everything was handled in an excellent manner. Continue reading
Paige RPearland, Texas
Read more reviews
It has given my old camera a new life, I will enjoy using it again. Continue reading
William PAustralia
Read more reviews
Excellent service and the camera works just great Continue reading
Hans FairhurstAustralia
Read more reviews
I just got my converted camera back from you guys. THANK YOU!!!! Continue reading
Anne CutlerForest Knolls, CA
Read more reviews
infrared_filter_choices_sidebar
ir_conversions_explained_sidebar
----------- Watch More Videos -----------
infrared_quick_start_guide

Ready to start shooting Infrared?

Convert My Camera

Subscribe To Our Newsletter

Receive updates, tips, cool tutorials, free stuff and special discounts.

Learn the Basics

  • Video
  • Start Here
  • Filter Choices
  • Focus Calibration
  • Lens Considerations
  • Camera Considerations
  • Place Your Conversion Order

Resources

  • Galleries
  • Lens Hot Spot Database
  • IR Tutorials
  • FAQ
  • Infrared Filter Choices
  • Infrared Photography Guide
  • Infrared DIY Tutorials

Company

  • Why Choose Us
  • Get In Contact
  • Job Openings
  • Write For Us
  • Affiliate Program
  • Terms of Use
  • Privacy Policy
  • Home
  • Start Here
  • Galleries
  • Tutorials
  • FAQ
  • Blog
  • Why Choose LifePixel?
  • Shop
  • Contact

Copyright © 2025 Life Pixel Infrared - All rights reserved - LifePixel Infrared Photography IR Conversion, Modification & Scratched Sensor Repair