• Cart
  • Checkout
  • My Account

Infrared Conversions, IR Modifications & Photography Tutorials | Life Pixel IR

The world leader in infrared conversions, modifications & DIY IR conversion tutorials. Scratched sensor replacement, UV & Full spectrum conversions.

The world leader in infrared camera conversions

866.610.1710
  • Home
  • → Start Here ←
    • 1 – Introduction
    • 2 – Filter Choices
    • 3 – Focus Calibration
    • 4 – Lens Considerations
    • 5 – Camera Considerations
    • 6 – Start Shopping
  • Galleries
    • Infrared Photography
    • Infrared Time Lapse
    • Infrared Cinematography
    • Infrared Stop Motion
    • Ultraviolet Photography
    • Forensic Photography
  • Education
    • Training Sessions
    • How To Shoot Infrared
    • AR Coated Infrared Filters
    • Lens Hot Spot Database
    • Photoshop Video Tutorials
    • Infrared Issues & Solutions
    • IR Basics in Photoshop
    • Camera Quick Start Guide
    • DIY Conversion Tutorials
    • IR Photography Primer
    • Secondhand Cameras
    • Wall Of Shame
  • Workshops
  • FAQ
  • Blog
    • Tutorials
    • Inspiration
    • Locations
    • Gear
    • News
    • Other
  • Why Choose LifePixel?
    • Submit Your Review
  • Contact
  • Shop

The Best Travel Photography Advice I Have Been Given Over The Years

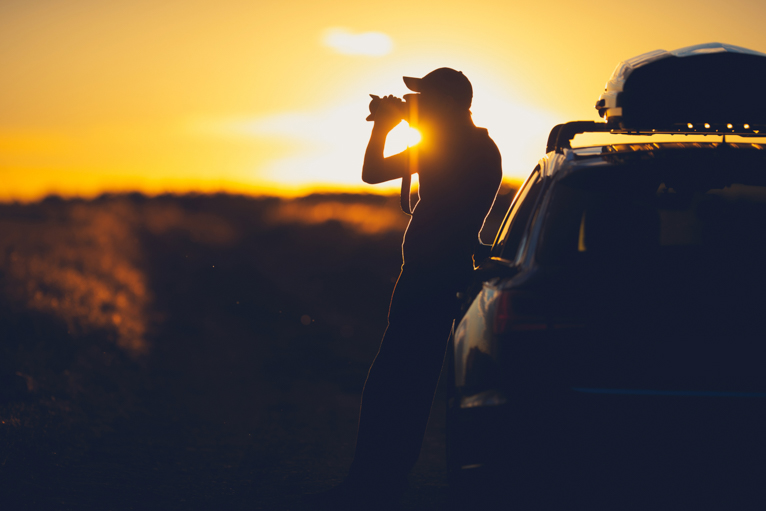
Nothing beats experience and practice when it comes to photography. Every photographer has to start somewhere and we all have to go through the same learning experiences. Over time you will face your own challenges and work out your own solutions to photography problems you may face. But you may also be lucky enough to come across experienced photographers who will share their wisdom and experiences with you. Here some of the best bits of travel photography advice that I have been given over the years.

Travel_photography_advice

Surround yourself with great photographers

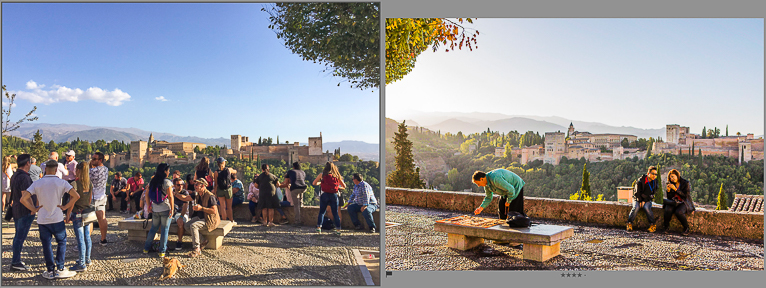
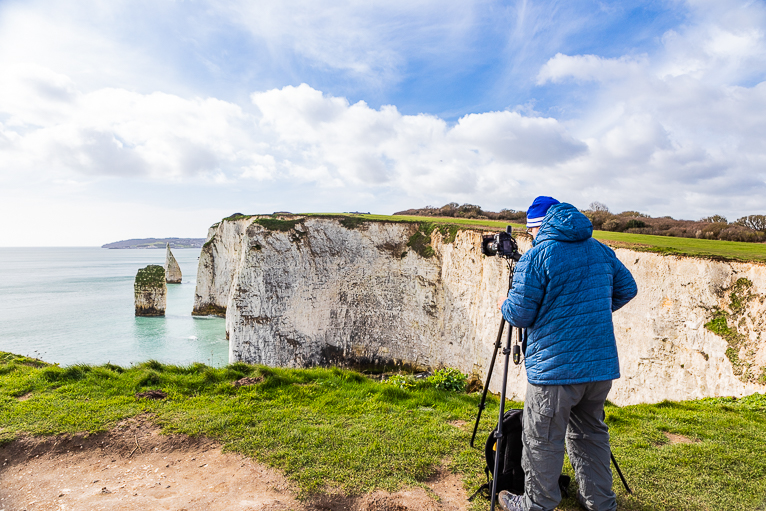
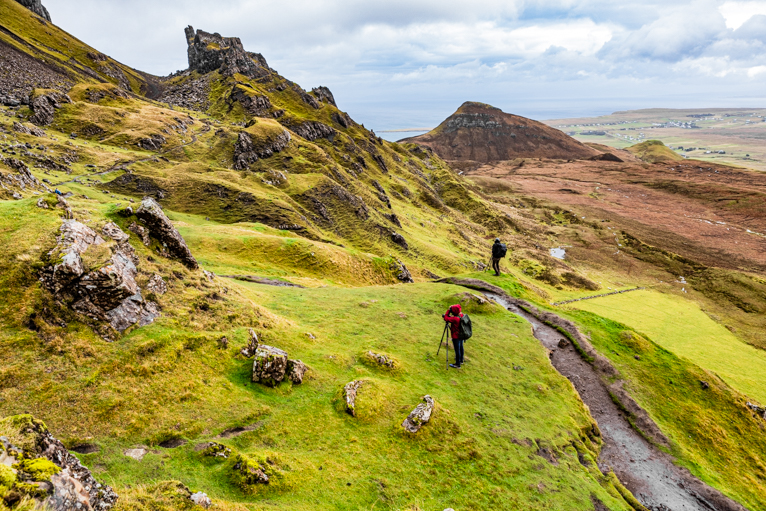
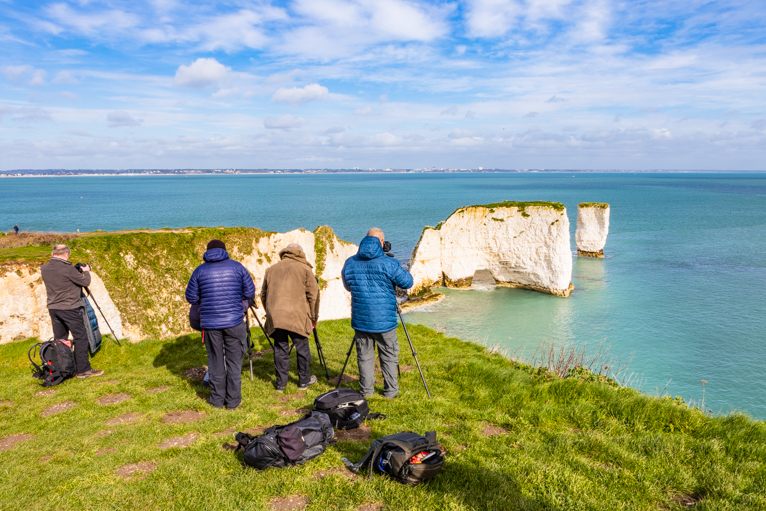
Travel photography is a lonely profession for the most part. Even when you are photographing a busy city, you are often working alone with little time to engage with other people. Any encounters will be fleeting. Travel photographers are also naturally very guarded and protective of their clients. This makes them see other travel photographers as competitors. But one of the best bits of advice I was given early in my career was to look at other travel photographers like a support community. I have some good friends and contacts who have helped me immensely over the years. So don’t be shy and find good photographers whose work you admire. It will inspire you to improve your own work.

Travel_photography_advice

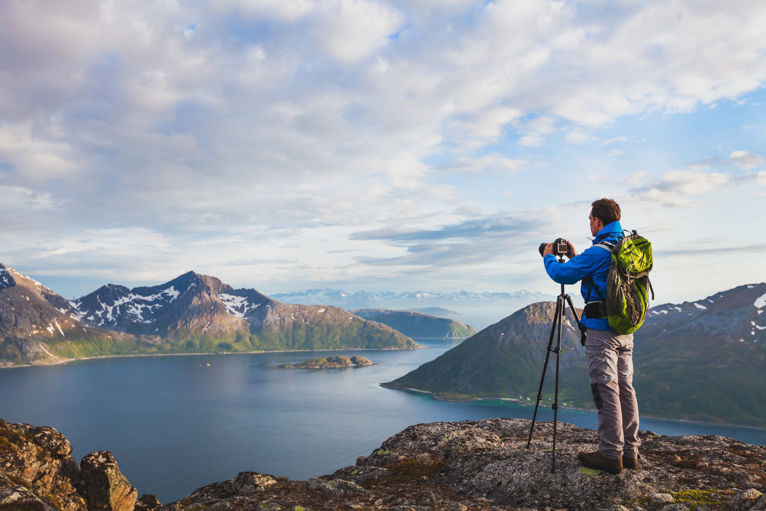
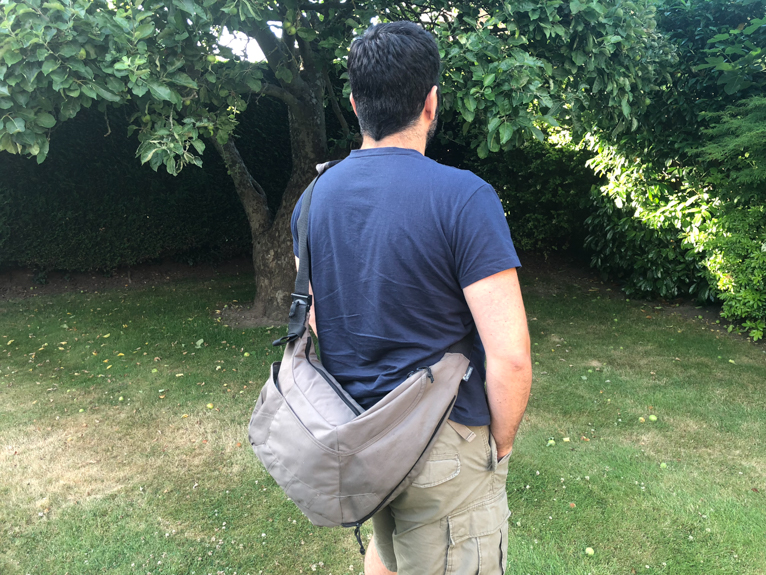
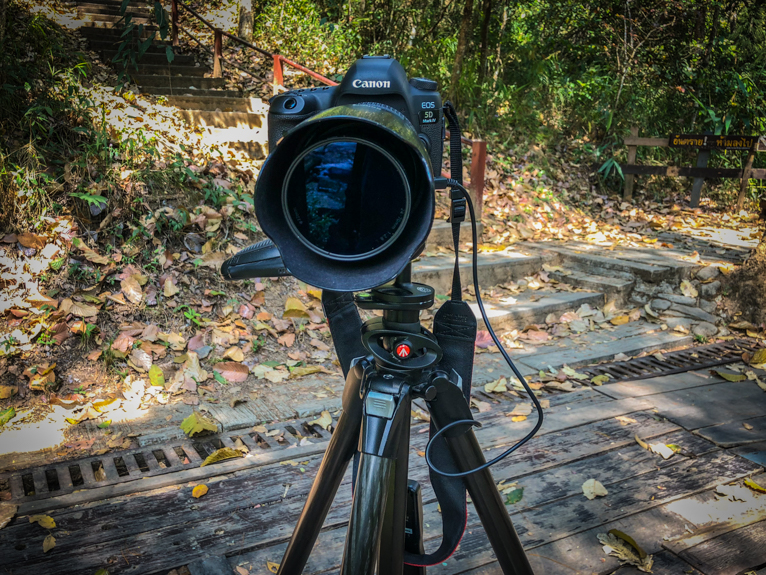
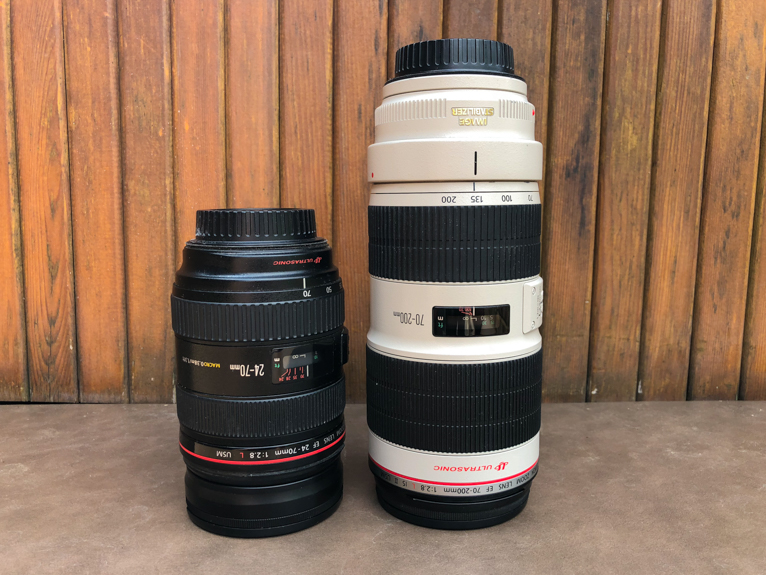
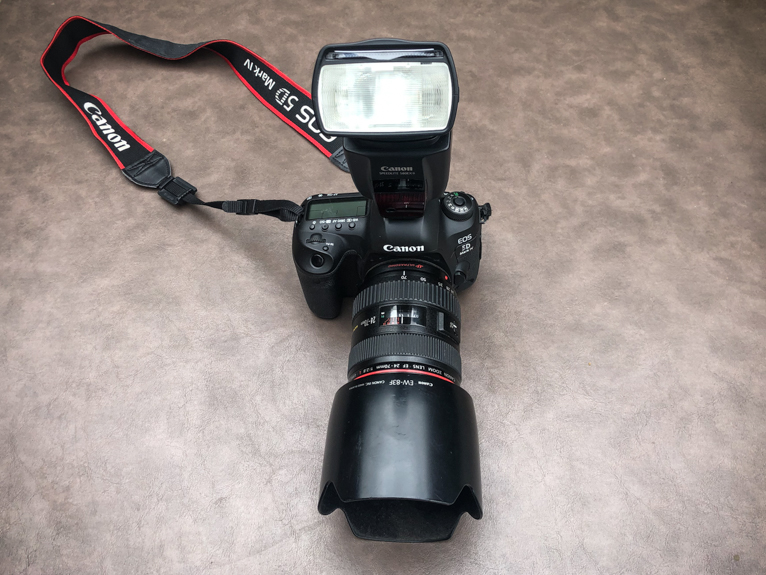
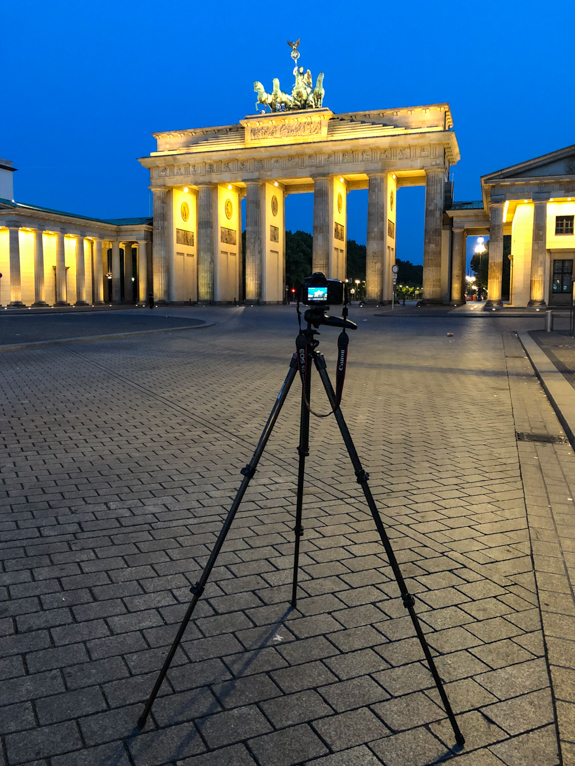
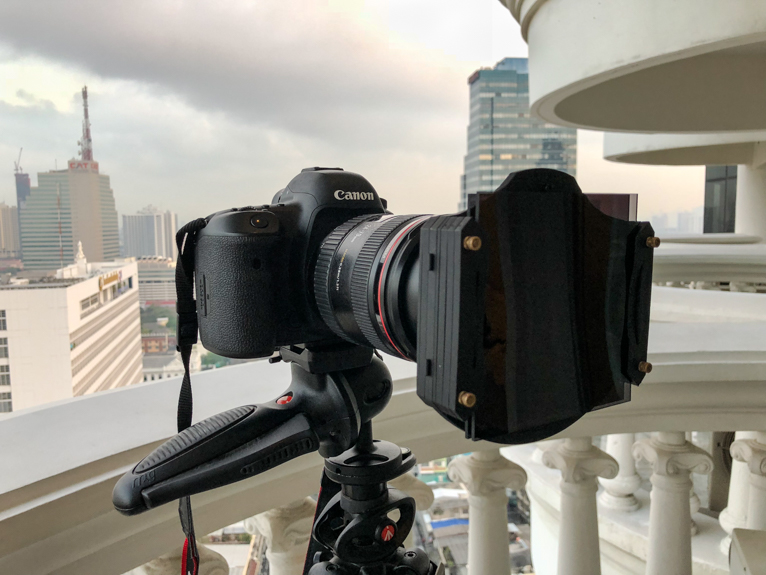
Collect photos, not camera gear

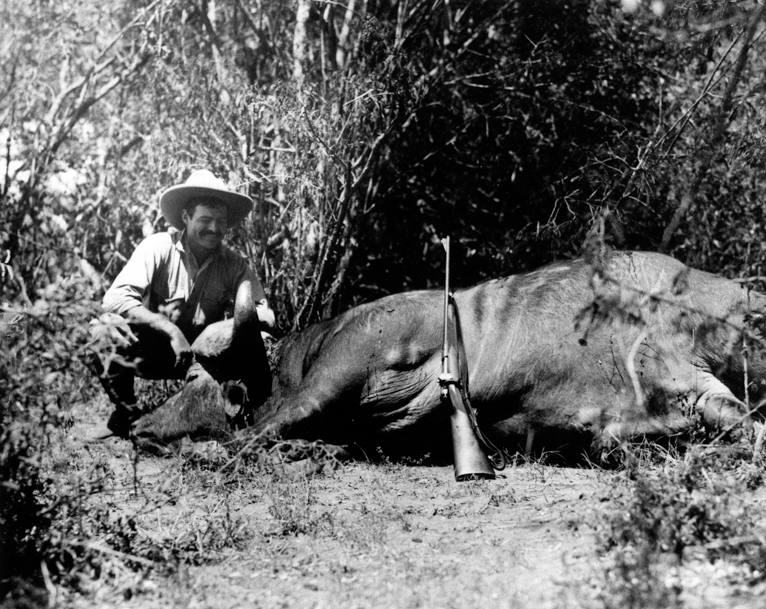
I remember right at the start of my photography journey thinking “if only I had a better camera I would take better photos”. It wasn’t until my university instructor at the time showed me some photos he had taken with a point and shoot camera that I realised how wrong I was in my thinking. From the moment he told me to stop worrying about my camera equipment and concentrate on improving my photography, it almost felt like someone had taken off the shackles. I wasn’t able to use that excuse anymore so I was forced to work hard at improving my photography knowledge and skills. A great photographer will be able to take photos with any camera in the same way as a great writer will be able to write a great article with pen and paper rather than the latest laptop.

Travel_photography_advice

Awards for vanity, sales for sanity

This is something that most full time working photographers will relate to. While winning a photography competition is great and can give you a sense of pride, there are lots of amateur photographers who get despondent when they don’t win or get criticism. The reality of being a full-time photographer is that often clients want photos that are not going to pick up awards. So don’t concern yourself with accolades (that extends to social media too) but instead take photos for yourself (or for your clients). That isn’t to say you shouldn’t enter competitions, but just develop a thick skin and worry less about what other people say about your work.

Travel_photography_advice

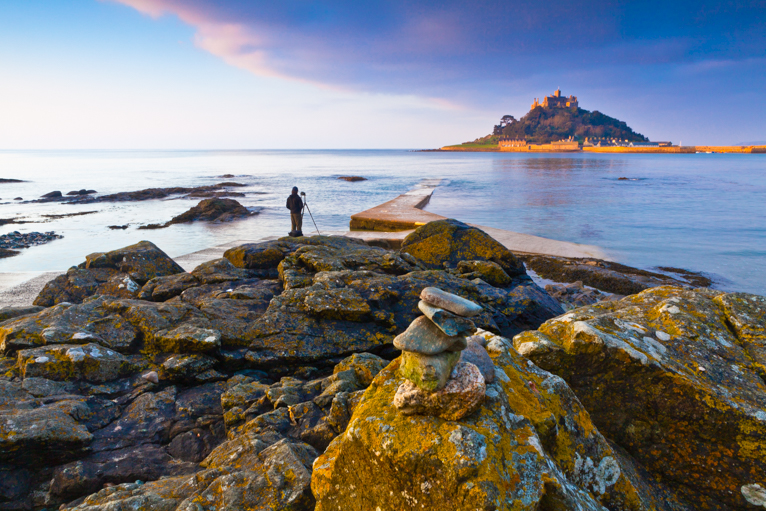
Turn around and face the other way

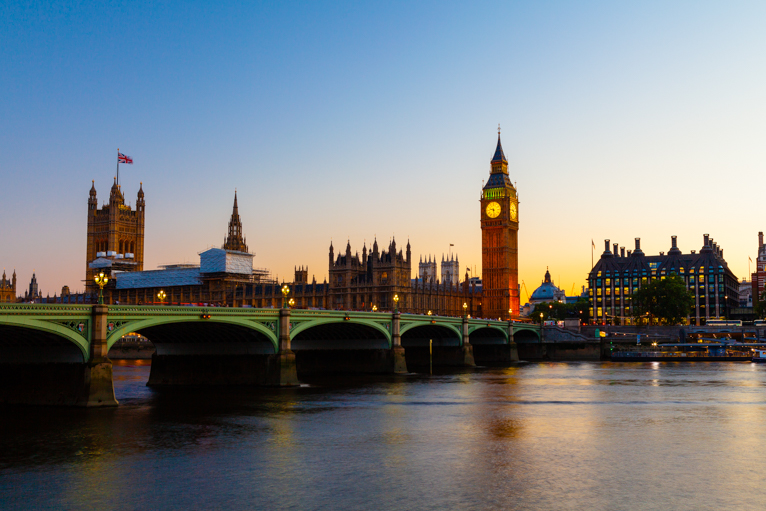
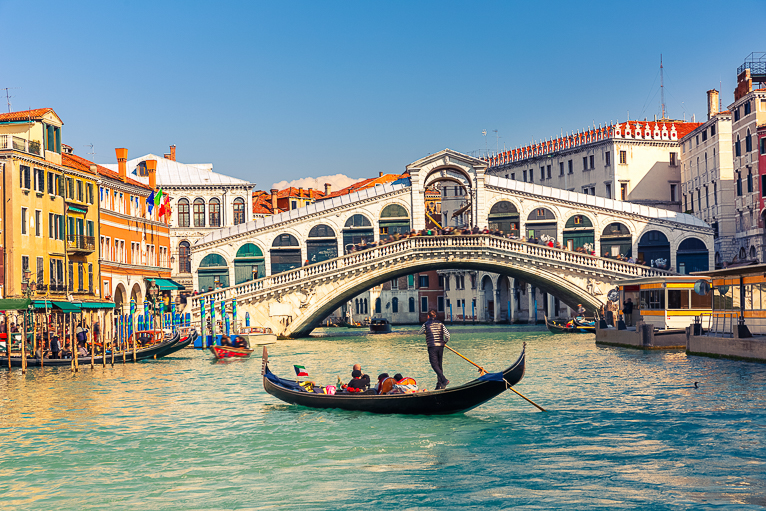
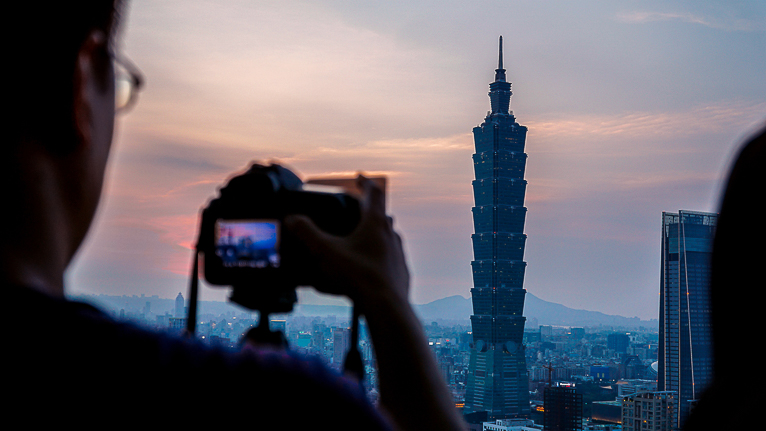
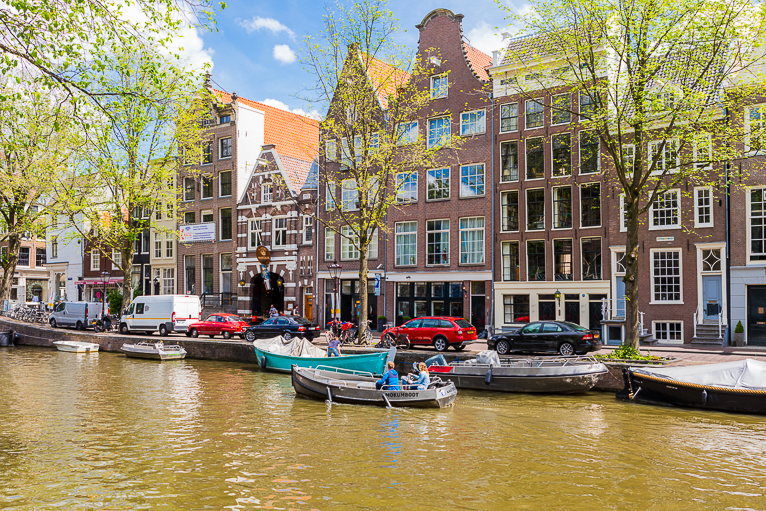
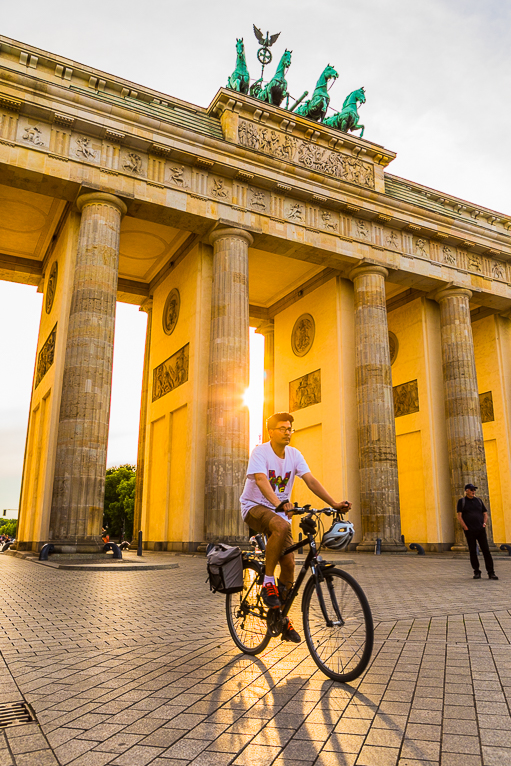
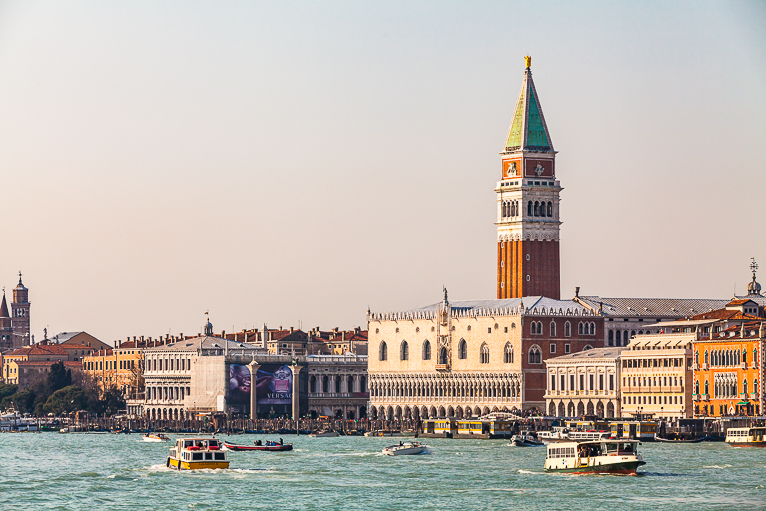
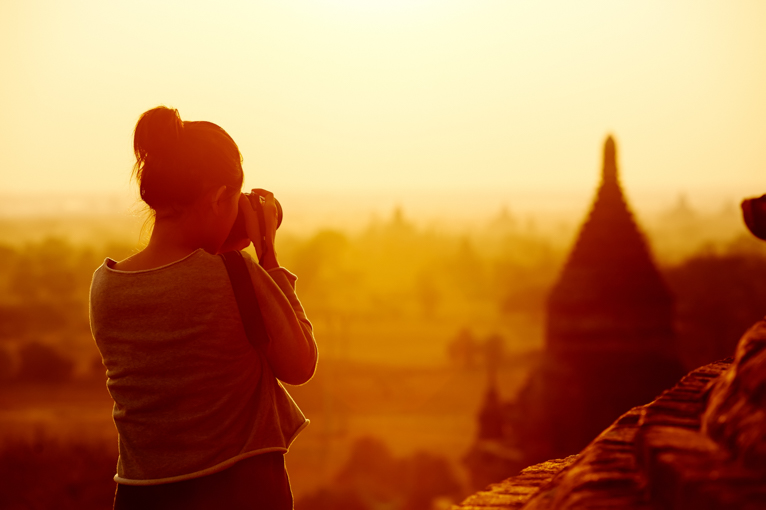
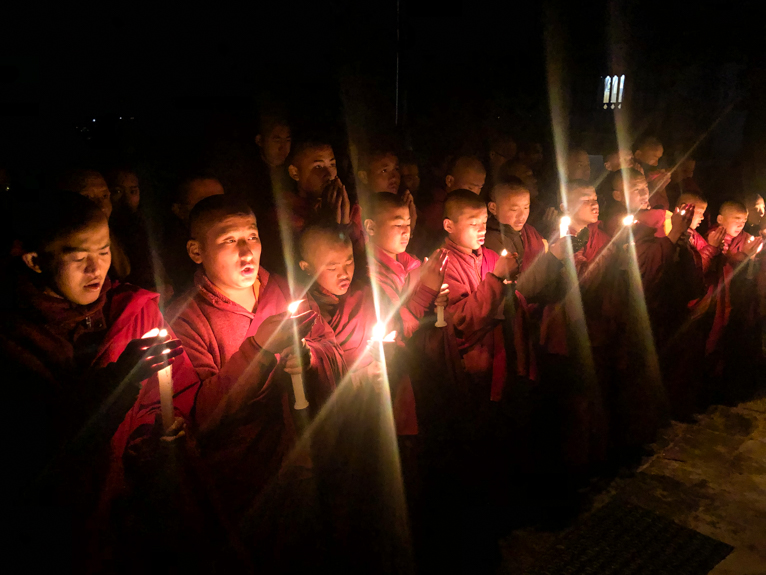
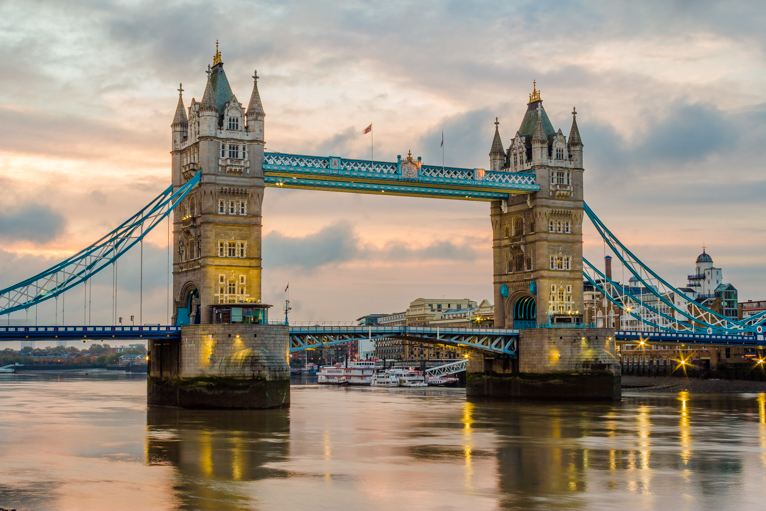
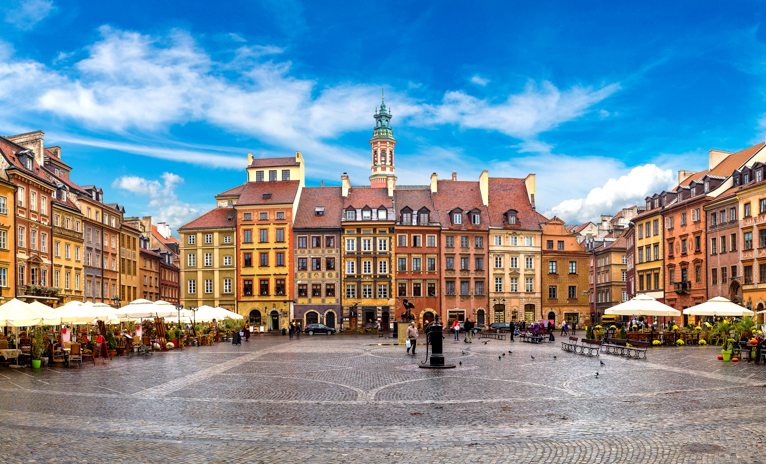
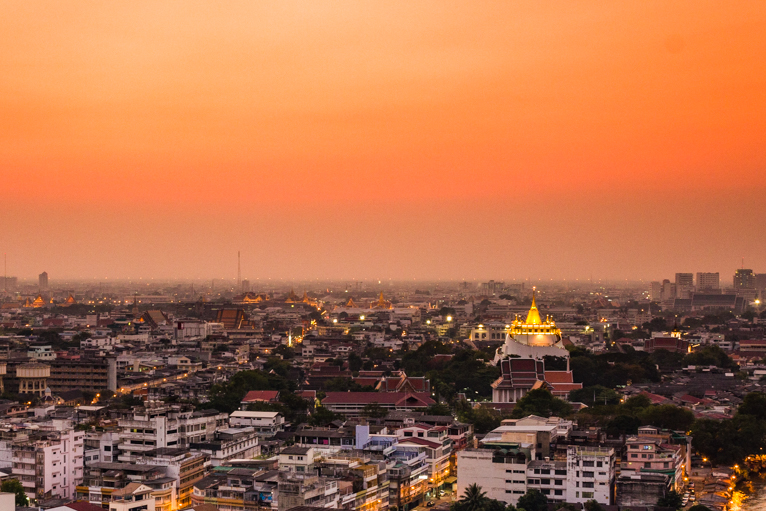
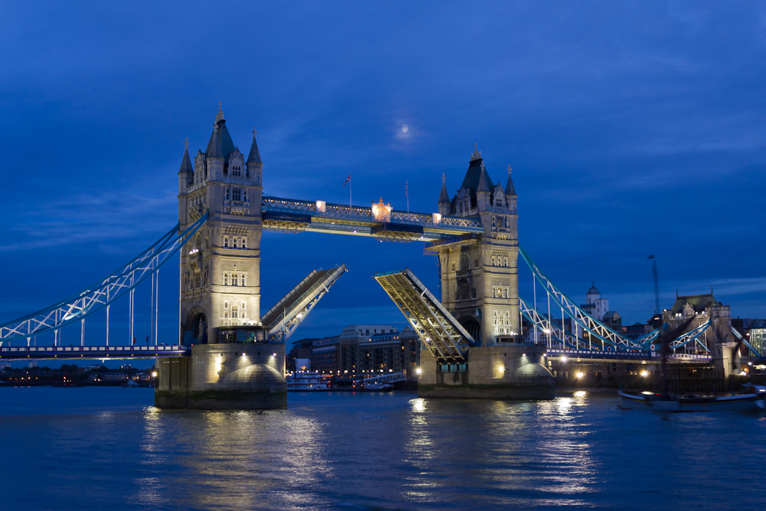
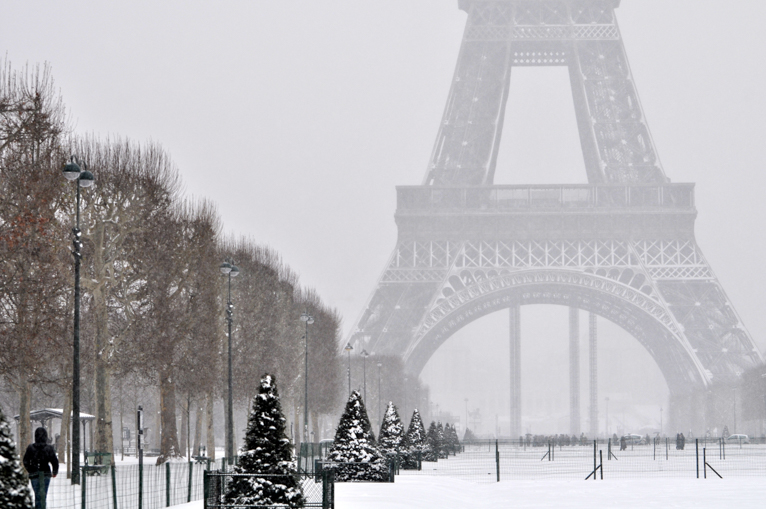
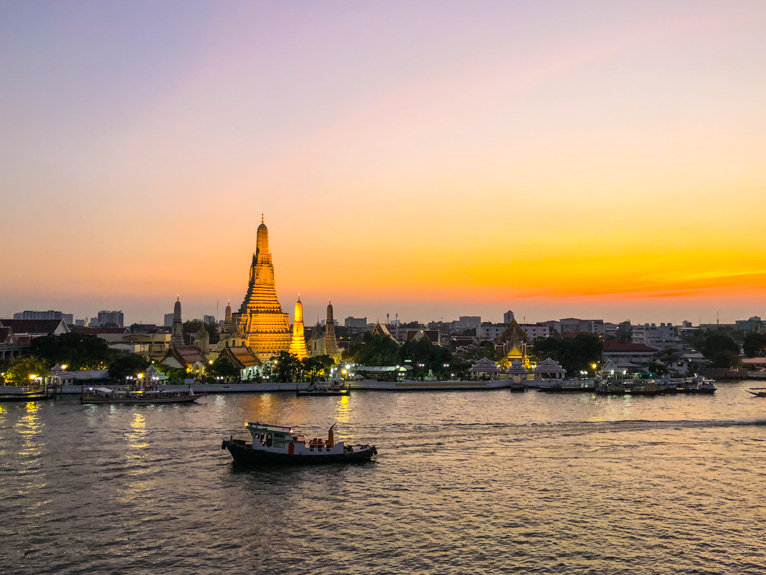
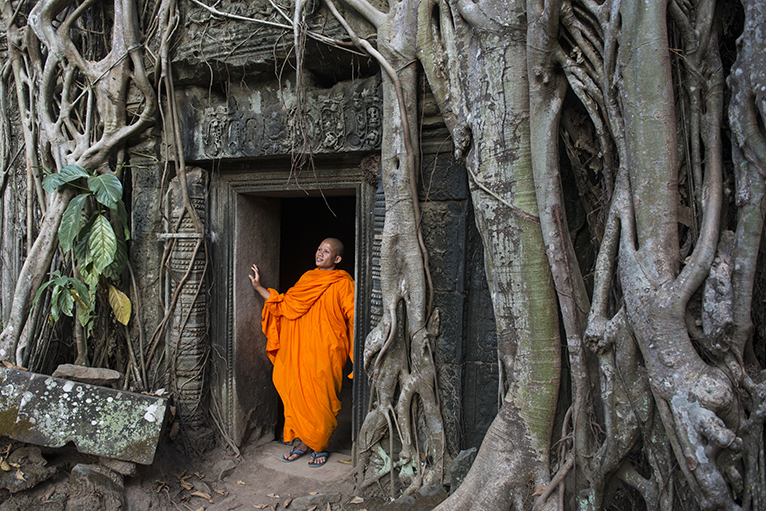
Okay, granted this doesn’t always mean literally facing the other way to where the view is, but the point is to try and look beyond the obvious. So when everyone is facing one way and photographing the “sunset viewpoint”, you should look in the other direction. This was another great exercise that we were often set at university. Our tutor would set us a challenge of representing one of London’s famous landmarks but we were not allowed to directly photograph it. So, for example, we had to look for reflections, shadows, paintings of the landmark or even being more abstract like photographing a child’s reaction to hearing the bells of Big Ben. This was a great exercise that has been invaluable in today’s digital age where capturing unique photos is more difficult than ever.

Travel_photography_advice

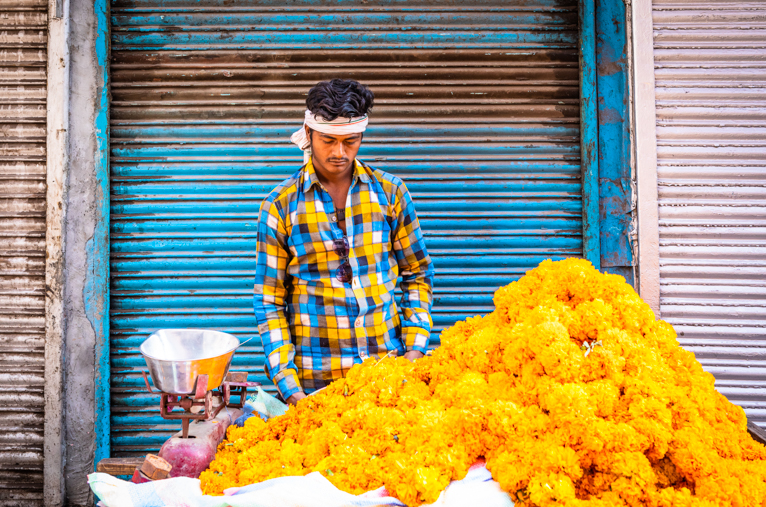
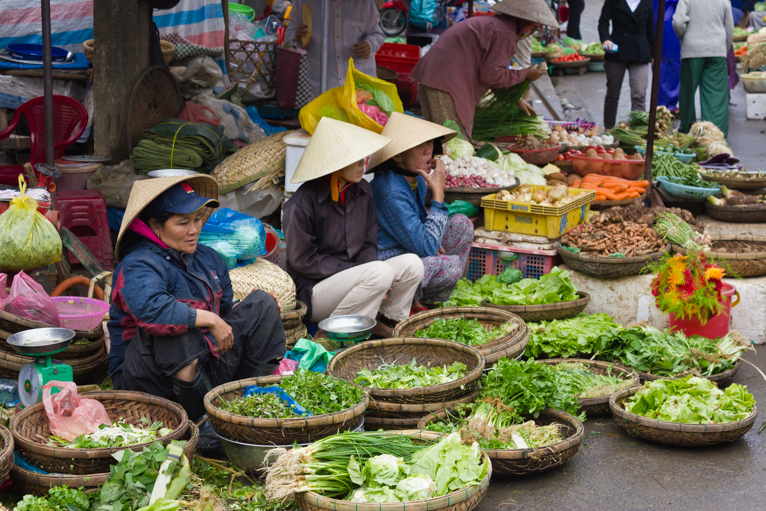
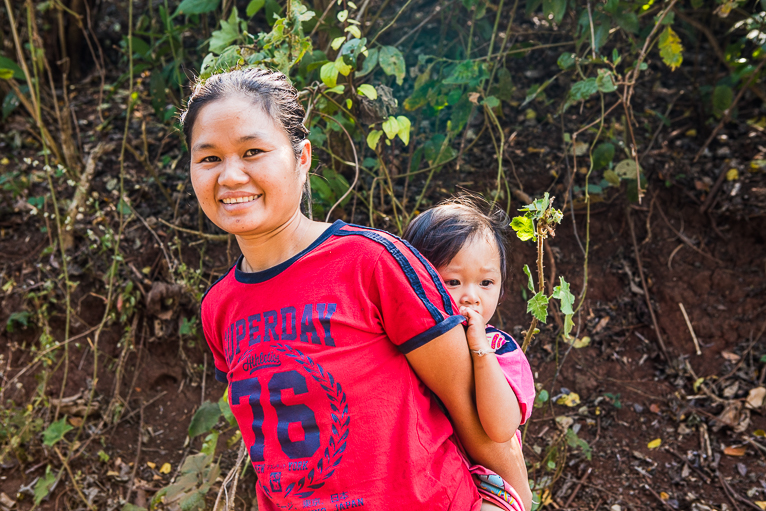
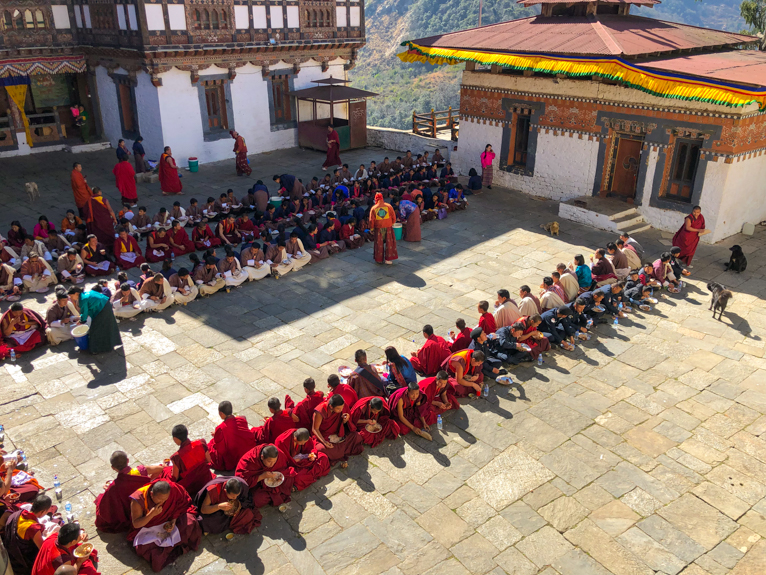
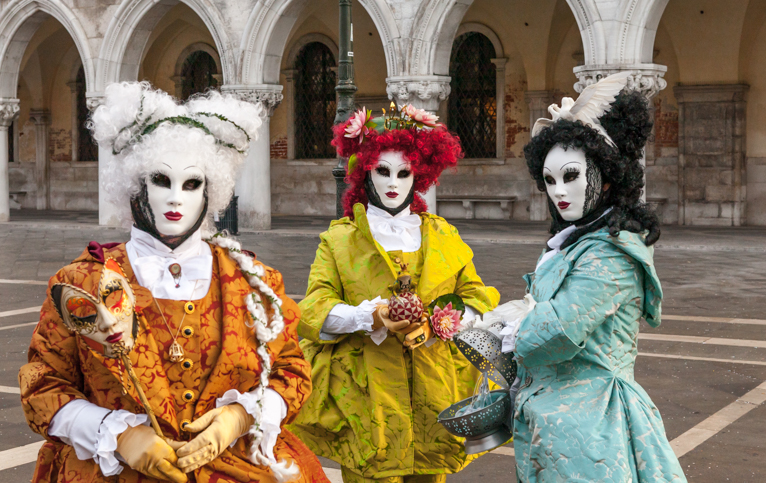
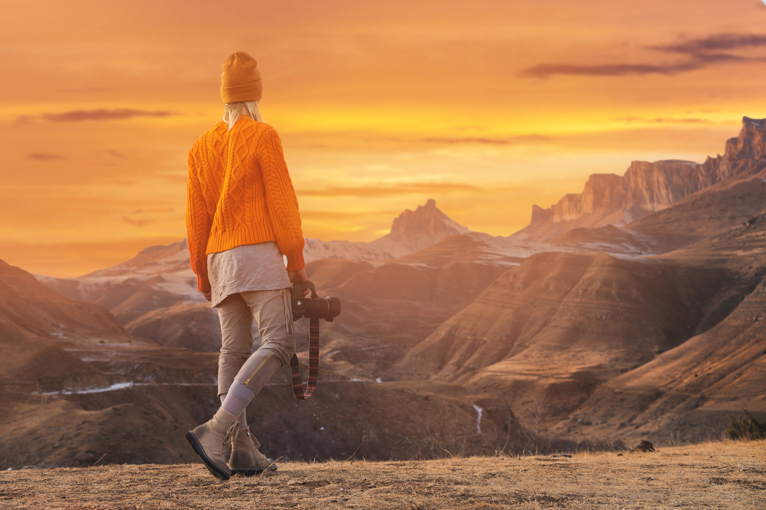
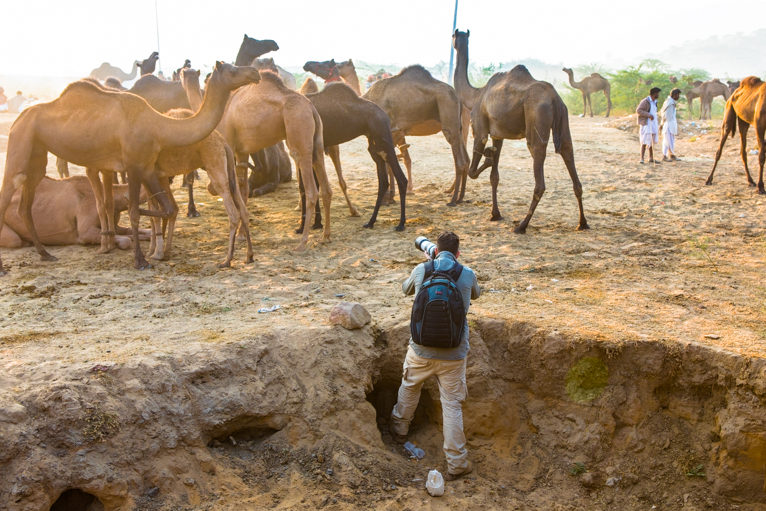
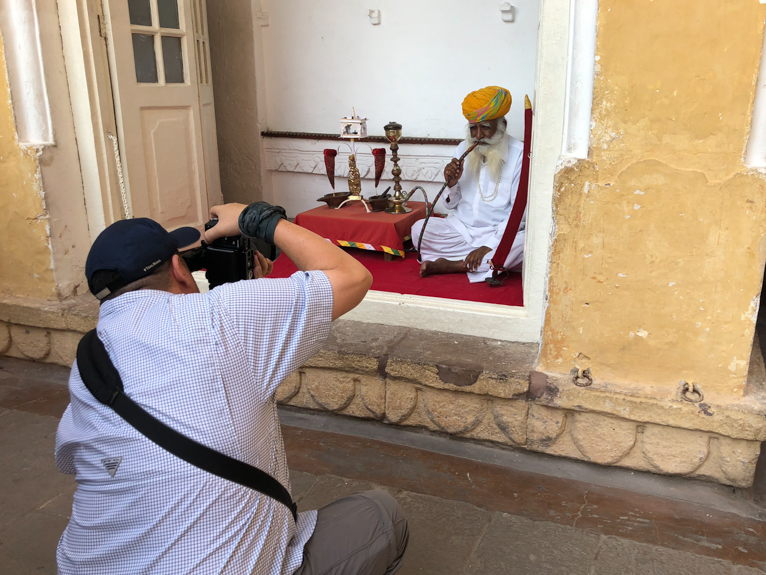
Photograph what you are least comfortable with

Every photographer has strengths and weaknesses. Some are great at photographing people, other photographers, landscapes or wildlife. But everyone has areas of photography that they could improve. Instead of being afraid of these and trying to avoid them, dive in headfirst and immerse yourself in that type of photography. For example, a common issue for amateur travel photographers is shyness in photographing strangers. So instead of photographing people up close or even asking people if they can photograph them, they avoid it altogether. But if you went out and approached 100 people, I guarantee you that you will be more confident by the end of the day in photographing people.

Travel_photography_advice

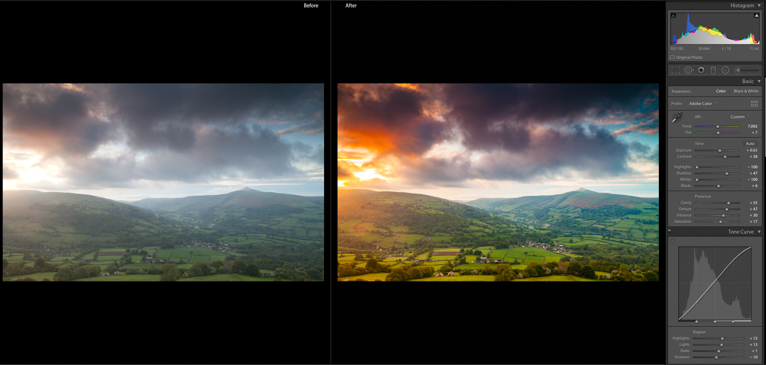
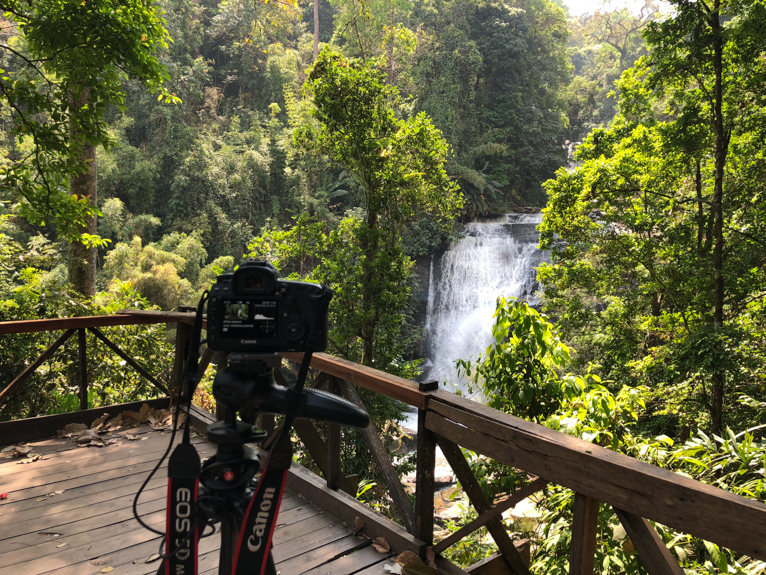
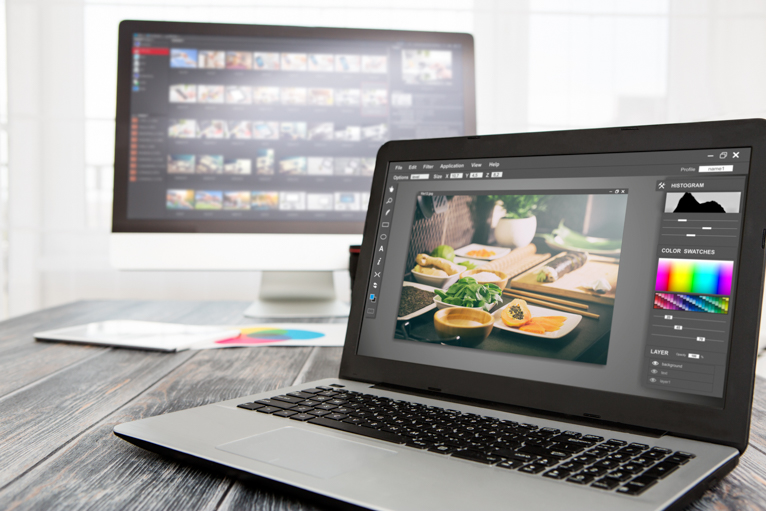
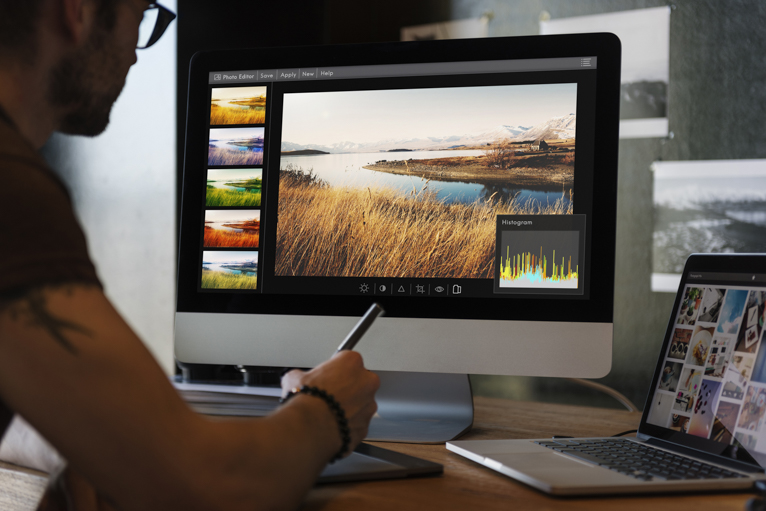
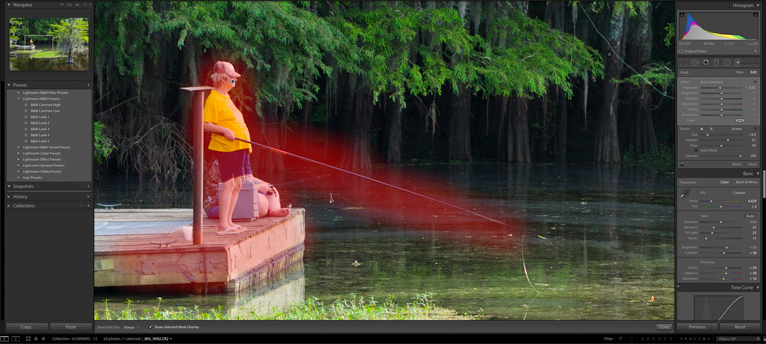
Get it right in camera

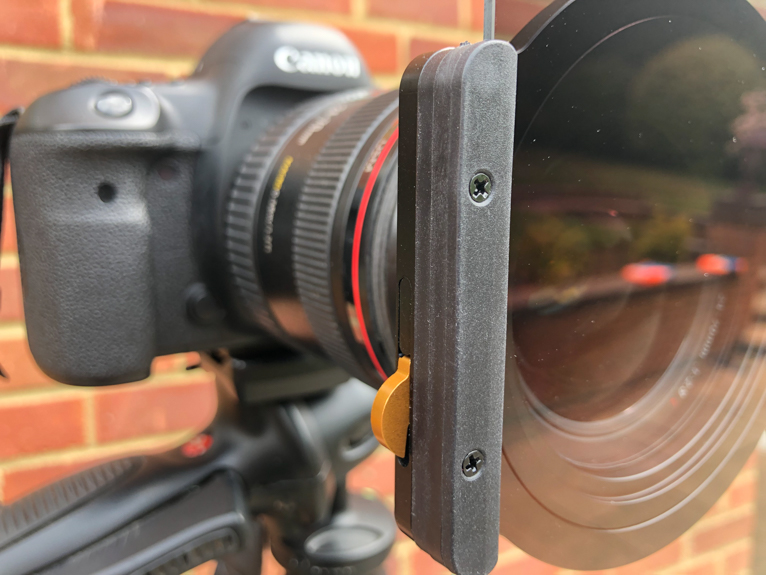
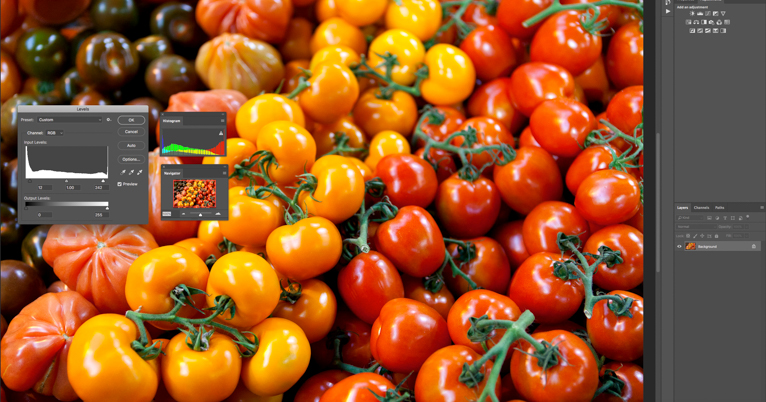
Editing software like Lightroom and Photoshop has revolutionized digital photography. They allow you to do amazing things and transform a photo that might otherwise be ordinary into an extraordinary one. Even with all of this, it is best to capture photos as best as possible when you are taking the photo. Not only will this ensure you understand how different aspects of photography come together to allow you to take a photo, but it will also make you learn more. Try to view post-processing as a way to enhance what is in your photos, not to create them. Which means avoiding that famous phrase “I’ll fix that in post-production”.

Travel_photography_advice

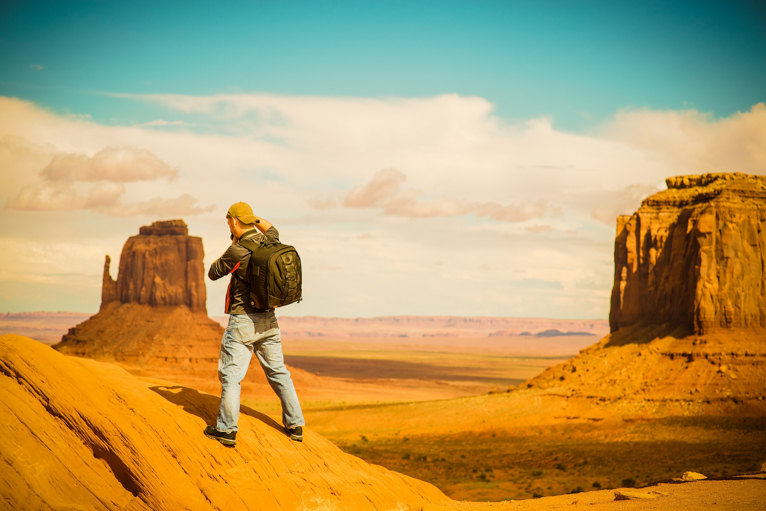
Don’t be afraid to fail

If you want to capture really great photos you have to be willing to take risks. Not life-threatening risks but photography risks. Go out and photograph landscapes when it isn’t blue skies and sunshine. Break the rule of thirds. Play around with your aperture to achieve different depths of fields. Capture portraits in different lighting conditions. Because without trying different things you will just end up with the same photos over and over again.

Travel_photography_advice

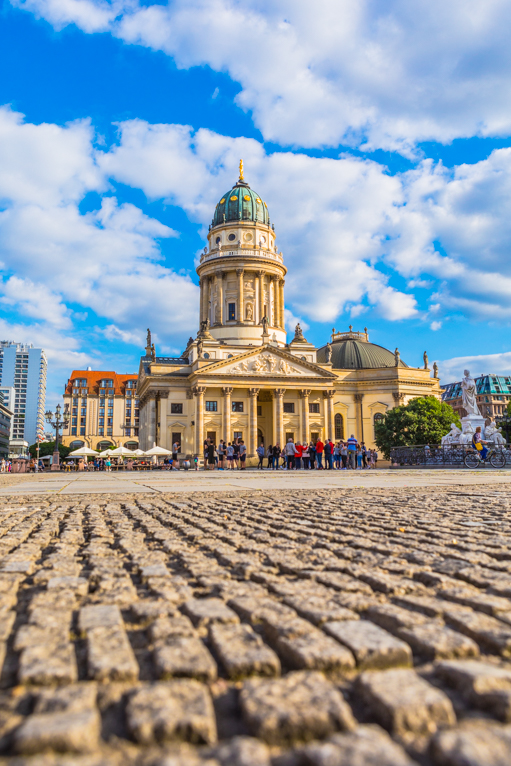
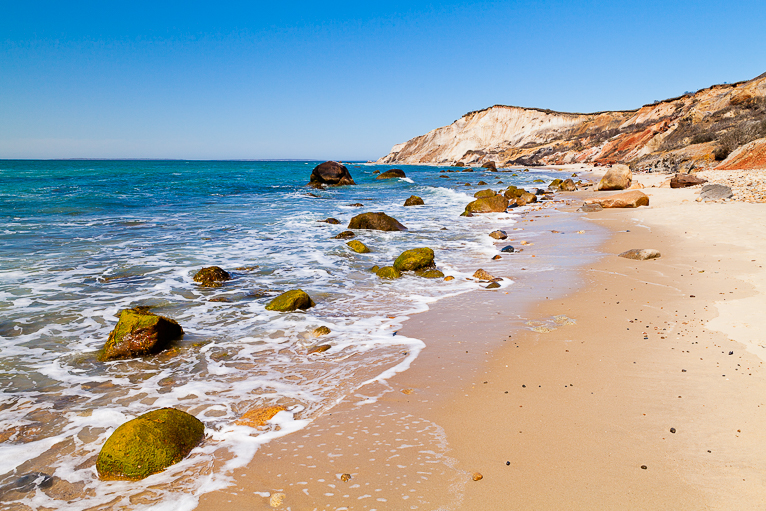
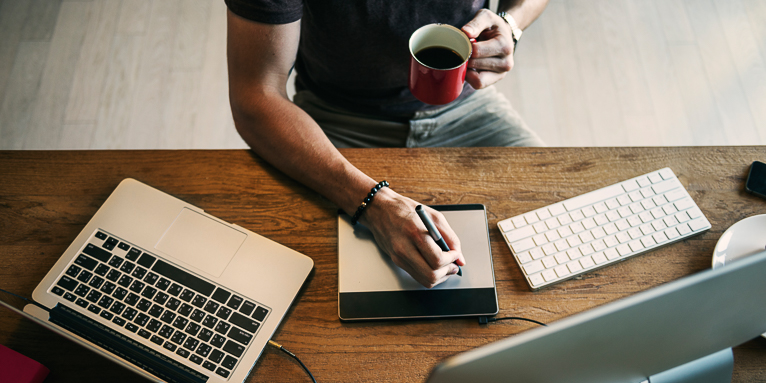
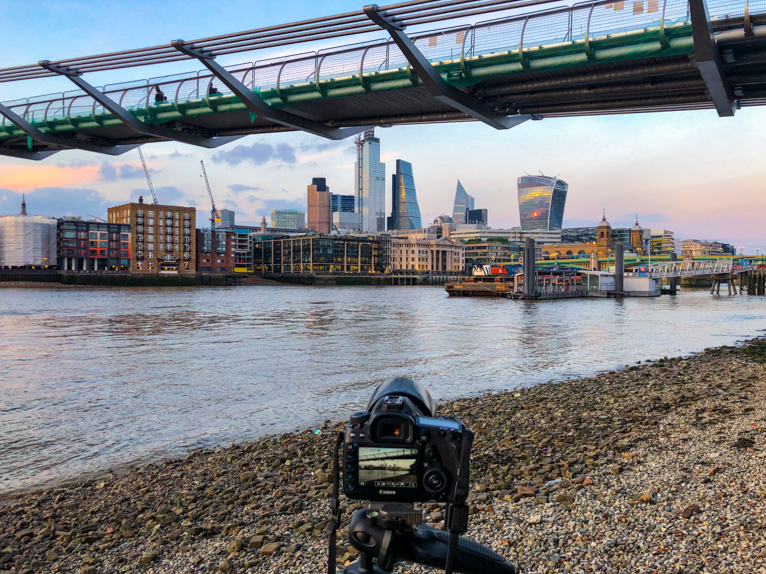
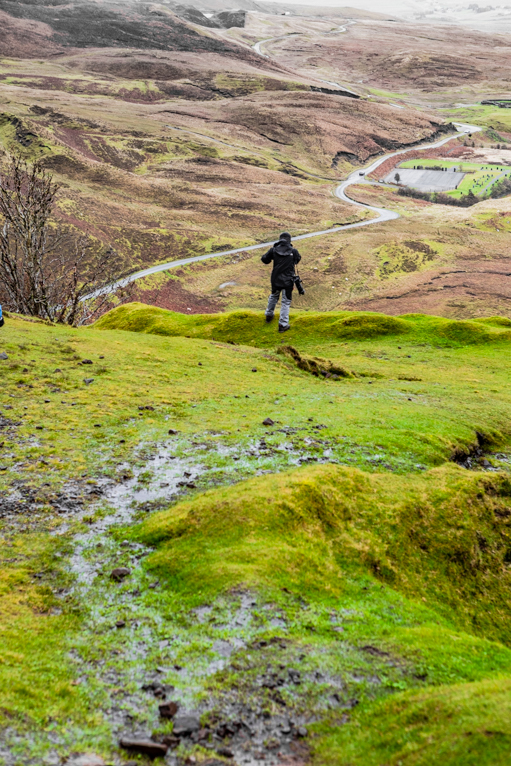
Even changing your camera position (like being close to the ground) can give you a different view.

These are just some of the best bits of advice that I have been given over the years. You may already have some of your own or you may have experienced things that you can pass on to others. The most important thing is to keep learning and improving and build on your experience and knowledge. But for now, you may find these bits of advice as useful as I have done over the years.

Photo credits: Kav Dadfar – All rights reserved. No usage without permission. Dreamstime.

Filed Under: Tutorials Tagged With: Travel photography, Travel photography tips

Improve Your Photography With This Photography Journey

Amateur photographers often ask me what is the best way that they can improve their photography. My answer is always that they should simply take more photos. The thing about photography is that no matter how much you read or how many YouTube videos you watch, nothing beats actually practising shooting different scenarios. Even if you make mistakes or end up with photos that aren’t sharp, you will learn far more from the experience and challenges that you face than watching tutorials.

This is one of the reasons why I always recommend that you try to travel and use the time away to practice your photography. By being somewhere and not being distracted by everyday life you will be forced to try and practice your photography every day. So here is my ultimate bucket list of an around the world photo tour itinerary that will help you improve your photography.

Photogenic_places

1. Home => Scotland

Landscape photography is a good way to begin your photography training. The great thing about landscape photography is that it can be done at a much slower pace than other genres of photography. You can take your time to really think about your composition, experiment with different settings and even try out some accessories like tripods and filters. So the first destination on the list is Scotland.

There are plenty of destinations around the world that offer themselves perfectly to landscape photography. But Scotland has a few advantages over the likes of Iceland or even North America. Firstly because of its size, it allows you to tick off many locations in a short space of time. Which also means if the weather isn’t great in one place, you can easily go to another location.

It also offers very easily accessible locations without the need for special transport like 4WD or snowmobiles. But the jewel in the crown of Scotland’s landscape is its incredible castles. There are not many places in the world that offer the array of landscapes mixed with incredibly photogenic castles. For these reasons, Scotland should be your first stop.

Photogenic_places

2. Scotland => Italy

Next on your incredible photography journey is practising your city photography of which there is probably no better country than Italy. Whether it is Rome, Milan, Florence or Pisa, Italy’s cities are like giant outdoor museums waiting to be photographed. So spend a few days or even weeks finding those famous views and capture the iconic cityscapes in perfect light. You can even explore some of the countrysides and brush up on how to photograph smaller towns and villages.

Try to coincide a visit to Italy with the Venice carnival where the whole city becomes an outdoor photography studio. This is where you can practice capturing stunning portraits either using natural light or by using artificial lighting. The great thing about photographing Venice during the carnival is that you will have a city full of willing models who will happily pose for you to photograph them.

Photogenic_places

3. Italy => Namibia

Now that you have practised photographing people, it’s time to try photographing wildlife. Nowhere on earth offers the breadth of wildlife as you would get in Africa. There are so many options depending on the type of wildlife you want to photograph but, arguably the greatest overall variety of photographic opportunities will be in Namibia. There will be the big five to capture photos of but also amazing world-famous landscapes are thrown in for an extra incentive. In the evenings you can also practice some astro and star trail photography for those once in a lifetime shots that will take your portfolio to the next level.

Photogenic_places

4. Namibia => India

Time to dive into some street photography. There is no better place in the world for that than India. A country that is all about extremes and for a lot of people it can be very overwhelming. But if you allow yourself to fall in love with what it can offer photographically, you may never want to leave. Whether it is the streets of Delhi or the ghats of Varanasi, India is the best place to practice capturing those authentic and candid street photos.

Because of the sheer volume of photographic opportunities, you will have ample time to practice in some challenging conditions. These might include low light conditions, fast-moving subjects or even just the sheer volume of people. Whatever the challenges may end up being, you will become a better photographer after spending some time photographing India.

Photogenic_places

5. India => Vietnam

From the craziness of India to a different kind of crazy in Vietnam. This is where you can bring it all together and practice all you have learned so far. Sure you can practice your street photography in Ho Chi Minh City or Hanoi. Or take cityscape shots in Hoi An and even landscapes in Halong Bay. But you can also begin to practice photographing foods and the incredible and colourful ingredients on offer in one of the many markets in the country.

This is also the place to practice your architectural photography by visiting the many temples in Vietnam. The combination of all of these makes Vietnam one of the best countries in the world for photography.

Photogenic_places

6. Vietnam => Home

Now that you are well practised in most aspects of photography, you can put it into practice in your home country. Wherever you live in the world, the opportunities for photography are there. You just have to be willing to work hard to find them. One of the things that all photographers experience is that they find it easier to photograph other countries than their own. The best way to combat this is to make yourself a shot list of places, ideas or even specific things to photograph when at home. This will ensure that you can continue to put into practice what you have learned.

Photogenic_places

There you have it, an idea of a once in a lifetime trip to inspire and ensure you come back a better photographer. Now, in reality, this will be beyond the realms of possibility for most of us doing it in one trip. So you can still use this as a potential bucket list of destinations. The point of this is to get you to try to think about going to places with specific scenarios and objectives in mind. But mainly to actively use your trips as photography shoots. Because being away and focusing on photography will ensure you get the practice in to become a better photographer.

Photo credits: Kav Dadfar – All rights reserved. No usage without permission. Dreamstime.

Filed Under: Tutorials Tagged With: inspiration, Travel photography

4 Reasons That Your Travel Photos Could Be Letting You Down

Taking a great travel photo might seem straightforward. You turn up to a location take a few shots and that’s that. If only… Great travel photography is a bit more complicated and time-consuming than that. Often newbie travel photographers are astonished at some of the reasons why their photos might not be turning out the way they thought. So, to help you ensure you are not making these mistakes, here are 4 reasons that your travel photos might not be turning out the way that you wanted.

travel_photography_reasons

Not enough time

Travel photography can be the ultimate contradiction. Sometimes you will face fleeting moments that will disappear in the blink of an eye. But more often, you will arrive at a location to find that it isn’t ideal for photography. This might be the light on offer or the weather conditions. It might be that someone or something is in your way. Or it could just be that the scene is missing a vital component to make the composition work (like for example a point of interest). This is where professional travel photographers often differ from newbies or hobbyist photographers. A professional photographer will wait or keep coming back to a location until they get the shot that they want. Whereas all too often I’ve seen some photographers turn up to a location, take a few shots and leave.

So my first bit of advice if you want to capture those awesome travel photos is to simply give yourself more time. I will sometimes just concentrate on two or three locations a day and spend hours waiting for the right moment to take the photo that I want. If you rely on a quick visit and hope to capture a stunning photo, you may be very disappointed. Give yourself as much time as you can at any location to maximise your shoot.

travel_photography_reasons

Didn’t research enough

I recently showed the attendees at one of my workshops my research from a previous two-week shoot in Scotland. They were astonished by the level of detail with one person commenting that it looked like an “encyclopedia”. I spend months researching any given shoot whether it’s a city, national park or country. I will make notes, create maps and mood boards. I will look on social media and contact local guides or businesses if I want access to shoot from their rooftops for example. I will read guidebooks, articles and even watch documentaries about the destination to get a better understanding of the destination. By the time I arrive at the location, I will have a folder full of clear and detailed maps and shot lists that include alternatives if for example my plans are ruined by the weather.

If you want to capture great travel photos you need to try to be the most informed tourist in town. Try to find out as much as possible and build a detailed shot list for your shoot.

travel_photography_reasons

The wrong time

Just because you’ve arrived at a location doesn’t mean it’s the best time for photography. Any outdoor photography relies as much on the conditions as the subject you are photographing. Even the most amazing vista will look dull and uninteresting in the wrong light. Whereas on the other hand even if your scene isn’t hugely interesting, a beautiful light can do wonders. So, the first element that you should always look for when you arrive at a location is the light. Ask yourself if this is the best time to be photographing this location? What is the direction of the light and is it enhancing the scene? You will generally find that early morning and late afternoon light is much better to photograph in than harsh midday sun.

Try to spend a bit of time when you are on location really studying and thinking about how the light is falling in the scene. If you find that you are there at the right time, then shoot away. But if not then be prepared to either wait for the right time or come back.

travel_photography_reasons

Wrong settings

Of course, once you have done all of the things above, it’s important to ensure that you capture the photo correctly. There is nothing more frustrating than looking at a great photo on a computer screen only to realise that it is blurred. But how do you know what setting to use for each scenario? Well, that comes from experience. But if you are photographing something for the first time spend some time reading online articles or watching tutorials so you have a rough idea of the settings that you will need.

travel_photography_reasons

These are by far the most common reasons that I have come across as to why people are often disappointed with their travel photos. The good thing is that all of these are pretty easy to fix and just require better planning, research or some learning. But the results will be great and could transform your photos.

Photo credits: Kav Dadfar – All rights reserved. No usage without permission.

Filed Under: Tutorials Tagged With: beginner photography tips, Better travel photography, Travel photography

6 Attributes You Should Develop To Become A Better Travel Photographer

Becoming a better travel photographer takes time and practice. But you also need to actively try to improve areas that you may struggle with. Some of these areas of improvement will include things like settings and specific scenarios. For example, you may struggle with capturing sharp photos when handholding the camera. So you will need to practice to become better at doing so. But there are also certain attributes that will help you become a better travel photographer. You may already have some of these attributes. If not, try to develop them as they will help you in your photography.

travel_photographer_attributes

Be an early riser

Most travel photographers will tell you that their favourite time for photography is early morning around sunrise. This is mainly due to the soft golden light that appears at this time which can transform a scene. But another reason for getting up early is that you will generally benefit from fewer people being around. Go to a famous landmark in the middle of the day and there will be lots of tourists and visitors. But visit at sunrise and you will only find a handful of people. Obviously there are some exceptions. Some experiences have become so famous at sunrise that they can be even busier than during the day. For example, Angkor Wat at sunrise pulls in huge crowds. But generally speaking, you will find yourself alone in most places early in the morning.

travel_photographer_attributes

Left: Alhambra viewing spot in the afternoon. Right: the same spot at sunrise

Become an explorer

I’ve lost count of the number of times that I have walked down a street in a city and hit a dead end. But I have also on occasions come across some great spots for photos that most people would miss. Part of being a travel photographer is capturing images of already photographed destination and locations in a new way. Sometimes the only way to do this is to explore places on foot to try and find new shot locations. Sure it can be frustrating as you might find yourself walking around and not finding somewhere. But ever now and again you will come across somewhere that gives you a unique shot.

travel_photographer_attributes

Keep a positive attitude

Travel photography can be incredibly frustrating at times. After all, you are at mercy of everything from weather to unplanned closures and construction work. Sometimes even other people (like for example a truck parking in your carefully composed shot). Unfortunately most of the time you can’t do anything about it. So the best way to approach the situation is to keep your calm and be positive about the shots you can capture both at that time and for the rest of the shoot. For example, can you crop out the truck that has parked in your shot? Or can you come back another time? If there’s bad weather, is there something else that you can photograph? Such as museums or parks and waterfalls? The more positive that you are, the more chance that you’ll be able to find those hidden gems to make the best of a bad situation.

travel_photographer_attributes

I was disappointed to see building works on Angkor Wat. But with a careful composition, I was able to capture a good photo.

Leave your “shyness” at home

This is by far one of the most common reasons that amateur photographers give me for not wanting to photograph people. I can certainly understand why people may feel uncomfortable photographing strangers. I always say to people; imagine if someone took a photo of you? Or even if you were asked by someone who wanted to take your photo. Would you be offended or angry? Or would you be flattered? Most people would react in the same way. If someone really doesn’t want their photo taken, they would normally just wave a hand to indicate it. So don’t worry unless you are taking a photo of someone you shouldn’t be photographing, like military or police, you shouldn’t have any issues.

travel_photographer_attributes

Learn to relax

Being a travel photographer can be difficult. You are often getting up early in the morning and usually not getting back to bed till late. You spend most of the day on your feet walking around. Meals become a distraction and so you are often eating as and when you can and there’s no time to just sit by a swimming pool and relax. But whilst you may not be able to relax in the same way as someone who is on vacation can, it is still really important to try and give yourself a bit of time to relax. That might just mean a few hours during the middle of the day to relax and catch up on some sleep. Or it might mean giving yourself a morning off to sit and enjoy a coffee. Depending on how long you are going to be away, having a bit of time to relax is important as it will keep you fresh and able to shoot more.

travel_photographer_attributes

Get into a routine

When you are on location, it is important to ensure that you don’t forego some of the admin and maintenance parts of the process. For example, you need to ensure that your camera equipment is in working condition and clean. So get into the habit of giving your lenses and camera a wipe every night. They will no doubt get dirty from the dust and smog in a city. Or make sure that you charge all of your batteries and clear your memory cards by backing up your photos on a hard drive. You can also give your filters a clean and even prepare for the next day by packing your bag, checking your shot list locations and laying out the clothes you will wear. By getting into a routine you won’t suddenly find yourself running out of batteries or memory card space.

travel_photographer_attributes

Travel photography is such a rewarding branch of photography that everyone does it to a certain extent. But beyond your skills as a photographer, you also need the skills above to be able to maximise your creative output when on location.

Photo credits: Kav Dadfar – All rights reserved. No usage without permission.

Filed Under: Tutorials Tagged With: Better travel photography, travel photographer, Travel photography

How To Take Great Photos At The “Wrong” Time

“There is a perfect time to photograph anything”. It is one of the earliest things that I was taught as a photographer. But for anyone photographing outdoors, you will certainly know that you can’t always photograph things at the perfect time. Be it the weather or even a lack of time, sometimes you have to try and do your best to capture the best possible photo you can in the conditions you are presented with. So if you have struggled to capture the photos that you want to take at the “wrong” time, then this short guide will help you.

wrong_time_photography

What is the “wrong” time?

One of the common questions that I get asked is “what do you mean by the wrong time”? This can mean several things. For example, the wrong time can be at a certain time of the day when the light doesn’t fall correctly on the subject. Or it could be at the wrong time of the year when for example the conditions are not right (i.e. flowers haven’t blossomed). There’s also the factor around the colour and intensity of light that changes throughout the day. All of these are an example of when you may potentially be photographing something at the wrong time.

wrong_time_photography

Point away from the harsh light

One of the issues of photographing during what might be perceived as the wrong time is the harsh light that you might encounter. This is something that you might experience, say around the middle of the day. With the sun being overhead, it creates a harsh light that will wash out shadows and create a flat scene. But you can still capture good photos during this time. You just need to ensure that you are pointing away from the light source. For example, if the sun is overhead but slightly to one side, photograph something so that the sun is behind you. You can often still capture nice shot if you do this but just avoid looking in the direction of the harsh light.

wrong_time_photography

Bring out details in the clouds

A real bugbear of any outdoor photographer is overcast cloudy conditions. The blanket of cloud acts as a diffuser that mutes colours and removes shadows and so it can make a scene seem flat and uninteresting. Incidentally, this is a great time to take photos of food and also portraits of people. The flat light allows you to capture an even exposure across the subject which is perfect for food and people photography where you want to avoid harsh shadows. But if you are photographing a landscape scene for example the flat light can be very frustrating.

One way that you can liven the scene up a little is by trying to bring to life the details in the sky. Often overcast skies will have tones of greys which can help you add some depth to your image. If you are lucky enough to have some storm clouds, then even better. The best way to bring out the details of the skies is to use graduated neutral density filters to darken that area whilst keeping for foreground brighter. You can then push this a little further by selectively editing in post-production.

wrong_time_photography

Switch your composition

While a blanket of white cloud can be frustrating, so can a completely clear sky in the sunshine. You often have to think carefully about your composition when there is no interest in the sky. In this case, your foreground becomes more important as you may have to position your horizon line near the top of your image (to minimise the sky). This will help eliminate the boring blue sky and hopefully allow you to feature some interesting foreground points of interest. Things like rivers, rocks, buildings, trees, people and even roads can be more interesting than just a blue sky.

wrong_time_photography

Go for a really long exposure

A good technique for some occasions when the conditions are not perfect is to look at doing something more creative. Long exposure photography is a really interesting way of adding some extra dynamism to your images. For example, you may be able to get some streaks in the clouds which can bring the sky to life. Or if there is moving water in the scene, the long exposure will blur and soften it out. Even the movement of cars and people can help add an extra element to your photos.

wrong_time_photography

Zoom into a section

One way that you can almost take the conditions out of the equation is by zooming into a small section of a bigger scene. This works well if you some interesting colours or patterns like the image below. The colours of the trees make this image interesting even when the light was pretty flat.

wrong_time_photography

Give your photo a different treatment

If you are efficient in using photoshop, Lightroom or any other post-processing software, you can always look to give your photo a different treatment to what you do normally. For example, you can mute colours so that only certain ones pop out. You can convert to monochrome or even bleach a photo to give it a different look. Don’t be afraid to play around in post-production on your images, you never know, you may just turn a photo that you didn’t think much of into something great.

wrong_time_photography

In an ideal world, you will always be able to photograph things at the best time in the best possible light. However, that isn’t always possible for an outdoor photographer. Even as a professional photographer you won’t have unlimited time to be able to capture the shots you need. So sometimes you just have to try and make things work. The good news is that you can take great pictures in any condition. Use the tips above and you’ll begin to discover how.

Photo credits: Kav Dadfar – All rights reserved. No usage without permission. 

Filed Under: Tutorials Tagged With: landscape photography, Outdoor photography, Travel photography

Avoid Disappointing Travel Photos With These Tips

Travel photography is something that everyone participates in. From your average tourist who has a point and shoot camera to a hobbyist or even semi-professional photographers. It is one of the fundamental parts of travelling. As a travel photographer, you will be looking for more than just holiday snaps. You’ll want to take the type of photos that will inspire people to travel to that destination and tell a story. So if you have ever been disappointed in your travel photos, fear not. Here are 6 tips to help you capture great travel photographs.

travel_photography_tips

Show an experience

One of the common mistakes that people make when it comes to travel photography is missing the type of photos that show an experience. For example, a photo of the Eiffel tower will look great. But on its own, it’s simply an observation of the place. But add a couple of photos of people’s experience around the Eiffel Tower and suddenly you have a story of the place. This could be as simple as a couple sitting and enjoying the view. Or a cyclist riding under it. These types of shots help you to capture more unique photos of places that have been photographed millions of times and give a much more rounded picture of the destination.

travel_photography_tips

Stop getting mesmerized

We are all guilty of it… You walk up to that famous landmark that has been on your bucket list for years and you can’t see anything beyond it. It is almost like you become unaware of anything else. While that’s understandable and you should absolutely photograph the main subject as much as you want, you also need to try and pull yourself away to see the bigger picture. By stopping and looking around you will often find a whole host of other less obvious photo opportunities. From close-up details to the potential viewpoints that might give you a different angle of the landmark, try to see beyond the main attraction. You might just end up with a photo that is completely unique.

travel_photography_tips

Slow down and take a breath

I am always amazed when I see people rushing around like headless chickens taking photos at any location. They can’t possibly be thinking about the shots properly or composing them in the best possible way. It is more about just ticking off the shots than making each photo the best that it can possibly be. Don’t be one of those photographers! Instead, train yourself to slow down and take in what is in front of you and really thinking about the scene. Work out the best angles and the settings that you may need. Try to picture the photos you want to take in your mind before lifting the camera. Once you have taken a set of photos, go back and start again. You’ll be amazed at how often you will end up with better photos the second time around. This does, of course, mean that you need to give yourself more time at a location than the average tourist. But it will be worth it for the photos you capture.

travel_photography_tips

Use the resources available

I often talk about the importance of research before any shoot. It is the basis of any successful photography trip and without good research, you are not going to get the photos that you would want to capture. But one of the great advantages that photographers have these days is that they have so many more resources for research. Beyond just searching on the internet there is also Google Maps that can be invaluable in giving you the exact spot you need to be at for a shot by using street view. Google Earth is also incredibly useful for anyone wanting to see what an elevated view would look like when using a drone for example. Beyond these, there is also social media. It is an incredibly useful source of information where you can often get insider information from locals on potential shoot spots. So learn to utilise all of the resources available to you to plan your shoot.

travel_photography_tips

Visit out of season

If you go to any famous photography destination at the recommended time of year, you will no doubt be joined by loads of other photographers. That shouldn’t discourage you, but it does mean that you are likely to end up with photos that look like lots of other photographers. But go to that destination at a different time of year and you might just end up with some truly unique photos that very few other photographers might have. For example, everyone has seen plenty of photos of the Eiffel Tower in beautiful sunshine and blue skies, but on a snowy day, well that is something that is more unique. So don’t be afraid to go to places out of season. It will be cheaper, less crowded and give you different photos.

travel_photography_tips

Learn to edit effectively

Some photos require very little editing. Others might need more. But one thing is for sure that every photo will benefit from some level of editing. How much will depend on the type of photo and also what you are hoping to achieve from that photo based on your style and vision. But learning to edit your photos effectively can open up new possibilities in being able to improve your photos. I would always recommend trying to capture a photo as best as you can in-camera. This will save you a lot of time and effort in post-production. But sometimes that isn’t possible and you need to adapt the photo to make it work the best you can. This could mean converting a photo to monochrome or even bleaching colours for a different effect. The more you know about editing the more you can adapt your photos during the shoot when conditions dictate a different look and feel.

travel_photography_tips

Travel photography is a wonderful genre of photography to be involved in. But it can also be incredibly frustrating as you are always at the mercy of the elements and the scene in front of you. But with a little bit of planning and by using the tips above you will be sure to see an improvement in your travel photos.

Photo credits: Kav Dadfar – All rights reserved. No usage without permission. Dreamstime.

Filed Under: Tutorials Tagged With: Destination Photography, Travel photography, Travel Photos, Unique travel photos

A Brief History Of Travel Photography

Almost everywhere you look today; you will see virtual treasure troves of people’s travel snapshots. It is safe to say that travel photography is quite a popular niche in today’s travel industry, but this wasn’t always the case. Before the high-powered smartphone cameras, expensive modern DSLR photography equipment, photo-editing software, and photo-sharing platforms travel photography wasn’t a thing. As the world moves forward at a dizzying pace where travel and photography firmly carve a niche in our daily lives, it’s worth taking a quick look at how this all started to appreciate how far it has come.

By Maxime Du Camp (Public Domain)

The early days of photography

During the early days of photography, taking and developing photos wasn’t necessarily seen as an art-form but more of a technical innovation given the hoops that travel photographers had to go through to take a picture.  It was such a massive effort to take these photos, and you can see for yourself that the quality of said photos wasn’t the best.

They worked with what they had, and that’s what mattered at that time unless you like looking at photos of un-smiling people with no thought to angles or lighting whatsoever.

In its early days, photography was used as a way to capture portraits and memories, and considering how cumbersome the equipment was, there was no way to bring it around during times of travel, so no actual travel photos were taken.

As with anything that was invented, people sought to make improvements, and as people began to see the real potential for photography, leaps and bounds were made to make it easier to bring around and use.

Travel-Photography-History

Photographer unknown) – Salford (Public Domain)

John Thompson

One of the pioneers of travel photography was John Thompson. A Scottish photographer who was one of the first to travel to the Far East. His images of the people, landscapes and historic sites captivated people upon his return home. It was also his images which were the first instance of social documentary photography which would later form what we regard as photojournalism.

Travel-Photography-History

John Thomson (British, 1837-1921). Island Pagoda, about 1871, from the album, Foochow and the River Min, Published in London, 1873. Peabody Essex Museum, Salem, Massachusetts. (Public Domain)

The early tourism boom

As photography technology developed and blossomed, so did the tourism industry, but at this time, only the rich could afford the prices travel commanded. Then more efficient modes of travel were invented, and it became accessible to a broader range of consumers. So much so that one didn’t have to be filthy rich to see the world anymore. As more and more people traversed the world, this created a demand for a better way to chronicle their travels when mere words weren’t enough to capture the splendour of faraway places.

Travel-Photography-History

By Maxime Du Camp (Public Domain)

Tourism and photography

It’s hard to say which one spurred the growth for the other, but it is safe to say they each had a hand in the popularity of the other. As more and more travelled, this created a demand for photographs of people’s travels, and as people were shown images of exotic locations in far off lands, their wanderlust was stoked; there was never a more perfect pair.

While speaking of perfect pairs, one of the very first photography expeditions was undertaken by a couple of Frenchmen called Maxime du Camp and Gustave Flaubert. These two travelled to North Africa, and the Middle East, wherein the photographs they took gained them instant notoriety when they returned home.

Travel-Photography-History

By Maxime Du Camp (Public Domain)

Notable early Cameras and their creators

Where there are photos, there are cameras. In 1839, Louis Jacques Daguerre created the daguerreotype, which was a type of photographic process that made travelling and taking images a more feasible method.  That invention allowed early travel photographers to bring their travel photography equipment with them but had the downside of long exposure times and a lack of negatives, which made it less attractive to commercial travel photographers. After all, no negatives meant they couldn’t reproduce prints for commercial distribution.

Then, the real breakthrough happened in 1888 when a certain someone named George Eastman invented the very first point-and-shoot camera. Photography enthusiasts will be familiar with him, but to those who may not know, George Eastman founded Kodak and wanted to bring photography to the world and make a profit. Selling and developing films was a big money-maker for Kodak.

Travel-Photography-History

George Eastman. Published by B. C. Forbes Publishing Company, New York, 1917 (Public Domain)

The very first point and shoot didn’t quite have the features that the cameras today have, far from it even. But what photography lacked in quality, it more than made up for in portability and made photography more accessible to budding photographers.

These point-and-shoot cameras proved immensely popular. One of the most popular models was the Kodak Brownie, which had no aperture control, no focusing functions, and had a fixed shutter speed. It was little more than a box wrapped in leather for added grip.

It sounds insignificant to the cameras we have today but make no mistake, the Kodak Brownie brought photography to the world because it was cheap. It was easy to use with illustrations explicitly created to cater to a young audience.

Travel-Photography-History

Kodak No. 2 Brownie Camera. By Alex Borland (Public Domain)

Travel safaris and photography

You have no doubt seen old-time photos of people on Safaris, and chances are some of those were taken by a Kodak Brownie or another make of camera, but the point is, people then loved taking their cameras to safaris. Documenting their travels through the African jungles and savannahs has provided modern-day photography enthusiasts with a myriad of exotic landscape and animal photos that are equal parts beautiful and disturbing.

Old black and white photos of hunters with big cats and dead elephants are shocking to look at these days but were one of the reasons behind photography becoming a way of documenting a holiday.

Travel-Photography-History

Photograph of Ernest Hemingway on safari in Africa after making a kill. By unattributed – JFK-EHEMC (Public Domain)

Modern Travel Photography

These days, travel and photography no doubt go hand in hand with people being able to access super-powered and feature-packed cameras and smartphones that can edit photos and connect to the internet to publish photos in an instant. Where plane tickets can be scored for pennies, if you are savvy enough to hunt down all the best deals, it is easy to forget how far the world has come since the days where cameras had to be stationary. No negatives were produced. The first point-and-shoot was a box that needed the perfect conditions to take good photos.

Travel-Photography-History

By Kav Dadfar (All rights reserved. No copying or republishing)

It is fascinating to see where travel photography will go next and what wonders it will continue to show the world as it too evolves and changes. But there’s no doubt about it, with technology advancing and cameras become more powerful, cheaper and accessible, the boom in travel photography may go on for a while longer.

Filed Under: Tutorials Tagged With: History of Travel Photography, Photography History, Travel photography, Travel Photography History

6 Easy To Remember Checks To Make For Better Travel Photos

Capturing great photos can be the easiest yet most complicated thing to master. But every photo will have certain elements that combine that make it great. It’s these combinations that are the anatomy of a great photo. So, if you have ever been disappointed with your photos here are 6 easy to remember checks to ensure you capture the best photos that you can get.

Easy-photography-checks

Is it the best time?

There is a perfect time to photograph everything. Often this is the biggest feedback that I give to people when they ask for their images to be reviewed. The fact that they haven’t taken the photo at the best time is what is holding that photo back. This isn’t just about the season, because that doesn’t necessarily make a photo fail. For example, whilst a stormy sky might not be the typical postcard beach shot, it is still possible to capture stunning photos in these conditions.

So, the best time is more around light and whether you are capturing something during the best time in the day. Light changes throughout the day both in terms of quality and intensity. But also, the direction of the light changes as well. So always ask yourself if you are taking the photo at the best possible time. If not aim to do so.

Easy-photography-checks

Have you committed to the image?

A great habit to get into is to commit to the shot that you are taking. Too many times I have seen people turn up somewhere take a couple of quick photos and move on. When you decide to add something on your shot list you should aim to capture the very best photo possible. Forget about everything else and just concentrate on capturing the best photo possible at that place however long it takes. Often this will just happen with more time at a location. The more you wait and look around the more you will see and notice things. You may even spot things that you didn’t even see initially. So, before you leave any location ask yourself if you have managed to capture that one iconic shot that encapsulates it.

Easy-photography-checks

Did you look beyond the obvious?

It’s a natural reaction to take the obvious photos. In fact, there is nothing wrong in doing that and you should cover off as many angles and compositions as possible, including the obvious shot. But the key is to also try to look for something different. Maybe a unique angle or even just an unusual time. For example, every photographer is guilty of taking photos at eye level the vast majority of the time. But get lower to the ground and the same photo will look completely different. Or find something like trees or arches to naturally frame your composition. These will give your photos a completely different look.

Easy-photography-checks

Is there a reason for the photo?

The best photos often tell a story. They can captivate the viewer into wanting to know more. So, whilst there is nothing wrong with a beautiful picture of the Eiffel Tower, to make your work stand out you need to also supplement that with other photos as well. So, try to always ask yourself when you are at a location what the story is that you are trying to tell. A good way to do this is to try to imagine the story being used somewhere like a magazine or newspaper. This should help you visualise the end product and give your photo more context.

Easy-photography-checks

Are you using the necessary accessory?

It can be easy to feel lazy and decide to take a photo without using the accessory that you should. For example, a tripod is heavy and cumbersome to carry so why bother when you can simply bump up your ISO? Or why use a neutral density filter to be able to have a longer exposure when you can just take a photo without it? Unfortunately, there is no way around it, if you want to capture great photos you have to be willing to use the ideal equipment for it. So, whilst bumping up your ISO to avoid using a tripod is an option, it will mean more noise in your photos. Too much noise and your photo will begin to look soft. Don’t be lazy, instead think about the end result.

Easy-photography-checks

Have you added the finishing touches in post-processing?

There are some people that think that any sort of editing of photos is cheating. But even the likes of Ansel Adams would use techniques such as dodging and burning to enhance the final photo. Whether you are a fan or not, editing your photos by enhancing colours, boosting contrast and adjusting the brightness is all part of the photography process. Because as advanced as modern-day cameras are, they are still no match for the human eye. So, to be able to replicate what you see in a photo will require some form of post-production.

Easy-photography-checks

The next time you are about to take a photo, ask yourself if you have taken the time to consider the points above. Doing so will help you end up capturing better and more unique photos. But if there is one thing you should remember it is to never settle for a photo. Make every photo the best that it can be.

Photo credits: Kav Dadfar – All rights reserved. No usage without permission. Dreamstime.

Filed Under: Tutorials Tagged With: Photography Checks, Travel photography

8 Things That You Learn When You Become A Professional Travel Photographer

Becoming a professional travel photographer is for many a dream job. After all who wouldn’t want to be paid to travel the world to take photos for a living. How hard can it be? The reality of being a professional travel photographer is very different. Whilst there are lots of positives there are also a lot of negatives that you learn through the years. So, here are 8 things that you learn when you become a professional travel photographer.

Professional-travel-photographer

It is not a free pass to travel the world

Often the first thing that hits people when they decide to become a travel photographer is that it isn’t going to suddenly mean you are going to be travelling the world for free. Unfortunately, it is becoming more and more competitive these days and with falling fees, the golden age of being commissioned for thousands of dollars for a feature are long gone. So, don’t expect clients to be knocking down your door to send you to exotic places.

Professional-travel-photographer

It’s not a holiday

It dawned on me pretty early in my career how different a photography trip or assignment was to a holiday abroad. For one, you are pretty much always short on time and having to survive on just a few hours’ sleep a day. There are also the missed meals not to mention the blisters and aches and pains from walking around all day with a heavy backpack. On top of all of this, there is also that sense of loneliness. There is no time to lay by a pool or spend an afternoon in a bar. Your entire focus and energy will be spent on capturing the next great shot.

Professional-travel-photographer

You become a CEO and cleaner

Most people don’t realise that to become a successful travel photographer you have to become a one-man company. That means you are the CEO, the Finance Director, Marketing Manager and even the cleaner. You have to be willing to get out there to get clients and devise marketing and promotional strategies to get more work. You need to learn to do everything from expenses to research and logistics. You’ll also have to clean your camera equipment and workspace whilst answering every day emails from clients. It’s not just a full-time job, it’s a full-time job of an entire company.

Professional-travel-photographer

It’s an easy job

When you tell people what you do, most will look at you through the eyes of someone who thinks what you do is easy. After all, it’s not a real job it’s just a holiday! After a while, you won’t bother responding and will just leave people to think what they think. You will need to develop a thick skin as there will be a lot of people ready to try to knock you down.

Professional-travel-photographer

You need to have your finances in order

When you first transition to becoming a pro photographer you automatically assume that your first paid gig will be just around the corner. But in reality, paid work can take a while to begin to come through and even then, don’t expect to get rich. So before quitting your day job to pursue becoming a professional photographer make sure you have enough money saved up to keep you going for a few years. But not only that, but you also need to factor in expenses such as marketing and even going on trips yourself. Because you won’t get any work without some marketing and promotion. So, make sure you are prepared financially.

Professional-travel-photographer

Everyone will want to offer you credit

The number of times I have been told by a client “we don’t have a budget, but we will credit you instead”. To be honest that should an absolute minimum offer even if you are paid for your work. Unfortunately, these days most clients don’t appreciate the value of photography. With stock agencies around which offer free images, it’s easy to understand why. Whether you decide to go down that route of offering your work for free is ultimately up to you. But consider this. If you don’t value your work enough to get paid for it then why would someone else? At the very least try to strike a deal to get paid even if it’s a small amount. That will at least show the client that you value your own work.

Professional-travel-photographer

Other photographers won’t bite

Photography is a lonely profession and most photographers are wary of sharing any info with other photographers. But if you can find a few likeminded individuals and share information, help each other and even team up you will often find that you will all end up being more successful. But it has to be a two-way street you have to be able to offer something in return even if it’s just hard work.

Professional-travel-photographer

It’s the best job in the world

From the above, it sounds like no one should ever become a travel photographer. On the contrary, being a travel photographer is one of the best jobs in the world. For all of the hard work and uncertainty, when you do capture that amazing photo it makes everything worthwhile. But when that photo goes on to be sold to a client, well there aren’t many more satisfying moments in a photographer’s career.

Professional-travel-photographer

Becoming a travel photographer is easy but actually making money from it is tough these days. But with hard work and persistence and as long as you are willing to accept the ups and downs, there are opportunities out there. In the meantime here are 8 things that you will learn for yourself along your journey.

Photo credits: Kav Dadfar – All rights reserved. No usage without permission. Dreamstime.

Filed Under: Tutorials Tagged With: travel photographer, Travel photography

How To Make Your Travel Photos Unique

One of the biggest challenges as a photographer these days is capturing unique photographs of places and landmarks that have already been photographed millions of times. Whilst there is no doubt that it is becoming increasingly difficult to capture unique photos, with a little bit of research, planning and creativity you will be able to capture photos that are different. So here are 6 tips on how to capture unique travel photos that will stand out against the crowd.

unique-travel-photos

Go to undiscovered places

The most obvious answer on how to capture unique photos is to go to places that other people don’t go to as much. For example, trying to photograph the Eiffel Tower in a new way is going to be much more difficult than capturing unique photos of a destination which is off the beaten path. Despite all of the travelling and Instagram photos that exist these days, there are still pockets of places in the world where they are simply not as popular for tourists and photographers to go to. Sometimes this is because these places require a lot of effort to get to (a waterfall that requires a four-hour hike is going to more secluded than one that is next to a big car park). At other times you have to be specially trained to be able to get to some of these places. But there are also places that are simply local to you that you will know and have a far better knowledge of than the masses. So always be on the lookout for potential places that are not the regular well-known photo spots that you can capture photos of.

unique-travel-photos

Find a different view

Another option for capturing unique photos of already well-photographed places is to try and find a new view or somewhere that will give you a different angle to what you already know and have seen. This may not be as difficult as you may think because even in big cities there are often places that are simply not as well known as the usual popular spots. The other benefit of photographing in cities is that there are always new places opening up offering rooftop views of the city. So there are always potential unique places. But granted they won’t stay unique for long.

Even in the wilderness photographing well-known natural landmarks do offer the opportunity for unique photos. Often the most popular and easy to photograph viewpoints are simply the ones that are most accessible for the masses. So if you’re willing to work hard and put the extra effort needed into a shoot you may be able to find other locations that you can hike to for a completely different view and perspective of what everyone else sees.

unique-travel-photos

A different view of Alhambra in Granada.

Try to photograph people

The best way to capture completely unique photos is to try and include people in your shots. Whether that is to make the person central to the actual photo or to use them as a point of interest in a bigger scene. The thing about photographing people is that every single person is unique and so capturing photos of people straight away gives you the added advantage of a unique look, style and even feeling that a person could portray. If you want to take things further and give yourself even more unique photos you could aim to photograph festivals, events and carnivals that are often steeped in history and tradition. Whether it’s a religious festival or carnival these events offer fantastic opportunities for unique photos.

unique-travel-photos

Develop your own style

Over time you will notice that most photographers will develop their own style. Often this is what makes their photos unique to the ones from other people. In fact, you could send two photographers to the same location and they would probably come back with different results. So one way to make your photos unique from other peoples is to develop your own style. Once people become familiar with your style, as soon as they look at your photos they will immediately be able to tell yours apart from other peoples. This is something that will happen naturally over time as you develop your own way of working and your own preferences in what and how to photograph things. A good exercise is to look at a selection of your photos And see if there is a common style that runs through them. If there is, then that is your own style that has started to develop.

unique-travel-photos

Go at the “wrong” time

Okay so there isn’t necessarily a completely wrong time to go somewhere but there is a time which isn’t the usual time that most people will photograph a scene. For example, if you look at beach photos the vast majority of the time you will see them basking in beautiful blue skies and golden sunshine. But photograph a beach in stormy weather or in winter when it is snowing and it will give you a completely different photo. Even the most well-known of sites can be photographed completely differently when there are different conditions happening at the scene. So always be on a look-out for those “wrong” times where the conditions might transpire to give you completly unique photos.

unique-travel-photos

Art direct your shots

Art directing is a term that is used quite frequently in the world of advertising. This is when the photographer is briefed on exactly how the creative team who has come up with the advert wants the photo to look. This may even involve the creative team sketching out what they want for the photographer to follow. Art directing your shots is another way that you can attempt to give your photos some uniqueness. For example, photograph a normal street scene and you will probably end up with photos that look just like everyone else’s. But now get a colleague to drive a red campervan in that street and suddenly you have a completely different and unique photo. Clearly this isn’t always feasible but sometimes there is the opportunity to use people you are travelling with or even friends and family to be able to do this for you. The key is to make it look natural But if you can do that it will give you a completely unique photo.

unique-travel-photos

Capturing photographs which are unique isn’t easy these days. But that shouldn’t stop you from trying. With a little bit of research and hard work and some out of the box thinking, there are still opportunities out there to be able to capture unique photos. That includes already well photograph places. The 6 tips above should help you on your way to being able to capture unique photos.

Photo credits: Kav Dadfar – All rights reserved. No usage without permission. Dreamstime.

Filed Under: Tutorials Tagged With: Travel photography, Travel photography tips, Unique travel photos

8 Of The Most Photogenic Cities In Europe

Europe is a fantastic continent for photographing cities. With so many iconic places in such a compact space, it’s no wonder that it has such a high number of visitors each year. The thing that makes Europe so special is that there is such a diversity in these cities that it makes them all so different. From the classic beauty of Rome to modern London, if you want to photograph the most photogenic cities, a trip to Europe is a must for any travel photographer. Here are the 8 most photogenic cities in Europe.

London

Not many cities in the world can rival London when it comes to travel photography destinations. This capital city ticks off pretty much every box needed for a travel photographer. History, art, people, food, markets and some of the most iconic landmarks in the world. But even when you have exhausted all of the top sights there are still things places to explore. Head to any neighbourhood and you will experience a different look, feel and vibe. From trendy Notting Hill to the gritty Brick Lane, London doesn’t disappoint.

Rome

The Eternal City may be one of the oldest cities in the world, but it’s also one of the most beautiful. This is a city with almost 3,000 years of history, art and culture. It’s almost like Rome is an outdoor museum just waiting to be photographed. Ancient ruins like the Colosseum and the Roman Forum highlight the history of the Roman Empire. Piazza Navona, the Spanish Steps and the Trevi Fountain shows its beauty. Castle Sant’Angelo and Pantheon it’s architecture. That’s all before you get to the stunning Vatican and St. Peter’s Basilica. But beyond the sights, there is also the real Rome, the everyday lives of people, cafes, restaurants and culture. Rome is a true photographer’s paradise.

Dubrovnik

Dubrovnik has played a major part in Hollywood movies and TV shows over the years. Known for its distinctive Old Town which is surrounded with a stone wall, the beautiful city on the Croatian coast is as photogenic as they come. Its range of baroque, gothic and renaissance architecture are as historic as they are beautiful. It’s no wonder this city is known as the “Pearl of the Adriatic”.

Amsterdam

If you have never been to Amsterdam, you might wonder what all of the fuss is about. But the capital of the Netherlands will keep you captivated and snapping away for days (or months). There is simply too much to cram into a short visit. So to really capture the beauty of this city you need to give yourself time to experience the canals, museums and food. Your shot list should be crammed full of sunrise shots by canals and late evening shots of the quirky narrow houses.

Venice

It almost as if Venice was built to be photographed. Nowhere else in the world has the same romantic aura and elegance of this city. But to really experience Venice to the full you should aim to visit during the Venice Carnival. The whole city becomes like an outdoor studio with willing models happy to pose to have their photo taken. The contrast of colours versus the old buildings makes for wonderful images. But of course, no collection of Venice is complete without a few shots of the famous canals and gondolas.

Warsaw

A city that literally rose the ashes of World War II, Warsaw is simply stunning to photograph. The Old Town was completely destroyed during World War II and was rebuilt in the same look and style that it was before. The result is a place that is teeming with photo opportunities. But the beyond the Old Town you can also get a glimpse of another side of Warsaw. From the gift of Stalin – a skyscraper with amazing views of the city to the modern malls directly opposite, Warsaw is a city of contrasts.

Paris

Sitting on the River Seine, Paris is as historic as it is beautiful. It’s no wonder it is known as the City of Love. The recent catastrophic fire of Notre-Dame has robbed this famous city of one of its icons. But there is still so much to love about Paris. From the wide boulevards of the Champs-Elysees with it’s iconic Arc de Triomphe to stunning Palace of Versailles. The list of photography spots is endless. There is the Musee d’Orsay, the famous Louvre Museum, Sacre-Coeur, Montmartre, Moulin Rouge as well the beautiful alleyways that are dotted around the city. But of course, no Paris shoot is complete without Gustave Eiffel’s masterpiece, the Eiffel Tower.

Istanbul

Straddling across the two continents of Asia and Europe, Istanbul crams in both cultures into one city. Arguably no other European city has such a wide abundance of influences from different cultures in one place. A stroll around the Old Town and you will see the famous Byzantine Hagia Sophia opposite the Islamic Sultanahmet Mosque (Blue Mosque). Then add the Basilica Cistern, Topkapi Palace Museum, the Grand Bazaar and the sheer number of photo opportunities will keep you snapping away for as long as you are there.

A few others…

It’s always difficult leaving out any location from a photography top list. In fact, you could easily create a top 8 with a completely different set of locations. So here are a few others that are worthy of being on this list:

  • Barcelona
  • Prague
  • Edinburgh
  • Florence
  • Santorini
  • Bruges
  • Budapest
  • Krakow
  • Bergen
  • Vienna

Europe is a wonderful place for photographers. With so many iconic places so close together, there is too much to see and photograph in one lifetime. What’s for certain is that you will end up with iconic photos wherever you go in Europe.

Photo credits: Kav Dadfar – All rights reserved. No usage without permission. Dreamstime.

Filed Under: Tutorials Tagged With: Photography guide, Travel photography

The Skills Needed To Be A Travel Photographer

Travel photography is a wonderful profession or hobby to be involved in. Being able to travel the world and take photos in exotic places can seem like the perfect job. But as any travel photographer will tell you, taking photos on your travels as a job is completely different from taking photos whilst on vacation. As a travel photographer, you have to sacrifice everything when you are away in search of the perfect shot. Often this involves tiredness, hunger, boredom and even time spent with loved ones if you’re travelling with them. So what does it actually take to be a travel photographer? Here are the skills that you need to be successful.

Expert planner

It’s no surprise that travel photographers just happen to be in the right place at the right time. Often this doesn’t happen by luck. A lot of planning and research has gone into any trip that a travel photographer goes on. The reality is that the majority of the time when you are travelling you won’t have enough time to photograph everything you want to. In addition to this, you will often have to make do with unforeseen circumstances. Bad weather, closures and even unexpected events can all happen. That is why it’s so vital that you plan as much of your shoot as possible in advance. This involves not only creating a shot list but also understanding the direction of the light, the sort of photos that already exist and even have a backup plan in case the weather is not great. As a travel photographer, you also have to be an expert planner.

Know how to photograph everything

Whilst it’s impossible to be an expert in every genre of photography, as a travel photographer you have to be able to photograph anything. This includes everything from landscapes, cityscapes, portraits, sport, food, close-ups and even occasionally wildlife. You have to be comfortable photographing in low light conditions as well as the midday sun. You have to know how to compose cityscapes as well as portraits. As mentioned above it’s impossible to be an expert in every single field but you need to know the basics of what it takes to capture images in any situation. The reason being that every destination is different and every shoot will be different also.

Hit the ground running

One of the biggest limitations you have as a travel photographer is the amount of time you will have at a destination. It is never long enough. So one of the key skills you need is to be able to start the moment you arrive at your destination. For Example, if your flight lands in the morning you need to be photographing the moment you get to your hotel and get your camera equipment out. You won’t have time for culture shock or jetlag. Some people are naturally more comfortable at adapting to new places. If you struggle with this sort of thing the only way to improve is to practice. The more you do it and the more places that you experience the more confidence you will have to be able to cope with new environments.

Strong visual analysis

There is a photography term known as previsualization. It is the concept of being able to see a photo in your mind before actually taking the picture. This is one of the key skills that set apart good travel photographers from ordinary tourists taking photos on their vacations. Being able to look at the scene and analyse it in your mind and put together the composition is usually what will give you those amazing photos. For example, you may get to a scene and think that it would look better with a person or a cyclist in your foreground. Or it could be that you imagine how the photo would sit on a double-page spread so you leave enough room for a headline to be written. The key to being able to do this well is to practice. The more you get into the habit of being able to do this previsualization in your mind before taking a photo, the quicker and more efficient you will become at it.

Fast reflexes

The vast majority of the time you have to be patient and wait for the perfect opportunity to capture the photos that you want. But there are also occasions that you need to work fast. It might be because there is a fleeting moment in front of you that you only have one chance at capturing. Take too long and you won’t get another chance to capture that photo. This, of course, involves knowing your camera inside out. You also need to have a good understanding of the technical elements of photography such as the exposure triangle and composition. But the real challenge is being able to do all of that in a split second. Again like most things in photography you will improve with practice.

Being confident

As a travel photographer, you have to immerse yourself in the destination that you are visiting. It’s culture, it’s people and even it’s food are all vital components that make the destination unique. So you need to be able to get out there and be confident enough to approach people to take their photos. But you also need to have confidence in your own ability to be able to capture photos in a foreign country. This often means putting yourself beyond your comfort zone. But if you can do it, you will end up with fantastic photos.

Enjoy your own company

Travel photography is a lonely profession. The best way to capture the photos that you want to take is to travel alone. One of the things that I learned very early in my career was how difficult it is to be able to have a successful shoot whilst you have family or friends around. After all, no one likes to hang around for hours on end to wait for you to take a photo at the perfect time. Inevitably travelling on your own means you have a lot of time for yourself. So you have to be able to enjoy your own company but also be comfortable enough to be able to go to places to capture the photos that you want to take.

Commit to the photo

It often astonishes me when I see photographers turn up to a location take a photo and leave faster than it has taken me to even set up my tripod. Every time you decide to take a photo you should be making a commitment to making that photo the best it can be. That means taking your time analysing the scene and visualising it in your mind. Then once you have taken the first shot, be willing to critique it and look at how you can improve on it. Don’t ever settle for your first photo. Make it the best it can be.

Be optimistic

I always find it funny when I get to a location out in the wilderness when the weather isn’t great and I see a load of photographers all set up and waiting. They are of course waiting for that off chance that the weather might just change and give them something special. Being a travel photographer also means being optimistic. Because I have lost count of the number of times that I thought a shoot wouldn’t happen only to be surprised by the most amazing sunset or light I have ever seen. There are of course times when it doesn’t happen and you are left frustrated. It’s in those times that you need to be able to lift yourself to try again tomorrow. Because after all you never know what opportunities will present themselves.

An insatiable wanderlust

It might seem obvious to say but to be a travel photographer you need to love to travel. But whilst most people enjoy going on vacation not everyone loves to travel. For travel photographers, it is often more than that. It is an insatiable appetite to be able to see the world and capture it in photos. There won’t be time for sunbathing by the pool or spending an afternoon in a bar, as a travel photographer all your thoughts are on where and how to capture the next amazing photo.

Know how to edit

There is no way around it. If you want your photos to look the best that they can do, you have to be willing to edit them. Whether it’s subtle changes or more extensive ones, editing your photos in a post-processing software will make them look better. So, without a doubt, one of the key skills of a travel photographer is being able to use post-processing software.

Travel photography is often a lonely, tiring and high pressured profession. It is also one of the most exciting and rewarding. But to be a great travel photographer takes time, discipline and hard work. So ask yourself if you have the skills above to be a travel photographer? Don’t worry if you don’t because like anything in photography, the more you practice the more you can develop those skills.

Photo credits: Kav Dadfar – All rights reserved. No usage without permission. Dreamstime.

Filed Under: Tutorials Tagged With: travel photographer, Travel photography, travel photography skills

What Shots Should Be In Your Vacation Photo Book?

A really great way to improve your photography and also to ensure that your photos from a trip don’t just stay on your hard drive is to create a photo book. Doing so will not only mean you can show off your trip (and photography skills) to your friends and family, but it will also give you a goal to aim for after a trip. It will help you be able to edit your photos and only select the very best ones. It will teach you how to ensure your photos flow in a clear pattern and story rather than a repetitive set of shots. So here are some tips to help you capture the shots you should, to be able to create a beautiful photo book.

The “show stopper” shot

This is the one that most people love to capture. The iconic, wide-angle shot that would look amazing on the wall or in a double-page spread. For example in a magazine, this would be the opening double-page spread that would grab people’s attention. Depending on your destination this shot should be something that captures the overall narrative. For example, if you are hiking, this might be a photograph of someone walking or camping in the wild. Whereas a train journey might feature a landscape photo of a train in a beautiful landscape. This photo might be your cover or even as an opening spread.

Main icon

How can you have a book about a destination without the main landmark featuring in it? Imagine a book about your time in Paris without the Eiffel Tower. These famous icons have been photographed millions of times but that shouldn’t discourage you from taking your own shots. You can either try to come up with a unique way of photographing them or you can just take the obvious shot – but try to do it better. That might be in a better light or different season to the usual. Even in this day and age, there are still opportunities for unique shots of those famous landmarks but try not to fill your photo book with them. Three or four shots will be more than enough and try to make them a little different from one another. For example, one could be a wide-angle view that captures the whole landmark. Another could be a close up of the details and the third could be showing what is happening around it.

This will help people stay more engaged with the story and make the book less repetitive and boring to look through.

People

Often this is one area that you are able to really capture different shots to what already exists. People are such an essential part of our experience of a place that it is vital to capture photos if possible. Obviously, sometimes the story may not warrant that. For example, a safari or a National Park is more about the landscape and wildlife. But if you can incorporate a human element into the photo then you will often find that not only will they give your story more variety, but you will be able to capture more unique shots. So whether it is a simple head and shoulder portrait, people going about their daily lives or even as a point of interest in a wide-angle shot, don’t forget to capture photos of people.

Local food

It doesn’t matter where you are in the world, everywhere has it’s own unique types of food. So it should be one of the shots that you cover on any trip. But photographing food can often be challenging. Most of the time you will be inside and so low light will be an issue. Without a tripod, this will mean that you have to raise your ISO which in turn means more noise in your photos. The best thing you can do is to try and photograph food on an outside table (if possible). If not possible, then sitting at a table near a window will help. A good accessory to have is a gorilla pod. It’s far more discrete than a tripod and you will be able to set it on the table. Select the lowest ISO (i.e. ISO 100) and an aperture of around  f/9 – f/11. This will ensure that your dish will be sharp throughout. Make sure you use a remote or set the camera on a timer to avoid touching the camera. As with all other shots you take on your trip, edit carefully to only feature a few key shots.

Details

The key to any great photo book is a god flow through the different images. But it also needs to have a variety. Looking through page after page of the same type of shot can leave the viewer feeling uninterested and bored. A really good way to add variety to your photos is to capture details. These are the things that often people miss when they go somewhere which is why they are so fascinating to look at. Closeups could be of anything from food to carvings on a wall. They could even be natural elements like rocks or wood. Imagine having a series of 16 of these images next to each other as thumbnails in a square. Not only will they look fantastic but they will also engage the viewer as they look through them.

Something different

It’s not an easy task, but if you can capture something a little different from a well-photographed location, then it can make a big difference to your photo book. The best way to do this is to do as much research as you can on a location. The more you know about what already exists and what type of photos have already been taken, the better your chances will be of creating something unique. Sometimes you will get lucky and a unique opportunity will present itself. But usually, you will have to work hard to make that happen. If you can capture a few unique shots, it will make your photo book far more interesting for friends and family and potential clients to look through.

Putting together a photo book is a great way to showcase your photos in a cohesive and interesting way. People would much rather flick through a book with 20 photos than have to sit through someone showing them hundreds of the same shots. But even if the book is just for you, by having an end goal it can help you ensure that you capture a variety of different shots. It will also mean that your photos won’t just end up being on your hard drive for eternity.

Photo credits: Kav Dadfar – All rights reserved. No usage without permission. Dreamstime.

Filed Under: Tutorials Tagged With: photo book, travel photo, Travel photography

7 Reasons Why You Need A Tripod For Travel Photography

Sometimes carrying a tripod with you seems to be the most arduous thing to do. Especially if for example you are planning on a sunrise shoot and then you are due to be outside all day. Having to carry a tripod all day can often mean people not taking one in the first place. But by doing so you are not capturing the best shots that you can. If you ask travel photographers what their favourite accessory is, most would reply with “tripod”. So here are 7 reasons why you need a tripod for travel photography.

Kav-Dadfar-Tripod

For sunrise or sunset shots

These times seem to be the holy grail for travel photographers and it’s understandable why. During these times you often get the best light for photography outdoors. The golden, soft light can enhance shadows and give a mundane scene a beautiful glow. Whilst you will often be able to shoot handheld in these conditions, it comes at a price. You will need to raise your ISO to be able to have a shutter speed fast enough to capture the shot. It also limits your depth of field as you may not be able to have a small aperture. So ultimately you end compromising and not capturing the best shot that you can.

Kav-Dadfar-Tripod

For nighttime photography

You might be able to get away with photographing sunrises or sunsets handheld, but for night time photography it becomes almost impossible. Sure you may be able to raise you ISO ridiculously high but that will mean your photo will be filled with noise and will look soft. It also means that you will not be able to capture certain shots like car light trails as you simply will not be able to hold the camera steady enough at those slow speeds to avoid camera shake.

Kav-Dadfar-Tripod

For better composition

The great thing about using a tripod is that it often makes you slow down your photography and be more considered. One of the most common bits of feedback that I give to newbie photographers is that they often rush to take a photo. By slowing down you are far more likely to be able to really think about your composition and adjust it if necessary. In addition to this by being detached from your camera, you will also find yourself analysing your shot in greater detail and being more critical.

Kav-Dadfar-Tripod

For capturing shots that you couldn’t otherwise

Sometimes to capture the shot that you want, a tripod will allow you to do so easier than not having one. For example, imagine trying to capture a low angle shot in a muddy field. Do you really want to lye on the ground and get yourself soaking wet? Why would you when you can use the tripod to capture the shot instead? Not only will using a tripod keep you dry and out of the mud but it will also mean that the camera will be much more steady. I have lost count of the number of times that I have been able to capture a shot with a tripod that I wouldn’t have been able to otherwise.

Kav-Dadfar-Tripod

I had to place my tripod on a ledge that wasn’t safe for someone to stand on for this shot.

For artistic visions

You might think that the only time you will ever need a tripod will be during low light conditions. But actually sometimes even during the day when there is enough light, you may wish to use a tripod to capture shots that you wouldn’t be able to otherwise. For example, if you want to capture smooth looking water during the day you will need to limit the amount of light coming into the camera. The way to achieve this is by using a neutral density filter. But by limiting the amount of light coming into the camera you are also affecting the shutter speed. If it’s too slow you will not be able to hold a camera steady without suffering from camera shake.

Kav-Dadfar-Tripod

For when you need an extra hand

In more challenging lighting scenarios, you may have to use a flash, lights or even reflectors to be able to capture the shot that you want to capture. Sometimes this requires you to place your flash away from your camera somewhere in the scene. A tripod is useful to allow you more flexibility in where you place your flash, lights or reflector. Rather than just placing your flash on the floor, using a tripod will allow you to change the height and angle so that you can light your subject perfectly.

Kav-Dadfar-Tripod

For this shot I have a flash mounted on a tripod sitting behind the pillar on the left to light up the woman’s face.

For keeping you safe

My tripod has managed to not only help me capture great photos, but also save me from potential injury as well. There have been numerous occasions when I have managed to keep myself from slipping over by using my tripod to keep myself steady. Like recently when I was photographing on some rocks on a beach and as I climbed down only my tripod stopped me from slipping over and causing myself serious injury. It’s not what they have been designed for but you never know when your tripod will actually come to your rescue.

Kav-Dadfar-Tripod

There is no doubt that tripods are cumbersome and sometimes it seems easier not to take one with you. But if you want to capture the best possible photo at that best possible time, then a tripod is essential. One way that you can make things easier for yourself is by having a bag that you can strap your tripod onto when not using it. This will save you at least having to carry it around and leave your hands free. But ultimately the photos you will capture will outweigh the nuisance of having to carry a tripod.

Photo credits: Kav Dadfar – All rights reserved. No usage without permission.

Filed Under: Tutorials Tagged With: Travel photography, tripod

10 Golden Rules For Better Travel Photography

One of the most common questions I get asked is how do I take better travel photos? Whilst there isn’t just one rule that you can apply that will automatically get you amazing results, over the years I have learnt that these 10 simple rules will dramatically improve most people’s photos. But you should view these as a starting point and continuously learn, experiment and practice to improve your photography. So here are 10 Golden rules for better travel photography to help you get started.

Know what you are doing

If you want to capture great photos you have to be willing to put some time into learning the basics. This is the technical stuff that often people forego in favour of the automatic or program settings on the camera. No one is saying that you should never use automatic mode. But if you know what those settings are and how they work, it will give you more options and more creative control over the picture-taking process. You need to understand the exposure triangle which is ISO, shutter speed and aperture and how they affect and interact with each other.

Beyond photography theory, you should also learn how to use your photography equipment. For example, how do you mount your camera on your tripod correctly and safely? Or which lenses to use when and how do you change them quickly? If you have a flash, what is the best way to use it to avoid your scene looking flat? Once you know the technical and practical parts of photography you can actually concentrate on capturing better photos and worrying less about how to do it.

Learn how light transforms a scene

Light is one of the most important elements in any photo. Even the most amazing scene will look dull and uninteresting If you haven’t got great light to work with. Often what transforms an ordinary photo to an extraordinary one is the right light. You need to learn how light differs at different times of the day. Things like intensity, direction and even colour can all make a huge difference to a photo. It’s no secret that the best light is in the early morning and late afternoon. This is when the soft warm light can enhance shadows, textures and shapes. Always remind yourself that there is a best time to photograph anything. So be prepared to wait or even come back for that best light.

Don’t shoot in anything other than RAW files

If your camera has the function to shoot RAW files, then you shouldn’t use in any other file format. RAW files are not processed by the camera’s software which often compresses data and will make permanent adjustments which are embedded in the photo. A RAW file is essentially what the camera captures with nothing else added to it. Any adjustments such as white balance, exposure, contrast, saturation and even sharpness can be added by the photographer subsequently on a post-processing software. This allows for greater control on an image by image basis. Simply put if you want the very best file format to work with for your photos you should shoot in RAW.

Know how to use editing software

Often one of the excuses people use to justify not using editing software is that they don’t believe photos should be edited. The thing is that if you are shooting in RAW files your photos will have to be post-processed in some way to be able to use day to day. Even if you simply convert them to JPEGs you are still adding a layer of post-processing to the photo. RAW files are fantastic but they are just that, RAW files. So to bring them to life and actually give them the best possible look and feel you have to add some adjustments to the photo. That could be as little as simply adjusting contrast and brightness. Or vibrancy and saturation. At the very least you should ensure that your photos are straight, cropped well and the white balance is corrected. But don’t be afraid to use post-processing to enhance your photos. It’s not cheating.

Be the most informed tourist in town

Research and planning are vital if you want to capture the very best photos. You have to know where to be at the best time of the day. the more you plan and research any destination the better your chances will be of capturing fantastic photos. Always remember that a photographer will need more time at a location then your average tourist. So don’t try and cram in too much into your shot list. It’s always best to allow more time than to find yourself rushing around. For example, you might get to a location and find that the sun has gone in behind clouds. Or there might be someone or something in your way like a van parked in your composition. Give yourself enough time and it shouldn’t be an issue. The reality is that most times when you get to a location you will have to wait to capture the photo you want.

Practice as much as you can

Photography is like any other skill or hobby. The more you practice the better you will become. So once you have the technical stuff sorted out and understand some of the theory, get out there and actually shoot as much as you can. Nothing will make you learn and practice what you have learnt better than actually doing it. You will make mistakes along the way or you might experience scenarios that you’re not prepared for, but this is part of the learning process. You will learn from your mistakes and you will become a better photographer because of it.

Commit to the image

Often one of the main reasons that professional travel photographers capture the fantastic images that you see in magazines and newspapers is because they have waited for the perfect moment. In other words, they committed to capturing that image as long as it took. Once you have got to a location and you have your settings and your composition sorted, set yourself the task to not leave until you have captured the very best photo. If you can’t capture the photo that you want then be prepared to come back. Of course, there will be times when this won’t be possible because of limited time. But if you have the option of giving up or persisting in order to capture a photo, there shouldn’t really be a decision for you to make.

Walk as much as you can

One of the best ways to capture great photos is to experience a destination in the same way as locals do. For example, if you get a taxi everywhere you go then you’re going to miss so much of a city. Instead of getting taxis or private transfers, if it’s safe to do so walk around. If you have to get transport from one place to another try to get buses or metros. This will give you much more of an insight into a destination and can present you with far more photo opportunities.

Be your own critic

It is often difficult to critique your own work. You tend to have a sense of nostalgia. You might select photos that may not be as good as you think simply because of the effort it took to capture them. But if you really want to have great photos in your portfolio, you have to be willing to put all feelings aside and judge your work on its merits, not sentiment. One good trick is to scroll through your photos and the ones that make you pause for a moment or two are possibly worth keeping in your portfolio. It’s always great to also get a second opinion. So ask someone else what they think. Do they agree with your choices? Treat this period as assessment and reflection on your work. Could you have done anything better? Did you make mistakes? Often you will learn much more from your mistakes then you will learn from your successes.

Find your own style

Over time most photographers will develop their own style. By that, I mean that if you looked at the collection of their work it all looks like it’s come from the same person. The subject may be different the destinations will vary and some photos will look different. But as an overall set of work, you can tell they belong together. There is no right or wrong here it’s just what works for you and the sort of composition, lighting, colours and styles that catch your eye. So try to develop your own style over time. Once in a while put out some of your work in front of you. Does it all look like it’s comes from the same person? You can, of course, look at other people’s work and be inspired. The key is not to copy but rather be inspired to find your own style.

Travel photography is a wonderful profession or hobby to have. To capture great photos you have to be willing to put the time and effort in. By using the tips above you will be on your way to capturing great travel photos.

Photo credits: Kav Dadfar – All rights reserved. No usage without permission. Dreamstime.

Filed Under: Tutorials Tagged With: beginner photography tips, beginner tips, Travel photography

5 Non Photography Tips That Will Improve Your Travel Photos

One of the most common questions that I get asked from amateur travel photographers is “how can I improve my photos?”. Whilst there is never one solution that will fit everyone’s needs, there are some things that are common amongst all amateur travel photographers. Some are actual photography improvements or tips like getting closer to the subject. But there are also quite a few things that you could try which are not necessarily photography tips. So, if you have never tried these then give it a go, you may be surprised by the outcome.

kav-dadfar-non-photo-tips

1. Travel alone

There’s a reason that travel photography is a lonely profession. Most of the time travel photography is pretty boring. You have to wait around for the best light or keep going back to a location so that you can capture the photo that you want to take. Nothing should get in the way of capturing that stunning photo. The problem with trying to do this when you have other people like friends or family around who are not photographers is that they will usually not have the patience to wait around for you. So whilst you might be happy to wait in the rain for the clouds to clear, your spouse or friend understandably won’t. This will either mean you have to leave with them which will mean missing out on the photo or having to settle for something taken at a time that might not be best. If you want the best possible photos with no distractions, try to travel alone.

If you are going to travelling with someone, maybe try to settle on getting some time alone so that you can focus on photography without distraction. This will mean you can focus on capturing great photos and the other person can do what they want without having to wait around for you.

2. Walk, walk, walk

Often one of the best bits of advice that I can give people is that they should just walk around especially in cities or destinations where there are bustling areas. Being in a taxi, subway or coach means you will miss the daily life that goes on. These are unique moments that will often give you better photos than that famous monument which has been photographed from every angle millions of times. You’ll be amazed how often you will stumble into a scenario that is incredibly photogenic.

But the other benefit of walking around is that you will find potential spots for photography like that dramatic sunrise or sunset shot that every photographer craves. I often find myself walking for hours in cities, exploring places that aren’t in the guidebooks. Most of the time these don’t lead to anything but every now and then you capture something unique.

kav-dadfar-non-photo-tips

3. Hire a guide

There seems to be some sort of taboo amongst the hardened travellers about hiring a guide when travelling anywhere. People usually prefer to be seen to be travelling independently rather than following the flock of other tourists. I must confess that for a long time I felt the same. That is until I started to think of the whole notion of the guide that I have differently. Rather than thinking he or she is your “guide” consider them as your photography “consultant”. Whilst they may not be photographers, you can still bounce ideas off them ask them for their advice on locations or good spots for photos. You can even put them into your photos as a point of interest. I always tell my guides at the start of any trip that I want their advice or opinions. More often than not they can suggest something that I didn’t even know I could do.

The more obvious benefit of a guide is that you have someone who can speak the local language. For people who are shy at taking photos of other people, this can make it a little less daunting.

kav-dadfar-non-photo-tips

4. Say “yes” more often

I always find that wherever I am in the world, the more open-minded I am to trying things or going places, the better my photos are at the end of the trip. Clearly, there has to be some level of caution so that you are not ripped off or even a victim of a worst crime. But if it’s something within reason than try to say “yes” to things more often. This could just be as simple as trying a different food or even listening to a suggestion from your guide to go somewhere that might not be your usual pick.

For example on a recent trip to Bhutan as we arrived into our local village after a long drive my guide asked me if I would prefer to stay in a farmhouse or hotel. For me, it was an obvious choice as I was far more likely to capture photos at a farmhouse than a hotel room. When I arrived at the farmhouse there was a celebration happening because a family member who was a monk had been promoted. So I ended being able not only to experience this unique and religious celebration with the family but also to photograph it as well! Something I would not have experienced had I said “no” to the farmhouse.

kav-dadfar-non-photo-tips

I was lucky to be able to witness and photograph this special family event simply by saying “yes” to staying in a farmhouse.

5. Sleep and rest as much as possible

This might seem like an odd tip. After all, every photographer always talks about getting up in the early hours of the morning and shooting after sunset into the blue hour or even later. But this is exactly the reason that it’s important to get as much sleep and rest as you can when you can. Most of the time you’ll be tired, sleep deprived and not eating very well. All of which can very easily combine to make you ill. The last thing that you will want is to be trying to recover on a trip. The best way to avoid this is by factoring in rest time at say midday when the light is harsh and you won’t be able to capture much. Remember that you will end missing more photo opportunities if you are ill for a few days than you would if you were sleeping for a couple of hours during the day. Being fresh and not tired will also mean you are far more alert to potential photo opportunities.

kav-dadfar-non-photo-tips

Some people will already be doing these things, but if you are not and always wanted to improve your travel photography than try it. You never know what it could bring you.

Note by the author: remember to stay safe

Whilst this might seem like an obvious thing to say, ultimately your safety should always be your main priority. Whilst all of the tips above are good to do, it should never be at the expense of your own well being. So, always make sure you trust your guide fully, know the places you are going to or that you will be safe walking around by yourself. Never take any risks that might endanger you. No photo is worth the price you may end up paying.

Photo credits: Kav Dadfar – All rights reserved. No usage without permission.

Filed Under: Tutorials Tagged With: Photography, Travel photography

What’s In A Travel Photography Camera Bag?

One of the questions that I get asked most often is what exactly do I carry with me on a trip. Often people are surprised with how little I do take with me. I must confess that when I started out, I carried a lot more than I do now. Over the years I have come to realise how little you can actually get away with. So here is what I carry in my camera bag.

Whats-In-My-Bag

Carry less, plan more

Before going into what I carry, my first bit of advice is to only carry what you need. Travel photography typically involves being outdoors and walking around for long periods of time. Do you really want to be doing that with a heavy backpack all day? There is a fine balance between taking what you have to and getting caught short because you haven’t taken packed something you may actually need.

So, before any trip, you should be writing a shot list and then using that to determine what equipment you will need.

Whats-In-My-Bag

Camera

You won’t get to do much without a camera… My camera is a Canon 5D MK IV and I always carry a back up which is a Canon 5D MK II. They are both fantastic cameras that produce stunning images. I tend to leave my back-up camera in the hotel safe unless I’m going to be in a situation where I might need to be using two lenses. For example, if I’m photographing a festival where I will need to be capturing photos at different focal ranges, I would use both cameras. I would have a wide-angle lens on one and telephoto on another.

Whats-In-My-Bag

Lenses: Canon 24-70mm f/2.8 II USM zoom lens

The vast majority of my photos are taken with this lens. In fact, I could probably get away with doing an entire shoot just with this lens. The focal range means that you can take landscape shots as well as portraits. Of course, sometimes you will need to get closer to your subject to be able to capture candid shots, but that’s a good thing. At f/2.8, it is also fast enough to use in low light conditions like markets or indoors.

Canon EF 70-200mm f/2.8L IS II USM lens

This pricey telephoto lens is one of the best around. Fantastic for portraits and close-ups but also a good option for landscape or cityscape shots when you want to isolate a small part of the scene. It’s big and heavy to carry but this is one that I usually keep with me.

Whats-In-My-Bag

Other lenses

The two above are my main lenses. This is what I use most of the time. But of course, from time to time depending on the shoot I may need to take other more specialist lenses with me. I would assess what the requirements are before each shoot and pack any of these lenses if needed.

For example, something like a Canon EF 50mm f/1.2L USM lens. This prime lens is superb and is really useful when photographing in low light conditions as it means you don’t have to raise your ISO too much. But the shallow depth of field does mean that you need to be careful when focusing.

Canon Speedlite 580EX II

I’m not a big fan of using a flash and will try to avoid it wherever possible. The problem with using a flash is that unless it is used subtly, it kills the ambience of the scene. It also usually gets unwanted attention. But having said that sometimes there is no other choice but to use one, so I do always carry one with me.

But rather than using it in low light settings, I usually use a flash most often to fill in shadows. This is called a fill flash where for example you are taking a portrait of someone in harsh lighting conditions which causes shadows on their face. A flash can help eliminate the shadows. So I always carry one with me but actually very rarely use it.

Whats-In-My-Bag

Manfrotto tripod

This is one accessory that I simply have to have with me for sunrise or sunset shots even if it means carrying it around all day. Anytime that you will need to capture photos in low light conditions a tripod becomes a must. My Manfrotto 055CXPRO3 is almost 10 years old but is still as good as ever. It is a sturdy carbon fibre tripod which is lightweight to carry. I also use a Manfrotto 327RC2 light duty grip ball head to connect my camera to the tripod.

Whats-In-My-Bag

Filters

All of my lenses are fitted with a Hoya Pro 1 Digital UV filter. This helps protect the lens glass against scratches. Remember that it is much cheaper and less of an inconvenience to change a filter than fix a lens. I also carry a range of Cokin Neutral Density filters and Graduated Neutral Density filters which are extremely useful for landscape photography. Lastly, I also have a Hoya polarizing filter as well which helps avoid unwanted reflections.

Whats-In-My-Bag

Other bits

Memory cards, hard drives and laptop – I take enough memory cards with me so that I can cover each day I’m away on a separate card. I also take a few additional ones in case I need more than one in a day. But even with all the memory cards, I still back up my photos on 3 passport size external hard drives each day. This way if anything happens to one then I have spares.

Whats-In-My-Bag

Lens and camera cleaning kit, spare batteries and chargers – You will always end up getting dust or dirt on your lens at some point on a trip. So you will have to clean your lens, your camera and even your sensor (although be very careful doing this). I also carry some spare batteries as I don’t want to ever end up being in a situation where I run out.

Whats-In-My-Bag

These are the basic set of equipment that I carry with me wherever I travel to and I add to these as I see fit. For example, architectural photographers might want to take a tilt and shift lens or for wildlife photography a 400mm lens. But remember try to only take what you are going to need. Don’t take equipment just for the sake of it.

Photo credits: Kav Dadfar – All rights reserved. No usage without permission.

Filed Under: Gear Tagged With: photography equipment, Travel photography

Profiled Photographers – Jordan Banks

jordan-banks

UK based photographer Jordan Banks has been photographing the world for the last 20 years. His work has seen him shoot assignments, stock photos and work with some of the biggest brands in the world. But for Jordan, it was simply the desire to earn a living whilst travelling the lured him into a career as a travel photographer. He says, “I wanted to travel and needed to make money and I was already into photography so it seemed like the perfect combination”.

Jordan’s photography journey started out in the days of film when in his own words “it was a lot easier to get clients as the market wasn’t so saturated”. His main clients were tourist boards from developing sectors and specialist travel magazines. Along with these, he had a few long term assignments before digital photography took over in Peru and Guatemala. Upon his return to the UK, editorial assignments were dying out and the stock photography market was still strong. So he decided to concentrate on stock and travel related commissions. As the stock industry started to wain he began to focus solely on travel commissions for tourist boards, brands and hotels.

Jordan also runs That Wild Idea, a landscape, travel and documentary photography workshops, tours & training company based in the UK. They include everything from 1-day workshops for beginners up to extended trips to some of the most exotic places in the world.

jordan-banks

Jordan, where are you from?

I was born in Yorkshire and raised in Saudi Arabia. I have also lived in Croatia, Mexico and a host of other places around the world.

Where do you currently live?

I currently live in beautiful Berkshire in a town called Maidenhead.

What genre of photography do you specialise in?

These days I mainly specialise in travel and landscape photography.

jordan-banks

Describe your style of photography?

I would class myself as a documentary photographer that specialises in travel, landscapes and people.

What are you working on at the moment?

I am covering the national parks of the USA for a Cruise America RV as well as running photography tours and workshops with That Wild Idea.

What is your next project or assignment?

My next assignment is in Japan for an editorial client shooting the cherry blossom.

jordan-banks

Are there any photographers whose work/style you admire?

There are so many to chose from. I love the work of James Nachtwey, Gregory Crewdson and Thomas Hoepker. These are just a few of my favourites.

What is your favourite memory of your experiences?

Not sure I would class it as a favourite exactly but at the last Maha Kumbh Mela (2011) festival in India I was lucky enough to meet a much respected Sadhu who I bathed with, in the Ganges. As a result, I earnt his respect and he got me access to areas that no other photographer could get to. These images then got me my first cover for National Geographic.

What’s the biggest photographic challenge you overcame?

Marketing. I think it’s very hard for a creative person to also be good at the daily hustle that is required to make yourself a success in this business. It’s a big part of any business and in this day and age, it is essential.

jordan-banks

What’s in your camera bag?

Nikon D850 and D800 as a backup body with 24-70mm 2.8, 17-35mm 2.8 and 70-400mm f4 lenses. Lee neutral density graduated filters, neutral density filters and a landscape polariser.

I use Manfrotto tripods with ball heads and Low Pro bags. For my drone work, I carry the Mavic Pro. I have just recently added the Nikon Z7 to my bag but haven’t had a chance to use it yet.

What photographic equipment would you never leave home without?

When I go on a shoot I would have all of this equipment with me but if I had to choose it would be the Nikon D850 and 24-70 lens.

What advice you would give anyone who is starting out?

I think the best advice I can give anyone is to practise and be willing to “hustle” for work. Also, don’t believe the hype about anything.

Any pitfalls they should avoid?

Don’t get caught up in the social media game and believing that everyone else is being successful – especially on Instagram.

Lastly… if you weren’t a photographer what would you be doing?

I am a qualified diver so I would probably be a technical diver on oil rigs or something along those lines.

To see more of Jordan’s work visit www.jordanbanksphoto.co.uk or to find out about photography workshops or tours visit www.thatwildidea.co.uk

You can follow Jordan on Instagram, Facebook or Twitter

All images by Jordan Banks. All rights reserved. No usage anywhere online or in print without permission.

Interview by Kav Dadfar.

Filed Under: Inspiration Tagged With: documentary photography, interview, landscape photography, Travel photography

A Travel Photographer’s Workflow

Travel photography like any other business requires you to put in a workflow to maximize your efficiency. The other advantage of a good workflow process is that it will ensure that you keep your images safe whilst traveling. Over time every photographer will develop their own processes and steps that they will go through. The key to any workflow is that it works for you but don’t be surprised if over the time you end up tweaking it. So here is my entire workflow to help you develop your own version.

Travel-Photographers-Workflow-2018-Kav-Dadfar

1. Preparation before a trip

My workflow starts a few days before I am due to start my shoot. I begin by charging all of my camera batteries and checking that all my memory cards are in working order. Then it’s time to clear them all and format my portable hard drives so that they are ready to use when I am away. I carry three small 250gb hard drives with me (they are colored red, black and blue – more on that later). I always pack the black one in my suitcase and the red and blue one in my camera bag.

Travel-Photographers-Workflow-2018-Dreamstime

2. Back up each day

When I am on location photographing, I follow the same workflow each day. If throughout the day I finish a memory card I turn it over in the memory card case that I have (this way I always know that if a memory card is turned over, it has photos on it). Once the day has finished and I am back at my hotel, I always back up every single card that I have used that day onto all three hard drives.

Travel-Photographers-Workflow-2018-Kav-Dadfar

The reason I carry three hard drives is that the red one always goes into my camera bag which I carry with me whilst I’m out. The black one goes into my hotel safe and the blue one will either be stored in my rental car (if I have one and it’s not going to be too hot) or in my suitcase back in my room.

This might seem like paranoia but whilst having a camera stolen or damaged will be incredibly annoying and frustrating, nothing can replace the photos that I have taken that day. The conditions or that moment might not arise again so protecting your photos is vital. By storing the hard drives in three places at least you can rest assured that you’ll always have a backup of your photos.

Travel-Photographers-Workflow-2018-Kav-Dadfar

3. Note down important info

The other key aspect of my workflow is that each day I make a note either in my post-processing software or in a notebook of any important information about the photos taken that day. Which temple was the photo taken at? The contact details of the person I have taken a portrait of and so on. One of the great features of my Canon 5D MKIV is that it has GPS tagging and so this saves me having to note down locations. But in some countries, you are not allowed to use this feature so I will also sometimes manually write the locations down. I try to do this every night whilst it is fresh in my mind rather than relying on my memory when I get home.

Travel-Photographers-Workflow-2018-Kav-Dadfar

4. Packing to leave

Once my trip has finished and I’m heading home I follow the same logic when packing my hard drives. One goes into my suitcase to be checked in and the other two will be packed in my camera bag. You never know when a strict security official at an airport will take exception to your hard drives and ask you to leave them behind. It has never happened to me so far but I’d rather travel with the knowledge that I have a backup in my suitcase.

Travel-Photographers-Workflow-2018-Kav-Dadfar

5. Transfer your photos

Once I am home I will transfer my photos from my portable hard drives to my main hard drives at the earliest opportunity. I use 2TB external hard drives that are always connected to my desktop computer. I also subscribe to Blackblaze as my backup provider incase of something going wrong. Once my images are on the main hard drive I can begin the post-processing part of my workflow.

Travel-Photographers-Workflow-2018-Dreamstime

6. Post-processing your photos

There’s no doubt that every photographer will have their own steps for post-processing. Mine starts by organizing my photos into folders using Lightroom by country, then location. So, for example, photos from Bangkok will be in a folder for Thailand and a subfolder called Bangkok. Once the images are organized I begin by looking through the photos and deleting any obvious errors liked blurred photos. Once this quick edit is done I then go back and flag the ones that I feel have potential. This is a pretty loose edit so the vast majority of the photos will be flagged.

The next step is to begin working on each photo and post-processing it to enhance it. Normally I will copy and paste settings on similar photos to save time from having to do it all again and just tweak them for each photo. Once the post-processing is finished I then go back to the start and begin to edit the photos down using the star ratings in Lightroom. I will go through each round by increasing the stars until I end up with a set of 5-star photos. These, in essence, are the ones that I will then send to clients or submit to stock agencies.

Some photographers will also re-name or number their photos once it is imported into Lightroom. I don’t do this as each client is different and requires a different file naming format, so I do this when I export photos from Lightroom.

Travel-Photographers-Workflow-2018-Kav-Dadfar

7. Double check your photos

Before I do anything else with the final 5-star shots, I go through each one and check them at 100%. This is so that I can check that they are sharp, correctly focused but also free of dust and blemishes. If any require further or more extensive retouching I will do that in Photoshop and import back into Lightroom as I want all my photos in one place. I also use the color tag functions in Lightroom to color code images based on which of my regular clients they are being sent to. This is to ensure that I don’t send or use photos that are for a client somewhere else.

Travel-Photographers-Workflow-2018-Dreamstime

8. Descriptions and keywords

Before I export the photos to send to clients, I go through and add in descriptions and also keywords as required by the client. This is a really important step especially in stock photography as without good keywording your photos might not actually be seen by customers. Once all keywording and descriptions are finished I then export the photos using the preset I created for each client.

Travel-Photographers-Workflow-2018-Dreamstime

As you can see, most of this might seem pretty straightforward and might be things that you are already doing. Over time depending on your own preference and genre of photography you will develop your own unique workflow. But in the meantime, this list might help you on your way.

Photo credits: Kav Dadfar – All rights reserved. No usage without permission. Dreamstime.

Filed Under: Tutorials Tagged With: Photography workflow, Travel photography

10 Countries That Will Give You Stunning Travel Photos

This might be an impossible task. How can anyone choose just 10 places? Every country, region, city or even village can offer fantastic photo opportunities. In fact, you often don’t even have to leave your own town or city to be able to capture stunning photos. The important thing to remember is that this list is sure to change depending on what genre of photography you enjoy. So in no particular order, here are the top 10 places in the world that will give you stunning travel photos.

LifePixel-2019-Kav-Dadfar

India

There truly isn’t anywhere in the world like India. This is a country where religious beliefs and customs are still as integral to life as they were thousands of years ago. From the streets of New Delhi to the incredible scenes that you witness in the many holy cities and festivals, there is a photo opportunity every second. In fact, you could probably just stand on a street corner and be able to come home with tons of great photos.

For most people, the first few days in India will be overwhelming. The obvious presence of poverty combined with the number of people as well as the pollution can be a turn-off. But if you can overcome that, you’ll be rewarded with stunning travel photos.

LifePixel-2019-Dreamstime

USA

There is no other country in the world that can offer the number of different photos opportunities that you can find in the United States. From the vast wilderness of the many National Parks to some of the most photogenic cities in the world, you could spend a lifetime trying to capture this amazing country. The great thing about photography in the USA is that each state is like a different country with its own customs, traditions, amazing food and beautiful places. From striking images of cowboys in Texas to the hip and trendy in Manhattan, it’s easy to come back with images that don’t even look like they are from the same country.

Italy

It’s almost as if Italy was built to be photographed. From charming towns in places like Tuscany to historic cities like Rome, Florence, and Milan, Italy almost feels like an outdoor museum. If you enjoy photographing cities and towns, there are plenty to choose from all being scattered with historic Roman monuments. Do you like photographing epic mountain scenes? Then head to the Dolomites or even to Mount Etna in Sicily. If food photography is what you are after, then you certainly will be not be disappointed with some of the most delicious and beautiful looking dishes in the world.

There’s also the Venice Carnival which is a portrait photographers paradise. Experiencing the Venice Carnival should be on everyone’s bucket list, but the great thing about photographing it is that you have a city of willing models wanting to have their photo taken. So if you struggle with approaching people to take their photo, this is a great place to practice and build confidence.

Iceland

When your nickname is “the land of fire and ice” you have to meet high expectations. You will find it hard to find anywhere else in the world with the sheer epic and raw wilderness that Iceland has to offer. There are volcanoes, hot springs, black beaches, and the unmissable Northern Lights to photograph as well as the hip and trendy city of Reykjavik. So if your passion is in landscape photography, then Iceland is a must go to destination.

LifePixel-2019-Dreamstime

Thailand

From the pristine and tranquil beaches of the islands and resort in the south to the remote tribes that live in the jungles of the north, Thailand is a melting pot of culture, traditions, and history dating back thousands of years. Photograph the ancient cities of Ayutthaya and Sukhothai that were once the capitals of an empire. Get up early in the morning to capture novice monks walking the streets and collecting alms. Head up high to one of the many sky bars in Bangkok to capture the sunset over the city. Or simply walk in one of the many markets capturing the buzz of activity that seems to be the heartbeat of this country. In the “land of a thousand smiles” you won’t be short of photo opportunities.

Scotland

“Where is the coward that would not dare to fight for such a land as Scotland?” said Sir Walter Scott. This is a country that was forged with blood and the sword. From the epic moors and highlands to historic castles and trendy cities, it’s easy to see why photographers have been coming to Scotland for years. This small country sitting north of England offers some of the best landscape photography opportunities in Europe not to mention some of the best whiskey in the world.

Vietnam

It’s almost 45 years since the end of the Vietnam war and this country has come back to become a serious location for travelers and photographers. It’s easy to see why. From the growing metropolis of Ho Chi Minh city to the natural beauty of Halong Bay the further you move north in Vietnam the more photo opportunities seem to be had. Like for example the rice terraces in Sapa or the beautiful cities of Hue and Hoi An. Or spend a few days in Hanoi and you’ll benefit from one of the best places in the world for street photography.

New Zealand

Even the most hardened of landscape photographers will stop in awe with the views on offer in New Zealand. From the geothermal activity of Roturua to the imposing view of Mount Cook or the sheer scale of Milford Sound, New Zealand will keep any landscape photographer busy. There is also the famous “That Wakanka Tree” which is almost a photographic icon of New Zealand in itself.

England

Little old England has certainly put its footprint on the world map over the course of the last 500 years. Whilst the more photography glamorous neighbors up north seem to get the plaudits for being an amazing photography destination, England is certainly underrated. But this is a country full of history with an abundant of different photography opportunities. Like the charming cottages that are dotted around on the Yorkshire Dales or the striking cliffs of the Cornish coast. There are historic cities like Bath and York and then there is London. A photography destination in a league of its own, London is one of the most culturally diverse and historic cities in the world. With ample markets, amazing local boroughs and some of the most famous monuments in the world, London could be on this list by itself.

South Africa

Its painful past will always be a reminder of how far it has come. As a photography destination, there are so many reasons to visit South Africa. Cape Town offers some of the best coastal views around not to mention the iconic Table Mountain. But head out into the wilderness and you’ll see the real Africa. Lions, hippos, giraffes, and elephants will be some of the wildlife on your photography shot list.

LifePixel-2019-Dreamstime

These are of course just some of the best places in the world for photography. In fact, you could place every country in the world on this list as every single one will have something that makes it unique. Think of places not on this list like China, Brazil, Kenya, Iran, Australia, Indonesia and Japan and you realize that there are just too many places in the world to see in one lifetime. The most important list is your own list and where you want to go, so just get out there and do it.

Photo credits: Kav Dadfar – All rights reserved. No usage without permission. Dreamstime.

Filed Under: Tutorials Tagged With: Travel photography

  • 1
  • 2
  • 3
  • Next Page »

Blog Topics

  • Tutorials
  • Inspiration
  • Locations
  • Gear
  • News
  • Other/Misc

What our customers say:

Life Pixel has been a life-changer for me. Continue reading
Eric GConnecticut
Read more reviews
I am more than satisfied with the service I received Continue reading
Christopher JCanada
Read more reviews
I am more than pleased with the conversion job that you did Continue reading
LOUIS MWaco, Texas
Read more reviews
I am VERY impressed with his knowledge of your products and his patience in explaining it to a novice like me. Continue reading
Lynn FEssex, Maryland
Read more reviews
Things will only get better from here thanks to all of you. Continue reading
Phillip FRedding, California
Read more reviews
The Lifepixel newsletter reminds me of not having expressed my gratitude for the excellent job you made. Continue reading
Michael GGermany
Read more reviews
Your staff went above and beyond the call of duty to make sure everything was handled in an excellent manner. Continue reading
Paige RPearland, Texas
Read more reviews
It has given my old camera a new life, I will enjoy using it again. Continue reading
William PAustralia
Read more reviews
Excellent service and the camera works just great Continue reading
Hans FairhurstAustralia
Read more reviews
I just got my converted camera back from you guys. THANK YOU!!!! Continue reading
Anne CutlerForest Knolls, CA
Read more reviews
infrared_filter_choices_sidebar
ir_conversions_explained_sidebar
----------- Watch More Videos -----------
infrared_quick_start_guide

Ready to start shooting Infrared?

Convert My Camera

Subscribe To Our Newsletter

Receive updates, tips, cool tutorials, free stuff and special discounts.

Learn the Basics

  • Video
  • Start Here
  • Filter Choices
  • Focus Calibration
  • Lens Considerations
  • Camera Considerations
  • Place Your Conversion Order

Resources

  • Galleries
  • Lens Hot Spot Database
  • IR Tutorials
  • FAQ
  • Infrared Filter Choices
  • Infrared Photography Guide
  • Infrared DIY Tutorials

Company

  • Why Choose Us
  • Get In Contact
  • Job Openings
  • Write For Us
  • Affiliate Program
  • Terms of Use
  • Privacy Policy
  • Home
  • Start Here
  • Galleries
  • Tutorials
  • FAQ
  • Blog
  • Why Choose LifePixel?
  • Shop
  • Contact

Copyright © 2025 Life Pixel Infrared - All rights reserved - LifePixel Infrared Photography IR Conversion, Modification & Scratched Sensor Repair