• Cart
  • Checkout
  • My Account

Infrared Conversions, IR Modifications & Photography Tutorials | Life Pixel IR

The world leader in infrared conversions, modifications & DIY IR conversion tutorials. Scratched sensor replacement, UV & Full spectrum conversions.

The world leader in infrared camera conversions

866.610.1710
  • Home
  • → Start Here ←
    • 1 – Introduction
    • 2 – Filter Choices
    • 3 – Focus Calibration
    • 4 – Lens Considerations
    • 5 – Camera Considerations
    • 6 – Start Shopping
  • Galleries
    • Infrared Photography
    • Infrared Time Lapse
    • Infrared Cinematography
    • Infrared Stop Motion
    • Ultraviolet Photography
    • Forensic Photography
  • Education
    • Training Sessions
    • How To Shoot Infrared
    • AR Coated Infrared Filters
    • Lens Hot Spot Database
    • Photoshop Video Tutorials
    • Infrared Issues & Solutions
    • IR Basics in Photoshop
    • Camera Quick Start Guide
    • DIY Conversion Tutorials
    • IR Photography Primer
    • Secondhand Cameras
    • Wall Of Shame
  • Workshops
  • FAQ
  • Blog
    • Tutorials
    • Inspiration
    • Locations
    • Gear
    • News
    • Other
  • Why Choose LifePixel?
    • Submit Your Review
  • Contact
  • Shop

4 Realities To Be Aware Of As A Photographer

Being a photographer these days is pretty hard work. Not only the level of competition but also being able to cancel out the noise to stay true to yourself and your style. That’s before even trying to keep up with trends, new gadgets and technology launches. Whether you are a pro or amateur, things seem to move at the speed of light. But there are also a lot of myths out there. Things that seem to have become “the right thing” which are simply not the case. So here are 4 realities to be aware of as a photographer.

Photographer-realities

Don’t believe the social media hype

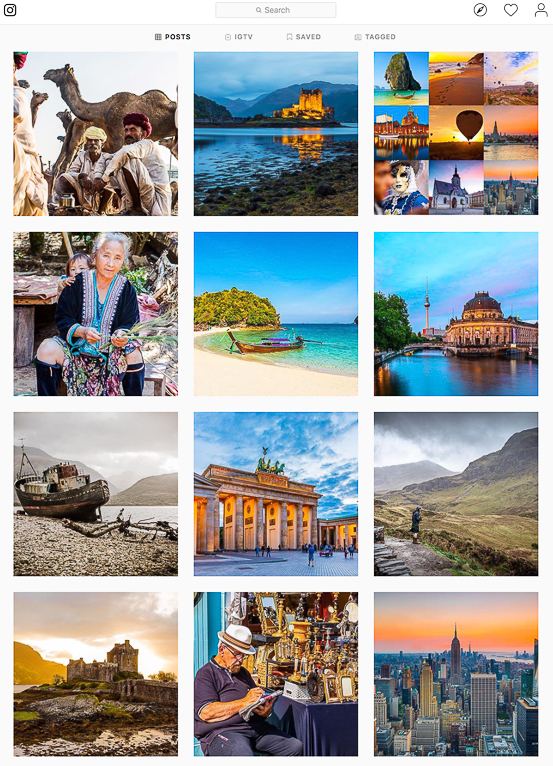
It seems like to be anybody these days you have to have a high profile social media presence. You need thousands and thousands of followers and people liking and commenting on your posts. Why is it that we have become so obsessed with this phenomenon? Well, it’s partly due to this myth that having a lot of followers leads to more work. That simply is not the case.

I know of a famous photographer on Instagram who has millions of followers. Yet for some strange reason, he still has the need to advertise his products like ebooks on a regular basis. You might argue that he is simply trying to increase his sales. But if what we are led to believe is true about platforms like Instagram, they are there to connect you to your customers or followers. So if you have a million people following you that should, in theory, mean you have a million customers.

But the reality is that is not true. Only a small number of those followers are really engaged with you and your photography. So don’t believe the social media hype of others and don’t get yourself down about why don’t have more “likes”. It is far more valuable to have a few people who are genuinely passionate about your work than thousands who are not.

Photographer-realities

Free work leads to paid work

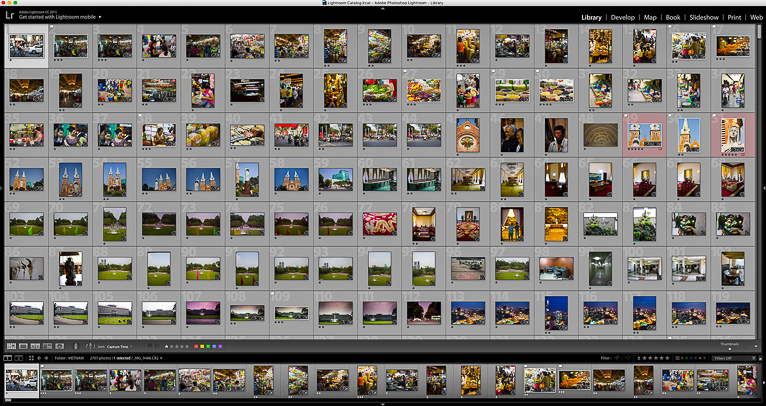
This is more for those who are wanting to earn money from their photography but still valid to anyone with a camera. One downside of digital photography and especially social media, has been the rapid growth of free work. Often clients will use the carrot of “you’ll be credited for your work”. Most photographers who agree to work for free do so with the belief that it will lead to paid work in the future. But from my years of experience and other photographers who I have spoken to, that rarely happens.

Think about it. If a client can get away with not having to pay for work, why should they do so at a later date? They will just believe that they can get free work next time. Unfortunately often it is the big companies who can afford to pay for photos who are the worst offenders. Because they know people want to be associated with their brand. If not you, then another photographer.

Now I’m not naive enough to think that this will stop anytime soon. Or that there is never any value in doing work for less than it might be worth. But you will often find that if a client likes your work enough they would be able to find the budget to pay for it. Even if it’s less than you normally charge try to get something for the work. Because ultimately the more “free work” that is done by photographers, the more difficult it will become for you and the whole industry in the future.

Photographer-realities

If you have great photos, you will get work

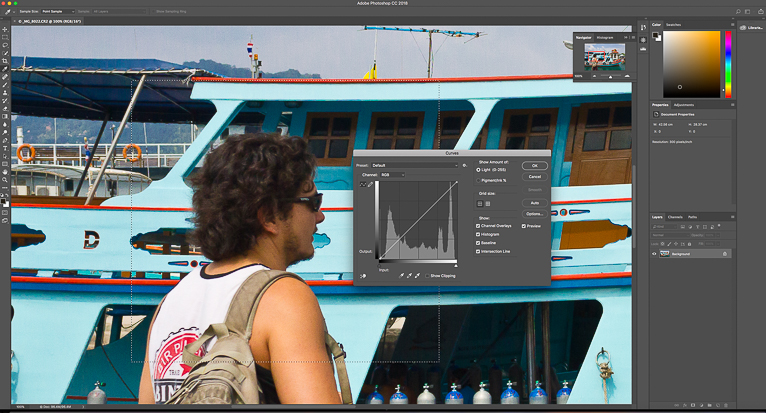
Having great images doesn’t automatically get you work from clients. Of course, it will certainly be necessary to have great work to impress clients, but that alone will not work. These days to be a successful photographer you also need to be a good marketer. But that goes beyond just sending a few emails out to clients. You need to think about everything from SEO to even advertising. There are so many different avenues available that by not exploring them you will be missing out.

You will have to actively go out and look for clients and pitch them ideas to get work. Very rarely will you find people just coming to you if you are just sitting around posting the odd picture here and there on social media. So, a solid portfolio of work is a good basis, but for success, you need so much more these days.

Don’t say “yes” to every job

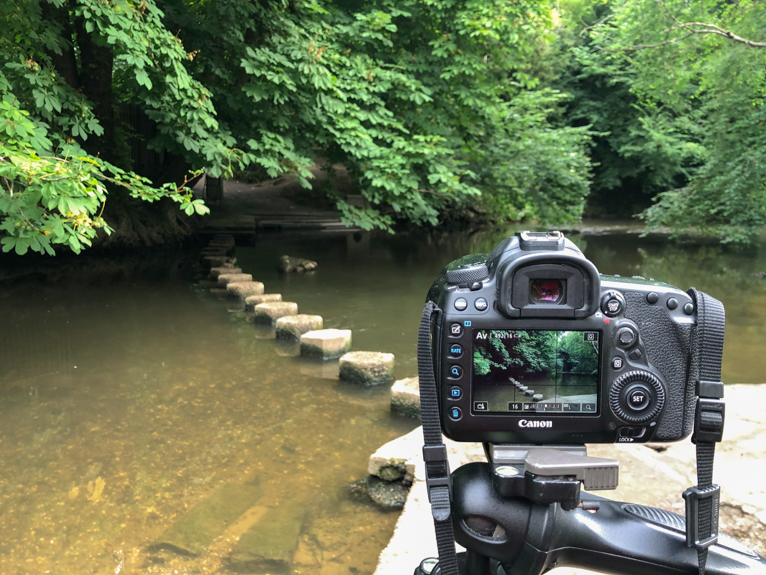
There’s no doubt about it that in the current era, you need to have more bows to string than just specializing in one thing. For example, many photographers might also be videographers or writers. More and more clients these days want the complete package rather than just one element. So if you have the skills to do other things make sure you shout about it.

But this also means that you shouldn’t agree to do jobs or projects that you don’t have the skills for. Because the damage that can be done to your relationship with a client for a poor job is far worst than explaining to them that what they need isn’t what you can offer. Not only will they respect you more, but they are far likelier to then consider using your services when the right opportunity comes along.

This might all seem daunting. It isn’t supposed to be. Rather it is there to hopefully guide you in being able to create a successful photography business. There will bumps along the way and at times you will make mistakes that you will learn from. You will also probably discover some more harsh realities about being a photographer. But with the right attitude and knowing some of the above you will have a better outlook for the future.

Photo credits: Kav Dadfar – All rights reserved. No usage without permission.

Filed Under: Tutorials Tagged With: beginner tips, Photography Pitfalls, Pro Tips, Professional Photography

10 Golden Rules For Better Travel Photography

One of the most common questions I get asked is how do I take better travel photos? Whilst there isn’t just one rule that you can apply that will automatically get you amazing results, over the years I have learnt that these 10 simple rules will dramatically improve most people’s photos. But you should view these as a starting point and continuously learn, experiment and practice to improve your photography. So here are 10 Golden rules for better travel photography to help you get started.

Know what you are doing

If you want to capture great photos you have to be willing to put some time into learning the basics. This is the technical stuff that often people forego in favour of the automatic or program settings on the camera. No one is saying that you should never use automatic mode. But if you know what those settings are and how they work, it will give you more options and more creative control over the picture-taking process. You need to understand the exposure triangle which is ISO, shutter speed and aperture and how they affect and interact with each other.

Beyond photography theory, you should also learn how to use your photography equipment. For example, how do you mount your camera on your tripod correctly and safely? Or which lenses to use when and how do you change them quickly? If you have a flash, what is the best way to use it to avoid your scene looking flat? Once you know the technical and practical parts of photography you can actually concentrate on capturing better photos and worrying less about how to do it.

Learn how light transforms a scene

Light is one of the most important elements in any photo. Even the most amazing scene will look dull and uninteresting If you haven’t got great light to work with. Often what transforms an ordinary photo to an extraordinary one is the right light. You need to learn how light differs at different times of the day. Things like intensity, direction and even colour can all make a huge difference to a photo. It’s no secret that the best light is in the early morning and late afternoon. This is when the soft warm light can enhance shadows, textures and shapes. Always remind yourself that there is a best time to photograph anything. So be prepared to wait or even come back for that best light.

Don’t shoot in anything other than RAW files

If your camera has the function to shoot RAW files, then you shouldn’t use in any other file format. RAW files are not processed by the camera’s software which often compresses data and will make permanent adjustments which are embedded in the photo. A RAW file is essentially what the camera captures with nothing else added to it. Any adjustments such as white balance, exposure, contrast, saturation and even sharpness can be added by the photographer subsequently on a post-processing software. This allows for greater control on an image by image basis. Simply put if you want the very best file format to work with for your photos you should shoot in RAW.

Know how to use editing software

Often one of the excuses people use to justify not using editing software is that they don’t believe photos should be edited. The thing is that if you are shooting in RAW files your photos will have to be post-processed in some way to be able to use day to day. Even if you simply convert them to JPEGs you are still adding a layer of post-processing to the photo. RAW files are fantastic but they are just that, RAW files. So to bring them to life and actually give them the best possible look and feel you have to add some adjustments to the photo. That could be as little as simply adjusting contrast and brightness. Or vibrancy and saturation. At the very least you should ensure that your photos are straight, cropped well and the white balance is corrected. But don’t be afraid to use post-processing to enhance your photos. It’s not cheating.

Be the most informed tourist in town

Research and planning are vital if you want to capture the very best photos. You have to know where to be at the best time of the day. the more you plan and research any destination the better your chances will be of capturing fantastic photos. Always remember that a photographer will need more time at a location then your average tourist. So don’t try and cram in too much into your shot list. It’s always best to allow more time than to find yourself rushing around. For example, you might get to a location and find that the sun has gone in behind clouds. Or there might be someone or something in your way like a van parked in your composition. Give yourself enough time and it shouldn’t be an issue. The reality is that most times when you get to a location you will have to wait to capture the photo you want.

Practice as much as you can

Photography is like any other skill or hobby. The more you practice the better you will become. So once you have the technical stuff sorted out and understand some of the theory, get out there and actually shoot as much as you can. Nothing will make you learn and practice what you have learnt better than actually doing it. You will make mistakes along the way or you might experience scenarios that you’re not prepared for, but this is part of the learning process. You will learn from your mistakes and you will become a better photographer because of it.

Commit to the image

Often one of the main reasons that professional travel photographers capture the fantastic images that you see in magazines and newspapers is because they have waited for the perfect moment. In other words, they committed to capturing that image as long as it took. Once you have got to a location and you have your settings and your composition sorted, set yourself the task to not leave until you have captured the very best photo. If you can’t capture the photo that you want then be prepared to come back. Of course, there will be times when this won’t be possible because of limited time. But if you have the option of giving up or persisting in order to capture a photo, there shouldn’t really be a decision for you to make.

Walk as much as you can

One of the best ways to capture great photos is to experience a destination in the same way as locals do. For example, if you get a taxi everywhere you go then you’re going to miss so much of a city. Instead of getting taxis or private transfers, if it’s safe to do so walk around. If you have to get transport from one place to another try to get buses or metros. This will give you much more of an insight into a destination and can present you with far more photo opportunities.

Be your own critic

It is often difficult to critique your own work. You tend to have a sense of nostalgia. You might select photos that may not be as good as you think simply because of the effort it took to capture them. But if you really want to have great photos in your portfolio, you have to be willing to put all feelings aside and judge your work on its merits, not sentiment. One good trick is to scroll through your photos and the ones that make you pause for a moment or two are possibly worth keeping in your portfolio. It’s always great to also get a second opinion. So ask someone else what they think. Do they agree with your choices? Treat this period as assessment and reflection on your work. Could you have done anything better? Did you make mistakes? Often you will learn much more from your mistakes then you will learn from your successes.

Find your own style

Over time most photographers will develop their own style. By that, I mean that if you looked at the collection of their work it all looks like it’s come from the same person. The subject may be different the destinations will vary and some photos will look different. But as an overall set of work, you can tell they belong together. There is no right or wrong here it’s just what works for you and the sort of composition, lighting, colours and styles that catch your eye. So try to develop your own style over time. Once in a while put out some of your work in front of you. Does it all look like it’s comes from the same person? You can, of course, look at other people’s work and be inspired. The key is not to copy but rather be inspired to find your own style.

Travel photography is a wonderful profession or hobby to have. To capture great photos you have to be willing to put the time and effort in. By using the tips above you will be on your way to capturing great travel photos.

Photo credits: Kav Dadfar – All rights reserved. No usage without permission. Dreamstime.

Filed Under: Tutorials Tagged With: beginner photography tips, beginner tips, Travel photography

6 Tips For Better Local Park Photos

Wherever you live in the world, you are sure to have a local park near you. Parks are fantastic places to photograph and importantly practice parts of your photography that you may be weak in. Besides the array of fauna and flowers, there are also people to photograph, wildlife and even sculptures and art. The great thing about parks is that you will often find people interacting with each other and nature. There might even be some people playing sport. All of this can lead to some great photos. To help you on your way here 6 tips for photographing local parks.

Use the right light

Light is vital in any sort of outdoor photography. Parks are no different. To capture great photos of parks aim to take your photos early in the morning or late in the afternoon. The soft golden light will enhance shadows and give the scene a warm glow. If you really want to improve your park photos, learn how to utilise this light creatively by for example backlighting your subject or creating sunbursts. The other advantage of photographing early morning is that you may also get some mist which will enhance the scene further.

Know what the rules are

Some local parks will be clear about what is and isn’t allowed when it comes to photography. For example, in some parks, tripods or drones might not be allowed. Or some may only allow photos for non-commercial use. For example, some of the Royal parks in London allow photography for editorial use but not commercial. The majority of the time if you are not intending to use the photos for commercial purposes (i.e. they are just for yourself) you will be fine and should have no problem. But it’s worth checking the rules and also using common sense. For example, taking pictures of kids or people sunbathing might get you being asked some questions. Also, pay attention to things like opening and closing times. You don’t want to end up being locked a park.

Look for stories

Parks are a wonderful place to practice your storytelling photography. There are so many different situations happening that the possibilities are endless. It could be someone walking their dog or people enjoying ice cream. Including people in your photos is a great way to tell these stories. These photos can often give you the unique shots that will make your portfolio stand out from the crowd. They are everywhere to be seen, you just need to keep your eyes open to capture them.

Shoot a few great photos

One of the great things about photographing in parks is the sheer volume of subjects that you can capture. From flowers, trees, lakes and animals to statues, wildlife, bugs and even people, they all offer great opportunities for photos. Instead of trying to photograph everything do some research to try and find what that park is famous for. Then just focus on capturing that part of the park. You may not end up with as many photos, but the ones that you have will stand out much more. Remember it’s far better to have a selection of fantastic photos than a whole load of mediocre ones.

Don’t forget the details

Photography allows us to photograph and see the little things. Often these small details Are missed by the naked eye. So instead of always trying to capture the wide-angle views, step in closer and capture those small details that you notice from time to time. It could just be the beautiful bark of a tree or the leaves of a plant. Not only will these types of photos give you a variety for your portfolio, but they will also provide you with wonderful abstract images. So don’t be afraid to experiment by getting in closer. You never know, you might be surprised by the result.

A close-up photo of the shell of a turtle.

Take your time

As with any form of travel photography, often you have to be willing to be patient and wait for the right moment to capture your shot. So if you spot a scene where you think it could be improved or the light isn’t right either sit and wait. Or come back later in the day. The key is not to cram too much into your shot list for each day so that you enough sufficient “waiting” time.

Parks are a great place to practice any form of photography you are interested in. Most often they are easily accessible and with the plethora of subjects on offer to photograph, it means it is easy to hone your skills. Just do your research beforehand and if time permits even scout the park out. Just make sure you pay attention to the rules.

Photo credits: Kav Dadfar – All rights reserved. No usage without permission. Dreamstime.

Filed Under: Tutorials Tagged With: beginer photography tips, beginner tips, photographing parks

How To Become A Better Photographer In 6 Weeks

Photography is like any other skill or profession. With experience and the more you practice the better you will become. But one of the issues that newbie photographers face is having the time and a clear plan of how to practice. Sure you can just head out and snap away, but is that actually improving areas that you may struggle with? Think about it, if you were going to hike up a mountain, would just walking around for a few hours a day be sufficient? It will help, but you would need to train yourself to be able to walk up a steep incline. You might even have to do it wearing a backpack to simulate the weight you would have to carry. There might also be specialized training like being able to use crampons and an ice axe.

Photography is no different. Every scenario will throw up challenges that you’ll need to overcome. The best way to ensure you are ready is to practice. So here is a 6-week plan aimed at helping you become a better photographer.

Week 1 – three picture story

One of the big challenges for any photographer is to be able to tell a story in a series of images. That might be as a feature in a magazine or newspaper or as just a set of 3 or 4 in a gallery. The photos all need to be different yet have a cohesive story that links them.

A great way to practice this art is by using a technique called the “three picture story”.  Simply aim to capture any scene or scenario that you are looking at in a set of 3 photos. That doesn’t mean putting your camera on burst mode and photographing the same thing 3 times. Start with a wide-angle shot that captures the whole scene. Then a slightly closer shot of one element or aspect of the scene. Finally, a close-up of the detail of something within a scene. Aim to do this wherever you are taking photos. Soon you’ll notice how much more variety you will get into your shots.

Week 2 – the street corner challenge

Sometimes as a photographer, you have to capture even the mundane. Not every scenario will be a beautiful sunset across an epic landscape. This challenge is designed to help you see the beauty and intrigue in even standing on a mundane street corner.

For this challenge find a street corner to stand at. Preferably you should aim for somewhere that will be relatively busy otherwise you might be waiting for hours before something happens. Set yourself a time limit (whether that’s an hour or a day is up to you) and just take photos as and when something catches your eye. You are allowed to move around a little and cross the road but the point of the exercise is to try and see if you can find that unique shot without moving away too far. For example, if someone with an interesting look walks past, ask to take their portrait. Look for details or interesting angles and composition. Once you have finished, check your images to see if you have managed to capture a photo (or a set of photos) that could represent that street corner. If not, try again somewhere else.

Week 3 – no chimping challenge

Chimping is a term that is used to describe the habit of looking at every photo on the LCD on the back of a camera after every shot. The reason that this is not always good to do is that by checking every photo, you are potentially missing others. But also because by having the option to check your photos, it can mean you are not thinking about the process of taking the photo in the first place.

Back in the days of film, as a photographer, you had to trust your knowledge and instinct to capture any photo. Everything from composition and settings would have to be known before the photo was taken. So you would have to analyze the scene more and think about the execution.

This challenge is about replicating this method of photography. Set yourself a time period of taking photos without looking at the LCD screen at all. If your camera has the option to switch it off then do so. Before you take any photo, really think about your composition and settings. To make this challenge even harder, set yourself a limit for the number of photos that you are going to take (similar to how a roll of film would work). You’ll be amazed how much more careful you are in selecting your shots when you only have limited photos to work with.

Week 4 – the prime lens challenge

This weeks challenge is all about teaching you not to rely on your zoom. A prime lens has a fixed focal length. In other words, you can’t zoom in or out. So if you want to capture a close-up photo, you have to physically get closer to your subject. The reason that this is important especially when taking photos of people is that it helps to build a connection with your subject. They will be more engaged with you and often that means more intimate and better photos. Look for a 50mm prime lens and aim to do a day’s worth of photography just with that lens.

If you don’t have a prime lens or can’t get one, just set you focal length on your camera to 50mm and try not to change it throughout the day.

Week 5 – long lens challenge

Whereas last week’s challenge was about getting closer, this week’s is all about stepping back. One of the common mistakes that beginner photographers make is that they try to capture everything within a scene. Good photography is about knowing when and what to exclude from a photo as much as what you should include. Using a telephoto lens will make you have to be selective about every scene. This will help your composition when you come to using a wide-angle lens. Aim for a lens that offers at least 100mm zoom.

Again if you don’t own a telephoto lens you can zoom in as much as possible using your existing lens. Most default lenses for cameras would be either 24-70mm or 24-105mm. So you should still be able to do the challenge using an existing lens.

Week 6 – the random word challenge

Your week 6 challenge is to put everything together and capture a telling and intriguing set of images. But rather than just heading out and snapping away with no direction, set yourself a random word challenge. This challenge is great fun and can really test your creativity. Write down a set of random words on a piece of paper. Then tear them up and place them in a hat. Choose one at random. Whatever your word is, that is your brief for the day. So you should aim to take photos that can represent that word. For example, if your word is “legs” you might take some photos of people’s legs whilst they are walking. But could then photograph shoes or closeup of shoelaces. You may even photograph someone’s tattoos and so on. How difficult you make this task is up to you.

These are just some of the sort of challenges and tasks you can set yourself to make you a better photographer. The key is to actively try to improve the areas that you struggle with using a clear plan. Follow this 6-week plan and you should see an improvement in your photos.

Photo credits: Kav Dadfar – All rights reserved. No usage without permission. Dreamstime.

Filed Under: Tutorials Tagged With: beginner photography, beginner tips, better photography

Which Type Of Camera Is Right For You?

Mirrorless or DSLR? Compact or smartphone? Or do you go for a medium format? These days the choice of cameras can seem endless. But if you know the differences between them that can be a great help in helping you choose the right one. Budget will also, of course, be a factor. So here is our guide to help you decide which type of camera is right for you?

Smartphone cameras

The first option when it comes to cameras is the trusty smartphone. Because after all the best camera is the one that you always have with you. Smartphones have improved vastly over the years and are slowly becoming a serious player in the camera market. In fact, it’s not unusual to even see photos that were taken with a smartphone being accepted by prospective clients. There are some smartphones now that can offer high-quality resolution and are even good in low light conditions. There are so many choices out there so do your research and chose one that will do what you are looking for.

Standard compact cameras

These are generally the basic point and shoot entry-level cameras. Whilst they are normally fully automatic, there is usually also the option to adjust some settings manually. Some will also offer HD video recording, image stabilization and even Wifi connectivity which is useful for uploading photos directly onto social media platforms. Most will also have a 10x zoom lens, built-in flash and an LCD screen on the back. With prices starting at around $80 it’s often the go-to camera for people who just want to take family or vacation photos.

Zoom compact

The next level up from the standard compact cameras are the zoom compact ranges. These are very similar to standard compact but often will have a more powerful zoom lens. For some models, this can be as much as x30. You will often have some manual exposure options as well as the usual fully automatic modes. As per standard compact cameras, they will usually have HD video recording and some models might offer extras such as GPS for geotagging or WiFi connectivity. Prices would usually start around $150 with some models being +$500.

Adventure cameras

An alternative option to the standard compact cameras are the adventure cameras. They are usually similar in their features to standard cameras and also a similar zoom. The big benefit of these cameras is that they are built to withstand the elements. Their tough casing might make them waterproof, shockproof, freezeproof and even have toughened glass on the lens. If you are going to be using your camera in harsh conditions, this would be a good alternative to standard compact cameras.

Advanced compact

Even though these cameras might look like the normal standard cameras, they offer far flexibility and control in their photo taking. Designed for more experienced photographers, they are ideal for those who want more versatility, quality and creative features. Options such as manual exposure mode and manual focusing features, optical viewfinders and external flash connections make these cameras a good option for photographers who want more control over their photos.

Compact (mirrorless) system cameras

The big step up from the compact systems is to the mirrorless cameras. The big benefit of these cameras over compact cameras is the ability to have interchangeable lenses which mean greater flexibility. But you can also benefit from all of the manual and creative features of SLR cameras without the burden of the additional weight. Mirrorless cameras have been experiencing a huge boom and they are becoming increasingly more powerful. Some of the latest models are as good as the higher-end DSLR cameras with some professional photographers also investing in these cameras as an alternative or even replacement to their usual cameras. These cameras are a great option for anyone from hobby photographers or even those who are more serious about their photography and even pros.

DSLR

Traditionally the go-to option for serious amateur and professional photographers, DSLR cameras helped make the transition between film and digital. With interchangeable lenses, full manual control, superb image quality they have been top of the tree for a long time. That position is under threat from mirrorless cameras and in the years to come they may fully replace traditional DSLRs. The majority of DLSRs use a sensor size called: APS-C. The high-end ranges will have a full-frame sensor which is the same size as the traditional 35mm film. Prices start from around $400 for an entry-level model with a standard lens right through to over $3000 just for the camera body for a full-frame model.

Medium format cameras

If you have a few thousand dollars to spend, then medium format cameras are the highest quality cameras you can get. This is the next step up from full-frame DSLR cameras. With a bigger sensor than even the full-frame DSLRs, it means higher image resolution (60 megapixels). But this extra quality comes at a whopping price. For example, some medium format cameras can cost in excess of $25,000! But before you rush out and get yourself one, ask if you are actually going to need that extra quality. The reality is that photos that are taken with full-frame DSLR cameras or even mirrorless camera will be a good enough quality to print even at big sizes.

Whatever camera you choose the important thing to remember is that your photos won’t automatically become better. You will just have more tools to be able to control the photo-taking process. Yes, your photos will have a better resolution, but a poorly composed photo in poor light will still not impress anyone, even if it is taken with a medium format camera. Invest in the best quality camera that you can afford. Then upgrade when you can afford to do so. These days it seems like a new camera is released every day. As long as you follow the advice above and learn the differences in the camera systems you will be able to purchase what’s right for you.

Photo credits: Kav Dadfar – All rights reserved. No usage without permission. Dreamstime.

Filed Under: Tutorials Tagged With: beginer photography tips, beginner tips, cameras, Different camera types

6 Things That Could Be Holding Your Back Your Photos

Most amateur photographers at some point through their journey feel like they have reached their peak. This might lead to the frustration that they cannot take their potential in taking great photos any further. Often the barriers that are holding them back have nothing to do with skill. Instead, they are either mental or the common photography pitfalls that they fall into. If you are one of these photographers, fear not. Below you’ll find 6 potential issues that are holding you back. The first step in being able to push through your limitations is to understand them. Because only then can you begin to rectify these issues and move forward.

Not confident enough

Confidence plays a huge part in anything that we humans do. When you are confident you feel you can achieve anything. It helps to motivate and push you further. But a lack of confidence in photography is probably the most common reason that is holding people back. Confidence is such a vital part of photography that if you are lacking in confidence, it is something you need to address. The first thing you should do is establish what you are lacking confidence in? Is it approaching people to take their photo? Is it the confidence in knowing what settings to use? Or is it a lack of confidence in your ability?

Whatever you are lacking confidence in, that is the area that you should focus on. But it’s not enough to simply acknowledge it. You need to try to train yourself to improve in that area. Because that is what will give you the confidence you need. For example, if you are shy and don’t like approaching people, make it a mission to do so. Set yourself a daily challenge to photograph one person. Then increase it to two and so on. Eventually, it will become second nature to you.

Or for example, if you are lacking confidence in knowing what settings to choose, make that a priority to practice. Go to a market for a day and keep shooting until you get a good idea of the settings you need. Then next time practice photographing during the blue hour until that becomes comfortable for you to do. Eventually, you will have a good understanding of every scenario and what settings you need to use.

Blaming your gear

This is one of the biggest misconceptions when it comes to photography. Having better or more expensive equipment will not make you a better photographer. If you don’t believe this, just have a look on Instagram at the thousands of amazing iPhone photographers out there. So don’t hide behind your gear and instead try to examine and understand how and why your photos are not as good as you want them to be. Better equipment will make the quality of your photos better. But that is in terms of resolution, sharpness and even colour saturation. But a poorly composed and executed photo will not be made better with a more expensive camera.

Saying “I don’t have enough time”

Everyone in any line of profession is always guilty of using this excuse. Whilst it is true that as an amateur photographer you may not have as much time to dedicate to photography as a pro, it shouldn’t be an excuse. If you want to improve your photography you have to dedicate the time to learn, practice and even examine your failures. Try to dedicate a set night in a week where you can just focus on photography. Think of it like attending a class. Or if you struggle to manage your time why not join a local camera club. Often you will find that because there are regular meetings every week, it will become part of your schedule.

Not shooting enough

Even if you feel that you do not have the time at all, at the very least you should carry your camera with you every day. Using the time when you are commuting to take photos is a good way to practice. Photography is like any other hobby or profession, the more you practice the better you will become. Try to set yourself a target daily, weekly or even monthly. But try not to think of it as to quantity but rather quality. Aim to capture one great shot a day. So even though you might take fifty photos, aim for that one fantastic shot. Even if you managed to capture just one great shot a week, that would be 52 a year. But think of how many you might have taken for those 52? Those photos will help you learn as much as your great shots.

Too impatient

One of the things that always astonishes me is how often I see photographers turn up somewhere, take a photo and leave in the blink of an eye. There is no time spent thinking about the shot or the light. No thought on the composition or even just taking in the scene. Very rarely will I ever find that my favourite photo from a scene is my first shot. Of course, sometimes there won’t be time to wait around and you have to capture the shot straight away. But if you are photographing something like a landscape scene, take your time instead of rushing to take the photo. You might be surprised by the results.

Giving up

All of the points above sometimes end up with you giving up. You may give up waiting for the perfect light when you are at a scene. Or you might just give up photography. The thing about photography is that sometimes it can be incredibly frustrating and disheartening. Even seasoned professionals will have their moments of thinking that a change in career might be in order. But if you can persevere and identify where you can improve then you may just find yourself being able to push through the thought of giving.

Photography can be incredibly rewarding. Just think of that moment when you were able to nail that shot that you had to work hard to capture. Or maybe it was just a lucky fleeting moment. Either way, you are proud of that shot. So every time that you feel that one of the issues above is holding you back think to that moment. Or just imagine how great it would be to capture that incredible shot. It may just stop the issue holding you back.

Photo credits: Kav Dadfar – All rights reserved. No usage without permission. Dreamstime.

Filed Under: Tutorials Tagged With: beginer photography tips, beginner tips, common mistakes

Basic Photography Tips For Beginners

For anyone new, photography can seem like a daunting hobby to get into. There are so many things to learn. So many different scenarios to master and so many challenges along the way. But you needn’t worry because there has never been a better time for learning photography as it is today. There is so much free information online that there are many full-time photographers that learnt on their own just using this free information. So if you are new to photography, here are 10 basic tips for beginners to help you get started.

Beginner-Photo-Tips

Learn the basics

I often tell newbie photographers that one of the first and best things you can do is to just read your camera manual. Yes, incredibly those big booklets that come with your camera have a whole wealth of information in there not just about your camera, but also about photography. So, start by simply reading your manual all the way through a couple of times.

Then go online and spend time actually learning the basics of photography. Things like shutter speed, aperture, ISO are together known as the exposure triangle and should become second nature to you. Learn the basics of composition like the rule of thirds and how to frame your shots. Basically, the more you learn the better and quicker your progress will become.

Beginner-Photo-Tips

Look after your gear

Even though camera equipment has become more accessible than it was many years ago, it does still come at a cost. By the time you have a collection of equipment that you need it will add up to a hefty sum. Looking after your equipment should be of the utmost importance. So, make sure you learn how to look after your camera gear.

For example, fitting a UV filter to your expensive lens means protecting the lens glass from scratches. It’s much cheaper to replace a UV filter than repairing a scratched lens. Or for example, know that you should avoid touching your sensor. There is plenty of advice on camera care online so spend time learning it. It can save you money in the long term.

Beginner-Photo-Tips

Put together a shot list

Whether you are a seasoned pro or a complete beginner, it always helps if you have a shot list. Professional photographers use shot lists to ensure that they cover off all the different photos that they need to capture on a shoot. But as a beginner, a shot list can be equally useful in helping you write a list of what you want to photograph.

It could be a place, a specific scenario like a blue hour shot of a famous landmark or even a specific image that you have in your mind. The good thing about a shot list is that it gives you goals and targets to achieve by ticking them off. But also helps you capture a diverse set of photos rather than the same thing over and over again. So, if you haven’t written out a shot list yet then go ahead and do so.

Beginner-Photo-Tips

Carry your camera with you

It might be cumbersome and a pain to carry your camera with you all the time, but when you are starting out it really does help. One of the big challenges for newbie photographers is finding time to practice. Juggling a job, family and other commitments mean you might not have a lot of time to actually take photos. By having your camera with you all the time it gives you more opportunities to practice taking photos.

If you find it really cumbersome to carry your camera with you then simply use your camera phone.

Beginner-Photo-Tips

Get off auto mode

The automatic modes on cameras have improved dramatically in recent years. But the problem with using automatic mode is that you are not actually learning about photography and how to take photos. The other issue with auto modes is that sometimes you need to compensate to be able to capture the shot you want. In auto mode, the camera will make that decision which might have an adverse effect on your photo.

For example, if you are shooting in low light conditions the camera might bump up your ISO to 6400! This means a lot of noise in your photo which will make it look soft. Whereas if you were controlling the exposure triangle yourself, you may have been able to underexpose your image by a stop or two to then brighten post-processing. This might have given you a better image. So, instead of settling for auto mode, learn the basics and do it yourself.

Beginner-Photo-Tips

Experiment

One of the great things about starting out is that you are allowed to make mistakes. You are also allowed to experiment with different genres and even different settings to find your own style and preference. So, don’t be afraid to experiment with your photos and if you get something wrong, learn from it and move on.

Beginner-Photo-Tips

Find people to inspire you

Photography is a lonely profession and you will quickly find that there aren’t too many people who want to wait around for you to take photos at sunset. Finding a photo buddy, especially one whose work you admire can really help push you to become a better photographer.

But even if you don’t have anyone to act as a photo buddy, find photographers whose work you like and follow them. The key is not to copy their work but instead use it to inspire your own.

Beginner-Photo-Tips

Share your photos

You don’t have to be a professional photographer to find an outlet for your photos. Anyone can do it and you should because it can help you become better. I said earlier that photography is a lonely profession and for many, their only interaction on photography comes online through social media. Don’t be afraid to find a way to share your photos with others whether that is online or in person. It could be your own website, Instagram, Facebook or even a local camera club.

Beginner-Photo-Tips

Learn basic photo editing

Even if you are completely against photo editing, it still pays to know the basics. As inevitably most photos will benefit from some level of post-processing. That could be as simple as just straightening the photo or cropping it slightly differently. Or sometimes you may need to add more extensive retouching like removing the trash can that is in the shot.

Whatever you decide is the right approach for you, as with everything else, there are lots of free learning material online. YouTube videos can walk you through the entire process from the basics to more advanced functions. So, don’t be lazy, learn the basics of post-processing.

Beginner-Photo-Tips

Get a workflow

One of the biggest benefits of digital photography is that it allows you to build a workflow that can get the work you need to get done in a fraction of the time. Your workflow will naturally evolve over time but it’s still worth thinking about it and putting a process in place. Think about how you want to store your photos like a filing structure? How do you want to back them up? How to flag the good ones and if you want to delete the bad ones? Don’t worry if you don’t have the answers straight away, that will come over time. But it’s good to think about it and have a process in place.

Beginner-Photo-Tips

As a beginner, you are starting a wonderful journey. One that will at times be frustrating whilst at other times gives you an enormous sense of pride. The most important thing when you are starting out is to enjoy yourself, learn as much as you can and practice, practice and practice. Don’t worry it won’t always be this daunting.

Photo credits: Kav Dadfar – All rights reserved. No usage anywhere online without permission. Dreamstime.

Filed Under: Tutorials Tagged With: beginner tips, photography tips

8 beginner tips to help you become a better photographer

When you first start out in photography it can feel daunting. There is so much to learn, not mention the time it takes to put into practice what you learn. The good news is that most people go through the same thing when they start out and with patience and practice it will soon become second nature to you. But to get you started, here are 5 beginner tips to help you become a better photographer.

Learn the basics

Believe it or not, usually the best thing you can do at the start is to read your camera manual. Yes, those big bulky manuals can actually be useful when learning photography. Not only will you learn some of the basics of photography, but it will also help you understand and learn how to use your camera.

But you shouldn’t stop there. Try to go further and get a basic understanding of the theory behind photography. For example, what is the actual process that happens when you press to take a photo. Or the different kinds of light and how that impacts your photos. You should also aim to learn what the different terms are in photography. Things like “shutter speed”, “depth of field” and “white balance” are integral to photography.

The more you can learn about the theory side of photography the better you will become at actually taking photos.

Learn about your equipment

Besides learning the theory part of photography, you also need to learn how to use your equipment and also how to look after them. It would be pointless owning the latest camera equipment if you can’t use it to it’s full capabilities. Or seeing a fleeting moment unfold before you but missing it because it takes you too long to get your settings right. Remember that it isn’t just the camera you need to learn how to use. You also should make time to learn how to use accessories such as filters, a flash and even a tripod. These will all be absolutely essential at some time in your photography journey.

Learn post-processing

Whether you are a fan of post-processing or are a purist and prefer to capture images perfectly when you are taking a photo, the reality is that every photo will benefit from some level of post-production. For some images it might just be tweaking a crop or straightening the horizon. Whilst for others it means retouching and color corrections.

Ultimately though, you will need to learn how to use a post-processing software. The most common software to use are Adobe Lightroom and Photoshop and they offer everything from basic controls like brightness and contrast to extensive retouching and correction facilities.

Don’t be daunted by using these bits of software as they are actually very easy to learn and master. The good news is that in this day and age there are a ton of materials, tutorials and videos that can cover everything you need to know. You  just need to set yourself time to learn and practice.

Make a shot list

A shot list is something that most photographers who are working on a brief are either given by the client or create for themselves. It’s a list of specific shots needed that they can then cross off as they work through the list. For travel photographer, this might be a list of sights at a destination or specific foods that need to be photographed. A wedding photographer might be given a list of people or situations to photograph and so on.

Creating a shot list for yourself is a really great way of keeping yourself focused on photographing specific things. For any beginner this is a really good way of practicing what you may not be great at but also break down the learning process into small manageable chunks. For example if you have just been learning about capturing movement of water with a slow shutter speed, set yourself a shot list of different places local to you that you capture photos to show this.

Set yourself photography times

One of most difficult things for people new to photography is making the time in their normal daily life to take photos. Unfortunately, photography is one of those hobbies or professions that you can only improve in by practicing. The more you practice, the better you become at seeing and taking photos. Obviously for most people practicing photography will usually come second to other more pressing matters.

So, instead of just haphazardly popping out here and there with a camera for a couple of hours, set yourself regular periods dedicated to photography. Then whatever the weather or your mood, aim to go and practice whatever it is that you need to. Keeping that consistent practice going is the only way you will improve.

Take lots of photos

These days digital cameras mean that you literally can take as many photos as you like (as long as you have enough memory cards). So, don’t be afraid to take lots of photos, but also to really push yourself beyond your comfort level. Experiment with different settings, crops, different light and even different genres. The more photos you capture the better and quicker you will become in the long term. You will notice that as you become a better photographer, you will begin to be more and more selective about the photos you actually take. So, whereas at the start you might take 100 photos and have 1 or 2 that you love, a few years down the line and you will love 40 or 50. The key is practice.

Evaluate your failures

You will often learn more from your failed photos than from your successes. It’s important that you accept that you will make mistakes when starting out in almost every aspect. That’s just part of learning a new discipline. But instead of just ignoring the mistake, try to evaluate why and where it went wrong? If it’s an obvious mistake like for example a blurred photo, try to work out what settings you should have used instead. Every time you learn from one of your mistakes, you’ll be unlikely to repeat it again.

Set yourself a goal

Even if your intention is for photography to be a hobby, it is still worth setting yourself some photography goals for the future. It could be as simple as you want to have a great website to showcase your work. Or it could be that you want to enter and win a photography competition. Or it could just simply be a list of places or things you want to photograph brilliantly. Whatever your goals are, they are important as they can keep you motivated and the more motivated you are the better your work will be.

Photography is a wonderful hobby or profession to be involved in. But like learning anything new, it requires time, effort and dedication. Follow these tips and you will be well on your way to becoming a better photographer.

Photo credits: Kav Dadfar – All rights reserved. No usage without permission. Dreamstime.

Filed Under: Tutorials Tagged With: beginner tips, photography tips

Blog Topics

  • Tutorials
  • Inspiration
  • Locations
  • Gear
  • News
  • Other/Misc

What our customers say:

Life Pixel has been a life-changer for me. Continue reading
Eric GConnecticut
Read more reviews
I am more than satisfied with the service I received Continue reading
Christopher JCanada
Read more reviews
I am more than pleased with the conversion job that you did Continue reading
LOUIS MWaco, Texas
Read more reviews
I am VERY impressed with his knowledge of your products and his patience in explaining it to a novice like me. Continue reading
Lynn FEssex, Maryland
Read more reviews
Things will only get better from here thanks to all of you. Continue reading
Phillip FRedding, California
Read more reviews
The Lifepixel newsletter reminds me of not having expressed my gratitude for the excellent job you made. Continue reading
Michael GGermany
Read more reviews
Your staff went above and beyond the call of duty to make sure everything was handled in an excellent manner. Continue reading
Paige RPearland, Texas
Read more reviews
It has given my old camera a new life, I will enjoy using it again. Continue reading
William PAustralia
Read more reviews
Excellent service and the camera works just great Continue reading
Hans FairhurstAustralia
Read more reviews
I just got my converted camera back from you guys. THANK YOU!!!! Continue reading
Anne CutlerForest Knolls, CA
Read more reviews
infrared_filter_choices_sidebar
ir_conversions_explained_sidebar
----------- Watch More Videos -----------
infrared_quick_start_guide

Ready to start shooting Infrared?

Convert My Camera

Subscribe To Our Newsletter

Receive updates, tips, cool tutorials, free stuff and special discounts.

Learn the Basics

  • Video
  • Start Here
  • Filter Choices
  • Focus Calibration
  • Lens Considerations
  • Camera Considerations
  • Place Your Conversion Order

Resources

  • Galleries
  • Lens Hot Spot Database
  • IR Tutorials
  • FAQ
  • Infrared Filter Choices
  • Infrared Photography Guide
  • Infrared DIY Tutorials

Company

  • Why Choose Us
  • Get In Contact
  • Job Openings
  • Write For Us
  • Affiliate Program
  • Terms of Use
  • Privacy Policy
  • Home
  • Start Here
  • Galleries
  • Tutorials
  • FAQ
  • Blog
  • Why Choose LifePixel?
  • Shop
  • Contact

Copyright © 2025 Life Pixel Infrared - All rights reserved - LifePixel Infrared Photography IR Conversion, Modification & Scratched Sensor Repair