• Cart
  • Checkout
  • My Account

Infrared Conversions, IR Modifications & Photography Tutorials | Life Pixel IR

The world leader in infrared conversions, modifications & DIY IR conversion tutorials. Scratched sensor replacement, UV & Full spectrum conversions.

The world leader in infrared camera conversions

866.610.1710
  • Home
  • → Start Here ←
    • 1 – Introduction
    • 2 – Filter Choices
    • 3 – Focus Calibration
    • 4 – Lens Considerations
    • 5 – Camera Considerations
    • 6 – Start Shopping
  • Galleries
    • Infrared Photography
    • Infrared Time Lapse
    • Infrared Cinematography
    • Infrared Stop Motion
    • Ultraviolet Photography
    • Forensic Photography
  • Education
    • Training Sessions
    • How To Shoot Infrared
    • AR Coated Infrared Filters
    • Lens Hot Spot Database
    • Photoshop Video Tutorials
    • Infrared Issues & Solutions
    • IR Basics in Photoshop
    • Camera Quick Start Guide
    • DIY Conversion Tutorials
    • IR Photography Primer
    • Secondhand Cameras
    • Wall Of Shame
  • Workshops
  • FAQ
  • Blog
    • Tutorials
    • Inspiration
    • Locations
    • Gear
    • News
    • Other
  • Why Choose LifePixel?
    • Submit Your Review
  • Contact
  • Shop

5 Ways to Build Confidence As A Photographer

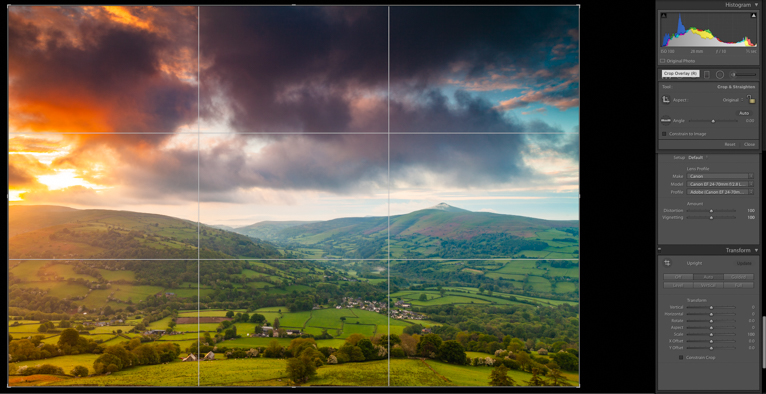
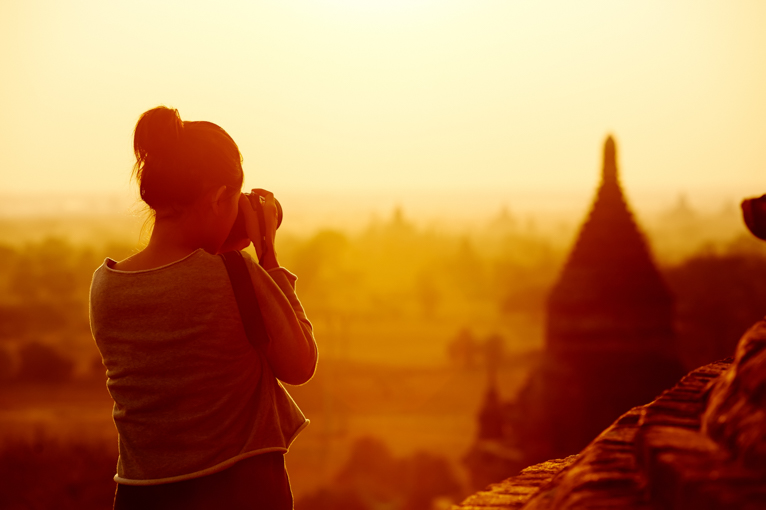
Taking your first steps into photography can be daunting, so let’s discuss the best ways to build a more confident version of yourself to help you become a better photographer. Before we get into any of this, it’s important to remember that everyone has the capability to become a good photographer. I firmly believe that most people have the talent to be good photographers but often lack confidence. So keep reading to understand the best ways to develop this confidence and in turn an improvement in your photos.
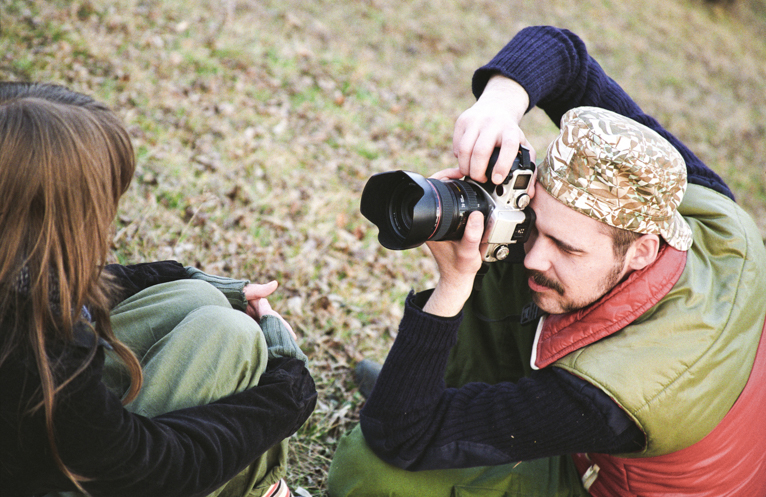
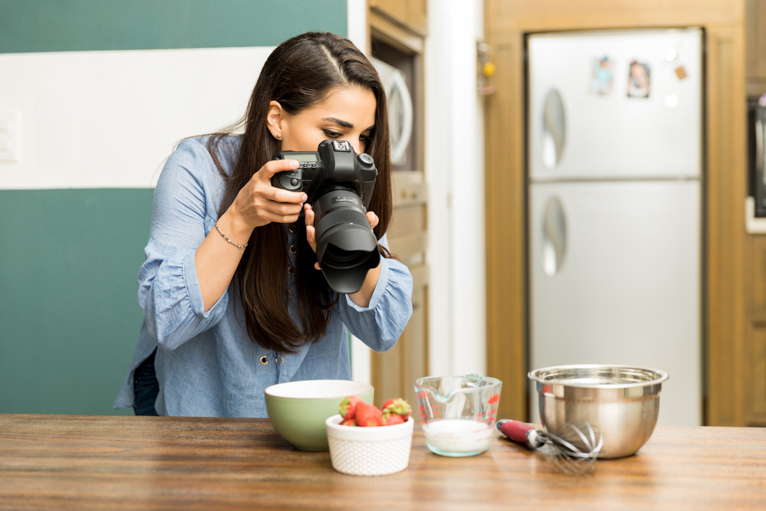
Build_confidence_as_a_photographer

Constantly practice

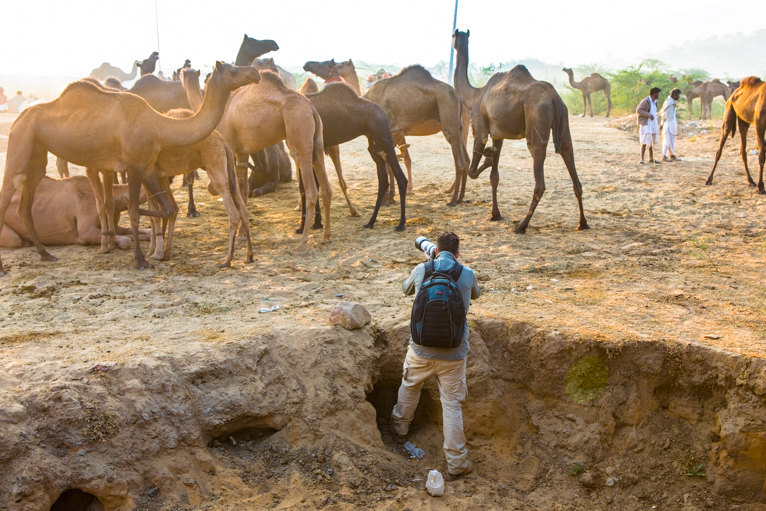
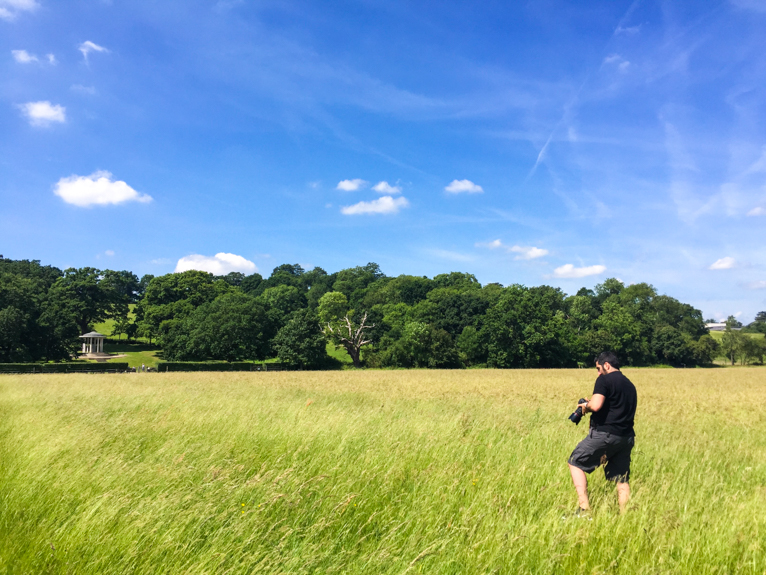
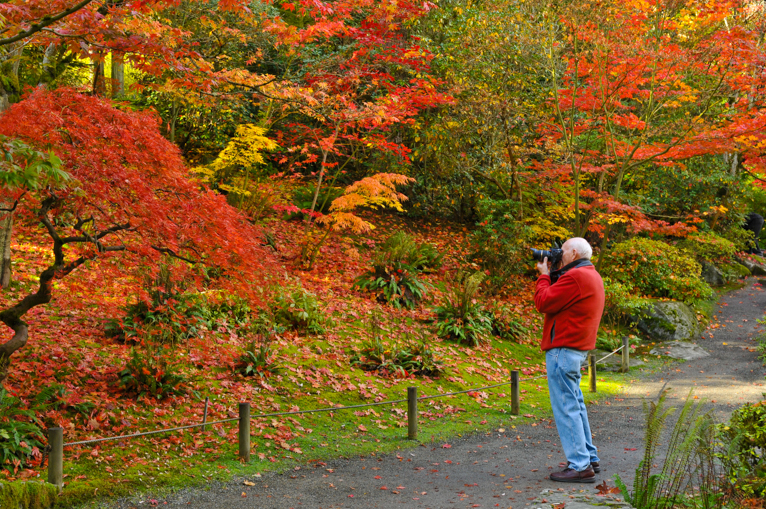
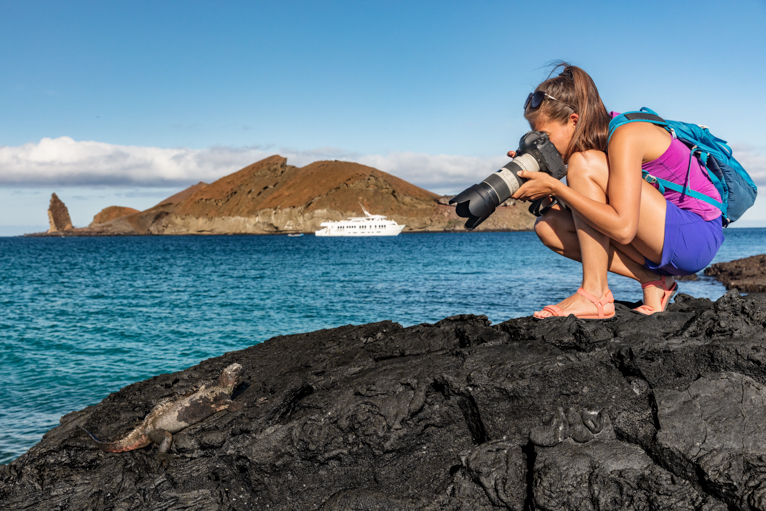
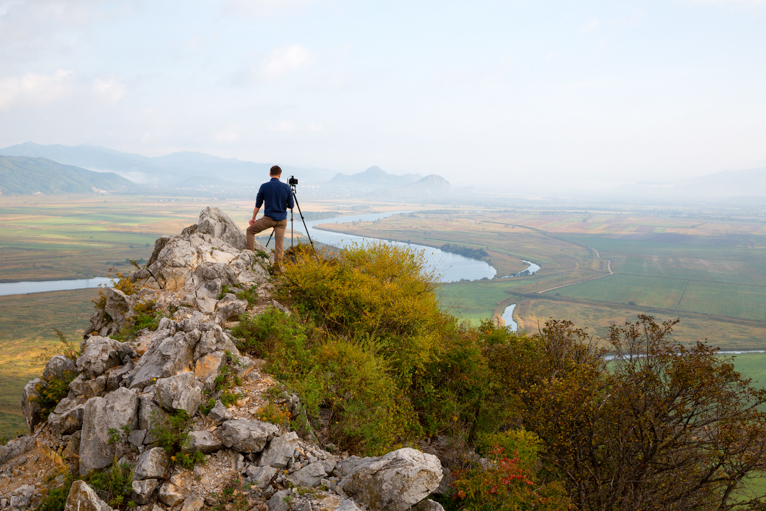
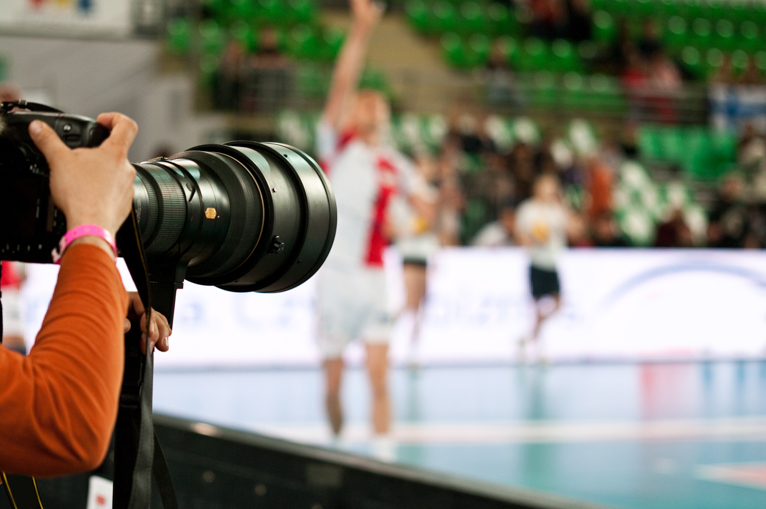
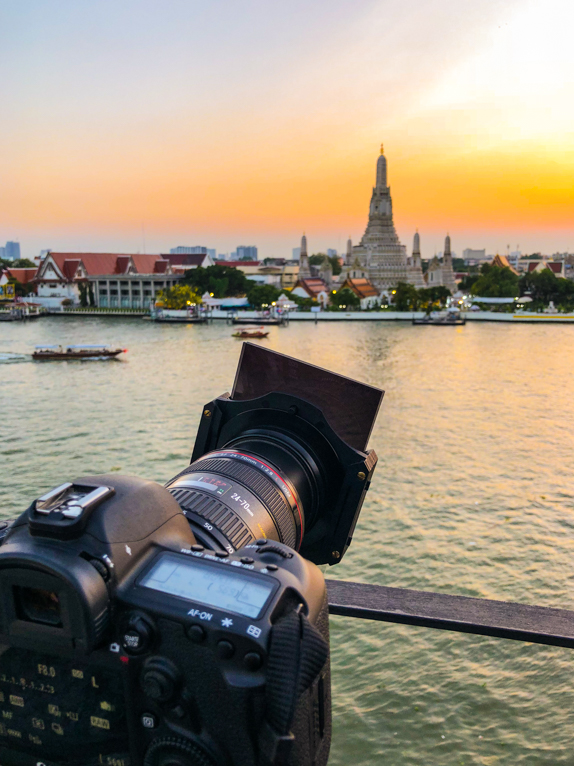
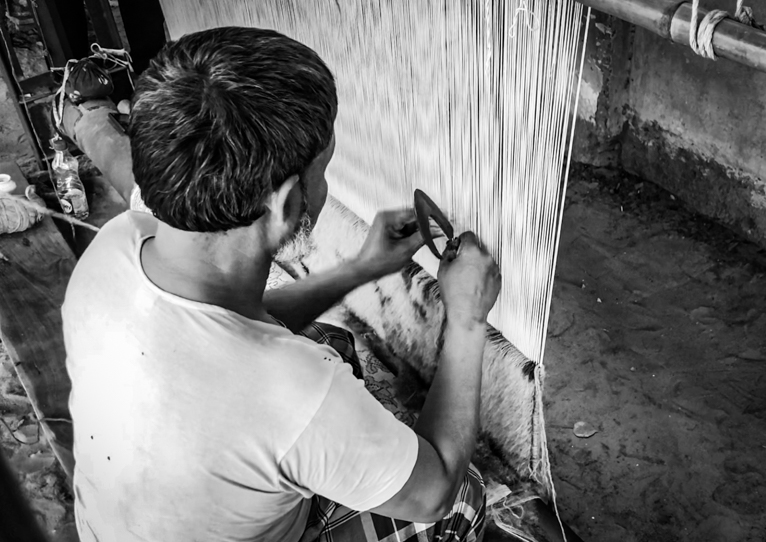
As a photographer, it is essential to create new work to help you grow your craft continually. In every profession, it is crucial that you stay active to support your progression through your work. Photography is no different.

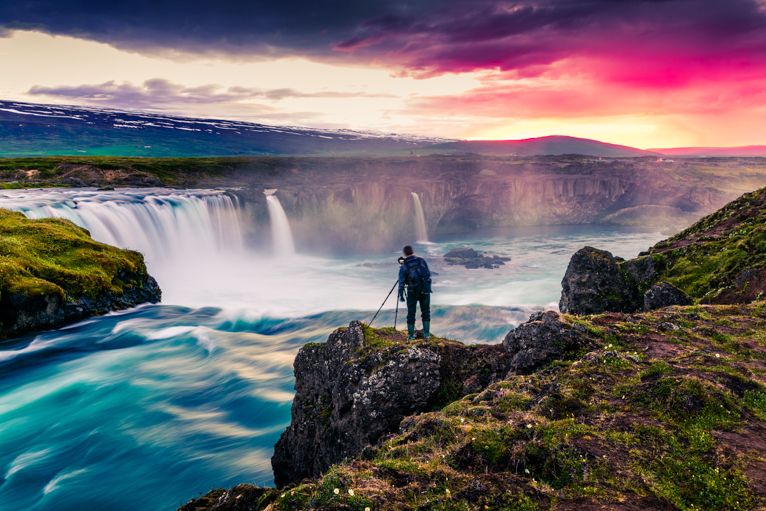
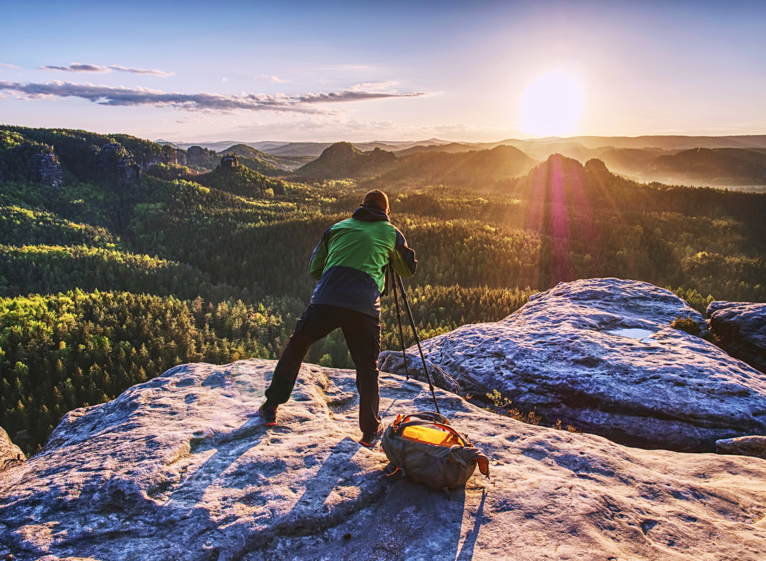
The more you practice the more confidence you will gain in different scenarios. This practice will also make you more confident because you will learn how to take photos in different scenarios.

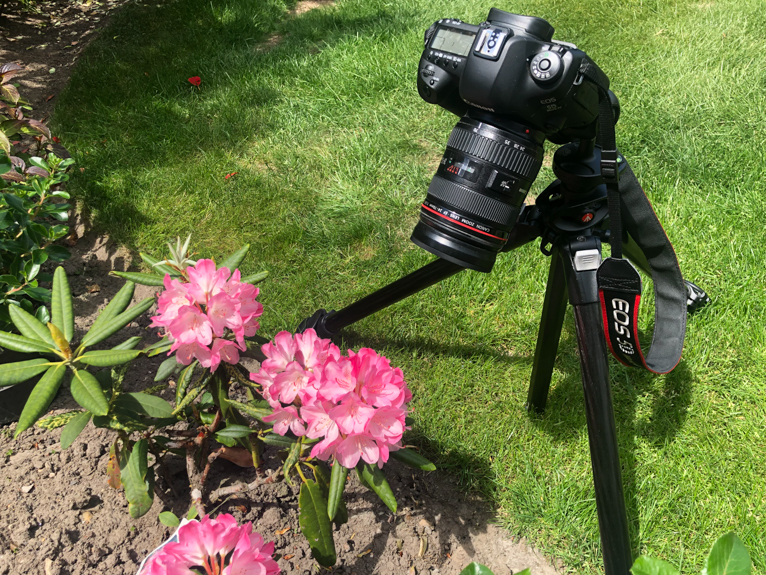
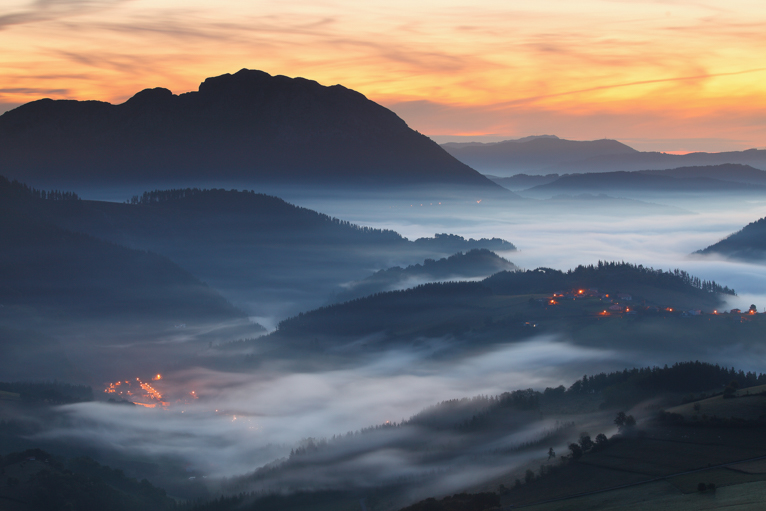
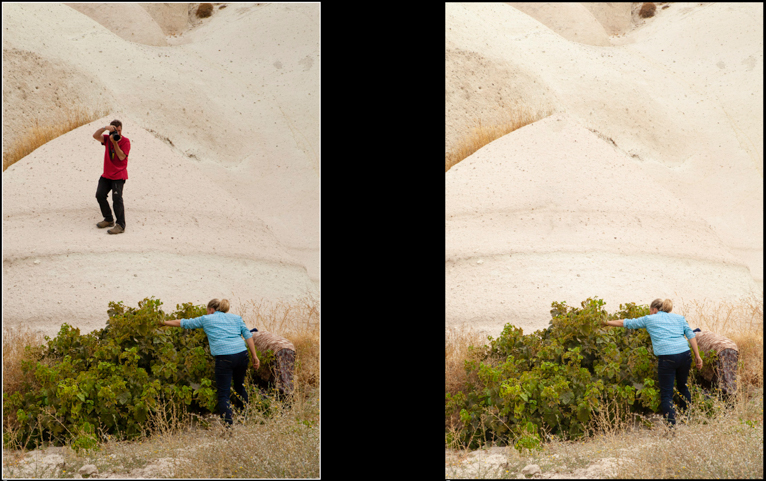
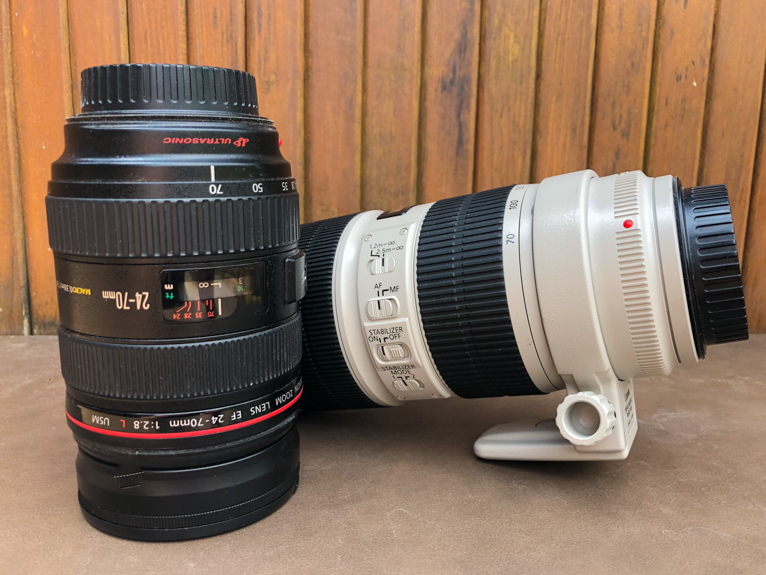
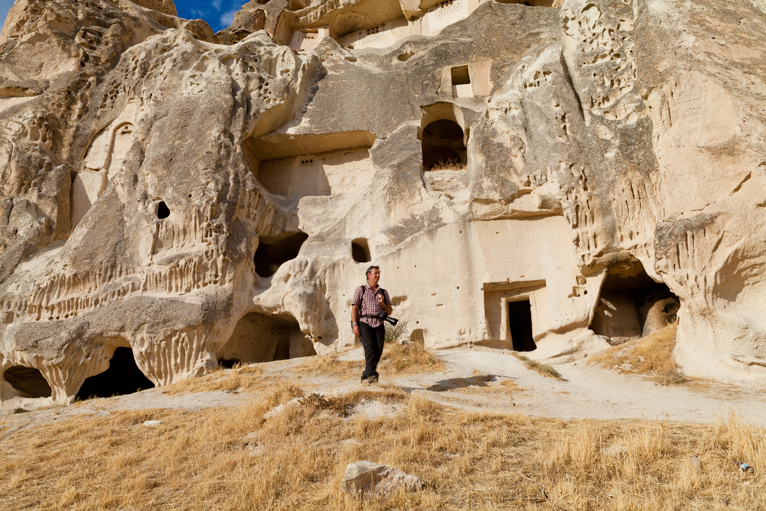
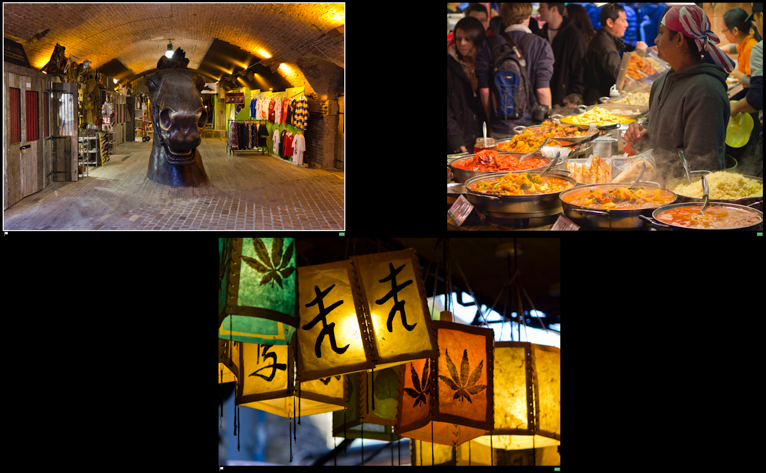
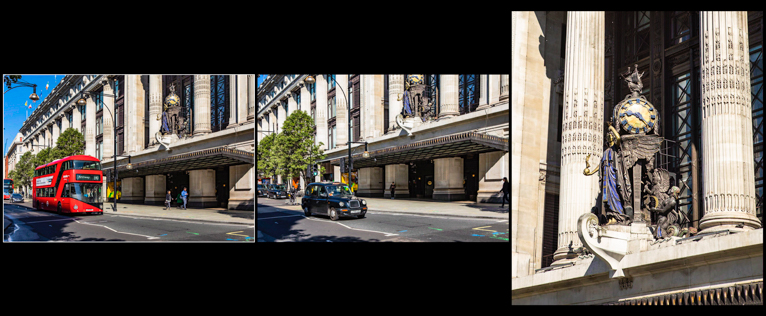
But practising requires effort. So aim to take time out of each day at specific times to focus on learning the best way to take photos with your selected equipment or testing out newer pieces of equipment. You can also extend this strategy to areas that you may struggle in. For example, if you struggle with action photography, bird photography or even taking portraits, make these your focus. 

Build_confidence_as_a_photographer

Taking professional advice

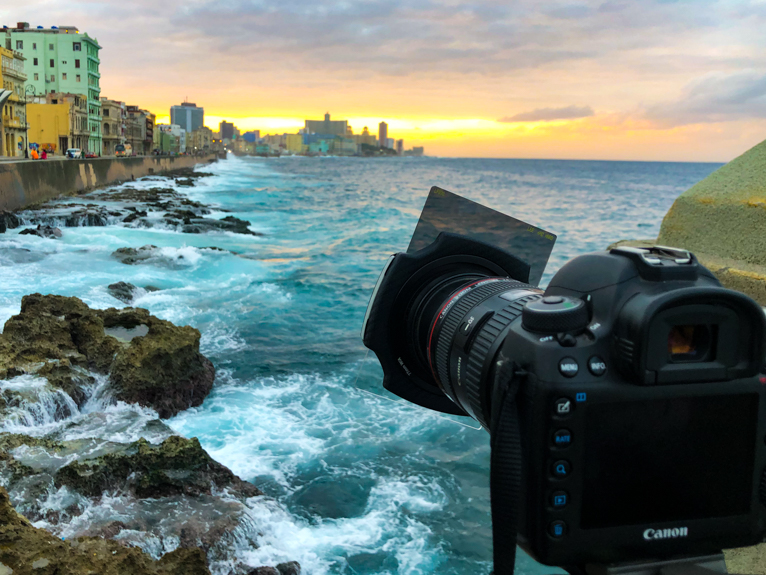
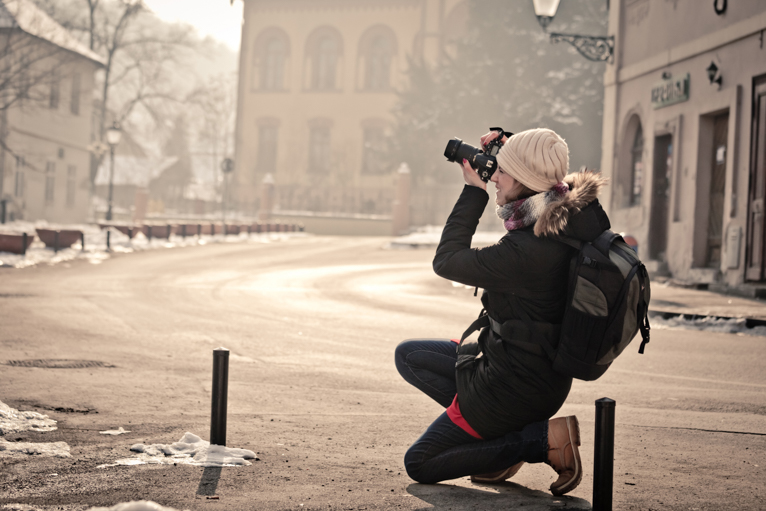
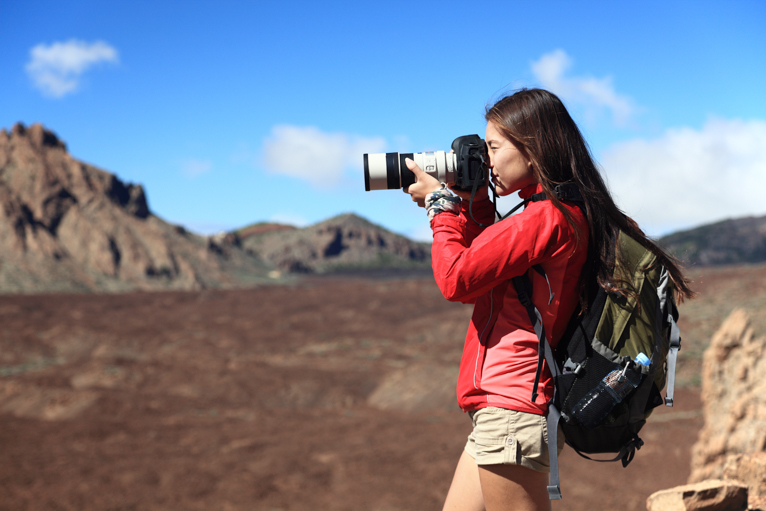
It is also essential to consider that sometimes, to help develop your confidence in a particular industry, it is best to get advice from the professionals. Going onto websites, YouTube or even doing workshops or taking some photography classes from masters in their industry is undoubtedly the best possible way to help yourself build confidence by learning various new skills applicable to your work.

However, it is also a great idea to take advice from different people, such as family and friends, who are likely only to want to see you improve yourself. Not only are they are likely to give you some great points and care about you, but they will also be able to give an opinion from a completely different outlook than someone in the industry.

Build_confidence_as_a_photographer

Consider your past

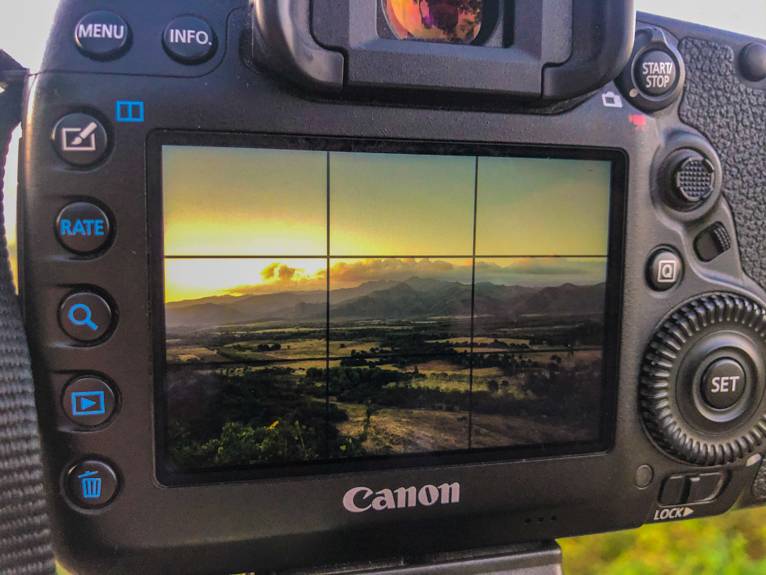
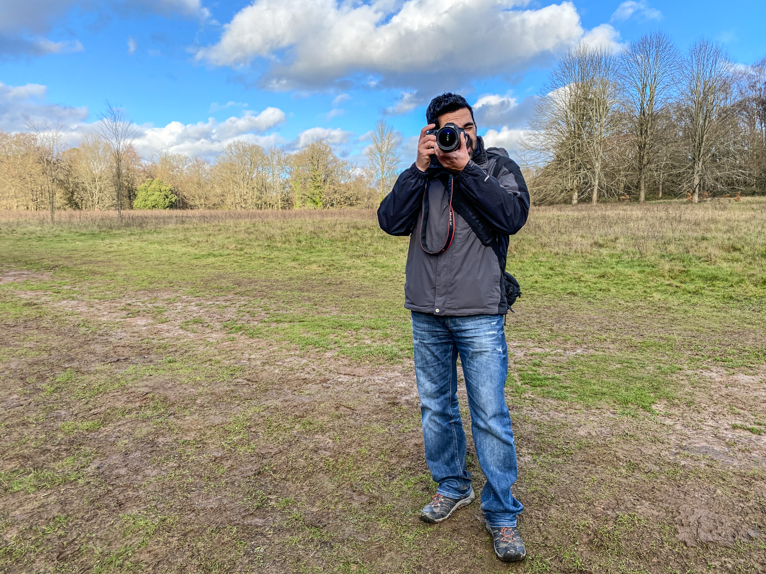
While the other two points are great for building confidence in the future, it is imperative to look at the past and compare it to where you are now. You will see a healthy growth pattern between the artist you used to be, and who you are now. I sometimes look at my early work as a photographer and I’m embarrassed by it. That’s OK because it tells me I’m a better photographer now than I was when I started.

Using your past as a focal point to work from can be a great way to consider areas you improve. You will feel more confident about your potential future in the industry, as you can pinpoint the best facets of your work that have been improved.

So just as you can be proud of your successes, also look at the areas that have not grown as much and focus on improving those as well. Over time this will make you a more rounded photographer with more skillsets.

Build_confidence_as_a_photographer

Always be willing to learn

Further to this, it is vital that you consistently grow your mindset and expose yourself to new methods that could help you succeed. For example, you should use constructive criticism from others not as a negative thing, but as an avenue to help your potential success. By having the mindset that you will eventually reach your goals, it is crucial to consider other photographers’ alternative approaches to developing your craft.

Be confident as a photographer in your abilities and methods to produce the best work possible. Still, there is no harm in testing other people’s practices and incorporating these into your work to see if it improves your work.

Build_confidence_as_a_photographer

Creating goals to work towards

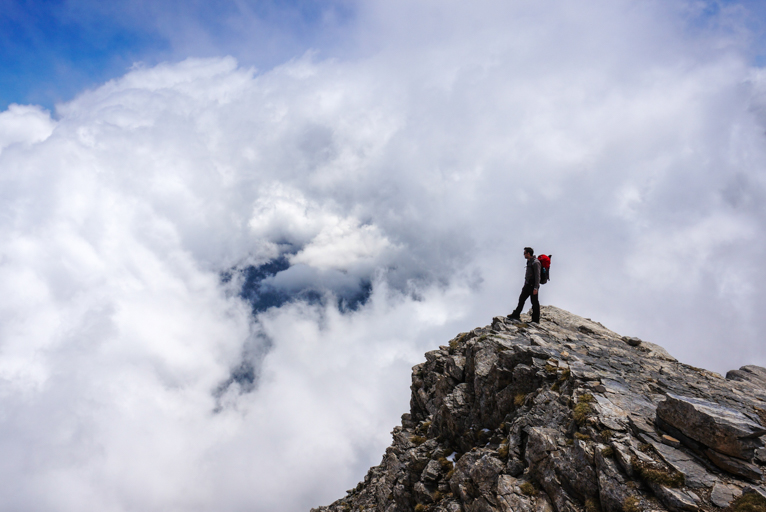
It is essential that you have photography goals for the future. The points discussed above can be some great goals to consider. Or you can set specific achievements like winning a competition or selling your first photo. 

Try to create short and long term goals with deadlines to work towards, such as hosting a bi-yearly exhibition of your photography. This gives you something to work towards, allowing you to look forward to potential future events with the aim of making it better each time. Photography is often a lonely hobby or profession. Having tangible goals can help ensure you have a purpose to work towards.

Build_confidence_as_a_photographer

There you have it. Here are a variety of ways to develop your confidence as a photographer. It is important to continually practise your craft to help keep you focused on implementing new ideas. But also to help build your photographic skills and become a more confident artist. Just remember how far you have come as a photographer. Be proud of that and be confident that you can get even better.

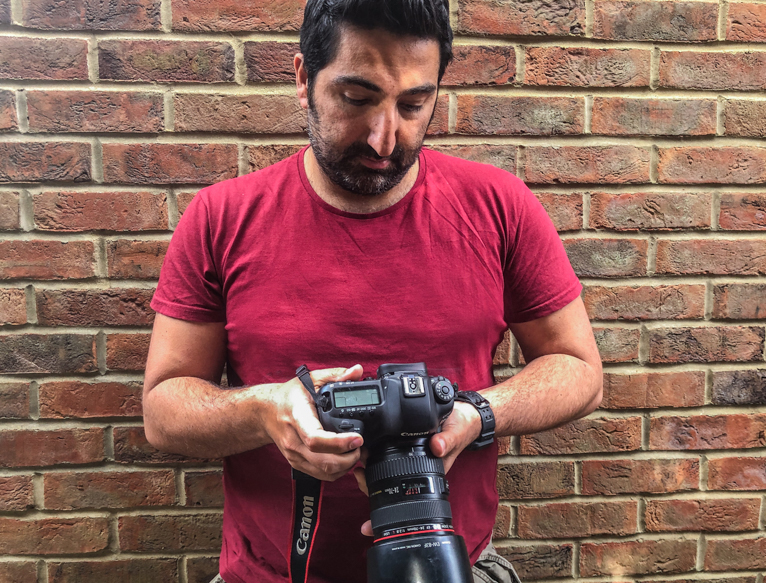
Photo credits: Kav Dadfar – All rights reserved. Dreamstime. 

Filed Under: Tutorials Tagged With: beginner photography, beginner photography tips, photography tips

6 Great Reasons Why You Should Take Up Photography

We live in a digital age where everyone has the capabilities of capturing photos straight from their smartphones. Whilst this genre of photography is certainly on the rise with plenty of acclaimed photographers already out there, there are some benefits from actually picking up a DSLR or Mirrorless camera. So here are 6 reasons why you should take up photography.

Why-you-should-take-up-photography

1. It will make you have to learn something new

Smartphones are great in being able to capture moments where you may not have a camera with you. But the big problem with smartphones is that most people just use them with all auto settings that are already set up. So even if you take nice photos, you are not actually understanding the process and the setting you are using. By using a digital camera you will b forced to actually have to learn how to take photos rather than just relying on auto modes. If nothing else it’s never a bad thing to learn something new as it can get your brain working on something other than what you are used to. This will help keep your brain working and learning new things.

Why-you-should-take-up-photography

2. You will be outside more

Taking up photography will force you to go outside more often. Because even if you decide that your interest is in interior photography, you won’t be able to spend forever more photographing your home. At some point, you will have to get outside and photograph other houses. Interior photography is an extreme example as in for the vast majority of photography genres you will have to be outside anyway. For example landscape photography, street photography, wedding photography, travel photography and even sport photography will require you to be somewhere other than your house. Let’s be honest all of us can probably benefit from being outdoors more these days. So taking up photography could actually also have a beneficial impact on your health.

Why-you-should-take-up-photography

3. Help your confidence

If you are the sort of person who suffers from shyness or low confidence, you may find that photography can help you. Being a photographer seems to always invite conversation with strangers and also forces you to interact with other people. But also if you are able to hone your skills and take good photos, you will undoubtedly receive compliments from other people on social media or even directly. This can be a real boost to your self-esteem. Even if you are the shyest person in the world, you may find that photography helps you come out of your shell.

Why-you-should-take-up-photography

4. Gives you a goal

Ask any professional photographer if they have a set of shots in their head that they would love to take and the answer will usually be yes. But even as an amateur you will begin to set yourself goals that you would like to achieve. At first, it might be just being able to master all the controls of your camera. Then might come specific shots that you have in mind that you want to take. This could be photographing your local town or city in a unique light. So you have to wait months and sometimes years for it to occur. Later it might be that you just want to be able to have a photo appear in a magazine or newspaper or even to win a competition. Your goals will change throughout your photography journey but make no mistake they will be there in the back of your mind.

Why-you-should-take-up-photography

 5. Make some extra money

Whilst it isn’t going to make you rich, you can use your photographs (or photography) to make some extra money. You may choose to sell your photos through stock sites. Or even try to sell them directly to clients. If you have great photos you may find that you have a following who are willing to buy them as prints. There is also, of course, the opportunity to actually photograph part-time or at weekends for some extra cash. But don’t rush out and quit your job straight away. Unfortunately, the photography industry has taken a big hit over the last 10 years and is suffering from oversupply. So think of it as extra money rather than vast sums that will change your life.

Why-you-should-take-up-photography

6. Sense of achievement

Even if nothing else comes of your photography or your photos, I guarantee you that you will have a sense of achievement when you capture that amazing shot that you worked so hard for. It will take pride of place in your collection and you will always remember it. But you will also have a sense of achievement in just starting and learning something new. The great thing is that you would have done it all by yourself.

Why-you-should-take-up-photography

Photography can be addictive. You can get addicted to that feeling of joy when you capture a great photo. But you will also find that the more you learn it will drive you to learn even more. It becomes a challenge to be able to better your photography every time you pick up a camera. Not only can this help you to focus on something different and creative but also keep you active and busy. You may just look back at the moment you decided to take up photography as one of the best decisions in your life.

Photo credits: Kav Dadfar – All rights reserved. No usage without permission. Dreamstime.

Filed Under: Tutorials Tagged With: beginner photography, beginner photography tips, photography tips

Ideas On How To Improve Your Photography At Home

What more enjoyable way to spend your free time than putting effort into improving your craft? There are plenty of ways to work on your photography skills at home, so read on for some tips! One common misconception about photography is that you must be somewhere spectacular to get a good picture. While an incredible landscape or city can create some strong visuals, what makes a great photo is a blend of your subject matter and your ‘eye’ for photography. The good thing is, you can continually improve on the latter by learning new creative techniques or developing new ideas and photoshoot concepts. Here’s how:

How-to-improve-your-photography-at-home

Critique yourself

We can’t get any better at anything if we don’t take a second to assess our strengths and weaknesses. No matter what level you’re at with regards to your photography skills, you can always improve on something. Pull up a recent batch of photos that you’ve taken, and try to look at them from the perspective of a critic, and not yourself as the photographer. Dig deep and ask yourself:

  • What was I trying to portray with this photograph?
  • Could the composition be improved?
  • Is the intended main subject translating as such?
  • Is there any blurriness, noise, or incorrect use of exposure?
  • Is my use of framing helping or hindering my image?
  • Could the composition have been improved?

Split these into two categories: one that you’re entirely pleased with, and one for those that need work. Jot down some areas of improvement, and start working on improving them!

How-to-improve-your-photography-at-home

Study your composition

With those photos that you weren’t completely sold on, were you perhaps displeased with the composition? An excellent way to play around with this is to pull up the old photos into your favourite photo editing system and spend some time moving the image around, changing the settings about, and cropping the photo. This manipulating of the image helps you to visualize different ways you could have taken the picture and trains your eye to seek out proper framing for objects that you’re photographing. By doing this, the next time you’re out in the field and need to get the perfect shot because the lighting is just right or the crowds have finally dispersed, you’ll have less about which to worry!

How-to-improve-your-photography-at-home

Treat your home like a new place to explore

Indeed, your home is not foreign territory to you. You’ve been everywhere in your home – theoretically – and you know where the cutlery is, where the best spot to relax is and how the alarm system works. Take off your man-or-woman-of-the-house hat, and put on your photographer hat. Explore your house as if you were exploring a new city or a new photographic location. Ask yourself things like:

  • Where does the best light fall throughout the day?
  • What are the best vantage points?
  • What unique angles or elements are around on which I could focus?

By looking for possibilities in a place where you have been so programmed to use for a different purpose, you’re training your eye to see through a photographer’s lens, no matter where you are. This fresh perspective will translate into practice in your daily life outside your home.

How-to-improve-your-photography-at-home

Explore your backyard, your bathroom, or pick up a plant and use it as your primary focus or an element to frame. Get creative! Think outside of the box, and push the boundaries of where your mind would usually go. No one will likely be seeing these photos, making it the perfect opportunity to practice. Play around with foreground focus, work with aperture, and gain a deep understanding of the depth of field and light.

Moreover, discover where the light shines and how to use things like shadows, sunlight, and reflections to your advantage, and understand what sort of effect they bring. And don’t be limited just by daylight or moonlight—play around with torches, candles, lamps, light fixtures—the possibilities are endless. Learn how to shoot in different light conditions and how to set the mood for particular types of photography.

How-to-improve-your-photography-at-home

Step outside of your comfort zone

If you want to improve different areas of your photography, choose one of your weaker ones, or perhaps one category that you don’t enjoy as much. As a photographer, especially if you’re just starting out, having a wide range of skills in your portfolio can be a great thing, as you are more likely to get hired to work on different sets of projects, which as a freelancer, means you’re making more money. Therefore, if you aren’t, for example, highly skilled in portraits, get your partner, family member, or child to pose for you, and work on your portrait photography skills. Take some shots, study your weaknesses, pull up the work of a photographer you admire and see what they do, and compare. Practice makes perfect, so get practising.

How-to-improve-your-photography-at-home

Another good reason for stepping out of your comfort zone and shooting things you don’t usually shoot is to help you come up with ideas for something you do like to shoot. Do you perhaps prefer portraits to landscapes because you can’t tell a landscape to move? Maybe you realized that you struggle with creating depth or altering your shutter speed for the scene. If you worked on those skills, would you start to love photographing landscapes? At the very least, you’ll also develop a deeper understanding of your camera and a personal knowledge of your strengths and weaknesses.

How-to-improve-your-photography-at-home

Join an online photography club

What better way to improve your craft than by networking with other photographers? These days technology means that there are plenty of resources online to help you meet people without having to leave your home. If you join a photography club on Meetup, you can share shots you’ve taken outside or in your home and get other photographer’s opinions on it. Alternatively, you can also share and receive tips on improving specific areas of your craft, so it’s truly a win-win.

How-to-improve-your-photography-at-home

Whether you’re out in the field or at home, there are plenty of ways to improve your photography skills. Often you’ll find it easier to practice your photography at home as it means there isn’t any effort in having to go out. So take advantage of your home and use it to improve your photography.

Photo credits: Kav Dadfar – All rights reserved. No usage without permission. Dreamstime.

Filed Under: Tutorials Tagged With: beginner photography, beginner photography tips, Improve Photography, Photography at home

7 Reasons Why You Should Pursue Photography As Your New Hobby

Everyone needs a hobby. All work and no play can drive us insane. Your brain needs alternate activities to distract it from the harsher responsibilities of life. Just like sleeping resets your neural pathways and refreshes you, hobbies can take your mind off your troubles and larger responsibilities. Then, when it’s time to go back to those responsibilities, you’re ready to tackle anything thrown your way with renewed vigour.

The hobbies that help with this mental rejuvenation the most are ones that have both cognitive and physical aspects. Photography does this in spades; from setting up your shot to exploring new locations to capture with your lens, photography can be a fantastic way to not only unwind but also fulfil you in a way that few other things can.

Photography_Hobby

Photography is a great pursuit for people with different levels of interest. Novices who just want to start learning or need a casual distraction on weekends will have no trouble at all getting into it. Experts are always finding new techniques or challenges to engage them. It’s rare that a hobby can be both entry-level and professional in difficulty. However, even with just a basic grasp of the fundamentals, beginners can quickly develop their skillset.

If you fall into this curious category of general interest about photography, but maybe either don’t know where to start or are intimidated about how to begin, then here are 7 reasons why you should pursue photography as your new hobby.

Photography_Hobby

Memories

Remember that one cute picture of you as a baby? Of course, but only because someone had the foresight to immortalize that moment in time forever. Since you were a baby, you had not yet developed long-term memories, and therefore that adorable moment of you smashing cake in your face or whatever was happening would be nothing but a family story for you. Because someone snapped a pic at that moment, you and everyone else can enjoy and reminisce about that particular memory. Photography helps us to reinforce our memories by providing a physical snapshot of a key moment. Learning photography is a great way to forever enhance your memory, whether through creating a photo album or selecting your moments.

Photography_Hobby

It’s fun

It might seem obvious, but a hobby should be fun. Photography can be a very versatile hobby with either a set of rules and guidelines to strive toward or a lot of people like to just keep it casual. Some people enjoy the challenge of getting that one specific shot just right; the sense of accomplishment is relishing. Others like to stroll through a park and just click off a few frames about whatever happens to be around. Whatever your level of interest, photography can be both fun and rewarding in very different ways.

Photography_Hobby

Be creative

Just like photography can run on both ends of a spectrum of capability, so can your level of creativity. For those that want a creative challenge, photography can offer some very intriguing scenarios. Getting the light and composition just right for a portrait, or discovering a unique angle that delightfully captures the spirit of a scene, can satiate your creative prerequisite. Photography can provide a creative outlet to rip you out of your doldrums. Imagine sitting at a desk for 40 hours a week, staring at the same stark walls day in and day out. Now imagine looking down on an entire city from an overlook at dawn just as the sea of fog recedes. Which would you rather capture?

Photography_Hobby

Meet new people

Believe it or not, even the most introverted person can suddenly become outgoing once they have a camera in their hands. When you’re looking through a viewfinder, all of a sudden the world looks a little different to you and it affects the way you interact with other people. From behind the camera lens, you can see people in a different light, taking a picture of a side of their personality that isn’t always so evident. Photography allows you to get engaged with new and interesting people, whether it’s to take their portrait or to just photograph a fun scene. Even complete and total strangers that would otherwise tell you to get out of their way might act differently when a camera is pointed at them. Photography can break down the barriers we construct around our personalities, not just for the subject, but for the person behind the camera as well.

Discover your style

Would you say that you have a certain aesthetic? You might be surprised at how your preferred photos turn out. When you start taking pictures, you might begin with simple angles and basic focus techniques. But over time, you start to see how lighting and composition affect the look and feel of a photo. You might even develop specific preferences and before you know it, a signature style so that people will know without even asking which photos are the ones that you took.

Photography_Hobby

It’s great exercise

Photography is a fantastic way to move your feet and put some miles behind you. Get your blood pumping by finding the right scene to take a photo of, or getting a few choice shots while you stroll through the park on your lunch hour. Photography is an exceptional method of getting up and out of your chair to move around a little, instead of sitting still all the time.

Photography_Hobby

Explore new places

Literally, you can reach new heights with photography. It’s a hobby that encourages you to explore new and exciting venues, like the peak of a mountain or the corners of an abandoned factory. New settings that you would otherwise never bother to explore will yield amazing backdrops for your photographic endeavours. Take the plunge and photograph the ocean floor. Discover the intimate details of a model railroad. Wherever the place is that you choose to explore, make sure to bring your camera with you!

Photography_Hobby

It’s easy to see why so many people these days have got the photography “bug”. So if you are looking for a new hobby this year, look no further than photography.

Photo credits: Kav Dadfar – All rights reserved. No usage without permission. Dreamstime.

Filed Under: Tutorials Tagged With: beginner, beginner photography

Images Not Sharp? You Could Be Making One Of These Mistakes

Capturing sharp images is one of the critical elements of photography. It is also often one of the areas that beginner photographers struggle with the most. It can be incredibly frustrating and somewhat disheartening when you think you have captured a great shot only to realise upon closer inspection that it isn’t sharp. Like most elements of photography with practice and experience, you’ll be able to pick up the knowledge and skills necessary to be able to capture sharp photos. But to help you on your journey, here are 4 mistakes that you could be making that have a detrimental effect on your photos.

Sharp_photos

Holding the camera incorrectly

This is one of the most common mistakes that I see photographers of all levels make. Like anything in life, you should aim to get the very basics right first. So you should pay close attention to the way that you are standing and holding the camera. Start by ensuring that your legs are shoulder-width apart with one slightly further forward than the other. Ideally, you should be standing at a slight angle so that your weight is distributed evenly. Next comes your arm position. Keep your elbows tucked into your sides rather than out to the sides. This will make things much easier on your shoulders and give your arms more stability.

Lastly, make sure you are holding the camera properly. I often see people holding the camera but then trying to zoom or focus with their other hand from the top of the lens. This means that one hand is holding of the weight of a camera. Instead, cradle the lens from underneath using your other hand. By adopting these tips you will hold the camera far more steady and will be less likely to suffer from camera shake.

Sharp_photos

Using a wide aperture all the time

Just because your lens is capable of allowing you to shoot at f/1.4 doesn’t mean that you should all the time. The big problem when using extremely wide apertures is that often it has a detrimental effect on your images (the same as shooting with very small apertures). Shooting at something like f/1.4 could result in edges appearing softer which in turn means less sharpness. So why are lenses capable of this you may ask? Because in some situations you have no other choice but to have a wide aperture to allow enough light to come into the camera so that you can shoot handheld.

The other big challenge when shooting with an extremely wide aperture is to make sure that you focus correctly on the right element that you want sharp. Because your plain of focus will be so shallow, only a very small part of the image will be in focus. So missing that mark will mean that your image will look blurred. So try to avoid using lenses at their extreme apertures unless you really have to.

Sharp_photos

Your shutter speed is too slow

You might already realise that unless you have statue-like hands, then you simply would not be able to hold a camera steady at slow shutter speeds. But how slow is that? Well, firstly that depends on you, the person holding the camera. One person might be able to hold a camera steady at 1/80 sec whereas for someone else that might result in camera shake. Then there is also your focal length to factor in. There is a longstanding rule called the “reciprocal rule” which simply means that you match your minimum shutter speed to the focal length you are shooting at. So for example, if you are shooting with a 100mm lens then your shutter speed should be 1/100 sec. For 200mm lens 1/200 sec and so on. This is not set in stone and these days lenses have much better image stabilization which can mean you can reduce your shutter speed. But it is a handy formula to use to ensure your shutter speed will not be too slow.

Sharp_photos

Letting the camera set your ISO

There’s no denying that modern cameras are incredibly advanced. But they are still no match for human intuition and are ultimately governed by predetermined rules and formulas. Unfortunately, sometimes this can lead to wrong decisions when it comes to settings. One of the biggest culprits of soft photos is too much noise which is often due to high ISO settings. For example, if you have set your camera to Auto ISO you may find that the camera will suddenly whack up your ISO so that you can achieve your shutter speed or aperture. Whilst on the surface this might seem like the right thing to do, by actually selecting the settings yourself you may find that you can underexpose your image a little instead of raising your ISO so high. You can then fix this in post-production and end up with a far sharper image than if you had used a very high ISO. Needless to say that you should always keep your ISO as low as possible.

Sharp_photos

This might all seem like too much to remember or implement, but with practice and experience, you will naturally improve. But remember to also check your mistakes and work out where you went wrong. Was it because you ISO was too high? Or maybe you focused on the wrong thing. By examining your photos and working out where you went wrong you are far more likely to avoid making the same mistakes again. Always remember that you learn more from your failed photos than your successful ones. Use the tips above and you should see an improvement in the sharpness of your photos.

Photo credits: Kav Dadfar – All rights reserved. No usage without permission. Dreamstime.

Filed Under: Tutorials Tagged With: beginner, beginner photography, Sharp photos, Sharpness

How To Get Vibrant Colours In Your Photos

Every single one of us has looked at a photo on a screen or printed and been astonished by the explosion of colour that is jumping out at us. The deep blues, striking reds and beautiful greens and everything else in between have the power to transform an image into something spectacular. That’s not to say that is the only way your photos should look. In fact, a lot of great photographers have developed a more muted style in their photos. It comes down to personal preference. But if you do want those striking colours in your photos, here are 4 tips to help you achieve it.

Vibrant-Photos

You need good light

Photography purists might often criticise those who manipulate their images in editing software as not being “real photography”. Sure, if you are replacing elements in a photo like for example the sky, then these arguments certainly have merit. But the reality is that you need the right elements in a photo and post-processing should be used to enhance those features. For example, without some striking clouds and colour in the sky to start with you won’t get those amazing colours. So the basis of getting those amazingly colourful photos is to ensure that the conditions are right. Of course, you need colours to be there so that they can be enhanced. But you also need great light. Without it, your image will look flat and the colours will be muted. So always ensure that you are searching and utilising the best light that you can. It is the basis of a good photo.

Vibrant-Photos

Experiment with your white balance

I’m sure every one of you has been told at some point in your photography journey to “get your white balance correct”. For example, you may need to add more warmth to an image taken in bright sunshine. But what many people may not realise is that your white balance can also be used to enhance colours in your photos. Most cameras have multiple preset white balance modes. Things like “Cloudy, Shade, Incandescent” and so on appear on most people’s cameras but many don’t know why or when to use them. If you shoot in RAW then you can easily experiment with these settings to see the effect it has on your photos. For example, using a “Cloudy” or “Shade” setting gives the image more warmth. So if you are taking a photo in the late afternoon, then selecting these will make your oranges, yellows and red much more vibrant. Next time you are taking photos experiment with your white balance settings. You can always change them in post-processing as long as you shoot in RAW.

Vibrant-Photos

Use filters

The advancement of editing software has certainly given people the opportunity to forego using filters at the time of taking photos and simulate the effect in post-processing software such as Photoshop or Lightroom. Whilst there is nothing wrong with doing that, learning and using filters out in the field will not only make you a better photographer but it will also allow you to make changes and tweak your photos when taking them. So I would always encourage people to use filters. The most commonly used one for enhancing colours in your photos is the polarizing filter. Not only can these filters stop unwanted reflections, but they can also boost the colours in blues and greens. So for example, if you are taking photos of a waterfall, the greens of the foliage and the blues of the sky or water will become much more saturated.

Vibrant-Photos

Saturation and vibrancy

Once you have got your photos into an editing software, the easiest way to boost the colours is to use saturation and/or vibrancy function. Saturation enhances the colour intensity of all the colours in your photo. In some circumstances, this might not have the desired effect as it might mean certain colours are far too saturated and look unrealistic. So you can also selectively saturate and de-saturate colours. For example, if a certain colour is too saturated you can just reduce the saturation in that colour whilst the other colours are still keeping their saturation.

Vibrancy is slightly different in that it only changes the intensity of the dull colours in the image. So again if you find that there is already striking colours in your image the vibrancy adjustment might work better. You can, of course, use both in conjunction with each other. But just be aware of over saturating the image. Too much saturation and the image will look fake and too posterized. Like any sort of post-processing, subtlety is the key. Slowly tweak your images until you get the desired look.

Vibrant-Photos

If you want to have those vibrant and striking colours in your photos, the good news is that it isn’t difficult. If you capture photos in good light and use filters and post-processing to enhance them you should easily be able to add lots of colour into your photos. Like anything in photography, it will come down to your personal preference on how much vibrancy you want in your images. Using the tips above will give you the basis of being able to choose.

Photo credits: Kav Dadfar – All rights reserved. No usage without permission.

Filed Under: Tutorials Tagged With: beginner photography, beginner photography tips, saturation, vibrancy

Train Yourself To Think Like This For Better Travel Photos

One of the questions that I often get asked by amateur photographers is how they can become better at seeing photographic opportunities. Unfortunately, there is no magic formula that can instantly help. To be able to see the opportunities, you need to train yourself and especially your mind to be able to do so. Over time and with practice you will become better at spotting these photography opportunities. For example, right now you may find that from 100 photos there are 5 that you really like. But in time, with practice and experience, you may find that you like 50 of your 100 shots taken. To help you get started, here are 5 “things” that you should look to train your mind to do for better travel photos.

Think_Like_A_Travel_Photographer

Always be aware of the light

A great photo requires multiple elements to come together. One of these elements is light. Think of the light available as your paint. This is what brings to life the subject you are photographing. Whether it is a portrait of someone or a beautiful cityscape, without good light the photo isn’t going to impress much. Most people might already realise this. But are you subconsciously thinking about the light in a scene when you are walking around? You need to train your mind to instantly be able to assess the light in a scene and determine the best angle or position to shoot from to maximise the light available. If you can train yourself to be aware of this subconsciously, you will also begin to see opportunities the other way around. For example, rather than seeing a moment to photograph, you’ll see the scene with the great light and wait for the right subject.

Think_Like_A_Travel_Photographer

Block out the noise

As a photographer, you are constantly bombarded with visual information in any given scene. This can be incredibly distracting and so often will mean that you won’t see the potential photo opportunity. You need to train yourself to be able to block out all of this noise to be able to just see that photographic opportunity. This won’t be easy but if you can do this you will begin to notice compositions that you may not have known existed. A good way to practice is to go to a busy place and try to capture isolated moments. Shots that make the viewer feel like your subject was the only thing happening. At first, this will be tough but over time you will begin to get better at blocking out everything that is irrelevant to just concentrate on the main story.

Think_Like_A_Travel_Photographer


Take the photo in your head

This is often referred to as pre-visualization. It’s the art of being able to see what the photo will look like in your head before you have even taken the shot. It will happen so quickly in your mind that it feels subconscious. Sometimes it translates itself to simply knowing that “it will be a good shot”. But to start with you need to train your brain to be able to do this. The best way to do this is to train by going to a location and evaluating the scene. Then try to picture the photo that you would like to take. You can even make a rough sketch of it on a piece of paper. Then spend whatever time you have just trying to capture that one shot. It might mean waiting around for hours or even coming back. If you do this exercise enough times you will begin to get quicker at pre-visualizing. Eventually, you will instantly see this in your mind in any scene even if it’s a fleeting moment.

See the end result

This is a little different to pre-visualization in that it’s about being able to imagine where the photo you are taking will end up. Even if you are just taking photos for yourself as a hobby, it is still worth imagining this. Will it be in a magazine? If so, is it going to be in a portrait or horizontal format? Would it be to illustrate a story, or could it be the “wow” shot for the front cover or opening spread? Could it work as a print on a wall? By imagining where a photo will end up you can begin to compose it better. For example, if it is going to be a double-page spread you will be forced to place the point of interest on the left or right-hand side to avoid it falling in the centre (known as the gutter). By placing it on the right- or left-hand side you are naturally more likely to adhere to the rule of thirds, even if it is unintentional. So even if you hadn’t remembered to do so by thinking about the end result of the photo you would have improved your composition.

Think_Like_A_Travel_Photographer

Know what story you are telling

So far, I have talked about visualizing the shot that you want to take. But it’s also important to know what story you are trying to tell the viewer. For example, a clean landscape shot with no people tells a completely different story to the same photo with someone hiking. So, it’s important that you know in your mind what story you want to tell when you are taking the photo. Because then you can ensure that your photo reflects just that story and the viewer isn’t distracted by other elements in the composition. As per all of the points above, it will take practice, so try this as an exercise. Before you take a photo, say to yourself what the story is. Then once you have taken the shot look at your photo to determine if it tells the story that you said.

Think_Like_A_Travel_Photographer

The same image, but on the right the photographer has been removed and so the image tells a completely different story.

These traits will often happen with practice and experience. If you can master them, you will begin to see many more photographic opportunities around you.

Filed Under: Tutorials Tagged With: beginner photography, beginner photography tips

A Guide To Different Types Of Lenses

I often get asked what lens should I buy? Whilst you can photograph anything with any lens often this isn’t advisable or possible. For example, no one wants to get too close to a lion to take a photo. Or trying to capture a cityscape with a telephoto lens means you have to stand so far away which might make it almost impossible. So having different lenses will give you more opportunities to be able to photograph different situations. I have never been one to advocate spending too much money on unwanted equipment. But when it comes to lenses, unfortunately, quality does matter. The better the quality of the lens, the better your images will be. Sharpness and the colour will be better with a better lens. It will also allow you to take photos with a faster shutter speed as you can select a wider aperture. This means that you can take photos handheld at lower light conditions. So if you have been unsure about which lenses do what, here is our guide to the different types of lenses.

Super wide-angle lenses

Super wide-angle lenses generally are less than 24 mm focal lengths. With this wide angle of view, they lend themselves to landscape photography and architectural photography. The only other scenario where these lenses might be useful is when you are working in confined spaces. For example, photographing a market vendor with a lens like this will allow you to capture their surroundings as well. But these lenses have to be used carefully otherwise you may find that your subject appears too small within the competition.

Wide-angle lenses

These are general wide-angle lenses. They are what most photographers use day-to-day. These will often be 24-70 mm and will allow the photographer to be able to photograph a wide range of scenarios with one lens. Over 90% of the photos that I would take on any shoot will be taken with this lens. This should be the first lens that you buy.

Prime lenses

Most photographers these days would have zoom lenses that allow you to have a range of focal lengths. Prime lenses are set so you cannot change the focal length. In other words, you can’t zoom in or zoom out. The benefit of these lenses is that they are often cheaper than buying good quality zoom lenses. They often also have a fast aperture such as f/1.2. This will allow you to capture photos in very low light conditions handheld.

Prime lenses are also a good way to practice becoming better as a photographer. Because you have to move around and get closer to your subject, you will find yourself doing the same when you have a zoom lens. Even if you don’t own a prime lens it’s always worth renting one for a few days and setting yourself the task of capturing photos with just that lens. You may be surprised by the results and your progression as a photographer.

Telephoto lenses

Telephoto lenses range from about 65-250 mm. The main characteristic of telephoto lenses is that they magnify your subject. In other words, you can capture closer photos of things which are further away. The other characteristic of telephoto lenses is that they will shorten perspective. This will make everything in a scene seem more compact. These lenses are generally used for head and shoulder portraits which give a pleasing perspective of the face of your subjects. The other benefit of these lenses when taking portraits is that it allows you not to be too close to your subject. Often that little bit of space can help relax them a little bit more and give better photos. The telephoto lenses are also useful for landscape photography especially cityscapes. When things are too far away they are useful in isolating a small section of a wide scene.

Super telephoto lenses

Anyone wanting to venture into wildlife photography, bird photography or even sports photography you would likely need these super-telephoto lenses. They will have a very narrow-angle of view and will often be very big and heavy to carry. If that doesn’t put you off the price often will. But for certain scenarios, you will not be able to capture a photo as well as you could without one of these lenses.

For example in bird photography, if you want to take pictures where you can actually see the bird close up, you are going to need at least a 500 mm lens. You may sometimes get away with using a shorter telephoto for some scenarios such as sport and some wildlife. But if you want to capture photos as you see in magazines and newspapers you are going to need one of the big serious telephoto lenses.

Perspective correction lenses

Perspective correction lenses or tilt and shift lenses are primarily used by architectural photographers. The main benefit of tilt and shift lenses is that they can eliminate linear distortion. This occurs when you take photographs of buildings where you tilt your camera upwards. By allowing you to control the angle of the plane of focus you can keep the image plane parallel to the building. Thus eliminating that effect of a building looking like it’s falling backwards. Keep in mind that these lenses are expensive and these days you can remove converging lines using post-processing software. Adobe Photoshop or Lightroom can remove this distortion easily.

Macro lenses

Macro lenses are ideal for photographing very small things such as insects or individual flowers. Generally, these macro lenses are described by the degree of magnification possible. A macro lens with 1x magnification is capable of one-to-one reproduction. A lens capable of 0.5x times magnification reduces objects at half life-size. They are specialist lenses for these types of scenarios.

Teleconverters

Teleconverters are accessories that fit between the camera body and the lens. They are used to increase the focal length of the lens and come in a variety of magnification (i.e. 1.4x, 2x, and so on). So for example using a 2x teleconverter on a 70-210 mm lens will turn that lens to a 140-240mm lens. They are ideal if you need a one-off solution where you need to magnify your lens. For example, if you are going on a safari and don’t want to rent or spend money buying an expensive super-telephoto lens this is a cheap alternative. But unfortunately, they do come with the downside of inferior optics. This will have an effect on the sharpness of your images. So you need to decide whether you would want to put a cheap piece of glass between your expensive lens and your expensive camera?

Image stabilisation

This is a feature that is available on most lenses these days. It is especially useful in telephoto lenses as it allows you to take photos at shutter speeds two or three stops below the recommended minimum shutter speed. For example with a 200 mm lens, image stabilisation will allow you to photograph at 1/60th or even 1/30th of a second handheld. Whereas without image stabilisation you would need a shutter speed of at least 1/200th sec or more. You will often see the image stabilisation referred to with IS on Canon and VR on Nikon. So in summary image stabilisation will allow you to take photos at slower shutter speeds then you would normally be able to handheld.

Like most things a photographer carries, lenses will be added to over your photography journey. The key is to always buy the very best lens that you can afford. Because lenses make a huge difference in the quality of your photos. But always buy what you actually are going to use. You can always rent a specialist lens for a one-off trip, assignment or even for personal photography. So there you have it. A brief summary of lenses and what they are for.

Photo credits: Kav Dadfar – All rights reserved. No usage without permission. Dreamstime.

Filed Under: Tutorials Tagged With: beginer photography tips, beginner photography, lenses

6 Elements That You Need To Nail For Great Photos

Back in my early days of photography, I was told by an experienced photographer that photography is the most “complicated but uncomplicated skill”. You can’t get much more of a contradiction than that. At the time I wasn’t too sure what this meant and even after being told the meaning I didn’t fully grasp the concept. It wasn’t until years later that I began to understand what he meant. In theory, capturing a great photo is easy. All you need is an interesting subject framed well with good lighting and the correct settings. But the reality is that it’s a little more complicated than that. In this article, we will delve into the anatomy of a great photo. So here are 6 elements that if you can get right will give you a great photo.

Photo-Elements

A great photo needs a great subject

The first part of any great photo is something interesting to actually photograph. Your subject or your story is an integral part of any great photo. You might be able to capture a great photo if it isn’t technically perfect. But you would rarely be able to capture a great photo without an interesting subject. This is the part of the photo that will capture the viewer’s attention. So you need to train yourself to be able to see those photographic opportunities. Sometimes they will be fleeting moments that will disappear quickly. At other times you may have to set up a scenario like in a studio. The more you get out there to take photos the better and more efficient you will become at seeing interesting subjects.

Photo-Elements

Good lighting is key

Usually, the biggest feedback that I give to amateur photographers when asked to view their images, is on lighting. If they simply took the same photo at a different time of the day they would see a vast improvement. For example, even the most stunning landscape scene will look dull and uninteresting in poor light. If you could improve just this area of your skillset, you will see a huge improvement in your work. This also extends to indoor lighting as well. A poorly lit subject in a studio will not have the same impact as one that is lit well. To utilise light effectivly you should dedicate some time learning about it. For example, natural light will look completely different throughout the day. You need to understand how to use this and the direction of the light to your advantage. Or in a studio, you need to learn how to use a flash or things like reflectors to manipulate the photo.

Photo-Elements

Consider the composition carefully

How you compose or frame your photo can have a huge impact on your final result. For example, leave too much dead space and your subject might be lost. Alternatively, don’t leave enough space and the image will look too busy and unbalanced. The key to capturing a great photo is to take your time when possible to compose your image. Of course, sometimes you will not have the time. But in a studio or for example for landscape photography, take a few minutes to work out the best composition before shooting. Once you have captured the shot ask yourself if it is the best it can be. If not try again with a different composition. Don’t forget that you can also crop your images in post-production. So for example, if there are distracting elements around your main subject, crop them out.

Photo-Elements

Your settings

If you have a great subject that is beautifully lit and composed, the last thing you want is to find that your photo isn’t sharp. So there is no way around it, you will have to at some point in your photography journey learn how to use the correct settings in different scenarios. This is arguably the hardest part for amateur photographers to master. Whatever your genre of photography is, you need to know what shutter speed, aperture, ISO, white balance and so on to use at what times. The more you know your settings and your camera inside out, the more control you will have over the final outcome. For example, using slower shutter speeds to capture some motion blur. Or a shallower depth of field to blur the background when taking a portrait. These can help give you more creativity for your photos. Unfortunately, there is no shortcut. You need to spend time learning and practising until it becomes second nature to you.

Photo-Elements

Can you capture something unique?

How many times have you seen a photo of a famous landmark and just moved on without a second look? With photography so mainstream these days, that is one of the biggest challenges photographers face. to really ‘wow’ people with photos you need to show them something unique and different from what they have already seen. This could be everything from lighting or composition to actually showing a different perspective of something people have seen before. So don’t be afraid to take risks with your photos, because that is the only way that you may end up with that unique shot that is different from what already exists.

Photo-Elements

How to use editing software

There is no denying it. Every photo will benefit from some level of editing in post-production. Sometimes these will be as simple as just straightening and adjusting the white balance. At other times the editing might need to be more extensive with boosting of contrasts, brightness or even saturation.  This is the final step in ensuring your photos are the best that they can be. If your camera allows it, always shoot in RAW format as it will give you the most options when it comes to editing not to mention photo quality. But whatever format you do shoot in, make sure you spend the time that is required to make your photos the best that they can be.

Photo-Elements

So there you have it. Easy, right? As mentioned at the start a great photo, in theory, is easy to achieve but in reality, it takes time and practice. The more you take photos the better you will become. Until eventually all of these points above become second nature to you. So use the tips above and you’ll be capturing amazing photos in no time.

Photo credits: Kav Dadfar – All rights reserved. No usage without permission.

Filed Under: Tutorials Tagged With: beginner photography, beginner photography tips

How To Become A Better Photographer In 6 Weeks

Photography is like any other skill or profession. With experience and the more you practice the better you will become. But one of the issues that newbie photographers face is having the time and a clear plan of how to practice. Sure you can just head out and snap away, but is that actually improving areas that you may struggle with? Think about it, if you were going to hike up a mountain, would just walking around for a few hours a day be sufficient? It will help, but you would need to train yourself to be able to walk up a steep incline. You might even have to do it wearing a backpack to simulate the weight you would have to carry. There might also be specialized training like being able to use crampons and an ice axe.

Photography is no different. Every scenario will throw up challenges that you’ll need to overcome. The best way to ensure you are ready is to practice. So here is a 6-week plan aimed at helping you become a better photographer.

Week 1 – three picture story

One of the big challenges for any photographer is to be able to tell a story in a series of images. That might be as a feature in a magazine or newspaper or as just a set of 3 or 4 in a gallery. The photos all need to be different yet have a cohesive story that links them.

A great way to practice this art is by using a technique called the “three picture story”.  Simply aim to capture any scene or scenario that you are looking at in a set of 3 photos. That doesn’t mean putting your camera on burst mode and photographing the same thing 3 times. Start with a wide-angle shot that captures the whole scene. Then a slightly closer shot of one element or aspect of the scene. Finally, a close-up of the detail of something within a scene. Aim to do this wherever you are taking photos. Soon you’ll notice how much more variety you will get into your shots.

Week 2 – the street corner challenge

Sometimes as a photographer, you have to capture even the mundane. Not every scenario will be a beautiful sunset across an epic landscape. This challenge is designed to help you see the beauty and intrigue in even standing on a mundane street corner.

For this challenge find a street corner to stand at. Preferably you should aim for somewhere that will be relatively busy otherwise you might be waiting for hours before something happens. Set yourself a time limit (whether that’s an hour or a day is up to you) and just take photos as and when something catches your eye. You are allowed to move around a little and cross the road but the point of the exercise is to try and see if you can find that unique shot without moving away too far. For example, if someone with an interesting look walks past, ask to take their portrait. Look for details or interesting angles and composition. Once you have finished, check your images to see if you have managed to capture a photo (or a set of photos) that could represent that street corner. If not, try again somewhere else.

Week 3 – no chimping challenge

Chimping is a term that is used to describe the habit of looking at every photo on the LCD on the back of a camera after every shot. The reason that this is not always good to do is that by checking every photo, you are potentially missing others. But also because by having the option to check your photos, it can mean you are not thinking about the process of taking the photo in the first place.

Back in the days of film, as a photographer, you had to trust your knowledge and instinct to capture any photo. Everything from composition and settings would have to be known before the photo was taken. So you would have to analyze the scene more and think about the execution.

This challenge is about replicating this method of photography. Set yourself a time period of taking photos without looking at the LCD screen at all. If your camera has the option to switch it off then do so. Before you take any photo, really think about your composition and settings. To make this challenge even harder, set yourself a limit for the number of photos that you are going to take (similar to how a roll of film would work). You’ll be amazed how much more careful you are in selecting your shots when you only have limited photos to work with.

Week 4 – the prime lens challenge

This weeks challenge is all about teaching you not to rely on your zoom. A prime lens has a fixed focal length. In other words, you can’t zoom in or out. So if you want to capture a close-up photo, you have to physically get closer to your subject. The reason that this is important especially when taking photos of people is that it helps to build a connection with your subject. They will be more engaged with you and often that means more intimate and better photos. Look for a 50mm prime lens and aim to do a day’s worth of photography just with that lens.

If you don’t have a prime lens or can’t get one, just set you focal length on your camera to 50mm and try not to change it throughout the day.

Week 5 – long lens challenge

Whereas last week’s challenge was about getting closer, this week’s is all about stepping back. One of the common mistakes that beginner photographers make is that they try to capture everything within a scene. Good photography is about knowing when and what to exclude from a photo as much as what you should include. Using a telephoto lens will make you have to be selective about every scene. This will help your composition when you come to using a wide-angle lens. Aim for a lens that offers at least 100mm zoom.

Again if you don’t own a telephoto lens you can zoom in as much as possible using your existing lens. Most default lenses for cameras would be either 24-70mm or 24-105mm. So you should still be able to do the challenge using an existing lens.

Week 6 – the random word challenge

Your week 6 challenge is to put everything together and capture a telling and intriguing set of images. But rather than just heading out and snapping away with no direction, set yourself a random word challenge. This challenge is great fun and can really test your creativity. Write down a set of random words on a piece of paper. Then tear them up and place them in a hat. Choose one at random. Whatever your word is, that is your brief for the day. So you should aim to take photos that can represent that word. For example, if your word is “legs” you might take some photos of people’s legs whilst they are walking. But could then photograph shoes or closeup of shoelaces. You may even photograph someone’s tattoos and so on. How difficult you make this task is up to you.

These are just some of the sort of challenges and tasks you can set yourself to make you a better photographer. The key is to actively try to improve the areas that you struggle with using a clear plan. Follow this 6-week plan and you should see an improvement in your photos.

Photo credits: Kav Dadfar – All rights reserved. No usage without permission. Dreamstime.

Filed Under: Tutorials Tagged With: beginner photography, beginner tips, better photography

Blog Topics

  • Tutorials
  • Inspiration
  • Locations
  • Gear
  • News
  • Other/Misc

What our customers say:

Life Pixel has been a life-changer for me. Continue reading
Eric GConnecticut
Read more reviews
I am more than satisfied with the service I received Continue reading
Christopher JCanada
Read more reviews
I am more than pleased with the conversion job that you did Continue reading
LOUIS MWaco, Texas
Read more reviews
I am VERY impressed with his knowledge of your products and his patience in explaining it to a novice like me. Continue reading
Lynn FEssex, Maryland
Read more reviews
Things will only get better from here thanks to all of you. Continue reading
Phillip FRedding, California
Read more reviews
The Lifepixel newsletter reminds me of not having expressed my gratitude for the excellent job you made. Continue reading
Michael GGermany
Read more reviews
Your staff went above and beyond the call of duty to make sure everything was handled in an excellent manner. Continue reading
Paige RPearland, Texas
Read more reviews
It has given my old camera a new life, I will enjoy using it again. Continue reading
William PAustralia
Read more reviews
Excellent service and the camera works just great Continue reading
Hans FairhurstAustralia
Read more reviews
I just got my converted camera back from you guys. THANK YOU!!!! Continue reading
Anne CutlerForest Knolls, CA
Read more reviews
infrared_filter_choices_sidebar
ir_conversions_explained_sidebar
----------- Watch More Videos -----------
infrared_quick_start_guide

Ready to start shooting Infrared?

Convert My Camera

Subscribe To Our Newsletter

Receive updates, tips, cool tutorials, free stuff and special discounts.

Learn the Basics

  • Video
  • Start Here
  • Filter Choices
  • Focus Calibration
  • Lens Considerations
  • Camera Considerations
  • Place Your Conversion Order

Resources

  • Galleries
  • Lens Hot Spot Database
  • IR Tutorials
  • FAQ
  • Infrared Filter Choices
  • Infrared Photography Guide
  • Infrared DIY Tutorials

Company

  • Why Choose Us
  • Get In Contact
  • Job Openings
  • Write For Us
  • Affiliate Program
  • Terms of Use
  • Privacy Policy
  • Home
  • Start Here
  • Galleries
  • Tutorials
  • FAQ
  • Blog
  • Why Choose LifePixel?
  • Shop
  • Contact

Copyright © 2025 Life Pixel Infrared - All rights reserved - LifePixel Infrared Photography IR Conversion, Modification & Scratched Sensor Repair