• Cart
  • Checkout
  • My Account

Infrared Conversions, IR Modifications & Photography Tutorials | Life Pixel IR

The world leader in infrared conversions, modifications & DIY IR conversion tutorials. Scratched sensor replacement, UV & Full spectrum conversions.

The world leader in infrared camera conversions

866.610.1710
  • Home
  • → Start Here ←
    • 1 – Introduction
    • 2 – Filter Choices
    • 3 – Focus Calibration
    • 4 – Lens Considerations
    • 5 – Camera Considerations
    • 6 – Start Shopping
  • Galleries
    • Infrared Photography
    • Infrared Time Lapse
    • Infrared Cinematography
    • Infrared Stop Motion
    • Ultraviolet Photography
    • Forensic Photography
  • Education
    • Training Sessions
    • How To Shoot Infrared
    • AR Coated Infrared Filters
    • Lens Hot Spot Database
    • Photoshop Video Tutorials
    • Infrared Issues & Solutions
    • IR Basics in Photoshop
    • Camera Quick Start Guide
    • DIY Conversion Tutorials
    • IR Photography Primer
    • Secondhand Cameras
    • Wall Of Shame
  • Workshops
  • FAQ
  • Blog
    • Tutorials
    • Inspiration
    • Locations
    • Gear
    • News
    • Other
  • Why Choose LifePixel?
    • Submit Your Review
  • Contact
  • Shop

Focus Stacking – A Beginner’s Guide

Focus stacking might sound like a complicated concept in photography, but it is much simpler than it sounds. This article will make what it is and how to do it yourself extremely clear! Focus stacking means essentially combining multiple images with different focuses to produce a photo with a much higher depth of field than if those images were seen individually. But there is so much more to understanding it than reading a simple definition, be sure to keep reading to know how to execute this yourself.

Focus_Stacking

Why do you need to do it?

This is often the first question people ask me when I talk about focus stacking. Why do I need to stack photos when I can just choose a small aperture such as f/22 especially when using a tripod?

The first and most obvious scenario is when you are photographing a scene where you have something very close to your camera and also an interesting background. You want to capture both sharp and in focus. Depending on the distance between them you may not be able to achieve focus on both a small aperture. But also, extremely small apertures (f/18 or smaller) can often have a detrimental effect of image sharpness. Most lenses have a sweet spot (where the lens produces the sharpest image) which is usually found two or three stops from a really wide-open aperture. If you can stack photos using the sweet spot it will result in a much sharper image than using extremely narrow apertures.

Another reason for using focus stacking is that there may also be times when the conditions won’t allow the depth of field that you want shooting handheld. For example, if you don’t have a tripod and there isn’t sufficient light to allow you to choose a smaller aperture, the shooting with a wider aperture and focus stacking might give you the result you want. Granted this can be tricky as you need to try and keep your camera as still as possible, but it can be done.

Focus_Stacking

Important equipment

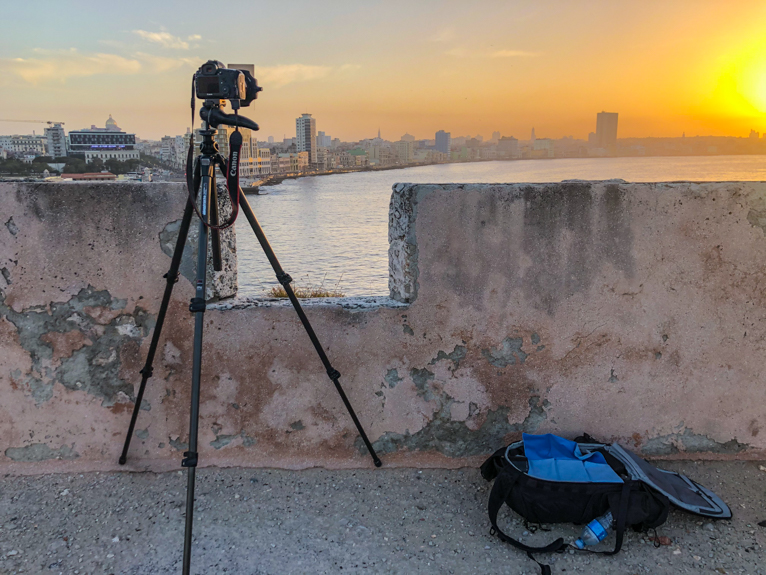
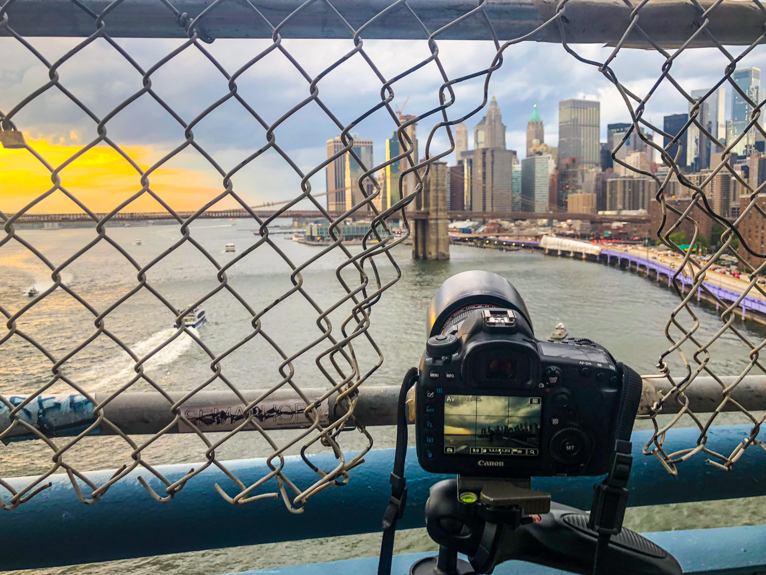
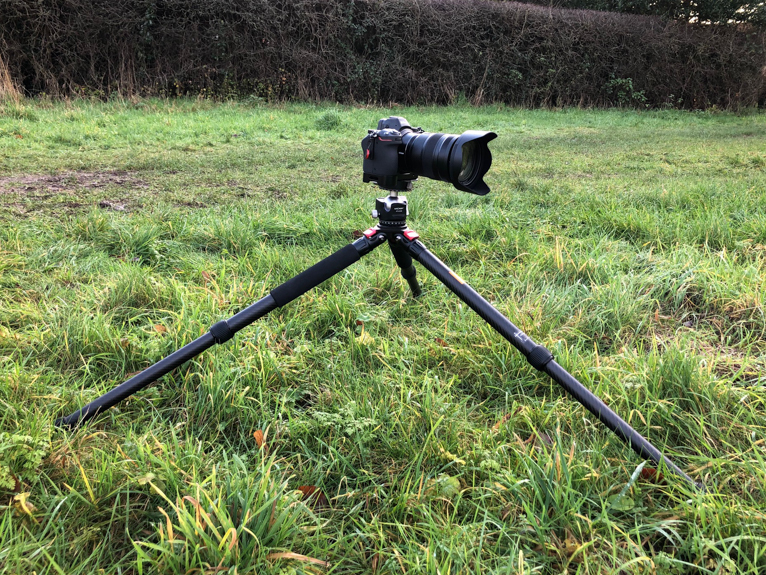
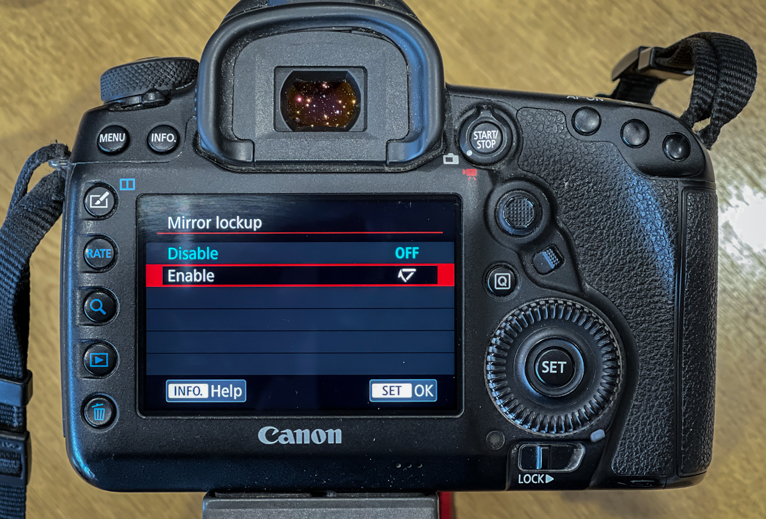
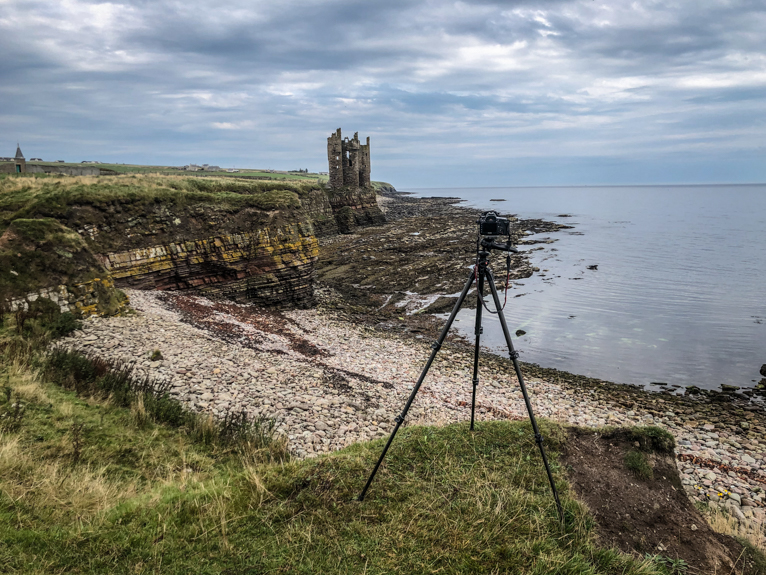
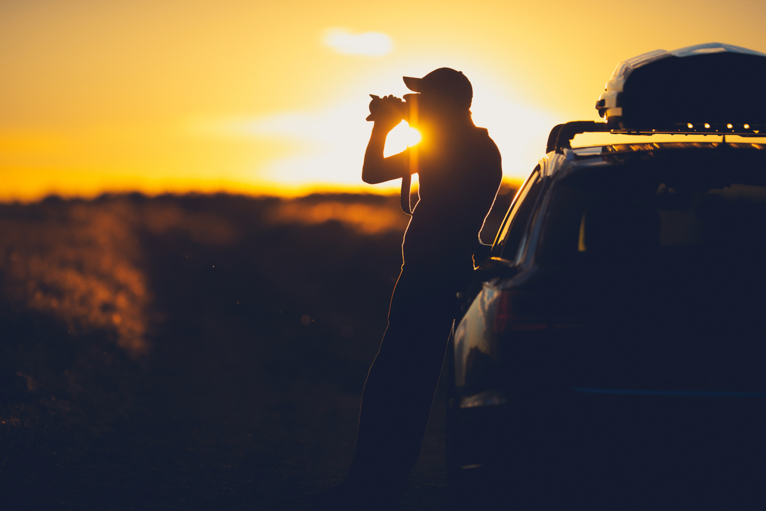
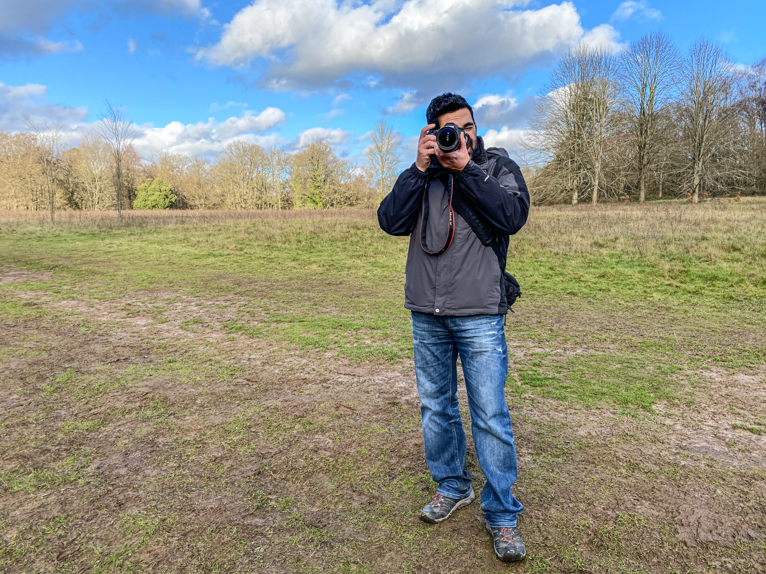
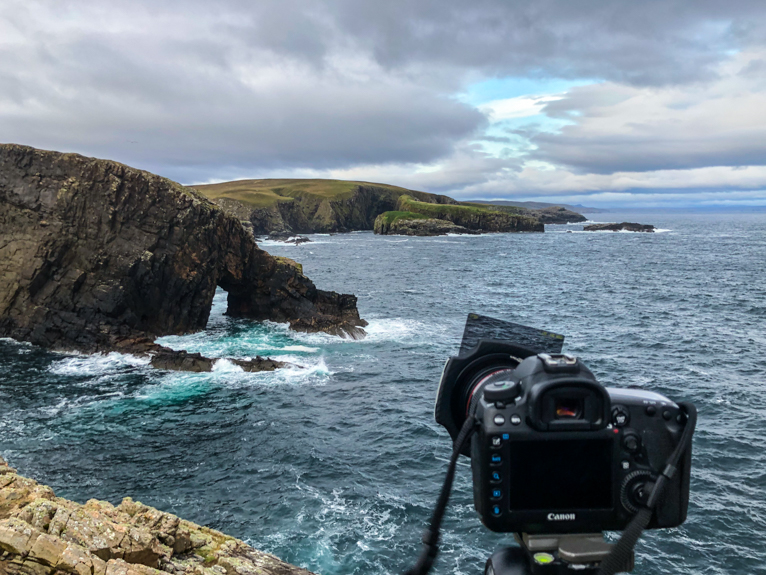
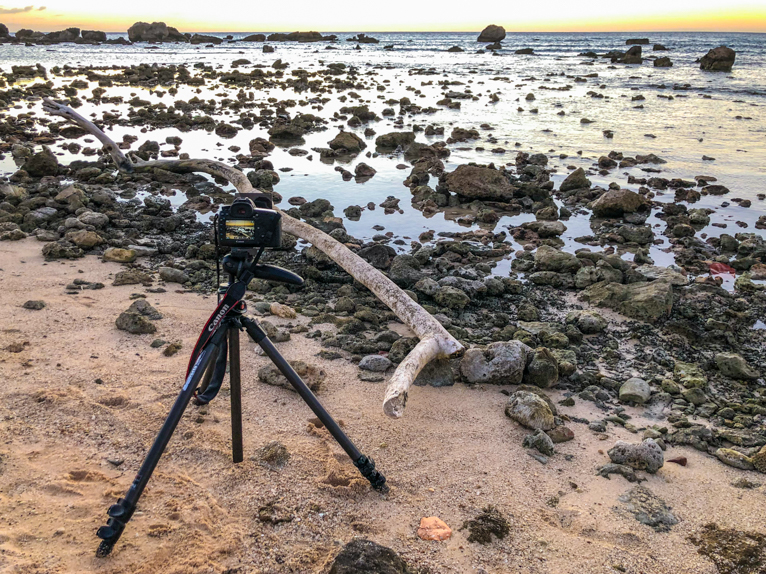
When focus stacking your images, you must have specific equipment to do the job most successfully. First, you will need a tripod to enable the individual images shot to be of the best quality and without movement of your camera. The camera used to do so must be able to shoot manual mode to allow to avoid the camera automatically changing settings. Finally, you must have access to editing software that specializes in the ability to focus stack (like Photoshop) where layering images in a photo stacking formation is possible.

Focus_Stacking

How do I do it?

The key for focus stacking is to try and keep your images as similar to each other as possible. So that means keeping your composition exactly the same (hence a using a tripod) and capturing the multiple shots as quickly as possible to avoid lighting and weather changes. Ideally, you’ll need to avoid elements coming into your shot as well such as cars and people. So as you can imagine this can be tricky when photographing busy cities. Landscape photography and macro photography are the two genres of photography that are most suited to focus stacking.

Essentially, you need to capture your image with different focal points. Aim for a minimum of three shots but you can take more. You should try to capture a shot where the focus is on the foreground, one which is around midway in your scene and one which is in the distance. When combined, you will produce a photo with a much greater depth of field than an individual shot.

Focus_Stacking

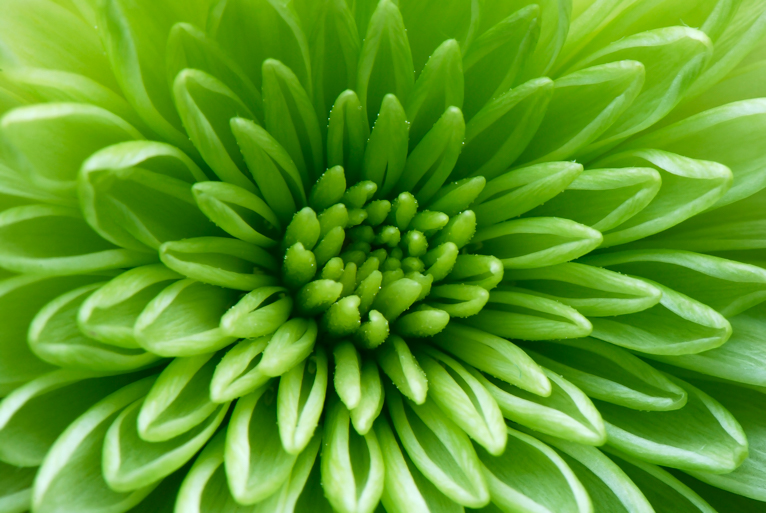
Macro photography focus stacking

One area of photography that focus stacking is really useful for is macro photography. Macro photography involves a very shallow depth of field. So if you miss the correct focus point even slightly your image will seem blurred. By focus stacking your shots, it gives you a degree of being able to get a longer depth of field.

As stated above, ensuring that you have the correct equipment will go so far in determining your images’ success. A tripod is a must for macro photography and you should make sure that you set up your tripod securely to avoid it moving in between shots.

Once this is done, position the camera to allow for your main focal point of the subject of your image. For example, for insects, this might be the head. Now, the important part is to make sure you don’t change your settings or zoom in or out in between shots so set your camera up on manual mode. You’ll probably find it easier to have live view on rather than looking through the viewfinder.

Once you have taken the first shot, move the focus point further away in increments. It might be worth doing this at set intervals, so you don’t move too far or too close each time you take a photo. Keep in mind that in macro photography your focus point will only need to move in millimetres.

Keep going until you feel that the depth of focus has been fully satisfied. This will depend on the subject being photographed but a good rule of thumb is to keep going until you have covered the totality of your subject.

Focus_Stacking

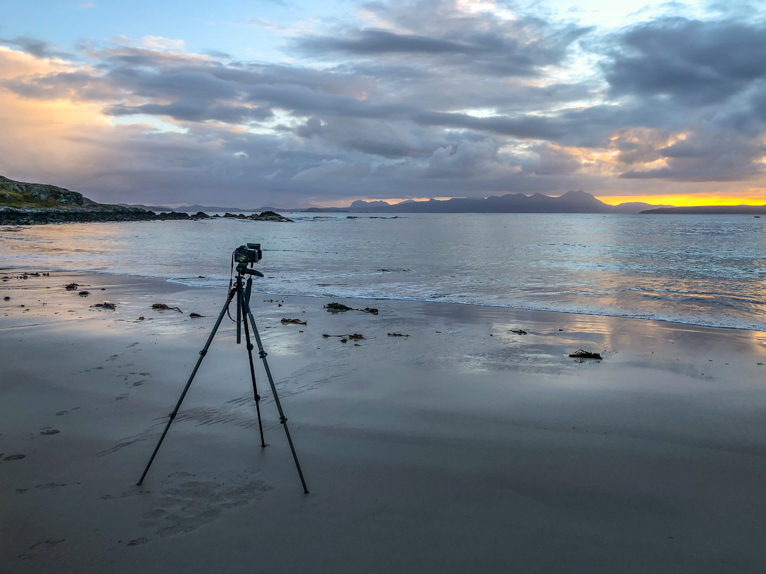
Landscape focus stacking

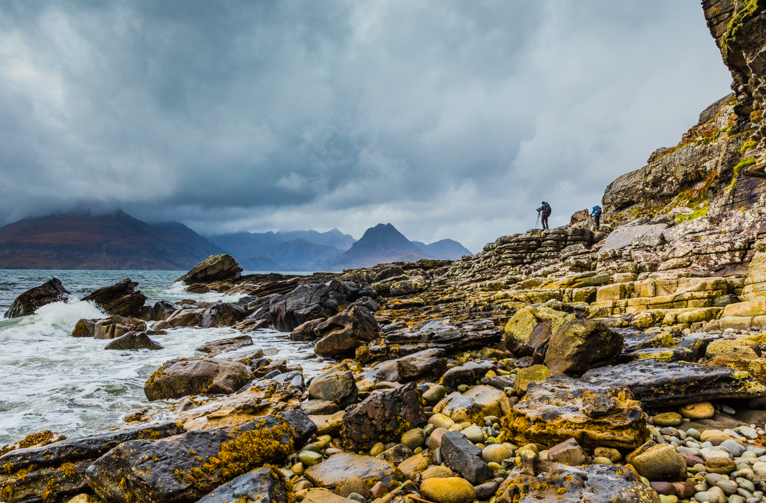
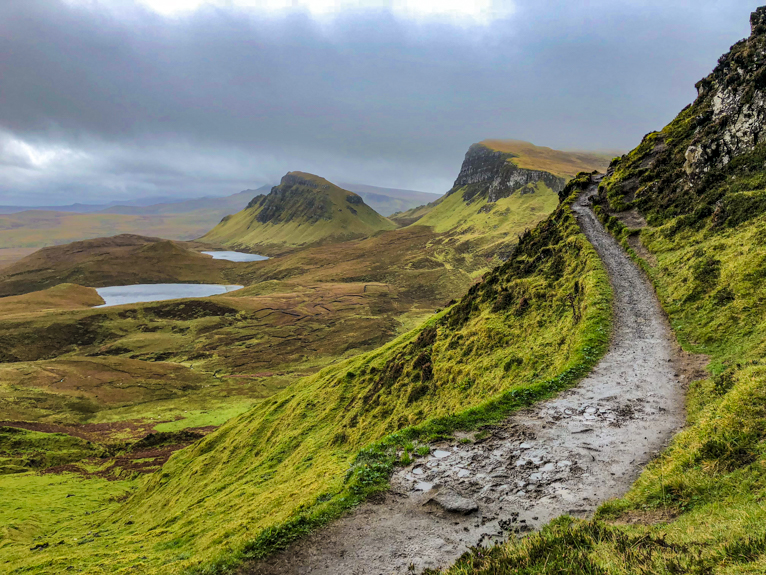
Now that we have covered macro focus stacking, let’s look at landscape focus stacking. This is another common scenario for using focus stacking. You may want the whole image to be focused, both the background and the foreground. Take the example of a person standing near the camera with a gorgeous mountain range behind them in the distance. Even at small apertures, the mountains may not be in focus.

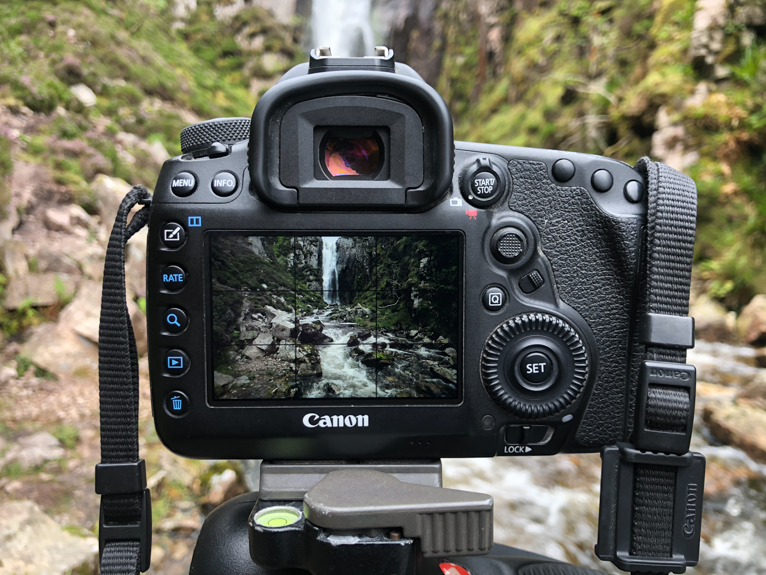
Just like in macro photography make sure your camera is set to manual mode and it securely placed on a tripod. Once done, set your camera to a live view and focus on the nearest point of interest to your camera. Zoom in on your LCD screen and precisely focus your shot. Then move the focus point mid-way from your subject (remember not to zoom in or out) and refocus on this midway point. Finally, focus on the furthest point and repeat! You can, of course, take more shot if needed but generally, three should be enough.

Focus_Stacking

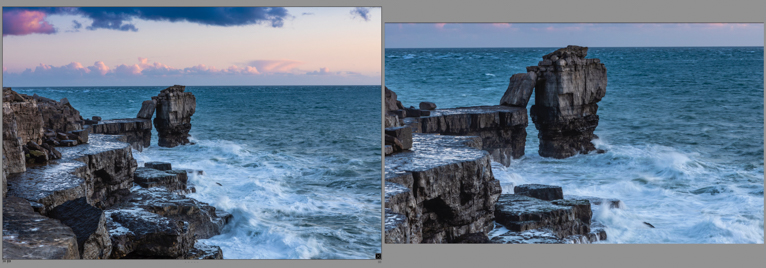
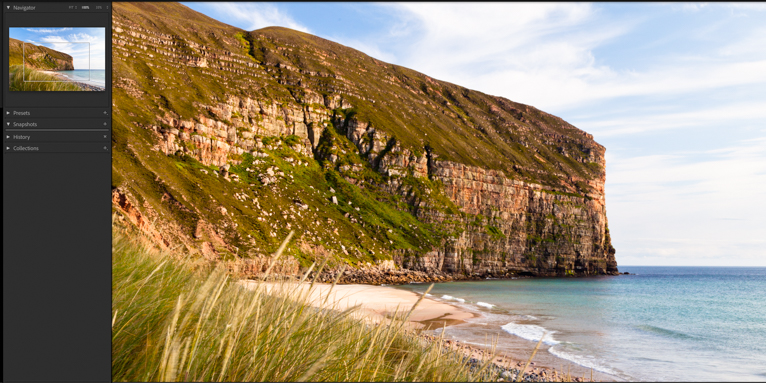
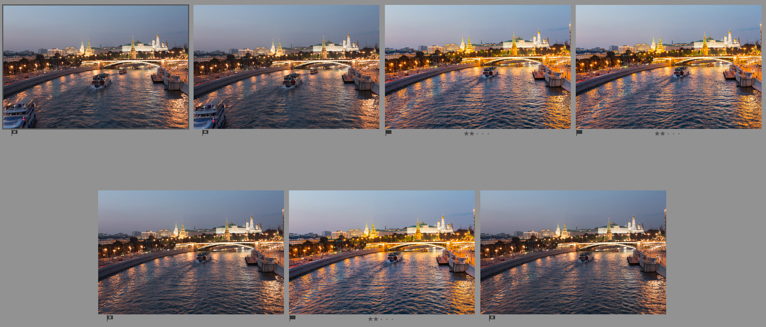
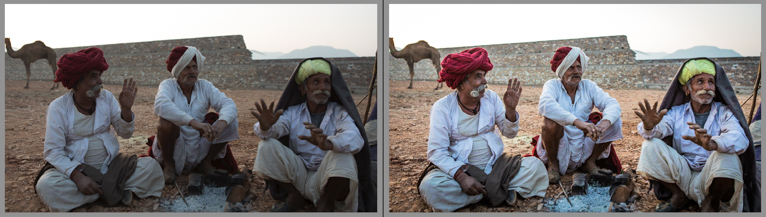
The stacked image of the 3 individual images from earlier in this post.

Stacking the final image

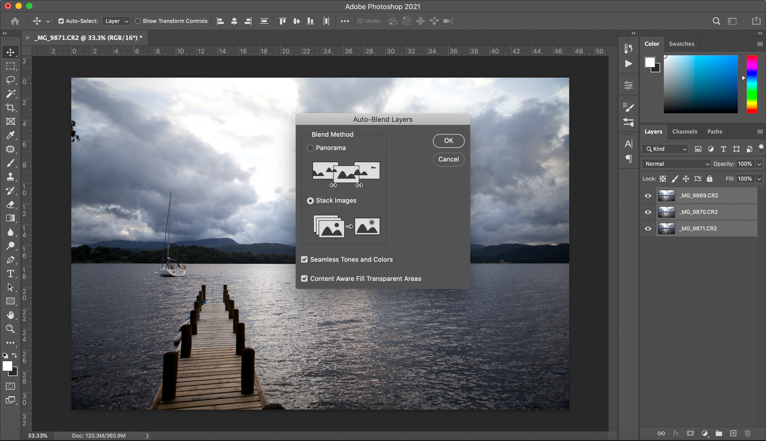
There are lots of software that you can use to stack your images. I use Photoshop which makes it incredibly easy. Here’s how:

  • Open Photoshop
  • Click: File => Scripts => Load Files into Stack => Browse
  • Select all of the images that will make up the stacked photo
  • Click OK and the images will open in Photoshop on separate layers
  • Click Edit => Auto-Blend Layers
  • Choose “Stack Images” and ensure “Seamless Tones and Colors” is ticked
  • I also tick “Content Aware Fill Transparent Areas” but this is optional
  • Click OK

This should blend all of the images into a single image using various makes on each layer. The final step is to flatten your image (Layer => Flatten Image) and then save it. Please note that flattening the image combines all the layers into one photo so if you want to keep the working file with the layers on, save it as a PSD file before flattening. You can then save a copy as a flattened JPEG or another file format if you wish.

Focus_Stacking

There you have it. An easy to understand guide to a really common technique that is used by photographers. Remember that the most important element in this process is making sure that your composition remains as similar as possible between your shots.

Photo credits: Kav Dadfar – All rights reserved. No usage without permission. Dreamstime.

Filed Under: Tutorials Tagged With: Depth of field, Focus Stacking, Focus stacking photos, Sharp photos

Why Your Photos Are Not Sharp When Using A Tripod?

A tripod is undoubtedly one of the most important accessories that a travel or landscape photographer has. For most, it is their favourite tool in capturing great shots. A tripod can offer so much and really make a difference to the quality of your photos. But sometimes you may find that your photos are not sharp even when you have used a tripod. This can be incredibly frustrating, so here are 7 reasons that your photos might not be sharp even when using a tripod.

Sharp_photos_with_a_tripod

Not on stable ground

The first part of ensuring that your images will be sharp is to make sure your tripod is set up securely so that there isn’t any movement. This might sound obvious, but I have seen so many instances where photographers set up their tripod wrong.

You also need to be aware of where you and your tripod are. For example, if your tripod is placed on a bridge there may movement when people or cars go past. You can’t stop this happening so you need to try and time your shot to take photos to coincide with a gap in the traffic. Or you need to use a faster shutter speed.

So the first step in capturing sharp photos with a tripod is to make sure your tripod is stable.

Sharp_photos_with_a_tripod

Too windy

There are times that no matter what you try the conditions will be against you and even the heaviest and sturdiest tripod won’t be able to handle the wind. The thing to remember is that when you are shooting with slow exposure even the faintest of movements will cause your shots to be blurred. So what do you do?

Sharp_photos_with_a_tripod

In a strong wind, even with a tripod, an image won’t be sharp at slow shutter speeds.

In these scenarios, your only option is to use a faster shutter speed to minimise the potential of camera movement during exposure. For example, even though you may want to capture the beautiful silky water, it may not be possible. 

One thing you could try is to get your tripod as low to the ground as possible and spread the legs out. This might buy you a couple more stops in strong wind.

Sharp_photos_with_a_tripod

You didn’t lock up the mirror

This is one of the most common mistakes that newbie photographers make when using a tripod and shooting slow exposure shots. In DSLR cameras, there is a mirror that reflects the scene into the viewfinder. That is how you see a live image rather than a digital one (like you get in mirrorless cameras).

When you press the shutter button to take a photo, this mirror flips up to expose the sensor to light to create the image. Incidentally, this is why your viewfinder goes dark. Because the mirror has flipped up. At fast shutter speeds, this doesn’t cause any issues. However, when you are shooting long exposures the mechanical movement of the mirror flipping up and down can cause vibrations which make your image look slightly blurred.

Sharp_photos_with_a_tripod

The solution is to go into your camera’s menu and select “lock up mirror”. This ensures that the mirror is flipped up before the sensor is exposed. Another easier solution is to set your camera to “Live view mode” which also does the same thing in flipping the mirror up.

Sharp_photos_with_a_tripod

Image stabilization in on

One of the best innovations in photography has been image stabilization. This can be really useful in allowing photographers to shoot at slower shutter speeds than was possible before. While this works great when you are shooting handheld, when your camera is on a tripod, the lack of movement can confuse the image stabilization system. This can cause your images to appear soft. So remember to turn off the IS when your camera is on a tripod.

Sharp_photos_with_a_tripod

You touched the camera

The most important thing to remember when your camera is on a tripod is that any movement can cause your photos to appear blurred (when you are not using fast shutter speeds). So even pressing the shutter button can cause this movement.

Rather than pressing the button to take a photo, set your camera on a timer. So that when you press the shutter button it takes a few seconds for the camera to take the photo. Or alternatively, you can use a shutter release cable.

Sharp_photos_with_a_tripod

Aperture too small

You probably already know that the smaller your aperture is, the greater your depth of field will be. So in landscape photography, for example, you will want to utilise this long depth of field. Most lenses have a sweet spot for sharpness which is around f/8 to f/11. That doesn’t mean that other apertures will give you a blurred photo.

But where it does start to cause problems is when you use extremely narrow apertures of f/18 and smaller due to something called “diffraction”. There’s plenty online about the science of this occurrence. But in short, this is an optical issue that is caused by small apertures. So always aim to keep your aperture at no more than f/16. 

Sharp_photos_with_a_tripod

This shot was taken at f/18. You can see that when zoomed in, the image isn’t 100% sharp. 

Not a good tripod

Like anything in life, sometimes the quality of a product makes a difference. A cheap and flimsy tripod might be more susceptible to vibrations and movements. So try to invest in a good quality carbon fibre tripod. I have had my Manfrotto tripod for almost 15 years and in that time I have dropped it, knocked it around and it even got hit by a car and it’s still standing strong.

Sharp_photos_with_a_tripod

Capturing sharp photos when using a tripod isn’t a given but if you follow the advice above you should end up with sharp photos when using a tripod every time.

Filed Under: Tutorials Tagged With: Sharp photos, Sharp photos FAQs, Sharpness, tripod, Using a tripod

5 Common Low Light Photography Questions Answered

Photographing in low light conditions can be one of the most challenging scenarios for a photographer. Some low light situations like cityscapes are not hugely challenging as long as you are using a tripod. But for example, any type of photography with movement can be very difficult to master. Over the years I often get asked the same questions about low light photography, so here are 5 of the most common questions answered.

low_light_photography

What settings should I use for low light photography?

This is by far the most common question I get asked. Unfortunately, there is no right answer here as all types of scenarios are different and require different settings. So rather than trying to give ideal settings, here are some tips to help you decide for yourself:

  • Think about what you are photographing – your shutter speed will need to be set depending on what you are photographing. The faster something is moving, the faster your shutter speed needs to be. For example, trying to freeze a moving car in your shots will require a much faster shutter speed than photographing a statue. As a general guide, a fairly fast-moving subject will usually need a shutter speed of at least 1/250 sec. This would still be the case for moving subjects even if you are using a tripod.
  • The depth of field is important – in addition to your shutter speed, your depth of field will also be an important consideration. More so in low light photography because it will impact your shutter speed. The smaller your aperture is the slower your shutter speed will need to be. So think about what you are photographing and set your aperture accordingly. For example, if you are taking a portrait, you don’t need a deep depth of field. By selecting a wide aperture you will naturally allow more light into the camera and so can achieve a faster shutter speed. This is really important in low light photography.
  • Set your ISO accordingly – once you have the above two settings sorted, your ISO will be the setting to allow you to achieve these. So increase your ISO as much as you need to so that you can achieve the shutter speed and aperture that you need.

low_light_photography

Why do my photos look blurred even with a fast shutter speed?

If your shutter speed is fast enough for the subject you are photographing and yet your photos still look blurred, there could be two reasons why:

  • You have focused on the wrong place – if you are using a wide aperture or in other words a shallow depth of field, then your focus point becomes much more important. For example, if you accidentally focus on the background of your subject you’ll find that they won’t be in focus. This will make the overall image seem soft or blurred.
  • Your ISO is too high – a high ISO can help you achieve the shutter speed and aperture that you desire. But that comes at a price. The higher your ISO is the more noise will appear in your image. More noise means the image will appear softer. So even if your shutter speed is 1/1000 sec, at 6400 your photo will look soft. The lesson here is to only raise your ISO as much as you need to. If for example, you can still capture the shot at 1/250 sec instead of 1/1000, then that will mean you can have a lower ISO.

low_light_photography

I used a tripod but my image is still blurry, why is that?

This can be incredibly frustrating but usually, there are reasons why even if you used a tripod your image is still not completely sharp. Check if it could be because of any of the reasons below:

  • Not stable enough – it could be that your tripod isn’t sturdy enough for your camera. Cheap and flimsy tripods can also suffer from vibration which has a detrimental effect on image sharpness at long exposures
  • The tripod moved – did you accidentally knock the tripod after your pressed the shutter button? That might even be because you actually pressed the shutter button instead of using a remote or timer. It also could be that you are standing somewhere that vibrates when people move on it (i.e. a bridge). Even a strong gust of wind can make a camera vibrate and cause camera shake.
  • You didn’t lockup your mirror –  DSLR cameras have a mirror inside that flicks up when you press to take a photo. This mechanical action causes small vibrations in the camera that can have an impact on image sharpness at slow shutter speeds. You can either “lockup mirror” in your camera settings or use “Live view mode” to avoid this issue.
  • Turn off image stabilization – modern lenses benefit from image stabilization which does a great job when you are handholding a camera. But when your camera is on a tripod, the image stabilization actually gets confused and can cause camera vibrations. So as a rule if your camera is mounted on a tripod, for slow exposures, turn off your image stabilization.

low_light_photography

How can I freeze the action in low light?

This is one of the toughest photography scenarios and will take time and practice to perfect. The simple answer is that you will need a fast shutter speed. Earlier I talked about being able to achieve this while keeping your ISO as low as possible. The other solution is to use artificial lighting such as a flash or LED light to brighten your subject so that you can have a fast shutter speed and a lower ISO than you would be able to select otherwise. Using a flash or LED will also have its challenges as sometimes it’s not allowed or even possible. But if you use some lighting in low light conditions, it will allow you to take photos with a faster shutter speed and lower ISO.

low_light_photography

How can I maximise my chances of capturing sharp photos handheld?

There are of course times when it isn’t possible to use a tripod and so you have to do your best to capture photos handheld. There are a few things you can do to maximise your chances of capturing sharp photos handheld:

  • Shoot in burst mode – you will often find that shooting in high-speed burst mode will mean your middle images are sharper than your first and last ones.
  • Set yourself – before you take photos, get yourself and your stance properly set up. Tuck your elbows in and if there is a wall or somewhere you can lean on, then do so. Keep your breathing steady and take your time.
  • Underexpose a little – if you find that your shutter speed is on the borderline of being fast enough to handhold, then underexpose your image slightly so that your shutter speed will be fast enough. You can then brighten the image up a little when you are editing.

low_light_photography

These are the most common questions that I get asked when it comes to low light photography. Like any other genre of photography, you will improve the more times you take photos in these scenarios and you will learn techniques you can use (and things not to do) to increase your chances of capturing better photos in low light conditions.

Photo credits: Kav Dadfar – All rights reserved. No usage without permission.

Filed Under: Tutorials Tagged With: Low light FAQs, Low light photography, Sharp photos, Sharp photos FAQs, Sharpness

5 Top Tips On Avoiding Blurry Photos When Not Using A Tripod

A tripod is one of the most important accessories that any photographer has. But they are heavy, cumbersome and awkward to carry around not to mention that they often do end up drawing attention. You may also find that in some places (usually indoors) tripods are not allowed at all. So how can you ensure that you take great photos that are not blurry when you don’t have a tripod with you? Here are 5 tips to help you do so.

Sharp_Photos_At_Low_Light

Bump up your ISO

The most important factor in ensuring that your photos are not blurred is your shutter speed. If it isn’t fast enough then you will end up with camera shake which in turn means blurred photos. How slow your shutter speed can be is influenced by a variety of factors such as the subject you are photographing (i.e. a speeding car requires a faster shutter speed than a statue). Your lens and your camera are also factors in how slow you can shoot handheld. Image stabilization has meant people can handhold a camera a few stops slower than they ever could before but it will vary from lens to lens and camera to camera. There is also your own ability to be able to hold a camera steady. For example many years ago on one of my workshops, one of the attendees could not hold a camera steady even at 1/100 sec due to a medical condition. Whereas others may be able to do so at speeds of 1/60 sec or even slower.

Sharp_Photos_At_Low_Light

To ensure that your shutter speed is going to be fast enough to capture the photos that you want, you will have to increase your ISO. The higher your ISO is the faster you can set your shutter speed. The important part is that you only increase your ISO as much as you need to as the higher it is, the more noise will appear in your photo. This actually ends up making your photo seem soft. So keep tweaking your ISO to see how low it can be whilst giving you a fast enough shutter speed.

Sharp_Photos_At_Low_Light

Find a resting place

As useful as the ISO setting is for allowing you to set a faster shutter speed, nothing will beat having your camera on a tripod and on as low an ISO as you can set (some cameras this could be as low as 50). This might seem like an obvious thing to point out, but even without a tripod you can still put your camera somewhere steady and treat it the same way as you would do with a tripod. A ledge, bench, rocks, trees, the ground or even your backpack can all act as a tripod and help you keep your ISO as low as possible. I have lost count of the number of times that I have taken photos by simply looking around or being creative and placing my camera somewhere.

Sharp_Photos_At_Low_Light

I placed my camera on the ground for this shot and placed my wallet underneath the lens to raise it up a little.

The added benefit of taking photos in this way is that you will often end up with some very interesting angles and views that you won’t normally take. We are all guilty of setting up our tripod at eye level and taking photos from the obvious spots. By having to find places to rest your camera on, you will automatically end up with much more unique shots.

Sharp_Photos_At_Low_Light

Find a light source

As mentioned earlier, often the main reason that people end up with blurred photos is that their shutter speed isn’t fast enough. This usually happens when there isn’t enough light for the scene. Throughout all my years of running photo tours and workshops very few people end up with blurred photos in the middle of the day when the scene outside is bright! One way to ensure that there is enough light to help you set a fast shutter speed in the lower light conditions that you face earlier or later in the day or even when you are indoors is to actually add more light to the subject. Rest assured I’m not talking about packing a whole load of lighting gear for the day (although you may want to do that). But something as simple as an LED light or even the light on the back of an iPhone can be incredibly useful to light up your subject a little. Just this bit of extra light can mean the difference in allowing a slightly faster shutter speed rather than a higher ISO.

This will only work when you have a subject that is fairly close to your camera, like if you are photographing a person. In a landscape scene, a small light wouldn’t be strong enough to light any further than the immediate foreground. But this is really useful when photographing people so it might be worth investing in an inexpensive LED light.

Sharp_Photos_At_Low_Light

I used an iPhone to light this man a bit more to allow me to set a slightly faster shutter speed rather than raising the ISO too high.

Get your stance right

Sometimes you have no choice but to do your best to capture the shot whilst handholding the camera There may not be anywhere you can rest your camera on. You may not want to set your ISO too high and you might not have an LED light with you. What do you do then? Firstly, it’s important to get the way you are standing and holding the camera correct. I often see people holding a camera with their hand over the focus ring rather than under it. If you hold the camera in this way you are in effect holding the full weight of the camera with one hand. Holding your lens from underneath will immediately make your camera more steady.

Sharp_Photos_At_Low_Light

You should also tuck your elbows into your side which again will help make you more steady. If you are shooting in low light conditions, try to find somewhere to lean on like a wall or even crouch down and rest your elbow on your knee. Lastly, take your time and control your breathing. If you have just been walking around or hiking you might be out of breath so give yourself a few minutes to calm down. All of this can help you become more steady so that the camera doesn’t shake when you take photos. In fact, you should make sure that your stance is correct whenever you take photos not just in low light conditions.

Sharp_Photos_At_Low_Light

Shoot in burst mode

Once you have got your stance correct, another way that you can improve your chances of capturing sharp photos is by setting your camera to shoot in burst mode. You will often find that the middle shots in a set of burst shots are the sharpest. Some cameras like the latest Canons also have high-speed burst mode which shoots even faster. Try to rattle off 6 or 7 shots and then check them in post-production where you can choose the sharpest ones.

Sharp_Photos_At_Low_Light

A burst of shots taken handheld. 3 of this set were sharp enough to use.

I would always advise anyone to use a tripod as much as possible where they can. But there are times and situations when that just isn’t possible. In those scenarios, use the tips above to enhance your chances of capturing a sharp photo.

Photo credits: Kav Dadfar – All rights reserved. No usage without permission. Dreamstime.

Filed Under: Tutorials Tagged With: Low light photography, Sharp photos, Sharpness

6 Hacks For Handholding Your Camera In Low Light

A lack of light is often the biggest culprit in blurred photos. If there isn’t enough light it will mean that your shutter speed will have to be slow which in turn can mean blurry photos. Using a tripod in low light conditions is the best way to ensure that your photos are sharp. But a tripod isn’t always allowed or convenient. Fear not, here are some tips to help you to shoot sharp photos when you handhold your camera in low light conditions.

Handheld_Low_Light

Know your limit

The first part of being able to take photos handheld in low light conditions is knowing how slow you can have your shutter speed when handholding a camera. Everyone is different and some people can hold a camera steady at slower shutter speeds than others. If you test out your steadiness before you need to shoot then you will have a baseline for how slow you can go.

This is important to know because it will help you decide what to aim for with your shutter speed using the tips below or by adjusting the other settings in the exposure triangle.

Handheld_Low_Light

Shoot in burst mode

Generally, for most people, the slowest that they can have their shutter speed and still have an acceptable level of sharpness is 1/60th sec. At this speed or even slower (if you are able to hold a camera steady), you should shoot in high-speed burst mode. The reason is that often you will find that the middle shots in your burst of shots are sharper than the ones at the start and finish. This can be a huge help when shooting handheld in low light conditions. Just make sure you have plenty of memory cards as you can go through them quickly when shooting in burst mode.

Handheld_Low_Light

Shoot in live view mode

An extension of the above tip is to shoot in bursts but in live view mode. The reason that this can sometimes help a little is that you are also taking the mechanical movement of the mirror flipping (in DSLR cameras) out of the equation. This movement of the mirror can cause small vibrations that show up at slow shutter speeds (hence why you need to lock up the mirror when taking long exposure shots using a tripod). It might not make a difference but when you are dealing with low light conditions sometimes it’s the sum of multiple things that can mean the difference between a blurred shot and one with acceptable sharpness.

Handheld_Low_Light

This shot was taken handheld at 1/40th sec at ISO 4000.

Get your stance correct

Another way that you can sometimes make your handheld photos in low light conditions sharper is by getting yourself and your stance more steady. Start by standing with one foot slightly in front of another and legs around shoulder-width wide. Tuck your elbows into your side rather than up in the air and support your camera with one hand under the lens. If you have just been walking around or hiking takes a few minutes to calm your breathing down before taking a photo. When ready to press the shutter button, take a couple of seconds to be more steady and do the same after you have finished taking the shot (rather than rushing to bring the camera down).

You can also kneel down on the ground resting your elbow on your knee or even fully lying on your stomach with your elbows on the ground. Both of these will help make you more steady.

Handheld_Low_Light

Underexpose your shot

Editing software like Lightroom is pretty amazing these days. You can often recover details in shadows without too much noise appearing. So sometimes it’s better to underexpose your shots slightly so that you can get a faster shutter speed. After all, what good is a perfectly exposed photo if it’s blurred? Of course, you don’t want to underexpose so much that your shadows are clipped (where the histogram gets cut off by the left side of the graph). But if you can get away with underexposing a little, then that is a far better option than raising your ISO too high.

Handheld_Low_Light

Left: Slightly underexposed shot allowed me a shutter speed of 1/160th sec. Right: Shadows recovered in Lightroom.

Experiment with your settings

The biggest tip to remember if you are unsure how to capture sharp shots in low light conditions when handholding a camera is to take lots of photos at different settings using the tips above. Not only will they help you increase your chances of capturing a sharp photo, but they can also help you learn from them for future shoots. Try to analyse all your shots and determine which ones are acceptable in terms of sharpness. Look at the ones that aren’t and learn what you did wrong so that you can eliminate it from future shoots.

Handheld_Low_Light

There is of course no substitute for using a tripod for low light shots. But that isn’t always an option and sometimes you will have to use the tips above or your creativity (like finding a ledge to rest your camera on) to be able to shoot handheld in low light conditions.

Photo credits: Kav Dadfar – All rights reserved. No usage without permission. Dreamstime.

Filed Under: Tutorials Tagged With: beginer photography tips, Handheld photography, Low light photography, Sharp photos

Images Not Sharp? You Could Be Making One Of These Mistakes

Capturing sharp images is one of the critical elements of photography. It is also often one of the areas that beginner photographers struggle with the most. It can be incredibly frustrating and somewhat disheartening when you think you have captured a great shot only to realise upon closer inspection that it isn’t sharp. Like most elements of photography with practice and experience, you’ll be able to pick up the knowledge and skills necessary to be able to capture sharp photos. But to help you on your journey, here are 4 mistakes that you could be making that have a detrimental effect on your photos.

Sharp_photos

Holding the camera incorrectly

This is one of the most common mistakes that I see photographers of all levels make. Like anything in life, you should aim to get the very basics right first. So you should pay close attention to the way that you are standing and holding the camera. Start by ensuring that your legs are shoulder-width apart with one slightly further forward than the other. Ideally, you should be standing at a slight angle so that your weight is distributed evenly. Next comes your arm position. Keep your elbows tucked into your sides rather than out to the sides. This will make things much easier on your shoulders and give your arms more stability.

Lastly, make sure you are holding the camera properly. I often see people holding the camera but then trying to zoom or focus with their other hand from the top of the lens. This means that one hand is holding of the weight of a camera. Instead, cradle the lens from underneath using your other hand. By adopting these tips you will hold the camera far more steady and will be less likely to suffer from camera shake.

Sharp_photos

Using a wide aperture all the time

Just because your lens is capable of allowing you to shoot at f/1.4 doesn’t mean that you should all the time. The big problem when using extremely wide apertures is that often it has a detrimental effect on your images (the same as shooting with very small apertures). Shooting at something like f/1.4 could result in edges appearing softer which in turn means less sharpness. So why are lenses capable of this you may ask? Because in some situations you have no other choice but to have a wide aperture to allow enough light to come into the camera so that you can shoot handheld.

The other big challenge when shooting with an extremely wide aperture is to make sure that you focus correctly on the right element that you want sharp. Because your plain of focus will be so shallow, only a very small part of the image will be in focus. So missing that mark will mean that your image will look blurred. So try to avoid using lenses at their extreme apertures unless you really have to.

Sharp_photos

Your shutter speed is too slow

You might already realise that unless you have statue-like hands, then you simply would not be able to hold a camera steady at slow shutter speeds. But how slow is that? Well, firstly that depends on you, the person holding the camera. One person might be able to hold a camera steady at 1/80 sec whereas for someone else that might result in camera shake. Then there is also your focal length to factor in. There is a longstanding rule called the “reciprocal rule” which simply means that you match your minimum shutter speed to the focal length you are shooting at. So for example, if you are shooting with a 100mm lens then your shutter speed should be 1/100 sec. For 200mm lens 1/200 sec and so on. This is not set in stone and these days lenses have much better image stabilization which can mean you can reduce your shutter speed. But it is a handy formula to use to ensure your shutter speed will not be too slow.

Sharp_photos

Letting the camera set your ISO

There’s no denying that modern cameras are incredibly advanced. But they are still no match for human intuition and are ultimately governed by predetermined rules and formulas. Unfortunately, sometimes this can lead to wrong decisions when it comes to settings. One of the biggest culprits of soft photos is too much noise which is often due to high ISO settings. For example, if you have set your camera to Auto ISO you may find that the camera will suddenly whack up your ISO so that you can achieve your shutter speed or aperture. Whilst on the surface this might seem like the right thing to do, by actually selecting the settings yourself you may find that you can underexpose your image a little instead of raising your ISO so high. You can then fix this in post-production and end up with a far sharper image than if you had used a very high ISO. Needless to say that you should always keep your ISO as low as possible.

Sharp_photos

This might all seem like too much to remember or implement, but with practice and experience, you will naturally improve. But remember to also check your mistakes and work out where you went wrong. Was it because you ISO was too high? Or maybe you focused on the wrong thing. By examining your photos and working out where you went wrong you are far more likely to avoid making the same mistakes again. Always remember that you learn more from your failed photos than your successful ones. Use the tips above and you should see an improvement in the sharpness of your photos.

Photo credits: Kav Dadfar – All rights reserved. No usage without permission. Dreamstime.

Filed Under: Tutorials Tagged With: beginner, beginner photography, Sharp photos, Sharpness

Blog Topics

  • Tutorials
  • Inspiration
  • Locations
  • Gear
  • News
  • Other/Misc

What our customers say:

Life Pixel has been a life-changer for me. Continue reading
Eric GConnecticut
Read more reviews
I am more than satisfied with the service I received Continue reading
Christopher JCanada
Read more reviews
I am more than pleased with the conversion job that you did Continue reading
LOUIS MWaco, Texas
Read more reviews
I am VERY impressed with his knowledge of your products and his patience in explaining it to a novice like me. Continue reading
Lynn FEssex, Maryland
Read more reviews
Things will only get better from here thanks to all of you. Continue reading
Phillip FRedding, California
Read more reviews
The Lifepixel newsletter reminds me of not having expressed my gratitude for the excellent job you made. Continue reading
Michael GGermany
Read more reviews
Your staff went above and beyond the call of duty to make sure everything was handled in an excellent manner. Continue reading
Paige RPearland, Texas
Read more reviews
It has given my old camera a new life, I will enjoy using it again. Continue reading
William PAustralia
Read more reviews
Excellent service and the camera works just great Continue reading
Hans FairhurstAustralia
Read more reviews
I just got my converted camera back from you guys. THANK YOU!!!! Continue reading
Anne CutlerForest Knolls, CA
Read more reviews
infrared_filter_choices_sidebar
ir_conversions_explained_sidebar
----------- Watch More Videos -----------
infrared_quick_start_guide

Ready to start shooting Infrared?

Convert My Camera

Subscribe To Our Newsletter

Receive updates, tips, cool tutorials, free stuff and special discounts.

Learn the Basics

  • Video
  • Start Here
  • Filter Choices
  • Focus Calibration
  • Lens Considerations
  • Camera Considerations
  • Place Your Conversion Order

Resources

  • Galleries
  • Lens Hot Spot Database
  • IR Tutorials
  • FAQ
  • Infrared Filter Choices
  • Infrared Photography Guide
  • Infrared DIY Tutorials

Company

  • Why Choose Us
  • Get In Contact
  • Job Openings
  • Write For Us
  • Affiliate Program
  • Terms of Use
  • Privacy Policy
  • Home
  • Start Here
  • Galleries
  • Tutorials
  • FAQ
  • Blog
  • Why Choose LifePixel?
  • Shop
  • Contact

Copyright © 2025 Life Pixel Infrared - All rights reserved - LifePixel Infrared Photography IR Conversion, Modification & Scratched Sensor Repair