• Cart
  • Checkout
  • My Account

Infrared Conversions, IR Modifications & Photography Tutorials | Life Pixel IR

The world leader in infrared conversions, modifications & DIY IR conversion tutorials. Scratched sensor replacement, UV & Full spectrum conversions.

The world leader in infrared camera conversions

866.610.1710
  • Home
  • → Start Here ←
    • 1 – Introduction
    • 2 – Filter Choices
    • 3 – Focus Calibration
    • 4 – Lens Considerations
    • 5 – Camera Considerations
    • 6 – Start Shopping
  • Galleries
    • Infrared Photography
    • Infrared Time Lapse
    • Infrared Cinematography
    • Infrared Stop Motion
    • Ultraviolet Photography
    • Forensic Photography
  • Education
    • Training Sessions
    • How To Shoot Infrared
    • AR Coated Infrared Filters
    • Lens Hot Spot Database
    • Photoshop Video Tutorials
    • Infrared Issues & Solutions
    • IR Basics in Photoshop
    • Camera Quick Start Guide
    • DIY Conversion Tutorials
    • IR Photography Primer
    • Secondhand Cameras
    • Wall Of Shame
  • Workshops
  • FAQ
  • Blog
    • Tutorials
    • Inspiration
    • Locations
    • Gear
    • News
    • Other
  • Why Choose LifePixel?
    • Submit Your Review
  • Contact
  • Shop

5 Common Low Light Photography Questions Answered

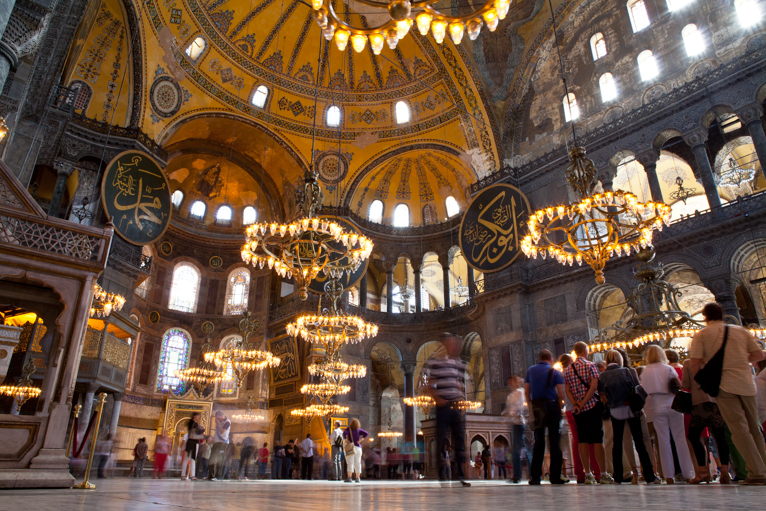
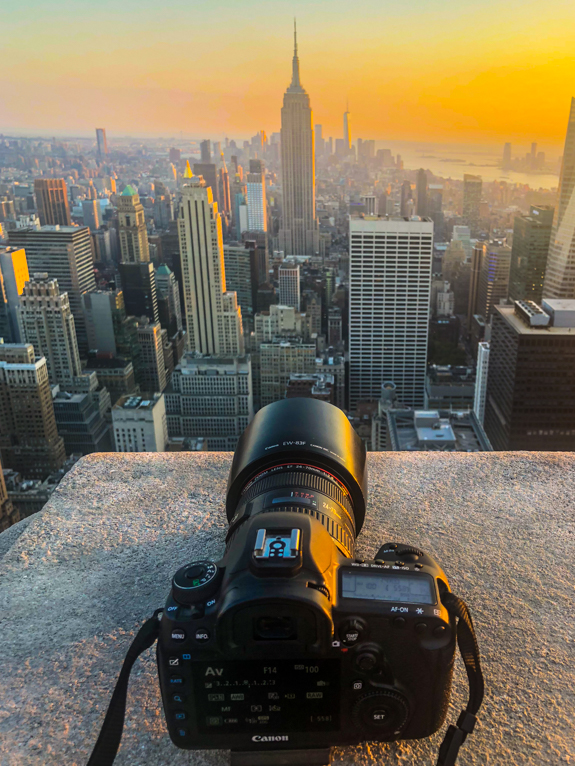
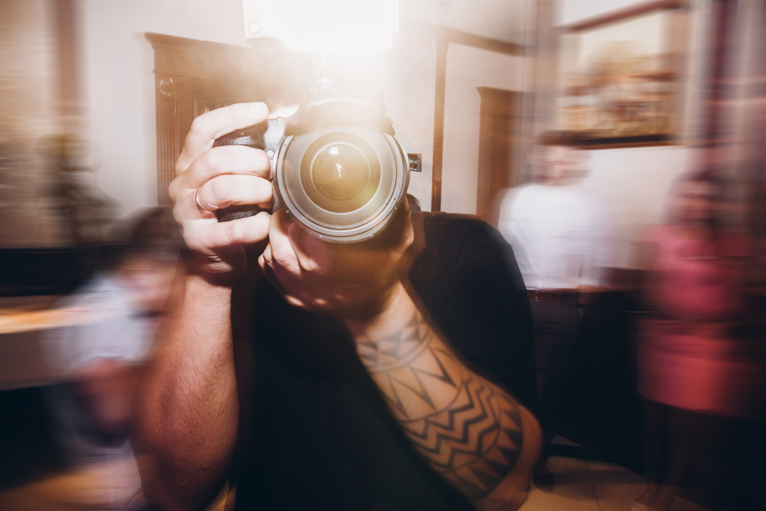
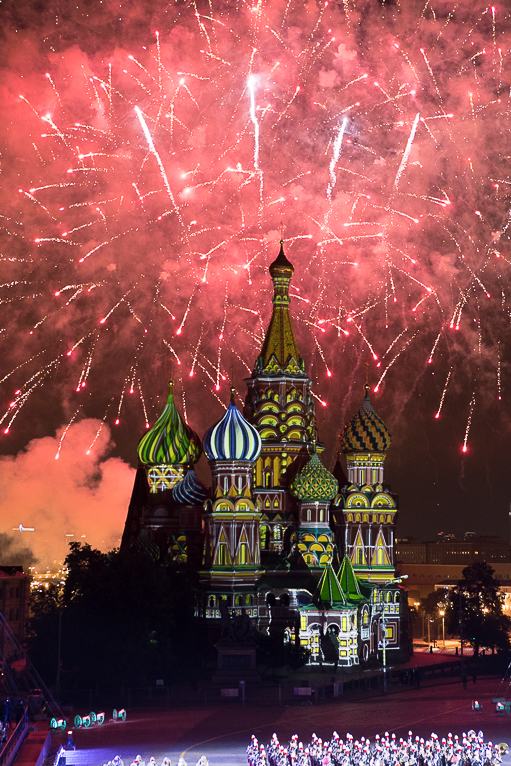
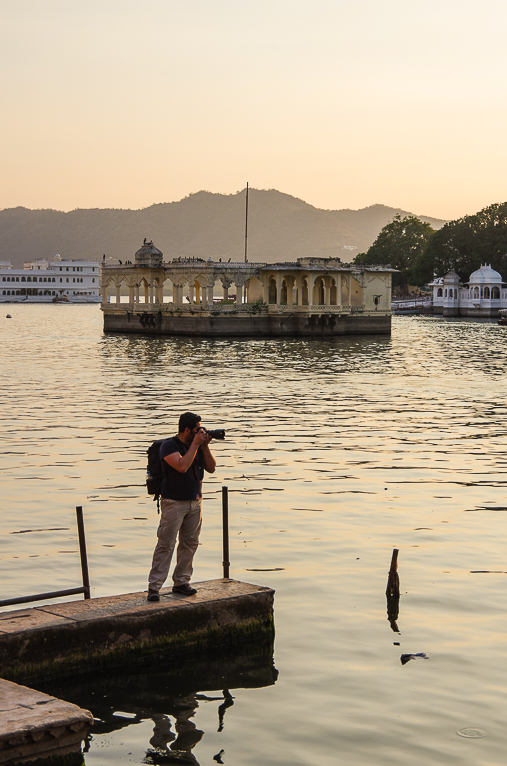
Photographing in low light conditions can be one of the most challenging scenarios for a photographer. Some low light situations like cityscapes are not hugely challenging as long as you are using a tripod. But for example, any type of photography with movement can be very difficult to master. Over the years I often get asked the same questions about low light photography, so here are 5 of the most common questions answered.

low_light_photography

What settings should I use for low light photography?

This is by far the most common question I get asked. Unfortunately, there is no right answer here as all types of scenarios are different and require different settings. So rather than trying to give ideal settings, here are some tips to help you decide for yourself:

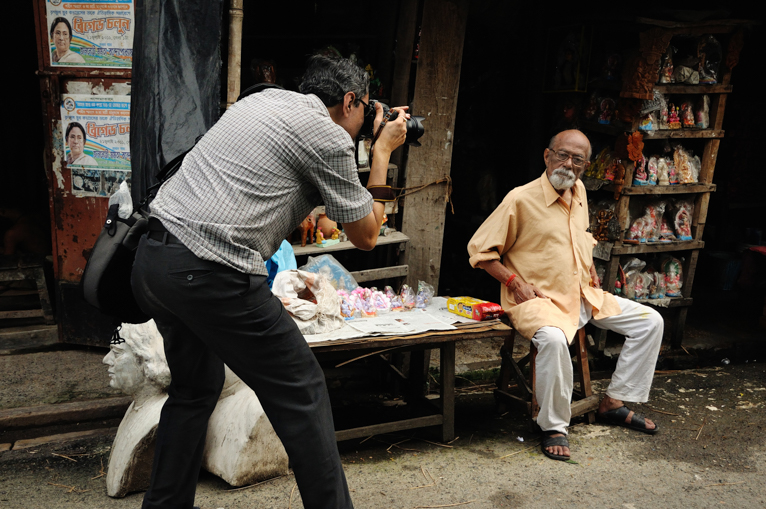
  • Think about what you are photographing – your shutter speed will need to be set depending on what you are photographing. The faster something is moving, the faster your shutter speed needs to be. For example, trying to freeze a moving car in your shots will require a much faster shutter speed than photographing a statue. As a general guide, a fairly fast-moving subject will usually need a shutter speed of at least 1/250 sec. This would still be the case for moving subjects even if you are using a tripod.
  • The depth of field is important – in addition to your shutter speed, your depth of field will also be an important consideration. More so in low light photography because it will impact your shutter speed. The smaller your aperture is the slower your shutter speed will need to be. So think about what you are photographing and set your aperture accordingly. For example, if you are taking a portrait, you don’t need a deep depth of field. By selecting a wide aperture you will naturally allow more light into the camera and so can achieve a faster shutter speed. This is really important in low light photography.
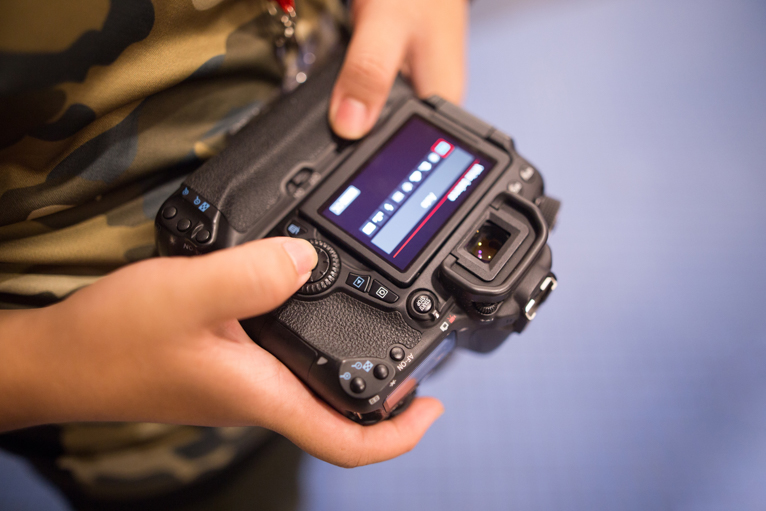
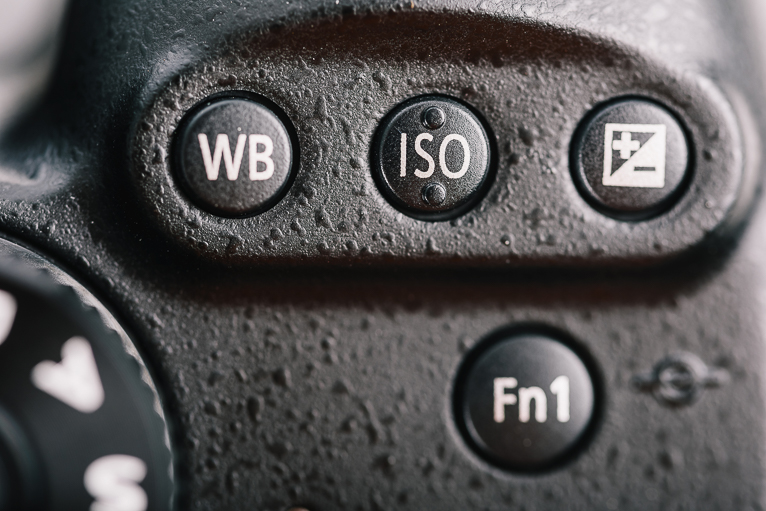
  • Set your ISO accordingly – once you have the above two settings sorted, your ISO will be the setting to allow you to achieve these. So increase your ISO as much as you need to so that you can achieve the shutter speed and aperture that you need.

low_light_photography

Why do my photos look blurred even with a fast shutter speed?

If your shutter speed is fast enough for the subject you are photographing and yet your photos still look blurred, there could be two reasons why:

  • You have focused on the wrong place – if you are using a wide aperture or in other words a shallow depth of field, then your focus point becomes much more important. For example, if you accidentally focus on the background of your subject you’ll find that they won’t be in focus. This will make the overall image seem soft or blurred.
  • Your ISO is too high – a high ISO can help you achieve the shutter speed and aperture that you desire. But that comes at a price. The higher your ISO is the more noise will appear in your image. More noise means the image will appear softer. So even if your shutter speed is 1/1000 sec, at 6400 your photo will look soft. The lesson here is to only raise your ISO as much as you need to. If for example, you can still capture the shot at 1/250 sec instead of 1/1000, then that will mean you can have a lower ISO.

low_light_photography

I used a tripod but my image is still blurry, why is that?

This can be incredibly frustrating but usually, there are reasons why even if you used a tripod your image is still not completely sharp. Check if it could be because of any of the reasons below:

  • Not stable enough – it could be that your tripod isn’t sturdy enough for your camera. Cheap and flimsy tripods can also suffer from vibration which has a detrimental effect on image sharpness at long exposures
  • The tripod moved – did you accidentally knock the tripod after your pressed the shutter button? That might even be because you actually pressed the shutter button instead of using a remote or timer. It also could be that you are standing somewhere that vibrates when people move on it (i.e. a bridge). Even a strong gust of wind can make a camera vibrate and cause camera shake.
  • You didn’t lockup your mirror –  DSLR cameras have a mirror inside that flicks up when you press to take a photo. This mechanical action causes small vibrations in the camera that can have an impact on image sharpness at slow shutter speeds. You can either “lockup mirror” in your camera settings or use “Live view mode” to avoid this issue.
  • Turn off image stabilization – modern lenses benefit from image stabilization which does a great job when you are handholding a camera. But when your camera is on a tripod, the image stabilization actually gets confused and can cause camera vibrations. So as a rule if your camera is mounted on a tripod, for slow exposures, turn off your image stabilization.

low_light_photography

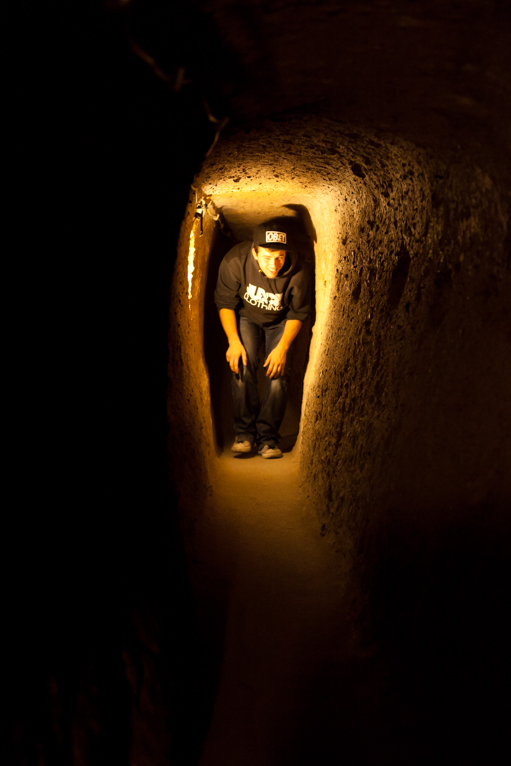
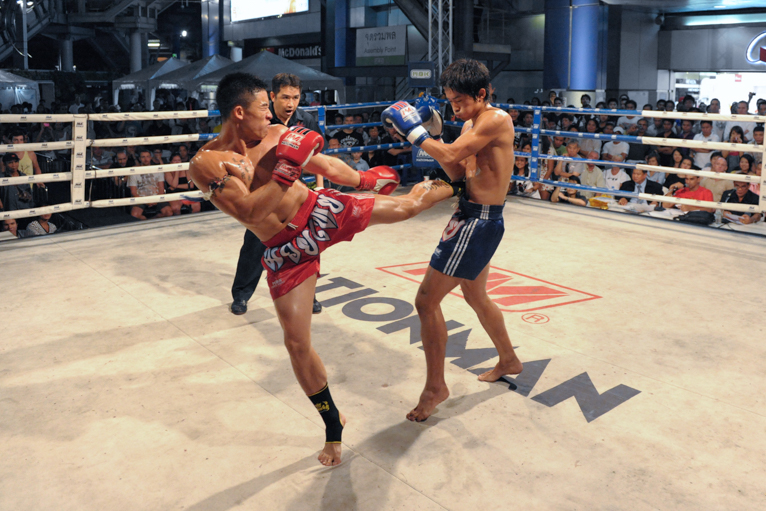
How can I freeze the action in low light?

This is one of the toughest photography scenarios and will take time and practice to perfect. The simple answer is that you will need a fast shutter speed. Earlier I talked about being able to achieve this while keeping your ISO as low as possible. The other solution is to use artificial lighting such as a flash or LED light to brighten your subject so that you can have a fast shutter speed and a lower ISO than you would be able to select otherwise. Using a flash or LED will also have its challenges as sometimes it’s not allowed or even possible. But if you use some lighting in low light conditions, it will allow you to take photos with a faster shutter speed and lower ISO.

low_light_photography

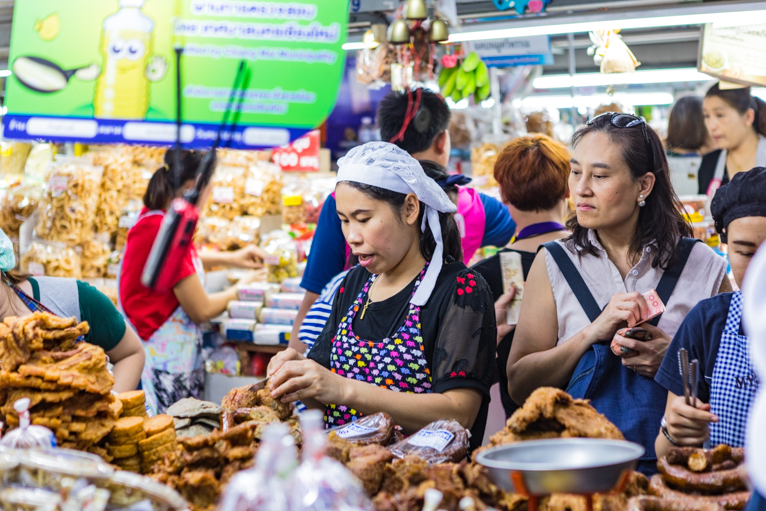
How can I maximise my chances of capturing sharp photos handheld?

There are of course times when it isn’t possible to use a tripod and so you have to do your best to capture photos handheld. There are a few things you can do to maximise your chances of capturing sharp photos handheld:

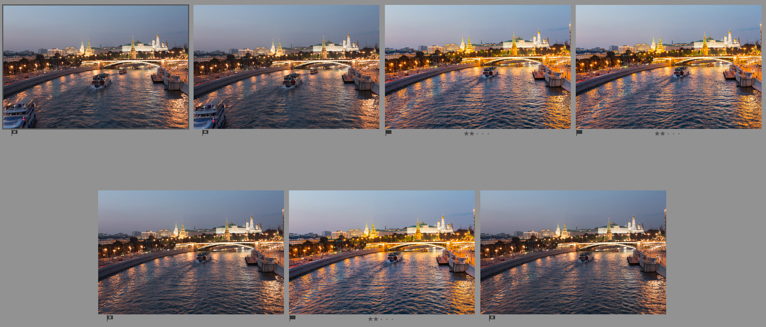
  • Shoot in burst mode – you will often find that shooting in high-speed burst mode will mean your middle images are sharper than your first and last ones.
  • Set yourself – before you take photos, get yourself and your stance properly set up. Tuck your elbows in and if there is a wall or somewhere you can lean on, then do so. Keep your breathing steady and take your time.
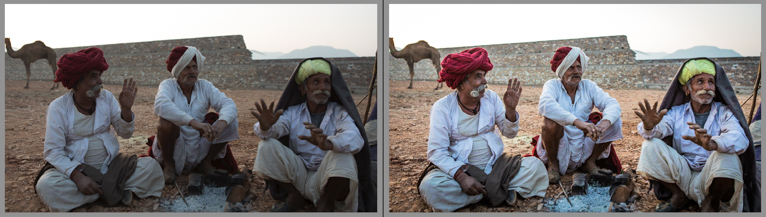
  • Underexpose a little – if you find that your shutter speed is on the borderline of being fast enough to handhold, then underexpose your image slightly so that your shutter speed will be fast enough. You can then brighten the image up a little when you are editing.

low_light_photography

These are the most common questions that I get asked when it comes to low light photography. Like any other genre of photography, you will improve the more times you take photos in these scenarios and you will learn techniques you can use (and things not to do) to increase your chances of capturing better photos in low light conditions.

Photo credits: Kav Dadfar – All rights reserved. No usage without permission.

Filed Under: Tutorials Tagged With: Low light FAQs, Low light photography, Sharp photos, Sharp photos FAQs, Sharpness

5 Top Tips On Avoiding Blurry Photos When Not Using A Tripod

A tripod is one of the most important accessories that any photographer has. But they are heavy, cumbersome and awkward to carry around not to mention that they often do end up drawing attention. You may also find that in some places (usually indoors) tripods are not allowed at all. So how can you ensure that you take great photos that are not blurry when you don’t have a tripod with you? Here are 5 tips to help you do so.

Sharp_Photos_At_Low_Light

Bump up your ISO

The most important factor in ensuring that your photos are not blurred is your shutter speed. If it isn’t fast enough then you will end up with camera shake which in turn means blurred photos. How slow your shutter speed can be is influenced by a variety of factors such as the subject you are photographing (i.e. a speeding car requires a faster shutter speed than a statue). Your lens and your camera are also factors in how slow you can shoot handheld. Image stabilization has meant people can handhold a camera a few stops slower than they ever could before but it will vary from lens to lens and camera to camera. There is also your own ability to be able to hold a camera steady. For example many years ago on one of my workshops, one of the attendees could not hold a camera steady even at 1/100 sec due to a medical condition. Whereas others may be able to do so at speeds of 1/60 sec or even slower.

Sharp_Photos_At_Low_Light

To ensure that your shutter speed is going to be fast enough to capture the photos that you want, you will have to increase your ISO. The higher your ISO is the faster you can set your shutter speed. The important part is that you only increase your ISO as much as you need to as the higher it is, the more noise will appear in your photo. This actually ends up making your photo seem soft. So keep tweaking your ISO to see how low it can be whilst giving you a fast enough shutter speed.

Sharp_Photos_At_Low_Light

Find a resting place

As useful as the ISO setting is for allowing you to set a faster shutter speed, nothing will beat having your camera on a tripod and on as low an ISO as you can set (some cameras this could be as low as 50). This might seem like an obvious thing to point out, but even without a tripod you can still put your camera somewhere steady and treat it the same way as you would do with a tripod. A ledge, bench, rocks, trees, the ground or even your backpack can all act as a tripod and help you keep your ISO as low as possible. I have lost count of the number of times that I have taken photos by simply looking around or being creative and placing my camera somewhere.

Sharp_Photos_At_Low_Light

I placed my camera on the ground for this shot and placed my wallet underneath the lens to raise it up a little.

The added benefit of taking photos in this way is that you will often end up with some very interesting angles and views that you won’t normally take. We are all guilty of setting up our tripod at eye level and taking photos from the obvious spots. By having to find places to rest your camera on, you will automatically end up with much more unique shots.

Sharp_Photos_At_Low_Light

Find a light source

As mentioned earlier, often the main reason that people end up with blurred photos is that their shutter speed isn’t fast enough. This usually happens when there isn’t enough light for the scene. Throughout all my years of running photo tours and workshops very few people end up with blurred photos in the middle of the day when the scene outside is bright! One way to ensure that there is enough light to help you set a fast shutter speed in the lower light conditions that you face earlier or later in the day or even when you are indoors is to actually add more light to the subject. Rest assured I’m not talking about packing a whole load of lighting gear for the day (although you may want to do that). But something as simple as an LED light or even the light on the back of an iPhone can be incredibly useful to light up your subject a little. Just this bit of extra light can mean the difference in allowing a slightly faster shutter speed rather than a higher ISO.

This will only work when you have a subject that is fairly close to your camera, like if you are photographing a person. In a landscape scene, a small light wouldn’t be strong enough to light any further than the immediate foreground. But this is really useful when photographing people so it might be worth investing in an inexpensive LED light.

Sharp_Photos_At_Low_Light

I used an iPhone to light this man a bit more to allow me to set a slightly faster shutter speed rather than raising the ISO too high.

Get your stance right

Sometimes you have no choice but to do your best to capture the shot whilst handholding the camera There may not be anywhere you can rest your camera on. You may not want to set your ISO too high and you might not have an LED light with you. What do you do then? Firstly, it’s important to get the way you are standing and holding the camera correct. I often see people holding a camera with their hand over the focus ring rather than under it. If you hold the camera in this way you are in effect holding the full weight of the camera with one hand. Holding your lens from underneath will immediately make your camera more steady.

Sharp_Photos_At_Low_Light

You should also tuck your elbows into your side which again will help make you more steady. If you are shooting in low light conditions, try to find somewhere to lean on like a wall or even crouch down and rest your elbow on your knee. Lastly, take your time and control your breathing. If you have just been walking around or hiking you might be out of breath so give yourself a few minutes to calm down. All of this can help you become more steady so that the camera doesn’t shake when you take photos. In fact, you should make sure that your stance is correct whenever you take photos not just in low light conditions.

Sharp_Photos_At_Low_Light

Shoot in burst mode

Once you have got your stance correct, another way that you can improve your chances of capturing sharp photos is by setting your camera to shoot in burst mode. You will often find that the middle shots in a set of burst shots are the sharpest. Some cameras like the latest Canons also have high-speed burst mode which shoots even faster. Try to rattle off 6 or 7 shots and then check them in post-production where you can choose the sharpest ones.

Sharp_Photos_At_Low_Light

A burst of shots taken handheld. 3 of this set were sharp enough to use.

I would always advise anyone to use a tripod as much as possible where they can. But there are times and situations when that just isn’t possible. In those scenarios, use the tips above to enhance your chances of capturing a sharp photo.

Photo credits: Kav Dadfar – All rights reserved. No usage without permission. Dreamstime.

Filed Under: Tutorials Tagged With: Low light photography, Sharp photos, Sharpness

6 Hacks For Handholding Your Camera In Low Light

A lack of light is often the biggest culprit in blurred photos. If there isn’t enough light it will mean that your shutter speed will have to be slow which in turn can mean blurry photos. Using a tripod in low light conditions is the best way to ensure that your photos are sharp. But a tripod isn’t always allowed or convenient. Fear not, here are some tips to help you to shoot sharp photos when you handhold your camera in low light conditions.

Handheld_Low_Light

Know your limit

The first part of being able to take photos handheld in low light conditions is knowing how slow you can have your shutter speed when handholding a camera. Everyone is different and some people can hold a camera steady at slower shutter speeds than others. If you test out your steadiness before you need to shoot then you will have a baseline for how slow you can go.

This is important to know because it will help you decide what to aim for with your shutter speed using the tips below or by adjusting the other settings in the exposure triangle.

Handheld_Low_Light

Shoot in burst mode

Generally, for most people, the slowest that they can have their shutter speed and still have an acceptable level of sharpness is 1/60th sec. At this speed or even slower (if you are able to hold a camera steady), you should shoot in high-speed burst mode. The reason is that often you will find that the middle shots in your burst of shots are sharper than the ones at the start and finish. This can be a huge help when shooting handheld in low light conditions. Just make sure you have plenty of memory cards as you can go through them quickly when shooting in burst mode.

Handheld_Low_Light

Shoot in live view mode

An extension of the above tip is to shoot in bursts but in live view mode. The reason that this can sometimes help a little is that you are also taking the mechanical movement of the mirror flipping (in DSLR cameras) out of the equation. This movement of the mirror can cause small vibrations that show up at slow shutter speeds (hence why you need to lock up the mirror when taking long exposure shots using a tripod). It might not make a difference but when you are dealing with low light conditions sometimes it’s the sum of multiple things that can mean the difference between a blurred shot and one with acceptable sharpness.

Handheld_Low_Light

This shot was taken handheld at 1/40th sec at ISO 4000.

Get your stance correct

Another way that you can sometimes make your handheld photos in low light conditions sharper is by getting yourself and your stance more steady. Start by standing with one foot slightly in front of another and legs around shoulder-width wide. Tuck your elbows into your side rather than up in the air and support your camera with one hand under the lens. If you have just been walking around or hiking takes a few minutes to calm your breathing down before taking a photo. When ready to press the shutter button, take a couple of seconds to be more steady and do the same after you have finished taking the shot (rather than rushing to bring the camera down).

You can also kneel down on the ground resting your elbow on your knee or even fully lying on your stomach with your elbows on the ground. Both of these will help make you more steady.

Handheld_Low_Light

Underexpose your shot

Editing software like Lightroom is pretty amazing these days. You can often recover details in shadows without too much noise appearing. So sometimes it’s better to underexpose your shots slightly so that you can get a faster shutter speed. After all, what good is a perfectly exposed photo if it’s blurred? Of course, you don’t want to underexpose so much that your shadows are clipped (where the histogram gets cut off by the left side of the graph). But if you can get away with underexposing a little, then that is a far better option than raising your ISO too high.

Handheld_Low_Light

Left: Slightly underexposed shot allowed me a shutter speed of 1/160th sec. Right: Shadows recovered in Lightroom.

Experiment with your settings

The biggest tip to remember if you are unsure how to capture sharp shots in low light conditions when handholding a camera is to take lots of photos at different settings using the tips above. Not only will they help you increase your chances of capturing a sharp photo, but they can also help you learn from them for future shoots. Try to analyse all your shots and determine which ones are acceptable in terms of sharpness. Look at the ones that aren’t and learn what you did wrong so that you can eliminate it from future shoots.

Handheld_Low_Light

There is of course no substitute for using a tripod for low light shots. But that isn’t always an option and sometimes you will have to use the tips above or your creativity (like finding a ledge to rest your camera on) to be able to shoot handheld in low light conditions.

Photo credits: Kav Dadfar – All rights reserved. No usage without permission. Dreamstime.

Filed Under: Tutorials Tagged With: beginer photography tips, Handheld photography, Low light photography, Sharp photos

6 Tips On Shooting In Low Light Without A Tripod

Most travel and landscape photographers would put a tripod on the top of their favourite list of accessories. It’s with good reason as a tripod gives you so much flexibility when it comes to taking photos. From being able to use slower shutter speeds to lower ISO, if you want to get the best quality photos at the best possible time, often a tripod is a must.

But there might be times when you don’t have a tripod with you, or possibly not allowed to use one. In those situations, you will need to find a different way to be able to take photos. So here are 6 tips to help you shoot in low light without a tripod.

1. Use A Wider Aperture

Depending on what you are photographing your first attempt at being able to photograph in low light could be to use a wide aperture (if you are not already). Basically, the more light you can get into the camera in these situations the better it will be. So, a wider aperture like f/3.5 or f/2.8 will give you that. Seems logical right? But there is a compromise with using a wide aperture.

The wider your aperture is, the shallower your depth of field will become. So, in other words, if for example, you are photographing a landscape scene you will find that not all your image will be sharp. Clearly, for something like landscape photography, this is an issue as you’ll need to try and keep the scene sharp all the way through. But if you are taking a portrait of someone where you only need their face in focus, you can use a shallower depth of field.

2. Bump Up Your ISO

Sometimes you may be able to get around the issue of low light by using a wide aperture. But as explained above in some cases like landscape photography you need a greater depth of field to ensure that your image is sharp throughout. In these scenarios, you have no choice but to raise your ISO to be able to have a shutter speed fast enough at smaller apertures.

But be very careful when raising your ISO. The higher it is the more noise you will get in your photos which in turn means your photo will lack sharpness. Remember that different cameras produce different levels of noise. It’s worth testing your camera at high ISO to see what level is acceptable.

3. Find A Resting Place

One of the key attributes a photographer needs to have is to be able to solve problems. Sometimes the problem might be to do with the photo itself. Like for example, the composition doesn’t work. Or it could be that the light isn’t right. Shooting in low light conditions is another one of these issues that need to be solved.

If you can’t have a tripod or don’t have one with you, then you need to work out the best way to shoot a scene without one. Often one of the best ways to do this is finding something that you can put your camera on. It might just be that you can place it on the floor or on a ledge. Or if you are creative in your thinking even using something you have with you like a camera bag.

If you can do this then it means you can take your photos at the ideal depth of field and shutter speed with the lowest ISO possible.

4. Use Burst Mode

Most cameras these days have a burst mode. This is when the camera rattles off multiple frames in a second. Some more advanced DSLRs will also have a high-speed burst which works even faster. Generally, you will probably find that when you are using slower shutter speeds, the first shot you take suffers from a bit more camera shake that the shots that follow. This often because you don’t have your initial hand movement of pressing the shutter button.

If your camera has burst mode or high-speed burst mode, then switch this on if shooting handheld in low light. It might just help you capture a photo which is sharper than you would be able to take with a single shot. But keep in mind that burst mode will often use up more battery power and will obviously fill up your memory card quicker. So, make sure you carry spares with you.

5. Get Your Stance Right

Another good tip for photography in general but especially for low light photography is to make sure you get your stance correct. For example, if you stand up with your elbows up and pointing out and you will be unstable. Instead by standing with your elbows down by your side and tucked into your body, you’ll find yourself being steadier.

Or for example, if you kneel on one knee and rest your elbow onto your knee you will again be less likely to suffer from camera shake. Finding something to lean against might also help you keep the camera steadier than standing up straight.

It’s important to learn and use the correct stance when photographing. So spend time learning and practising it.

6. Underexpose Your Shot

I said earlier that as a photographer you have to solve problems. But you also need to learn what compromises you can make in order to capture a photo. Everything you do to the elements in the exposure triangle affects something else. For example, one way to get around the issue of a slow shutter speed in low light photography is to underexpose your image.

People will vary in how steady they can hold a camera. Some people can hold a camera steady at 1/60 second, whilst for others, the slowest might be 1/100 second. If you find that your shutter speed is just below your minimum, by underexposing your image by one stop, you might see your shutter speed become faster. Yes, your image is going to be underexposed but you can then brighten it up in post-production. But you won’t be able to recover a blurred image.

Just be very careful how much you underexpose your shot. If it’s too underexposed then when you brighten it up in post-production you will end up with a lot of noise and an image that lacks sharpness.

There is no substitute for using a tripod when it comes to low light photography. But at times when it isn’t possible these tips might help you capture the image you want. It might be that you have to use a combination of them to achieve the photo that you want. But always just be aware of the consequences and compromises you may have to make.

Photo credits: Kav Dadfar – All rights reserved. No usage without permission. Dreamstime.

Filed Under: Tutorials Tagged With: Low light photography

Blog Topics

  • Tutorials
  • Inspiration
  • Locations
  • Gear
  • News
  • Other/Misc

What our customers say:

Life Pixel has been a life-changer for me. Continue reading
Eric GConnecticut
Read more reviews
I am more than satisfied with the service I received Continue reading
Christopher JCanada
Read more reviews
I am more than pleased with the conversion job that you did Continue reading
LOUIS MWaco, Texas
Read more reviews
I am VERY impressed with his knowledge of your products and his patience in explaining it to a novice like me. Continue reading
Lynn FEssex, Maryland
Read more reviews
Things will only get better from here thanks to all of you. Continue reading
Phillip FRedding, California
Read more reviews
The Lifepixel newsletter reminds me of not having expressed my gratitude for the excellent job you made. Continue reading
Michael GGermany
Read more reviews
Your staff went above and beyond the call of duty to make sure everything was handled in an excellent manner. Continue reading
Paige RPearland, Texas
Read more reviews
It has given my old camera a new life, I will enjoy using it again. Continue reading
William PAustralia
Read more reviews
Excellent service and the camera works just great Continue reading
Hans FairhurstAustralia
Read more reviews
I just got my converted camera back from you guys. THANK YOU!!!! Continue reading
Anne CutlerForest Knolls, CA
Read more reviews
infrared_filter_choices_sidebar
ir_conversions_explained_sidebar
----------- Watch More Videos -----------
infrared_quick_start_guide

Ready to start shooting Infrared?

Convert My Camera

Subscribe To Our Newsletter

Receive updates, tips, cool tutorials, free stuff and special discounts.

Learn the Basics

  • Video
  • Start Here
  • Filter Choices
  • Focus Calibration
  • Lens Considerations
  • Camera Considerations
  • Place Your Conversion Order

Resources

  • Galleries
  • Lens Hot Spot Database
  • IR Tutorials
  • FAQ
  • Infrared Filter Choices
  • Infrared Photography Guide
  • Infrared DIY Tutorials

Company

  • Why Choose Us
  • Get In Contact
  • Job Openings
  • Write For Us
  • Affiliate Program
  • Terms of Use
  • Privacy Policy
  • Home
  • Start Here
  • Galleries
  • Tutorials
  • FAQ
  • Blog
  • Why Choose LifePixel?
  • Shop
  • Contact

Copyright © 2025 Life Pixel Infrared - All rights reserved - LifePixel Infrared Photography IR Conversion, Modification & Scratched Sensor Repair