A lack of light is often the biggest culprit in blurred photos. If there isn’t enough light it will mean that your shutter speed will have to be slow which in turn can mean blurry photos. Using a tripod in low light conditions is the best way to ensure that your photos are sharp. But a tripod isn’t always allowed or convenient. Fear not, here are some tips to help you to shoot sharp photos when you handhold your camera in low light conditions.
Know your limit
The first part of being able to take photos handheld in low light conditions is knowing how slow you can have your shutter speed when handholding a camera. Everyone is different and some people can hold a camera steady at slower shutter speeds than others. If you test out your steadiness before you need to shoot then you will have a baseline for how slow you can go.
This is important to know because it will help you decide what to aim for with your shutter speed using the tips below or by adjusting the other settings in the exposure triangle.
Shoot in burst mode
Generally, for most people, the slowest that they can have their shutter speed and still have an acceptable level of sharpness is 1/60th sec. At this speed or even slower (if you are able to hold a camera steady), you should shoot in high-speed burst mode. The reason is that often you will find that the middle shots in your burst of shots are sharper than the ones at the start and finish. This can be a huge help when shooting handheld in low light conditions. Just make sure you have plenty of memory cards as you can go through them quickly when shooting in burst mode.
Shoot in live view mode
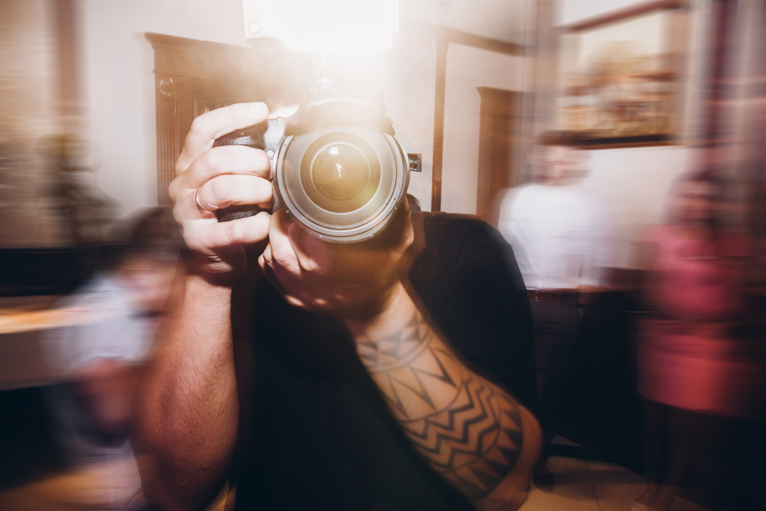
An extension of the above tip is to shoot in bursts but in live view mode. The reason that this can sometimes help a little is that you are also taking the mechanical movement of the mirror flipping (in DSLR cameras) out of the equation. This movement of the mirror can cause small vibrations that show up at slow shutter speeds (hence why you need to lock up the mirror when taking long exposure shots using a tripod). It might not make a difference but when you are dealing with low light conditions sometimes it’s the sum of multiple things that can mean the difference between a blurred shot and one with acceptable sharpness.

This shot was taken handheld at 1/40th sec at ISO 4000.
Get your stance correct
Another way that you can sometimes make your handheld photos in low light conditions sharper is by getting yourself and your stance more steady. Start by standing with one foot slightly in front of another and legs around shoulder-width wide. Tuck your elbows into your side rather than up in the air and support your camera with one hand under the lens. If you have just been walking around or hiking takes a few minutes to calm your breathing down before taking a photo. When ready to press the shutter button, take a couple of seconds to be more steady and do the same after you have finished taking the shot (rather than rushing to bring the camera down).
You can also kneel down on the ground resting your elbow on your knee or even fully lying on your stomach with your elbows on the ground. Both of these will help make you more steady.
Underexpose your shot
Editing software like Lightroom is pretty amazing these days. You can often recover details in shadows without too much noise appearing. So sometimes it’s better to underexpose your shots slightly so that you can get a faster shutter speed. After all, what good is a perfectly exposed photo if it’s blurred? Of course, you don’t want to underexpose so much that your shadows are clipped (where the histogram gets cut off by the left side of the graph). But if you can get away with underexposing a little, then that is a far better option than raising your ISO too high.
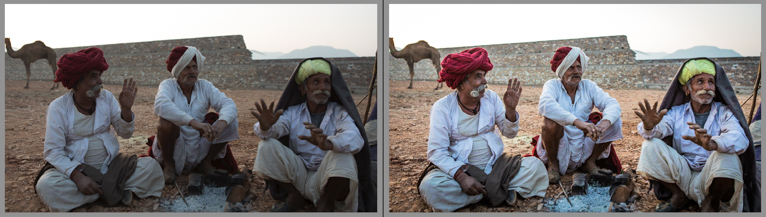
Left: Slightly underexposed shot allowed me a shutter speed of 1/160th sec. Right: Shadows recovered in Lightroom.
Experiment with your settings
The biggest tip to remember if you are unsure how to capture sharp shots in low light conditions when handholding a camera is to take lots of photos at different settings using the tips above. Not only will they help you increase your chances of capturing a sharp photo, but they can also help you learn from them for future shoots. Try to analyse all your shots and determine which ones are acceptable in terms of sharpness. Look at the ones that aren’t and learn what you did wrong so that you can eliminate it from future shoots.
There is of course no substitute for using a tripod for low light shots. But that isn’t always an option and sometimes you will have to use the tips above or your creativity (like finding a ledge to rest your camera on) to be able to shoot handheld in low light conditions.
Photo credits: Kav Dadfar – All rights reserved. No usage without permission. Dreamstime.
