Every single one of us has looked at a photo on a screen or printed and been astonished by the explosion of colour that is jumping out at us. The deep blues, striking reds and beautiful greens and everything else in between have the power to transform an image into something spectacular. That’s not to say that is the only way your photos should look. In fact, a lot of great photographers have developed a more muted style in their photos. It comes down to personal preference. But if you do want those striking colours in your photos, here are 4 tips to help you achieve it.
You need good light
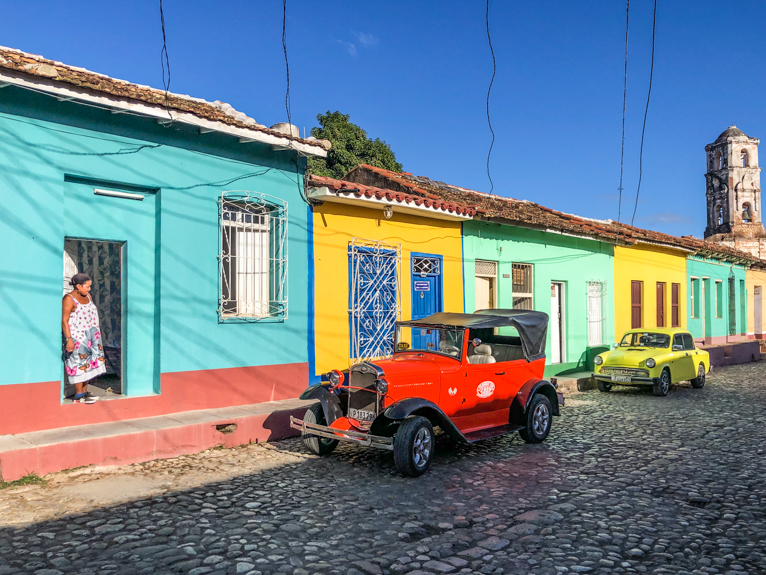
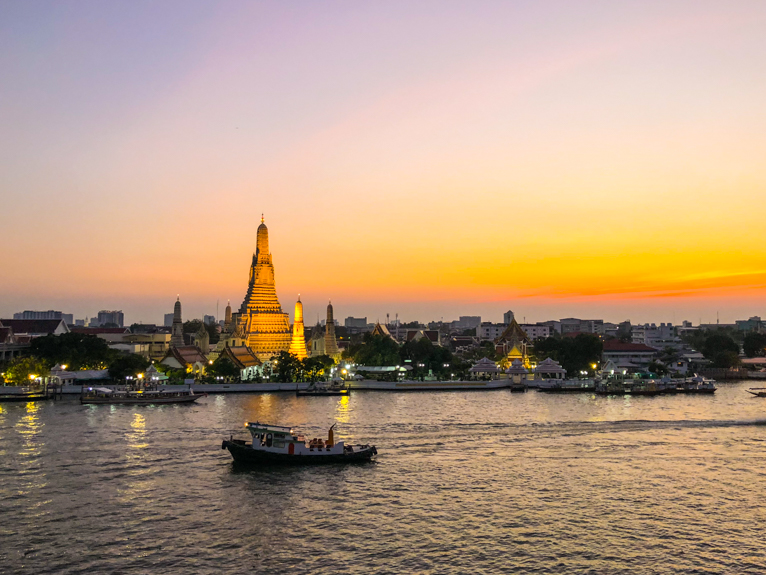
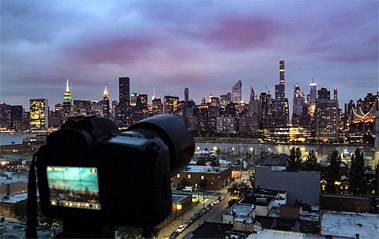
Photography purists might often criticise those who manipulate their images in editing software as not being “real photography”. Sure, if you are replacing elements in a photo like for example the sky, then these arguments certainly have merit. But the reality is that you need the right elements in a photo and post-processing should be used to enhance those features. For example, without some striking clouds and colour in the sky to start with you won’t get those amazing colours. So the basis of getting those amazingly colourful photos is to ensure that the conditions are right. Of course, you need colours to be there so that they can be enhanced. But you also need great light. Without it, your image will look flat and the colours will be muted. So always ensure that you are searching and utilising the best light that you can. It is the basis of a good photo.
Experiment with your white balance
I’m sure every one of you has been told at some point in your photography journey to “get your white balance correct”. For example, you may need to add more warmth to an image taken in bright sunshine. But what many people may not realise is that your white balance can also be used to enhance colours in your photos. Most cameras have multiple preset white balance modes. Things like “Cloudy, Shade, Incandescent” and so on appear on most people’s cameras but many don’t know why or when to use them. If you shoot in RAW then you can easily experiment with these settings to see the effect it has on your photos. For example, using a “Cloudy” or “Shade” setting gives the image more warmth. So if you are taking a photo in the late afternoon, then selecting these will make your oranges, yellows and red much more vibrant. Next time you are taking photos experiment with your white balance settings. You can always change them in post-processing as long as you shoot in RAW.

Use filters
The advancement of editing software has certainly given people the opportunity to forego using filters at the time of taking photos and simulate the effect in post-processing software such as Photoshop or Lightroom. Whilst there is nothing wrong with doing that, learning and using filters out in the field will not only make you a better photographer but it will also allow you to make changes and tweak your photos when taking them. So I would always encourage people to use filters. The most commonly used one for enhancing colours in your photos is the polarizing filter. Not only can these filters stop unwanted reflections, but they can also boost the colours in blues and greens. So for example, if you are taking photos of a waterfall, the greens of the foliage and the blues of the sky or water will become much more saturated.
Saturation and vibrancy
Once you have got your photos into an editing software, the easiest way to boost the colours is to use saturation and/or vibrancy function. Saturation enhances the colour intensity of all the colours in your photo. In some circumstances, this might not have the desired effect as it might mean certain colours are far too saturated and look unrealistic. So you can also selectively saturate and de-saturate colours. For example, if a certain colour is too saturated you can just reduce the saturation in that colour whilst the other colours are still keeping their saturation.
Vibrancy is slightly different in that it only changes the intensity of the dull colours in the image. So again if you find that there is already striking colours in your image the vibrancy adjustment might work better. You can, of course, use both in conjunction with each other. But just be aware of over saturating the image. Too much saturation and the image will look fake and too posterized. Like any sort of post-processing, subtlety is the key. Slowly tweak your images until you get the desired look.

If you want to have those vibrant and striking colours in your photos, the good news is that it isn’t difficult. If you capture photos in good light and use filters and post-processing to enhance them you should easily be able to add lots of colour into your photos. Like anything in photography, it will come down to your personal preference on how much vibrancy you want in your images. Using the tips above will give you the basis of being able to choose.
Photo credits: Kav Dadfar – All rights reserved. No usage without permission.
Latest articles by Kav Dadfar (see all articles)
- How To Photograph Street Performers - April 26, 2022
- Profiled Photographers – Ben McKechnie - August 24, 2021
- Profiled Photographers – Jim Maher - August 24, 2021
is the founding editor of JRNY Travel Magazine as well as a professional travel photographer and writer based in the UK. His images have been used by clients such as Condé Nast, National Geographic, Lonely Planet, Rough Guides and many others. Kav is also the co-founder of That Wild Idea, a company specializing in photography workshops and tours both in the UK and around the world.
See All Articles by Kav Dadfar

Leave a Reply