• Cart
  • Checkout
  • My Account

Infrared Conversions, IR Modifications & Photography Tutorials | Life Pixel IR

The world leader in infrared conversions, modifications & DIY IR conversion tutorials. Scratched sensor replacement, UV & Full spectrum conversions.

The world leader in infrared camera conversions

866.610.1710
  • Home
  • → Start Here ←
    • 1 – Introduction
    • 2 – Filter Choices
    • 3 – Focus Calibration
    • 4 – Lens Considerations
    • 5 – Camera Considerations
    • 6 – Start Shopping
  • Galleries
    • Infrared Photography
    • Infrared Time Lapse
    • Infrared Cinematography
    • Infrared Stop Motion
    • Ultraviolet Photography
    • Forensic Photography
  • Education
    • Training Sessions
    • How To Shoot Infrared
    • AR Coated Infrared Filters
    • Lens Hot Spot Database
    • Photoshop Video Tutorials
    • Infrared Issues & Solutions
    • IR Basics in Photoshop
    • Camera Quick Start Guide
    • DIY Conversion Tutorials
    • IR Photography Primer
    • Secondhand Cameras
    • Wall Of Shame
  • Workshops
  • FAQ
  • Blog
    • Tutorials
    • Inspiration
    • Locations
    • Gear
    • News
    • Other
  • Why Choose LifePixel?
    • Submit Your Review
  • Contact
  • Shop

Bracketed Exposures for IR photography

What are bracketed exposures? If you’re familiar with this term, you know how useful they can be. There are multiple uses for bracketed exposures, but they are especially helpful in IR photography. Shooting bracketed exposures is where the camera is set-up to shoot the same scene, but at different exposures.

Nearly all stock cameras are meant to shoot in color. So when we get into the optics and start removing filters or adding other filters, the camera doesn’t work the same. The one area that really takes a beating is the metering. After a modification, the metering will still be fairly close. But shooting in IR or full spectrum will definitely change the way the camera’s metering system sees the world. I find that my full spectrum modified Canon 5D Mk II with a 740nm filter will usually meter a ½ to 1 stop (usually denoted by EV) brighter than a normal scene. Most of my other modified cameras were the same.

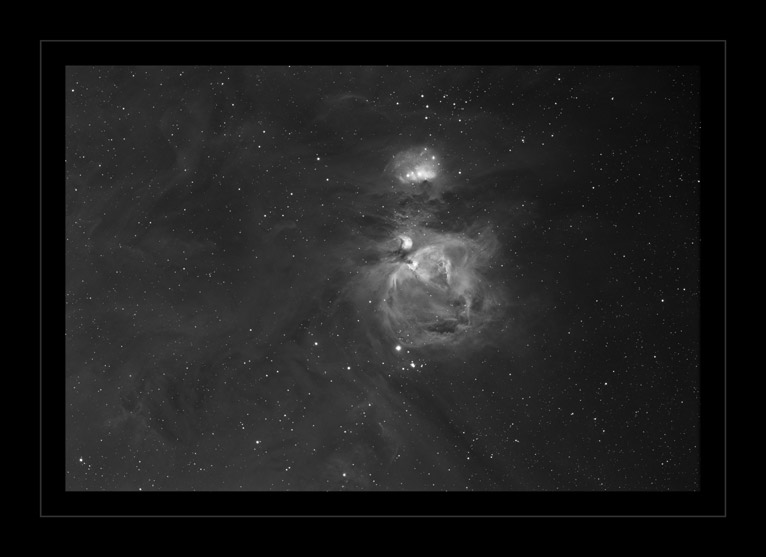
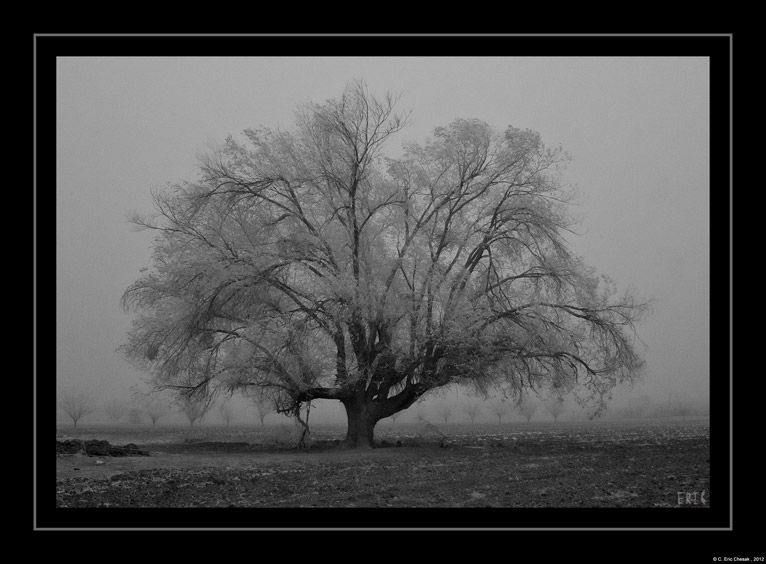
The shows a series of 3 bracketed exposures at -1, 0 +1 EV

When I shoot IR photos, I shoot bracketed exposures as a rule. I’ve had too many IR photos where I thought the metering was accurate only to find that there are highlights in the scene that are blown out (camera’s histogram is clipped on the RHS). Shooting bracketed exposures nearly always helps me recover these highlights or even allows me to process a different shot that is at the + or – end of the bracket.

How do you begin doing this? Well, most cameras these days will allow the use of bracketed exposures. This is where the camera will shoot 3 or more exposures for each image. Depending on how you set it up, the camera will typically shoot a normal exposure and one under exposed and another that is over exposed. Some cameras will shoot additional over/under frames and also allow you to skew how these different exposures are framed in the overall bracket.  I like to set my camera to shoot the bracketed exposures in high speed mode, so I can get the 3 images in rapid succession with a single shutter button press.

This is the menu option for setting bracketed exposures on a Canon 7D.  This one is set for -1, 0 +1 EV

My cameras (as to many) have several programmable settings where I can set f/stop, ISO, exposure mode, bracketed exposures, etc. So I have 2 custom settings that shoot only bracketed. On my camera, C1 is set up for 1 stop over and under. The camera will record 1 normally metered frame, one frame that is one stop under and one frame that is one stop over. C2 is the same operation except for 2 stops over/under. This makes it quick and easy for me to change the camera to different situations where 1 or 2 stops might be needed.

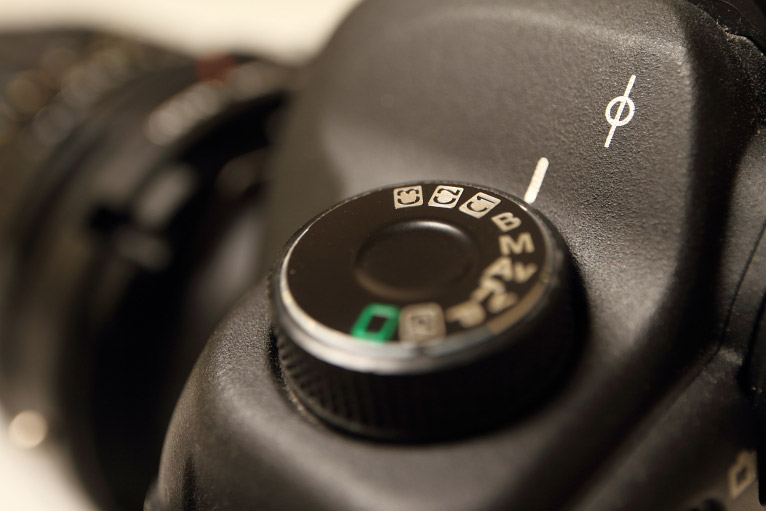
Many DSLR’s have the ability to set custom settings.  This one is a Canon 5D MkII

So why else would I shoot bracketed exposures? One great feature is HDR. If you’re shooting a scene that has both bright and dark elements or the scene spans more dynamic range than a single shot can record, HDR or some other technique of exposure masking or blending is the way to do this. It’s also very helpful to have multiple exposures when shooting on the shadow side of the Sun, or toward the Sun.  Many times you won’t see the need for HDR until after you return and are processing your images. It’s too late to do an HDR at that point. So by shooting bracketed exposures, you have the ability to do HDR or exposure blending on shots, after the fact.

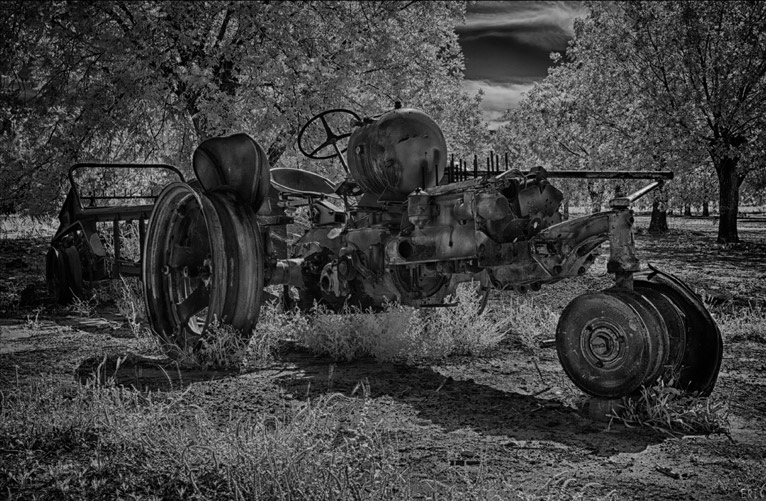
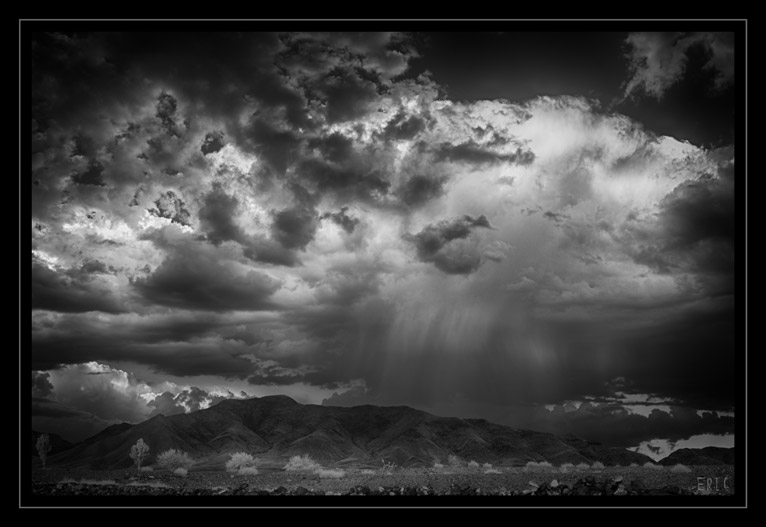
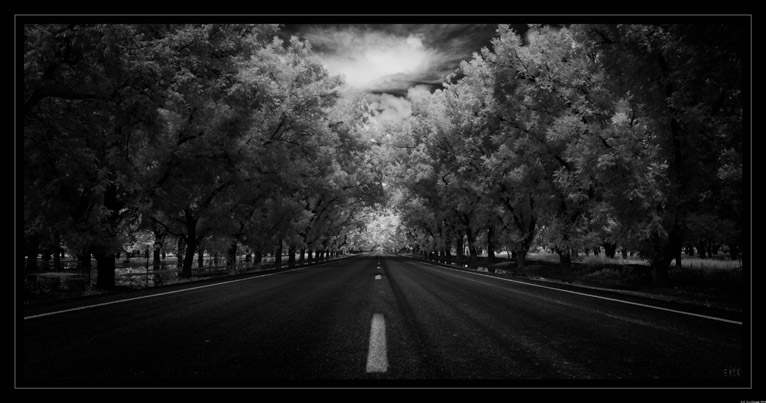
This is an HDR of the 3 images shown above.

Isn’t shooting bracketed exposures going to wear out my camera? Won’t it take more memory? Yep, for both. Your shutter is now clicking 3 or more times for each scene. All of these shots have to be recorded on the memory card. Of the 7 modern DSLR’s I’ve owned, I’ve only replaced the shutter on one camera (my 30D), and that was at about 3700 clicks, for sure an anomaly.  Most prosumer DSLR’s are good for 100k -150k shutter clicks. I’ve never shot 100k shots on any of my cameras. But I’m not a professional photographer. I venture to guess that most other casual shooters are the same. As for the memory consumption, memory cards are cheap.

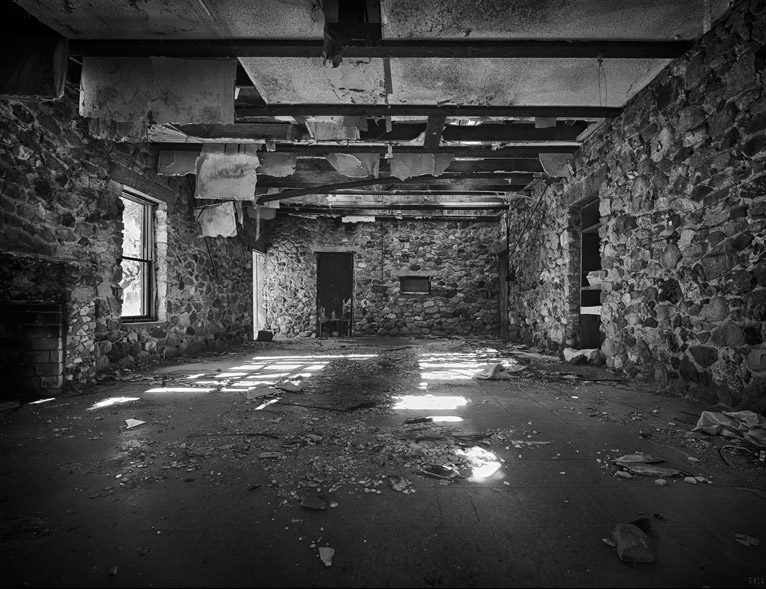
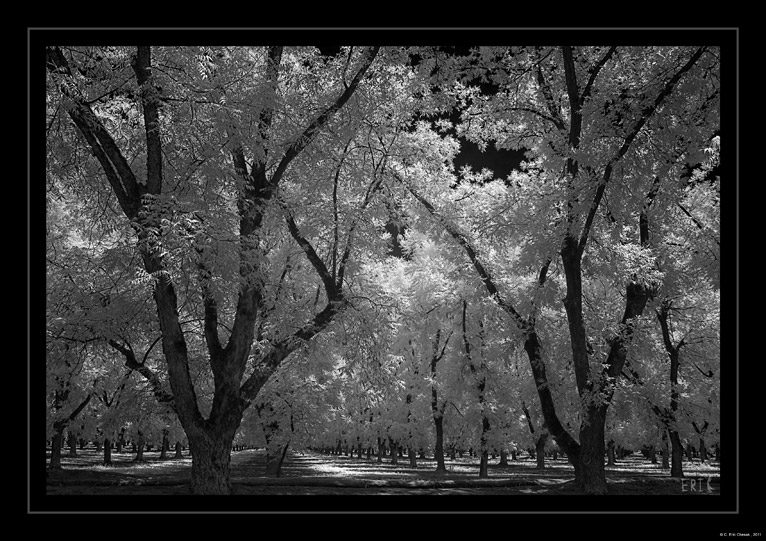
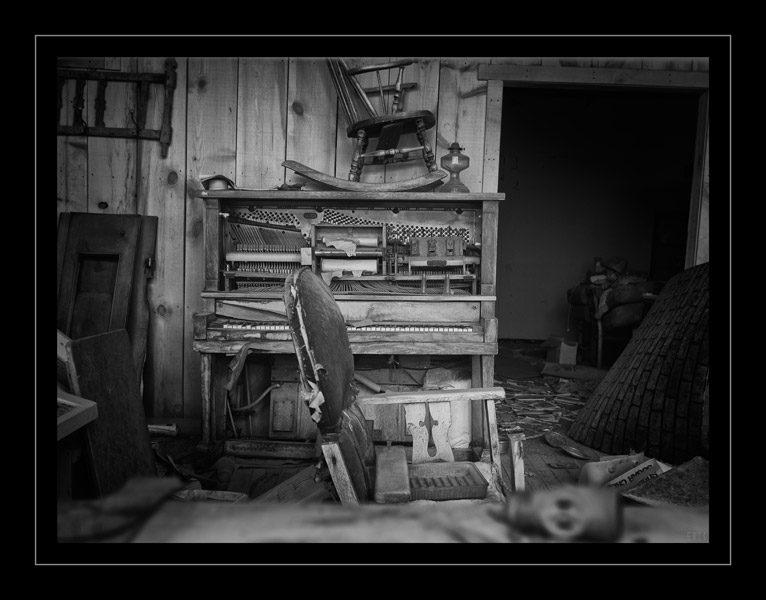
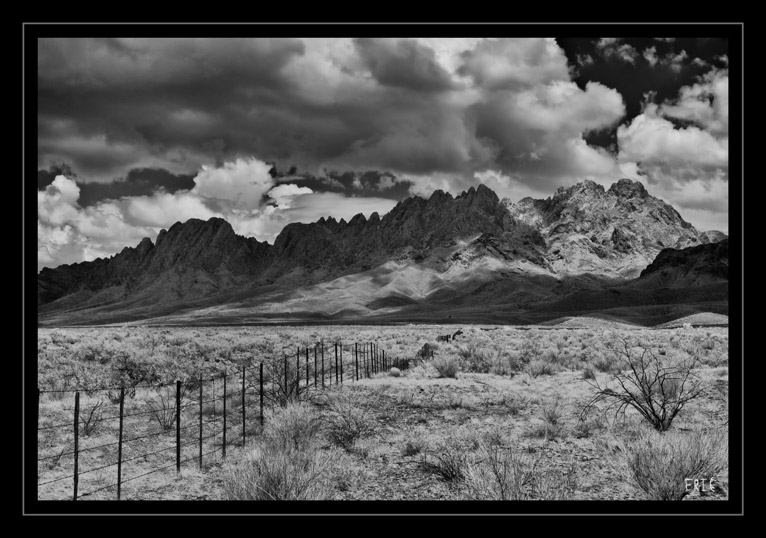
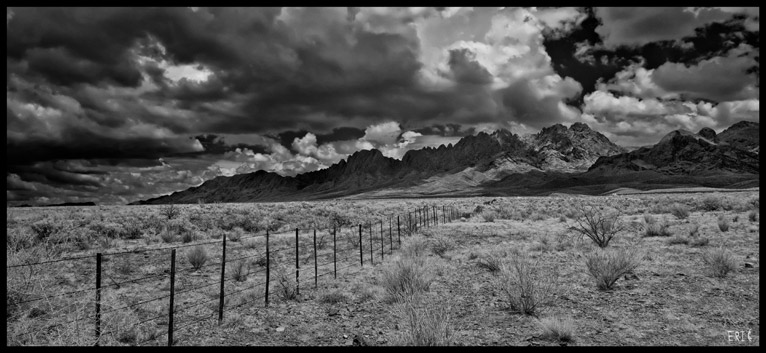
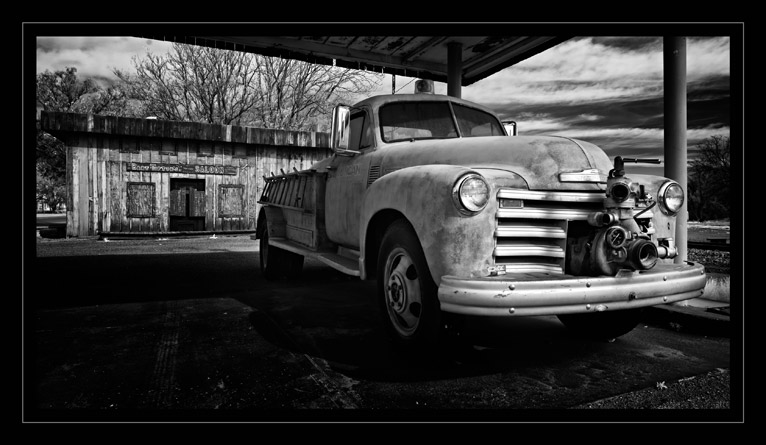
Another example of scene that benefited from having more than a single exposure

There is a little good news. If you focus and shoot your IR like I described in my last blog, focusing through live-view, the mirror will stay locked up. So the wear associated with the mirror flipping up and down is removed from this operation.  It also helps to use a tripod when shooting bracketed exposures, especially if you’re going to be using them for HDR. You can still align the images in post-processing. But it’s easier if the images begin with good alignment. I prefer to shoot all my IR with a tripod.

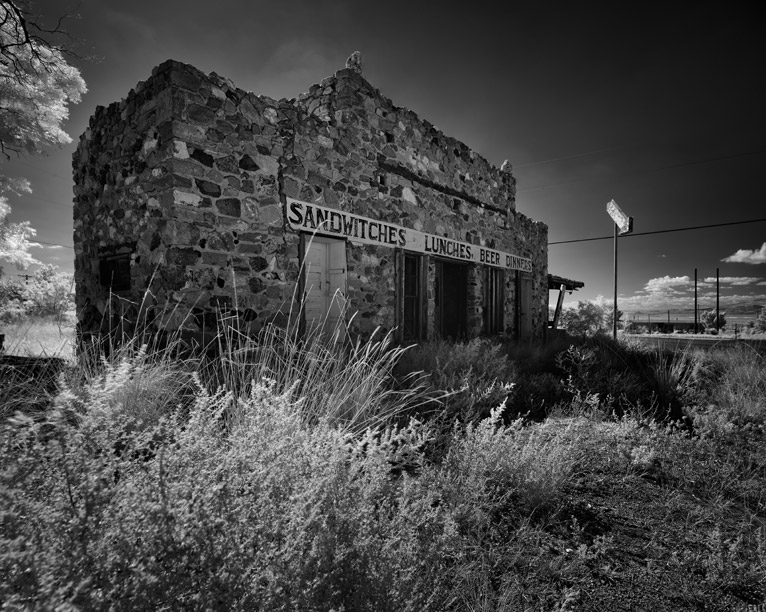
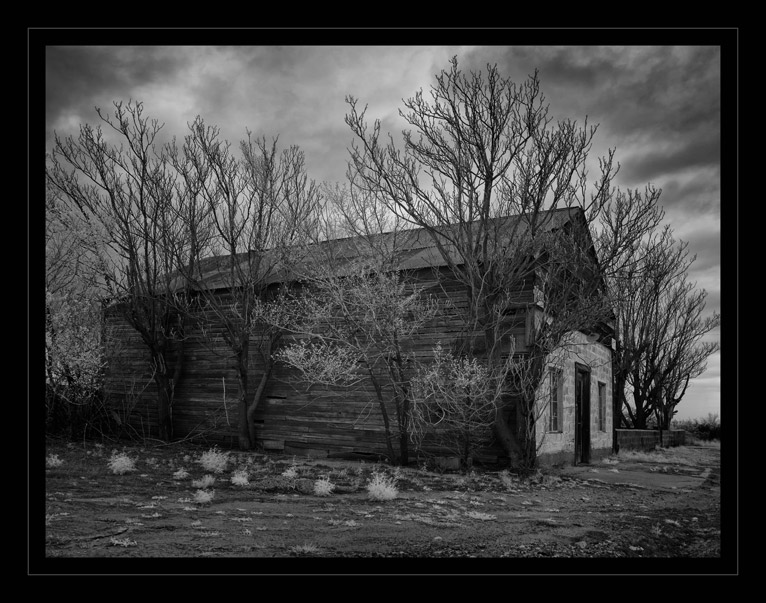
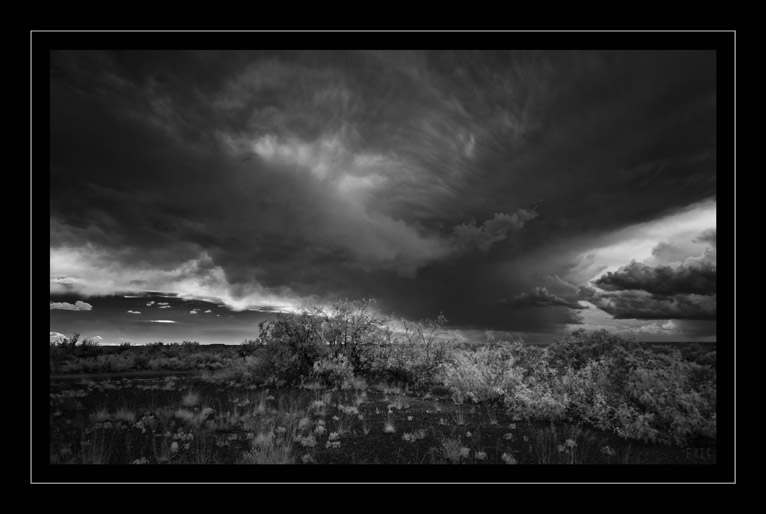
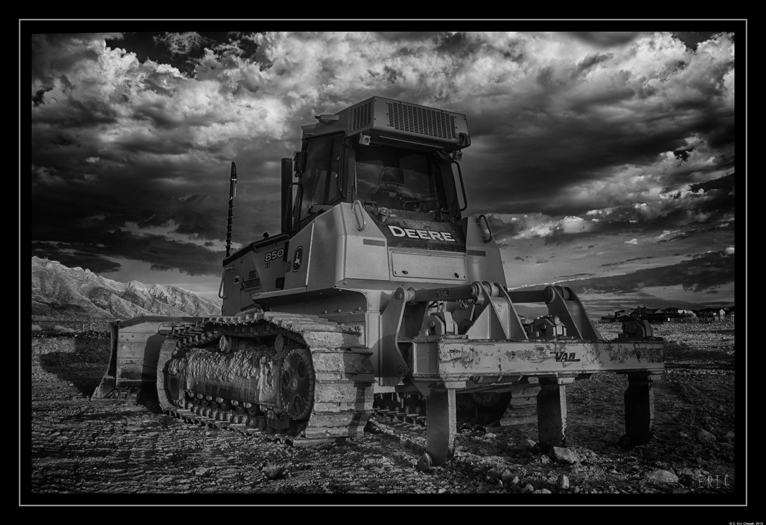
Scenes that are shot toward the Sun typically have a high dynamic range that benefit from having bracketed exposures

If you’re comfortable with shooting regular exposures with your IR photography, by all means proceed. I find that shooting bracketed exposures helps save many images that might have otherwise been unusable. Happy shooting.

Filed Under: Tutorials Tagged With: 5d Mark II, 5DII, Bracketed Exposures, Eric Chesak, full spectrum, HDR, Infrared, IR, Photography

Southwest IR Photography

Like many other things in life, we think the grass is always greener on the other side of the fence. I enjoy digging through forums and seeing photographs of other photographers. I used to think that all these photographers had better subjects for photography. This is especially true when I got into IR photography. IR seems to do best with lots of greenery in the scene, or that’s what I used to think.


Living in the desert southwest, we don’t have much greenery. What we do have is lots of dust, rocks and cactus. When I first got started doing IR photography, I envied people that lived in greener locales. But that’s no longer the case. IR photography is so much more than the iconic white foliage on trees. After shooting IR for several years, I found that it is a great tool for any scenery.

During my early IR photography experiments, I tried the color swapping techniques. But I always returned to my B&W versions. I find it much more challenging to get an interesting B&W photo. I began to have an interest in B&W images with my astrophotography. It happened sort of by accident. I live in an area with fairly heavy light pollution. So it was much easier to shoot B&W images using a specific narrow bandwidth filter (called Hydrogen Alpha).


My IR photography spun off of my astrophotography, since modified cameras are sometimes also needed for shooting nebula. I started with the iconic photos of trees with white leaves and liked the results.


Shooting IR photos limited me to summer photography. So I began to experiment shooting in the fall and winter. It was then that I saw that IR had a lot of potential for B&W. I also learned what looks good in IR photos and began looking for other subjects. Not a leaf in sight in this photo.


IR is also great for adding interest to what might otherwise be considered junk. I shot this through a broken window of an abandoned building. I wasn’t expecting much from this photo, being hand held in a dark environment. It was windy & raining. I was holding an umbrella and my tripod wasn’t tall enough to reach the height of the window. But I loved the result.


We can have some fairly ugly weather here in the desert. Spring brings us wind, and a lot of it. At times the wind is strong enough to pick up the dirt. Voila, dust storm. I wouldn’t advocate taking your camera gear out in a dust storm. For those willing, there are some interesting shots to be had. This is probably one of my all-time favorite IR photos. Ironically, it was also one of my first. There was no live view focusing. The camera wasn’t focus calibrated (link here for focus calibration) and I had no tripod. To make matters worse, the camera I used was a first generation 6.3MP Canon 300D (Digital Rebel) that I had converted on my own to full spectrum, not something I’d recommend.


This was a shot that I probably could not have done at any other time. Behind the tree is the rest of the city, roads and mountains. Some years later, the tree looks much different (with broken branches and its age showing).   It also didn’t take long to find out that IR photography is great for landscape shots.


IR is also a fantastic tool for shooting clouds and inclement weather. So when other photographers are heading home, I’m usually heading out. It seems these days that my preference is to shoot IR in poor weather.

IR photos also seems to bring out the old-ness of subjects. I really enjoy shooting old, rundown buildings or vehicles. IR makes these attractive subjects even more interesting.

Modern subjects seem to be just as attractive in IR.  Combining the subject and the poor weather is always nice.


Although not really limited to IR, I find that shooting Panoramas gives my IR images a little punch, and also the ability to print them larger. There’s also the combination of all the techniques. It keeps the excitement in photography and the challenge in IR photography.


Nearly every IR photographer starts out by shooting the iconic white foliage. I’m no different. It’s what you do after this that makes IR so interesting. Most hang up their IR cameras and move on. For me, it’s basically started my photography world. I spent the last 40 years doing regular photography and the last 5 shooting IR. I’ve enjoyed the latter so much more. You may not think that you live in an area best for IR photography. I challenge you to find and shoot the subjects that you have in your area and make the most of them. You never know what emerges from the seemingly uninteresting.

Filed Under: Inspiration Tagged With: 5DII, Canon, Chesak, Clouds, El Paso, IR, landscape photography, Panorama, Southwest, Texas

Shooting Infrared Panoramas

Panoramas are the ideal tool for capturing scenes with expansive views or to increase the field of view of a lens. They are also a lot of fun to shoot. However with the excitement of shooting a panorama comes the frustrating reality of assembling the images into to single frame. Without some proper shooting techniques this assembly process can be hit or miss.

pano1-766

Anyone that has tried to assemble panoramas in Photoshop (or a similar image processing program) is aware that some aspects of the individual frames of the panorama don’t always match. This is caused by parallax errors of near and distant objects. With these images there is usually some compromise to the assembly. So some of the image parts will match and other parts may not. These parallax errors are most problematic where the scene has close foreground objects as well as distant objects in the background. So what can be done about this?

pano2-766
Well, lets first look at the problem, parallax. You can easily see the effects of parallax by setting up a couple objects on a counter top, in line with the camera. Place one object closer than the other and aligned so that the object closest to the camera hides the object further from the lens. Now pan the camera and notice the effect. This effect is seen because the camera is not being rotated around the optical node of the lens.

pano4-766
So how do we fix this problem?  The use of a nodal slide will allow you to rotate the camera around a predetermined nodal point.  The nodal slide allows you to offset the camera so that the axis of rotation is around the optical node (also known as the no-parallax-point or entrance pupil) of the camera lens. Not too many manufacturers publish this information, but it can be determined experimentally. The nodal point will differ from lens to lens and also at different zoom settings on the same lens.  To properly use a nodal slide you’ll need a tripod and a head with a panning base (or separate pan head).  Below is an example of a nodal slide set up with my 5DII.  Although I machined this one, they are available many places at very reasonable prices.  Note the blue tape that has information on the location of the nodal point for various lenses.  My preference is to use a set-up with an L-bracket attached to my camera.  However nodal slide set-ups can be done in many different ways, even on both axes (pan and tilt) for monster panoramas.

nodal-766
Another superb option for panoramas is to use the shift feature of a tilt-shift lens. In my opinion, this produces the best panoramas with the least trouble with assembly in Photoshop.  The shift feature of the lens is used to shift the image across the film plane, without movement of the camera itself. Using this technique there are imperceptible levels of parallax. I usually start by composing the scene keeping track of how far the shift feature will frame the field of view.  I then shift the lens to one side and begin shooting and shifting.  Use care to not move the camera or tripod.  One major downside is that a tilt-shift lens can be a pricey solution for panoramas. Another drawback is that it’s typically only possible to shoot up to 3 frames on a full frame camera and maybe 4 frames on an APS-C camera. The use of a nodal slide offers the potential for full 360 degree panoramas, if you ever have that need.

shift-pano-766

The shot below is a 3 frame panorama shot on a full spectrum modified 50D with a 740nm filter and my 24mm TS-E lens.  Without the use of a nodal slide, the parallax errors in this scene would have made assembling this image nearly impossible.  The front of the truck is close the camera and the buildings in the background being much further.  This would have created large parallax errors and made final image assembly very difficult.  But using the shift feature of the lens, the images stitched together without any trouble or compromises.

pano3-766
Now all this being said, there are some situations where panorama shots can be done without any equipment and can even be hand held.  But these are mainly done for distant scenic shots where there would be very few problems with parallax. Regardless of what method you use to shoot panoramas, it’s best to overlap the images. I usually shoot with at least 1/4 overlap. It’s also generally best to have the camera in portrait orientation.  This will provide the best set of images for final processing.

A tilted horizon can be fairly distracting on a large landscape panorama.  So for these I always try to insure that the nodal slide and panning or tripod head are level. Most tripods & nodal slides have a bubble level.  But for times where I don’t have a level and can’t see the horizon, I use a $5 hot shoe cube level on the camera.  This helps make sure that the horizon is not tilted in the final assembled panorama.  Correcting a tilted horizon on a large panorama requires cropping a large portion of the panorama.

Probably the most important point when shooting panoramas is to shoot in manual mode. With the camera in an auto-mode, the camera will typically detect a difference in exposure from shot to shot and adjust the camera accordingly. But having it in manual mode will insure the same exposure for all the shots. The final images will need considerably less work to assemble if there are no exposure variations.

I hope this brief overview has removed some of the mystery and has inspired you to get out and shoot panorama images.  I really enjoy shooting panoramas and hope you’ll give it a try. Practice makes perfect.  So get out and shoot!

Filed Under: Tutorials Tagged With: 5d Mk II, 5DII, Eric Chesak, Infrared, nodal slide, Panorama, tilt shift

Blog Topics

  • Tutorials
  • Inspiration
  • Locations
  • Gear
  • News
  • Other/Misc

What our customers say:

Life Pixel has been a life-changer for me. Continue reading
Eric GConnecticut
Read more reviews
I am more than satisfied with the service I received Continue reading
Christopher JCanada
Read more reviews
I am more than pleased with the conversion job that you did Continue reading
LOUIS MWaco, Texas
Read more reviews
I am VERY impressed with his knowledge of your products and his patience in explaining it to a novice like me. Continue reading
Lynn FEssex, Maryland
Read more reviews
Things will only get better from here thanks to all of you. Continue reading
Phillip FRedding, California
Read more reviews
The Lifepixel newsletter reminds me of not having expressed my gratitude for the excellent job you made. Continue reading
Michael GGermany
Read more reviews
Your staff went above and beyond the call of duty to make sure everything was handled in an excellent manner. Continue reading
Paige RPearland, Texas
Read more reviews
It has given my old camera a new life, I will enjoy using it again. Continue reading
William PAustralia
Read more reviews
Excellent service and the camera works just great Continue reading
Hans FairhurstAustralia
Read more reviews
I just got my converted camera back from you guys. THANK YOU!!!! Continue reading
Anne CutlerForest Knolls, CA
Read more reviews
infrared_filter_choices_sidebar
ir_conversions_explained_sidebar
----------- Watch More Videos -----------
infrared_quick_start_guide

Ready to start shooting Infrared?

Convert My Camera

Subscribe To Our Newsletter

Receive updates, tips, cool tutorials, free stuff and special discounts.

Learn the Basics

  • Video
  • Start Here
  • Filter Choices
  • Focus Calibration
  • Lens Considerations
  • Camera Considerations
  • Place Your Conversion Order

Resources

  • Galleries
  • Lens Hot Spot Database
  • IR Tutorials
  • FAQ
  • Infrared Filter Choices
  • Infrared Photography Guide
  • Infrared DIY Tutorials

Company

  • Why Choose Us
  • Get In Contact
  • Job Openings
  • Write For Us
  • Affiliate Program
  • Terms of Use
  • Privacy Policy
  • Home
  • Start Here
  • Galleries
  • Tutorials
  • FAQ
  • Blog
  • Why Choose LifePixel?
  • Shop
  • Contact

Copyright © 2025 Life Pixel Infrared - All rights reserved - LifePixel Infrared Photography IR Conversion, Modification & Scratched Sensor Repair