We all know about presets in Lightroom and all the great things they can do your post processing. Presets help make your editing easier and make achieving a constant styling much more efficient. The biggest benefit of using presets is that they speed up your post processing so you can get back to making photographs, baking muffins, building model airplanes, or whatever it is you might rather be doing instead of sitting in front of your computer screen. But did you know you can use presets jumpstart your post processing efforts before you even import your photos into Lightroom?
In this article I’m going to show you how easy it is to apply presets to your photos as they import into Lightroom. These presets aren’t even limited to develop presets…oh no. You can even add in metadata presets like copyright information and keywording along with camera and lens profile information. This is the kind of thing that the pros use and you should as well. If you find yourself editing large batches(weddings, portraits, events) of similar photos then you’re going to love using import presets in Lightroom. Let’s get started.
Applying Presets on Import
It all starts here in the Import screen of Adobe Lightroom.

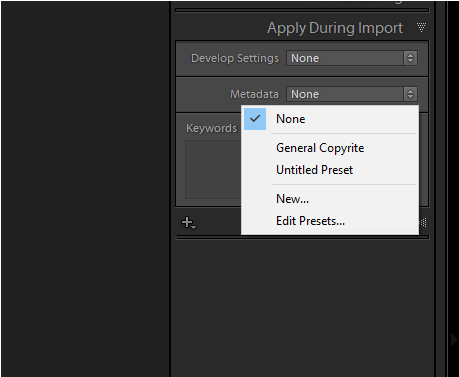
If you look to the right you’ll notice an ‘Apply During Import’ panel.
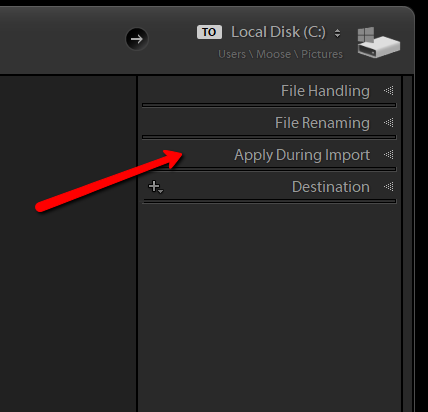
This is where all the magic will happen. Click on that tab to open up your options. From here we’ll have a few choices.
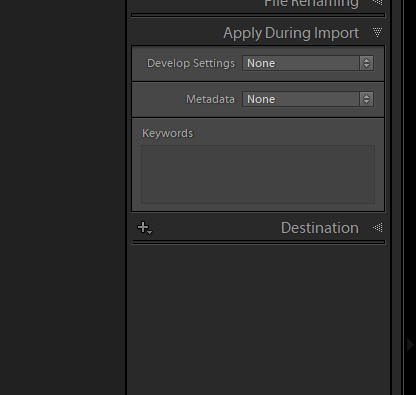
Develop Presets and Camera Calibration
Applying develop and camera calibration* presets as you import your photos into Lightroom couldn’t be easier. The process is essentially the same as it is while editing your images in the Develop Module. To begin, make sure you have the photos you wish to import with the preset. Next, click the ‘Develop Settings’ drop down. This will bring up a list of all the develop presets you have currently installed in Lightroom.
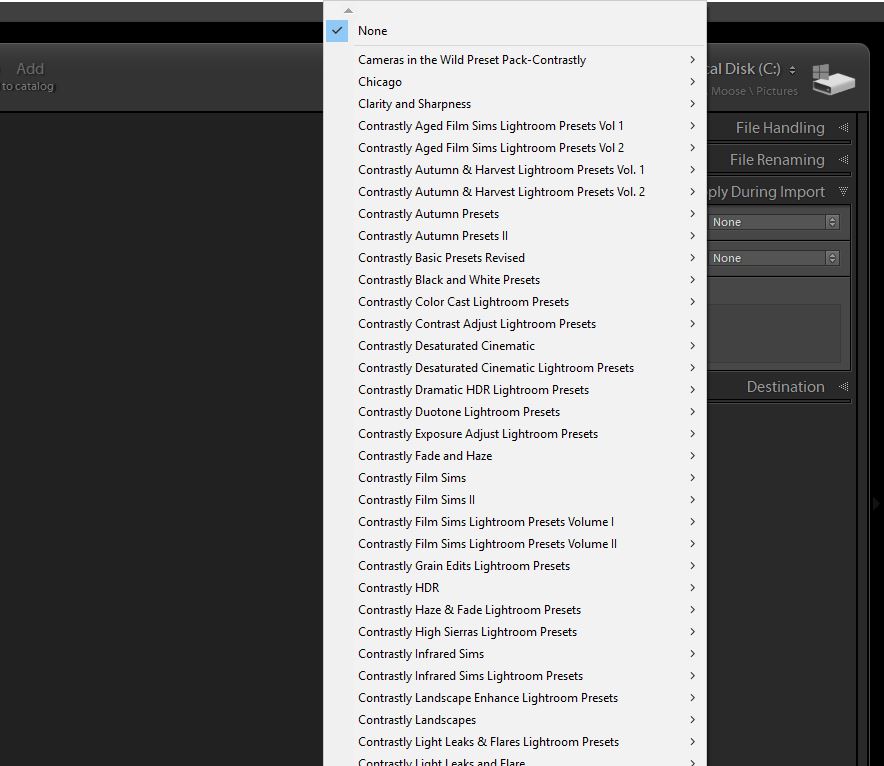
From here it’s simply a matter of selecting the preset you want to apply to the images you’re importing. After you’ve made you’ve made your choice click ‘Import’ and your photos will be brought into Lightroom with the chosen develop preset freshly applied.
**To apply camera calibration settings to your photos on import simply save them in a develop preset and then use the same steps as above.
Copyright and Metadata
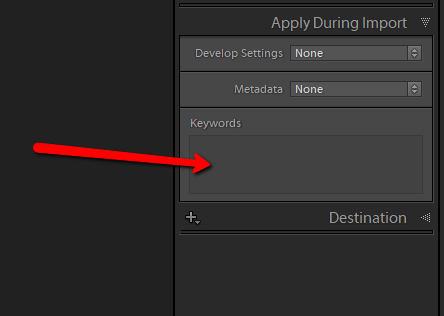
Import presets aren’t limited to develop settings. We can also apply keywording and metadata(copyright information/location/creator) to each and every image we import. This helps to better organize or photos and perhaps more importantly, it allows us to protect them from unwanted use. Adding in keywords is super easy as you can type them right into the keyword box. Alternatively, you can add in keywords alongside your other metadata.
Assigning metadata to images is just as easy as applying develop presets. To start, click the ‘Metadata’ drop down arrow.
Select your preset or to add a new one click ‘New’. This launches the new metadata preset dialog box.
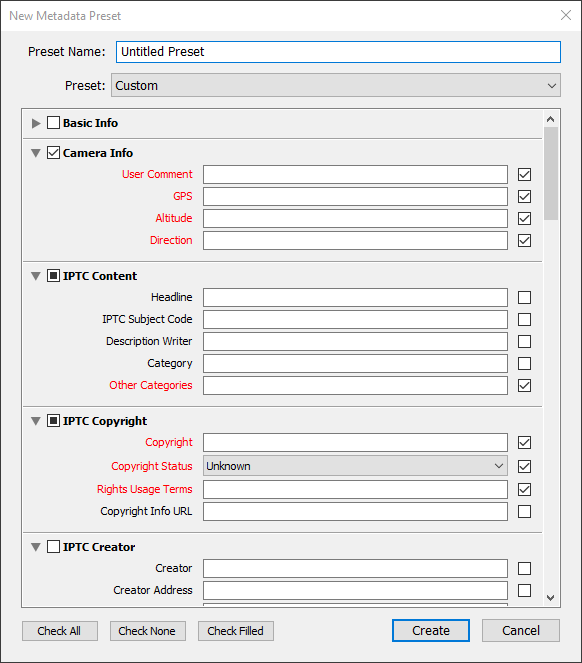
It’s here where you can add in virtually any information imaginable. When you’re finished be sure to name your new metadata preset. In the example above I’ve left the title as ‘Untitled Preset’ (I’m lazy) but it’s always a good idea to title any preset you make in such a way that you can immediately know what it contains. Once you’ve created the new preset it will then become selectable from the metadata preset drop down menu. After you’ve applied it, click ‘Import’. Your new metadata information will automatically be applied to each image you selected to import just as the develop settings were in the previous example.
Some Final Thoughts….
Import presets are a great way to easily jump start your processing workflow. By applying certain develop and metadata presets on import you can yourself a lot of time by having the settings you use the most already applied before any work actually begins. This becomes especially useful when you find yourself editing a large number of photos at once. Not only can import presets making editing a breeze but they can also play a big part in protecting your photos by attaching important copyright information to your photos. If you haven’t already give import presets a try and see just how much they can help you and your photography.
Latest articles by Adam Welch (see all articles)
- Bare Bones Photography: What Gear Do You Really Need? - May 13, 2018
- A Simple Explanation of Aperture - May 13, 2018
- The Case for Black and White Photography - May 13, 2018
Adam Welch
Photo maker, author, and adventurer currently based in the western portion of his home state of Tennessee. You can usually find him on some distant trail making photographs or at his computer writing about all the elegant madness that is photography. Follow his sometimes controversial Blog on everything related to photography and then check out his cozy home on Instagram.
Adam has also authored one of the most comprehensive guide books on using Adobe Lightroom Classic CC. You can get your copy of Lightroom Mastery:
A COMPLETE GUIDE TO WORKING IN LIGHTROOM CLASSIC CC HERE!
See All Articles by Adam Welch


Leave a Reply