Deserts are one of my favourite places to photograph because there’s nothing quite like gazing out into the wilderness and seeing continuous rolling sand dunes against a beautiful blue sky, but the harsh conditions and lighting can make photographing the desert a challenge. Follow these simple tips and you could improve your desert photos.
Beware of sand
If you are going to be photographing in the desert, the first thing you need to do is protect your camera. Sand particles can cause havoc to your camera and even if it is a calm day with little wind, there will still be sand blown from dunes. Avoid changing lenses and if possible take two cameras with different lenses. If you have to change your lens, do it as quickly as possible and try to protect it by shielding against the wind. It is a good idea to wrap your camera in a cloth when you are not using it and use a UV filter to protect the glass on your lens. Remember it’s much cheaper to replace a filter than have to repair a scratched lens glass. And always remember to clean your camera thoroughly when you get back to your hotel room as the particles of sand would still be on the outside of your camera.
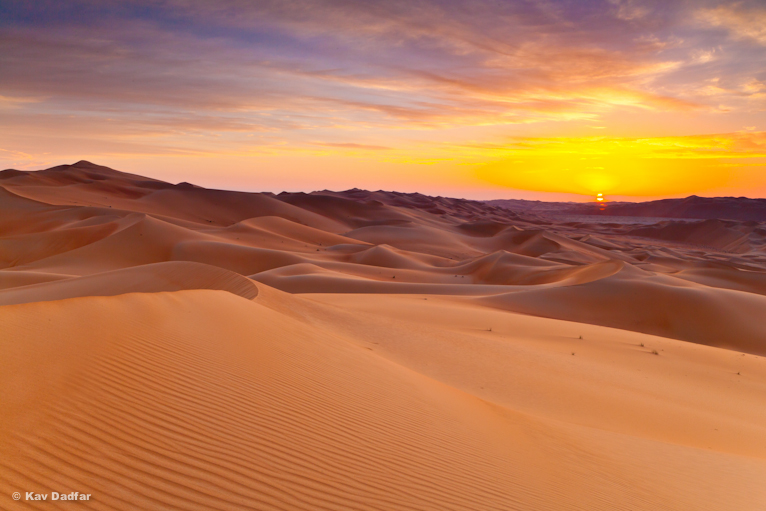
Avoid harsh light
In any form of landscape photography, the light is one of the most critical elements of the photo. Early morning or late afternoon light is usually best and this is even truer for photography in the desert. The soft golden light will enhance the image and give you much more contrast in the patters of the sand, but be mindful that your shadow isn’t intruding into your image and if you are going to be using a slow shutter speed make sure you use a sturdy tripod. Try to avoid the harsh midday sun which will make your scene look flat.
Use the correct settings
Like any type of photography, you need to ensure that your photos are technically correct and don’t have unwanted noise or camera shake. There is no hard and fast rule for photography and every scene and its conditions will require its own settings, but here are a few simple tips to get you started:
1. Low ISO – There’s no shortage of light in the desert, so keep your ISO as low as possible to avoid unwanted noise in your images. If you are photographing early or late in the day, use a tripod.
2. Middle range f-number (i.e. f/11) – In most cases you would want the majority of your image sharp and in focus. To achieve this you need to close the aperture as much as you need in order to get the required depth of field.
3. Polarizing Filter – A polarizing filter can be really beneficial in bringing out the blue sky and also reducing reflections from the sand. A cool blue sky can really compliment the golden or red colour of the sand.
4. Turn off stabilization – If you are using a tripod, make sure you turn off your camera’s image stabilization. This does not provide extra benefits and can actually be detrimental to your images by causing artefacts.

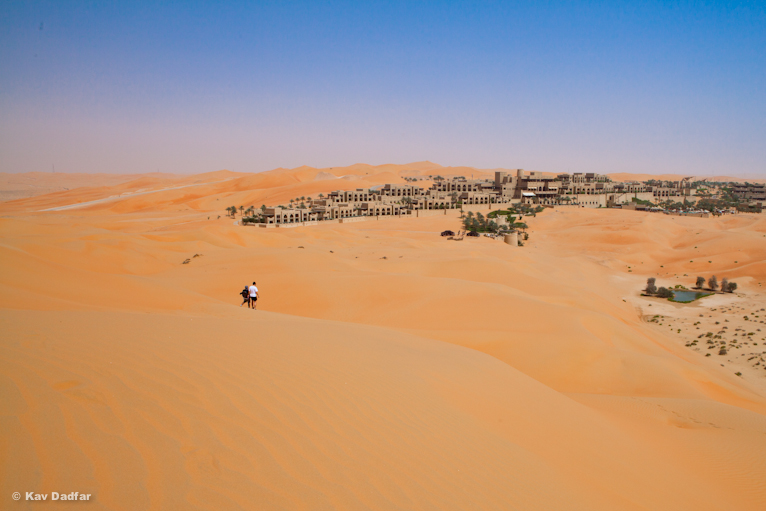
Find something interesting
Let’s be honest, sand itself is pretty boring. What makes those amazing photographs of deserts stand out is usually something that makes them interesting, like a point of interest, so always be on the lookout for plants, wildlife or even people that you can incorporate into your composition. Not only will this make your images much more interesting and tell more of a story, but it will help draw the viewer’s eyes to the subject rather than trying to process the whole image.
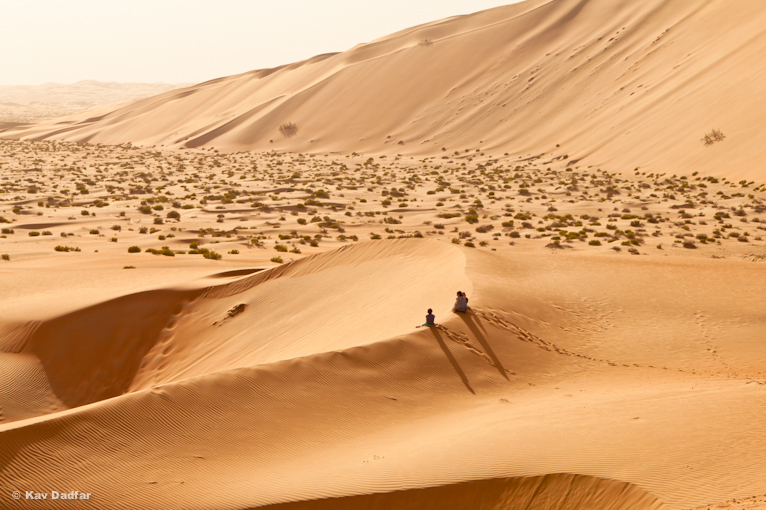
Create stories
Photography allows us to tell a story in just a few photos and the desert can provide an amazing backdrop for these stories, so instead of just concentrating on the landscape, try to look for and capture images that can tell a story. Footprints in the sand, an insect scurrying along or an animal resting in the shade can all provide amazing photographs, which also tell a story and can really help diversify your portfolio.
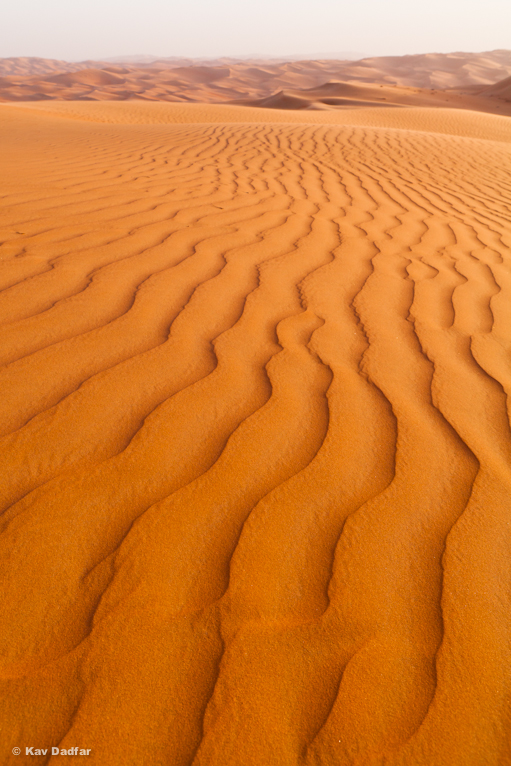
Details matter
Sometimes the most evoking photos of places are the small details. This is because our eyes usually look for the big picture and we miss some of the small details around us. In the desert this is in the form of the amazing sand lines that the wind creates. With the light coming from the side these can look fantastic as the shadows can really highlight the lines even more, so instead of trying to capture the whole scene, simply crouch down and focus on the detail in the sand. Make sure you are aware of where you are planning to photograph – the last thing you would want are footprints unintentionally spoiling the beautiful untouched scene.

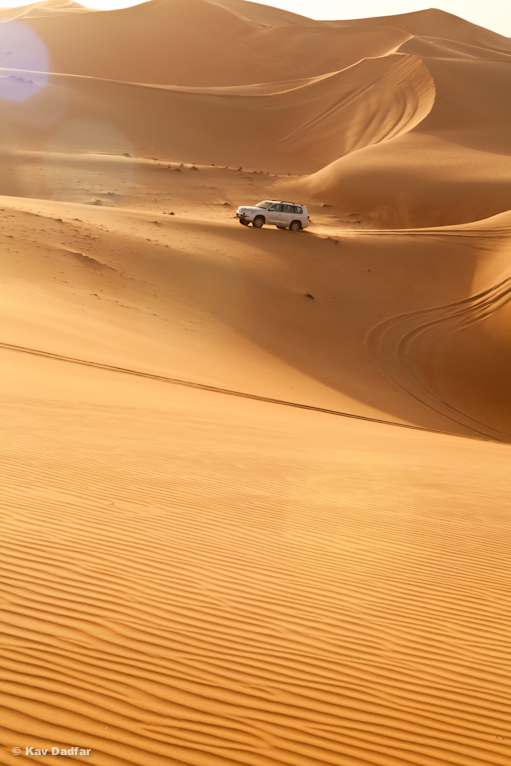
Think beyond the obvious
If you really want to become a successful photographer, often you have to try and capture photos that are in some way different to what already exists. Sometimes this happens by luck in that you capture a scene with beautiful lighting, a dramatic sunset or a wildlife encounter, but the majority of the time you have to be willing to work hard to capture something unique. You might have to hike for a few hours to a location to give you a different view or keep coming back to a location until the conditions and composition are right. The key is to always analyze what you are seeing and try to think of how you can show it differently. Then be willing to do whatever it takes (within the law) to capture it.
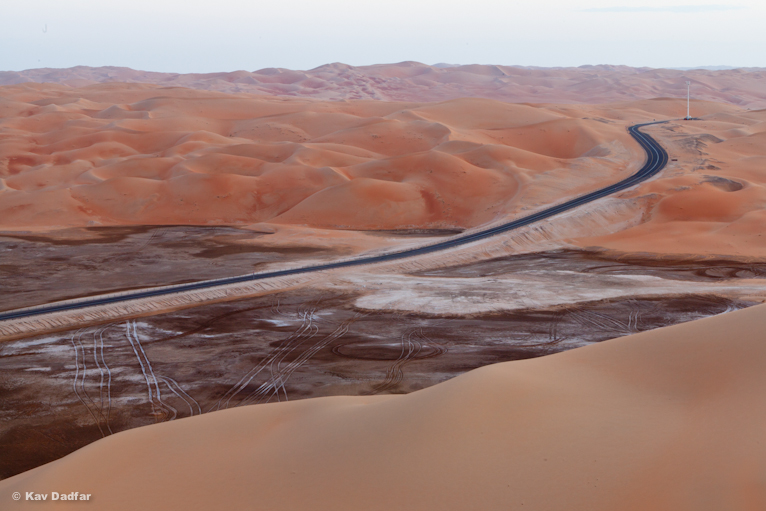
For example, I made it a mission that one day during my stay I was going to try and capture this road from a point that could show it against the vastness of the desert, so I drove around until I could find the highest dune and then walked up in the searing heat and humidity to be able to capture this photograph.
Deserts are truly wonderfully places to photograph. The sheer vastness of the dunes often captivates anyone who sees them in real life or in photographs. With the right approach and hard work you can capture stunning photographs that will stand the test of time.
Show us your great photographs of the desert and share you tips and experiences below.
Latest articles by Kav Dadfar (see all articles)
- How To Photograph Street Performers - April 26, 2022
- Profiled Photographers – Ben McKechnie - August 24, 2021
- Profiled Photographers – Jim Maher - August 24, 2021
is the founding editor of JRNY Travel Magazine as well as a professional travel photographer and writer based in the UK. His images have been used by clients such as Condé Nast, National Geographic, Lonely Planet, Rough Guides and many others. Kav is also the co-founder of That Wild Idea, a company specializing in photography workshops and tours both in the UK and around the world.
See All Articles by Kav Dadfar


Hi Gordon, sorry it’s taken me a while to respond but I normally get notification of comments however I didn’t for this one…
Firstly, I love white sands NP, what an amazing place. I actually really do like your shots of it. I think there are two ways to avoid the sand looking like snow. Firstly, as you’ve done in one of your photos with the camel. This clearly shows that it is the desert. The second way is to get much further down and really extenuate the ripples. Snow doesn’t give the same ripple effect so highlighting it will help. Hope this helps.
Kav
i enjoyed the photos. I visited White Sands in December of 2013. There the sand is WHITE and can be mistakenly taken for SNOW. Any suggestions on taking images at white sands based upon the white color as opposed to the brown color of your desert shown in this article?
Some of my White Sands photos can be seen on my web site:
http://www.gordon-ripley.artistwebsites.com
Thanks. Gordon Ripley