• Cart
  • Checkout
  • My Account

Infrared Conversions, IR Modifications & Photography Tutorials | Life Pixel IR

The world leader in infrared conversions, modifications & DIY IR conversion tutorials. Scratched sensor replacement, UV & Full spectrum conversions.

The world leader in infrared camera conversions

866.610.1710
  • Home
  • → Start Here ←
    • 1 – Introduction
    • 2 – Filter Choices
    • 3 – Focus Calibration
    • 4 – Lens Considerations
    • 5 – Camera Considerations
    • 6 – Start Shopping
  • Galleries
    • Infrared Photography
    • Infrared Time Lapse
    • Infrared Cinematography
    • Infrared Stop Motion
    • Ultraviolet Photography
    • Forensic Photography
  • Education
    • Training Sessions
    • How To Shoot Infrared
    • AR Coated Infrared Filters
    • Lens Hot Spot Database
    • Photoshop Video Tutorials
    • Infrared Issues & Solutions
    • IR Basics in Photoshop
    • Camera Quick Start Guide
    • DIY Conversion Tutorials
    • IR Photography Primer
    • Secondhand Cameras
    • Wall Of Shame
  • Workshops
  • FAQ
  • Blog
    • Tutorials
    • Inspiration
    • Locations
    • Gear
    • News
    • Other
  • Why Choose LifePixel?
    • Submit Your Review
  • Contact
  • Shop

Bare Bones Photography: What Gear Do You Really Need?

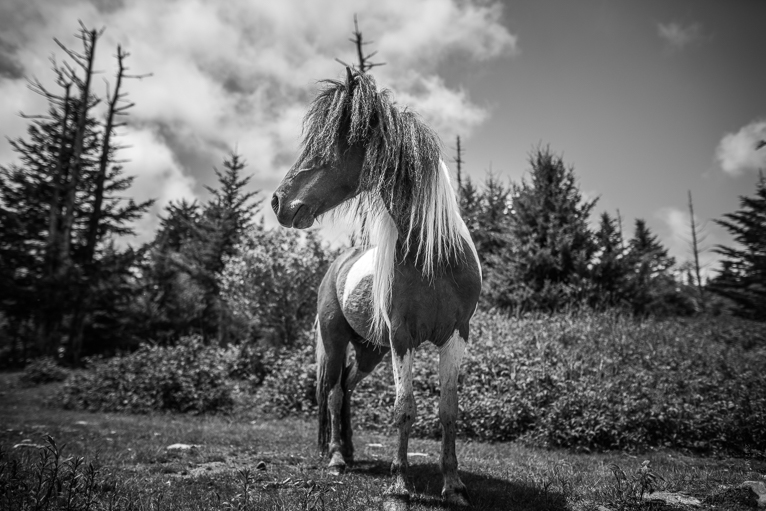
What is the end game of photography? To make a photo, right? Not always a print but nonetheless an image of some kind is the final goal of most photographers. The tools needed to complete what can sometimes be a world altering task are simple. At their minimum, you’ll require some type of otherwise light-proof box which has a relatively small opening-i.e. a camera, and some way of recording the incident light which enters-i.e. film or digital sensor. You don’t even truly need a lens(pinhole cameras) to make a photograph but of course that helps immensely.

Now, that list of gear might sound incredibly lacking but when you think about it everything else that we throw into the mix simply expounds on or enhances those basic pieces. There are multitudes of cameras, both film and digital, with equally vast selections of lens and filters for each. Everything else aside, this article will help you if you’re just starting out on your photographic journey in that you will learn what basic photo gear you will actually need…not just what someone might want to sell you.
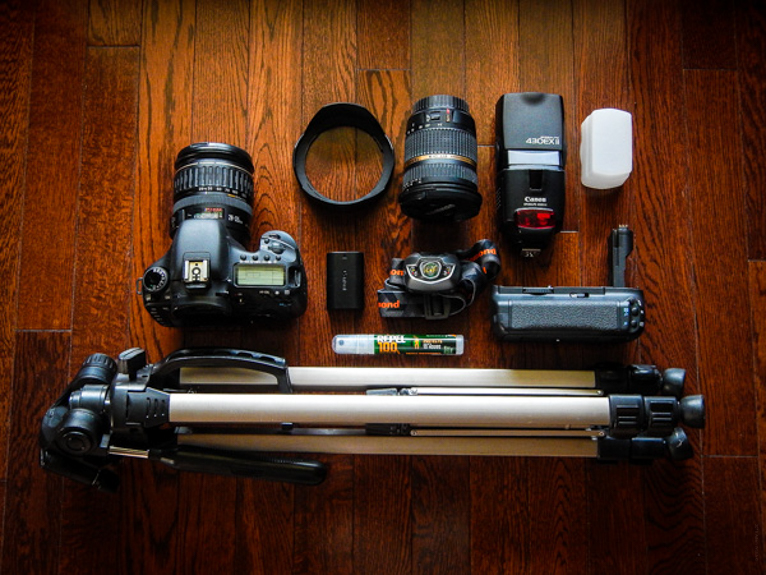
What You’ll Need

Below is a list of the bare-bones gear that you will need to get rolling in making photographs. Of course there are not real absolutes as you will soon find out but in order to reach the end result, a picture, you will need these few things:

The Most Important Item

The single most important tool you can possess isn’t actually a piece of gear at all but rather the correct mindset. I’m listing this first because everything else is secondary to your ability and to adapt and make the most of whatever camera or lens you have available. When I first started out in photography, eighteen year old me saved $265 and bought a 35mm SLR kit that included one 18-55mm F3.5-5.6. I shot on that one lens for about five years and managed to make some wonderful photographs despite it being a “kit” setup. After I switched to digital photography(I still shoot film as well) the progression evolved much the same way with me beginning with a kit lens and later branching out as I learned more about the craft.

Don’t think that you need incredibly expensive cameras or lenses to get started doing photowork. Granted, there are some things that even the most determined effort can’t make happen without the necessary equipment but you might be surprised how much you can get out of “low end” gear when you approach the problem with creative solutions.
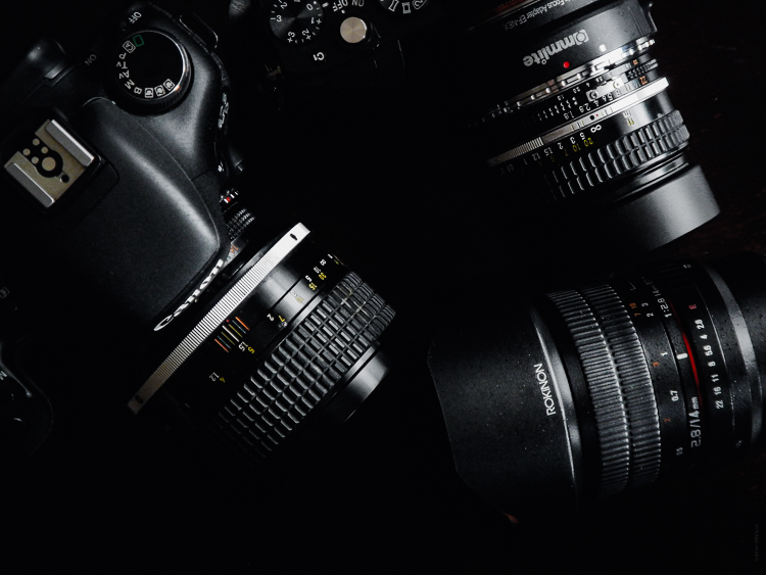
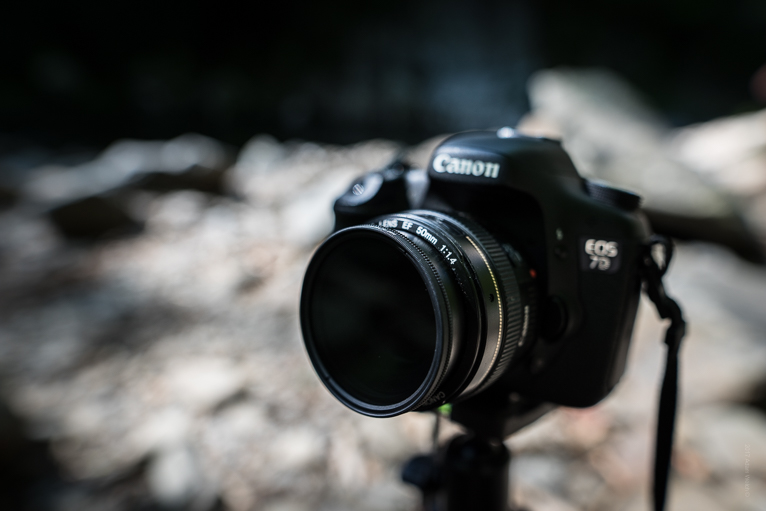
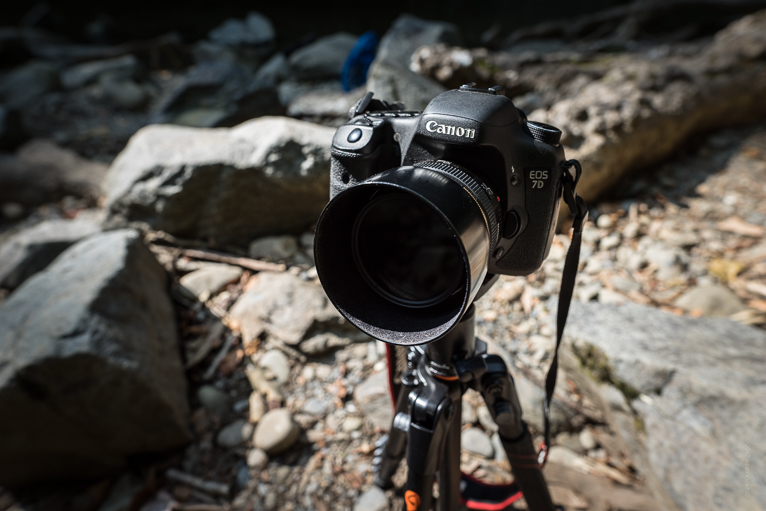
A Camera

The importance of a camera can’t be overstated but that doesn’t mean that it has to be the latest and greatest piece of tech to roll off the line. In fact, if I could back in time I would have spent much less on my first digital camera and much more on the lens. More on lenses in a minute but ironically the camera you use usually plays much less of a role in the final image quality(sharpness/color/contrast) than you might think.

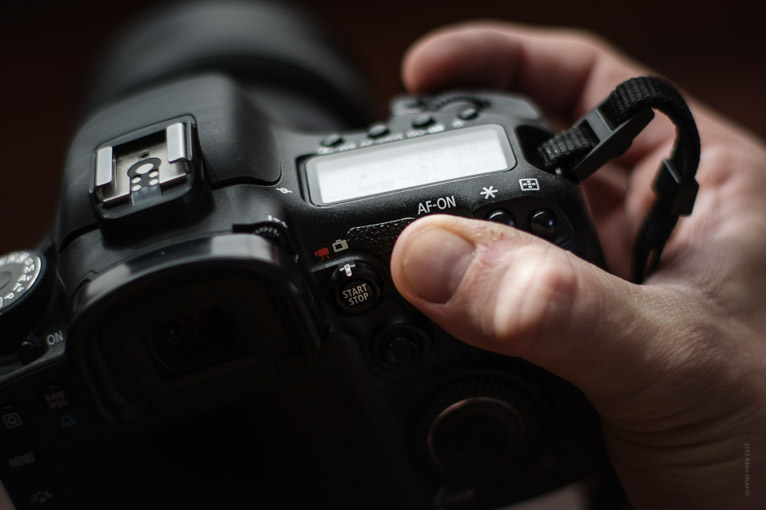
Whether it be film or digital, find a camera that is well built and feels good to you. If you can’t readily handle the camera before you buy then become a review hound and learn everything you can about other users experiences. Luckily, most digital cameras today are so good in terms of ISO performance and build that you won’t really go wrong in most cases. Again, if I can offer a little advice in hindsight, invest more in your glass instead of your camera.
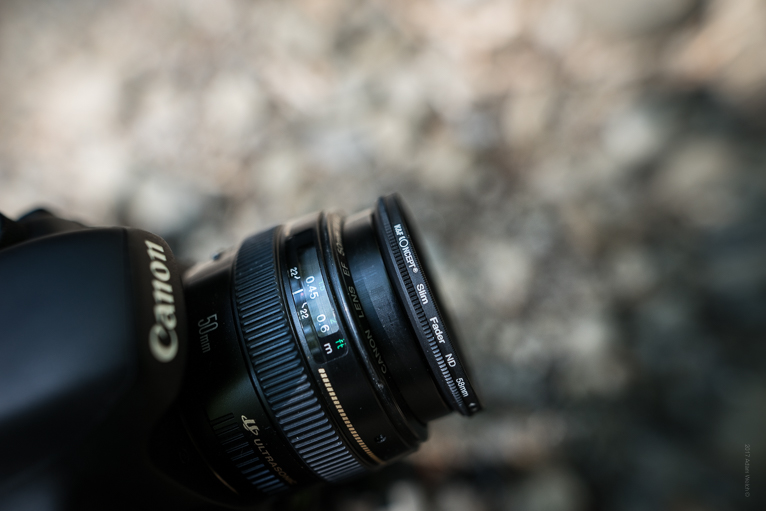
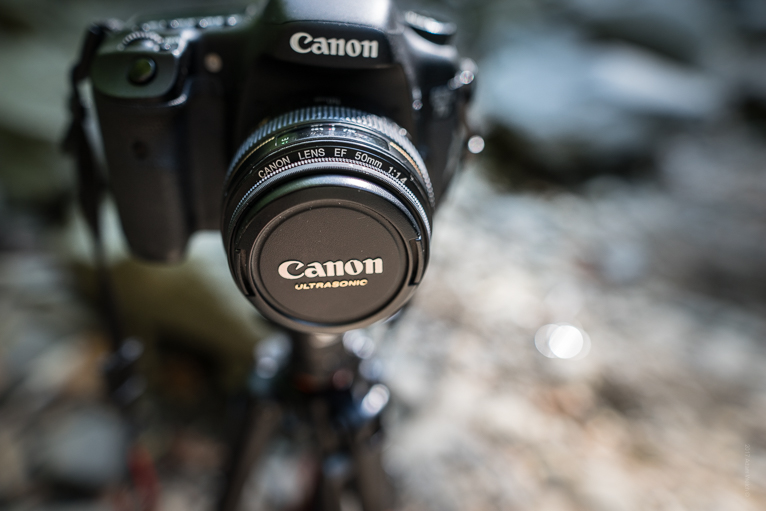
A Lens

The lens is the eye through which your camera sees and there are apparently hundreds of different eyes out there. Like I mentioned earlier, the quality of your lens is a huge factor in the final quality of your photos. If you put a poorly made, blurry and sluggish lens on the most expensive camera in the world you will still get poorly made, blurry and sluggish photos in turn

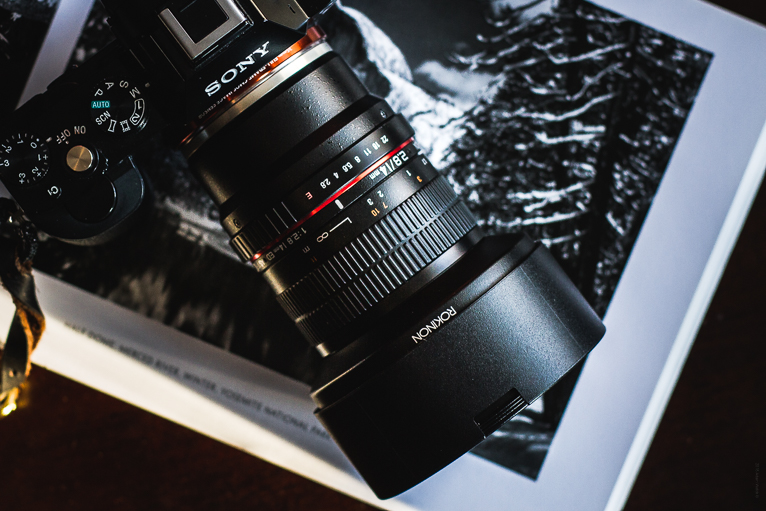
In short, if you aren’t sure yet which genre of photography you’ll gravitate towards, what’s called a “normal” focal length lens will be the best bang for your buck. The term “normal” refers to a lens approximately equal to the field of view of the human eye which is arguable in the 30-50mm range. Most kit lenses included with cameras hover in the normal range. In any case, find the fastest lens(small F-number/large aperture) that will fit the most situations be it landscape, portraiture or street photography. Fortunately, a fast 50mm lens remains of the cheapest lenses you can currently buy.

Finishing Up

Yes, that really is all you need. While there are a few accessories like film or memory cards that you’ll require the overall basic gear to start making images really is as simply as that.

As you progress you will learn what makes you tick photographically and you can adjust your tools accordingly. Find a camera, find a lens, and start shooting.

Filed Under: Gear, Inspiration Tagged With: camera, cameras, Getting started, inspiration, landscape photography, lens, lenses, Lifepixel, Photographer, photographers, Photography, photography tips, Travel photography, tripod, Wildlife photographer

The Case for Black and White Photography

Brace yourself because here it comes…it’s another discussion about black and white photography. Don’t worry, it’s not going to be the same old “which is better?” or even worse, another “how to convert your photos to black and white” type of articles. Admittedly, I have written on both of those subjects extensively before but this time will be a little different.

Today, we’re going to strip down the idea of black and white photography and attempt to locate how this tried and true area of photography has managed to maintain its status in an arguably over saturated(pun intended) world of photographic modernism.

Monochrome and the Film Difference

It’s not secret that the black and white side of photo work is deeply rooted in film. Still, even though it makes for a solid title for this section, the term “monochrome” has been somehow mismanaged to the point where it is widely considered synonymous with black and white. This is wrong. Monochrome means “one color” or essentially an image made of shades of only one color. This color could be anything from black, yellow, red or pink. Grayscale might actually be a more appropriate term for true black and white. Even then the lines become somewhat blurred because it’s incredibly difficult to completely abolish all color toning from a black and white film negative. Take a look at these images of a 4×5 black and white negative(complete with film borders)and I’ll show you what I mean.

The first photo is a color rendition of the negative. You’ll notice that is is toned quite blue based on the development. This is due to a few factors but the point is virtually all black and white photographs aren’t exactly black and white. Rather, they are toned based on the type of film emulsion and the development techniques used. Now, look at that same piece of film after I have digitally converted it to black and white in Lightroom.

See the difference? I say all of that to say this: modern digital photography often paints a one dimensional representation of black and white images. True black and white photographs aren’t usually black and white at all or not even monochromatic. Instead, they are a carefully mapped presentation of tonal ranges. Remember this the next time you click a button to make your photo black and white. Sure, it might remove the color but the work shouldn’t stop there.

Speaking of color…

Is Color Necessary?

Yes, color is needed. Is it always needed? Absolutely not. There are times when a photo is suited to black and white and times when it is not. Well, who decides? That question is also deceptively simple to answer. It’s you, you’re the one who decides. Does the color play a role in the emotion or feeling you mean to convey or does it get in the way? These are most certainly murky waters to wade.

Today, we don’t even have to approach color or black and white photography the same way as we did thirty or even twenty years ago. Take the very site you’re reading this article on right now. LifePixel specializes in infrared converted cameras that brings the world of color into a new realm of creative exchange. Infrared cameras see light differently than our own eyes. As a result, completely familiar colors become foreign and black and white pictures take on a completely new feel. When you think about color and how it relates to photography you must understand that even the things we see are wholly subjective to our own perception.

Some Closing Thoughts…

If you haven’t been able to tell by now the purpose of this article isn’t to promote the merits of one type of photo over another. There’s plenty of room even now for both color and black and white photography. In fact, a lot of it comes down to personal taste and how we perceive the world around us. At the same time, remember to look deeper into your work and find what gives it meaning to you. Does color play a part? Does it make more of a connection in black and white? Whatever direction you choose just make sure that the original intent of the photo shines through.

Filed Under: Inspiration Tagged With: black & white, blackandwhite, bw, camera, color, inspiration, landscape photography, Lifepixel, lightroom, Photographer, photographers, Photography, photography tips, photoshop, processing, Travel photography, tutorial, Wildlife photographer

Review: K&F Concept TM2534T Professional Tripod

Often times I open my photo gear reviews by talking about what a great time it is to be a photographer. Really, I should specify that it’s an excellent time to be a buyer of photography products. There’s just simply so many choices out there these days than there was even ten years ago for the budget conscious shooter to obtain high quality tools to help them and their work. This is especially true when it comes to choosing a tripod.

Enter the K&F Concept TM2534T tripod, which is a recent entry to the budget line, but not necessarily budget quality, world of advanced hobbyist to professional grade tripods. I’ve spent the last few weeks working with the TM2534T. I’m going to show you what I liked and didn’t like about this unique tripod offering from K&F.

Out of the Box

I pleased to immediately see that the tripod comes with it’s own padded transport bag which has an included shoulder strap. The tripod itself looks great with a classy red/black color scheme and discrete logo placement, which I like. For a tripod with an extended height of 72 inches it is quite compact when folded.

It’s feels solid in hand without being overly heavy. All the paint and finishes on the tripod look very well done. The official specifications from K&F are as follows:

  • Folded height: 14.76in/37.49cm
  • Extended height: 72.24in/183.48cm
  • Weight: 3.48lbs/1.58 kg
  • Load rating: 17.64lbs/8kg

Also included is a short center column conversion attachment with bolt and a nifty storage bag for the ball head.

Build

The TM2534T is hefty and it feels quite sturdy with it’s all aluminum construction. The adjustment knobs are solid and lock the ball head in place securely.

Leg locks are the twist variety and feature rubber seals to protect against sand or dirt entering the locking mechanisms. The locks secure the four section legs securely. There are three angle options for the legs at 25, 50, and 80 degrees. These locks also lock crisply and allow for great versatility for low angle work.

One of the legs is padded and this leg is also the removable monopod. This is a great feature which essentially makes this tripod a two for one deal.

The entire center column assembly can also be attached to the convertible monopod which gives a total height of 77.56in(197cm) if you choose to carry it in this configuration.

Speaking of the center column assembly, it is somewhat puzzling. It’s not that the concept of the two piece center column isn’t a good idea, in fact, it adds an extreme amount of articulation especially for top-down product photography. The entire ball head and center column gives the user the ability to cover virtually in angle imaginable.

However, from a practicality standpoint the added stress points in the assembly don’t seem to be a worth while feature when you take into account the added weight and possibly stability issues. That being said, the ball head itself works smoothly and offers great fluid motion for panning.

The feet of the tripod legs give a great compromise between stability and variable surface suitability. They are rubber boots that terminate in a point that can dig into soft ground while protecting fragile floor finishes.

Also worth mentioning is the base plate that included with the tripod. It has rubber cushioning at the attachment surface as well as a “D” ring screw head which makes attaching/removing the plate MUCH easier especially when a coin or screwdriver isn’t readily available.

Real World Performance

This tripod worked as a tripod should during all my uses. The legs locked securely and remained so during shooting. There was no drift in the ball head during long exposures and all the movements worked smoothly. Something I want to again address is the center column assembly and just how much practical use it adds. The overall height the additional length of the column adds isn’t something most photographers of average height will likely need. Even with the added articulations it allows isn’t enough to justify the added chunkiness and bulk it adds to the total package.


In the time I’ve used this tripod it has held up to indoor and outdoor shooting well, with only a small amount of wear being noticed at the angle adjustment locks which is largely superficial.

I feel that the TM2534T should have no problem in terms of durability during heavy outdoor or studio use.

Final Opinion

For all practical purposed the TM2534T tripod from K&F Concept is solid option for those needed a well made platform for a wide range of shooting situations. It offers great looks, incredible articulation and versatility, all wrapped up in a package that’s great to look at and won’t break the bank. The overly bulky center column isn’t something that I feel is exactly worth it’s added weight and ungainliness but that is something the user will need to decide. Check it out for yourself and see if it fits your particular needs. It’s going for under $150US at Amazon* or the K&F Concept website.

*Note* The Amazon description lists the tripod(TM2534T) height incorrectly as 66in.

Filed Under: Gear Tagged With: camera, cameras, Canon, gear, gear review, K&F, landscape photography, Lifepixel, photo gear, Photographer, Photography, review, tripod, Wildlife photographer

How to Use the Clarity Slider in Adobe Lightroom Classic CC

If you reach way back to Adobe’s Lightroom 1.1 build you will find the clarity slider. After its introduction wayyyy back then the clarity slider has been a favorite weapon of most landscape and even portrait photographers. This slider is a personal favorite of mine just as it is the professed secret love of many Lightroom users. It adds a little “punch” to your photographs and can work wonders with portraits, landscapes, and virtually any other image that appears to be a little visually flat.  And now in Lightroom Classic CC, the clarity slider is still going strong.

But what does the clarity slider do specifically? In this article we’re going to talk about how the clarity slider works and how you can use it more effectively to bring out the full potential of your images.

How Does the Clarity Slider Work?

When we adjust clarity, we are essentially adjusting the contrast of our photo.The difference is that instead of the entire tonal range being adjusted, the clarity slider targets the midtones only. This give the overall illusion of the image become more clear. Look at this histogram of the image above before the clarity was increased by+60…

Now, look at that same histogram after the boost in clarity

The blacks and highlights haven’t been affected very much but the midtones certainly have. And that’s the great thing about the clarity slider: it is far less likely to wash out detail in the areas which are already bright or already dark. This makes it a great tool when working with textures(insert link to texture article) with scenes which need a good bit more contrast without going into overkill in the shadows and highlights. Speaking of overkill…or rather over’clear’(haha)…the next section will talk about some things to watch out for when using the clarity slider.

How NOT to Apply Clarity

Granted, every photo is going to be different, so there are no real “rules” when it comes to using the clarity slider(or anything else in photography) to adjust your images. That being said, a general guideline that will help you immensely is the good ol’ fashioned “less is more” approach. While there clarity slider works great to add some extra power in your photograph it can also cause some unsightly side effects if abused.

Here’s a photo where the clarity has been cranked to +100. Notice anything?

On top of the entire scene now looking a little unnatural, when we zoom in we can see the real problem with using the clarity slider too liberally.

Zoomed to 3:1

Those dreaded halos. I hate them, and honestly, you probably should as well. They are caused by the pixels around high contrast areas becoming too separated from the pixels surrounding them which adds up to the bright banding around those areas. To remedy this, try adjusting clarity locally using the radial or graduated filter or the adjustment brush. If all else falls, simply back off the clarity a bit. In almost all cases less contrast will be more preferable than that dastardly halo effect.While Adobe has drastically refined the performance of the clarity slider in recent years the over clearing a photo can still be problematic. Also note the halo effect is worsened when coupling too much clarity along with too much sharpening as happened with the image above..

Final thoughts on Clarity

The clarity slider is a great tool. It helps us to increase contrast in the midtone luminosity range while avoiding blown out highlights and burnt out shadows. I use it to some extent in virtually every photograph I process. That being said, as awesome as the clarity slider can be, it can also work against you if you push it too far. Always remember to keep things in the scope of the reality you wish to present to the viewer and don’t over clarify your images. On the flip side of that you should also not be afraid to actually lessen the clarity in some of your images. It can actually smooth out skin tones and impart a nice soft contrast to a landscape. With a little bit of knowledge the clarity slider can open up entirely new post processing opportunities that you might not have considered!

Filed Under: Tutorials Tagged With: clarity, clarity slider, landscape photography, Lifepixel, lightroom, lightroom classic cc, mountain photography, Photographer, Photography, photography tips, post processing, processing, Travel photography, tutorial, Wildlife photographer

How to Add Instant Contrast in Photoshop

Adobe Photoshop is a beautiful thing. It allows an incredibly wide range of artists, designers, creatives, and especially us photographers to inject a little bit of creative juice into their work and see it come to life. And while Photoshop can be enormously complex there are so many simple, straightforward edits you can use to instantly transform your photographs.

One of these goes back to the basics of photo editing: exposure and contrast. There is a great way to quickly add contrast to your images by using PS blend modes, more specifically the “soft light” blend mode. You may be thinking “But why not just add contrast with the contrast adjustment?” Well, you can for sure…but it’s not exactly the same. And why not expand your photographic editing horizons to try something new?

Soft Light Blend Mode

The soft light blend mode is one of seven PS blends that make up the “contrast” group. These modes all use varying mathematical wizardry to accomplish a similar effect which is to make darks darker and lights lighter in relation to one another. While that is an incredible over-simplification it’s not entirely inaccurate.

The soft light blend mode bases itself on whether pixels are lighter or darker than 50% gray. If a pixel in your image is darker than 50% gray it will be darkened further. If a pixel is whiter than 50% gray it will be lightened. The result? More contrast. Not only that, but this contrast is wholly dependent on image and it’s tonal makeup.

Adding Contrast with Soft Light Blend Mode

First, duplicate your base photo layer by using the keyboard shortcut ‘Ctrl+J’(Cmd+J for Mac).

Next, select the soft light blend mode from the blend mode drop down list. Alternatively, use the keyboard shortcut ‘Ctrl+F’ to do the same thing a little faster. You will instantly notice a fairly drastic change to your photo. Namely the increased amount of contrast.

To really control the amount of contrast I highly recommend adjusting your layer opacity until you reach the overall level of contrast for your particular image. In the case of soft light the opacity and fill accomplish the same outcome so it is your choice which to use.

The real fun begins when you decide to add a layer mask. Don’t worry! Masks aren’t something to be afraid of(in most cases) and they allow you to completely take charge of how an edit is applied in PS. You’re about to see how easy it is right now.

Adding a Layer Mask

To add a layer mask to your soft light blend layer simply click on the “add a mask” icon at the bottom of the layer panel.

Guess what? You’ve just added a layer mask! It’s that simple. Now, you’re free to paint in or out the soft light contrast to virtually any degree and location you choose. Just adjust the size and opacity of your brush to achieve the desired effect.

Add in some a quick increase in exposure and we’re left with the finished product. All done within a matter of minutes.

Some Final Thoughts….

One of the fun and interesting aspects of post processing is discovering all the different methods of achieving certain editing effects. Adding contrast to a photograph is one of the most basic edits a photographer can make to instantly add power to a photo. There are many ways to do this and you’ve just learned one. Try using the soft light blend mode technique to add contrast in a smarter, more controlled way. The soft light blend mode in PS makes it easy to quickly and effectively add punch to your images and it is something I use to some extent on virtually every photograph I process.


Filed Under: Tutorials Tagged With: camera, cameras, Getting started, landscape photography, Lifepixel, lightroom, mountain photography, Photographer, Photography, photography tips, photoshop, processing, Travel photography, Wildlife photographer

Previsualziation: Knowing Before the Shot

Previsualization, or simply “visualization”, is one of the most simply yet alarmingly difficult aspect of making your own photograph become more than just the some of their parts. When we “previsualize” our images it means that the appearance of the final outcome before we ever click the shutter button. The method of previsualization was championed by the photographically indomitable Ansel Adams who believed the best way to convey wholeness within a photograph was to strive to see it in your minds eye from the get go. Everything else would then be a matter of what needs to be done in order to reach your personally desired outcome.

But how is it done? Or more importantly, how can you learn to do it yourself? Ansel gave us a lot to go on and we can learn a lot from his legacy. At the same time, we can mesh together with modern digital techniques and expound into something I like to call dynamic visualization. We’ll get more into that in just a minute. But first, let’s talk about how you can begin to visualize the finished photograph before you actually make it manifest itself from your camera.

Learning to “See”

Teaching yourself to see the finished product on the front end of the process isn’t an easy thing to accomplish, especially not right out of the gate. The ability to visualize a finished photograph is somewhat paradoxical due to the fact that a large component of the skill involves shooting a lot of photographs. This means that visualization is a product of repetition. Each time you make a photograph, you see the effect of shooting at the technical factors you have selected. Pay close attention to what settings you use!

Once you begin to mentally catalog the cause and effect relationship between your techniques and their respective outcomes you will then gradually learn to approximate the particular look of a finished image before it is actually shot.

Be Patient

The largest detriment in learning how to visualize your finished photos is that confidence-killing frustration that often sneaks in from perceived failure. Will you be able to anticipate the exact outcome of your photographs each and every time? Of course not. Failure is an incredible teacher and this is especially true when it comes to learning the skill of photographic visualization.

So, don’t allow yourself to be discouraged by the tedium. Shoot as often as you can, practice seeing the finished photo in your mind, observe the results, and then apply those outcomes to future photographs. I assure you that being able to see a finished photo(or close approximation) will slowly begin to happen on its own.

Dynamic Visualization in the Digital Age

I want to speak briefly on the progression of the visualization process as it pertains to today’s digitally integrated world of photography. The technique is one I have coined as “Dynamic Visualization” and is a direct evolution of the visualization idea of Ansel Adams. It involves the instant feedback we now are capable of achieving with our digital photographs. As we no longer have to wait for development of our film to be completed before we see the results of our efforts, the process of visualization changes. We can now allow the readily displayed outcome of our photos to directly impact the mechanism of visualization in a much quicker and more dynamic fashion.

What I mean here is that we immediately view the image we have just captured and that quick feedback can organically spur our creativity in real-time. This can lead to alternative compositions and exposure combinations that we might not have otherwise considered, thusly changing the final visualized image in our minds. This dynamic visualization could in fact be the continuation of Ansels visualization method. We first visualize the finished photo we want to make, receive real-time feedback from our digital displays, and then use that information to mold alternate(possible better) visualizations.

Final Thoughts on Visualization

The hard truth about learning visualization is that it takes time, effort, and patience. There are no real shortcuts when it comes to teaching yourself to “see” a photograph before it’s made. Shoot as much as you can and observe the results carefully. See the results of your work and study your own work. Visualization happens as much by physical labor as it does by mental flexibility. The key is to keep trying until that visualization “aha” moment makes its way to you. Just keep shooting!

Filed Under: Inspiration, Tutorials Tagged With: black & white, camera, cameras, Getting started, inspiration, landscape photography, passion, perspective, Photographer, Photography, photography tips, Travel photography, visualization, Wildlife photographer

Review: K&F Concept 58mm Variable Neutral Density Filter

Neutral density filters(ND) are one of the staple components of virtually every serious landscape photographers gear bag(read some outdoor photography tips). The great thing ND filters allow us to do is shoot longer exposures in bright light without overexposure. A good analogy I always like to use is that ND filters are light sunglasses for your lens. Neutral density filters are a great way to remain flexible with your shooting even when conditions aren’t ideal.

Like most photographic equipment, you often get what you pay for…. That doesn’t mean that every piece of budget gear isn’t capable of yielding great results. The K&F Concept 58mm ND Fader Variable Neutral Density Adjustable ND Filter is quite a mouthful to say, but essentially it is a neutral density filter that is capable of shooting at various shades of darkening. This particular filter ranges from ND2-ND400. If we’re speaking in terms of f-stops, then it equates to 1-8 ⅔ stops of light reduction. The version I tested was the 58mm size and I used it with my trusty Canon EF 50mm F1.4.


Build Quality

The filter arrived well packaged and included a nice micro-fiber cloth along with a standard padded plastic filter case.

Overall, I was extremely impressed with the build of this ND filter from K&F. The material of the two elements is listed by the manufacturer as “optical quality glass” with the body of the filter likely being aluminum. Originally I had thought the housing was made from some type of resin but after a scratch test it turned out to indeed be metallic.

I was also pleased to note that both the stock lens cap and lens hood still worked perfectly while the filter was attached.

The filter itself functions by turning the outer ring to the desired darkening setting is reached. This ND filter functioned extremely smoothly with no binding or sticking points.

Optical Performance

As I mentioned earlier, there is most often an unavoidable compromise between cost and quality(with a few exceptions) when it comes to camera gear. The K&F Concept variable ND is a budget ND filter currently retailing for around $20US from both Amazon and Kentfaith.com. The performance of the filter was a mix of great to, well, not so great. When used at it’s lowest optical darkening setting, the results were wonderful for a filter at this price point.

1/100 second

Moving a little darker to approximately 3 stops of light reduction, the results were still great and allowed me to shoot long exposures with no real color tinting or vignetting to speak of from a practical standpoint.

1.3 seconds

Now, moving onto the darkest setting of ND400, or approximately 8 ⅔ stops, we see some extreme problems arise in terms of color tinting and image degradation.

25 seconds

For a $20 ND filter, I was honestly surprised at how well the filter performed up till now. And from a real world point of view, the filtration offered between ND2 and ND400(1-8 ⅔ stops) was outstanding. This lends me to believe that he overall results from this filter are perfectly workable from approximately 1 to 3-4 stops of darkening. Here are three more images showing the progression of image quality across the range of filtration. It’s interesting to note that while the last image shows significant quality reduction, the massively apparent purple tinting observed in the previous example is virtually nonexistent. This is possibly due to the lengthy exposure of 25 seconds used for the image above. The white balance of my camera was set to ‘Auto’.

1/200 second

1.6 seconds

4 seconds

Final Thoughts….

Given the low cost of this variable ND filter from K&F Concept, I have no problem with the limited performance results achieved from my tests.

Pros:

  • Low lost
  • Sturdy build
  • Looks great on the camera
  • Smooth operation

Cons:

  • Extreme color tint at dark settings

The fitler itself is well made, looks great, and lends itself to relatively respectable performance for a filter costing around $20US. Beginners will love it for its quality to cost ratio and even experienced photogs could find a place for it in their kit. The K&F Concept 58mm ND Fader Variable Neutral Density Adjustable ND Filter is a low cost option for those looking for a variable ND filter with good performance in the 1-4 stop range of light reduction. The diminished performance at the far end of the filters capabilities are indicative of the cost of the product and expectations should be tempered with that information in mind!

Filed Under: Gear Tagged With: Canon, filter, filters, K&F, landscape photography, Lifepixel, mountain photography, nd filter, neutral density, Photographer, photographers, Travel photography, Wildlife photographer

Effective Black and White Conversion in Lightroom

In a way, black and white photographs were part of the reason I became interested in photography. I was no more than twelve or thirteen when my parents bought me a black and white Kodak disposable film camera. Remember those? It contained one roll of black and white 35mm film. Everything was set for you…just wind, click, and repeat. The thirty six exposures from that roll of film displayed an alien world. No colors, just shades of grey and contrasts of light. I was dumbfounded at the power that even these simple images could convey.

A picture from that magic roll of film….

Fast forward over twenty years and we find ourselves in the middle of the roaring age of digital photography. Now, we can see the world with two different sets of eyes: one in color, one in black and white. In our digital darkrooms it’s easier than ever to make professional quality black and white conversions from your RAW image files. In this tutorial we’re going to show you how to take your images beyond black and white using Adobe Lightroom.

More than Desaturation

There is more than one way to convert your images to black and white in Lightroom. We start with this image….

Sure you can grab hold of that saturation slider and simply set it to zero. This works. But you lose so much due to the nature of the desaturation.

The photo is somewhat flat after setting the saturation to “0”.

While the color has been removed, so too have the luminance values of those colors. Luminance values are the brightness values of the specific colors within the photo. It’s these differences in lights and darks that make a strong black and white image. Without being able to control each colors luminance we are left with a flat and often uninteresting image. The most effective method for converting your photo to black and white is to convert it to grayscale and then adjust the image with the black and white portion of the HSL Panel. It’s incredibly easy and powerful tool for working with black and white photos. You’re about to learn how to do it right now!

The Grayscale Conversion

Changing our images to “black and white” actually means we are converting them to “Grayscale”. No, grayscale isn’t some kind of mythological skin condition…. Grayscale is simply the term used to describe black and white photos which are in reality shades of gray and not only black and white. To convert your image to grayscale, click the black and white treatment option at the top of the Basic Adjustment panel.

Which gives us this grayscale image of our original photo.

You can also achieve the same result by jumping directly to the HSL panel and clicking the black and white tab.

Basic adjustments can be made for things like exposure, contrast, clarity, ect., but remember that we’re about to do more work on the photo using the color luminance adjustment in the HSL Panel. These adjustments can affect the overall contrast of the image so its a good idea to keep your initial edits at a minimum.

Adjusting with the B&W Section of the HSL Panel

Now that we have a black and white image to work with it’s time to adjust them color luminance and really make our image stand out. You can adjust the sliders for each color to either darken or brighten them within the image but an easier way is to use the target adjustment option. It’s the little dot at the top left of the B&W section.

Using the target adjustment tool is useful since we can select the area of color we want lighten or darkened without actually having to remember the original colors. Simply click the target adjustment tool and then click the area of color in the photo. Just drag up or down to adjust.

In this photo, the sky is made up mostly of blue, reducing the blue luminance values can add some great dramatic effects to the sky.

The same is true for the other colors. Greens and yellows in the bushes can be brightened. The orange color of the ponies hair can be darkened. After some final tweaking in the basic panel we have this final black and white photograph.

Final Thoughts

Converting and processing your black and white images in Lightroom is an incredibly easy and fast process. It also will open up a whole new world of creativity for you and your photography. Think your photos aren’t black and white material? Try the techniques in this article and I can virtually guarantee you might begin seeing your images in a completely different light.


Filed Under: Tutorials Tagged With: adobe, black and white, grayscale, landscape photography, Lifepixel, lightroom, monochrome, photography tips, Travel photography, tutorial, Wildlife photographer

Going Vintage with Adobe Lightroom

Retro Made Easy

When we think of “vintage style” photographs what we may be actually envisioning is a photo that bears many of the characteristics of analog film photography. These characteristics include subtle nuances in film grain and development, toning, and contrasts. The variations and combinations of these traits are quite literally too many to count but generally most vintage style photo-looks can be accomplished with just a few ridiculously simply edits in Adobe Lightroom. Generally speaking, vintage looking photographs are slightly faded with significant contrast. There are also some very slight color tones that are thrown into the mix in order to give a finished photo that has that great earthy feel of a analog photograph.

We’ll show you how to go from a RAW image file to a fully processed final image that has a nice vintage vibe. Here’s the before and after to give you an idea of just how impressive the results can be using just a few quick edits.

For this particular tutorial, we will look at a basic editing workflow for producing images with a vintage feel. But remember, this is just one look you can achieve. Don’t be afraid to experiment with color tones and contrast or even adding grain to your photo. The results can be fantastic!

Basic Edits First

We begin with a simple, and let’s face it, quite lackluster RAW file. Before we start with the vintage processing let’s do some basic edits to bring the image up to par for further processing. It’s always a good idea to do this before any other changes are made.

The edits applied here included some adjustments to color temperature and highlights as well as some adjustments to contrast and clarity. A couple of graduated filters were also used to even out the exposures of the sky and foreground. Here’s our processed RAW file that is now ready to go vintage.

Tone Curve

The tone curve has an undeserved bad reputation for being complicated to use. Nothing could be further from the truth once you have a basic understanding of how it affects your photo. For our vintage photo, most of the effects will be made using the tone curve adjustment. In most cases, begin with the tone curve set in “RGB” mode and the click the points to roughly an “S” shape with the curve. To add more fading, slightly drag the left most control point straight up the graph. In the case of this edit, I also moved the control point a small amount to the right to achieve the look I wanted.


I want to add a little bit of blue tone to the entire image. While still in the tone curve panel switch to the blue channel by selecting the dropdown menu below the graph. Keep in mind that you certainly don’t have to tone YOUR image with blue. The blue hue simply adds another element to the photo especially in the shadows which gives it a more vintage style. You could even use red or green if you like!

Final Tweaking in the Basic Panel

Now that we’ve reached a happy place with our tone curve it’s time to switch back to the Basic panel for a few final adjustments. In this case I increase the contrast while also reducing the highlights. After that I bring up the shadows. The colors in the photo are still a little too bright for me taste so I reduce the vibrance slightly. The color temp is just a slightly on the cool side so I also increase the temperature to warm the entire image a bit.

Vignette or Nah?

Our final step in the vintage conversion is to apply a slight vignette to help draw the viewers eye into the image. In come cases the vignette might not be desirable as in others. With this photo the darkening of the corners adds more appeal to the moody nature of the frame.

Careful not to go overboard here. Be sure to experiment with the feathering and shape of the vignette as well in order to get just the right look.

And here is the final vintage-styled photo. A considerable change from the dull and flat RAW file we started off with at the beginning of the article.

The fun thing about manufacturing vintage style photos in Lightroom is the shear enormity of the editing possibilities at your fingertips. Try out different combinations of color and toning to give different washes to your photographs. It’s definitely an easy way to add a little unique charm to your images without spending hours at the computer.

Filed Under: Tutorials Tagged With: adobe, landscape photography, lightroom, Photography, photography tips, Travel photography, Wildlife photographer

Bosque del Apache Wildlife Refuge

Bosque del Apache Wildlife Refuge

Each year around Thanksgiving you’ll find the Festival of the Cranes in Socorro, New Mexico. If you enjoy photographing wildlife, particularly birds, you will love a trip to the Bosque del Apache Wildlife Refuge which is where you’ll find oodles of birds about twenty minutes down the road from Socorro. Bosque is the stopping place for snow geese and sandhill cranes. While I was at the refuge on this trip, I concentrated on making images of cranes. When I return, and I will, I’ll try my hand at capturing compelling pictures of the snow geese.

I’ll make a couple of observations about most of the other photographers I saw photographing during my time there. One was that almost to a person images were being made from eye level and eye level only. If you want to make images that are more creative, it’s a good idea to explore ways to get different angles. Lower angles can be had by lowering the legs on your tripod. All tripods that I saw were fully extended and stayed that way.

Photographers at the Refuge
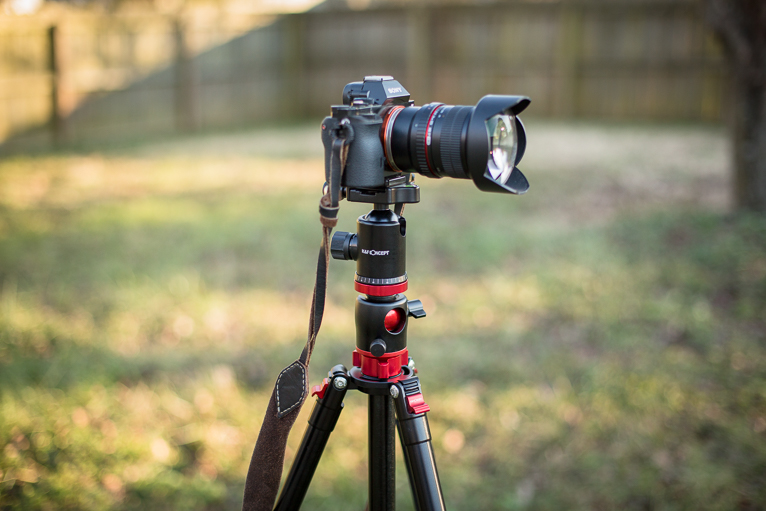
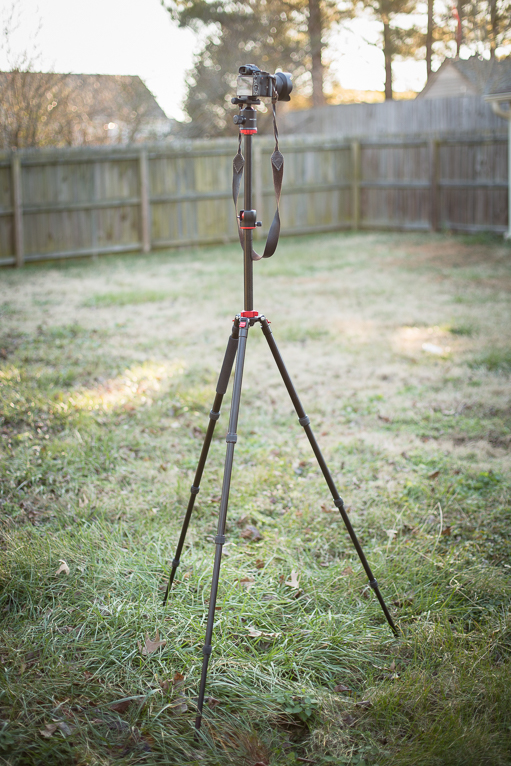
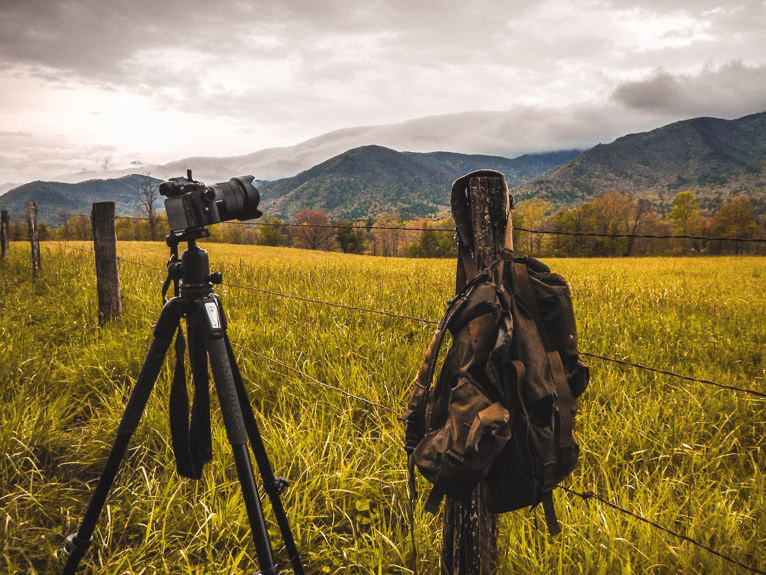
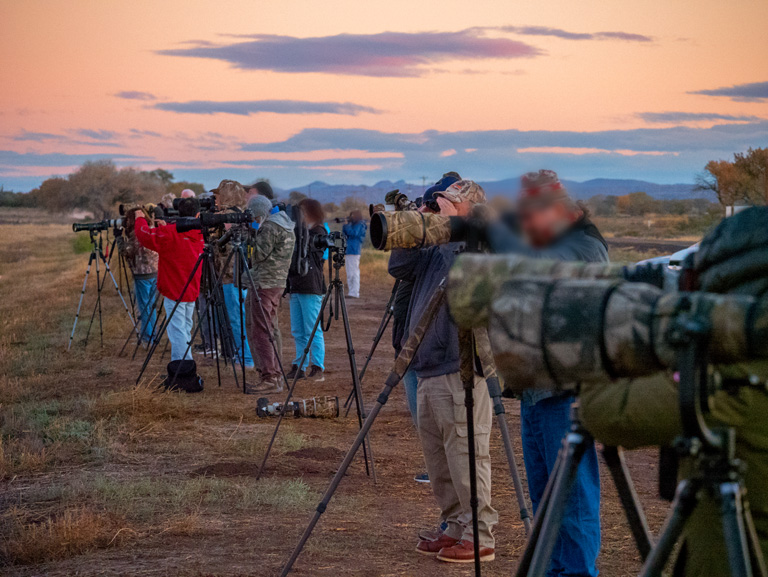
Photographers all lined up at the same height with tripods fully extended

Another behavior I noticed was no matter what the subject, moving or still, I heard motor drives firing at full machine-gun speed. There are times when having the motor-drive engaged will help you obtain a good photo that might otherwise get away. Pick your times to save yourself countless hours culling images after the shoot. When the lighting is not changing, and the birds are hardly in motion 14 frames a second is a bit of overkill. Better to learn the bird’s behavior and anticipate movement you would like to capture. You will end up with more keepers and fewer tossers. Working that way will save you a ton of time in post-production review of your photos.

sandhill cranes by bob coates photography

Lots of opportunities to capture sandhill cranes in flight as they fly-in and fly-out at dawn and dusk. Make sure you ask those who have been there before you for the best places to set up. At the very least ask at the front gate. Very friendly and knowledgeable folks there! F6.3  1/4000 SEC ISO 12800

sandhill cranes photo by bob coates photography

One of my favorite photos from the two-day shoot. F6.3 1/800 SEC ISO 1600

Capturing photos such as the one above while tracking flight is usually best accomplished with a gimbal-head atop your tripod. You can spend between $100 to $500 or more depending on the size of the lens you want to support. Conversely, I was testing some new camera gear and handheld all my images with surprisingly beautiful results. I used a Panasonic Lumix GX85 with a 100-400mm lens. This camera and lens combination have five-axis image stabilization giving a lot more freedom to get sharp images from moving subjects even in low light. This camera has a micro four-thirds sensor which means the 800mm full frame equivalent set-up only weighs three and a half pounds.

sandhill cranes photo by bob coates photography

Taking a slightly higher angle enabled me to isolate this crane from the other birds in the background and having the reflection in the area with the color reflected from the clouds.
F6.3  1/1000 SEC BTW the ISO for this image was 12,800.

sandhill crane photo by bob coates photography

Cornfields are planted to help feed the birds as they pause during their migration. While midday light is not as beautiful as sunrise and sunset, mid-day shooting allows for the study of the bird’s behaviors.
F6.3 1/1000 SEC ISO 1600

Getting the best images from your wildlife photography has a lot to do with understanding and studying the behavior of your subject. As you spend more time with the animals, look for repetitive movements. Often you’ll note a slight change in position just before a bird launches into flight. Or you might notice flight patterns can be discerned when a bird is landing. Anticipating these moments can mean the difference of getting an OK photo and one that has the animal positioned exactly as you would like in the frame.

Study the places and birds before you even get on location by researching them on the Internet before you go. Here are a couple of sites for the Bosque del Apache.  US Fish & Wildlife Service

I’ll share some more ‘artistic’ photos in another post. Look for it soon.

Yours in Creative Photography, Bob.

Filed Under: Locations Tagged With: Wildlife photographer

Profiled Photographers – Mandy Karlowski


african_soul

German photographer Mandy Karlowski received her first camera as a gift from the family that was hosting her during an exchange student program in the U.S. She took photos of everything from family and friends to all the places she traveled to and even the family dogs! Very quickly she realised that she found her passion in photography.

gregarious

Mandy, where are you from and where do you currently live?

I currently live in beautiful Cologne, Germany where I have been living for 6 years. Since moving here I’ve been in love with this place and people’s sense of life. But I grew up in a town called Hennef which is South East of Cologne.

What genre of photography do you specialize in?

I enjoy photographing architecture or landscapes when traveling around the world, but my preferred genre is taking minimalistic animal portraits.

african_beauty

Describe your style of photography?

My work is mostly inspired by architectural Fine Art photography. I love this idea and even more so to transfer it to animal portraits to give them this special minimalistic kind of look.

Doing so puts them into focus and really makes a statement. I’m always fascinated by their almost human-like expressions and majestic presence, and by playing with light and contrasts, there are great possibilities to capture their individual characters.

curious_owl

What are you working on at the moment?

Funnily enough, right now, I’m actually working on application photos for my best friend.

What is your next project or assignment?

Win a FREE Camera Conversion!

My next assignment is actually photographing animal portraits in Cologne Zoo.

Are there any photographers whose work/style you admire?

I really like Manuela Kulpa and Mathijs van den Bosch who are two of my absolute favourite photographers. I feel that their work has had a big influence on my work.

i_am_famous

What is your favourite memory from your experiences?

It was the day when I took the picture of the drinking duck. It was a typical example of why sometimes it is good when things go wrong. After a failed attempt to photograph an old, disused military facility, I more or less reached the river Rhine by mistake. Contrasting the claustrophobic darkness and tangible feeling of menace the old bunker exuded, the duck stood calmly and peacefully by the riverside. When she started to drink, I managed to capture this moment of tranquility, serenity, and obvious implicitness of life.

thirsty

What’s the biggest photographic challenge you overcame?

Being impatient while shooting and trying to fix it in the post production.

What’s in your camera bag?

My Canon 550D, several lenses, ND filters and a tripod.

What photographic equipment would you never leave home without?

Almost every time I carry my 550D on a Sun-Sniper-Strap with me. I would never leave home without my favourite lenses 50mm f1.8 and 70-200mm f4 from Canon.

black_beauty

What advice you would give anyone who is starting out?

Never get stuck because of your tools. No matter what camera you have, even if it’s a smartphone or a camera from the Stone Age – always focus on your motive and the right technique, it’s the most important thing that matters in photography! Remember that you don’t have to invest in expensive equipment to shoot awesome pictures.

Any pitfalls they should avoid?

Being afraid of getting their camera wet or dirty and therefore running the risk of missing an amazing shot!

thinking_of_you

Lastly… if you weren’t a photographer what would you be doing?

Not sure, but I don’t think I would be happy.

To view more of Mandy’s work visit 500px or follow her on Instagram or Twitter.

Images by Mandy Karlowski. All rights reserved. No usage without permission.

Interview by Kav Dadfar.

Filed Under: Inspiration Tagged With: Photographer, Wildlife photographer

Blog Topics

  • Tutorials
  • Inspiration
  • Locations
  • Gear
  • News
  • Other/Misc

What our customers say:

Life Pixel has been a life-changer for me. Continue reading
Eric GConnecticut
Read more reviews
I am more than satisfied with the service I received Continue reading
Christopher JCanada
Read more reviews
I am more than pleased with the conversion job that you did Continue reading
LOUIS MWaco, Texas
Read more reviews
I am VERY impressed with his knowledge of your products and his patience in explaining it to a novice like me. Continue reading
Lynn FEssex, Maryland
Read more reviews
Things will only get better from here thanks to all of you. Continue reading
Phillip FRedding, California
Read more reviews
The Lifepixel newsletter reminds me of not having expressed my gratitude for the excellent job you made. Continue reading
Michael GGermany
Read more reviews
Your staff went above and beyond the call of duty to make sure everything was handled in an excellent manner. Continue reading
Paige RPearland, Texas
Read more reviews
It has given my old camera a new life, I will enjoy using it again. Continue reading
William PAustralia
Read more reviews
Excellent service and the camera works just great Continue reading
Hans FairhurstAustralia
Read more reviews
I just got my converted camera back from you guys. THANK YOU!!!! Continue reading
Anne CutlerForest Knolls, CA
Read more reviews
infrared_filter_choices_sidebar
ir_conversions_explained_sidebar
----------- Watch More Videos -----------
infrared_quick_start_guide

Ready to start shooting Infrared?

Convert My Camera

Subscribe To Our Newsletter

Receive updates, tips, cool tutorials, free stuff and special discounts.

Learn the Basics

  • Video
  • Start Here
  • Filter Choices
  • Focus Calibration
  • Lens Considerations
  • Camera Considerations
  • Place Your Conversion Order

Resources

  • Galleries
  • Lens Hot Spot Database
  • IR Tutorials
  • FAQ
  • Infrared Filter Choices
  • Infrared Photography Guide
  • Infrared DIY Tutorials

Company

  • Why Choose Us
  • Get In Contact
  • Job Openings
  • Write For Us
  • Affiliate Program
  • Terms of Use
  • Privacy Policy
  • Home
  • Start Here
  • Galleries
  • Tutorials
  • FAQ
  • Blog
  • Why Choose LifePixel?
  • Shop
  • Contact

Copyright © 2025 Life Pixel Infrared - All rights reserved - LifePixel Infrared Photography IR Conversion, Modification & Scratched Sensor Repair