In a way, black and white photographs were part of the reason I became interested in photography. I was no more than twelve or thirteen when my parents bought me a black and white Kodak disposable film camera. Remember those? It contained one roll of black and white 35mm film. Everything was set for you…just wind, click, and repeat. The thirty six exposures from that roll of film displayed an alien world. No colors, just shades of grey and contrasts of light. I was dumbfounded at the power that even these simple images could convey.
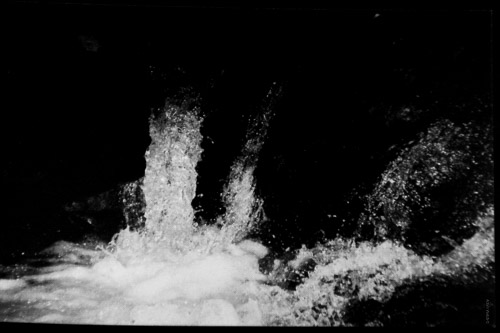
A picture from that magic roll of film….
Fast forward over twenty years and we find ourselves in the middle of the roaring age of digital photography. Now, we can see the world with two different sets of eyes: one in color, one in black and white. In our digital darkrooms it’s easier than ever to make professional quality black and white conversions from your RAW image files. In this tutorial we’re going to show you how to take your images beyond black and white using Adobe Lightroom.
More than Desaturation
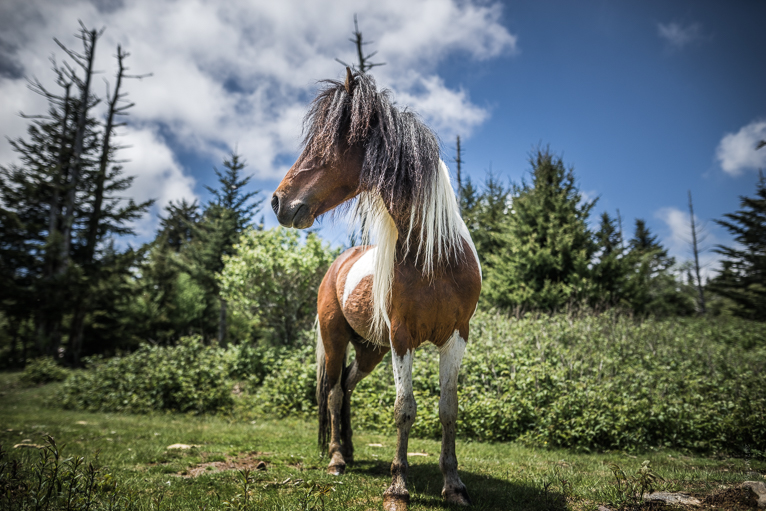
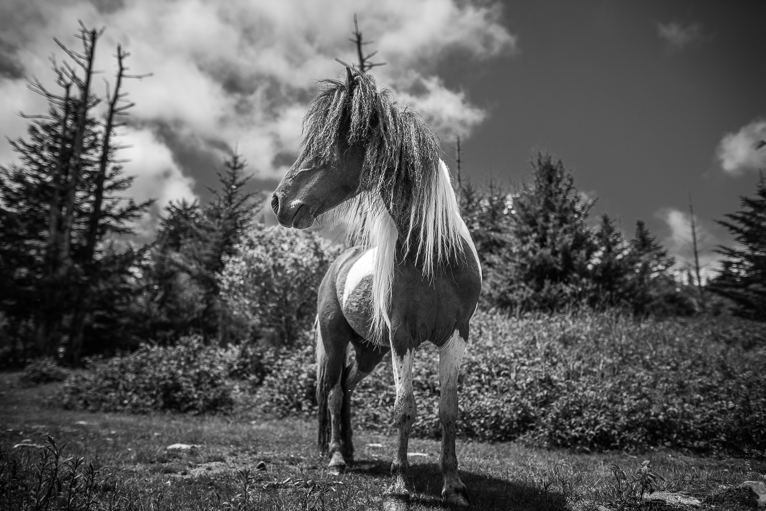
There is more than one way to convert your images to black and white in Lightroom. We start with this image….
Sure you can grab hold of that saturation slider and simply set it to zero. This works. But you lose so much due to the nature of the desaturation.
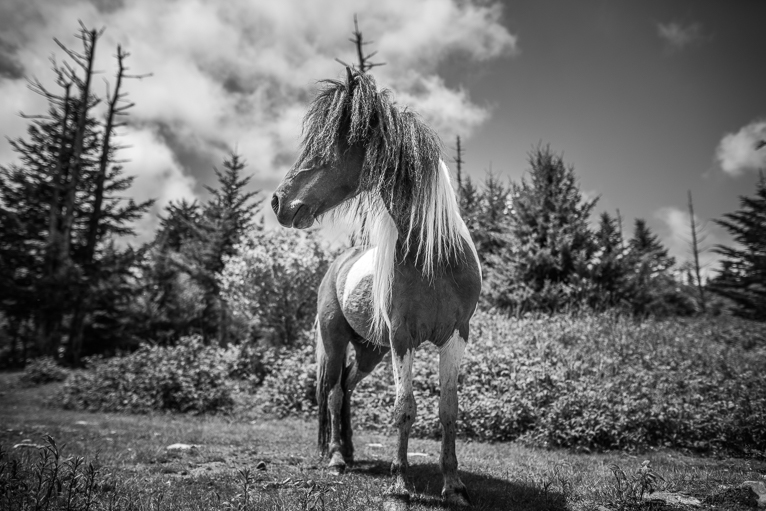
The photo is somewhat flat after setting the saturation to “0”.
While the color has been removed, so too have the luminance values of those colors. Luminance values are the brightness values of the specific colors within the photo. It’s these differences in lights and darks that make a strong black and white image. Without being able to control each colors luminance we are left with a flat and often uninteresting image. The most effective method for converting your photo to black and white is to convert it to grayscale and then adjust the image with the black and white portion of the HSL Panel. It’s incredibly easy and powerful tool for working with black and white photos. You’re about to learn how to do it right now!
The Grayscale Conversion
Changing our images to “black and white” actually means we are converting them to “Grayscale”. No, grayscale isn’t some kind of mythological skin condition…. Grayscale is simply the term used to describe black and white photos which are in reality shades of gray and not only black and white. To convert your image to grayscale, click the black and white treatment option at the top of the Basic Adjustment panel.

Which gives us this grayscale image of our original photo.
You can also achieve the same result by jumping directly to the HSL panel and clicking the black and white tab.
Basic adjustments can be made for things like exposure, contrast, clarity, ect., but remember that we’re about to do more work on the photo using the color luminance adjustment in the HSL Panel. These adjustments can affect the overall contrast of the image so its a good idea to keep your initial edits at a minimum.
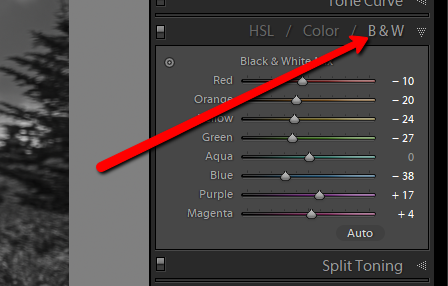
Adjusting with the B&W Section of the HSL Panel
Now that we have a black and white image to work with it’s time to adjust them color luminance and really make our image stand out. You can adjust the sliders for each color to either darken or brighten them within the image but an easier way is to use the target adjustment option. It’s the little dot at the top left of the B&W section.
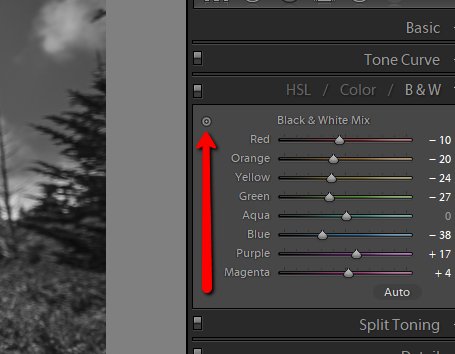
Using the target adjustment tool is useful since we can select the area of color we want lighten or darkened without actually having to remember the original colors. Simply click the target adjustment tool and then click the area of color in the photo. Just drag up or down to adjust.
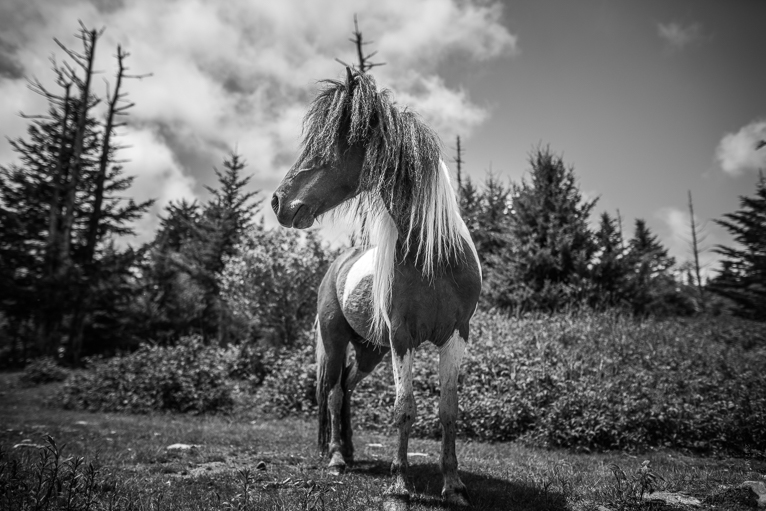
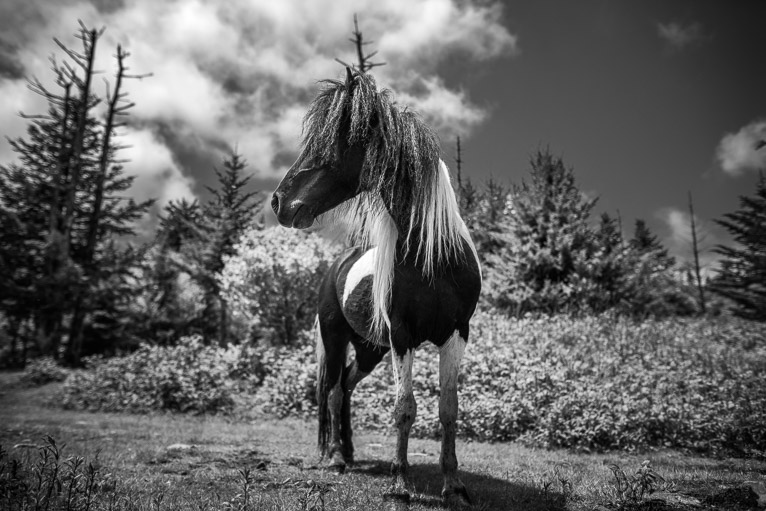
In this photo, the sky is made up mostly of blue, reducing the blue luminance values can add some great dramatic effects to the sky.
The same is true for the other colors. Greens and yellows in the bushes can be brightened. The orange color of the ponies hair can be darkened. After some final tweaking in the basic panel we have this final black and white photograph.
Final Thoughts
Converting and processing your black and white images in Lightroom is an incredibly easy and fast process. It also will open up a whole new world of creativity for you and your photography. Think your photos aren’t black and white material? Try the techniques in this article and I can virtually guarantee you might begin seeing your images in a completely different light.
Latest articles by Adam Welch (see all articles)
- Bare Bones Photography: What Gear Do You Really Need? - May 13, 2018
- A Simple Explanation of Aperture - May 13, 2018
- The Case for Black and White Photography - May 13, 2018
Adam Welch
Photo maker, author, and adventurer currently based in the western portion of his home state of Tennessee. You can usually find him on some distant trail making photographs or at his computer writing about all the elegant madness that is photography. Follow his sometimes controversial Blog on everything related to photography and then check out his cozy home on Instagram.
Adam has also authored one of the most comprehensive guide books on using Adobe Lightroom Classic CC. You can get your copy of Lightroom Mastery:
A COMPLETE GUIDE TO WORKING IN LIGHTROOM CLASSIC CC HERE!
See All Articles by Adam Welch

Leave a Reply