• Cart
  • Checkout
  • My Account

Infrared Conversions, IR Modifications & Photography Tutorials | Life Pixel IR

The world leader in infrared conversions, modifications & DIY IR conversion tutorials. Scratched sensor replacement, UV & Full spectrum conversions.

The world leader in infrared camera conversions

866.610.1710
  • Home
  • → Start Here ←
    • 1 – Introduction
    • 2 – Filter Choices
    • 3 – Focus Calibration
    • 4 – Lens Considerations
    • 5 – Camera Considerations
    • 6 – Start Shopping
  • Galleries
    • Infrared Photography
    • Infrared Time Lapse
    • Infrared Cinematography
    • Infrared Stop Motion
    • Ultraviolet Photography
    • Forensic Photography
  • Education
    • Training Sessions
    • How To Shoot Infrared
    • AR Coated Infrared Filters
    • Lens Hot Spot Database
    • Photoshop Video Tutorials
    • Infrared Issues & Solutions
    • IR Basics in Photoshop
    • Camera Quick Start Guide
    • DIY Conversion Tutorials
    • IR Photography Primer
    • Secondhand Cameras
    • Wall Of Shame
  • Workshops
  • FAQ
  • Blog
    • Tutorials
    • Inspiration
    • Locations
    • Gear
    • News
    • Other
  • Why Choose LifePixel?
    • Submit Your Review
  • Contact
  • Shop

An Easy Guide To Photographing Mountains Successfully

Mountains are wonderful subjects to photograph. They can provide an unmistakable point of interest in any landscape or cityscape shot. The opportunities are endless, but only if you take the time to plan and execute your shot. So here is a short guide with tips and advice on how to ensure your mountain photos come out stunning.

Guide_to_photographing_mountains

1. Find the perfect location

There is no doubt about it, my number one tip when it comes to mountain photography is to do your research and plan your shoot meticulously. Whilst it’s always good to take inspiration from other photographers, there is no point in going to the same places and taking the same photographs of the same scenes.

So be creative and go out and explore. Find locations that no one has discovered yet but has a story to tell. Or find a different angle or time of day to give a well-known location some distinction. Try to plan your shoot for times when the light or conditions might be unique to give you a different shot that will stand out.

Guide_to_photographing_mountains

2. Be prepared

Needless to say, that mountain photography can have it’s hazards so if your plan is to hike into the wilderness or even climb a mountain, make sure you are ready. This includes everything from clothing to food and water and even a first aid kit.

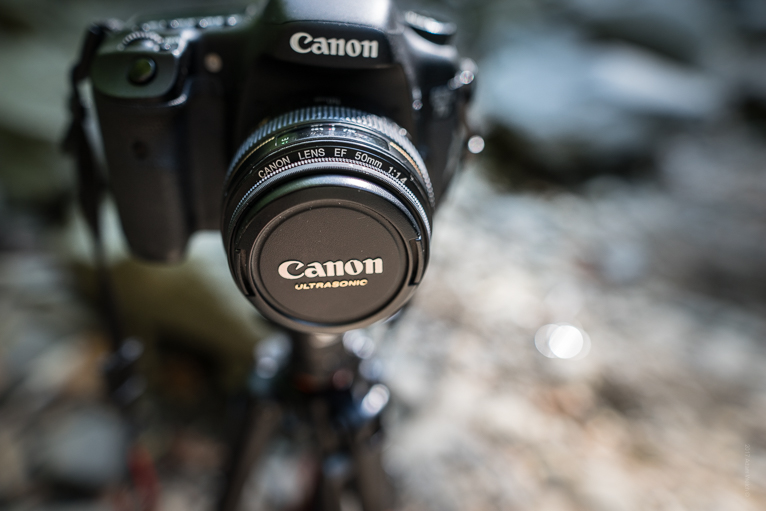
This also extends to photographic preparation as well. Make sure that you have all the equipment you are potentially going to need. This includes tripods, filters, batteries (keep in mind batteries drain faster in cold conditions), memory cards and of course camera and lenses. But only take what you are going to need as the last thing you will want to do is add more weight to your backpack.
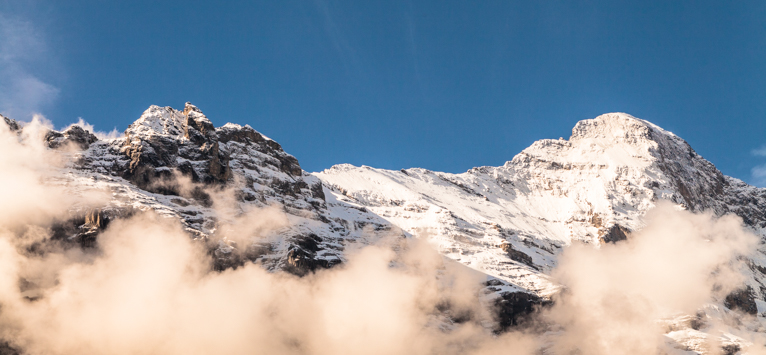
Guide_to_mountain_photography

3. Be patient

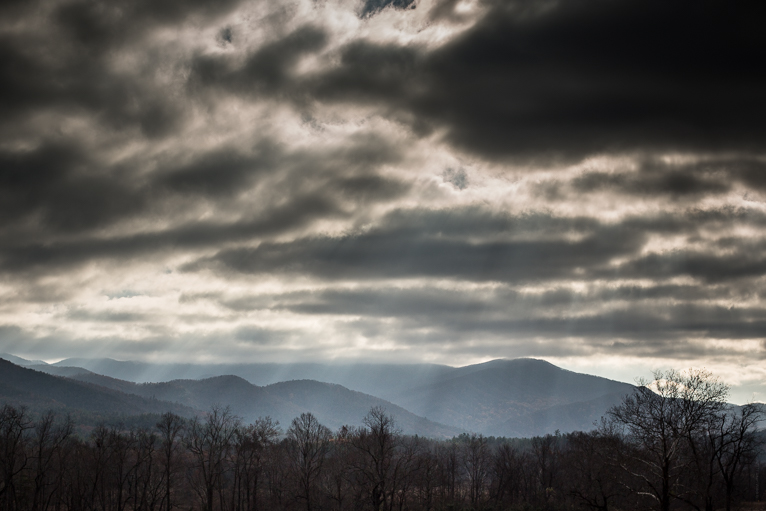
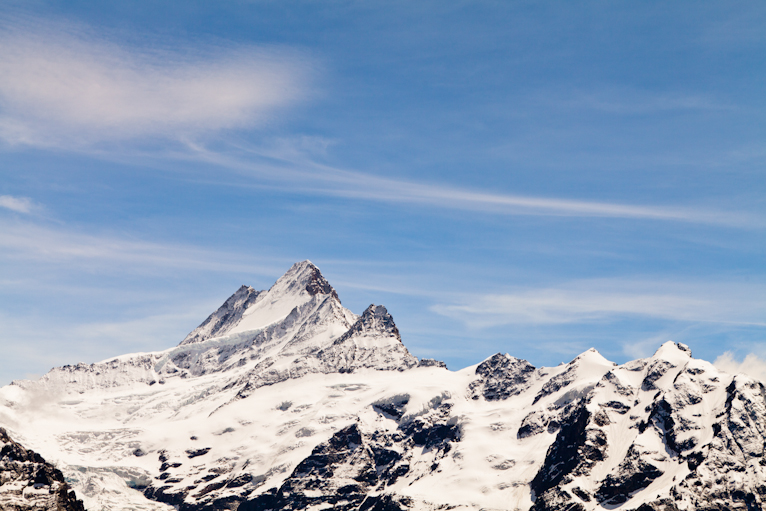
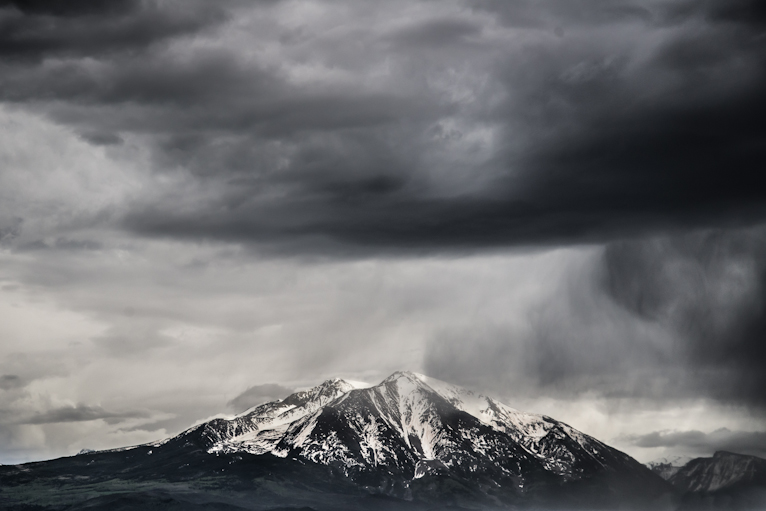
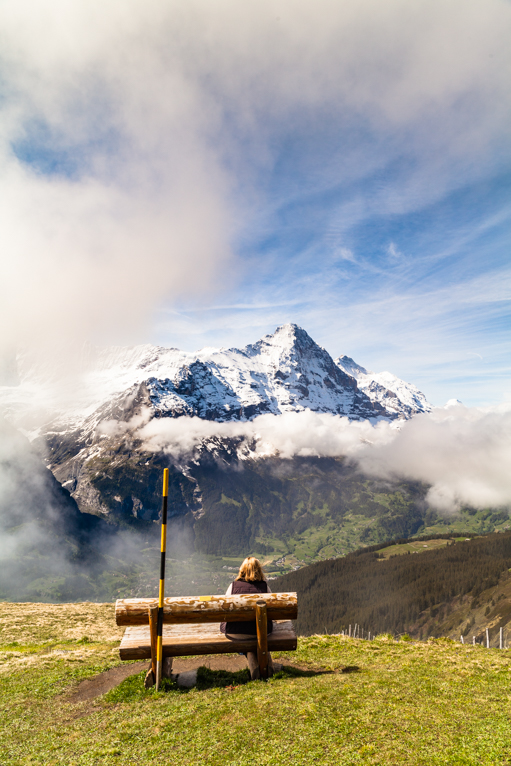
Most photographers get frustrated at times, especially when the weather seems against you. Unless you are really fortunate, you will rarely ever get to your location and have everything in place for a great shot. Sometimes you just have to have patience and wait for that moment when the clouds disappear or the fog lifts. Mountain weather can change rapidly and unpredictably so make sure you are aware of the forecast before you set off and sit and wait if the conditions are not right.

Be patient for the right lighting too. Early morning and late afternoon light gives the scene a wonderful glow and emphasizes shadows. If the weather prevents a good shot, come back later in the day or the next morning.

Guide_to_mountain_photography

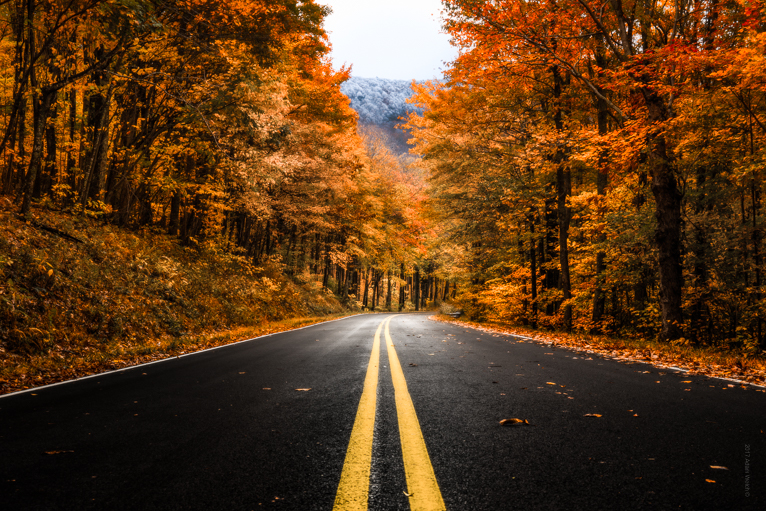
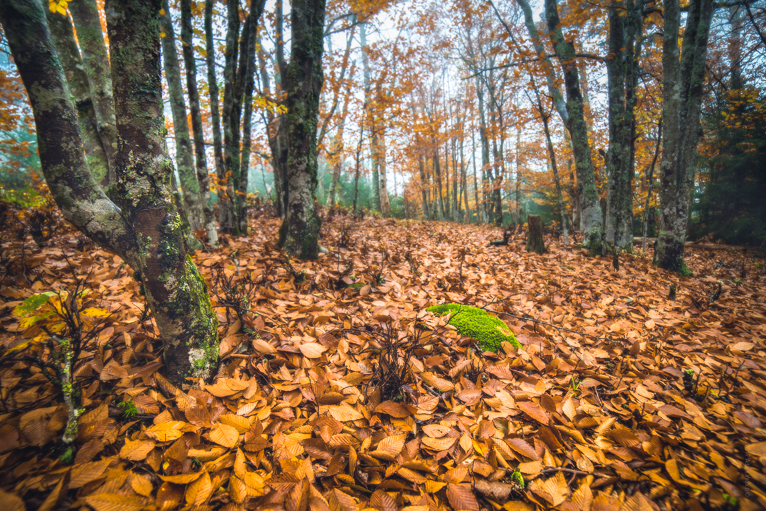
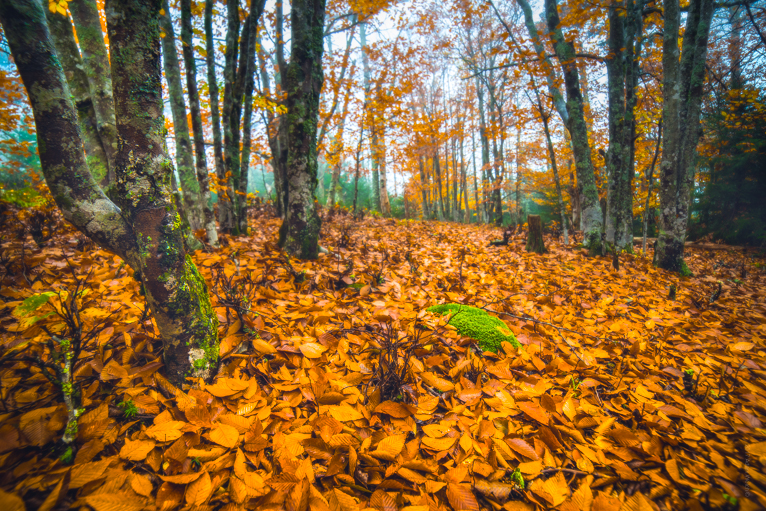
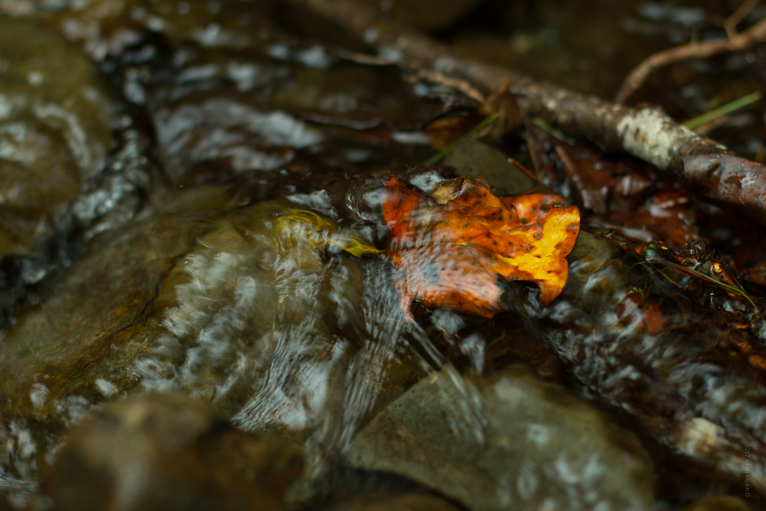
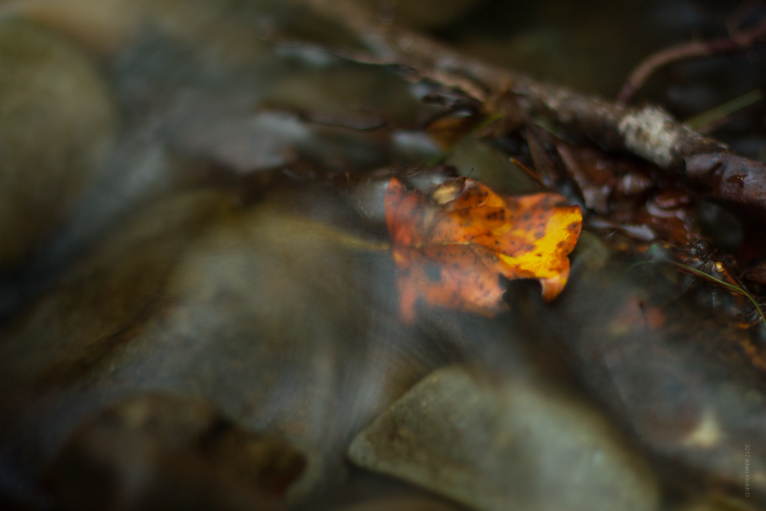
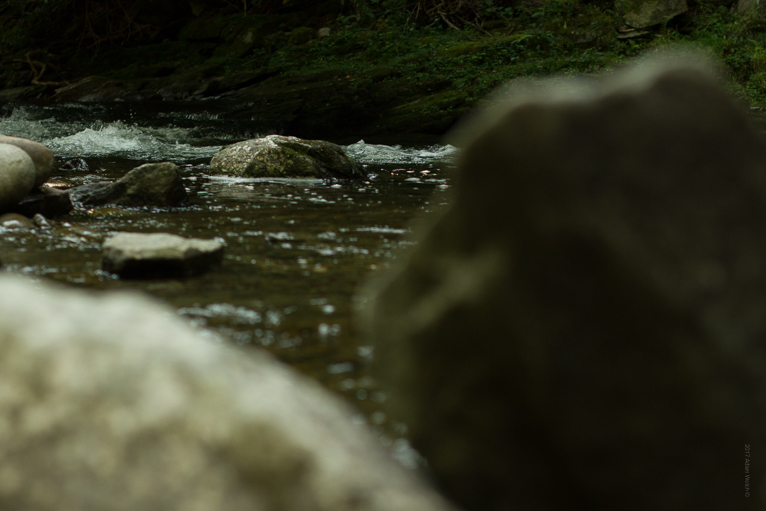
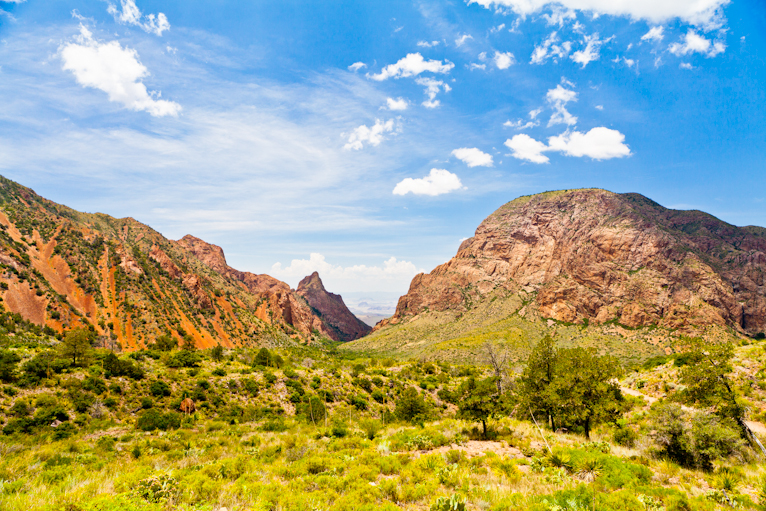
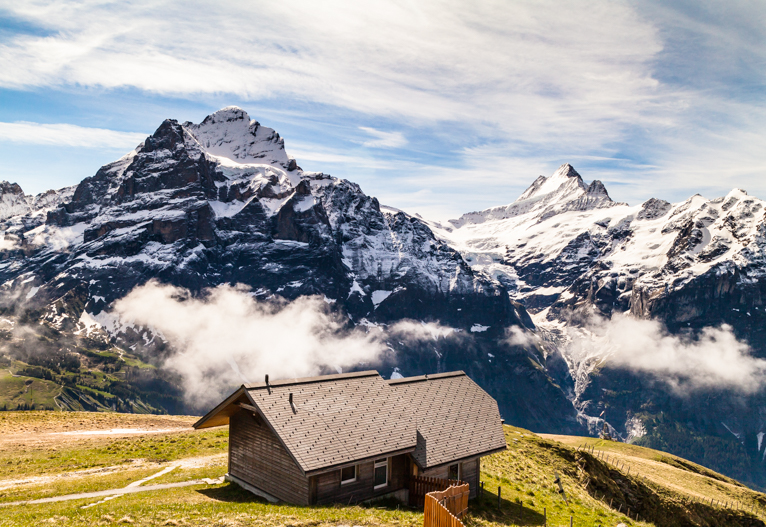
4. Compose carefully thinking about the foreground

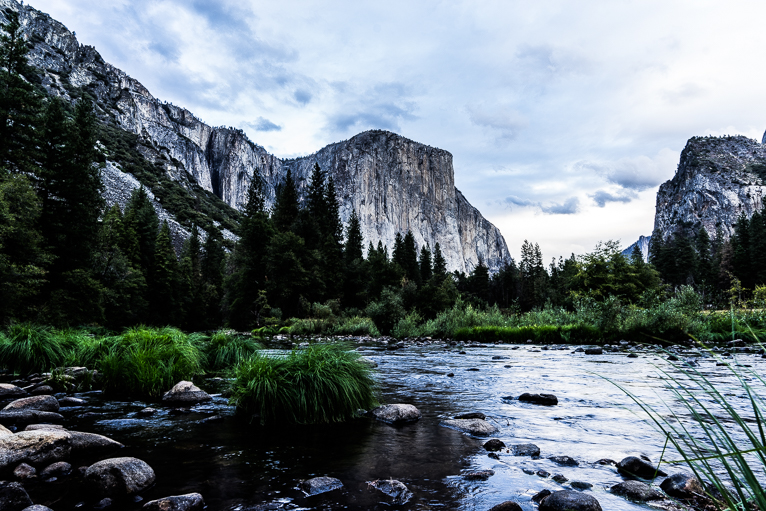
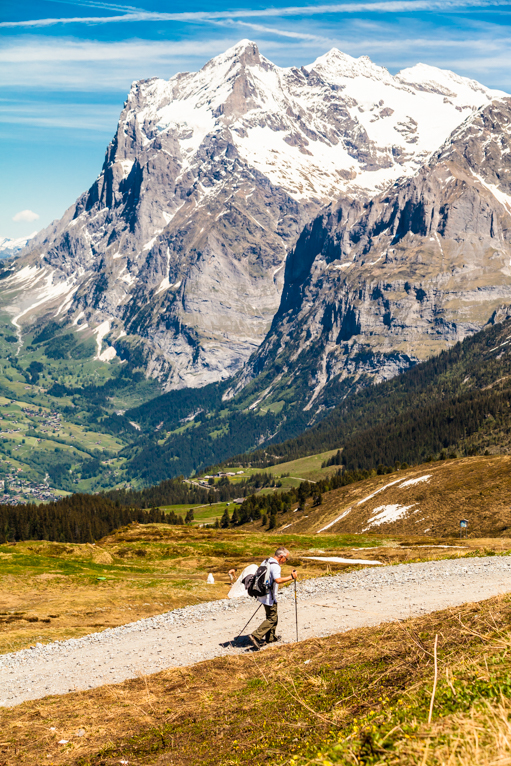
Even if you are photographing a mountain in the distance, don’t forget about your foreground. Good landscape images usually contain something interesting in the foreground. This is especially important in mountain photography when sometimes the mountain range is far in the distance.

So, the next time you are photographing mountains in the distance, think about how you can incorporate a tree, stream, people, animals or even some rocks to give your photo more depth or even a sense of scale. You can also use a mountain range as a background to a city for example.

Guide_to_mountain_photography

5. Increase your depth of field

Any type of landscape photography generally requires a long depth of field as you will want as much of the scene to be in focus. This means you will need to increase your aperture (f/number) so that both your immediate foreground and background will be in focus and sharp.

But it’s really important to avoid closing your aperture too much (f/18 or smaller) as this can actually have an adverse effect on image sharpness. Most lenses have a sweet spot of f/8 to f/11. You can always test yours out to see if this is the case. So it’s a good idea to start at the sweet spot and then close your aperture if needed up to f/16.

Guide_to_mountain_photography

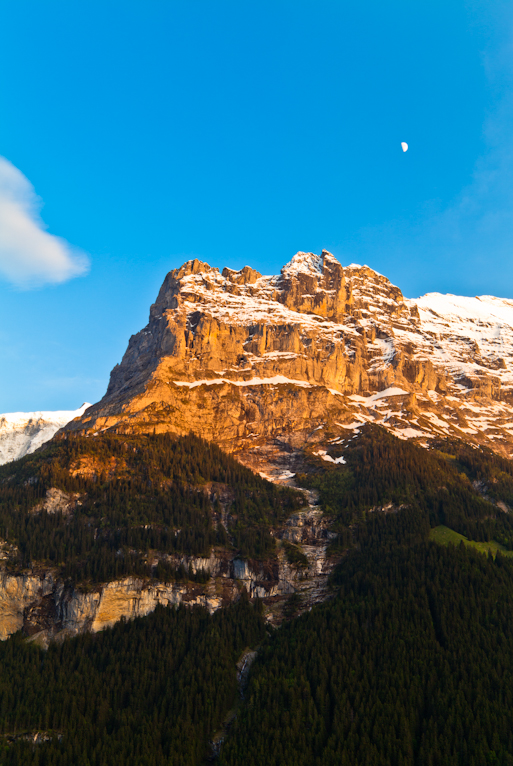
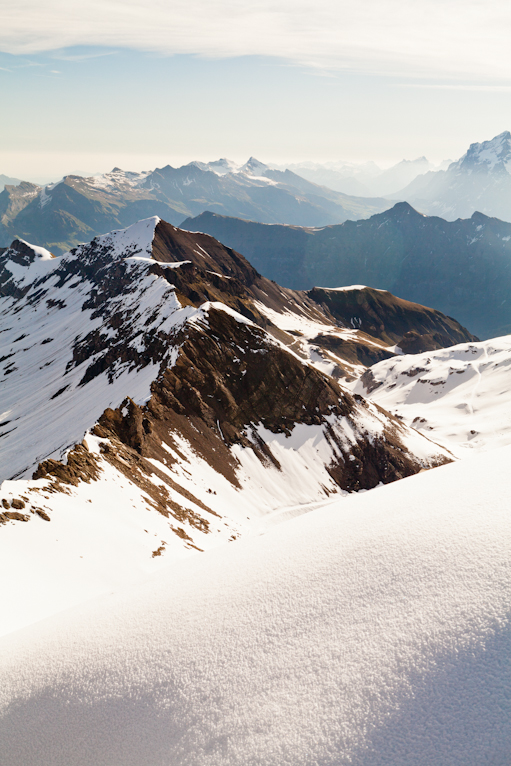
6. Try a vertical shot

As you would imagine, most landscape shots are taken in a landscape format (horizontal). However, don’t be afraid to experiment in portrait (vertical) versions. This works especially well if you want to isolate a narrower view of the scene and lead your viewer into the distance. Do remember though that your foreground is even more vital as you might be showing more of it.

The other added benefit of a vertical landscape shot is that it often helps you cut out any clutter around your image. Remember that a vertical shot has a chance of being used on front covers.

Guide_to_mountain_photography

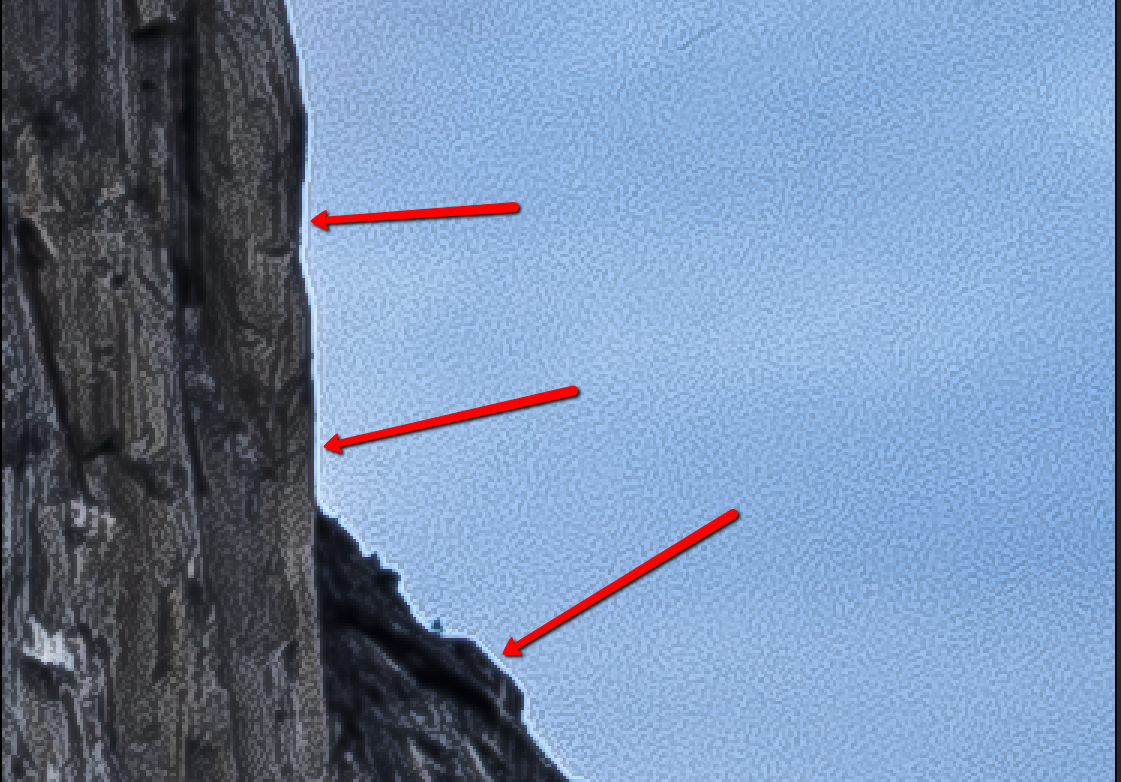
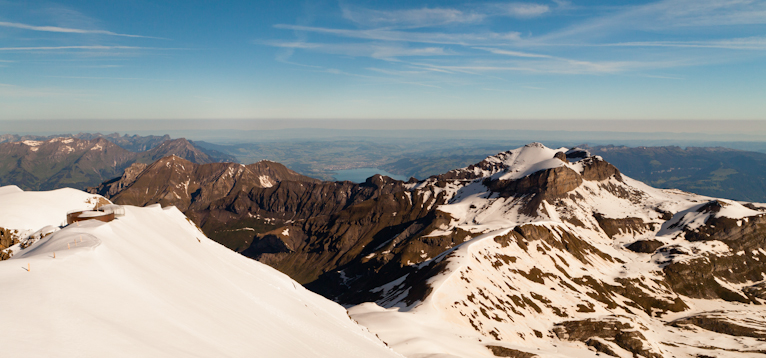
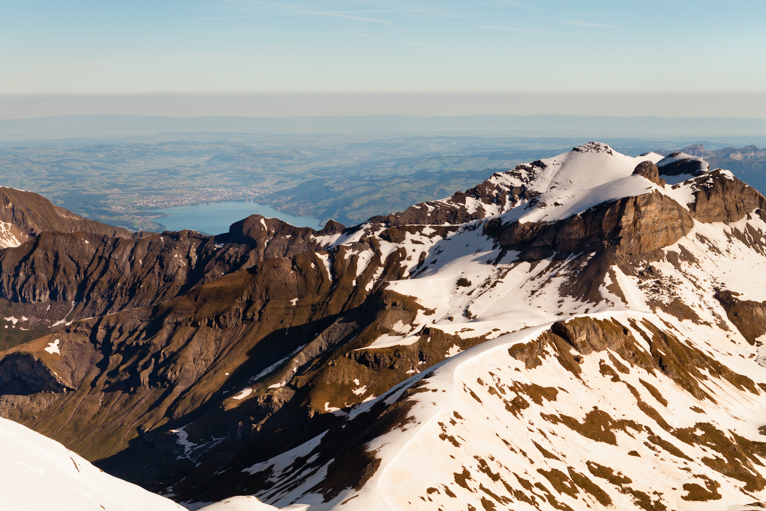
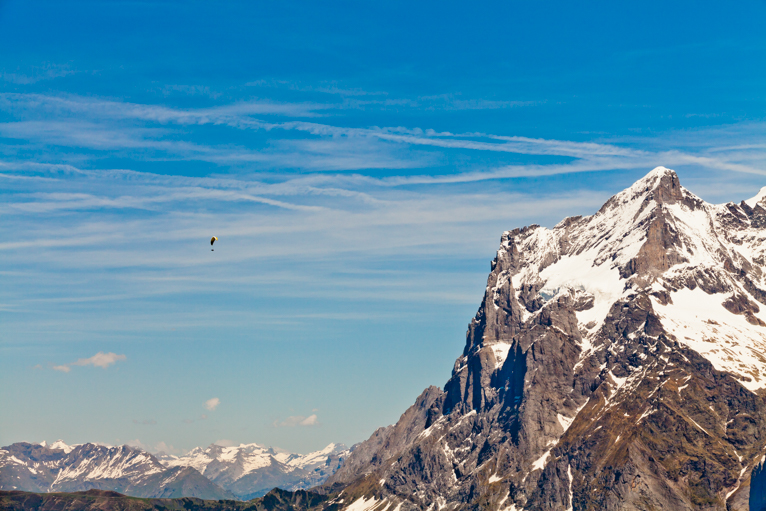
7. Place your horizon carefully

Your horizon line is one of the most important elements of your photo. So think about the rule of thirds and avoid placing the horizon in the middle of the composition if possible. If the scene has an interesting foreground or an uninteresting sky (e.g. flat white clouds) place your horizon high in the photo (along the top line in the rule of thirds). Alternatively, if you have interesting cloud formations or light you could place your horizon lower to show more of the sky and less of the foreground.

While this might sound like a contradiction, keep in mind that rules are there to be broken. So sometimes you may find that a horizon line in the middle of your shots actually works.

Guide_to_mountain_photography

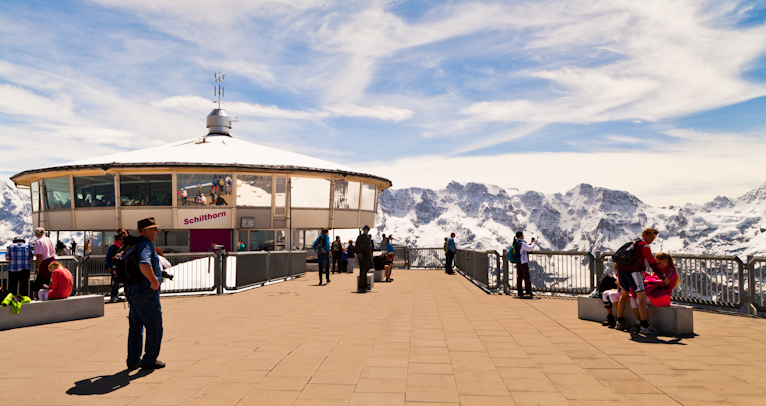
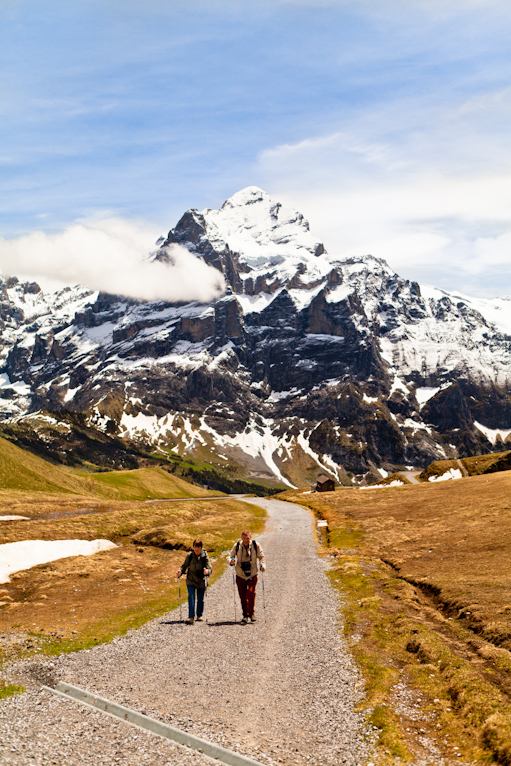
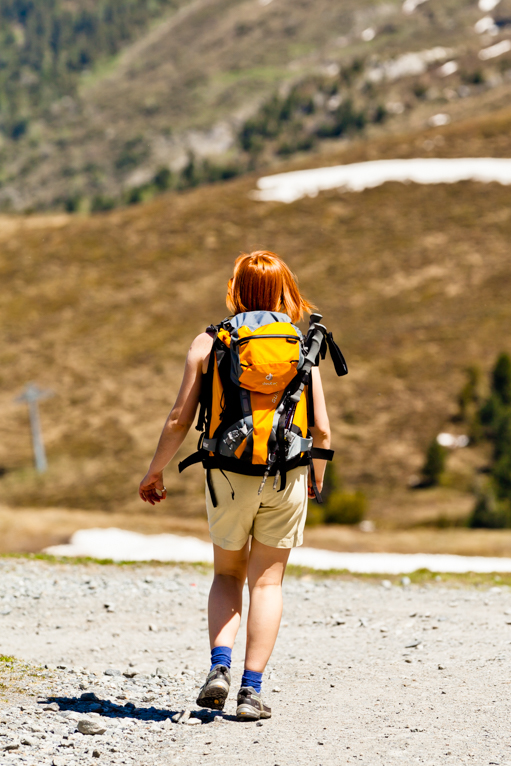
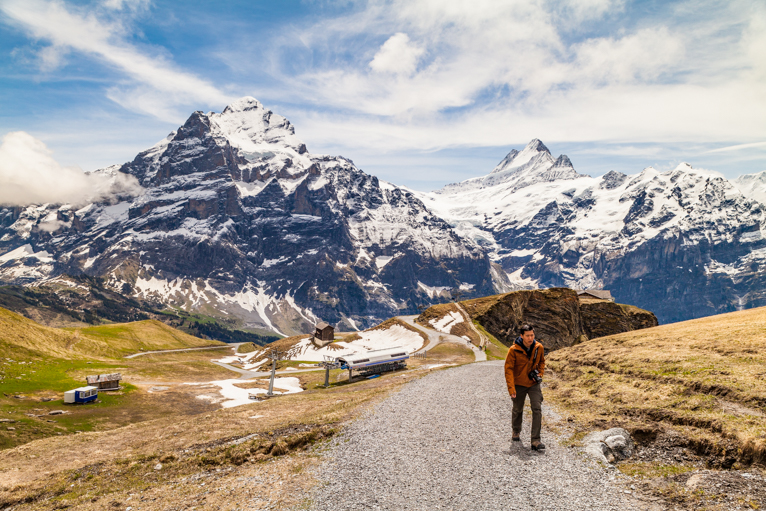
8. Tell a story by using people or wildlife in your shots

One of the best ways to ensure your photos are unique is to include people or wildlife in your composition. Not only can this give your photo context, but it can also act to give your scene a sense of scale. Clearly, wildlife is a little more difficult to incorporate as you need to be lucky for it to be there. But for people, you can always ask travel companions or even put yourself in the shot.
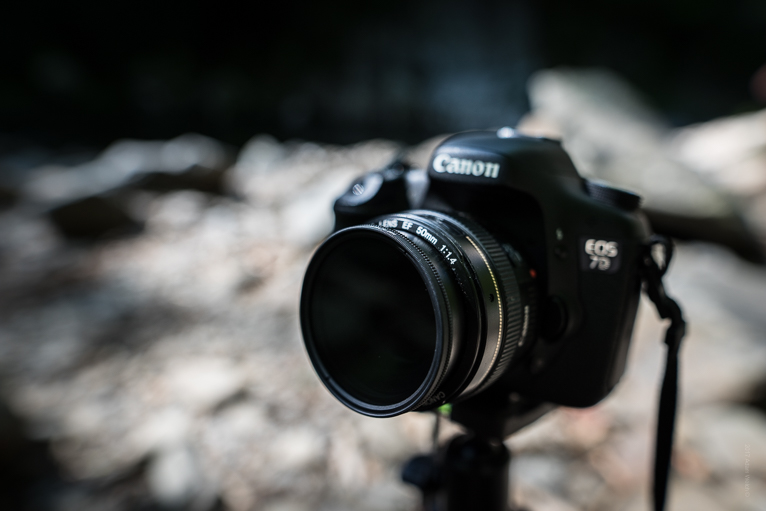
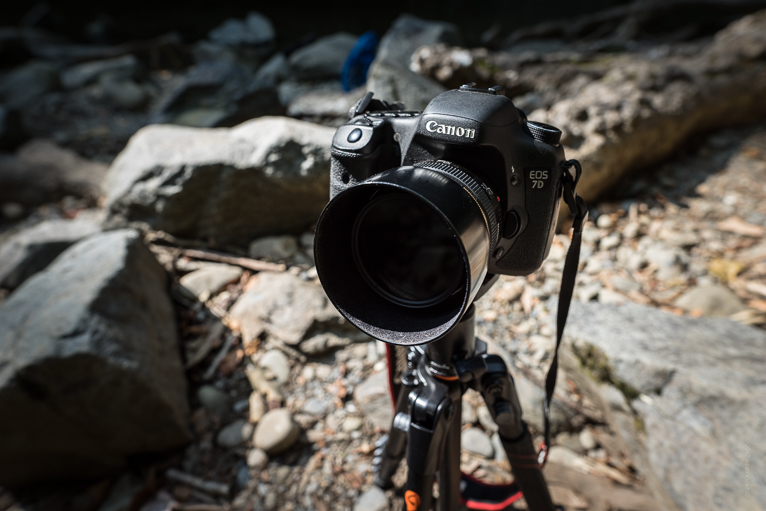
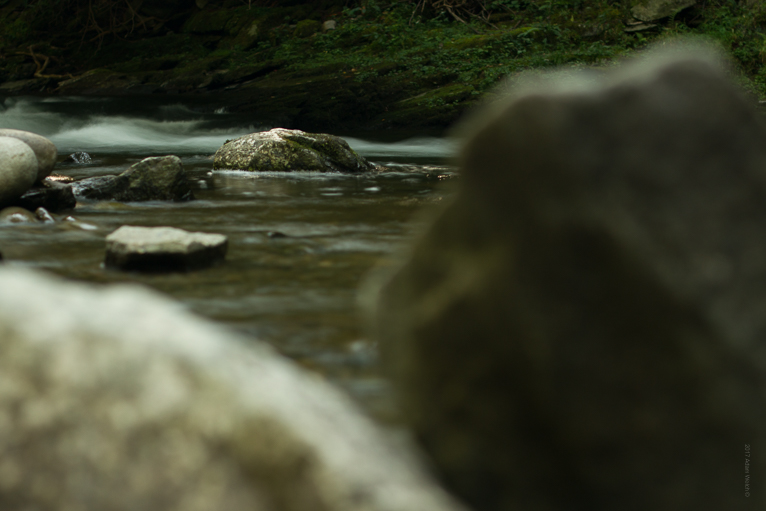
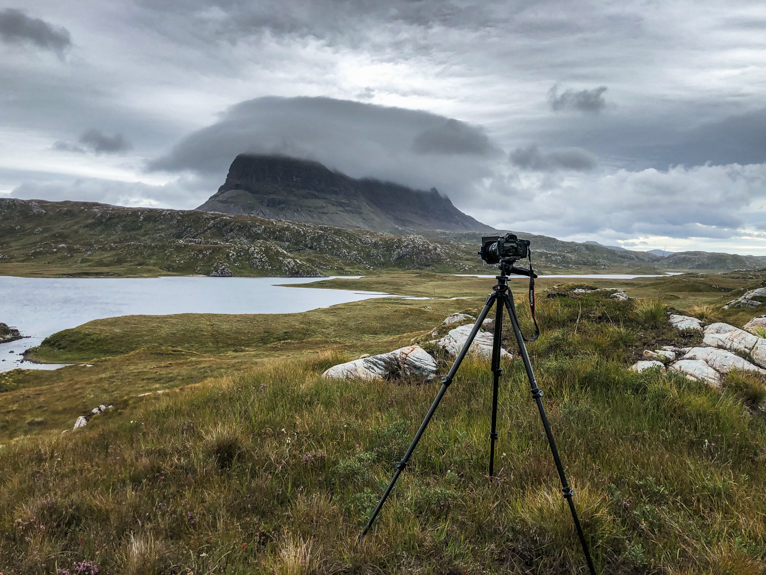
Guide_to_mountain_photography

9. Use a tripod

Tripods are an essential piece of equipment for landscape photography. If you are shooting in low light, such as sunset or sunrise, due to a slow shutter speed your camera needs to be still to achieve complete sharpness. A tripod is the only way.

You could try boosting your ISO higher to be able to shoot handheld, but this could mean losing image quality through excessive noise in your image. Simply put, if you want to capture the best landscape images possible, a tripod is a must.
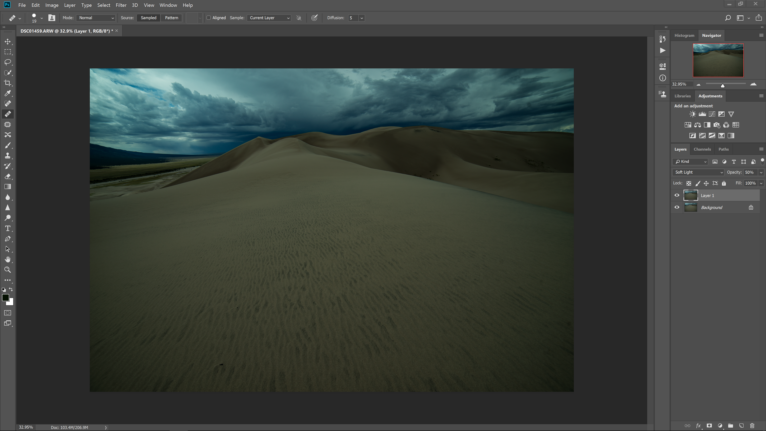
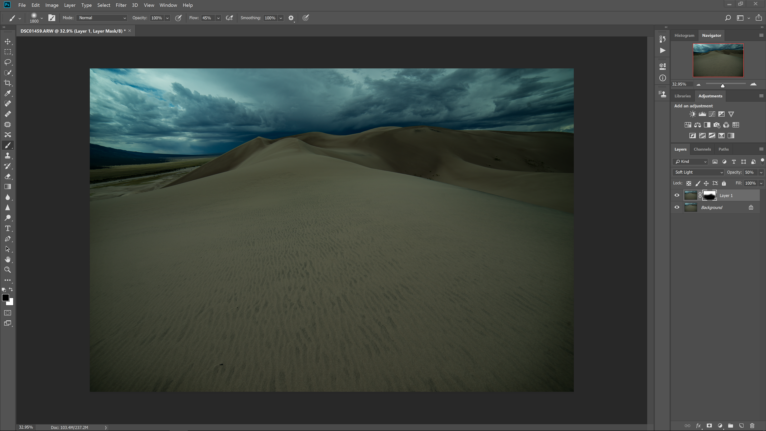
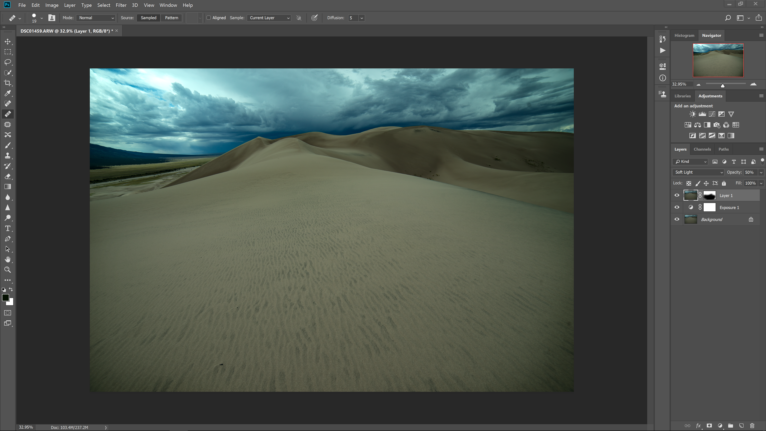
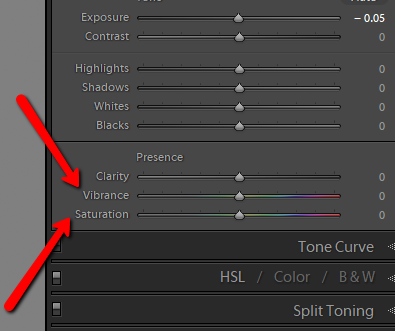
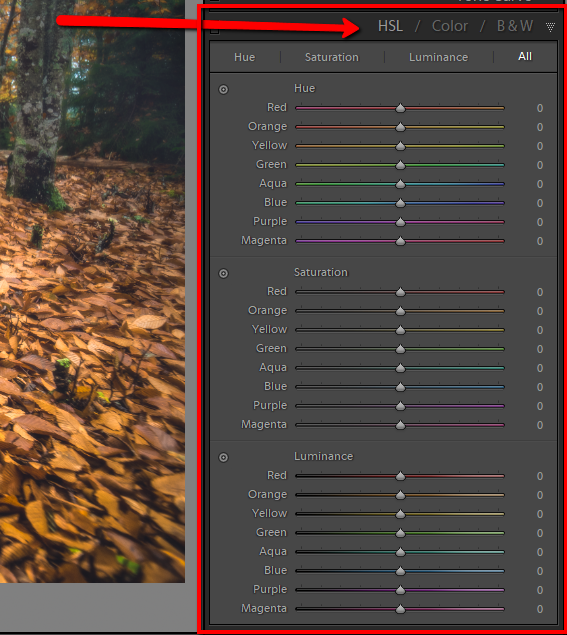
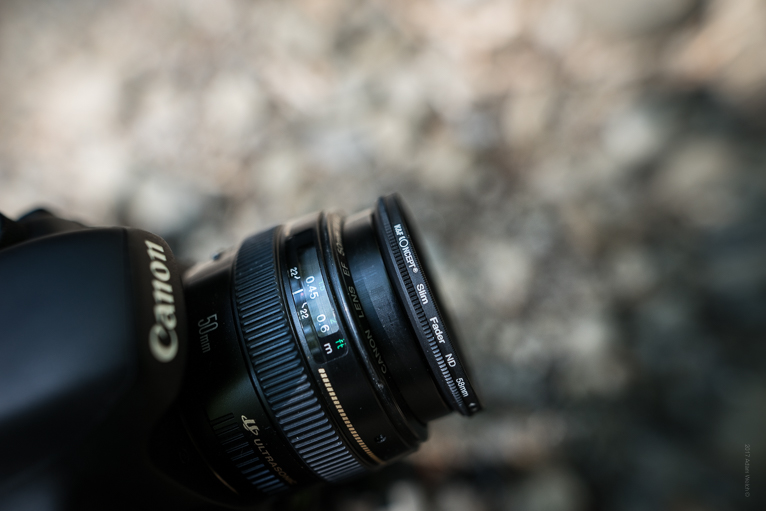
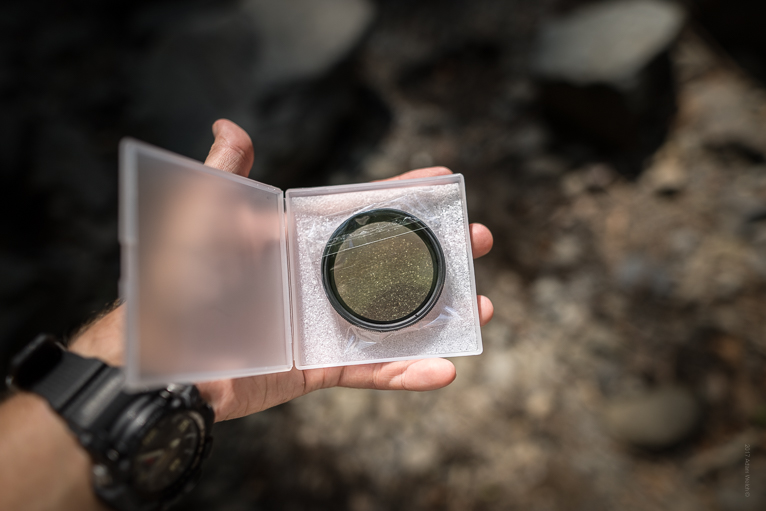
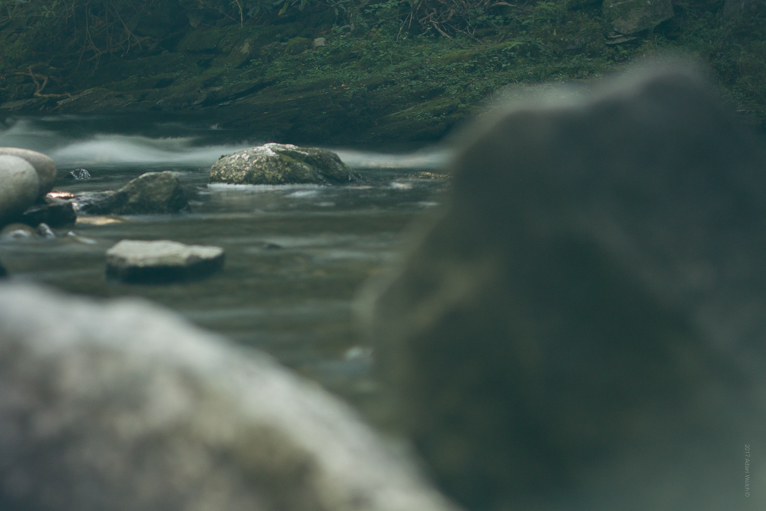
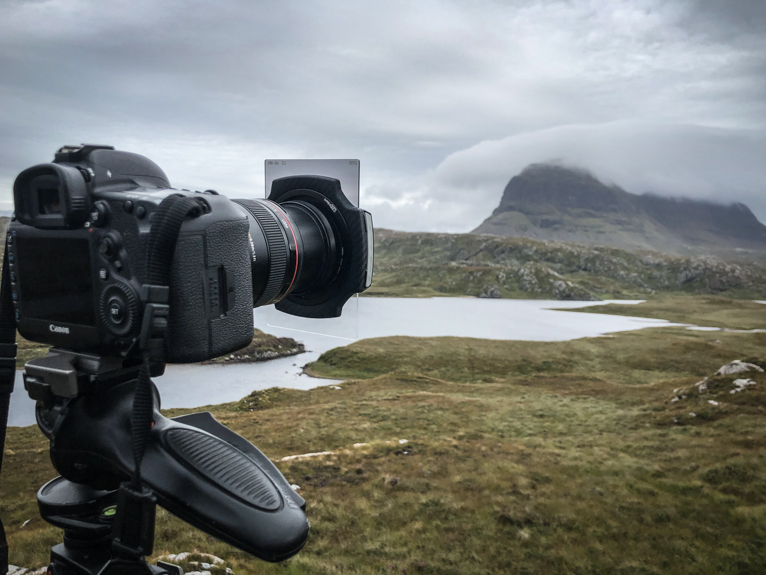
Guide_to_mountain_photography

10. Use filters

Most photographers use filters to instantly improve their photos. I would very rarely take a landscape shot without using some sort of filter. For mountain photography filters can be useful. For example, a graduated neutral density filter can help in situations when you have a high contrast scene (the sky is too bright and the foreground is too dark).

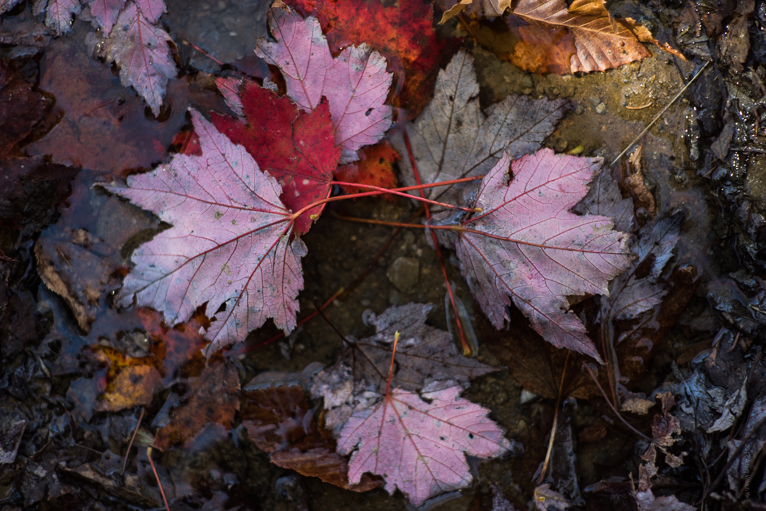
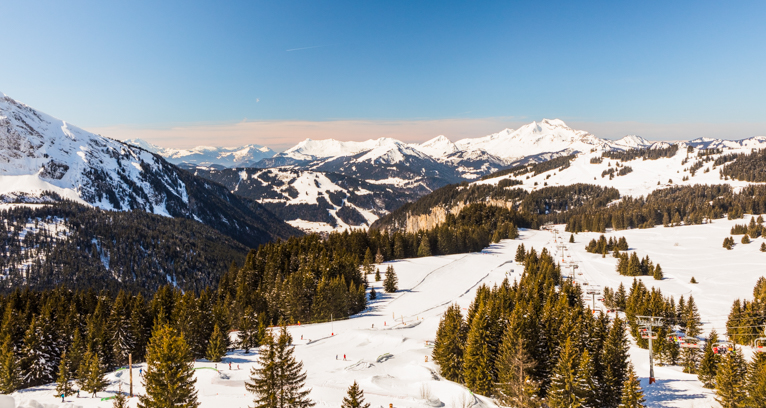
Or a polarizer can help boost colours such as blues and greens and cut haze and reflections in your shots. A polarizer can also be useful if you are photographing winter scenes to cut reflection on the snow. So, make sure you invest in some good quality filters and learn how to use them.

Guide_to_mountain_photography

This short guide to mountain photography will help you improve your photos. The 10 tips above are not difficult to follow or master and like anything, with more practice you will become a better photographer. So, get out there and look to incorporate these into your next mountain shoot.

Photo credits: Kav Dadfar – All rights reserved. No usage without permission.

Filed Under: Tutorials Tagged With: landscape photography tips, mountain photography, Mountains, Photographing mountains

How to Use the Clarity Slider in Adobe Lightroom Classic CC

If you reach way back to Adobe’s Lightroom 1.1 build you will find the clarity slider. After its introduction wayyyy back then the clarity slider has been a favorite weapon of most landscape and even portrait photographers. This slider is a personal favorite of mine just as it is the professed secret love of many Lightroom users. It adds a little “punch” to your photographs and can work wonders with portraits, landscapes, and virtually any other image that appears to be a little visually flat.  And now in Lightroom Classic CC, the clarity slider is still going strong.

But what does the clarity slider do specifically? In this article we’re going to talk about how the clarity slider works and how you can use it more effectively to bring out the full potential of your images.

How Does the Clarity Slider Work?

When we adjust clarity, we are essentially adjusting the contrast of our photo.The difference is that instead of the entire tonal range being adjusted, the clarity slider targets the midtones only. This give the overall illusion of the image become more clear. Look at this histogram of the image above before the clarity was increased by+60…

Now, look at that same histogram after the boost in clarity

The blacks and highlights haven’t been affected very much but the midtones certainly have. And that’s the great thing about the clarity slider: it is far less likely to wash out detail in the areas which are already bright or already dark. This makes it a great tool when working with textures(insert link to texture article) with scenes which need a good bit more contrast without going into overkill in the shadows and highlights. Speaking of overkill…or rather over’clear’(haha)…the next section will talk about some things to watch out for when using the clarity slider.

How NOT to Apply Clarity

Granted, every photo is going to be different, so there are no real “rules” when it comes to using the clarity slider(or anything else in photography) to adjust your images. That being said, a general guideline that will help you immensely is the good ol’ fashioned “less is more” approach. While there clarity slider works great to add some extra power in your photograph it can also cause some unsightly side effects if abused.

Here’s a photo where the clarity has been cranked to +100. Notice anything?

On top of the entire scene now looking a little unnatural, when we zoom in we can see the real problem with using the clarity slider too liberally.

Zoomed to 3:1

Those dreaded halos. I hate them, and honestly, you probably should as well. They are caused by the pixels around high contrast areas becoming too separated from the pixels surrounding them which adds up to the bright banding around those areas. To remedy this, try adjusting clarity locally using the radial or graduated filter or the adjustment brush. If all else falls, simply back off the clarity a bit. In almost all cases less contrast will be more preferable than that dastardly halo effect.While Adobe has drastically refined the performance of the clarity slider in recent years the over clearing a photo can still be problematic. Also note the halo effect is worsened when coupling too much clarity along with too much sharpening as happened with the image above..

Final thoughts on Clarity

The clarity slider is a great tool. It helps us to increase contrast in the midtone luminosity range while avoiding blown out highlights and burnt out shadows. I use it to some extent in virtually every photograph I process. That being said, as awesome as the clarity slider can be, it can also work against you if you push it too far. Always remember to keep things in the scope of the reality you wish to present to the viewer and don’t over clarify your images. On the flip side of that you should also not be afraid to actually lessen the clarity in some of your images. It can actually smooth out skin tones and impart a nice soft contrast to a landscape. With a little bit of knowledge the clarity slider can open up entirely new post processing opportunities that you might not have considered!

Filed Under: Tutorials Tagged With: clarity, clarity slider, landscape photography, Lifepixel, lightroom, lightroom classic cc, mountain photography, Photographer, Photography, photography tips, post processing, processing, Travel photography, tutorial, Wildlife photographer

How to Add Instant Contrast in Photoshop

Adobe Photoshop is a beautiful thing. It allows an incredibly wide range of artists, designers, creatives, and especially us photographers to inject a little bit of creative juice into their work and see it come to life. And while Photoshop can be enormously complex there are so many simple, straightforward edits you can use to instantly transform your photographs.

One of these goes back to the basics of photo editing: exposure and contrast. There is a great way to quickly add contrast to your images by using PS blend modes, more specifically the “soft light” blend mode. You may be thinking “But why not just add contrast with the contrast adjustment?” Well, you can for sure…but it’s not exactly the same. And why not expand your photographic editing horizons to try something new?

Soft Light Blend Mode

The soft light blend mode is one of seven PS blends that make up the “contrast” group. These modes all use varying mathematical wizardry to accomplish a similar effect which is to make darks darker and lights lighter in relation to one another. While that is an incredible over-simplification it’s not entirely inaccurate.

The soft light blend mode bases itself on whether pixels are lighter or darker than 50% gray. If a pixel in your image is darker than 50% gray it will be darkened further. If a pixel is whiter than 50% gray it will be lightened. The result? More contrast. Not only that, but this contrast is wholly dependent on image and it’s tonal makeup.

Adding Contrast with Soft Light Blend Mode

First, duplicate your base photo layer by using the keyboard shortcut ‘Ctrl+J’(Cmd+J for Mac).

Next, select the soft light blend mode from the blend mode drop down list. Alternatively, use the keyboard shortcut ‘Ctrl+F’ to do the same thing a little faster. You will instantly notice a fairly drastic change to your photo. Namely the increased amount of contrast.

To really control the amount of contrast I highly recommend adjusting your layer opacity until you reach the overall level of contrast for your particular image. In the case of soft light the opacity and fill accomplish the same outcome so it is your choice which to use.

The real fun begins when you decide to add a layer mask. Don’t worry! Masks aren’t something to be afraid of(in most cases) and they allow you to completely take charge of how an edit is applied in PS. You’re about to see how easy it is right now.

Adding a Layer Mask

To add a layer mask to your soft light blend layer simply click on the “add a mask” icon at the bottom of the layer panel.

Guess what? You’ve just added a layer mask! It’s that simple. Now, you’re free to paint in or out the soft light contrast to virtually any degree and location you choose. Just adjust the size and opacity of your brush to achieve the desired effect.

Add in some a quick increase in exposure and we’re left with the finished product. All done within a matter of minutes.

Some Final Thoughts….

One of the fun and interesting aspects of post processing is discovering all the different methods of achieving certain editing effects. Adding contrast to a photograph is one of the most basic edits a photographer can make to instantly add power to a photo. There are many ways to do this and you’ve just learned one. Try using the soft light blend mode technique to add contrast in a smarter, more controlled way. The soft light blend mode in PS makes it easy to quickly and effectively add punch to your images and it is something I use to some extent on virtually every photograph I process.


Filed Under: Tutorials Tagged With: camera, cameras, Getting started, landscape photography, Lifepixel, lightroom, mountain photography, Photographer, Photography, photography tips, photoshop, processing, Travel photography, Wildlife photographer

Making Fall Colors Pop with Adobe Lightroom

Here in the Northern hemisphere Autumn is in full swing. The colors of the leaves are changing and giving their last big show as we head into winter. The frosty mornings and golden hues offer outstanding opportunities for photographers to capture these beautiful Fall colors before they’re gone until next year.

In this article we’re going to talk about how you can make those bright Fall colors really pop in Adobe Lightroom! It doesn’t take much to make your images of the season standout. Let’s get started!

Bringing Out the Color

The main focus of majority of Autumnal photos is of course color. Bright Earth-tones and muted flavors of of brown and gray intermingle together to produce an incredible palate of gold. Here’s how to make all those beautiful tones come to the forefront in your image. We’ll begin with the Vibrance and Saturation sliders in the basic Development Panel of Lightroom.

Vibrance

The vibrance slider brings out the mid tone saturation of colors. It comes in handy when you want only the less saturated colors in the photo to be amplified. Look at this image before the vibrance was adjusted.

And now after

With +50 Vibrance

The key use of increasing the vibrancy of a photo is to maintain a natural and pleasing look to the colors that need to be intensified.

Saturation

Saturation and vibrance are closely related but at the same time affect different aspects of your image. Whereas vibrance boosts the colors which are less saturated, the saturation slider increases the color saturation of all the colors. This means that if a color is already well saturated it will become even more so when this slider is used. Here we have an image with color already well saturated.

If we boost the overall saturation, it leaves the image looking overly saturated with the color appearing fake and unnatural.

With +40 Saturation

The saturation is increased to the point of looking gaudy. So, be very careful when applying the saturation slider to the entire image.

The HSL Panel

If you want to get a little more advanced when edited your Fall photos then look no further than the HSL panel in Lightroom. It’s here where you can take full control of color.

The aptly named HSL panel adjusts the hue, saturation, and luminance of color. This is the master control station for color within your photo. Use this to not only affect the brightness and saturation of specific colors but also their hue. Here’s a photo before any HSL adjustments.

And now with the orange luminance and saturation increased…

The hue adjustments make colors appear more or less true to their original tone. For example, blue can appear more green or more purple; oranges more yellow or more red. Here we’ve changed the oranges to a lighter, more yellow hue.

While here, to a darker red hue.

Some Final Thoughts on Fall Photos…

Fall is a wonderful time of year for photography. If you’re seeking to make your images of Autumn to stand out from the crowd, try these simple tips that will help all those beautiful colors of the season shine through! Don’t be afraid to adjust the hues of the colors until they reflect how you felt about the scene. Likewise, don’t hesitate to actually DECREASE the saturation and vibrance of the colors in order to reach the final look that you want.

Filed Under: Tutorials Tagged With: camera, cameras, landscape photography, Lifepixel, lightroom, mountain photography, Photography, photography tips, photoshop, processing, Travel photography

Review: K&F Concept 58mm Variable Neutral Density Filter

Neutral density filters(ND) are one of the staple components of virtually every serious landscape photographers gear bag(read some outdoor photography tips). The great thing ND filters allow us to do is shoot longer exposures in bright light without overexposure. A good analogy I always like to use is that ND filters are light sunglasses for your lens. Neutral density filters are a great way to remain flexible with your shooting even when conditions aren’t ideal.

Like most photographic equipment, you often get what you pay for…. That doesn’t mean that every piece of budget gear isn’t capable of yielding great results. The K&F Concept 58mm ND Fader Variable Neutral Density Adjustable ND Filter is quite a mouthful to say, but essentially it is a neutral density filter that is capable of shooting at various shades of darkening. This particular filter ranges from ND2-ND400. If we’re speaking in terms of f-stops, then it equates to 1-8 ⅔ stops of light reduction. The version I tested was the 58mm size and I used it with my trusty Canon EF 50mm F1.4.


Build Quality

The filter arrived well packaged and included a nice micro-fiber cloth along with a standard padded plastic filter case.

Overall, I was extremely impressed with the build of this ND filter from K&F. The material of the two elements is listed by the manufacturer as “optical quality glass” with the body of the filter likely being aluminum. Originally I had thought the housing was made from some type of resin but after a scratch test it turned out to indeed be metallic.

I was also pleased to note that both the stock lens cap and lens hood still worked perfectly while the filter was attached.

The filter itself functions by turning the outer ring to the desired darkening setting is reached. This ND filter functioned extremely smoothly with no binding or sticking points.

Optical Performance

As I mentioned earlier, there is most often an unavoidable compromise between cost and quality(with a few exceptions) when it comes to camera gear. The K&F Concept variable ND is a budget ND filter currently retailing for around $20US from both Amazon and Kentfaith.com. The performance of the filter was a mix of great to, well, not so great. When used at it’s lowest optical darkening setting, the results were wonderful for a filter at this price point.

1/100 second

Moving a little darker to approximately 3 stops of light reduction, the results were still great and allowed me to shoot long exposures with no real color tinting or vignetting to speak of from a practical standpoint.

1.3 seconds

Now, moving onto the darkest setting of ND400, or approximately 8 ⅔ stops, we see some extreme problems arise in terms of color tinting and image degradation.

25 seconds

For a $20 ND filter, I was honestly surprised at how well the filter performed up till now. And from a real world point of view, the filtration offered between ND2 and ND400(1-8 ⅔ stops) was outstanding. This lends me to believe that he overall results from this filter are perfectly workable from approximately 1 to 3-4 stops of darkening. Here are three more images showing the progression of image quality across the range of filtration. It’s interesting to note that while the last image shows significant quality reduction, the massively apparent purple tinting observed in the previous example is virtually nonexistent. This is possibly due to the lengthy exposure of 25 seconds used for the image above. The white balance of my camera was set to ‘Auto’.

1/200 second

1.6 seconds

4 seconds

Final Thoughts….

Given the low cost of this variable ND filter from K&F Concept, I have no problem with the limited performance results achieved from my tests.

Pros:

  • Low lost
  • Sturdy build
  • Looks great on the camera
  • Smooth operation

Cons:

  • Extreme color tint at dark settings

The fitler itself is well made, looks great, and lends itself to relatively respectable performance for a filter costing around $20US. Beginners will love it for its quality to cost ratio and even experienced photogs could find a place for it in their kit. The K&F Concept 58mm ND Fader Variable Neutral Density Adjustable ND Filter is a low cost option for those looking for a variable ND filter with good performance in the 1-4 stop range of light reduction. The diminished performance at the far end of the filters capabilities are indicative of the cost of the product and expectations should be tempered with that information in mind!

Filed Under: Gear Tagged With: Canon, filter, filters, K&F, landscape photography, Lifepixel, mountain photography, nd filter, neutral density, Photographer, photographers, Travel photography, Wildlife photographer

8 Tips to Improve Your Mountain Photos

Mountains have been captivating photographers ever since the early cameras were invented. Renowned photographers like Ansel Adams spent a considerable amount of their time capturing landscapes that highlighted the beauty of them, however, capturing an image that might do the scene justice isn’t always straightforward. Follow these simple tips to help you next time you are looking to photograph mountain scenery.

Kav Dadfar_Mountains_6

Scout The Location

There is no doubt about it, if you want to capture great photos of mountains, you will need to do your research before you even leave home. That means understanding everything you possibly can about the location, the weather and the direction and intensity of the light, although that research is only the start. Once at the location you often have to scout the location to find the best viewpoint. This means you need to allow yourself enough time to so that you are able to visit the location and still have an opportunity to go back if you need to.

Kav Dadfar_Mountains_3

Catch The Best Light

It’s no secret that a big element of any sort of landscape photography is the lighting. Early mornings and late afternoons offer the best light as the low sun enhances shadows and saturates the colours. But that doesn’t mean you can’t photograph at other times of the day. You just need to consider the direction and intensity of the light, but try to avoid photographing landscapes in the midday sun. The harsh light can make a scene seem flat and uninteresting.

Kav Dadfar_Mountains_2

Consider The Foreground

Often, when photographing mountains, your immediate foreground is clear because you are some distance away from the mountain range that you are capturing. This means your foreground becomes incredibly important to your image. You need to avoid having too much “dead space” in the photo so try to find something that can add a point of interest to the foreground. Not only will it enhance the photo, but also lead the viewers’ eyes into the distance and the mountain range.

Kav Dadfar_Mountains_4

Bad Weather Adds Mood

There’s nothing enjoyable about being caught in the cold and wet out in the wilderness. However, bad weather can lead to incredibly stunning and moody photographs of mountains. If you are brave enough to head out, you can capture photos that really are incredibly unique and powerful. Stormy dark clouds are great backdrops for mountain ranges, whilst fog can add a completely different element to your photos. Always remember that mountains are dangerous places where the weather can change dramatically without notice, so always make sure you are well prepared and most importantly stay safe.

Dreamtime_Mountains

Experiment In Portrait Mode

The majority of time you will be photographing in landscape mode, although sometimes mountains look great when photographed in portrait mode. But your foreground (or the sky) becomes even more important when photographing in portrait mode, so make sure that you are paying close attention to these parts of the composition.

Kav Dadfar_Mountains_7

Consider Your Horizon

Whatever the landscape that you are photographing, where you place your horizon can have a huge impact on the photo. If you have an interesting foreground, place your horizon further up in the image so that the viewer sees more of the foreground. If your mountain range is being supported by a dramatic sky, place your horizon lower so that you show more of the sky. The majority of time you need to avoid putting your horizon in the middle of the photo.

Kav Dadfar_Mountains_9

Add A Person

One of the big challenges when photographing mountains is conveying the sense of scale. The best way to achieve this is to add a person to the composition. The viewer will find it much easier to interpret and get a sense of scale when there is a person in the photo. The other advantage of introducing a person in the photo is that it can make the image tell a much more of an interesting story rather than a generic landscape.

Win a FREE Camera Conversion!

Kav Dadfar_Mountains_10

Get The Technical Elements Right

You have done your research, scouted the location, worked out the best time to take the picture and composed it in your mind. Now you need to ensure that the final result is technically perfect. The last thing you would want is for your image to be let down because it’s not sharp.

  • Close the aperture to increase the depth of field. Generally you will be looking at f8 – f16
  • When using long exposure, ensure you lock up the mirror on your camera to avoid vibrations which will blur the image
  • For long exposures you will need a tripod. It is also a good idea to use a remote release cable to avoid camera shake. If you don’t have one, simply set your camera mode to timer (usually 2 or 3 sec)
  • A polarization filter can be invaluable as it can remove reflections (especially useful when photographing near snow or ice and also water) and can also really enhance the blues in the sky which contrast well against mountain ranges

Kav Dadfar_Mountains_11

Mountains make wonderful subjects to photograph, and if done well can stand out in any portfolio. Just follow these simple tips and you will be well on your way.

Now it’s your turn. Share your awesome mountain photos below.

Photo Credits: Kav Dadfar (All rights reserved). Dreamstime

Share
Pin
Tweet
Email
Share

Filed Under: Tutorials Tagged With: landscape photography, mountain photography, Travel photography

Blog Topics

  • Tutorials
  • Inspiration
  • Locations
  • Gear
  • News
  • Other/Misc

What our customers say:

Life Pixel has been a life-changer for me. Continue reading
Eric GConnecticut
Read more reviews
I am more than satisfied with the service I received Continue reading
Christopher JCanada
Read more reviews
I am more than pleased with the conversion job that you did Continue reading
LOUIS MWaco, Texas
Read more reviews
I am VERY impressed with his knowledge of your products and his patience in explaining it to a novice like me. Continue reading
Lynn FEssex, Maryland
Read more reviews
Things will only get better from here thanks to all of you. Continue reading
Phillip FRedding, California
Read more reviews
The Lifepixel newsletter reminds me of not having expressed my gratitude for the excellent job you made. Continue reading
Michael GGermany
Read more reviews
Your staff went above and beyond the call of duty to make sure everything was handled in an excellent manner. Continue reading
Paige RPearland, Texas
Read more reviews
It has given my old camera a new life, I will enjoy using it again. Continue reading
William PAustralia
Read more reviews
Excellent service and the camera works just great Continue reading
Hans FairhurstAustralia
Read more reviews
I just got my converted camera back from you guys. THANK YOU!!!! Continue reading
Anne CutlerForest Knolls, CA
Read more reviews
infrared_filter_choices_sidebar
ir_conversions_explained_sidebar
----------- Watch More Videos -----------
infrared_quick_start_guide

Ready to start shooting Infrared?

Convert My Camera

Subscribe To Our Newsletter

Receive updates, tips, cool tutorials, free stuff and special discounts.

Learn the Basics

  • Video
  • Start Here
  • Filter Choices
  • Focus Calibration
  • Lens Considerations
  • Camera Considerations
  • Place Your Conversion Order

Resources

  • Galleries
  • Lens Hot Spot Database
  • IR Tutorials
  • FAQ
  • Infrared Filter Choices
  • Infrared Photography Guide
  • Infrared DIY Tutorials

Company

  • Why Choose Us
  • Get In Contact
  • Job Openings
  • Write For Us
  • Affiliate Program
  • Terms of Use
  • Privacy Policy
  • Home
  • Start Here
  • Galleries
  • Tutorials
  • FAQ
  • Blog
  • Why Choose LifePixel?
  • Shop
  • Contact

Copyright © 2025 Life Pixel Infrared - All rights reserved - LifePixel Infrared Photography IR Conversion, Modification & Scratched Sensor Repair