• Cart
  • Checkout
  • My Account

Infrared Conversions, IR Modifications & Photography Tutorials | Life Pixel IR

The world leader in infrared conversions, modifications & DIY IR conversion tutorials. Scratched sensor replacement, UV & Full spectrum conversions.

The world leader in infrared camera conversions

866.610.1710
  • Home
  • → Start Here ←
    • 1 – Introduction
    • 2 – Filter Choices
    • 3 – Focus Calibration
    • 4 – Lens Considerations
    • 5 – Camera Considerations
    • 6 – Start Shopping
  • Galleries
    • Infrared Photography
    • Infrared Time Lapse
    • Infrared Cinematography
    • Infrared Stop Motion
    • Ultraviolet Photography
    • Forensic Photography
  • Education
    • Training Sessions
    • How To Shoot Infrared
    • AR Coated Infrared Filters
    • Lens Hot Spot Database
    • Photoshop Video Tutorials
    • Infrared Issues & Solutions
    • IR Basics in Photoshop
    • Camera Quick Start Guide
    • DIY Conversion Tutorials
    • IR Photography Primer
    • Secondhand Cameras
    • Wall Of Shame
  • Workshops
  • FAQ
  • Blog
    • Tutorials
    • Inspiration
    • Locations
    • Gear
    • News
    • Other
  • Why Choose LifePixel?
    • Submit Your Review
  • Contact
  • Shop

Remembering Why You Shoot

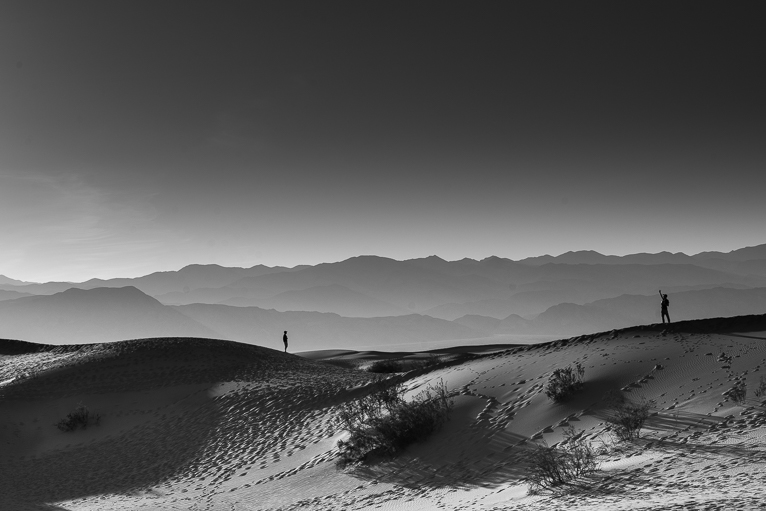
There are times when the most simple of explanations eludes us. When it comes to photography, or more specifically to the point of making strong photographs, we must be fully aware. Not just aware of our settings and camera placement but also our intent. Oddly enough, it’s frightfully easy to lose this awareness during the very process of doing the thing which we love. What I’m so gently hinting at here is this: do you know why you make photographs? Are you aware on an internal level why you you shoot what you shoot?

In this article we’re going to take a look at why we can so easily lose sight of our purpose while making photos. This artistic straying can happen gradually or on a picture by picture basis. Perhaps more importantly we will also examine how you can regain your a creative awareness and become a more deliberate, purposeful photographer.

Obsessing with the Technical

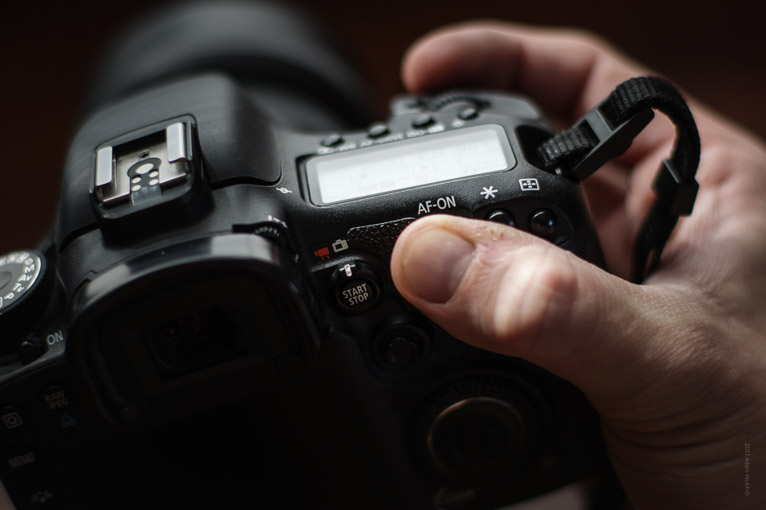
When you think about it there are arguably very few absolutes when it comes to photography. So, why does the pursuit of technical perfection occupy such a large corner of our creative minds? Never place more emphasis on the technical aspects of photography than you do on expressing the feeling of a scene.

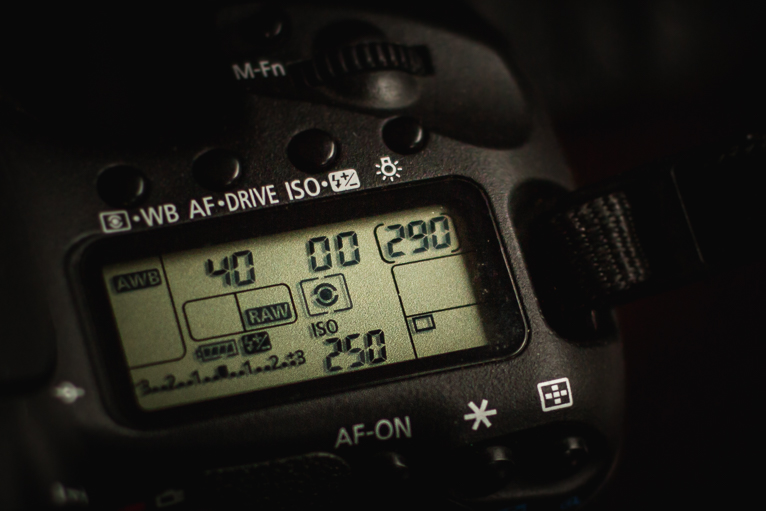
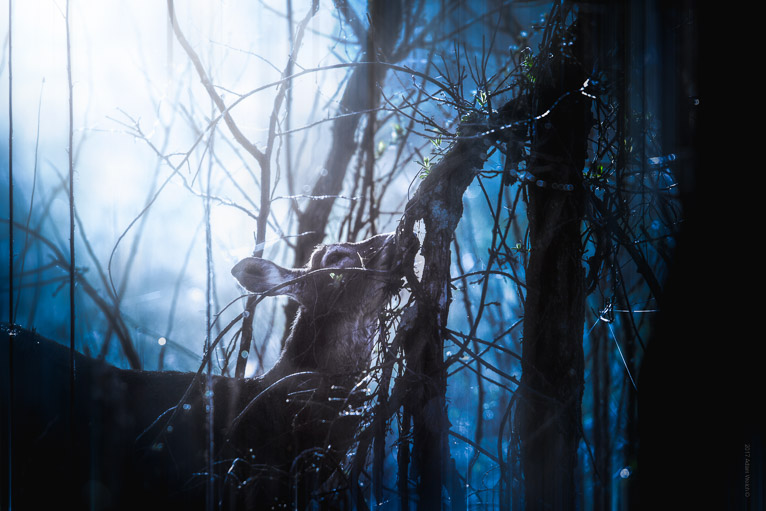
How many incredible photographs have you seen that are underexposed? Over exposed? Maybe they are slightly out of focus. The worth of those photographs or any other image doesn’t lie in the balance of a histogram or tack focus. They move us because they were made with intent and show the truth and beauty of a moment. Don’t put so much attention into the way you capture a photograph that forget why you wanted to shoot it in the first place.

Burnout

If you make photographs long enough there will come a dark and wretched day when you simply become tired of it all. It might happen sooner than later or it might take years but to some degree or another you will have to face burnout. When you become tired of shooting there just doesn’t seem to be anything out there to make pictures of that interests you. You just don’t get the joy from the process as you once did.

Don’t worry…this literally happens to us all and it isn’t limited to one event. There are highs and lows throughout a photographer’s journey. The key remedy is somewhat paradoxical, however. To beat burnout you take a break but not altogether stop shooting. Try to take a rest from your camera(and it from you) and breathe for a while without making photographs. When you begin to say “Man, I wish I had my camera with me” you will know you are cured. Do this as needed or as directed by a photo writer….

Self-Doubt

The best way to forget why you make photographs is by trying to make them them exactly the way someone else does. Be mindful that there is an incredibly fine line between inspiration and emulation. Never allow yourself to sacrifice how you want to capture a photograph based on the idea that it’s not the “right way” or just because it might not look like someone else’s version.

There could be an entire book written on this point but I’ll do you the favor of brevity. It’s perfectly alright to absolutely love the way other photographers images might look; that’s great, learn how to make yours in a similar way. But only do this if it fits with your own vision. Don’t do it for ‘likes’, shares, or any other reason that would otherwise cause you to shoot with anything but your own photograph in mind.

Final Thoughts….

Today, it’s easier than ever to allow yourself to forget why you make your photographs. We are constantly bombarded by new and better equipment that make us lose sight of what makes a good photo. Sometimes we simply become tired of shooting and this causes us to forget why we love making images at all. And what maybe be the most common danger, sometimes we doubt our own instincts as photographers. All these reason, and no doubt others, can make us forget our own intent. Luckily, they can all be overcome and if you find yourself in any of the circumstances I’ve mentioned then I hope this article gives you a helping hand. Have fun with what you do and always remember why you do it!


Filed Under: Inspiration Tagged With: black & white, camera, Canon, composition, create, Getting started, inspiration, inspire, Lifepixel, perspective, Photographer, photographers, photography tips

Working with Texture in Photography

As a word, “texture” carries quite a few meanings. For photographers, texture is a concept that is often difficult to explain. It’s almost as if it has to be shown instead of merely described. Texture is simply the pronounced visualization of the surface feel of an object which is photographed. Now, you may be thinking “well, everything has texture…”. While this is true, the way in which that tactile nature of whatever you’re shooting can play a huge role in the overall mood and expressiveness your final image. Understanding texture in photography means learning how to recognize the importance(or lack of) the portrayal of the physical surface of a substance will impact the viewer.

I know I know…how boring can you get, right? Just hang in there and read on. You might be surprised just how much incorporating and focusing on textures can strike increased interest in a photo. We’ll talk about how the directional properties of light morph the textural feel of a scene and how you can put that to work for you. Let’s get started!

Communicating Texture

How do you transmit a physical sense into a two dimensional photograph? It all comes down to the type of thing you happen to be shooting and how you position your focus and your camera. Generally, there must be some degree of angle involved between the subject and the camera. This essentially places the surface of whatever your shooting into profile and thereby better displays whatever the irregularities might be into sharper relief. Here, have a look at this. It was shot with the camera directly overhead and perpendicular to the cloth.

This is a rather mundane example but it does a good job at displaying the relationship between camera angle and texture. Notice how with the straight on camera position all the texture within the cloth is muted and visually flat. This next image is made after moving the camera to approximately a 45 degree angle to the subject.

This places all the nonuniform attributes of the cloth at an angle and makes its texture more pronounced. If you want to amplify the texture of a scene, try different shooting positions and avoid photographing the subject from 90 degree angles.

The Effects of Light

Extremely closely related to camera position is the directionality of the light falling on your subject. Shadows are key when showcasing texture. The textures of an image will be enhanced by the addition of contrast which is, afterall, the differences between lights and darks in a photo. The direction of the light will determine how and by how much the contrast of the texture will be determined. The more contrast, the more obvious the texture will become. If you’re ready for another effective yet basic example, you’re in luck. These next two images are of the same floor tile. The first was shot under very diffused natural light from above.

The next photo was shot with the window blinds open which produced a much harsher directional light. And the camera angle was lowered to enhance the lighting effect even more.

All the textures within the tile are brought out due to the shadows produced by the side lighting and camera angle. These were not at all evident with the previous lighting conditions.

Using Depth of Field

Photographs that center around textural elements work well when shot in abstraction and/or with shallow depth of field. The small plane of focus adds contrast to the texture by framing it with foreground and background blur. Here’s an image shot using an aperture of F8.

The entire subject is in focus. And while the texture is evident it’s not readily defined. Next have the the same little pine cone but this time shot at a much wider aperture of F2.8.

The softening around the edges help to focus the attention on the textures of the cone and seperate it from the rest of the frame. While not a rule(what are those?) wider apertures generally work well to isolate and draw focus to the evident textures present in a subject.

Final Thoughts on Texture…

Let’s face it, talking about texture in photography isn’t the most exciting thing in the world. Still, ignoring it completely means ignoring one of the most powerful techniques for adding interest to your photographs. Texture is all around us and can be made the centerpiece of your images if you understand how to put it at the forefront. Using textures effectively will open up so many more shooting opportunities that you might not have considered before now.

Filed Under: Tutorials Tagged With: camera, cameras, landscape photography, Lifepixel, perspective, Photographer, photographers, Photographing deserts, Photography, photography tips, texture

Previsualziation: Knowing Before the Shot

Previsualization, or simply “visualization”, is one of the most simply yet alarmingly difficult aspect of making your own photograph become more than just the some of their parts. When we “previsualize” our images it means that the appearance of the final outcome before we ever click the shutter button. The method of previsualization was championed by the photographically indomitable Ansel Adams who believed the best way to convey wholeness within a photograph was to strive to see it in your minds eye from the get go. Everything else would then be a matter of what needs to be done in order to reach your personally desired outcome.

But how is it done? Or more importantly, how can you learn to do it yourself? Ansel gave us a lot to go on and we can learn a lot from his legacy. At the same time, we can mesh together with modern digital techniques and expound into something I like to call dynamic visualization. We’ll get more into that in just a minute. But first, let’s talk about how you can begin to visualize the finished photograph before you actually make it manifest itself from your camera.

Learning to “See”

Teaching yourself to see the finished product on the front end of the process isn’t an easy thing to accomplish, especially not right out of the gate. The ability to visualize a finished photograph is somewhat paradoxical due to the fact that a large component of the skill involves shooting a lot of photographs. This means that visualization is a product of repetition. Each time you make a photograph, you see the effect of shooting at the technical factors you have selected. Pay close attention to what settings you use!

Once you begin to mentally catalog the cause and effect relationship between your techniques and their respective outcomes you will then gradually learn to approximate the particular look of a finished image before it is actually shot.

Be Patient

The largest detriment in learning how to visualize your finished photos is that confidence-killing frustration that often sneaks in from perceived failure. Will you be able to anticipate the exact outcome of your photographs each and every time? Of course not. Failure is an incredible teacher and this is especially true when it comes to learning the skill of photographic visualization.

So, don’t allow yourself to be discouraged by the tedium. Shoot as often as you can, practice seeing the finished photo in your mind, observe the results, and then apply those outcomes to future photographs. I assure you that being able to see a finished photo(or close approximation) will slowly begin to happen on its own.

Dynamic Visualization in the Digital Age

I want to speak briefly on the progression of the visualization process as it pertains to today’s digitally integrated world of photography. The technique is one I have coined as “Dynamic Visualization” and is a direct evolution of the visualization idea of Ansel Adams. It involves the instant feedback we now are capable of achieving with our digital photographs. As we no longer have to wait for development of our film to be completed before we see the results of our efforts, the process of visualization changes. We can now allow the readily displayed outcome of our photos to directly impact the mechanism of visualization in a much quicker and more dynamic fashion.

What I mean here is that we immediately view the image we have just captured and that quick feedback can organically spur our creativity in real-time. This can lead to alternative compositions and exposure combinations that we might not have otherwise considered, thusly changing the final visualized image in our minds. This dynamic visualization could in fact be the continuation of Ansels visualization method. We first visualize the finished photo we want to make, receive real-time feedback from our digital displays, and then use that information to mold alternate(possible better) visualizations.

Final Thoughts on Visualization

The hard truth about learning visualization is that it takes time, effort, and patience. There are no real shortcuts when it comes to teaching yourself to “see” a photograph before it’s made. Shoot as much as you can and observe the results carefully. See the results of your work and study your own work. Visualization happens as much by physical labor as it does by mental flexibility. The key is to keep trying until that visualization “aha” moment makes its way to you. Just keep shooting!

Filed Under: Inspiration, Tutorials Tagged With: black & white, camera, cameras, Getting started, inspiration, landscape photography, passion, perspective, Photographer, Photography, photography tips, Travel photography, visualization, Wildlife photographer

Four Ways to Rekindle Your Photographic Spark

As you progress more and more on your photographic journey you will encounter problems and challenges. Some of those challenge you expect while some can take you fairly by surprise. You will go through ups and downs, strikes and gutters. This cycle of peaks and valleys can affect you creatively, financially, even physically. Most common of these is the fact that sometimes we lose a little bit of our enthusiasm for the craft. This is normal and most definitely a problem you can overcome through all kinds of ways. In this article, we’re going to talk about a few ways that can help you rekindle your photographic spark.

Understand that it Happens to Us All

The first step to overcoming any problem is to understand that you have one and that it’s a natural part of growing as a photographer. Simply realizing that your loss of photo making zeal isn’t the end of the world can actually snap you out of your slump.

An important thing to remember is that whatever the reason you’ve lost your spark, you can get it back. The opposite is also true. If you continually find yourself dreading a shoot or not getting excited to get home to edit an awesome sunset image, ignoring the problem will only make it worse. Take a breath and work to identify what’s happening.

Learn about Great Photographers

We all have reasons why we got into photography. And the majority of us have certain “icons” whose work speaks to us especially loudly. The giants of the photography not only produced legendary photos but they also left behind lessons that we can learn from in order to strengthen our own craft. Take the time to learn the methods of the established masters.

Find books they’ve written and invest as much in your learning as you do in your gear…well, maybe not that much. When I get a little less that spritely to get out and make images, I open up a book of Ansel Adams photos. After seeing a few images of Half Dome and Taos Pueblo and I’m ready for action!

Shoot Something Different

If you find that you’ve grown tired of shooting, maybe you’re just tired of shooting the same things over and and over again. Sometimes it helps enormously to take a refreshing dip into another end of the creative pool.

Break the monotony and give yourself a fresh pair of eyes. If you shoot a lot of landscapes, then try some portraits. Shoot a lot of portraits? Try some landscapes. Changing things up a bit can open up entirely new creative outlets for your work.

Leave the Camera

Completely ceasing your shooting might sound counter intuitive but at times we can can photographic burnout. If this is happening to you try leaving your camera at home. Just focus yourself on the events, people, and environment around you without viewing everything through a viewfinder.

Live and breathe without making photos for a few days or even a few weeks. Much like switching up your shooting material, walking away from the camera for a while can hit your reset button and jump start your enthusiasm for making photographic once more.

Final Thoughts….

Whether most of us will admit it or not, we aren’t always super excited about making photographs 24 hours a day, 7 days a week. We have highs and lows of creativity and artistic energy levels. At some point you will experience this reduction in your photographic spark to some extent. Just remember that when it happens, and it will, that there are ways to combat the lack of motivation. While it all depends on your situation, some type of healthy change is usually the best remedy. This change can be taking a break from shooting or reading an autobiography about your favorite photographer’s life. Recognize that things just don’t feel right and take steps to bring yourself back into the photographic fold.

I love helping people overcome their hurdles so check out a couple more of my articles here at LifePixel, How To Be Successful in Photography and Real Talk: Reasons Your Photography Isn’t Improving. They deal with similar situations and can give you that lift that you need to get back into the game.

Filed Under: Inspiration, Tutorials Tagged With: camera, cameras, Canon, inspiration, landscape photography, Lifepixel, passion, perspective, Photographer, Photography, photography tips

Do Photography Trends Stifle Your Style?

Do you allow photography trends to stifle your style, or does your personal passion, style and creativity prevail?

A well-known wedding photographer (who shall remain nameless) once berated me because I was, in his opinion, following the trends and overdoing the new and popular filter effects of the time. I walked away from our conversation feeling mortified and crushed. In short, incredibly defeated. Upon reflection, I realized he was indeed correct in many instances. Some of the images I was creating for my customers were over stylized and would not withstand the test of time. However, these trends are often popular and very much in demand. It is sometimes hard to stick to your guns when asked to create a certain look. Do you allow your artistic style to be compromised because of your clients’ specific requests?

I would suggest that unless your work is synonymous with a particular style, I would highly recommend catering somewhat to their suggestions, but make sure you add plenty of your own artistic vision into the mix. However, some demands can simply rub you the wrong way, and it is ok to say no! I think I can state without much dispute that there is one particular request that simply makes many photographers see red. Namely, trends that clients have found on other photographic websites or on social sites that they want you to copy. So, standing up for your particular style may lose you a few customers in the short term, but tenacity can prevail given time, allowing you to be true to your photographic vision and recognized for your talent.

In my opinion, there are a couple of photographic trends that I thought were amazing at the time, but have not really held up that well. Disclaimer! I am guilty of creating some of these images and will showcase them below.

  • Coloring parts of your black and white image

color

  • Photographs that disrupt the horizon

tilt

  • Over processing the vintage look

filters

Do you ever find yourself re-visiting your website and removing those images that reflect trends that really date your photographs? Generally speaking, the cleaner images do tend to stay in your portfolio longer. Other tips that come to mind are limiting the use of the highlight priority tool. The foggy feel used to feature on my website, but I have since removed most of these. Also, while my children were growing up, I became deeply ensconced in the world of senior photography and I fought hard with many clients to keep the completely unblemished images to a minimum.

Above all, make sure the photograph talks to you. If you want it to be commercially viable, you do need to be critical of your work, and maybe request the opinions of those friends who are happy to be honest with you (time to check the ego!) Take pictures people want to admire. Captured images should not require interpretation they should speak for themselves. Neal Rantoul recounts his opinion on this subject in an enthralling article featured in PetaPixel. I do agree that cameras are most certainly much simpler to use. Great photographs can be taken with only a minimum understanding of ISO; shutter speed and camera settings in general, but eventually the mechanics do need to be understood.

There are many simple plug-ins that allow you to edit your images quickly and efficiently. Plug-ins for use with Photoshop or Lightroom can be used as an artistic tool, allowing you to create your own recipes and layer your effects for all sorts of finished looks. The Nik collection is now offered as a free download, and I would highly recommend it. You can learn a simple edit, or explore the software to create some amazing visual effects. The secret is to use them wisely, and not become obsessed with one particular result.

When it comes to creating images that are just for me, I use all of the software products mentioned above, and enjoy playing with effects and layers. This is especially true when I am editing my IR images, or detail shots where I like to add a little artistic license.

flowers

I recently took senior portraits of my triplets (two girls and a boy) before they left for college, and I admit to enhancing the sunset to create a somewhat vintage look. My girls are extremely close and are now attending colleges in two different states. The candid image of them together means so much to me, and this is the essence of why we chose to be photographers. On a personal level, what pleases you is really all that matters.

seniors

I also had some fun with the DJI Inspire during the family photo-shoot!

tripletsfly

In conclusion, one has to wonder why the paintings of Vincent Van Gogh were not popular during his lifetime. He was a unique painter, pushing the limits, who is now considered to be one of the most famous post impressionist artists of all time. I am sure we can name many popular artists and photographers of our time, but one has to wonder if they will stand up to the opinions of critics, or indeed the general public 100 years from now. Maybe our work will be discovered and we will be revered! It is worth contemplating what it is that constitutes an iconic photograph? I very much enjoyed reading an article by Evie Salmon entitled ‘what is iconic imagery?’ Who is to say what will be revered in the future, which should encourage all of us to keep persevering when it comes to our artistic vision. Don’t let those trends take over and stay true to your vision.

Filed Under: Inspiration Tagged With: artistic vision, creativity, filter effects, inspiration, passion, perspective, Photography, photography trends, trends

Confront Your Photographic Challenges

Are there times when you feel challenged to complete an assignment, or even to just go out and take some photographs? Tangential activities take on an unanticipated urgency. I have never really understood what drives this onset of dispassion for the task, but I know I have experienced it many times, and I find it helps to set myself a few challenges and hold myself accountable until each of  my personal challenges are completed.

Nature photographer Jim Brandenburg is known for challenging himself. Jim decided to limit his images to only one photograph a day for a 90-day period between the autumnal equinox and the winter solstice. His project was deeply personal, and the amazing work that developed over the months most certainly speaks for itself.

Here are a couple of ways you can provoke your challenges, and learn a few new techniques in the process:

Join a Photo challenge site – One great site, Photochallenge.org encourages you to increase your photographic skills by committing to a photo challenge. No tutorials, just photographers interacting with each other. The team sets out common guidelines, which are easy to understand and simple to follow. The challenges are specific, such as; capture black and white shots of the human body, or take portraits of people or animals, and then share with others also participating in the challenge. If you are not quite up to engaging at that level, it is still worth visiting the site to view images and to ultimately gain the courage to start interacting online with other photographers.

Commit to taking a tutorial a week – There are many sites that provide free tutorials, such as Iheartfaces as well as subscription based sites like CreativeLive, KelbyOne, and Lynda.com that offer the opportunity to learn a little more about your camera, as well as how to use software applications to successfully edit your images. If you find it easier to learn in a classroom, give yourself the gift of a workshop a year. The secret is to follow through on what you have learned.

Set specific parameters – Make some definitive decisions each time you go out to take images. Consider some of these ideas:

1 – Take only one lens with you. If you do not have fixed lenses, choose a zoom lens focal length and don’t be tempted to change it. This will encourage you to position yourself correctly for each shot. It will also help you to really understand the capabilities of each lens.

2 – Utilize the full frame. Fill your frame with the shot and don’t plan on cropping in post. This will encourage correct orientation, and enable you to make every pixel count.

3 – Decide upon a color or texture and concentrate on images of that color or texture. This makes you evaluate your surroundings and notice many things you may not normally have seen.

Vegas_Flower

4 – While teaching at a photographic conference in Las Vegas, I played around with the color/full frame challenge and spent a couple of hours in the beautiful botanical gardens located in the Bellagio hotel. I started with some fairly simple images and then dug down into the fragility of petals. I found myself down a whole new path involving the combination of shadow and color.

5 – Dedicate a photographic day to simply using your mobile phone, and get creative. There are many apps for editing camera phone images and some of the results are pretty impressive. While boating in Maine, I was able to capture the old Maine Windjammer, the Isaac H. Evans. I challenged myself to use only my mobile phone all day so that I would concentrate on light and composition. It was quite refreshing to have my head up and looking at my subject, rather than staring down the camera viewfinder!

IMG_8560-Edit

6 – Limit the number of images you take. Imagine you do not have the capability of taking many photographs. Make every image count, and don’t cheat by erasing images!

Win a FREE Camera Conversion!

Sometimes it is important to try to recognize the route of the challenged feeling! Each time I head up to Rockport, Maine to teach drone flight and aerial photography, I find myself having to overcome the inherent fears surrounding the nature of the class. I am not immune to the constant commentary surrounding the use of drones and their various applications. In order to overcome those mental challenges, I remind myself that I teach because I enjoy teaching, and the pleasure I receive from watching students initially grapple with the technology, and then start creating beautiful images is most certainly more contagious than the niggling doubts in my head. I also take time out to go and fly with my teaching partner and hone my skills a little more.

Maine_Lighthouse

Flying over water takes a little more concentration and awareness of the wind conditions. but the results can be incredibly rewarding. The image above is a single capture, and below, a 5 image panorama created in Lightroom. These were taken using a DJI Phantom 4.

Maine_Pano

Finally, I have also noticed that as infrared photography becomes more popular, there are many discussion groups debating about what constitutes a good IR image. No matter what my assignment, I carry my converted Canon 1DS with me and find an opportunity to experiment.

MaineIR

It is interesting to compare my results with images taken from the Phantom 4. In the image below, I am actually much closer to the boats in the harbor, but hovering over the water.

Boats

I challenge you all to experiment with IR. If you are not yet ready to convert one of your cameras, consider purchasing a filter that somewhat replicates the look and feel, and this will give you a great introduction. I am pretty sure you will soon be hooked. Whatever your end goal, don’t let those perceived or real challenges get in the way and don’t let the negativity of others (or your own doubts) prohibit your creativity.

Filed Under: Inspiration Tagged With: aerial photography, Canon, challenge, composition, DJI, DJI Phantom 4, inspiration, IR, landscape photography, Lifepixel, Maine Media Workshops, Panoramas, perspective, Photography, photography tips, Workshops

Recognizing your Talents

I have written about cultivating the creative and overcoming the fear factor. Let’s consider ideas to help you recognize your talents!

Many photographers find that there are periods when they are unsure of their abilities. Discovering that you have a photographic ‘eye’ is an exciting moment. Then the frustration of learning the mechanics comes in to play. Those images that looked so good on an automatic camera setting are much harder to recreate once you start exploring the camera. Further discouragement can come from a critical photographer who starts to tear apart your technique. The secret is not to let those moments of frustration inhibit your learning curve. Open the floodgates and keep experimenting! The good news is that I believe the teaching community is more responsive to positive feedback, and there is a culture of acceptance and encouragement when it comes to helping photographers develop their craft. This is further supported by the plethora of online learning possibilities such as Lynda.com and KelbyOne.

Once you have started to develop your technical skills, find out where the camera leads you. After many years as a photographer, it is only recently that I have started loving my work because I am finally focused on creating images for my clients and making pictures that please me! Many of the points I have already written about in previous blogs would apply to this blog also, overcoming fear and encouraging your creative side both help you to recognize your talents. What do you really enjoy about photography? And what inhibits you from growth? I have mentioned the importance of exploration; encouraging yourself to capture images that don’t necessarily come easily to you. The mistakes you make will also bring new insight to your photographic body of work, or simply help you to understand the mechanics of your camera better.

I recently watched a fascinating documentary about Vivian Maier. Vivian became famous posthumously when John Maloof discovered her work in a thrift auction house in Chicago. She worked as a nanny, but constantly experimented with her camera. Her passion led her to create a vast collection of candid street photographs. She most certainly discovered her talent, but one wonders if she actually recognized it. Her touring exhibitions can be seen around the world, and attract huge crowds. What we do not know is why she did not share her work. If you take a moment to peruse her online galleries you will marvel at her extraordinary photographic skill.

Unlike Ms. Maier and those wonderful street photographers of her ilk, I have never been adept at catching people as they go about their lives. I find myself concerned about invading privacy and once I become self conscious my work falters. I learned early on that street photography was not one of my innate talents! On my recent search for new photographic pastures, I find that I very much enjoy seeking out resilience and vulnerability. This can be found repeatedly in nature, and I am drawn to exploring something beyond the obvious. I enjoy playing with available light to expose, scrutinize and find the beauty from a unique perspective. This is a simple technique which involves considering more than just the angle that comes immediately to mind.

Flowers1

The translucent, delicate nature of flowers can really be examined when using available light to emphasize the shadows and accentuate their fleeting beauty.

Georgina

It is always fun to explore all sorts of available light. Try taking your camera and a willing subject out a dusk when the street lights are turned on. If your long suffering accomplice is happy to work with you to find the best angle, the effects can be quite dramatic!

GoldenGate_1

For extremely personal reasons, I am drawn to the Golden Gate bridge. My latest infrared images using a converted Canon 1D, captured the late afternoon mist, and I was able to reflect just the right mood for the particular project I had in mind.

Win a FREE Camera Conversion!

I am also enjoying creating a body of work from a different perspective. Looking down on the world from above, using a small unmanned aerial vehicle (UAV), involves a distinct skill set which is constantly evolving as the tools become more advanced with each new iteration. Shooting with the camera pointed directly downward, and a bit of advanced planning, can make for some fun and different shots.

Surfer Davenport

It is amazing how our work grows as we recognize our talents, and find we no longer need to emulate the talents of others. Our work may end up looking like another photographer’s work, but this should not be because we are forcing a style, more because that is how the process evolved naturally. Whether professional or amateur, make sure and take time to evolve, and to enjoy your moments behind the camera.


Filed Under: Inspiration Tagged With: Getting started, Infrared photography, inspiration, passion, perspective, photography tips, talents

The London Blog – Perspective in IR

I recently returned from the UK, where I love being a visitor in my homeland.

A great delight for me is capturing a different perspective of buildings and sites that I previously took for granted. This is something I highly recommend as a photographer. Take time to be tourists, whether visiting new locations, or just in your hometown, and really absorb what you see around you.

Big_Ben1

While I am aware that you have all just read a wonderful, and informative, blog, about capturing images in London, I would like to take you on a slightly different journey, but cover some of the same ground.

I am lucky enough to have dual citizenship – UK and USA. I studied and worked in London, and have fond memories of riding my bicycle to work from the Cromwell Road to Trafalgar Square. It was what I affectionately like to remember as my ‘Princess Diana’ period, where many young girls wore high collars, pearls and long skirts that frequently got caught in the spokes of the bicycle wheel! I very much enjoyed my job as a research assistant for a Member of the European Parliament, who was also a lobbyist. But I am ashamed to admit that all too often, I took my surroundings for granted, passing iconic buildings every day without missing a beat. My job meant that I was a frequent visitor to the House of Commons, the House of Lords, and 10 Downing Street.

HOP

Moving forward many years, I now live in San Jose, California, and delight in visiting London as a tourist. I only really found the time to reflect upon the beautiful city of my birth once I left London, and revisited with my children, taking them on the bus tours, which is such a brilliant way of navigating through this great city.

Perspective is such a wonderful thing. Not only through the eyes of someone who should have lapped up her surroundings, but also through the lens of a camera. So this blog concentrates on perspectives. The images I am sharing with you are not meant to be great photographic masterpieces, rather the result of experimenting with my newly converted Canon 1D Mk III. I did not take the time to consider all the accouterments I should have included in my bag, I simply grabbed a lens (the wrong one as it turned out, but this is when you aim to turn a sow’s ear into a silk purse!).

Many areas of the Houses of Parliament are being renovated, so it is hard to capture any image, let alone that perfect image. I focused in on Big Ben and the London Eye, and attempted to capture my IR shots from a unique angle (yes, this also had something to do with the lens I neglected to change before hopping on the train!). I had some epic fails, due in part to the softer focus, and my inability to accurately check focus due to the muddy reddish images reflected in my viewfinder. But I enjoyed editing a few of these using a mixture of Lightroom, Photoshop and Nik plugins. I love the contrasts that come through the IR image.

London_Eye2

London_Eye3

London_Eye1LondonEye4

Big_Ben2

I also captured a couple of street shots, and love how the IR element makes images, that are clearly modern, appear as if they were taken earlier this century.

OldLondon2 OldLondon

Win a FREE Camera Conversion!

How many times do we go to an assignment, take the required shots, and sigh with relief once it is over? I wish I had taken more time to rest for a moment, and take a few shots for myself (and I am not talking about after assignment beverages!). Have fun with your camera, play with your settings, your lenses, and if you have become in any way jaded, find a new perspective and get excited again! The end result just needs to please you. Sometimes (as you can see in the image below) it is also great to experiment and create something that pushes the truth.

Surreal1

Since I am on the subject of perspective. I do so enjoy leaving work behind, if I can, when I travel. Buildings answer back in an extremely different way to humans. Buildings don’t complain if they look slightly overweight, or you capture them from the wrong angle. They may seem to groan every once in a while from the steady flow of foot traffic gawping and admiring in turn, but they are gentle and forgiving. Photographing for websites and various other forms of content is all well and good, but if this is what you do, take a break and become a tourist in your own town. You will be glad you did!

Share
Pin
Tweet
Email
Share

Filed Under: Inspiration Tagged With: Infrared photography, inspiration, london, london photography, perspective, Travel photography

Blog Topics

  • Tutorials
  • Inspiration
  • Locations
  • Gear
  • News
  • Other/Misc

What our customers say:

Life Pixel has been a life-changer for me. Continue reading
Eric GConnecticut
Read more reviews
I am more than satisfied with the service I received Continue reading
Christopher JCanada
Read more reviews
I am more than pleased with the conversion job that you did Continue reading
LOUIS MWaco, Texas
Read more reviews
I am VERY impressed with his knowledge of your products and his patience in explaining it to a novice like me. Continue reading
Lynn FEssex, Maryland
Read more reviews
Things will only get better from here thanks to all of you. Continue reading
Phillip FRedding, California
Read more reviews
The Lifepixel newsletter reminds me of not having expressed my gratitude for the excellent job you made. Continue reading
Michael GGermany
Read more reviews
Your staff went above and beyond the call of duty to make sure everything was handled in an excellent manner. Continue reading
Paige RPearland, Texas
Read more reviews
It has given my old camera a new life, I will enjoy using it again. Continue reading
William PAustralia
Read more reviews
Excellent service and the camera works just great Continue reading
Hans FairhurstAustralia
Read more reviews
I just got my converted camera back from you guys. THANK YOU!!!! Continue reading
Anne CutlerForest Knolls, CA
Read more reviews
infrared_filter_choices_sidebar
ir_conversions_explained_sidebar
----------- Watch More Videos -----------
infrared_quick_start_guide

Ready to start shooting Infrared?

Convert My Camera

Subscribe To Our Newsletter

Receive updates, tips, cool tutorials, free stuff and special discounts.

Learn the Basics

  • Video
  • Start Here
  • Filter Choices
  • Focus Calibration
  • Lens Considerations
  • Camera Considerations
  • Place Your Conversion Order

Resources

  • Galleries
  • Lens Hot Spot Database
  • IR Tutorials
  • FAQ
  • Infrared Filter Choices
  • Infrared Photography Guide
  • Infrared DIY Tutorials

Company

  • Why Choose Us
  • Get In Contact
  • Job Openings
  • Write For Us
  • Affiliate Program
  • Terms of Use
  • Privacy Policy
  • Home
  • Start Here
  • Galleries
  • Tutorials
  • FAQ
  • Blog
  • Why Choose LifePixel?
  • Shop
  • Contact

Copyright © 2025 Life Pixel Infrared - All rights reserved - LifePixel Infrared Photography IR Conversion, Modification & Scratched Sensor Repair