Adobe Lightroom is one of the most widely used software programs out there. When it comes to editing your digital photos it’s extremely difficult to beat Lightroom when it comes to ease of use, versatility, and powerful post processing tools. It’s safe to say that most of you reading this likely have had some experience using Lightroom but do you know about some of the hidden capabilities of the software? Well, maybe I shouldn’t say hidden. Perhaps “lesser known” is a better way for my point to be phrased.
In this article, we’re going to show you five lesser known tricks to be found in Adobe Lightroom. You might even wonder how you’ve managed without them for so long!
#1: Direct Histogram Adjustments
You know how to adjust exposure using the adjustment sliders in Lightroom but did you know that you can make exposure adjustments directly to the histogram?
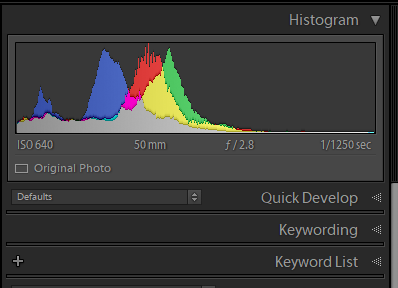
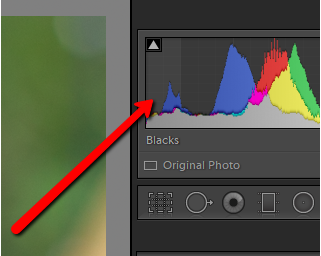
Yeah, really! Not only that, but you can work with the blacks, shadows, and highlights independently. To do it, simply hover over different areas of the histogram and pay attention to the bottom left corner of the histogram. This tells you which area of the histogram you will be adjustment. At the far left is the blacks region…
And to the far right will be the whites region.
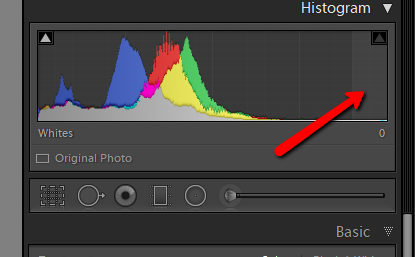
To adjust an area, click on it and hold as you drag left or right on the histogram.
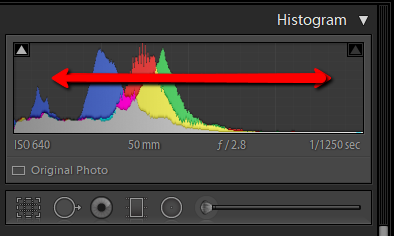
In the middle areas you will have shadows highlights and overall exposure. All independently adjustable in the exact same way.
#2 Visualizing Spots in Clone/Heal Mode
The clone and healing tools are a great way to remove unsightly dust and dirt specks that show up on your finished digital photo. It’s easy to just make some of those things go away with a click or two.
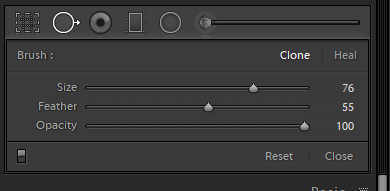
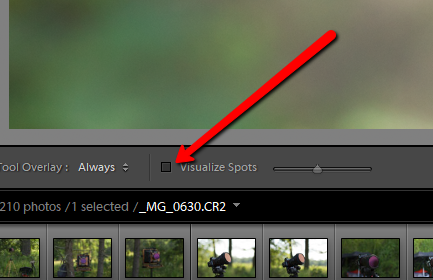
Did you know that there’s a super easy way to make removing those spots a lot more precise? It’s aptly called the “visualize spots” mode and to access it click…you guessed it, the visualize spots box at the bottom of the view window when in clone/heal mode. You can also use keyboard shortcut (A).
Your image is instantly converted to a black and white relief. Spots show up in white.
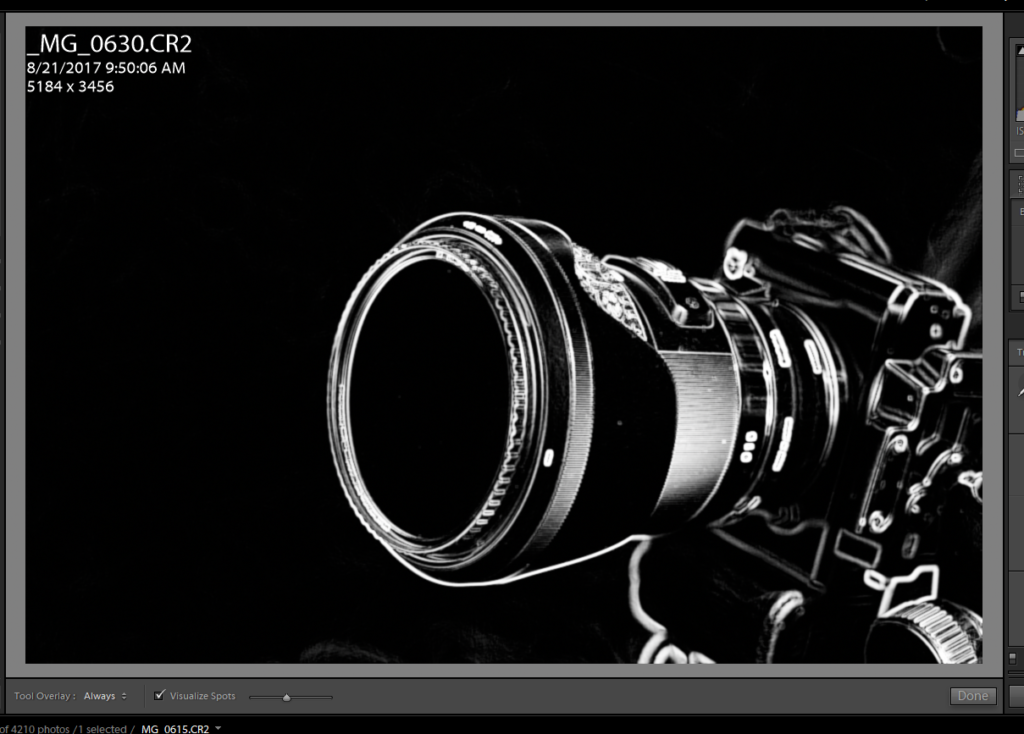
You can control the sensitivity of the spot revelation by using the slider.
#3 Sharpening Mask
Don’t introduce unwanted noise by sharpening your entire photo! There’s a smarter way and it’s by using the masking slider when sharpening your images in Lightroom.
![]()
Holding down the ‘Alt’ key(Option key on Mac) while adjusting the masking slider sensitivity will convert the image to a black and white relief similar to the visualize spots mode from earlier.
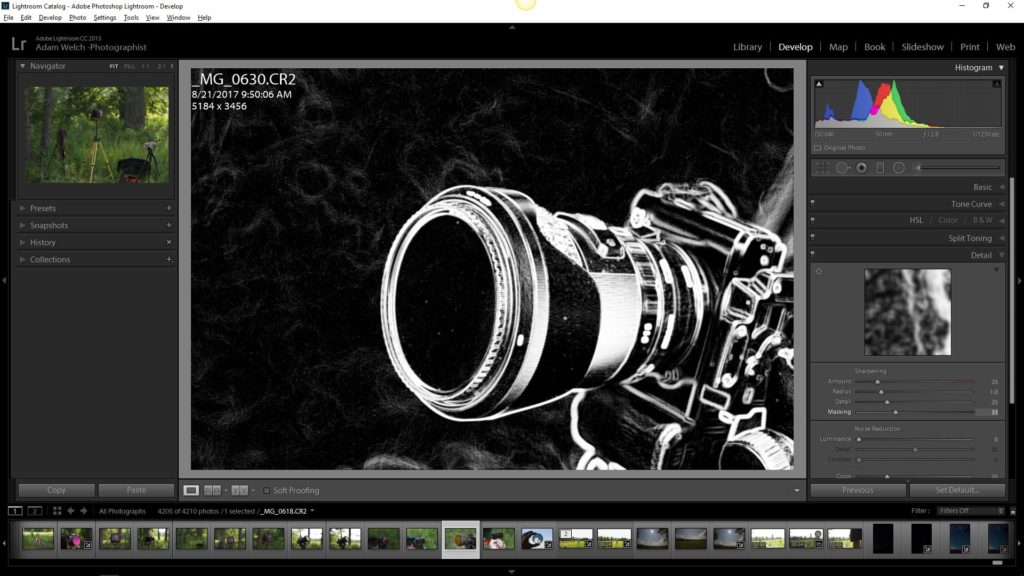
Now it’s just a matter of healing or cloning out the spots!
#4 Developing Video
For some, the downside of Lightroom is that it doesn’t work well with video editing. Video isn’t supported in the Develop Module so you have to rely on quick develop settings and presets to process any of your video files. Or do you? There is in fact a work around to help you edit your videos more precisely in Lightroom. First, make an image capture from your video.

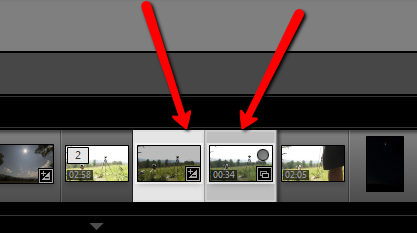
Then make any adjustments to that image capture just as you would a normal photo. When finished, go back to the Library module. Then hold down the ‘Ctrl’ key(Command on Mac) and be sure both your edited image capture AND the video thumbnail are selected.
Now, click on ‘Sync Settings’
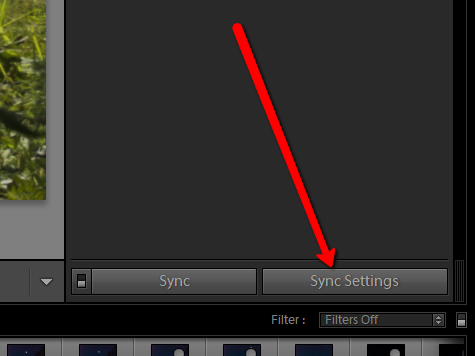
A dialog box will appear showing the available settings which can be synced. Make your selections and click ‘OK’. And boom! You’ve just developed your video.
#5 Custom Name Plate
This last trick is possibly the easiest…and the most arbitrary. You can customize the “name plate” in Lightroom along with a couple other things. The name plate is that little bit of text in the upper left hand corner of the view window.
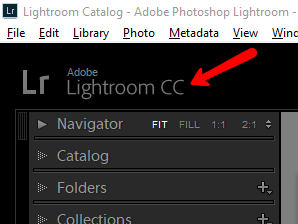
Here’s how to change it. Simply right click on the name plate and choose ‘Edit identity plate’ from the drop down.
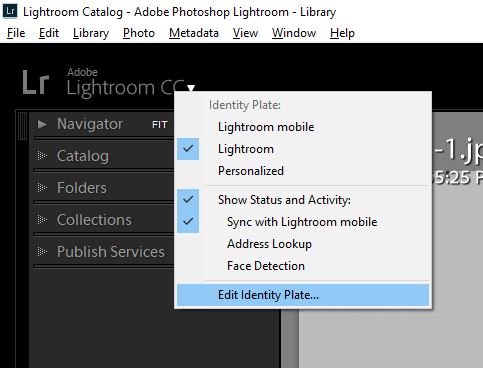
This will open the identity plate edit dialog box.
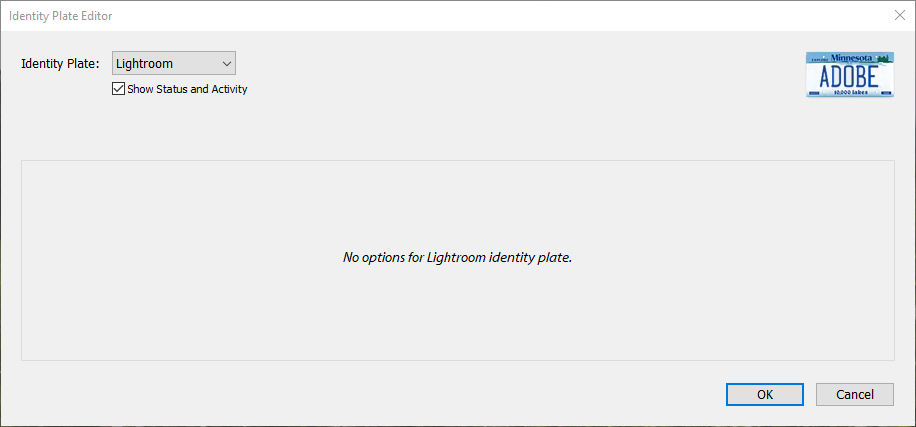
Select ‘Personalize’ from the dropdown at the top left.
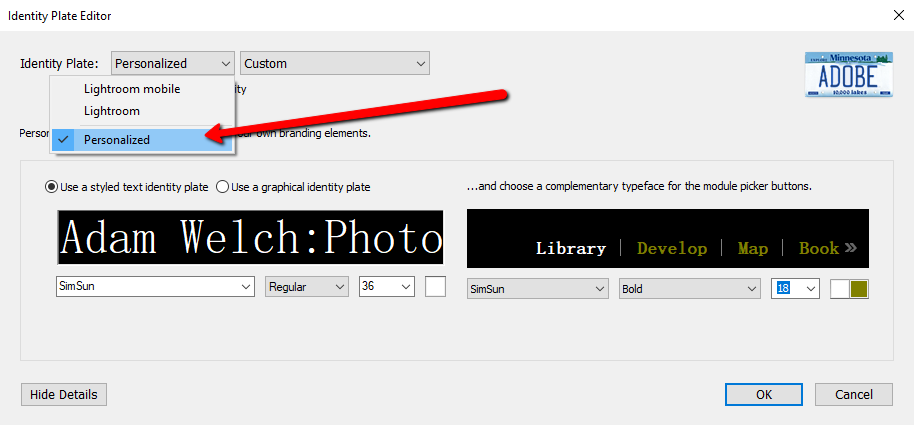
Now change the font color, style, and size to whatever you want! You can even upload a custom logo image form here as well!
Final Thoughts…
Lightroom, as powerful as it is, offers some hidden gems if you just know where and how to find them. The secrets of Lightroom aren’t limited to just the ones we’ve shown here! Have your own tricks that you’d like to share with the class? Post them in the comments below!
Latest articles by Adam Welch (see all articles)
- Bare Bones Photography: What Gear Do You Really Need? - May 13, 2018
- A Simple Explanation of Aperture - May 13, 2018
- The Case for Black and White Photography - May 13, 2018
Adam Welch
Photo maker, author, and adventurer currently based in the western portion of his home state of Tennessee. You can usually find him on some distant trail making photographs or at his computer writing about all the elegant madness that is photography. Follow his sometimes controversial Blog on everything related to photography and then check out his cozy home on Instagram.
Adam has also authored one of the most comprehensive guide books on using Adobe Lightroom Classic CC. You can get your copy of Lightroom Mastery:
A COMPLETE GUIDE TO WORKING IN LIGHTROOM CLASSIC CC HERE!
See All Articles by Adam Welch


Do you have recipe or preset to process IR files in lightroom? I currently have to open in PS and use an action – False Colors – to convert the files and save back to LR to finish processing them. It would nice to do it all in LR.
If you haven’t already found it ..
https://robertreiser.photography/proper-infrared-white-balance-in-lightroom/