Retro Made Easy
When we think of “vintage style” photographs what we may be actually envisioning is a photo that bears many of the characteristics of analog film photography. These characteristics include subtle nuances in film grain and development, toning, and contrasts. The variations and combinations of these traits are quite literally too many to count but generally most vintage style photo-looks can be accomplished with just a few ridiculously simply edits in Adobe Lightroom. Generally speaking, vintage looking photographs are slightly faded with significant contrast. There are also some very slight color tones that are thrown into the mix in order to give a finished photo that has that great earthy feel of a analog photograph.
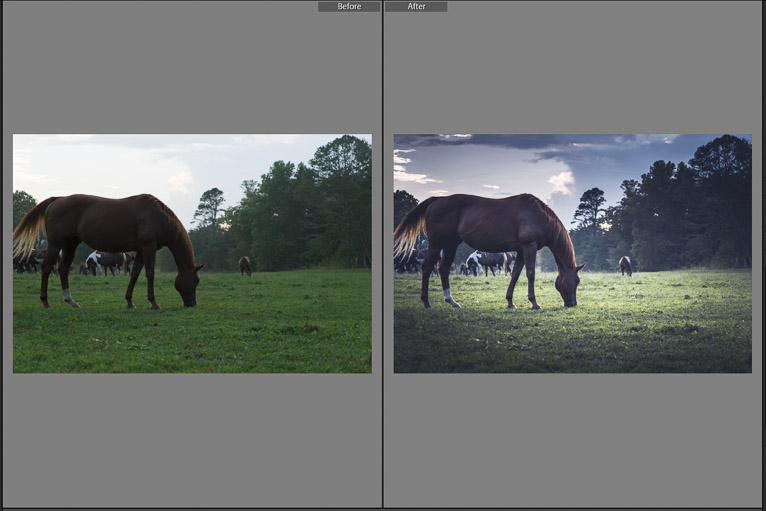
We’ll show you how to go from a RAW image file to a fully processed final image that has a nice vintage vibe. Here’s the before and after to give you an idea of just how impressive the results can be using just a few quick edits.
For this particular tutorial, we will look at a basic editing workflow for producing images with a vintage feel. But remember, this is just one look you can achieve. Don’t be afraid to experiment with color tones and contrast or even adding grain to your photo. The results can be fantastic!
Basic Edits First
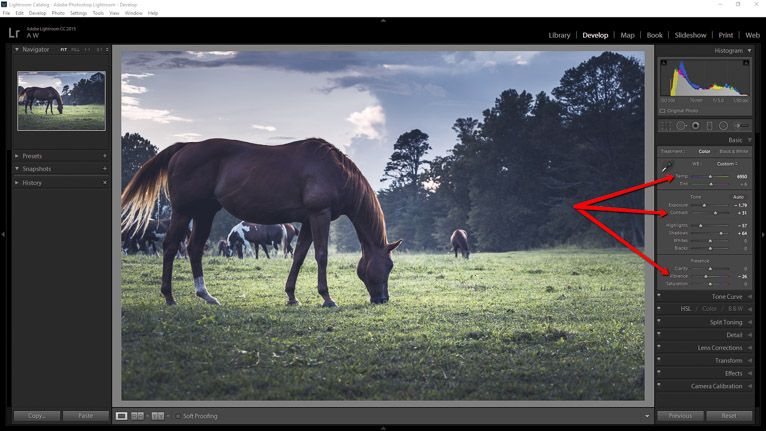
We begin with a simple, and let’s face it, quite lackluster RAW file. Before we start with the vintage processing let’s do some basic edits to bring the image up to par for further processing. It’s always a good idea to do this before any other changes are made.
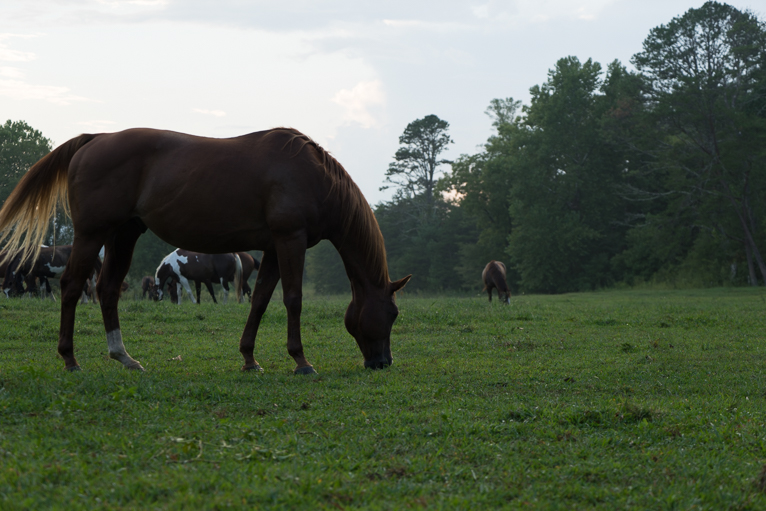
The edits applied here included some adjustments to color temperature and highlights as well as some adjustments to contrast and clarity. A couple of graduated filters were also used to even out the exposures of the sky and foreground. Here’s our processed RAW file that is now ready to go vintage.
Tone Curve
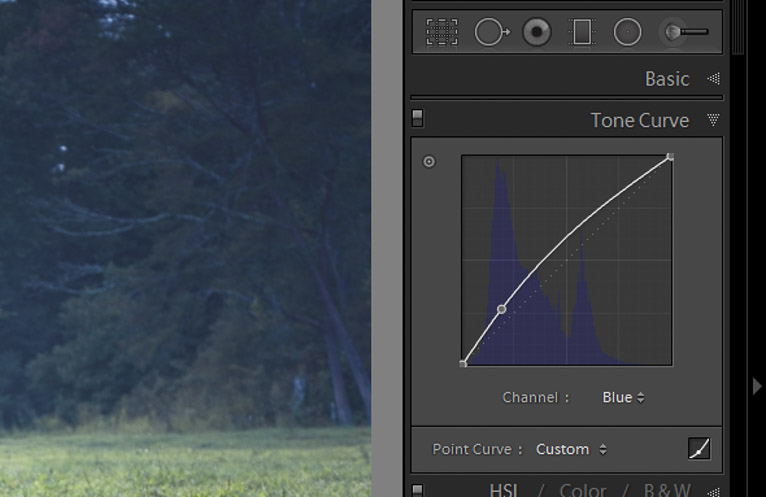
The tone curve has an undeserved bad reputation for being complicated to use. Nothing could be further from the truth once you have a basic understanding of how it affects your photo. For our vintage photo, most of the effects will be made using the tone curve adjustment. In most cases, begin with the tone curve set in “RGB” mode and the click the points to roughly an “S” shape with the curve. To add more fading, slightly drag the left most control point straight up the graph. In the case of this edit, I also moved the control point a small amount to the right to achieve the look I wanted.

I want to add a little bit of blue tone to the entire image. While still in the tone curve panel switch to the blue channel by selecting the dropdown menu below the graph. Keep in mind that you certainly don’t have to tone YOUR image with blue. The blue hue simply adds another element to the photo especially in the shadows which gives it a more vintage style. You could even use red or green if you like!
Final Tweaking in the Basic Panel
Now that we’ve reached a happy place with our tone curve it’s time to switch back to the Basic panel for a few final adjustments. In this case I increase the contrast while also reducing the highlights. After that I bring up the shadows. The colors in the photo are still a little too bright for me taste so I reduce the vibrance slightly. The color temp is just a slightly on the cool side so I also increase the temperature to warm the entire image a bit.
Vignette or Nah?
Our final step in the vintage conversion is to apply a slight vignette to help draw the viewers eye into the image. In come cases the vignette might not be desirable as in others. With this photo the darkening of the corners adds more appeal to the moody nature of the frame.
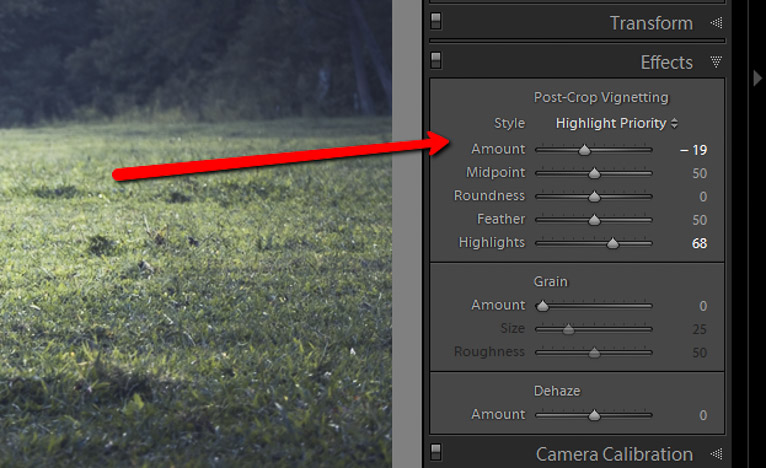
Careful not to go overboard here. Be sure to experiment with the feathering and shape of the vignette as well in order to get just the right look.
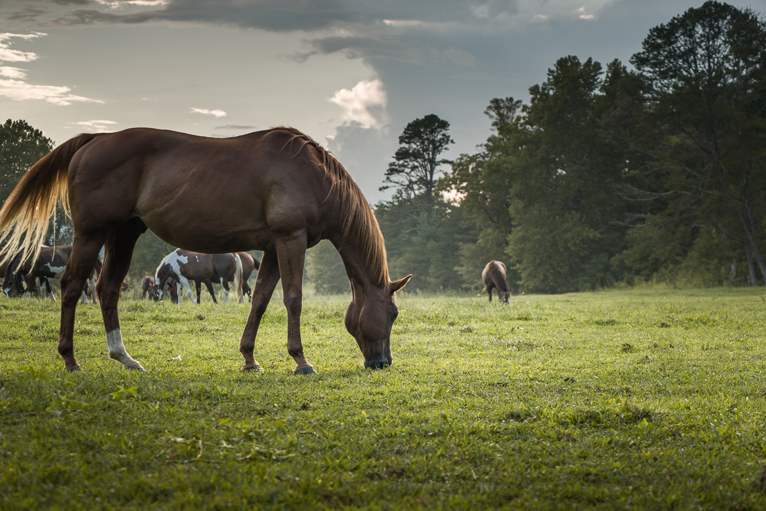
And here is the final vintage-styled photo. A considerable change from the dull and flat RAW file we started off with at the beginning of the article.
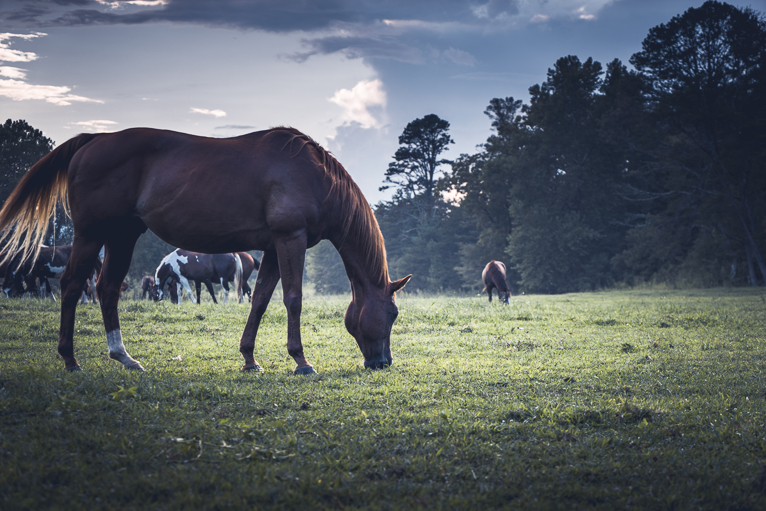
The fun thing about manufacturing vintage style photos in Lightroom is the shear enormity of the editing possibilities at your fingertips. Try out different combinations of color and toning to give different washes to your photographs. It’s definitely an easy way to add a little unique charm to your images without spending hours at the computer.
Latest articles by Adam Welch (see all articles)
- Bare Bones Photography: What Gear Do You Really Need? - May 13, 2018
- A Simple Explanation of Aperture - May 13, 2018
- The Case for Black and White Photography - May 13, 2018
Adam Welch
Photo maker, author, and adventurer currently based in the western portion of his home state of Tennessee. You can usually find him on some distant trail making photographs or at his computer writing about all the elegant madness that is photography. Follow his sometimes controversial Blog on everything related to photography and then check out his cozy home on Instagram.
Adam has also authored one of the most comprehensive guide books on using Adobe Lightroom Classic CC. You can get your copy of Lightroom Mastery:
A COMPLETE GUIDE TO WORKING IN LIGHTROOM CLASSIC CC HERE!
See All Articles by Adam Welch


Leave a Reply