Did you ever wonder why IR landscape photos look so crispy sharp? It may not be obvious. But photographing in the near-infrared part of the spectrum has some definite benefits over photographing visible light, especially for landscape photography.
Before we get into the photography portion, let’s take a look at some of the science involved. You might have noticed that infrared light has some ability to penetrate the haze in the air. Why is that? Haze is caused by light scattering off particles in the air. By shooting our photos in IR (longer wavelengths) we can take advantage of some science to reduce the haze that is apparent in our photos.
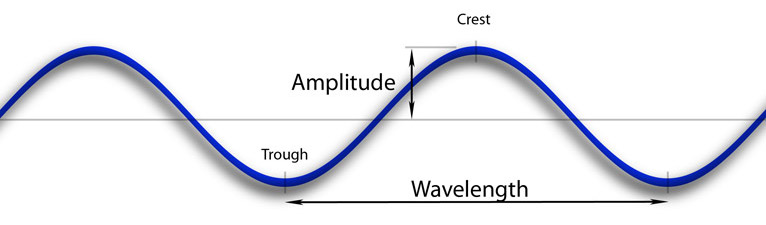
To help understand the scattering mechanisms, it’s important to understand what I mean by wavelength. Sure it’s related to the color. But why? Light is an electromagnetic wave. All waves can be measured by frequency (like broadcast radio waves) or by wavelength (like light). Frequency in inversely related to wavelength. The color of light depends on the wavelength – the length of the light wave (see the graphic below). If you could see the waves you could measure the distance in order to obtain the wavelength. But the wavelength of visible light is very small. It’s measured in nanometers (billionth’s of a meter). So you’ll need a pretty small ruler. Around the visible light spectrum, the longer wavelengths are associated with orange, red and infrared and shorter wavelengths with blue, purple and ultraviolet light.
Visible light is only a small part of the entire electromagnetic spectrum (EM). You can see where X-rays and gamma rays or microwaves and radio waves lie in the EM spectrum. 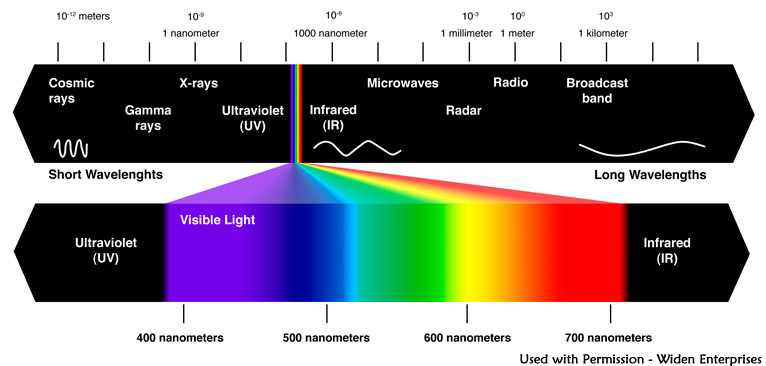
Now that the science is out of the way, let’s dive into the photography. What is it that makes the haze apparent in photographs? It’s scattering. But what’s causing the scattering and why? When light hits objects it’s scattered. Blow a little smoke in the air and shine a flashlight on it. What you’re seeing is light being scattered by the smoke particles in the air. But how light is scattered depends highly on the size of the media doing the scattering.
- Non-selective scattering is a mechanism that occurs with larger particles (much larger than the wavelength of the light being scattered). This occurs mainly with larger water droplets, ice crystals and similarly sized atmospheric particles. This scattering occurs equally for all wavelengths. So shooting in IR doesn’t provide any benefit over traditional color photography.
- Mie scattering is a scattering occurs with atmospheric particles that are approximately the same size as the wavelength being scattered. These particles are typically spherical in nature and are characterized by dust, pollen and water vapor (droplets). Although there is some wavelength dependence, typically all colors are scattered equally. As an example, clouds appear white since the water vapor is being scattered equally across all colors.
- Rayleigh scattering is where the magic happens for IR photographers. This scattering occurs mainly on the molecular level, when the particles are much smaller than the wavelength of light being scattered. In the atmosphere this is primarily caused by oxygen and nitrogen molecules. These molecules absorb the light and re-emit it in a random direction, thus scattering the light. However, the amount of Rayleigh scattering that occurs is inversely proportional to the 4th-power of the wavelength. Knowing this, it is easy to see that infrared light (~800nm) is scattered 1/16 as much as blue light (~400nm).
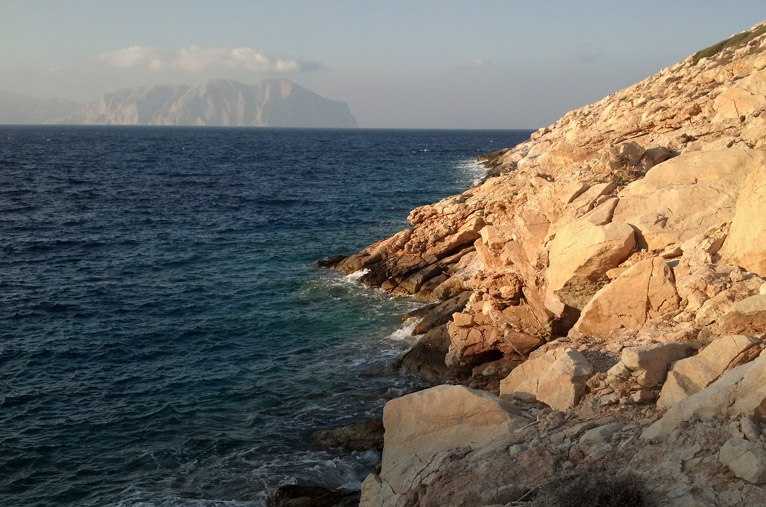
At ground level, all 3 scattering mechanism can influence the production and of haze. As a result, the haze-penetrating benefits if IR photography are not as strong. Even so, the effects are still quite evident. Take a look at the photo below. The top photo was shot with my cell phone and the bottom with full spectrum camera and IR filter.
 A scene photographed with a color camera showcasing the haze on the distant mountains.
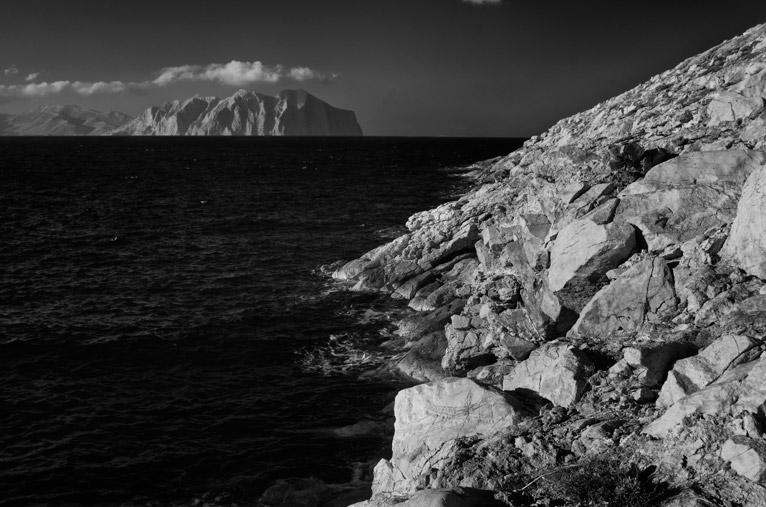 The same scene photographed at 740nm. Notice the reduction in haze and improved detail.
I’ve seen the benefit of shooting IR landscapes for many years. However, it is quite shocking to see the difference when shooting from an airplane. There is less dust at higher altitudes. This means that the majority of the scattering is done by Rayleigh scattering. As we already learned, this scattering is highly wavelength dependent. So the difference between visible and IR photos is much more dramatic.
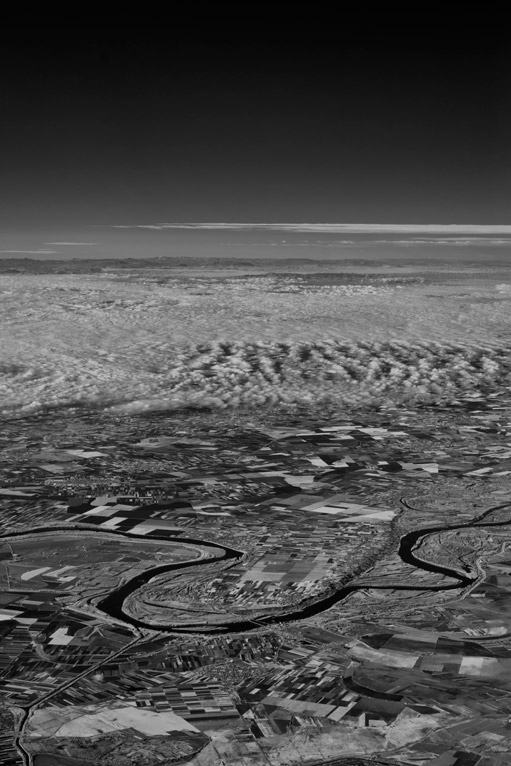
The photograph above is one I shot while flying over central Hungary. It was the first time I’d shot any IR from an airplane. The ground was heavily obscured by haze. After I processed the IR image, I was surprised by the clarity and the appearance of the mountains on the horizon. It’s a perfect example of the powerful haze reduction power of IR photography. This effect is what makes infrared aerial photography such a powerful tool for scientists and those requiring clear images of the ground. Here are a couple of my color vs. IR comparison photos.
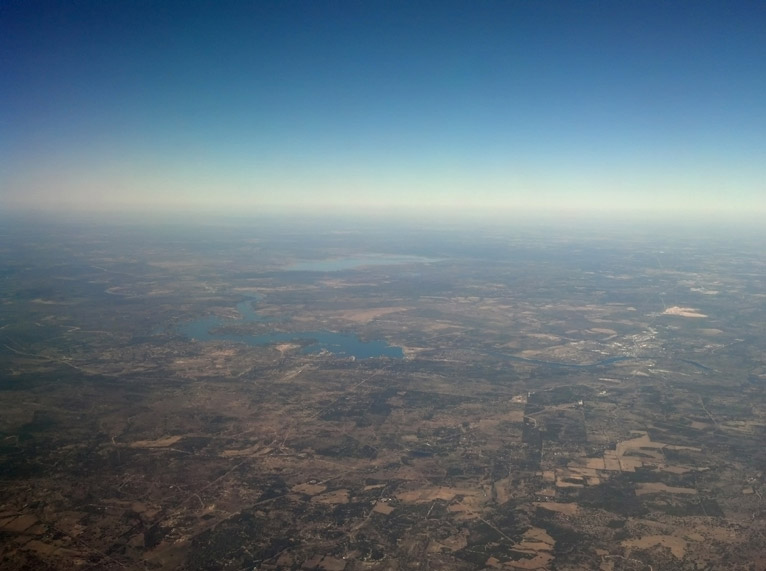 Visible Light photo West of Austin Texas
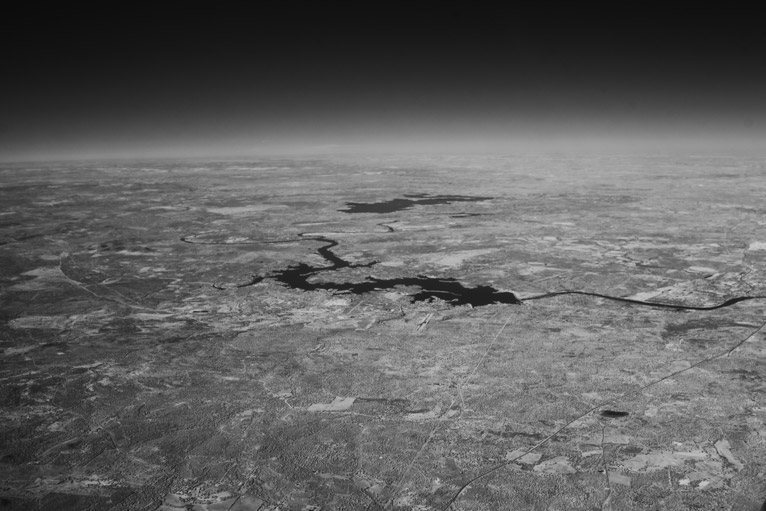 Same photo in 740nm IR
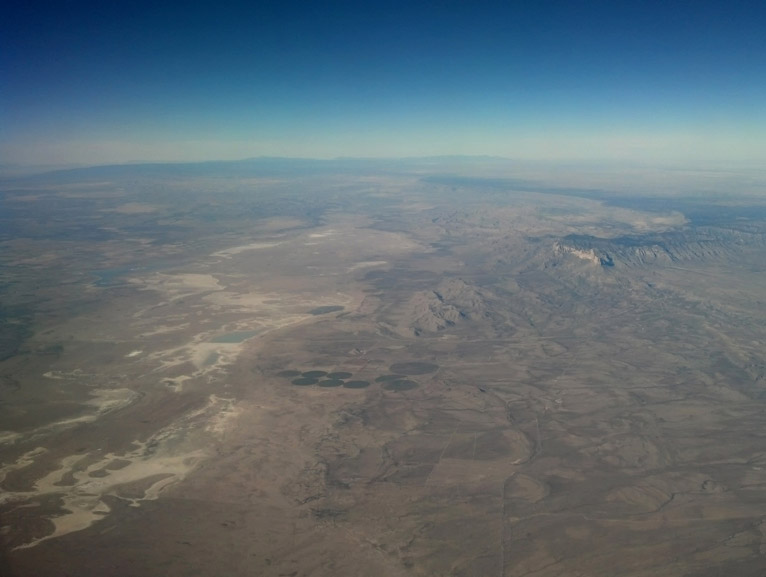 Visible light photo of West Texas, including Guadalupe peak (upper RH side) and Salt Flats.
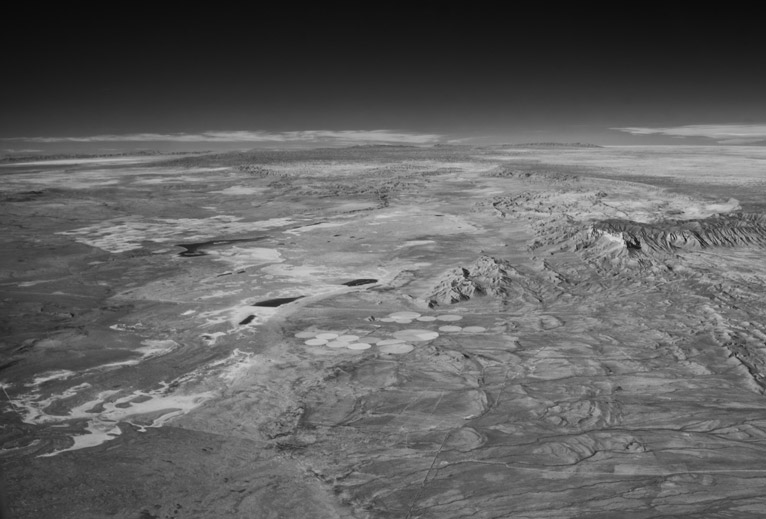 Same photo in 740nm IR. White Sands National Monument is visible in the upper LH portion of the image, more than 100 miles away.
Hopefully, you pulled something useful out of this blog. But at the very least, I hope you see how IR photography can be used to reduce the haze in photographs. The advantage can be striking and significantly improve the clarity of IR images. I’ve done landscape photography for many years. However, shooting in IR has allowed me to see landscapes in a totally different light (pun intended).
