• Cart
  • Checkout
  • My Account

Infrared Conversions, IR Modifications & Photography Tutorials | Life Pixel IR

The world leader in infrared conversions, modifications & DIY IR conversion tutorials. Scratched sensor replacement, UV & Full spectrum conversions.

The world leader in infrared camera conversions

866.610.1710
  • Home
  • → Start Here ←
    • 1 – Introduction
    • 2 – Filter Choices
    • 3 – Focus Calibration
    • 4 – Lens Considerations
    • 5 – Camera Considerations
    • 6 – Start Shopping
  • Galleries
    • Infrared Photography
    • Infrared Time Lapse
    • Infrared Cinematography
    • Infrared Stop Motion
    • Ultraviolet Photography
    • Forensic Photography
  • Education
    • Training Sessions
    • How To Shoot Infrared
    • AR Coated Infrared Filters
    • Lens Hot Spot Database
    • Photoshop Video Tutorials
    • Infrared Issues & Solutions
    • IR Basics in Photoshop
    • Camera Quick Start Guide
    • DIY Conversion Tutorials
    • IR Photography Primer
    • Secondhand Cameras
    • Wall Of Shame
  • Workshops
  • FAQ
  • Blog
    • Tutorials
    • Inspiration
    • Locations
    • Gear
    • News
    • Other
  • Why Choose LifePixel?
    • Submit Your Review
  • Contact
  • Shop

If Your Eyes Could See… Part 2

In Part 1 of this series I presented a few color astro photos that represent what you’d see, if your eyes were super sensitive. In part 2, I’m presenting similar images, only these will be presented in one color, the color of H-alpha. Hydrogen alpha is likely the most important emission, for imaging the night sky. In my astrophotography blog series, I discuss the importance of H-alpha and how to image these nebula with a modified DSLR.

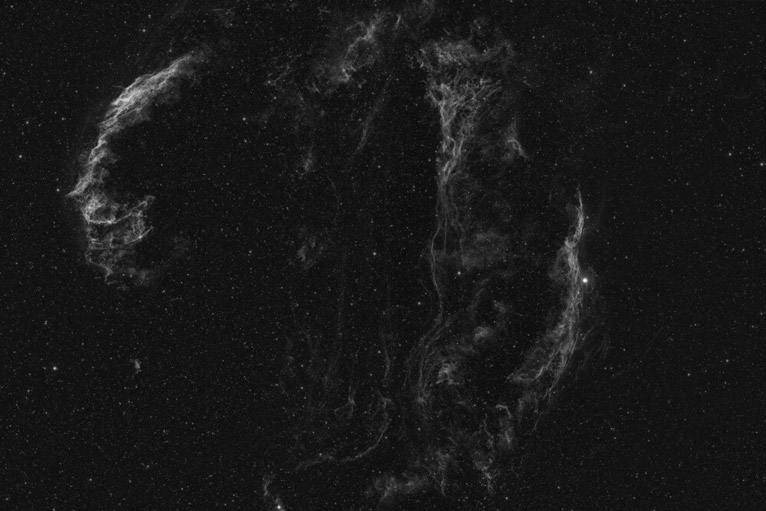
The Veil Nebula Complex


The Great Orion Nebula

The images in part 2 were all photographed in the H-alpha wavelength (656.28 nm). The exposures are long. The equipment is expensive. The tracking is critical. But the results are some of the most stunning images that I’ve ever photographed, all of which are invisible to the naked eye.

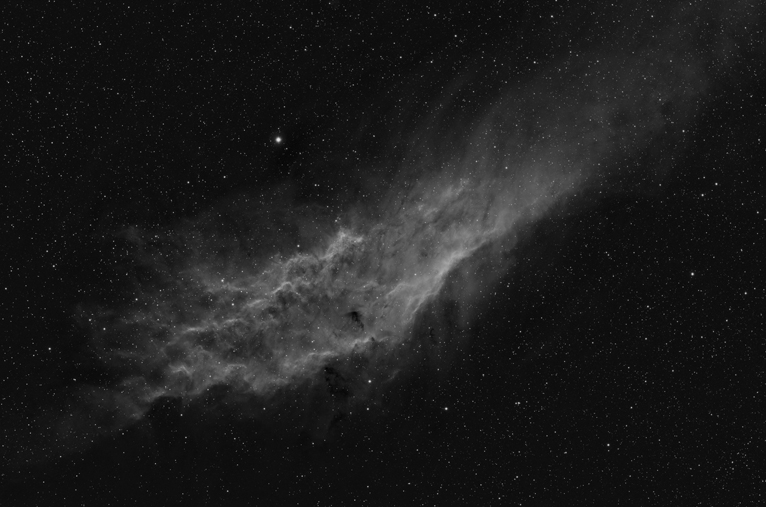
The California Nebula

All of these H-alpha images required a series of 30 minute long exposures. These are then stacked and processed to achieve the final result (again, see my astrophotgraphy series). Like their color counterparts, the subjects of these images are so dim that they are invisible to the naked eye. This makes locating the subjects somewhat tricky.  The use of a computerized mount reduces the time needed to get the telescope pointed at the target. Then it’s just a matter of fine tuning and framing. The focus is set, , the guide camera is calibrated, the filter wheel rotated to the proper filter and the exposures begin. Thirty minutes later, I check the resulting image to see if I hit the target as intended. If so, the imaging continues until the object is too low in the sky to continue.
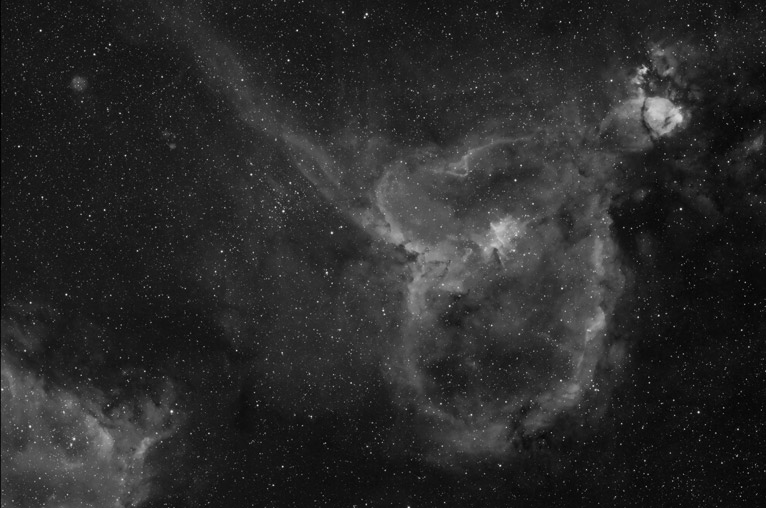
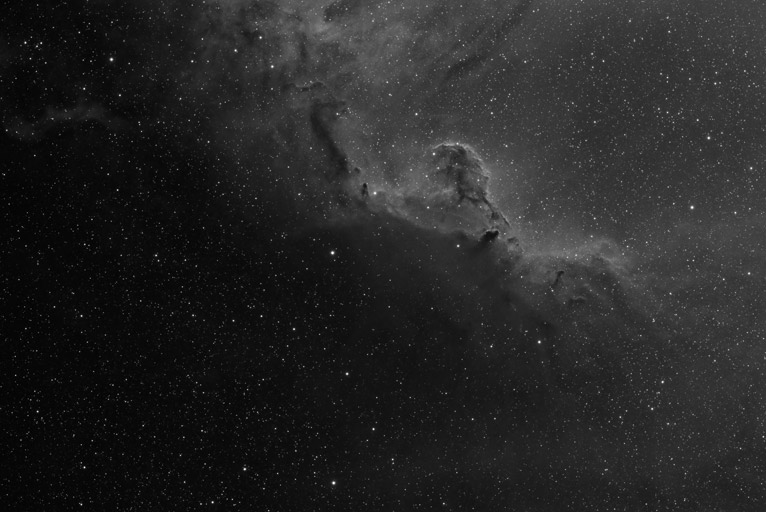
The Heart Nebula


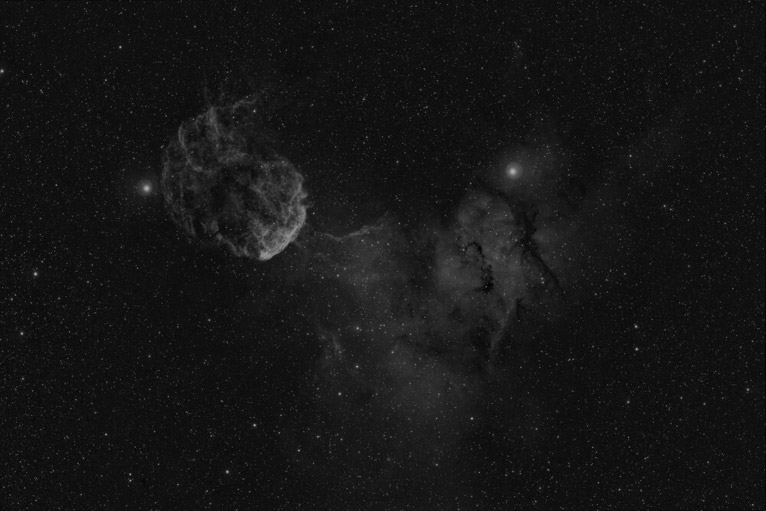
The Jellyfish Nebula

Sometimes, I’ll look up an uncommon object and point the telescope in the general area and shoot a test exposure. Many times, this technique isn’t too fruitful, but once in a while, a gem is recorded. This is the case of the image below. I scoured the web looking for similar images, to no avail. So this particular area, rarely photographed, is one of my favorite subjects.

B30 and Friends

Probably one of my all-time favorites is my mosaic of the Orion area.  This is an 8 frame 60 megapixel mosaic that required many nights to shoot and many more nights to assemble and process.  Anyone that has processed very large images in Photoshop will sympathize on the amount of work required of the computer and it’s operator.  Each frame was individually processed.  When they were all complete, each one was registered in a special piece of software called Registar.  Then all 8 were imported into Photoshop, assembled, blended and processed. more than 40 hour of post-processing was performed on this image alone.

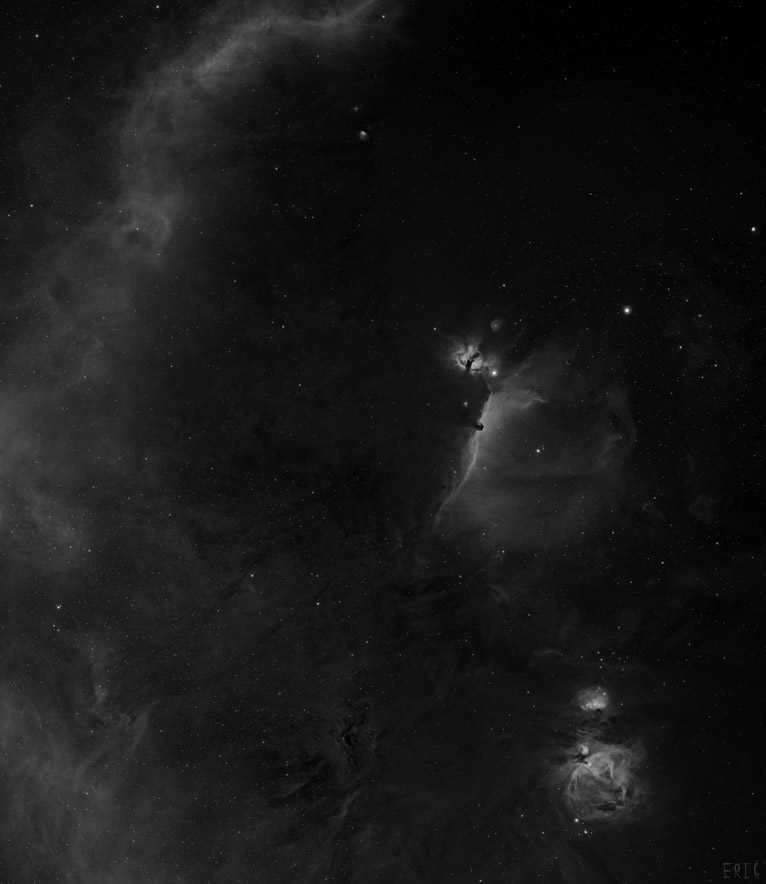
The Orion Complex Mosaic

Imaging deep sky targets is not for everyone. It can get complicated quickly, with steep learning curves on both the imaging and post-processing sides. Imaging with a DSLR can be a superb entry into this field. If your interests lie in photographing H-alpha, like the images here, the DSLR will need to be modified, and an H-alpha filter purchased. An astro-modification or a full spectrum modification can be performed to allow the proper H-alpha wavelengths to pass. My preference is the latter for the maximum throughput and flexibility.  It allows my DSLR to be used for astrophotography, IR photography or any other application I can dream up.

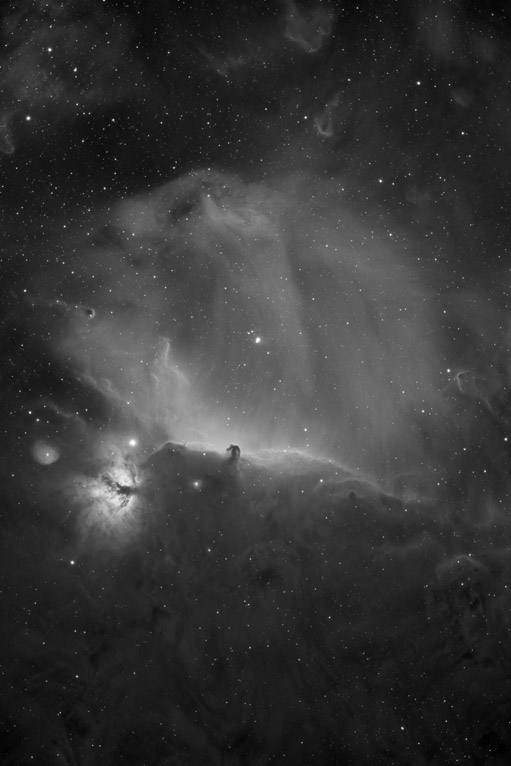
The Horsehead Nebula

I hope you’ve enjoyed this short series highlighting some of my favorite images. A modified DSLR is a great way to get started doing astrophotography.  If you’re interested in giving this a try, take a look at an H-alpha modified DSLR or a full spectrum version.

Filed Under: Inspiration Tagged With: Astrophotography, Eric Chesak, full spectrum, H-alpha, hydrogen alpha, monochrome

Blog Topics

  • Tutorials
  • Inspiration
  • Locations
  • Gear
  • News
  • Other/Misc

What our customers say:

Life Pixel has been a life-changer for me. Continue reading
Eric GConnecticut
Read more reviews
I am more than satisfied with the service I received Continue reading
Christopher JCanada
Read more reviews
I am more than pleased with the conversion job that you did Continue reading
LOUIS MWaco, Texas
Read more reviews
I am VERY impressed with his knowledge of your products and his patience in explaining it to a novice like me. Continue reading
Lynn FEssex, Maryland
Read more reviews
Things will only get better from here thanks to all of you. Continue reading
Phillip FRedding, California
Read more reviews
The Lifepixel newsletter reminds me of not having expressed my gratitude for the excellent job you made. Continue reading
Michael GGermany
Read more reviews
Your staff went above and beyond the call of duty to make sure everything was handled in an excellent manner. Continue reading
Paige RPearland, Texas
Read more reviews
It has given my old camera a new life, I will enjoy using it again. Continue reading
William PAustralia
Read more reviews
Excellent service and the camera works just great Continue reading
Hans FairhurstAustralia
Read more reviews
I just got my converted camera back from you guys. THANK YOU!!!! Continue reading
Anne CutlerForest Knolls, CA
Read more reviews
infrared_filter_choices_sidebar
ir_conversions_explained_sidebar
----------- Watch More Videos -----------
infrared_quick_start_guide

Ready to start shooting Infrared?

Convert My Camera

Subscribe To Our Newsletter

Receive updates, tips, cool tutorials, free stuff and special discounts.

Learn the Basics

  • Video
  • Start Here
  • Filter Choices
  • Focus Calibration
  • Lens Considerations
  • Camera Considerations
  • Place Your Conversion Order

Resources

  • Galleries
  • Lens Hot Spot Database
  • IR Tutorials
  • FAQ
  • Infrared Filter Choices
  • Infrared Photography Guide
  • Infrared DIY Tutorials

Company

  • Why Choose Us
  • Get In Contact
  • Job Openings
  • Write For Us
  • Affiliate Program
  • Terms of Use
  • Privacy Policy
  • Home
  • Start Here
  • Galleries
  • Tutorials
  • FAQ
  • Blog
  • Why Choose LifePixel?
  • Shop
  • Contact

Copyright © 2025 Life Pixel Infrared - All rights reserved - LifePixel Infrared Photography IR Conversion, Modification & Scratched Sensor Repair