One of my favourite advances in photography equipment has been the introduction of Geotagging on photos. As a stock photographer adding location information is vital to my work. Before I purchased my Canon 5D Mark IV, I would have to take notes on the location that photos were taken when I was away. This is so that I could then fill in the relevant descriptions, Keywords and location information when I submitted my work. If I ever forgot to take notes of the location it was down to me to try and find it on a map. Whilst this wasn’t an issue for the famous landmarks, a random street was a bit more difficult to remember. Geotagging has made this whole thing a lot more simple. As a result, the Lightroom map module has become a really useful part of my workflow process. So what exactly is the Lightroom map module and how do you go about using it?
What is the Lightroom map module?
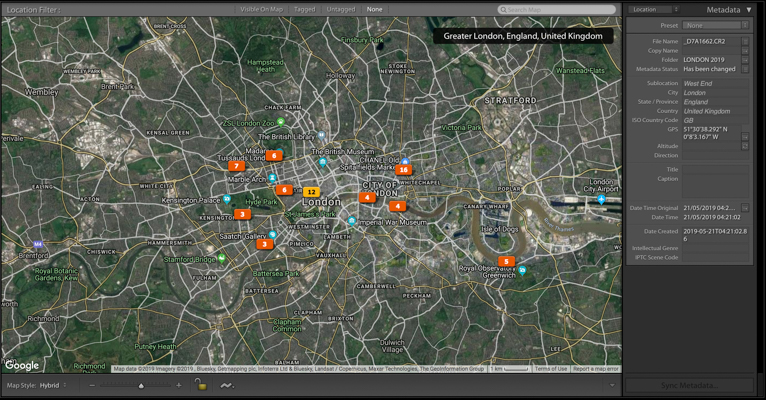
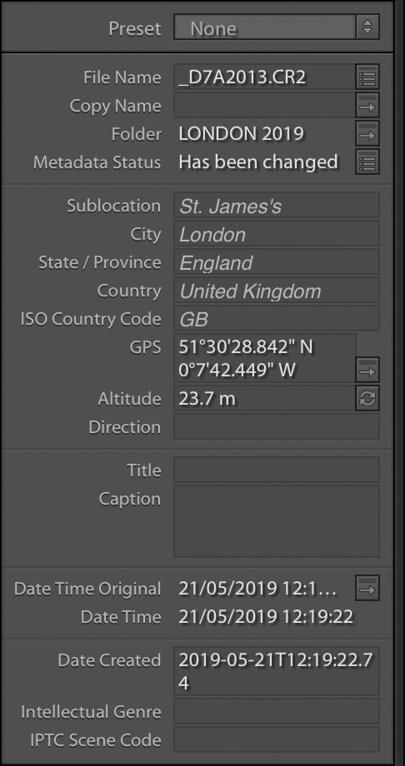
If you look along the top of your Lightroom screen you will notice that the word “Map” appears between “Develop” and “Book”. When you click on the map module you will see a map of the world (which is pulled in from Google). If your Photos have Geotagging or in other words GPS coordinates they will appear as orange squares on a map. These orange squares might have numbers in them. These numbers indicate how many photos were taken in that particular location.
How to use the map module?
The easiest way to use the map module is to have a camera that has Geotagging functionality. For example, the Canon 5D Mark IV has this function. This means every time a photo is taken as long as you have enabled Geotagging in your camera settings that photo will be tagged with the GPS coordinates in the EXIF data of the photo.
So when you import those photos into Lightroom, it automatically read the EXIF data and assigns that photo to a location on the map. Whilst it may not always be accurate to the exact place that you were standing, it is usually pretty accurate. As Lightroom is using Google maps it does mean that you need to be connected to the Internet for the map to work.

How to use the map module?
Once your photos have been imported into Lightroom and placed on the map you are able to view the details. Hovering over a folder on a map will show the images that have the GPS coordinates in that spot. If you zoom into the map you may find that the location of the photos differs slightly and so you are able to get a closer look at the exact location that the photo was taken.
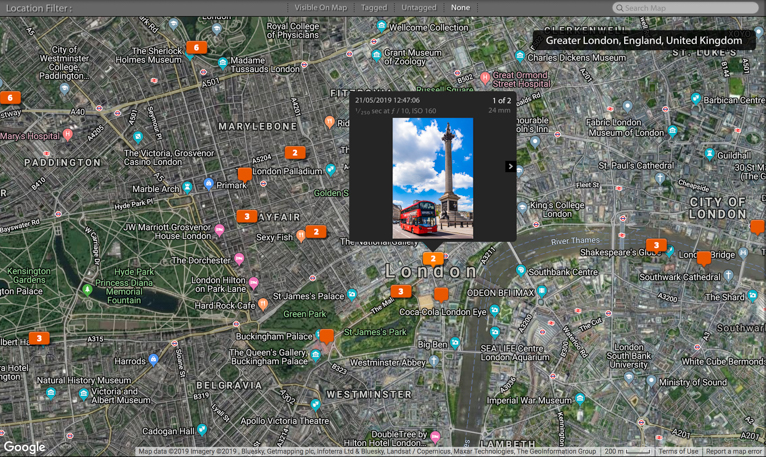
If you click on the photo on the film strip along the bottom you’ll notice that one of the orange squares will become yellow. This is the location that photo that you have selected was taken at.
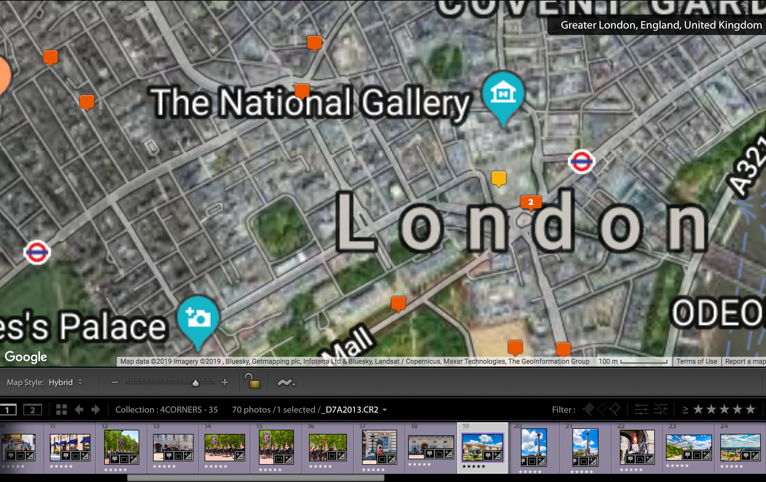
If you hover over any of the orange squares you will see a thumbnail image appear. You can use the arrows to scroll through the other images that were taken at that location.
If you zoom right into the map so that each photo represents its own orange triangle you can move the location of the photo to somewhere else. This is useful if, for example, the Geotagging hasn’t placed the photo in the right place.
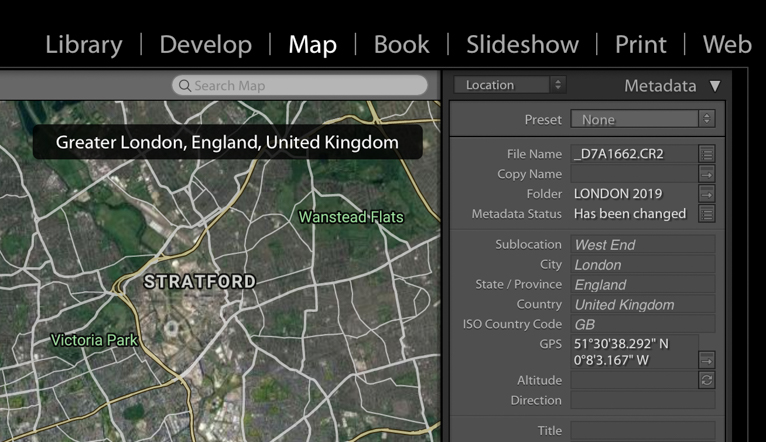
Whenever you have clicked on any of the orange squares you will notice that on the right-hand side panel there is some information about the exact location written in the metadata. This is another area where you can change the details of the photo.
What if your camera doesn’t have Geotagging?
If your camera doesn’t have Geotagging you can still add GPS data to a photo. But it’s a little more inconvenient. You would either have to purchase an external unit that connects to your camera that records GPS coordinates. Or you would have to record the GPS coordinates using something like your mobile phone and then add them in manually. So it might not actually be worth doing it.
For anyone that needs to record the exact location of photos, the Geotagging function can be a real time saver both in the field and back in front of your computer. The great thing about Geotagging is that you don’t have to worry about knowing where a photo was taken at the time of taking it. As you will always have the information on EXIF data. This means that when you’re out in the field you can focus on the most important element which is actually capturing the photos. Keep in mind though that some countries don’t allow GPS to be activated on your camera. So make sure you check regulations and turn it off if it’s not allowed. If you already have a camera that has GPS functionality start using it and you might see a huge difference in how much quicker your workflow becomes.
Photo credits: Kav Dadfar – All rights reserved. No usage without permission.
Latest articles by Kav Dadfar (see all articles)
- How To Photograph Street Performers - April 26, 2022
- Profiled Photographers – Ben McKechnie - August 24, 2021
- Profiled Photographers – Jim Maher - August 24, 2021
is the founding editor of JRNY Travel Magazine as well as a professional travel photographer and writer based in the UK. His images have been used by clients such as Condé Nast, National Geographic, Lonely Planet, Rough Guides and many others. Kav is also the co-founder of That Wild Idea, a company specializing in photography workshops and tours both in the UK and around the world.
See All Articles by Kav Dadfar

Leave a Reply