You will probably hear most photographers utter the words “I’d rather get my shots right when taking the photo rather than fix them in post-production”. Whilst this is absolutely the way to approach photography, sometimes it isn’t possible. At other times you may just make a mistake that you need to correct. Or it could just simply come down to your preference and how you want your image to look. Whatever the reason is, there’s no doubt that every photo will benefit from some level of post-production. Here are 5 simple Lightroom edits that will improve your photos.

White Balance
Adobe Lightroom is a brilliant photo editing software. For a lot of photographers, it is the go-to software for their editing. Of course, more complex tasks need to still be done in Photoshop but for most tasks Lightroom will work perfectly fine.
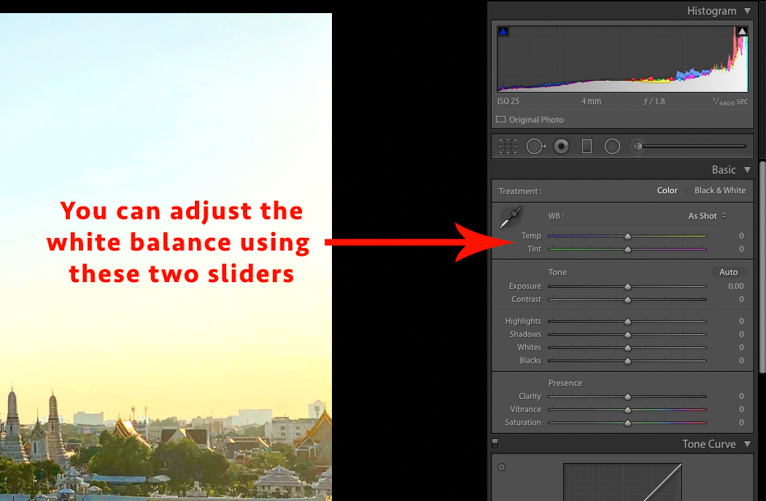
One of these is the White Balance (WB). This is a key component of photography and one of the main reasons that often photos don’t look right when you look back on them. The science behind it can seem daunting to understand. But in simple terms, you need to learn that different light sources produce a different colour light. What makes this difficult to judge is that our eyes adjust so that often we don’t notice much of a difference. However, cameras are not as advanced as the human eye so cannot always make the correction accurately. For example, if you take a photo during the day you may find that your photo has a blue tint to it.
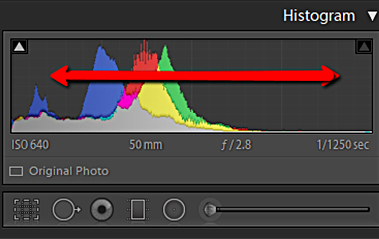
One of the first and easiest things that you can adjust on your photos is the white balance (as long as you are photographing in RAW format). Simply move the slider left or right until you get the desired effect. Generally, when your photo seems too blue you need to add more “warmth”. Alternately if it feels too orange you may need to add blue to make it feel cooler. Ideally, you need to aim for a natural look for the photo.
Brightness & Contrast
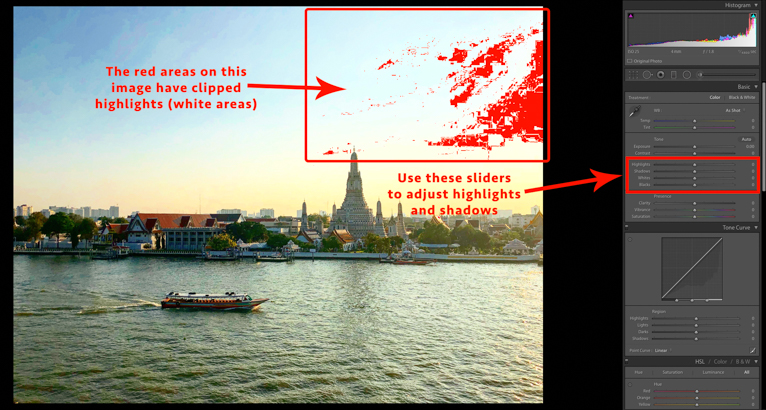
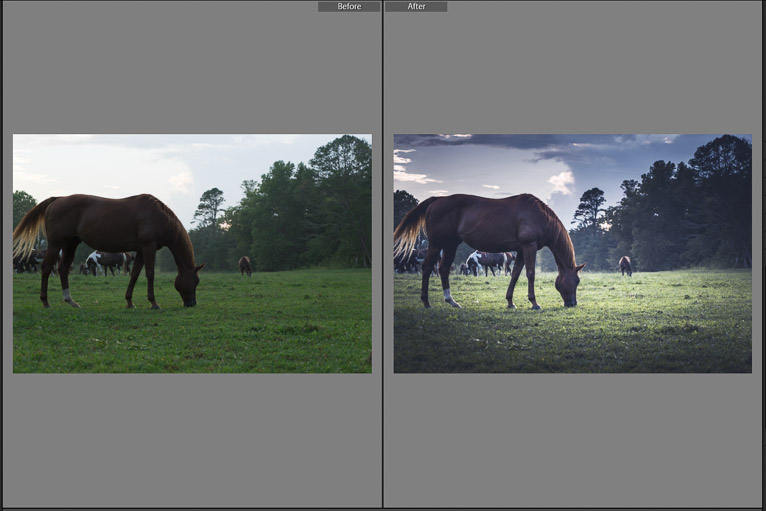
Another really simple edit that can transform an image is by adjusting the brightness and contrast of the photo. There are several ways that you can do this moving the relevant sliders:
- You can either brighten the entire image by moving the exposure slider
- Add more contrast to the image by moving the contrast slider
- The “Whites” slider works on the highlights parts of the image (useful when your highlights are clipped and you need to recover them)
- Shadows – similar to highlight but focusing on the dark areas (again useful when your shadows/blacks are clipped)
By combining these sliders you are able to adjust the brightness and contrast of the image to make it stand out more. Like all editing, the key is to create a natural look. Too much contrast in your image and it will look cartoon-like.
Vibrance & Saturation
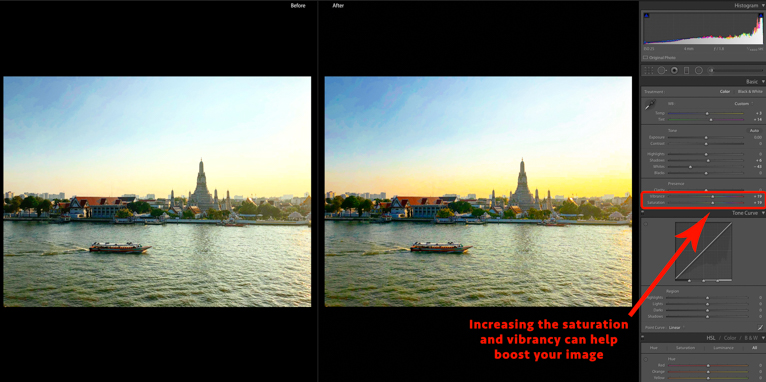
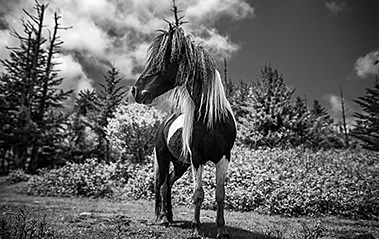
Another great tool in Lightroom to help your images stand out is the vibrancy and saturation sliders. By tweaking these you can really make an image that looks flat pop out. But it’s important that you use these in moderation as too much saturation in an image will make it look posterized and simply won’t work. When assessing the image after adding vibrancy and saturation ask yourself if the scene looks real. In other words, if those colours are something that you would see. If not, then scale back.
Straightening and Cropping
The one thing that I always find astonishing is when I see photos from photographers where the image hasn’t been straightened. Whether you are an amateur, semi-pro or even professional photographer, if you do nothing else in post-processing you should at least ensure that your images are straight. This is even more vital when there are vertical or horizontal lines like photographing cityscapes or landscape shots where there is a horizon.
The other part of straightening your shot is also to look at the crop. Sometimes you will find that simply cropping an image differently will be the difference from an image that doesn’t work to one that does. The great thing about cropping in Lightroom is that it is non-destructive. That means that you always have your previous versions of the photo that you can go back to (or even the original). So, play around with the crop of your image considering things like the rule of thirds to see if it makes a difference to the end result.

Burn & Dodge
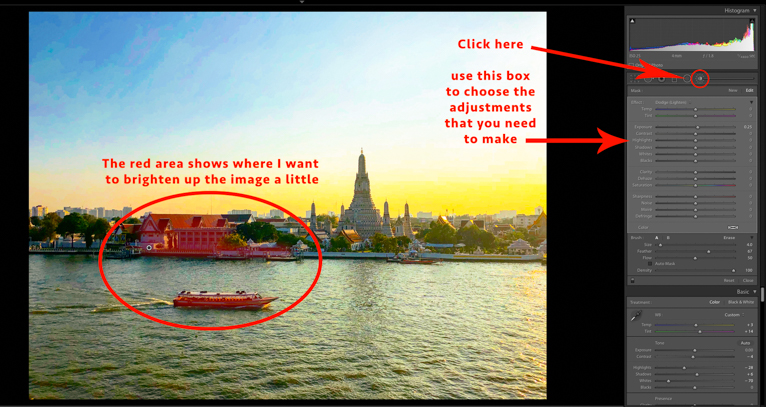
These are terms that are left over from the days of film and involve being able to alter a specific area of the image without it impacting the whole photo. For example, it might be that you have a composition where your subject is a little underexposed and so you want to brighten it up. Using the traditional brightness slider will brighten the entire image which might not be what you want. By selecting the “dodge” tool you can select the area of an image that you want to brighten and use the sliders to implement the change to just that area. The “burn” tool does the opposite and darkens the part of the image that you want to alter. You can also use these tools to adjust other elements such as saturation, contrast, clarity and many more.
Spot removal
If you use your camera f0r long enough you will get dust and dirt on your lens. These show themselves as black dots on your image. They are especially visible in flat colour areas such as blue skies. Lightroom has an easy spot removal tool that allows you to clean up your image. Select the tool as indicated in the image below and click on the spot you want removing. Lightroom will remove that spot by copying from a nearby spot on your image.

There’s no doubt that digital photography has allowed photographers possibilities that didn’t exist before. Part of this change has also meant that you are now able to manipulate photos in post-production more than ever before. Sometimes a photo might just require small tweaks whereas at other times it will be more complex. How much post-processing you apply will come down to the photo and personal choice. These 6 simple and very quick edits will improve any photo even if you do nothing else. So don’t be afraid to use them to get the photo you want.
Latest articles by Kav Dadfar (see all articles)
- How To Photograph Street Performers - April 26, 2022
- Profiled Photographers – Ben McKechnie - August 24, 2021
- Profiled Photographers – Jim Maher - August 24, 2021
is the founding editor of JRNY Travel Magazine as well as a professional travel photographer and writer based in the UK. His images have been used by clients such as Condé Nast, National Geographic, Lonely Planet, Rough Guides and many others. Kav is also the co-founder of That Wild Idea, a company specializing in photography workshops and tours both in the UK and around the world.
See All Articles by Kav Dadfar

Leave a Reply