• Cart
  • Checkout
  • My Account

Infrared Conversions, IR Modifications & Photography Tutorials | Life Pixel IR

The world leader in infrared conversions, modifications & DIY IR conversion tutorials. Scratched sensor replacement, UV & Full spectrum conversions.

The world leader in infrared camera conversions

866.610.1710
  • Home
  • → Start Here ←
    • 1 – Introduction
    • 2 – Filter Choices
    • 3 – Focus Calibration
    • 4 – Lens Considerations
    • 5 – Camera Considerations
    • 6 – Start Shopping
  • Galleries
    • Infrared Photography
    • Infrared Time Lapse
    • Infrared Cinematography
    • Infrared Stop Motion
    • Ultraviolet Photography
    • Forensic Photography
  • Education
    • Training Sessions
    • How To Shoot Infrared
    • AR Coated Infrared Filters
    • Lens Hot Spot Database
    • Photoshop Video Tutorials
    • Infrared Issues & Solutions
    • IR Basics in Photoshop
    • Camera Quick Start Guide
    • DIY Conversion Tutorials
    • IR Photography Primer
    • Secondhand Cameras
    • Wall Of Shame
  • Workshops
  • FAQ
  • Blog
    • Tutorials
    • Inspiration
    • Locations
    • Gear
    • News
    • Other
  • Why Choose LifePixel?
    • Submit Your Review
  • Contact
  • Shop

The 5 Key Components For Great Cityscape Shots

Cityscapes are one of the most popular types of photos that people like to capture. They are also relatively easy to execute compared to say action photography where you are dealing with moving subjects. You will usually be able to use a tripod and take your time so blurred photos shouldn’t be an issue. But a great cityscape shot isn’t always a given and requires some planning and preparation in order to achieve. So here are the 5 key components that you need to nail in order to capture great cityscape shots.

Cityscape_photography_tips

Location

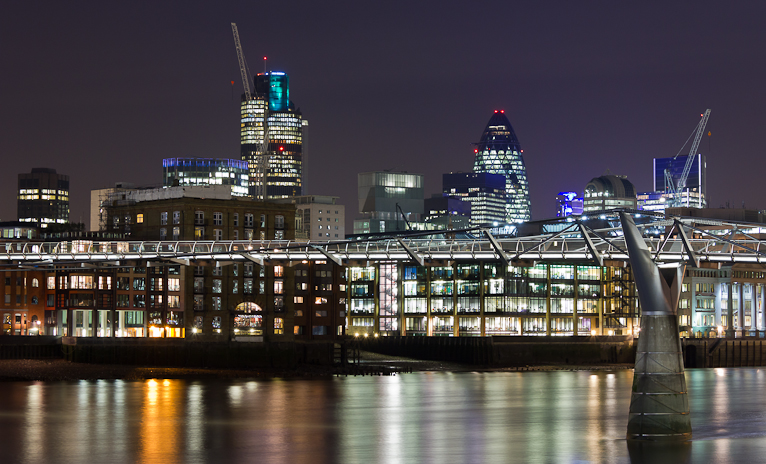
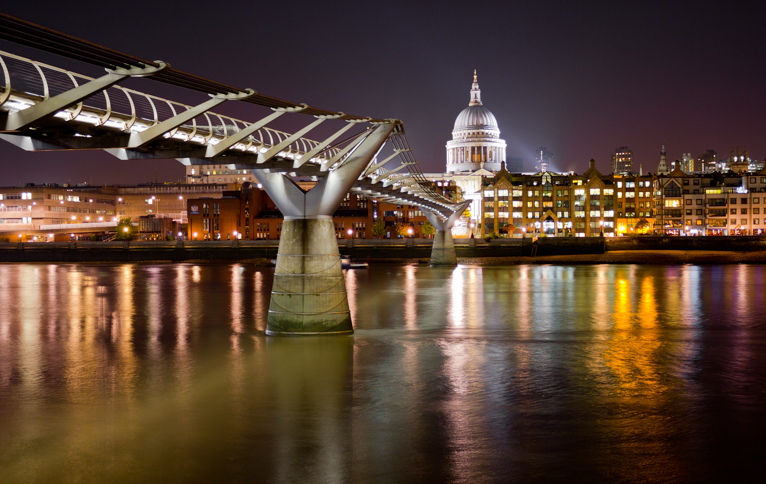
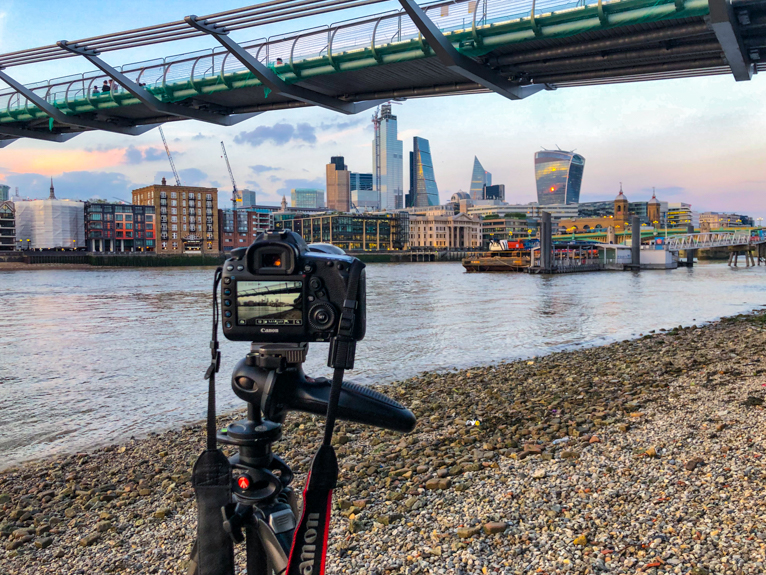
Like any type of landscape photography, the first part of a great cityscape shot is that you need a great location to shoot from. Cityscapes by their nature require open space in front of you. So the obvious option is always to head to the river as this gives a natural clearance to the skyline. But this will usually also mean that you might end up with the same photos that everyone captures. Which isn’t necessarily something to avoid as often the reason for that is that those are the best locations.

Cityscape_photography_tips

But the great thing about city photography is that there are always new places to capture photos of the skyline from. Whether it is a new rooftop bar, a viewing platform or even sometimes just buildings being demolished that can give a new line of sight, the ever-changing skyline of a city means you can capture new photos all the time. You just need to be on the lookout for potential new locations.

So your first step for a successful shoot should be to research and find great spots to shoot from. Google maps and Google Street view has certainly made things a lot easier in this day and age. But don’t stop there. Check out local photographers’ accounts on social media and even tourist boards who will often announce when new things are happening. Keep a list of locations on hand so that when the conditions are right you can head straight there to capture the photos you want to take.

Cityscape_photography_tips

Light

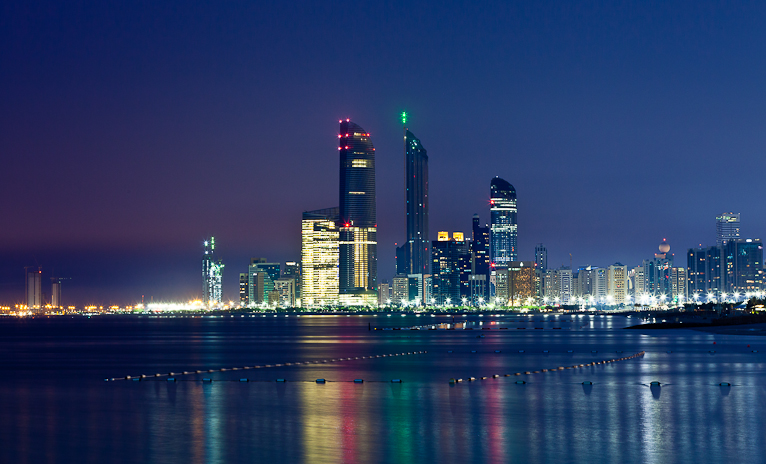
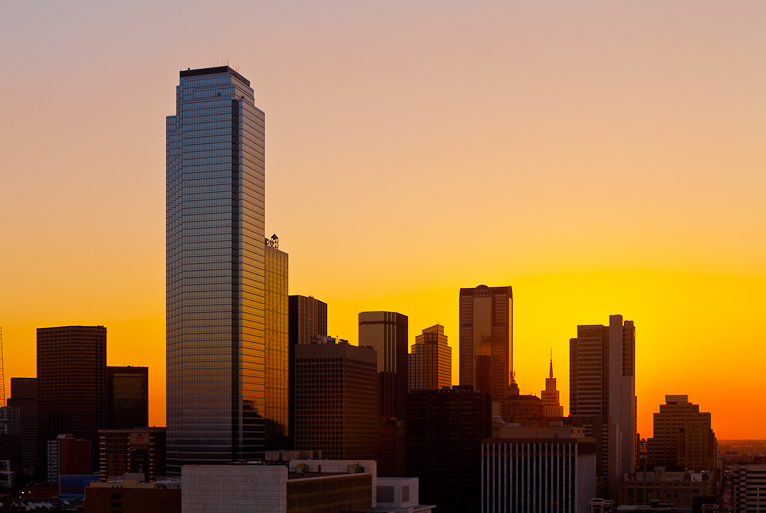
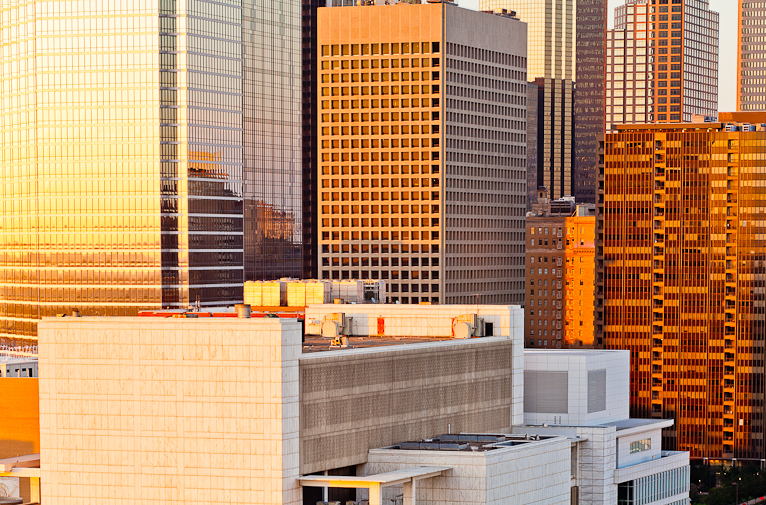
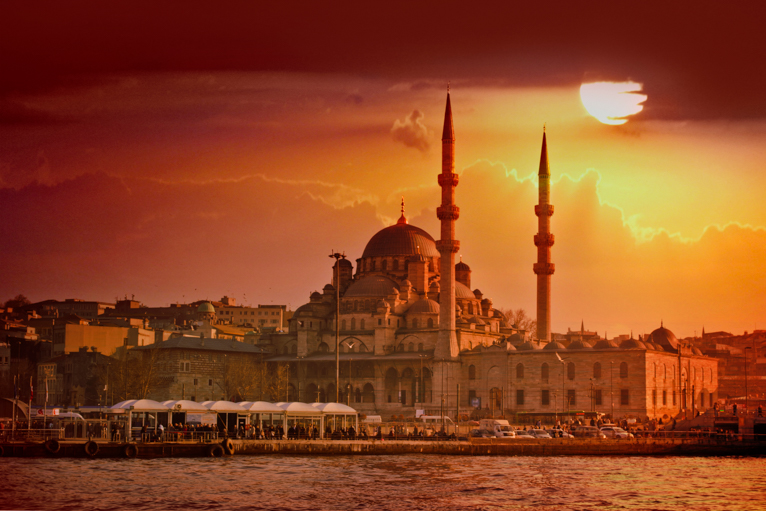
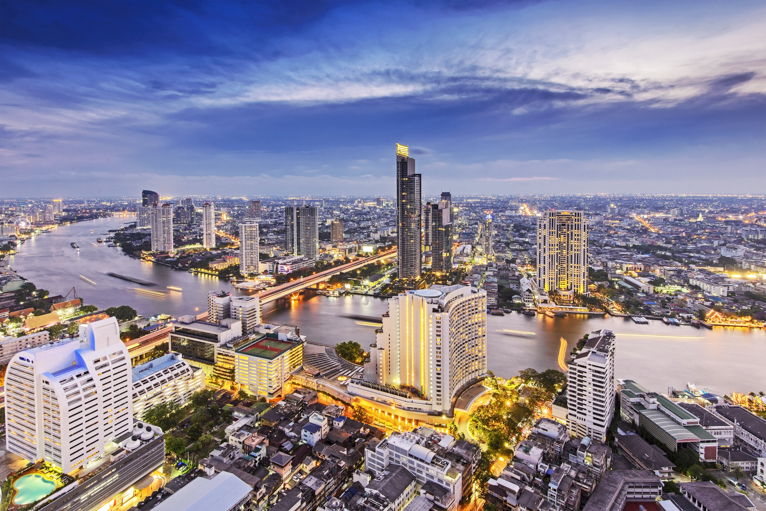
The light that you have in a scene is arguably the single most important element in your cityscape photography. A stunning scene won’t come out as an amazing photo if you have a flat and uninteresting light. But great light doesn’t mean beautiful sunshine. In fact, sometimes a moody or stormy sky can provide much more dramatic results. So don’t think of great light as just sunshine, but instead as “interesting light”. Ideally, you should aim for a light that gives something that is unusual or that enhances the scene in some way.

Cityscape_photography_tips

Often this does mean sunlight in the early hours of the morning or late afternoon which can give a scene a beautiful golden glow. In addition, this sort of soft light helps to enhance contrasts and shadows to give the photo more depth and feeling. So if you find that you are getting these kinds of conditions head to one of your locations to capture cityscape shots.
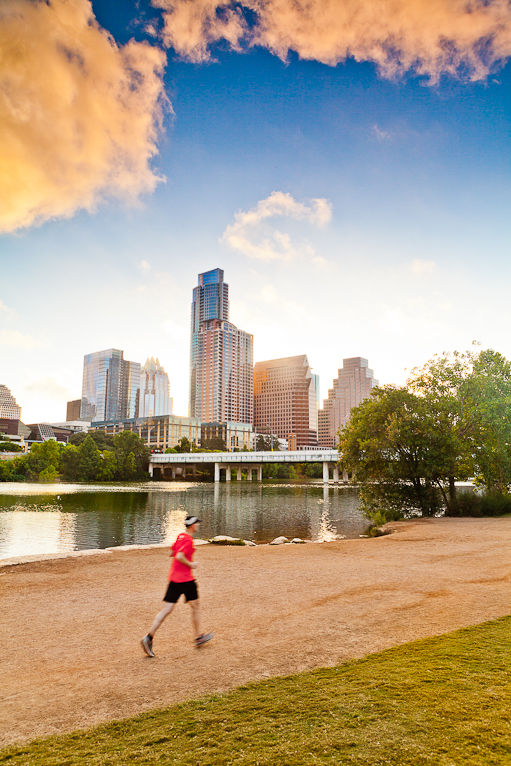
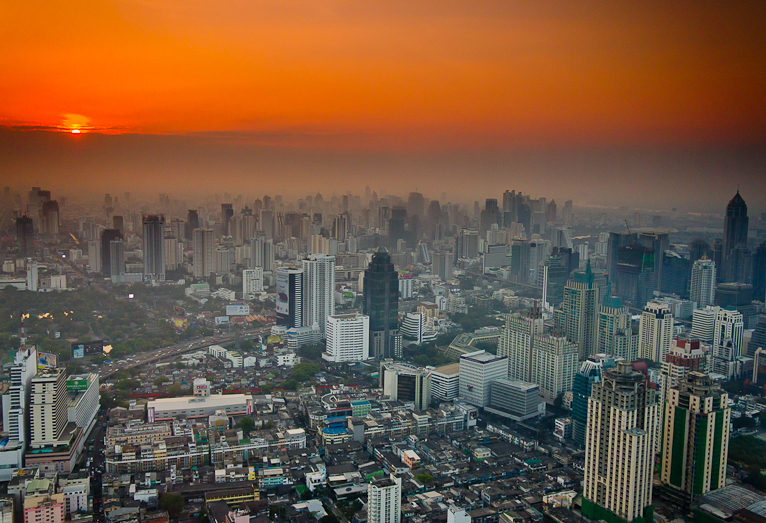
Cityscape_photography_tips

Sky

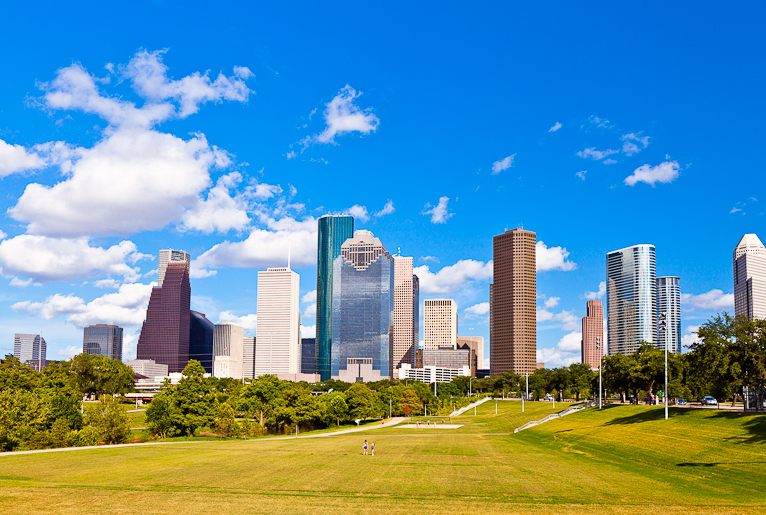
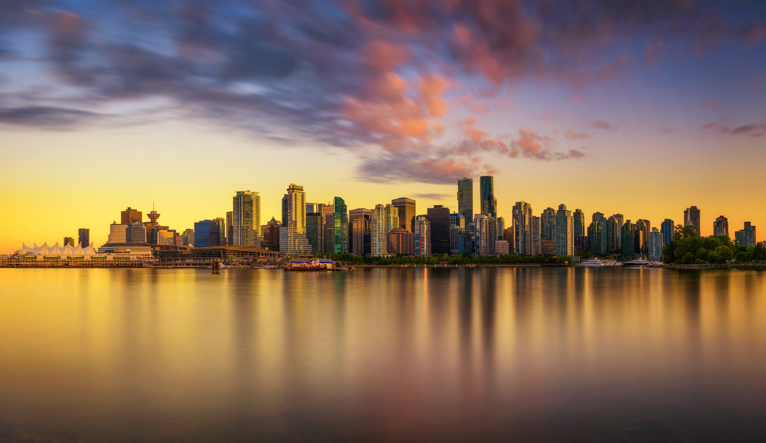
Now that we talked about light, I should also mention the sky as well. The best cityscape shots will also have a great sky as well possibly with dramatic clouds or even just a lovely colour. For example, just a few fluffy clouds in the sky can make a huge amount of difference to a photo versus one which has nothing but clear blue sky. Of course, the holy grail of this type of photography is the dramatic colourful explosions of colours that might happen at sunrise or sunset. These types of skies can transform a cityscape shot into something spectacular that will “wow” the viewer. Obviously, a dramatic sky doesn’t happen every day so you’ll have to wait for the right conditions.

TIP: Be on the lookout for days where there is a strong wind as by using a slow exposure you will be able to capture the clouds moving as streaks in the sky to add some dynamism into your photos.

Cityscape_photography_tips

Composition

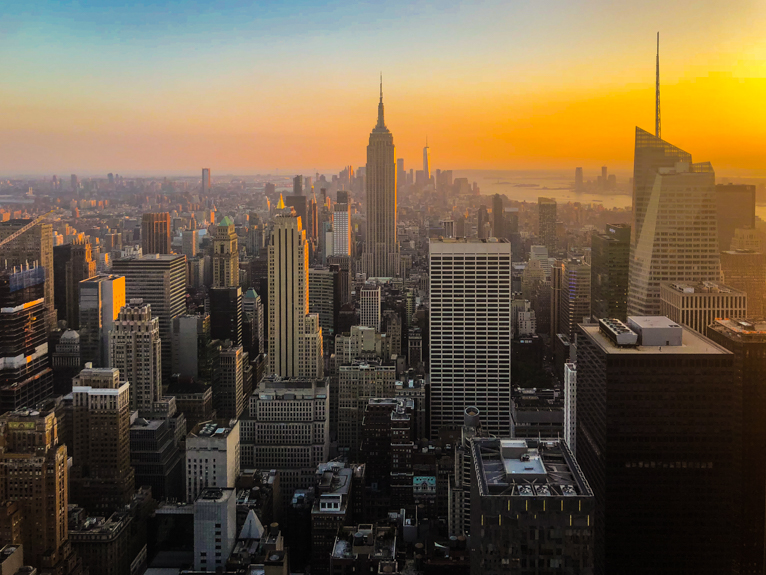
One of the most common mistakes that I often see from amateur or newbie photographers when taking cityscapes is trying to cram too much into their composition. Think of your skyline photo like any other photograph. There needs to be a point of interest that is the focus of the image. So for example on the image below the main point of interest is the Empire State Building. Try to compose your image in a way that showcases the point of interest and if that means having to crop out other elements then so be it. Also, remember that you don’t always have to show the entire skyline. You can sometimes crop into your scene by using a telephoto lens to just focus on a small area.

Cityscape_photography_tips

Editing

The final step in ensuring your cityscape shot is stunning is to edit it properly. So spend time tweaking your image ensuring that the colours are correct and enhanced, contrasts are looking good and you have cropped the image if needed. I would always start by first correcting your white balance. Then move onto the essentials like brightness, contrasts and even curves to really make your image pop out. You can also choose to add some more saturation and vibrancy to your image (or even reduce it for a more muted look).

One really important aspect to check on your image is that your verticle lines are straight. This is something that is easy to do on Lightroom with a simple click. This will fix the effect known as “converging lines” where it looks like buildings are falling backwards.

Cityscape_photography_tips

A great cityscape shot can look amazing anywhere. Whether its in a magazine or printed and framed to be hung on a wall, the iconic cityscapes of the world can provide wonderful photo opportunities. The great thing about cityscape photography is that it is relatively easy to master and do well. Once you know the basics and practice your composition a little, the only thing that you will need is the right conditions. Think about the elements above the next time you are planning on taking cityscape shots and you may just end up with some stunning results.

Photo credits: Kav Dadfar – All rights reserved. No usage without permission. Dreamstime.

Filed Under: Tutorials Tagged With: City photography, Cityscape tips, Cityscapes, Skyline photo, Skyline photography, Skylines

7 Tips For Photographing Skylines

Skylines are often one of the most defining visuals of a city. Every city has its own unique skyline and should be on every travel photographer’s shot list for any location. However, capturing great skyline photos isn’t easy and requires planning and perseverance. Here are a few simple tips to help you capture great photographs of skylines.

KD-2016-Skylines-1

The Right Location

The big advantage of photographing skylines is that the majority of the time there are pretty well established vantage points around the city that offer great views of the city skyline. However, this does mean that as a photographer you have to work harder and think more creatively to be able to capture unique photos. Like most types of photography, you will need to plan and research in advance to find the right location. There are various websites to help and the likes of Google Maps make it easier than ever to plan your skyline photos.

KD-2016-Skylines-2

Start by looking at existing photos of the city online to get a sense of what already exists and the angles that are available on view. Then using a map, plot points around the city where you have a good clearance in front of you such as a river or large park. But keep in mind that you will need to be a fair distance away to ensure you capture a wide photo and also to keep the vertical lines of the buildings straight in your photo. Finally, when you get to the city, be prepared to scout the locations out and try to find new ones. Speaking to locals or even looking at local post cards can often give you a good indication of any locations you might have not thought about.

Take Your Equipment

Whenever possible I try not to carry too much equipment with me, after all there’s nothing worse than having to walk around all day in the heat with a load of unneeded camera equipment. However, when you are photographing skylines there are a few things that you will most certainly need so it’s best to ensure you have them with you. These include:

  • A tripod, if you are photographing early morning, late afternoon or at any other time that you might need long exposure times
  • A wide angle lens is usually what you would need, but there might also be occasions where you would need a telephoto lens if you are very far away from the skyline
  • An array of filters – these could be anything from Neutral Density filters to Polarizing filters
  • Cable release to ensure that you don’t touch the camera if you are going to take photos using long exposure as this could cause camera shake
  • Waterproof layers for you and something to cover your camera equipment if there is a chance of rain
  • Warm clothes – even during the summer some places can be cold early morning or late in the evenings

KD-2016-Skylines-7

Use Early Morning or Late Afternoon Light

It’s not a secret that most of the landscape photos that we usually find stunning are usually taken at dawn or dusk. The hour after sunrise and the hour before sunset give a beautiful light, which when mixed with interesting cloud formations or weather can transform a mundane scene into a magnificent vista. In fact, you can get two very contrasting photos taken from the same place at different times of the day depending on the light and weather. The key is to always leave yourself enough time in your trip but also during that day to return to the location if you need to.

KD-2016-Skylines-3

Wait For Night

It’s so easy to pack up and go home after sunset especially if you’ve had a long day, but often cities come to life in the evening. When the building lights and street lamps illuminate the city, this is arguably when the skyline is at it’s most visually striking. So instead of packing up after sunset, wait around for an hour or so and you can capture the city skyline at it’s best. You will definitely need a tripod if you are planning to photograph at night, as you will have long exposure times, so make sure not to leave it behind.

KD-2016-Skylines-7

Zooming In Is OK

Sometimes it’s impossible to capture the entire skyline because you are either too close to it or too far away. After all, a photograph of a city skyline where the majority of the photos is plain sky and water with a very thin strip for the skyline isn’t going to work. Or it could be that you are actually too close and can’t capture the entire skyline. In these situations you may need to either zoom into the scene to just capture a small selection of the view or simply focus on one part of the scene. For example, this might be a bridge in the foreground or an interesting building. Sometimes zooming into a scene with lots of different architecture can give you an abstract photo, which helps diversify your portfolio.

Win a FREE Camera Conversion!

KD-2016-Skylines-4

Think About The Rule Of Thirds

One of the big pitfalls of photographing skylines is having too much “dead space” where nothing interesting is taking place. Too much plain white overcast sky and the photo looks dull and interesting, and too much of a plain foreground could also have the same effect, so it is important to think about all aspects of your composition and not just the skyline part. This is where the rule of third can help by helping you reduce this “dead space” and helping you add points of interest when the photo needs it. Try to position your horizon either 1/3rd up from the bottom of the photo (if you have an interesting sky) or 2/3rd up if you have an interesting foreground with a point of interest. This way you are maximizing the interesting elements in the scene and minimizing the elements that don’t enhance the photo.

KD-2016-Skylines-10

Make The Most Of Your Hotel

Believe it or not, one of the best places to photograph city skylines is from hotels and roof top bars, because these are often positioned to give their customers the best view of the city. And if you are lucky enough to be staying at one of these hotels, you can get great photos right from your doorstep. Research is key, so prior to booking your hotel room, keep this in mind, and when you arrive at your hotel always ask if they have a room with a view of the skyline. I have lost count of the number of times I was able to take skyline shots from my hotel – and sometimes even from my room!

KD-2016-Skylines-5

There is no doubt that skylines can provide some incredibly striking photographs which can be stand-out shots on their own but can also work as part of a portfolio. The most important factor is researching and planning to maximize your time. Vantage points are often dotted around a city so you need to ensure you are fully prepared for where to be and at what time. Once you are there the challenge is to capture unique shots that can do the scene justice.

Photo Credits: Kav Dadfar (All rights reserved).

Filed Under: Tutorials Tagged With: Skyline photography, Travel photography

Blog Topics

  • Tutorials
  • Inspiration
  • Locations
  • Gear
  • News
  • Other/Misc

What our customers say:

Life Pixel has been a life-changer for me. Continue reading
Eric GConnecticut
Read more reviews
I am more than satisfied with the service I received Continue reading
Christopher JCanada
Read more reviews
I am more than pleased with the conversion job that you did Continue reading
LOUIS MWaco, Texas
Read more reviews
I am VERY impressed with his knowledge of your products and his patience in explaining it to a novice like me. Continue reading
Lynn FEssex, Maryland
Read more reviews
Things will only get better from here thanks to all of you. Continue reading
Phillip FRedding, California
Read more reviews
The Lifepixel newsletter reminds me of not having expressed my gratitude for the excellent job you made. Continue reading
Michael GGermany
Read more reviews
Your staff went above and beyond the call of duty to make sure everything was handled in an excellent manner. Continue reading
Paige RPearland, Texas
Read more reviews
It has given my old camera a new life, I will enjoy using it again. Continue reading
William PAustralia
Read more reviews
Excellent service and the camera works just great Continue reading
Hans FairhurstAustralia
Read more reviews
I just got my converted camera back from you guys. THANK YOU!!!! Continue reading
Anne CutlerForest Knolls, CA
Read more reviews
infrared_filter_choices_sidebar
ir_conversions_explained_sidebar
----------- Watch More Videos -----------
infrared_quick_start_guide

Ready to start shooting Infrared?

Convert My Camera

Subscribe To Our Newsletter

Receive updates, tips, cool tutorials, free stuff and special discounts.

Learn the Basics

  • Video
  • Start Here
  • Filter Choices
  • Focus Calibration
  • Lens Considerations
  • Camera Considerations
  • Place Your Conversion Order

Resources

  • Galleries
  • Lens Hot Spot Database
  • IR Tutorials
  • FAQ
  • Infrared Filter Choices
  • Infrared Photography Guide
  • Infrared DIY Tutorials

Company

  • Why Choose Us
  • Get In Contact
  • Job Openings
  • Write For Us
  • Affiliate Program
  • Terms of Use
  • Privacy Policy
  • Home
  • Start Here
  • Galleries
  • Tutorials
  • FAQ
  • Blog
  • Why Choose LifePixel?
  • Shop
  • Contact

Copyright © 2025 Life Pixel Infrared - All rights reserved - LifePixel Infrared Photography IR Conversion, Modification & Scratched Sensor Repair