• Cart
  • Checkout
  • My Account

Infrared Conversions, IR Modifications & Photography Tutorials | Life Pixel IR

The world leader in infrared conversions, modifications & DIY IR conversion tutorials. Scratched sensor replacement, UV & Full spectrum conversions.

The world leader in infrared camera conversions

866.610.1710
  • Home
  • → Start Here ←
    • 1 – Introduction
    • 2 – Filter Choices
    • 3 – Focus Calibration
    • 4 – Lens Considerations
    • 5 – Camera Considerations
    • 6 – Start Shopping
  • Galleries
    • Infrared Photography
    • Infrared Time Lapse
    • Infrared Cinematography
    • Infrared Stop Motion
    • Ultraviolet Photography
    • Forensic Photography
  • Education
    • Training Sessions
    • How To Shoot Infrared
    • AR Coated Infrared Filters
    • Lens Hot Spot Database
    • Photoshop Video Tutorials
    • Infrared Issues & Solutions
    • IR Basics in Photoshop
    • Camera Quick Start Guide
    • DIY Conversion Tutorials
    • IR Photography Primer
    • Secondhand Cameras
    • Wall Of Shame
  • Workshops
  • FAQ
  • Blog
    • Tutorials
    • Inspiration
    • Locations
    • Gear
    • News
    • Other
  • Why Choose LifePixel?
    • Submit Your Review
  • Contact
  • Shop

10 Tips for Getting People to Naturally Smile When Being Photographed

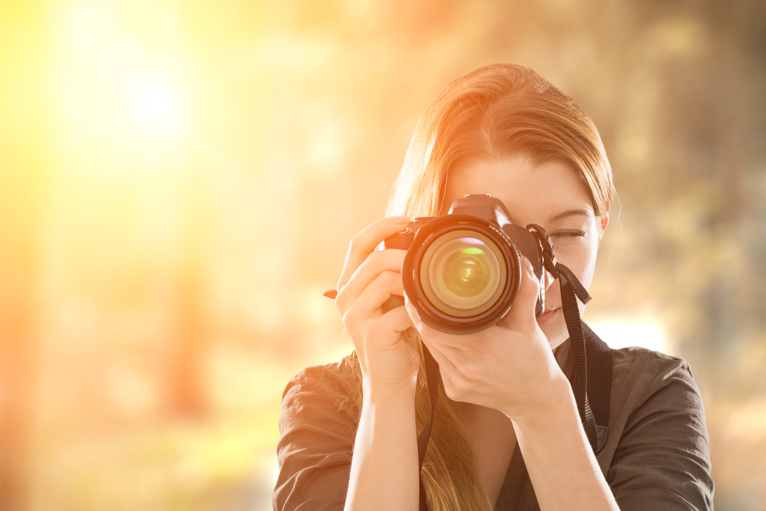
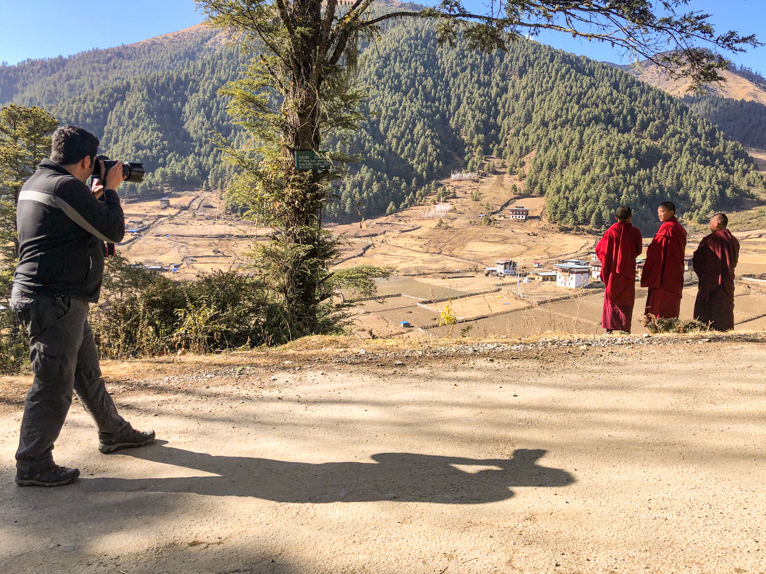
How is it that the moment people are placed in front of a camera, a nervous air suddenly washes over them, making it incredibly difficult to capture a natural smiling shot. It can be quite a challenge to take great pictures of people when photo time makes them feel awkward and uncomfortable.

We all know the “say cheese” trick; however, it always seems to produce an ingenuine looking smile. It’s unbelievable how different a natural smile and a fake smile are, and people can tell. Fortunately, there are a few foolproof tricks that can help you to get people to feel natural and relaxed in front of the camera. Try these ten helpful tips for getting people to smile as naturally as possible when being photographed.

Natural-Smile-portrait-photography

1. Create an emotionally safe environment

People tend to be highly attuned and reactive to other peoples’ emotional states, meaning that the overall “vibe” of the environment you are photographing may reflect on your subjects’ emotions, and their ability to produce a natural smile. To provide an extreme example, imagine trying to get an entire football team to smile for a group photo when they’re debriefing in the locker room after losing a match only moments before. The emotional state of the environment is simply not right for capturing a natural smiling shot, and you will likely be unable to get the image you want.

Although not always something that the photographer can control, you may be able to influence the emotional state of the environment by taking control of the situation, keeping everyone involved, and staying positive and patient.

2. Mirror the emotion you would like to capture

Ever wondered why smiling at a baby will often result in the baby smiling right back at you? There is some science at play behind this reaction. Specifically, something called ‘mirror neurons.’ Mirror neurons are described as “a special class of brain cells that fire not only when an individual performs an action, but also when the individual observes someone else make the same movement.” Mirror neurons allow us to simulate peoples’ actions and even the emotions behind those actions.

If you’re trying to get people to smile as naturally as possible when they are being photographed, simply smile yourself. Everyone will likely react to your warm, natural, smiley demeanour and start to smile naturally themselves.

3. Fake laugh

People need to be comfortable and relaxed to produce a natural smile. An excellent way to break down people’s feelings of discomfort is to try something silly like asking them to fake laugh. Set the challenge for your subjects to see who has the most outrageous phoney laugh. With a bit of luck, your subjects’ facial expressions after hearing the simultaneous roar of fake laughter should be of genuine happiness. Just make sure you’ve got your finger on that shutter button.

4. Compliment them!

Often the reason that people feel uncomfortable behind the camera is due to a lack of confidence. So, what a better way to make them feel more confident and relaxed than to offer them a genuine compliment. The options are endless when you compliment—for example, their hair, their outfit, or their jewellery. Better yet, if you can compliment them on their natural smile, then chances are that those natural smiles will just keep coming. Be sure that your compliments are genuine and don’t feel forced, as this may have the reverse effect.

Natural-Smile-portrait-photography

5. “Say….”

As touched on earlier, we all know the “say cheese” line. We half expect to hear the photographer say it each time we pose for a photo. As a photographer, you can use the historical overuse of this term as a tactic for triggering some natural smiles. Throw your subjects a curveball, and they will likely crack a smile or even a giggle if you’re lucky. Instead of “say cheese,” use the line “say…” followed with a random word that you think might entertain your subjects. Take into account the age of your subjects, any jokes or funny situations that may have occurred earlier during the session, and use your discretion to pick an appropriate word.

Natural-Smile-portrait-photography

6. Bemusement

People become quite bemused when they are posing for a photo, and the photographer asks them to simply “look at each other.” The vagueness of these instructions creates a sense of confusion among a group of people. It often will result in laughter or smiling natural reactions as people look around seeking validation from their peers as to what they are being asked to do. This technique is great for capturing candid shots and can be followed up by tip 7 below to get a more classical smiling picture.

Natural-Smile-portrait-photography

7. “Look at me”

While your subjects are still smiling following the confusion caused by your earlier instructions to “look at each other,” follow up with the new directions, “everyone, look at me” to capture those natural smiles before they dissipate.

Natural-Smile-portrait-photography

8. Trigger a special memory

This tip is most suitable when photographing couples or people you may know well. By asking your subjects to recall a particular moment in their relationship (e.g., their first date, first kiss, or engagement) or history, you’ll help them feel more relaxed and attuned to each other. This method is likely to result in those loving natural smiles you want.

Natural-Smile-portrait-photography

9. Try not to laugh

Here’s one for when you’re photographing groups of children. Have you ever challenged a group of children to try not to laugh, and the exact opposite happens? The longer the children stare each other down, trying not to laugh, the more their lips quiver, and all of a sudden, they’re all bursting into fits of laughter. This idea is an incredibly simple but almost foolproof way to get natural smiles out of children.

Natural-Smile-portrait-photography

10. Tongues out

To finish off the list, here is one more simple tip for getting natural smiles out of children. Sometimes, sticking your tongue out at children is all you need to get some giggles out of them. Hopefully, you’ll be able to catch some natural smiling shots before they stick their tongues back out at you.

Natural-Smile-portrait-photography

With these tips, you’ll be in good stead to go out there and get those natural, smiling, photographs that you’re seeking. Just remember to stay positive, be patient, and adjust your techniques appropriately.

Photo credits: Kav Dadfar – All rights reserved. No usage without permission. Dreamstime.

Filed Under: Tutorials Tagged With: people photography, photographing people, portrait photography, portraits

How To Capture Awesome Environmental Portraits

Photographing people is one of the most vital types of travel photos to cover off on any given trip. Often these are the types of photos that can really bring a destination to life and offer a unique view of the world. But there are different types of “people photos”. In this short guide, we will discuss the differences between traditional head and shoulder portraits and environmental portraits as well as some tips on how to capture great environmental portraits.

Environmental_Portraits

Portraits or environmental portraits

As mentioned above, there’s a difference between portraits and environmental portraits. Portraits usually consist of head and shoulder shots with the focus being on the person’s eyes. Environmental portraits on the other hand not only focus on the person but also the wider context of what they are doing. In other words, we see their surroundings. So the first element of an environmental portrait is to ensure you capture the wider context of the scene.

Environmental_Portraits

Use a wide-angle lens

Just because you are capturing a wider scene doesn’t mean you should stand across the road and zoom in with a long lens. You will usually find that if you get closer to your subject it will help build that connection that will become apparent in the image. So get close to your subject and use a wide-angle lens to give you a wider angle of view. The other benefit of getting closer is that you will find it less difficult to take a photo without people stepping into your composition.

Environmental_Portraits

Think about your depth of field

Your depth of field (controlled by your aperture) is incredibly important in environmental portraits. In traditional head and shoulder portraits, you can afford to select a wide aperture as you are only really concerned with the person’s face. So as long as you focus correctly on the eyes and they are sharp, the background can be blurred. In fact in these types of portraits, the blur helps the subject stand out against the background and so it is usually preferred.

For an environmental portrait, you do need to also capture some of the surroundings. So you may have to select a slightly smaller aperture to increase your depth of field. This can be tricky in places like markets where you are likely to face low light conditions. Without using artificial lighting, the only solution will be to increase your ISO.

Environmental_Portraits

Know your shutter speed limit

The other important setting when it comes to any type of photography is your shutter speed. For environmental portraits, you may not have the luxury of the person remaining perfectly still (like they would for a head and shoulder portrait). For example, they might be making something or moving their head as they are interacting with someone. This means that your shutter speed will need to be faster than when taking a portrait of someone. How fast will depend on various factors such as your camera’s image stabilization and your own ability to hold a camera steady.

Some people may find that they can hold a camera steady at 1/60th sec whereas someone else has a limit of 1/100th sec before they start seeing blurred photos through camera shake.

Environmental_Portraits

Compose your shot carefully

Environmental portraits can be tricky to compose and it becomes tempting to place your subject in the centre of your composition. While sometimes that might be the best scenario, there are also times when you can place your subject to one side to show more of the scene. This also has the added benefit of allowing photos to be used as double-page spreads in magazines when your subject needs to avoid being in the centre of the page (which is known as the gutter). So try to play around with your composition and take multiple shots with different setups involving your subject. Not only will this ensure you have different crops in case a client needs it, but you can also select the best composition in post-production.

Environmental_Portraits

You can also use other compositional techniques like “leading lines” to compose your shot.

Don’t be shy, but don’t get in the way

As a photographer, it’s important to be confident in your ability and also in managing the shoot. This doesn’t only refer to a professional setup with models and lighting, but also simply photographing a market vendor. Before you approach the person to take photos try to envision the shot in your mind and get your settings correct. Once you begin taking photos, be confident but also always be aware not to get in the way. This is especially important if you are photographing someone who is working, as the last thing you want is for them to miss out on a sale because of you.

Environmental_Portraits

Environmental portraits can be very rewarding and give you some incredible and unique photos. Use the tips above and you will be well on your well to capturing great environmental photos.

Photo credits: Kav Dadfar – All rights reserved. No usage without permission.

Filed Under: Tutorials Tagged With: environmental portraits, people photography, portrait photography

How To Avoid The Most Common Portrait Photography Mistakes

A great portrait photo can not only capture amazing detail about the subject but also immortalize emotion. However, any number of factors can turn a fantastic image into something that feels awkward and contrived. Some elements are easily controlled and might be obvious to beginners, but some other elements can prove difficult for even the most seasoned of photographers.

After all, there’s so much to arrange before you press the shutter, and each subject is different. Portrait photography, or portraiture in photography, is meant to freeze the subject’s personality in time, instantly acquiring a sense of who that person really is at a given moment. Aside from a fidgety model who just wants to scratch the itch on his or her nose the moment you take a picture, there is more to consider than just your automatic camera settings.

In fact, those automated settings may detract from what would otherwise be a great photo. To help novices, here are 8 tips to avoid the most common portrait photography mistakes.

Portrait_Photography_Mistakes

1. Prepare your subject

Prior to even getting your camera out, you should communicate with your subject and convey what you intend to get out of them during the session. Whether it’s a random person on the street or a veteran model, basic communication becomes extremely important. If you want your subject to elicit sadness, but he or she is smiling broadly, it’s up to you to communicate that to them. Too often even professional photographers don’t do this and that only lead to wasted time and not the photo that you want. You need to connect with your subject to make sure that you’re all on the same page and to build that connection. Your photos will be better off for it.

Portrait_Photography_Mistakes

2. Get yourself ready

It might seem obvious, but what happens when you set up a portrait photoshoot and realize that you forgot to pack the backdrop you intended to use? Or you don’t have enough lighting arranged? Double-check that you have everything you’re going to use including lenses, lighting and flashes. Additionally, preparing yourself is more than just having the physical items you’ll need for the shoot. It also means having a clear idea of what you want to accomplish during the session, so don’t end up taking random photos and hoping that one of them happens to turn out wonderful. This is no different if you are photographing a random stranger outdoors. Having a clear idea in your mind will make the process quicker, easier and give you better photos.

Portrait_Photography_Mistakes

3. Select the right location

If you’re shooting a portrait in a studio, then you will have a lot of control over your surroundings, such as lighting and background. A studio may very well be the right place to shoot a specific kind of portrait. However, if you opt for an outdoor location, then some of these elements will not be under your control. Not only should you be concerned about natural lighting, but having your subject pose in front of a distracting background can also ruin a great photo. Select your lens carefully, since using a longer lens can trim down the background in your frame. Make sure to separate your subject from the background as well, so they don’t get lost in what could be a busy background. A wide aperture will help in blurring the background to ensure that your subject stands out.

Portrait_Photography_Mistakes

4. Crop appropriately

Your subject is supposed to be the focal point in your image, therefore leaving too much empty space above their head or around them will make the subject look lost in the space. Crop your shot tighter to avoid leaving so much blank background that may take away from your subject. This doesn’t necessarily mean that you have to centre your subject; on the contrary, justifying to one side can make a much more dynamic image. Your subject doesn’t have to be centred perfectly to draw someone’s eye the way you intend. If you are leaving space around your subject you need to ensure that this done intentionally and there is balance in the composition.

Portrait_Photography_Mistakes

5. Focus on the eyes

The eyes are the windows to the soul, or so we’re told. Portrait photography has the unique ability to really bring out different sides of a subject, and by keeping the focus on your subject’s eyes, it becomes much easier to find those different sides. If your subject is directly facing your camera, then it’s pretty easy to focus on both eyes. However, if your subject is turned away from you, then just focus on the one visible eye. If the eyes are out of focus, then your portrait will not work.

Portrait_Photography_Mistakes

6. Use a fast shutter speed

A portrait is meant to freeze a moment in time, which means that if your subject moves (even slightly), then your image is going to blur. Your subject is going to move at some point, no matter what, so you don’t want to risk losing that perfect shot due to movement. Select a shutter speed that’s fast enough to really freeze your subject. How fast your shutter speed needs to be will depend on how steady you can hold a camera and your subject. But a safe choice is around 1/125 sec to 1/250 sec to ensure a fast enough shutter speed to capture your subject. A slower shutter speed may be possible but might be susceptible to some blurring.

Portrait_Photography_Mistakes

7. Use appropriate lighting

Modern digital cameras have lots of automated features that portrait photographers generations ago would have loved to have. In fact, many smartphones can take decent pictures with next to no light. However, to get a nicely composed, in-focus portrait, you’ll absolutely want to make sure your lighting is on point. For portraits, lighting quickly sets the mood of your image. If you want a softer look for your subject, don’t use hard, high-contrast lighting. Conversely, if you’re trying to bring out a dramatic look, then don’t use softer lighting. This is one of the most important elements of a portrait so consider it carefully.

Portrait_Photography_Mistakes

8. Be patient

If you’re trying to get a certain expression or mood from your subject, then don’t rush through the process to try and push them into looking “just right.” It’s unlikely that your subject will look into your camera, expressionless, for a prolonged period of time. Wait and watch their face for the right moment to take the photo. That doesn’t mean you should just take one photo. Instead, but rather to be patient not just with your subject, but yourself as well. Take plenty of photos so that you capture a range of expressions.

Portrait_Photography_Mistakes

Portrait photography isn’t easy and takes time and practice to perfect. The great thing about portrait photography is that you can practice with friends and family. In the meantime, the following tip should help you avoid some of the most common portrait photography mistakes.

Photo credits: Kav Dadfar – All rights reserved. No usage without permission. Dreamstime.

Filed Under: Tutorials Tagged With: portrait photography, portrait photography mistakes, portraits

6 Tips To Help You Capture Better Environmental Portraits

Environmental portraits can make for great photos. Capturing someone in their own setting can often be a glimpse into their life and also the daily life of a destination. These photos are often unique as unlike photographing a monument, they cannot be repeated. But capturing environmental portraits well can be challenging. Whether it’s the composition or the execution, there is a fine line between getting it right or a photo that simply does not work. But fear not, here are 6 tips to help you capture better environmental portraits.

Do some research

Even though it may seem that environmental portraits are spontaneous if you want to capture good photos you need to do some research. Whether that is about potential locations for good photos or the rules and regulations regarding photography at that location. Or simply what settings you need to use, the better your research is the better your chances of capturing a great photo. You can also use this opportunity to research what sort of photos already exist from the scenario or location you are photographing. Use this to help you think of your own ideas of how to take environmental portraits in that scene.

Get closer

By far the biggest piece of feedback that I give amateur photographers on workshops is for them to get closer. Most people tend to be pretty shy when it comes to photographing people. So they stand back and zoom in. The issue with photographing people in this way is that you can’t build a connection with that person. As a result, the photo can sometimes feel detached and not candid enough. So instead of zooming in, actually move in closer to your subject. Start by just having a chat with them which will make them more relaxed and open to having their photo taken. Even if you don’t speak their language, it’s amazing how much more receptive people are when you say hello, smile and ask to take their photo.

Know your settings

Whilst it is always betting to take your time and be patient when taking photos, sometimes you have to work quickly. Your subject may not want to wait around for a while for you to work out which settings you will need. This will often lead to photographers who are not confident in their camera getting flustered and rushing things. So try to work out your settings before you even approach the person you are photographing. The best way to approach this is to determine your shutter speed first as you don’t want a blurred photo.

Most people will not be able to hold a camera steady enough at speeds slower than 1/60 sec. But to be safe you may want to aim for 1/100 sec. Then work out your aperture. For most environmental portraits you can get away with a fairly shallow depth of field. Something like f/5.6 should work fine (just be careful of your focusing at wider apertures). If there is more of the scene that you need in focus then you may have to go to f/8 or higher. Once you have your shutter speed and your aperture, you can then raise you ISO accordingly to allow you to capture a photo at the desired exposure. If you know all of this before you approach your subject it will make things somewhat easier.

Crop accordingly

Even though in an environmental portrait it is important to see the full picture (i.e. the surroundings of the person you are photographing), you still need to crop your image accordingly. Make sure that you remove distracting elements either when taking the photo or in post-production. Always ask yourself if the image is telling the story that you want to tell. If there are any elements that are not essential to the story, then remove them. Be especially aware of things around the edge of your photo.

Direct your model

Keep in mind that the people you are photographing are not professional models. So usually having a person thrusting a camera in their face will make them nervous. This can result in unnatural smiles or facial expressions. They may not even know how to stand or pose. Try to take the time to direct your model to where and how you want them to stand for you. You can even direct them to use possible accessories or props that they may have. Not only will this add to the story but it will also help to distract them from the camera giving you a more natural shot.

Take multiple shots

You probably won’t have a lot of time to photograph your model, but that doesn’t mean you can’t take multiple shots. Besides the fact that you will have a better chance of capturing a sharp photo, it will also allow you to choose your best composition later. How often have you looked at a set of photos you have taken and thought you liked the first one you tool? Often you will find that one of the later shots ends up being your favourite. But avoid capturing the same photo over and over again. Instead to look for a variety of angles and if possible even different lighting.

A good environmental portrait can tell a story and capture the viewer’s attention. It often transports them into the life of the subject and can tell so much about the person they are seeing. But good environmental photos are challenging and require practice to perfect. Follow the advice above and you will be on your way to capturing great environmental portraits.

Photo credits: Kav Dadfar – All rights reserved. No usage without permission.

Filed Under: Tutorials Tagged With: environmental portrait tips, environmental portraits, portrait photography, portraits

Profiled Photographers – Ines Banks

Ines_Banks

Croatian born portrait photographer Ines Banks grew up in the beautiful surroundings of Dubrovnik. But her journey into photography was in part due to meeting her husband. She says “my husband is a photographer so I learnt from him almost without meaning to”. Having worked as a fashion designer and a model in her early career, Ines had the creative eye when it came to people. Being in front of the camera most of her life helped her when she swapped to being behind the camera instead. Knowing how to pose or get the best out of people is one of the things that makes you a good photographer.

So when she and her husband opened up their first studio, she sort of fell into portrait photography. She says “I guess the fact that I was around the age when people I knew and their friends started to have children when the studio opened played a massive role in my genre of photography”.

Ines_Banks

Ines, where are you from?

I was born in the beautiful Croatian city of Dubrovnik. I woke up every morning to the most amazing view of the town and the sea. So I guess you can not help but be inspired to be creative if you grow up somewhere like this.

Where do you currently live?

I now live in England just outside London in Berkshire.

What genre of photography do you specialise in?

My work now is now mainly portraits. Specialising in newborn, maternity, children and family photography.

Ines_Banks

Describe your style of photography?

I would describe my style as natural and timeless I guess. There is nothing better than capturing “that” image that will end up on someone’s wall, printed and mounted, for them and everyone else to look at for years to come. Although I use the studio for most of my newborn sessions, I do love to capture “these moments” in a person’s natural surroundings. So I would also say that my style is reportage as well as I like to document the client and their baby’s first days.

What are you working on at the moment?

Nothing specific at the moment but I do have a few new projects that I’m getting excited about. I have two young children so as a working mum I don’t have much time to grow my business to the point I want it to be. I’m quite happy where I am for the time being photographing a select number of existing clients and a few new ones.

What is your next project or assignment?

Due to the nature of what I do, my work tends to be reactive. For example at the time of this interview, I have a set of newborn twins coming into the studio which should be good fun. I would, however, like to extend my business into self-branding. This is something I did for a few of my clients recently who are mostly working mums. I help them get their self-confidence by taking beautiful images of them and helping them to grow their ideas and businesses further.

Ines_Banks

Are there any photographers whose work/style you admire?

I love the work of some of the old masters like Steve McCurry, Ron Haviv and Peter Adams. Their work is timeless and has inspired me on my journey.

What is your favourite memory of your experiences?

I love photographing babies so naturally, all the newborn shoots tend to be special. I don’t think there’s anything cuter than a tiny little human.

What’s the biggest photographic challenge you overcame?

Oh, without a doubt that has got to be screaming children. Trying to calm a screaming baby so that you can capture candid photos can be a challenge sometimes. But you can never really know what to expect so you have to be able to adapt to the situation. My favourite email was from one of my clients asking when can her kids go back and take more photos with “that crazy lady”. I guess I delivered.

Ines_Banks

What’s in your camera bag?

My main cameras are the Nikon D700 and D3X. They are pretty old now but I love the tones they produce so I keep them around. I pair these with Nikon 35mm f2, 50mm f1.4 and 85mm f1.4 lenses. I have recently upgraded to a Sony A7iii with 24-70mm f2.8 lens, 70-200mm f4 lens and 55mm f1.8 Zeiss lens.

What photographic equipment would you never leave home without?

Without a doubt that would have to be Nikon D700 and 50mm lens. It’s a great combination. Although I just used Nikon D850 on my latest shoot so I might have to convert.

What advice you would give anyone who is starting out?

Unfortunately, these days business skills are about as important as photography skills in order to run a successful and profitable studio. So if you are not business savvy try to learn more about that side of things. Good marketing and social networking can get you a few steps ahead of your competitors.

Ines_Banks

Any pitfalls they should avoid?

I find a lot of new photographers focus too much on equipment. Good glass will no doubt help but you can create a very good studio set up for less than you might think. So don’t get into the habit of trying to purchase the latest stuff. Start with what you can afford and absolutely need and grow from there. Becoming a great photographer takes time and you will make a few mistakes along the way. As long as your clients are aware you are a “newbie” you should be fine. Pretending you can do some shoots when you can’t will only bring misery, not just to you but for the expecting customer as well. Do not overthink and make sure you do your research.

Lastly… if you weren’t a photographer what would you be doing?

Interesting question. I’d say probably a fashion or interior designer. Before I met my husband I was designing pieces for a number of fashion houses and names in Croatia. I still make my kids clothes as we speak and stitch anything around the house. Design and interiors are my hobbies now but they are definitely something I would love to include in my future photography. So watch this space!

To see more of Ines’ work or book a shoot visit www.inesbphoto.com

You can follow Ines on Instagram, Facebook or Twitter

All images by Ines Banks. All rights reserved. No usage anywhere online or in print without permission.

Interview by Kav Dadfar.

Filed Under: Inspiration Tagged With: baby photography, interview, portrait photography

Blog Topics

  • Tutorials
  • Inspiration
  • Locations
  • Gear
  • News
  • Other/Misc

What our customers say:

Life Pixel has been a life-changer for me. Continue reading
Eric GConnecticut
Read more reviews
I am more than satisfied with the service I received Continue reading
Christopher JCanada
Read more reviews
I am more than pleased with the conversion job that you did Continue reading
LOUIS MWaco, Texas
Read more reviews
I am VERY impressed with his knowledge of your products and his patience in explaining it to a novice like me. Continue reading
Lynn FEssex, Maryland
Read more reviews
Things will only get better from here thanks to all of you. Continue reading
Phillip FRedding, California
Read more reviews
The Lifepixel newsletter reminds me of not having expressed my gratitude for the excellent job you made. Continue reading
Michael GGermany
Read more reviews
Your staff went above and beyond the call of duty to make sure everything was handled in an excellent manner. Continue reading
Paige RPearland, Texas
Read more reviews
It has given my old camera a new life, I will enjoy using it again. Continue reading
William PAustralia
Read more reviews
Excellent service and the camera works just great Continue reading
Hans FairhurstAustralia
Read more reviews
I just got my converted camera back from you guys. THANK YOU!!!! Continue reading
Anne CutlerForest Knolls, CA
Read more reviews
infrared_filter_choices_sidebar
ir_conversions_explained_sidebar
----------- Watch More Videos -----------
infrared_quick_start_guide

Ready to start shooting Infrared?

Convert My Camera

Subscribe To Our Newsletter

Receive updates, tips, cool tutorials, free stuff and special discounts.

Learn the Basics

  • Video
  • Start Here
  • Filter Choices
  • Focus Calibration
  • Lens Considerations
  • Camera Considerations
  • Place Your Conversion Order

Resources

  • Galleries
  • Lens Hot Spot Database
  • IR Tutorials
  • FAQ
  • Infrared Filter Choices
  • Infrared Photography Guide
  • Infrared DIY Tutorials

Company

  • Why Choose Us
  • Get In Contact
  • Job Openings
  • Write For Us
  • Affiliate Program
  • Terms of Use
  • Privacy Policy
  • Home
  • Start Here
  • Galleries
  • Tutorials
  • FAQ
  • Blog
  • Why Choose LifePixel?
  • Shop
  • Contact

Copyright © 2025 Life Pixel Infrared - All rights reserved - LifePixel Infrared Photography IR Conversion, Modification & Scratched Sensor Repair