When I was a college student, I was working as a welder on a construction site. I was an Engineering student at that time. But science was always something that had my interest. Many folks, interested in science or not, have a fascination with lasers. I was no different. At that time semiconductor lasers (diode lasers) were rare and mostly infrared. But gas lasers were fairly common. I spent several paychecks on a small helium-neon laser from a company called Spectra Physics. It was something that I had always wanted and now I had one. It was cool and I did all sorts of experiments with it.
After I spent a lot of time shining it at things, I decided to try to put it to some real use. I wanted try my hand at making holograms. Now to call holography a sort of photography is technically wrong. There are no lenses for the image formation as in regular cameras. The recorded images are not as a result of an image being focused on a film plane. Holography is an interference phenomenon. This is where two mutually coherent forms of monochromatic light are recombined and a pattern of light and dark lines are formed and recorded on film. Let me discuss this in a little more detail.
Interference is also the principle where soap bubbles get their color. But it is what makes holography possible. Because of the wave nature of light, it has the ability to interfere. In areas where the peaks of the wave correspond, there effect is a bright spot. Where the troughs match, there is a dark spot. See my blog on infrared haze reduction for a brief description of waves.
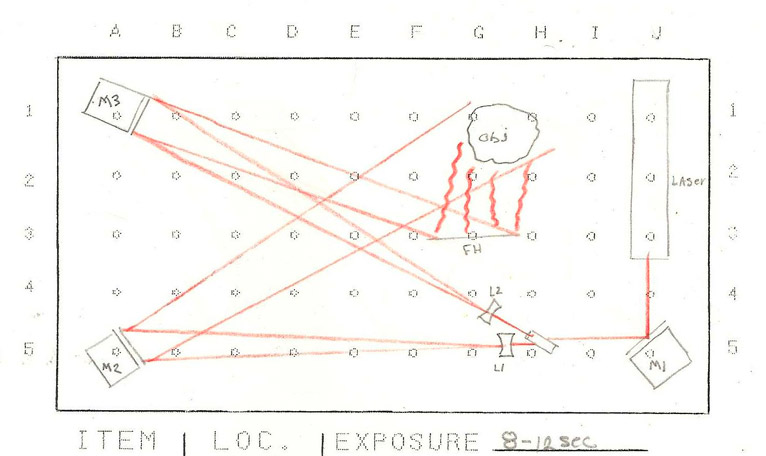
Holography works in this manner, but on a much more complicated scale. A laser beam is split in to 2 beams. One beam is spread and used to illuminate a film plane (reference beam). The other beam is spread and illuminates the subject (object beam). The light from the subject scatters and hits the film plane. Rather than construct a graphic, I scanned part of a page of my old holography lab manual. This is an example of a working set-up that I used frequently.
When the scattered light off the object interacts with the reference light on the film plane, the mutually coherent light interferes creating light and dark interference patterns. The light is coherent because it’s of the same wavelength and phase, mutually coherent because the 2 beams are split from the same source. These complex interference patterns are what are recorded by the film and make up the hologram.
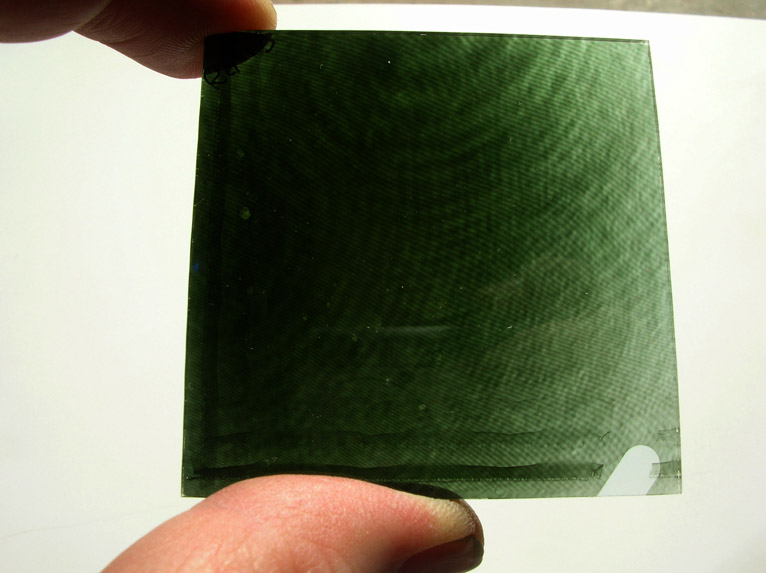
At that time, most holography was recorded on very high resolution silver halide film or glass plates. Depending on how the hologram is set-up and processed made a difference on how the hologram was replayed. Some holograms can be replayed with white light (like on your credit cards). Others must be re-illuminated with the reference beam (reflection and transmission holograms, respectively).
This is a reflection hologram I recorded on a glass plate. It’s being illuminated by sunlight.
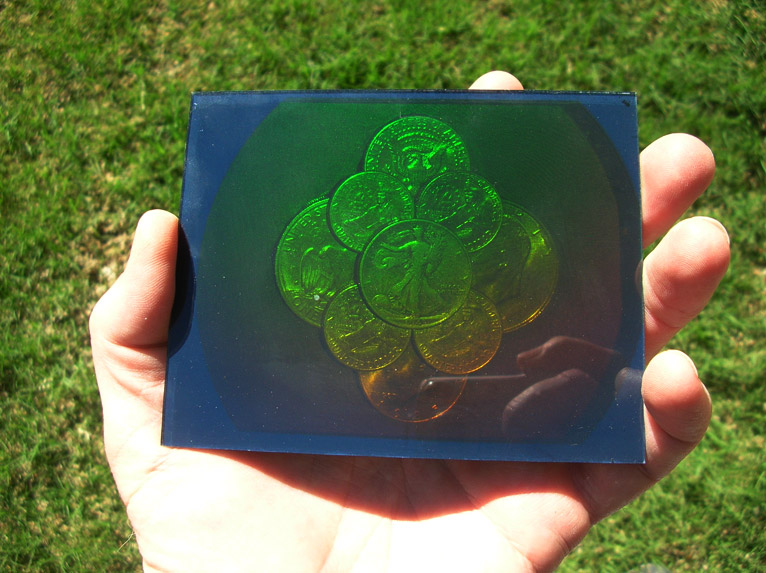
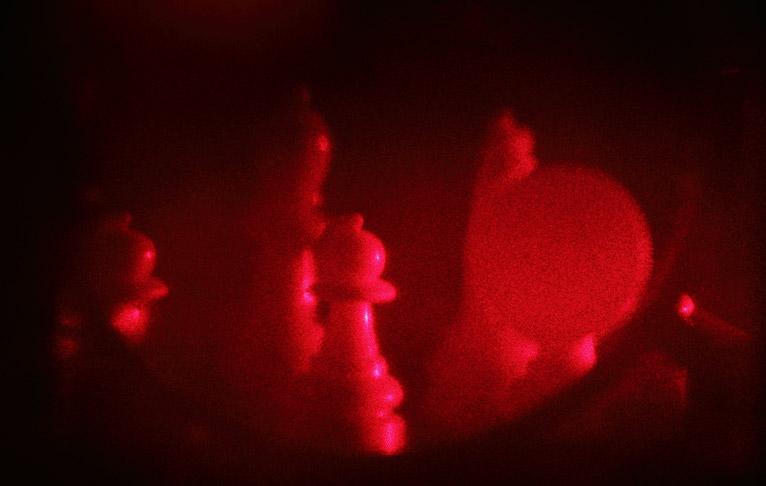
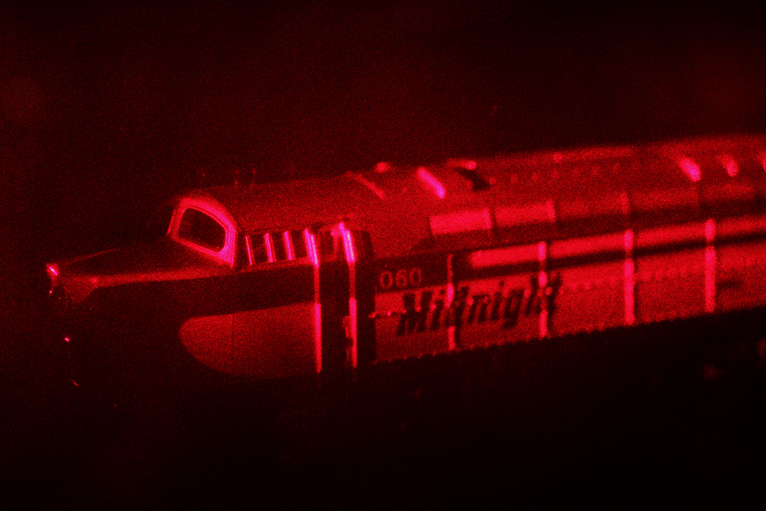
The following are examples of transmission holograms being replayed with laser light. The photos can’t capture the essence of how stunningly realistic these look in person.
I uploaded a short video of the hologram above that shows the front view and also the area behind it. It gives a good indication of the strange experience of seeing the hologram and expecting to see the subject behind the film plate.
A transmission hologram has a truly breathtaking degree of detail and realism. They are very difficult to photograph, as the laser speckle tends to give the images a grainy appearance. What is most amazing is that the camera must be focused on the reconstructed image of the subject behind the film plane, not the film plane where the hologram is recorded. Even though the subject is not physically present, the hologram reconstructs the scene so precisely that the camera’s optics believes that the subject is still present.
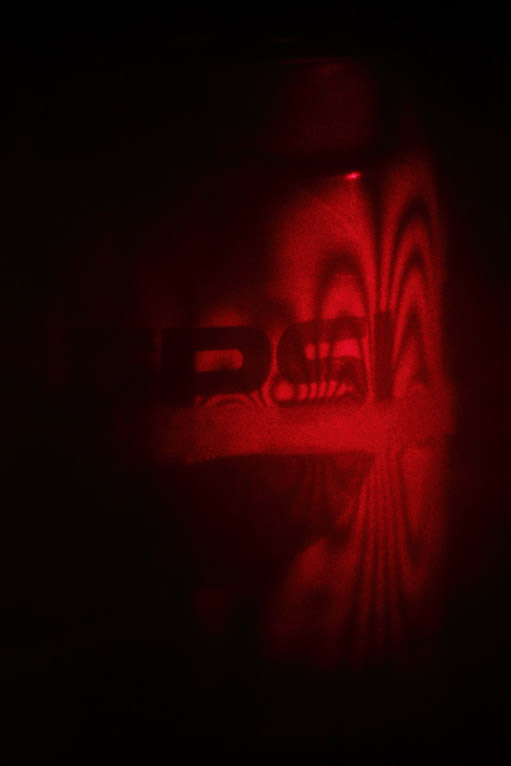
This accuracy of reconstruction lead to an entire industry of holographic stress analysis and non-destructive testing. The details of this is a subject for another time. But here are a couple fun examples displaying the sensitivity of the process. The first is a soda can under stress by loose fitting rubber band. These bands correspond to a dimensional change of about 12 millionth’s of an inch.
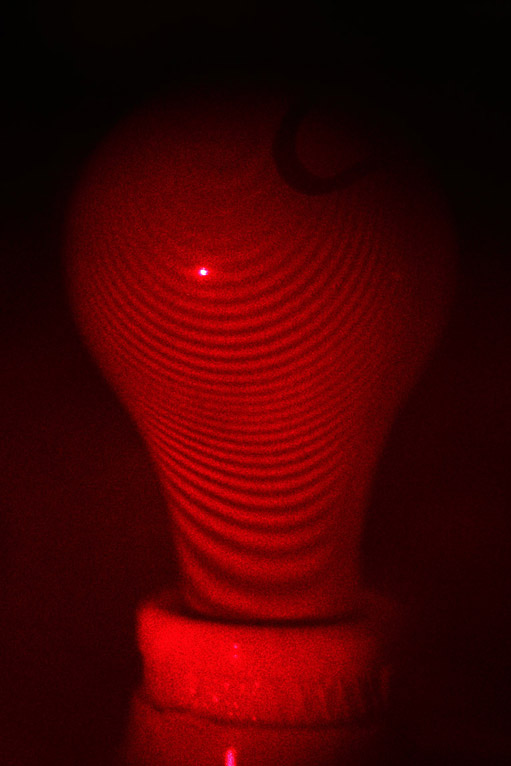
The next is an example of the expansion of the glass envelope of a light bulb. The heat from the filament caused the glass to expand, which is shown in the series of topographic-type rings.
One of the trickier aspects of holography is to make sure that the set up is ultra-stable, interferometrically stable. As a photographer you might think that a tripod is stable. Holography requires stability of an entirely different level. Remember I mentioned the interference? If this pattern is disturbed, the hologram is destroyed. Any movement of the arrangement or optics, mirrors or the subject itself (on the order of 12 millionth’s of an inch) will cause the interference pattern to loose contrast thus making ruining the visibility of the hologram.
I built a small concrete table into which included threaded fasteners. This 300 lb table was placed on a stack of cinder blocks onto which partially deflated inner tubes were laid. This set-up absorbed any seismic vibrations. The large mass helped to damp any other vibrations. The optical holders for the lenses and mirrors were bolted to the top of the concrete for additional stability. Even air currents had to be minimized to prevent disruption of the interference pattern. There are even more details involving the laser and the split laser beams which also have to be kept in check. When I saw my first home made hologram, I was stunned that it all worked. I was so interested in this technology that I attended a symposium on holography at New Mexico State University. I met a lot of great folks and learned more than I ever thought I needed to know.
One day while walking down the hall in the local Physics department I ran into one of the sponsors of the symposium. We chatted for a while and I offered to show him my set-up for holography. Interestingly, some weeks earlier a theft occurred in the department’s optics lab. All the lab’s holography equipment was stolen. On the day of my show & tell (in my parents garage) the professor that ran the optics lab also showed up to see my set-up. I’m sure he expected to find all the stolen equipment from the ransacked physics lab. But I had machined all the mounts and had built the table myself. Unbeknownst to me, they were working on several holography-related projects and I was immediately offered a job.
It’s been a few years since I’ve done any holography, but am planning to give it a go again sometime. Laser technology has advanced significantly and the process might be easier to tackle the next time around. If I never get back around to it, I’ll always have these holograms to view and share.
Latest articles by Eric Chesak (see all articles)
- IR Fireworks - July 14, 2018
- Medium Format Lenses – Part II - December 11, 2017
- Bracketed Exposures for IR photography - July 19, 2017
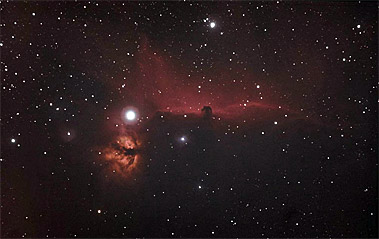
Eric Chesak is a physicist, engineer, photographer, and general technophile. He has always been interested in cameras, photography, and optics with several patents and scientific publications on the subject. He’s a full-time consultant, after a successful career in Engineering and R&D management. Eric has been enjoying photography for more than 40 years and began shooting with his grandfather’s rangefinder, 35mm Zeiss Ikon camera. His life-long passion for astronomy and astrophotography spun off to IR photography which developed into a full-blown obsession.
Eric's images are published in Astronomy & other magazines, many websites and on the artwork on a classical music CD. He has also written for several engineering trade magazines and received numerous awards for technical excellence. In addition to his photography hobbies, he enjoys metalworking, machining, and mechanical design and is experienced with CNC machining equipment. In fact, he designs and fabricates some of his own equipment for astrophotography and photography.
You can view more of Eric's IR and Astrophotography at his online gallery.
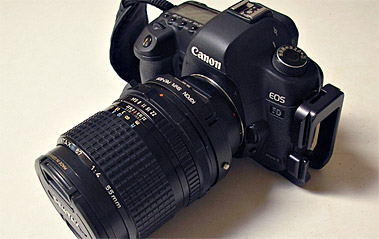
Eric currently shoots with custom, full-spectrum modified Canon 50D and 5DmkII -- and learns something new every time he shoots a photo.
See All Articles by Eric Chesak

Leave a Reply