The purpose of this article is to compare photographs taken with a Canon 100 – 400mm 4.5-5.6 L IS II lens with and without the Canon Extender EF 2X III. The goal is to help people decide if the Canon Extender EF 2X III will prove a useful tool in your camera bag.
Methodology:
- The same Canon 5DSr body was used for all the photographs.
- All photographs were taken with a tripod.
- All photographs were taken at 400mm or 800mm with 2X extender.
- At least five photographs were taken of each subject. Autofocusing was performed for every shot. The best photograph from each sequence was selected for this article.
- No retouching / sharpening were performed except where indicated.
- Photographs taken at 400mm were doubled in size for comparison.
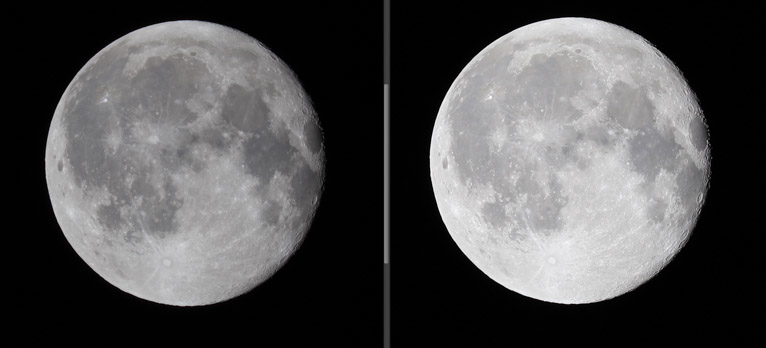
Test 1 – Full Moon 99% illumination:
Below: as captured, 800mm on left – 400mm on right
Left 1/80sec., f11, ISO 100 – Right 1/100sec., f8, ISO 100
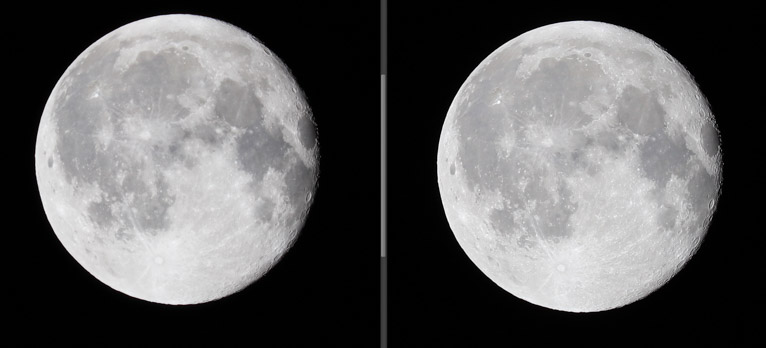
Below: 800mm on left – 400mm on right. The 800mm photograph, left, had its contrast and exposure adjusted to match the 400mm photograph.
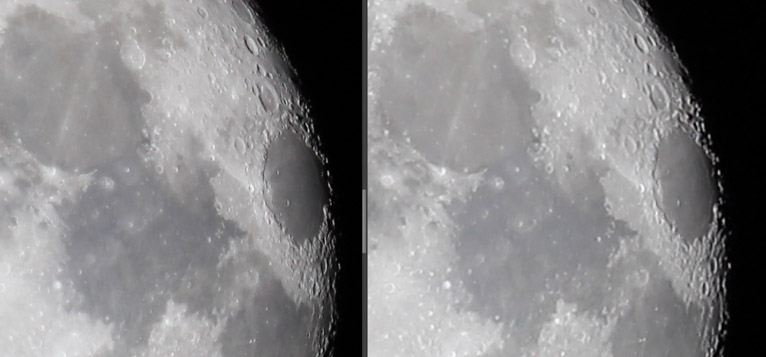
Below: an enlargement, made after the contrast and exposure adjustments above. While very close the 800 mm photograph, left, appears to have slightly more detail and sharpness.
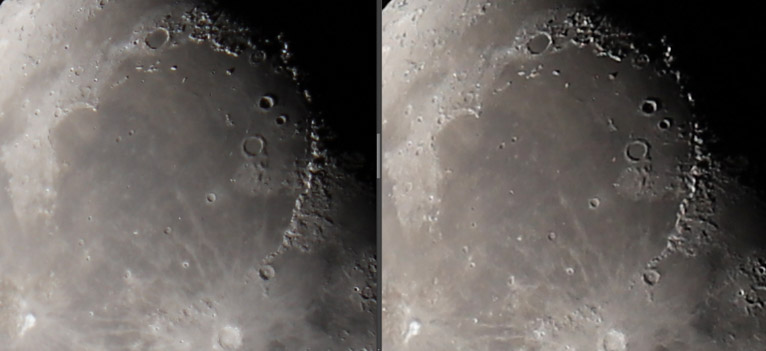
Test 2 – Half Moon:
Below: an enlargement, made after slight contrast and exposure adjustments. While very close the 400 mm photograph, right, appears to have slightly more detail and sharpness in the mountainous regions.
Left 1/20sec., f11, ISO 100 – Right 1/80sec., f5.6, ISO 100
Test 3 – Daylight a Church at 436 yards:
Below: as captured, 800mm on left – 400mm on right
Left 1/80sec., f18, ISO 100 – Right 1/250sec., f5.6, ISO 100
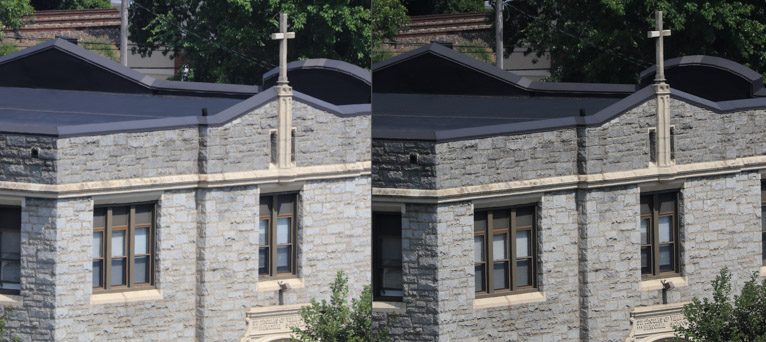
Below: enlargement as captured, 800mm on left – 400mm on right
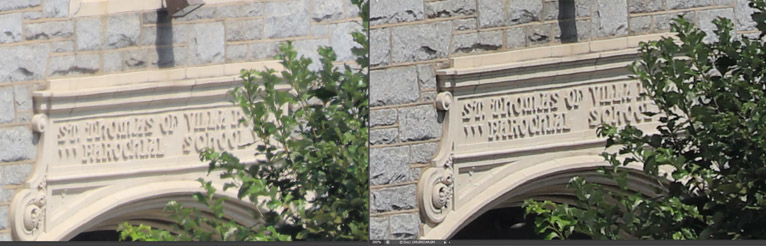
Below: contrast and exposure adjusted, 800mm on left – 400mm on right

In this test the reduction in contrast due to the 2X extender is clearly visible even with adjustments.
Test 4 – Gas Station Sign at Night – 400 yards:
Below: enlargement as captured, 800mm on left – 400mm on right
Left 1/6sec., f11, ISO 100 – Right 1/15sec., f5.6, ISO 100
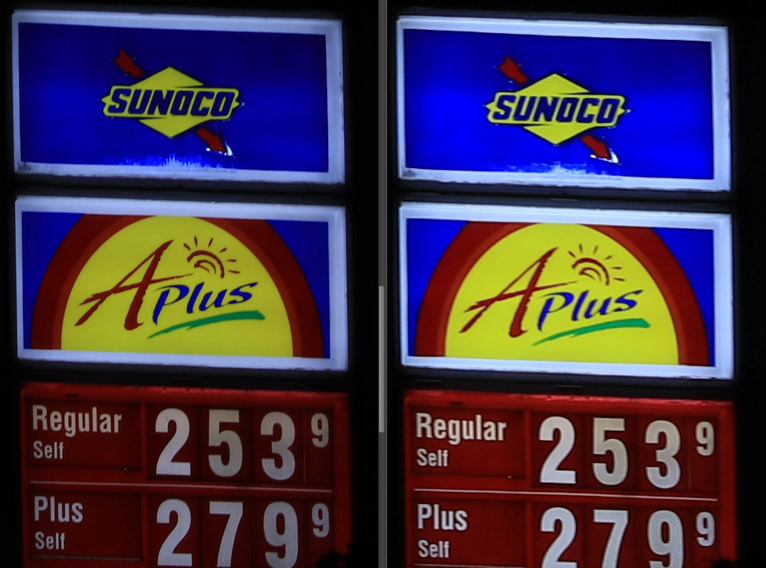
In this example the 800mm is has much better edge sharpness which is best seen in the large “A”.
Analysis: In most of the conditions shown above the Canon Extender EF 2X III can produce excellent images when compared to a 2x enlargement created without the extender.
Conclusion: For those who often shoot with a telephoto lens, the Canon Extender EF 2X III is an excellent tool worthy of a place in your camera bag. Keep in mind that the 2X will introduce a two f-stop lost in light you’ll most likely need a sturdy tripod, and your best photographs will be produced utilizing f-stops in the mid-range of the lens. If you cannot safely get close to the subject the Canon Extender EF 2X III is the tool for the job.
Take care, and keep experimenting.
Latest articles by Irv Schlanger (see all articles)
- Review of the IDAS LPS-D1 Light Pollution Suppression Filter - November 11, 2017
- Stacking to Increase Depth of Field - September 26, 2017
- Diffraction of Light – Creating an Artificial Rainbow - September 1, 2017
Irv Schlanger
Irv Schlanger worked as a professional photographer in the 80’s through the late 90s, photographing hundreds of weddings and many magazine covers. His formal training is in information systems, and security. He has a Master’s degree from Drexel University. Irv got back into photography as a way to relax, and now focuses primarily on landscapes, wildlife, and portrait photography.
See All Articles by Irv Schlanger

Leave a Reply