For eons, mankind has looked up into the night sky in wonderment. All the stars and celestial bodies which hover over our heads have always held a nearly indescribable allure. Since the advent of photography we have looked for ways to photograph all the beautiful happenings of our galactic home.
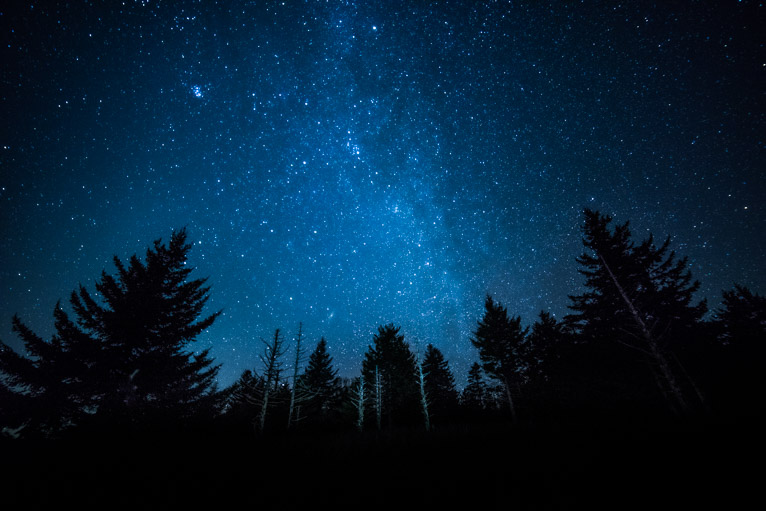
You might think that making photographs of stars or even our own galaxy requires special equipment or extensive knowledge of mind numbing photography concepts. Nothing could be further from the truth. In reality, it all comes down to a few simple techniques and basic camera gear. In this article we are going to look at a few key points that can help you start making great photographs of the night sky right now!
Use a Tripod
Having a stable shooting platform is always a good idea for any type of photograph. The introduction of sharpness-robbing camera shake is one of the largest hurdles to overcome for any photo maker and it is especially true in astrophotography.
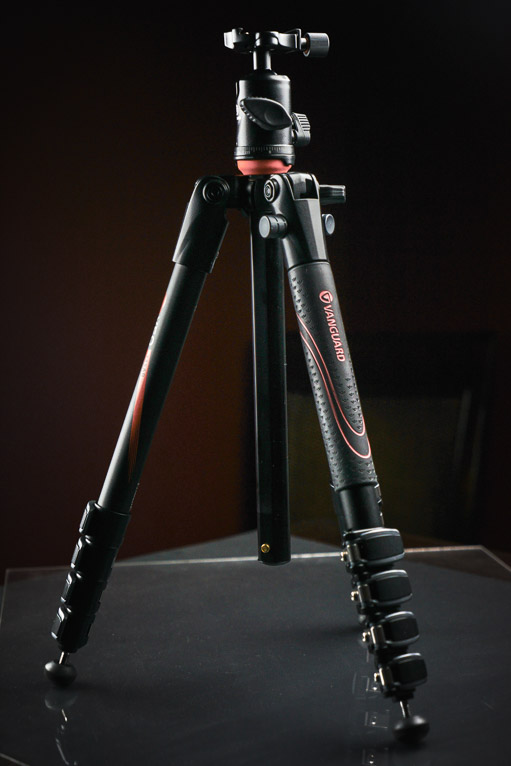
Always use a tripod(like the one from this LifePixel article) so that you can eliminate as much motion as possible in your images of the night sky. Speaking of motion….
Make Use of the 600 Rule
We often forget that even though our cameras seem to be perfectly still they, and ourselves, are moving along through space at around 67,000 miles per hour(30 km per second!). That’s not exactly slow. What this means for our astrophotography is that we are constantly working in a moving environment. Depending on the type of night photograph we want to end up with there is a very simple way to make sure all those stars stay in place. It’s called the “600 Rule”.
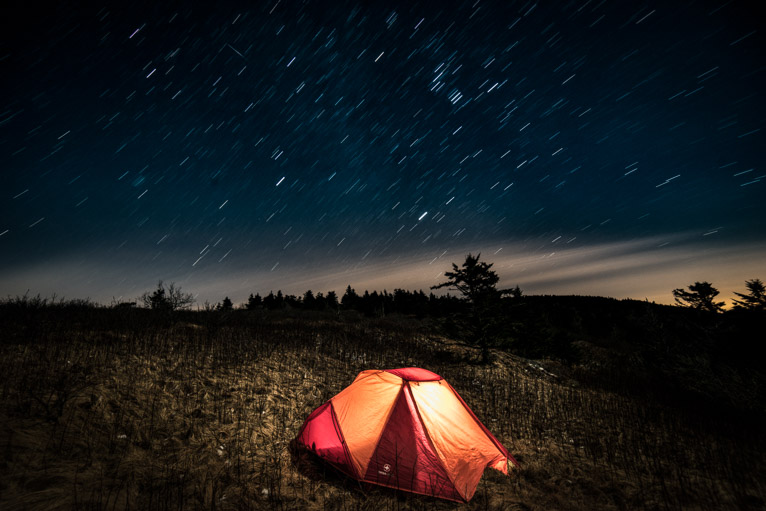
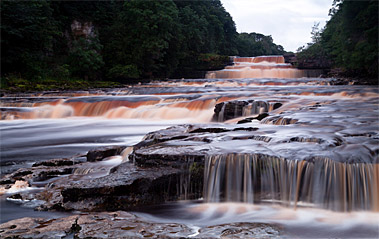
This was shot at a 7 min 30 second exposure using a 14mm lens. Note the the visible star trails….
Well, it’s more of a guideline for exposure rather than a rule. Since, the earth is moving so fast, longer exposure times results in “star trails” which is the streaking of starlight due to motion. This can be a good or a bad thing. Luckily, we can estimate the longest shutter time we can use based on our lens so that we don’t see star trails. Conversely, we then know what the approximate minimum exposure time needed so that we do see them. And it really is a easy…I promise. The 600 Rule states that the focal length of your lens, be it 14mm, 50mm, 85mm, ect., should be divided into 600. Here’s the equation:
600/focal length of lens = Maximum Shutter Time in Seconds
See! That wasn’t so bad. There are a few versions of this rule which use different numbers such as 400 or 500. They all yield similar results so use whichever one works best for you. I use 600 but this is simply a preference.
Include Interesting Elements
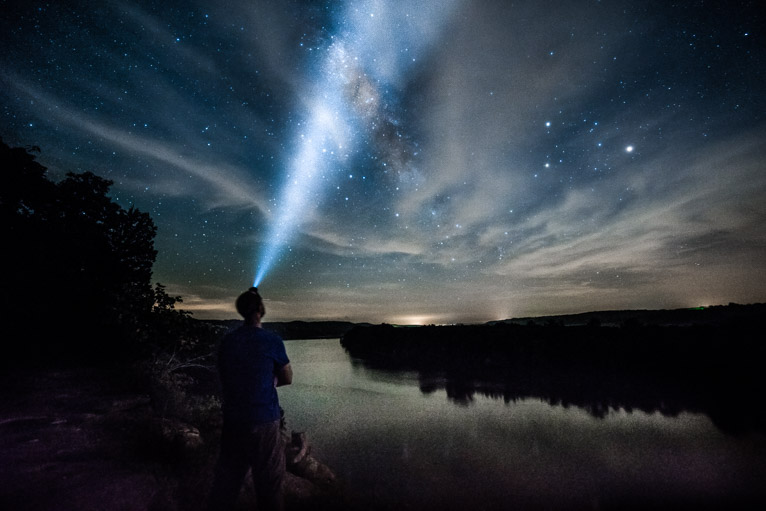
Make your astrophotography more than just pictures of stars by including elements into your foregrounds. People, buildings, trees, even light pollution(unwanted artificial light) can add wonderfully interesting elements to your astro photos.
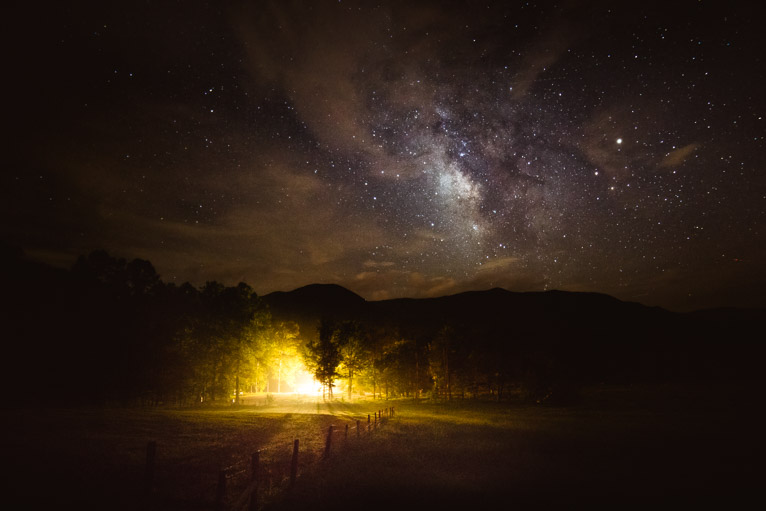
The fence and building light in the background works to lead the viewer up towards the beautiful Milky Way.
Make use of your entire environment to bring a unique perspective. Sometimes it helps to see just how small we really are in a wide universe.
Use a Remote Shutter Release or Timer
We’ve already learned that camera motion is our enemy when shooting long exposures. Even a small amount of camera shake can ruin a perfectly composed nightscape. You might not realize it, but the impact vibration of pressing the shutter button can cause enough motion to appear in your photo. To combat this, consider using a remote shutter release. Most cameras today have wireless remote capabilities(even budget cameras) and the remotes like these are cheap.
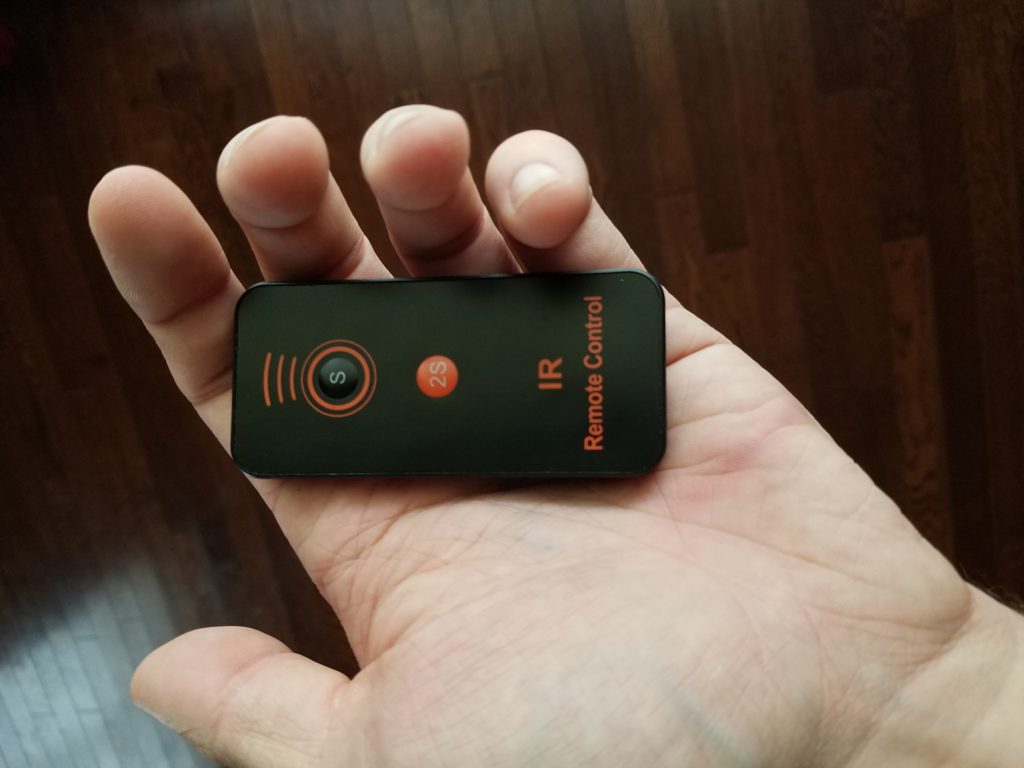
This wireless remote cost me about $11
No remote? Try putting setting your camera to a 2 second or even 10 second timer. This will make sure your camera is as still as possible.
Closing thoughts….
Astrophotography is an almost magical goal for some photographers. When I first began making photographs one of my personal goals was to make a photo of the full moon. It doesn’t take much to be able to make wonderful images of the night sky. Follow the simple tips in this article and you will see…dare I say…ASTROnomical improvement in your photographs! Photography jokes are fun….
Latest articles by Adam Welch (see all articles)
- Bare Bones Photography: What Gear Do You Really Need? - May 13, 2018
- A Simple Explanation of Aperture - May 13, 2018
- The Case for Black and White Photography - May 13, 2018
Adam Welch
Photo maker, author, and adventurer currently based in the western portion of his home state of Tennessee. You can usually find him on some distant trail making photographs or at his computer writing about all the elegant madness that is photography. Follow his sometimes controversial Blog on everything related to photography and then check out his cozy home on Instagram.
Adam has also authored one of the most comprehensive guide books on using Adobe Lightroom Classic CC. You can get your copy of Lightroom Mastery:
A COMPLETE GUIDE TO WORKING IN LIGHTROOM CLASSIC CC HERE!
See All Articles by Adam Welch


Leave a Reply