• Cart
  • Checkout
  • My Account

Infrared Conversions, IR Modifications & Photography Tutorials | Life Pixel IR

The world leader in infrared conversions, modifications & DIY IR conversion tutorials. Scratched sensor replacement, UV & Full spectrum conversions.

The world leader in infrared camera conversions

866.610.1710
  • Home
  • → Start Here ←
    • 1 – Introduction
    • 2 – Filter Choices
    • 3 – Focus Calibration
    • 4 – Lens Considerations
    • 5 – Camera Considerations
    • 6 – Start Shopping
  • Galleries
    • Infrared Photography
    • Infrared Time Lapse
    • Infrared Cinematography
    • Infrared Stop Motion
    • Ultraviolet Photography
    • Forensic Photography
  • Education
    • Training Sessions
    • How To Shoot Infrared
    • AR Coated Infrared Filters
    • Lens Hot Spot Database
    • Photoshop Video Tutorials
    • Infrared Issues & Solutions
    • IR Basics in Photoshop
    • Camera Quick Start Guide
    • DIY Conversion Tutorials
    • IR Photography Primer
    • Secondhand Cameras
    • Wall Of Shame
  • Workshops
  • FAQ
  • Blog
    • Tutorials
    • Inspiration
    • Locations
    • Gear
    • News
    • Other
  • Why Choose LifePixel?
    • Submit Your Review
  • Contact
  • Shop

When To Use Manual Focus In Your Photography?

Digital cameras have come a long way since they were launched. They are more powerful than ever with an ever-increasing level of technology to aid photographers. One of these bits of technology is the auto or semi-auto focusing capabilities. The vast majority of times, this works perfectly. But there are occasions when the auto-focus of the camera isn’t the best option and also times when it fails to focus correctly. So if you’ve ever found yourself frustrated with blurry photos, it could be due to the fact that you are using the autofocus on your camera rather than the manual focus.

Manual_focus

What is manual focus?

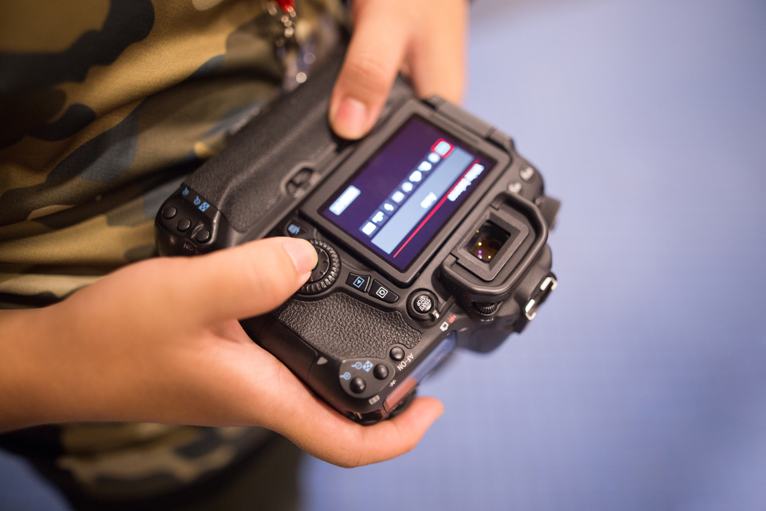
Manual focus is pretty much what it implies. A photographer manually adjusts their lens to focus on whatever it is that they want to appear sharp in the photograph. You can do this by turning the ring around your lens to extend or retract it. But it’s important to know that there are other factors that can also impact how sharp your focus point and beyond will be. So to understand manual focus you should also grasp how your camera works.

Manual_focus

How does a camera work?

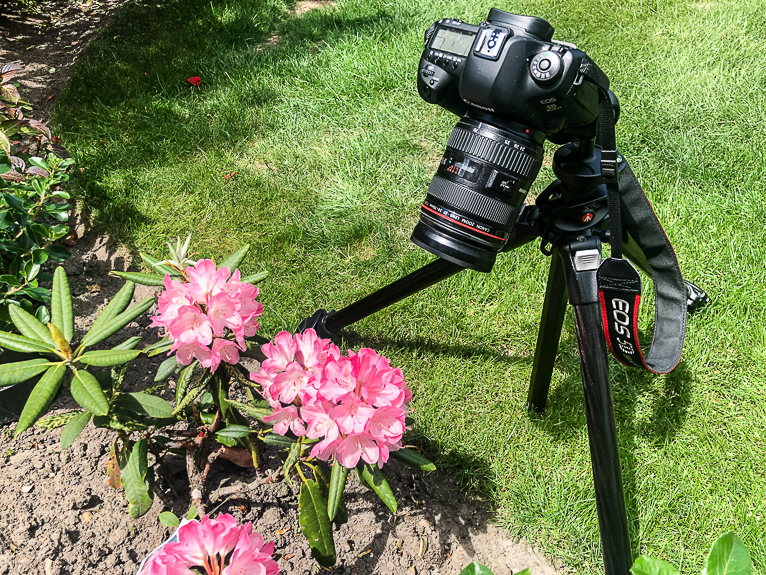
Most professional photographers use a DSLR (digital single-lens reflex) camera. The camera body and lens work together to transfer the scene in front of you into a picture.

Light travels through a hole before hitting the camera sensor. The hole can be manually changed to open larger or smaller the instant you take a photo, which is referred to as aperture. By adjusting the aperture, you are allowing a certain amount of light in, determining the exposure. This is important to know because the aperture also regulates your depth of field, which is the parts of your photo that are in sharp focus. So even if you have manually focused on a specific point, the depth of field will determine how much in front and behind this point will be in focus.

Manual_focus

In addition to this, there is also the length of time that light is allowed to hit the sensor. The shutter lets light in for a particular length of time before being closed off. The period of time that it stays open is called the shutter speed. Similar to aperture, shutter speed does two things for you. It regulates the brightness and motion of the content in your photo.

A fast shutter speed opens and closes the curtain quickly, allowing less light and captures a moving object in still motion. A slow shutter speed remains open longer, bringing more brightness into a poorly lit area but also catching the movement of a moving subject and creating a blurred effect.

As crucial as aperture and shutter speed are for a photograph, there is a third key element to know about. Although it is not an actual part of your camera as the lens or shutter, the adjustable ISO is the sensitivity of your sensor to light and works to brighten a photo the higher it is set. But it also creates noise at high ISO levels. So even if you have correctly used manual focus for your focus point, with the noise from a high ISO you will find this point being less sharp. You should only resort to adjusting your ISO if you are unable to brighten your image enough through the other two settings.

Manual_focus

When should you use manual focus?

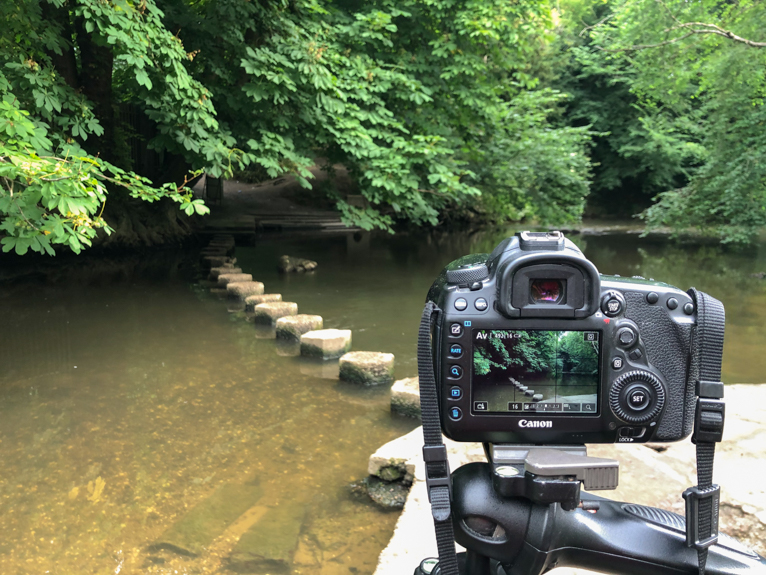
Strictly speaking, there is no right or wrong time to shoot in manual focus. You can technically shoot in manual mode all the time. But for example, trying to manually focus on a fast-moving subject or scene in manual mode is going to be extremely difficult. The more time you spend photographing the more experience you will gain in when to use manual focus mode. But it all comes down to what you are trying to photograph. So here are some common scenarios of where manual focus mode comes in handy.

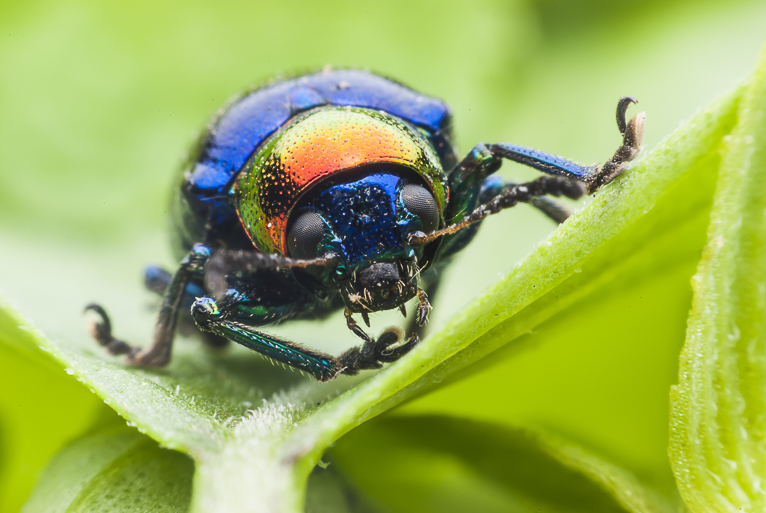
Macro photography – The beauty of macro is its ability to hone in on the detail. Manual focus allows you to draw the eye to a specific level of depth in an up-close photo. Manual focus is really important in this scenario as you need to ensure that the focus is spot on otherwise the photo just won’t work.

Manual_focus

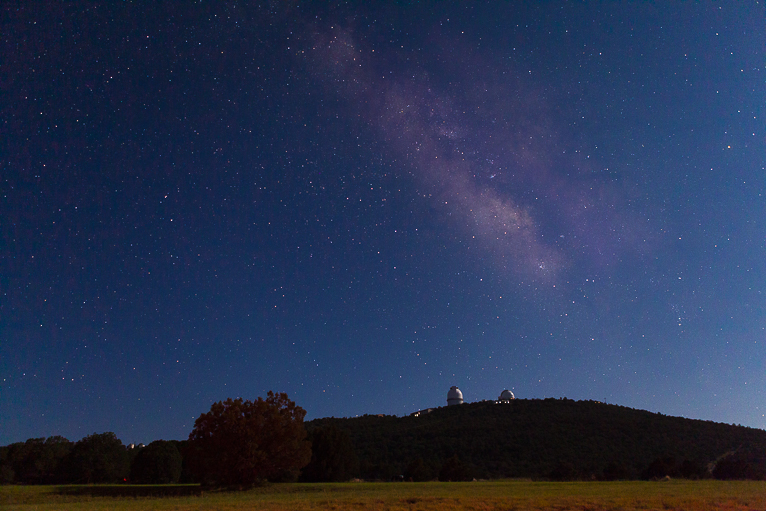
Low light – When trying to shoot a photo in an area where there is minimal light (like for example when photographing the Milky Way) your camera’s auto-focus might struggle to find something to focus on. Even if it does, you want to make sure it has actually focused on the correct element in your scene.

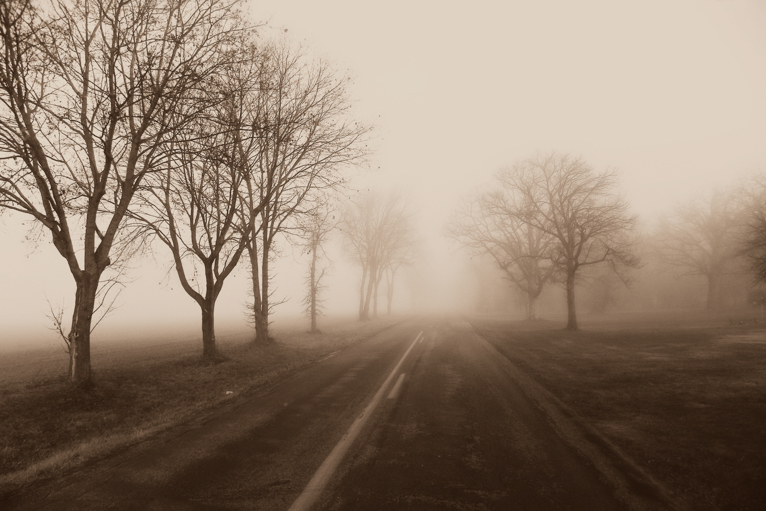
Low contrast – Sometimes you’ll find yourself trying to take a photo with significantly bright light or even in a situation where the tones and colours within your image are almost the same (like on a foggy day). This can cause issues with the auto-focus as it struggles to find enough contrast in a scene for focus. Manual mode can ensure you are focusing correctly in these situations

Manual_focus

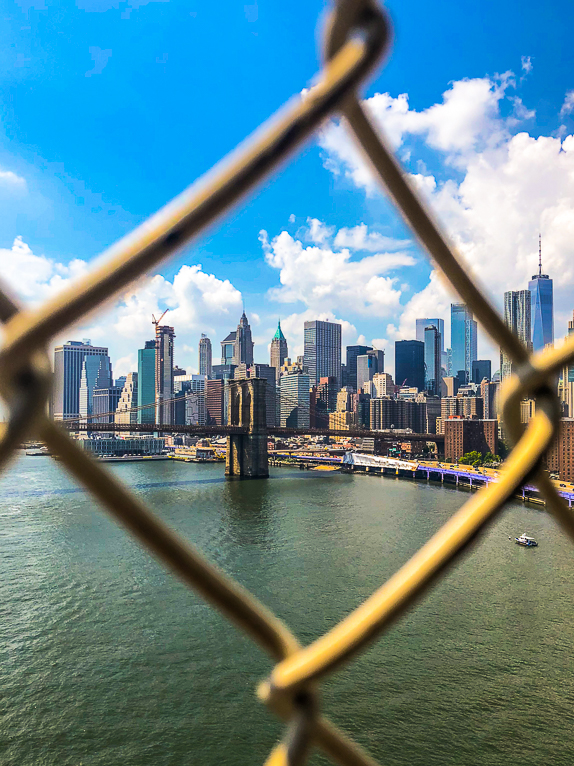
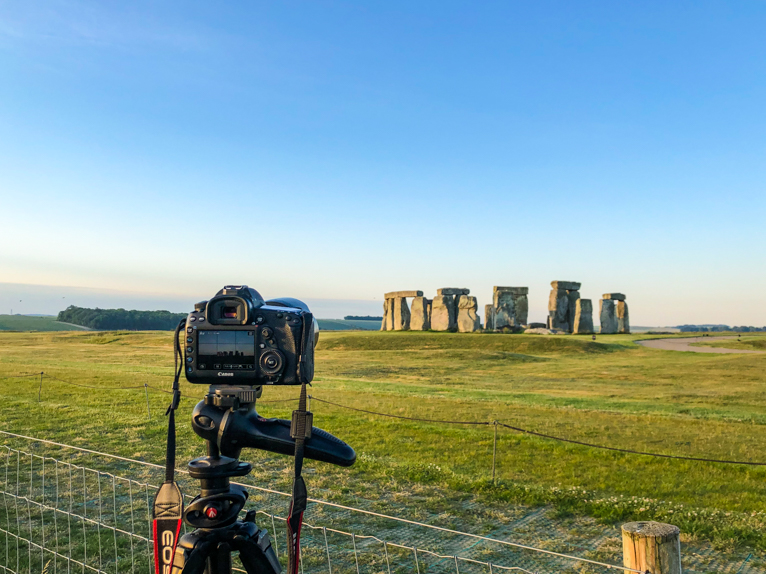
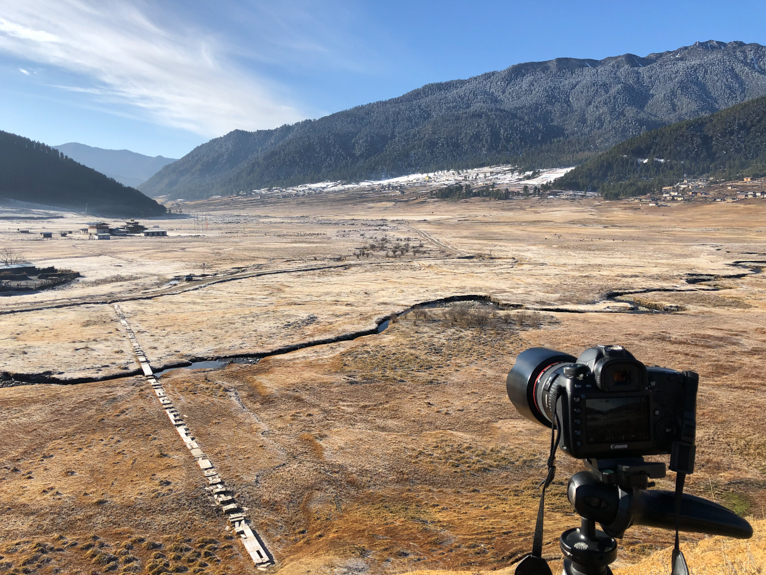
Shooting “Through” – Taking a photo through something means you are trying to set your focus beyond whatever is closest to your camera. Shooting a photo with a wire fence laced in front of your lens can confuse your camera. Manual focus is excellent for this type of photography in comparison to autofocus, where your camera will have a difficult time deciphering on what it is you are trying to focus.

Video – One thing that camera enthusiasts forget is that manual focus mode can be a lifesaver to videographers. In the same way that you need to tweak settings for a photograph, videos may need manual focus to ensure you are focusing on the correct element.

Manual_focus

Using autofocus isn’t the end-all to be all of a photograph. Most of the time it can come in handy and it will definitely be the best focus mode for shooting. But keep the points above in mind for the occasions when auto-focus may fail you and you need to rely on manual focus to be able to ensure your point of interest is sharp.

Photo credits: Kav Dadfar – All rights reserved. No usage without permission. Dreamstime.

Filed Under: Tutorials Tagged With: Focus mode, Manual Focus, Manual focus mode

What Is Manual Focus And When to Use It?

Through the use of digital cameras, photographers have been given ever exceeding control over their shots. With a mix of automatic and semi-automatic settings and shooting modes, photographers are given a unique ability to take shots not previously possible with older cameras. One element of this extra control is focusing. Through modes like auto, continuous focusing for moving focal points, and manual focus, photographers have far greater control over their photos. Though automatic focusing on cameras has its place, in some situations it isn’t the right option. The control that manual focusing provides makes it a vital setting to know and use.

Manual focusing on a camera is just what it sounds like, the ability to manually focus using the ring around the lens. It allows you complete control of where your camera is focusing. This option will enable you to take shots of your chosen subjects, without needing to struggle with or settle with what the automatic focus function has chosen for you.

Manual_Focusing

Why should you use manual focus?

Some photographers choose manual focus regardless of the subject they’re photographing. But that can be very difficult in situations where you are dealing with moving subjects. To be able to focus quickly enough and take a photo can be almost impossible.

But then there are some situations where it’s much more strongly advised to use manual focus instead of automatic. In reality, you can also use manual focus whenever you feel comfortable or prefer to. But there are some situations where you almost have no choice but to use manual focus.

The biggest issue of using automatic focusing is that there are times when your camera can focus on the wrong element in a composition which can make a photo blurred if you are using a shallow depth of field. By manually focusing you can ensure the precise focus of exactly the right focal point in a scene. Below are some of the common examples where manual focus is advised.

Manual_Focusing

1. Macro photography

Macro photography means taking a photo of something small in a way that makes them look life-sized or more substantial in the photo. This type of photography often involves small insects, dewdrops, small flowers, and other subjects that are otherwise scarcely seen in that perspective in daily life. This particular type of photography relies on a very narrow depth of field and precise focusing that isn’t possible without manual focus. This type of photography requires so much precision that if you were a tad out of focus or have your tripod only a half-inch too far from the subject, it ruins the shot. As such, macro photos are one of the most common types of photos that rely on a photographer’s use and knowledge of manual focusing.

Manual_Focusing

2. Dim and low light

When shooting a photo in a poorly lit or dark environment, the camera’s automatic focus will struggle to pick out the details in the darkness and find the subject. As such, if you are trying to use the automatic focus in these conditions you may notice your camera continuously trying to focus by going back and forth. When it does finally focus, there is a good chance that it will be on the wrong focal point. This is because in dark conditions the camera will struggle to find the contrasting lines of objects. Manual focus will allow you to focus on exactly the right part of the image even when it’s so dark that the camera can’t pick out details.

Manual_Focusing

3. Portraits

Another type of photography that sometimes might need manual focus is portraits. In this type of photography, traditionally the eyes are the most important element and so your focus needs to be carefully considered. Automatic focus means that you won’t have as much control over which aspect of the subjects face you’re focusing on, and so you may find that you have accidentally focused on the wrong part of the scene. As mentioned above, in traditional portraits, you want the focal point to be the eyes, but this is not a hard and fast rule. Manual focus for portraits allows you to control where the viewer’s eyes are focusing on when they see the photo.

Manual_Focusing

4. Shooting through fences, glass, mirrors, and screens

When you are trying to get a shot through an object like a fence, automatic focusing will struggle to know what to focus on. So you may find that it focuses on the fence instead of what’s through the fence. Focusing on the fence instead of the focal point is like focusing on the smudge on a mirror instead of the person in the mirror, and will mean the main subject will be blurred (unless you are using a very small aperture for greater depth of field). This is why it is essential to use the manual focus on the camera instead of the automatic mode for these shots. When you use the manual focus, you can find the subject easier no matter what is between you and that object.

Manual_Focusing

5. Selective focusing

Have you ever wondered how those shots of specific lines or words in books are taken? This type of photo is taken through a method of selective focusing. Essentially, if you want to have full control over the shot and be able to choose which place to focus on, you need to use manual focus to achieve it. Seeing as a page is full of various words and images, the automatic focus wouldn’t be able to choose the one you want, and so it will usually focus on the wrong spot.

Manual_Focusing

6. Panorama photos

A panorama photo is created through stitching together a series or a set of images taken all around the same time. Though most of this process is completed in the post-processing stage, it’s essential to remember how vital uniformity is when taking a panorama photo. If you take a series of photos with the automatic focus, you run a high risk of your camera, taking pictures focusing on different spots in each photo. Having each photo in the set focused on a different focal point will mean that when you stitch your photos together there will be a different focal point in each. So if you are going to be stitching photos for a panorama shot, make sure you set your camera on manual focus first.

Manual_Focusing

For the vast majority of the time, when you are photographing you will use automatic focus. But as the points above illustrate sometimes you have no choice but to use manual focus. So knowing when and how to use manual focus is a vital piece of photography knowledge to have.

Photo credits: Kav Dadfar – All rights reserved. No usage without permission. Dreamstime.

Filed Under: Tutorials Tagged With: Focus, Focusing, Focusing Modes, Manual Focus

Blog Topics

  • Tutorials
  • Inspiration
  • Locations
  • Gear
  • News
  • Other/Misc

What our customers say:

Life Pixel has been a life-changer for me. Continue reading
Eric GConnecticut
Read more reviews
I am more than satisfied with the service I received Continue reading
Christopher JCanada
Read more reviews
I am more than pleased with the conversion job that you did Continue reading
LOUIS MWaco, Texas
Read more reviews
I am VERY impressed with his knowledge of your products and his patience in explaining it to a novice like me. Continue reading
Lynn FEssex, Maryland
Read more reviews
Things will only get better from here thanks to all of you. Continue reading
Phillip FRedding, California
Read more reviews
The Lifepixel newsletter reminds me of not having expressed my gratitude for the excellent job you made. Continue reading
Michael GGermany
Read more reviews
Your staff went above and beyond the call of duty to make sure everything was handled in an excellent manner. Continue reading
Paige RPearland, Texas
Read more reviews
It has given my old camera a new life, I will enjoy using it again. Continue reading
William PAustralia
Read more reviews
Excellent service and the camera works just great Continue reading
Hans FairhurstAustralia
Read more reviews
I just got my converted camera back from you guys. THANK YOU!!!! Continue reading
Anne CutlerForest Knolls, CA
Read more reviews
infrared_filter_choices_sidebar
ir_conversions_explained_sidebar
----------- Watch More Videos -----------
infrared_quick_start_guide

Ready to start shooting Infrared?

Convert My Camera

Subscribe To Our Newsletter

Receive updates, tips, cool tutorials, free stuff and special discounts.

Learn the Basics

  • Video
  • Start Here
  • Filter Choices
  • Focus Calibration
  • Lens Considerations
  • Camera Considerations
  • Place Your Conversion Order

Resources

  • Galleries
  • Lens Hot Spot Database
  • IR Tutorials
  • FAQ
  • Infrared Filter Choices
  • Infrared Photography Guide
  • Infrared DIY Tutorials

Company

  • Why Choose Us
  • Get In Contact
  • Job Openings
  • Write For Us
  • Affiliate Program
  • Terms of Use
  • Privacy Policy
  • Home
  • Start Here
  • Galleries
  • Tutorials
  • FAQ
  • Blog
  • Why Choose LifePixel?
  • Shop
  • Contact

Copyright © 2025 Life Pixel Infrared - All rights reserved - LifePixel Infrared Photography IR Conversion, Modification & Scratched Sensor Repair