Through the use of digital cameras, photographers have been given ever exceeding control over their shots. With a mix of automatic and semi-automatic settings and shooting modes, photographers are given a unique ability to take shots not previously possible with older cameras. One element of this extra control is focusing. Through modes like auto, continuous focusing for moving focal points, and manual focus, photographers have far greater control over their photos. Though automatic focusing on cameras has its place, in some situations it isn’t the right option. The control that manual focusing provides makes it a vital setting to know and use.
Manual focusing on a camera is just what it sounds like, the ability to manually focus using the ring around the lens. It allows you complete control of where your camera is focusing. This option will enable you to take shots of your chosen subjects, without needing to struggle with or settle with what the automatic focus function has chosen for you.

Why should you use manual focus?
Some photographers choose manual focus regardless of the subject they’re photographing. But that can be very difficult in situations where you are dealing with moving subjects. To be able to focus quickly enough and take a photo can be almost impossible.
But then there are some situations where it’s much more strongly advised to use manual focus instead of automatic. In reality, you can also use manual focus whenever you feel comfortable or prefer to. But there are some situations where you almost have no choice but to use manual focus.
The biggest issue of using automatic focusing is that there are times when your camera can focus on the wrong element in a composition which can make a photo blurred if you are using a shallow depth of field. By manually focusing you can ensure the precise focus of exactly the right focal point in a scene. Below are some of the common examples where manual focus is advised.
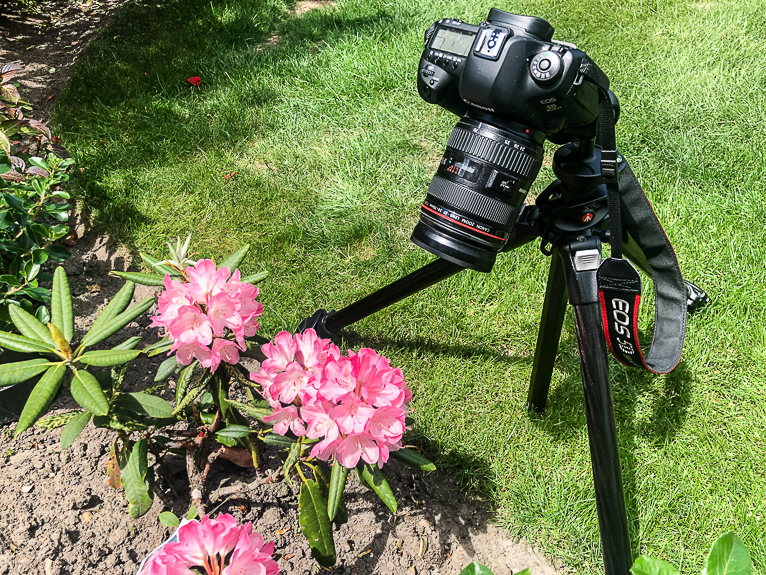
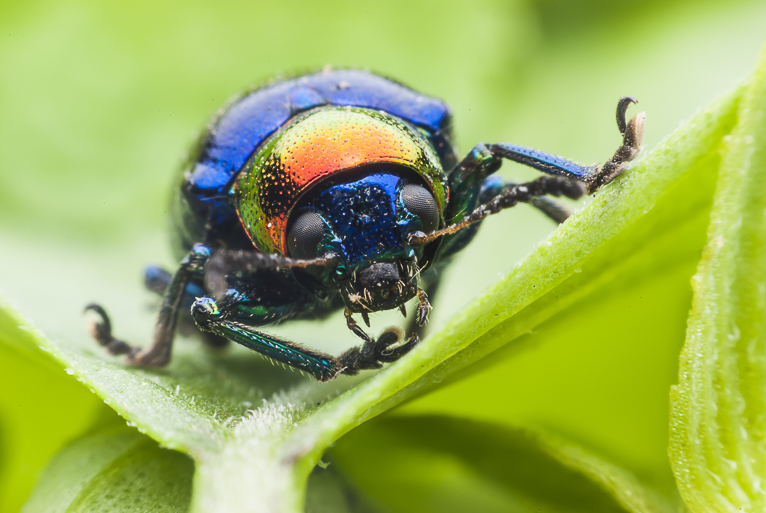
1. Macro photography
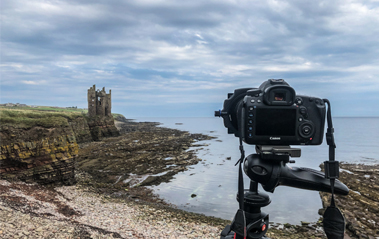
Macro photography means taking a photo of something small in a way that makes them look life-sized or more substantial in the photo. This type of photography often involves small insects, dewdrops, small flowers, and other subjects that are otherwise scarcely seen in that perspective in daily life. This particular type of photography relies on a very narrow depth of field and precise focusing that isn’t possible without manual focus. This type of photography requires so much precision that if you were a tad out of focus or have your tripod only a half-inch too far from the subject, it ruins the shot. As such, macro photos are one of the most common types of photos that rely on a photographer’s use and knowledge of manual focusing.
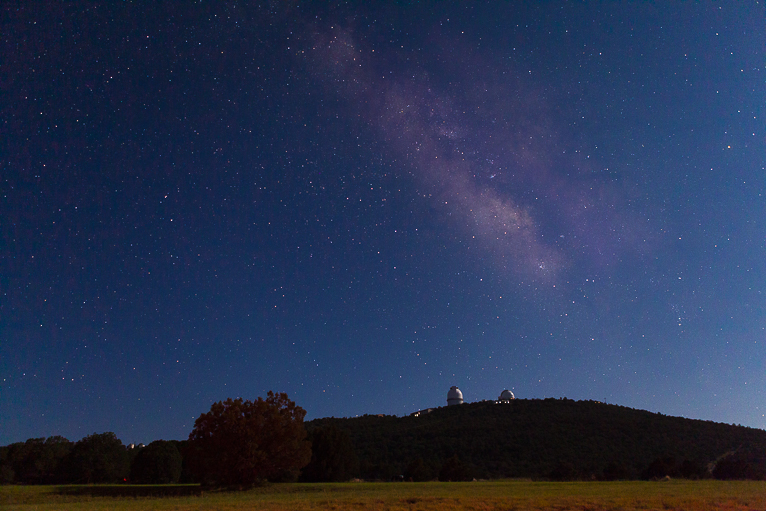
2. Dim and low light
When shooting a photo in a poorly lit or dark environment, the camera’s automatic focus will struggle to pick out the details in the darkness and find the subject. As such, if you are trying to use the automatic focus in these conditions you may notice your camera continuously trying to focus by going back and forth. When it does finally focus, there is a good chance that it will be on the wrong focal point. This is because in dark conditions the camera will struggle to find the contrasting lines of objects. Manual focus will allow you to focus on exactly the right part of the image even when it’s so dark that the camera can’t pick out details.
3. Portraits
Another type of photography that sometimes might need manual focus is portraits. In this type of photography, traditionally the eyes are the most important element and so your focus needs to be carefully considered. Automatic focus means that you won’t have as much control over which aspect of the subjects face you’re focusing on, and so you may find that you have accidentally focused on the wrong part of the scene. As mentioned above, in traditional portraits, you want the focal point to be the eyes, but this is not a hard and fast rule. Manual focus for portraits allows you to control where the viewer’s eyes are focusing on when they see the photo.

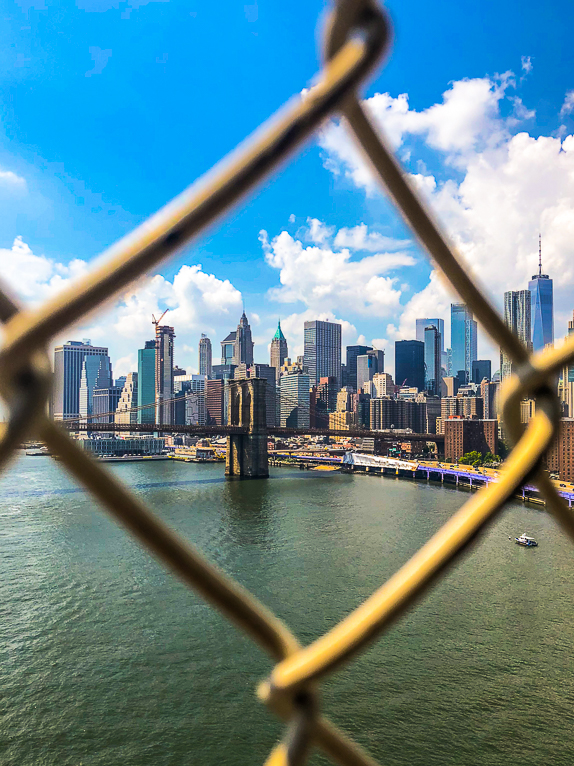
4. Shooting through fences, glass, mirrors, and screens
When you are trying to get a shot through an object like a fence, automatic focusing will struggle to know what to focus on. So you may find that it focuses on the fence instead of what’s through the fence. Focusing on the fence instead of the focal point is like focusing on the smudge on a mirror instead of the person in the mirror, and will mean the main subject will be blurred (unless you are using a very small aperture for greater depth of field). This is why it is essential to use the manual focus on the camera instead of the automatic mode for these shots. When you use the manual focus, you can find the subject easier no matter what is between you and that object.
5. Selective focusing
Have you ever wondered how those shots of specific lines or words in books are taken? This type of photo is taken through a method of selective focusing. Essentially, if you want to have full control over the shot and be able to choose which place to focus on, you need to use manual focus to achieve it. Seeing as a page is full of various words and images, the automatic focus wouldn’t be able to choose the one you want, and so it will usually focus on the wrong spot.

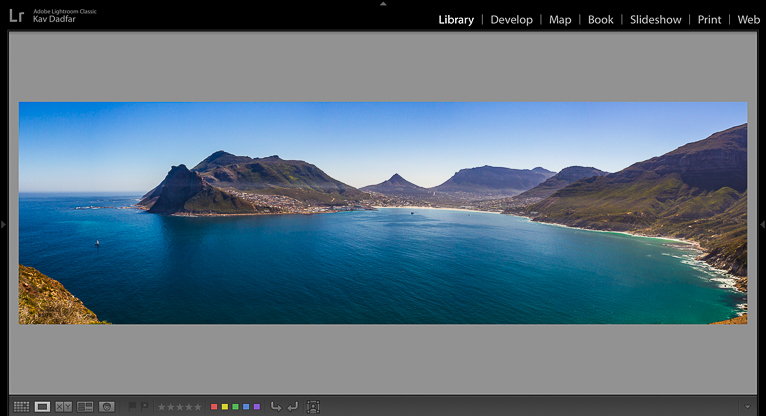
6. Panorama photos
A panorama photo is created through stitching together a series or a set of images taken all around the same time. Though most of this process is completed in the post-processing stage, it’s essential to remember how vital uniformity is when taking a panorama photo. If you take a series of photos with the automatic focus, you run a high risk of your camera, taking pictures focusing on different spots in each photo. Having each photo in the set focused on a different focal point will mean that when you stitch your photos together there will be a different focal point in each. So if you are going to be stitching photos for a panorama shot, make sure you set your camera on manual focus first.
For the vast majority of the time, when you are photographing you will use automatic focus. But as the points above illustrate sometimes you have no choice but to use manual focus. So knowing when and how to use manual focus is a vital piece of photography knowledge to have.
Photo credits: Kav Dadfar – All rights reserved. No usage without permission. Dreamstime.
Latest articles by Kav Dadfar (see all articles)
- How To Photograph Street Performers - April 26, 2022
- Profiled Photographers – Ben McKechnie - August 24, 2021
- Profiled Photographers – Jim Maher - August 24, 2021
is the founding editor of JRNY Travel Magazine as well as a professional travel photographer and writer based in the UK. His images have been used by clients such as Condé Nast, National Geographic, Lonely Planet, Rough Guides and many others. Kav is also the co-founder of That Wild Idea, a company specializing in photography workshops and tours both in the UK and around the world.
See All Articles by Kav Dadfar


One point not mentioned is that most newer AF lenses and focus screens in those AF cameras are designed with AF in mind. The lenses often have a very short “throw” meaning that the distance in turning the focus ring is shortened so as the lens can acquire focus faster. Thus a slight bump of the focus ring on one of those lenses is enough to change the point of focus. The focus screens are optimized for AF as well, gone are the split prism and microprism collars that were focus aids on older film cameras. One saving grace here is the “focus peaking” feature that is becoming more commonplace on today’s cameras as it is designed to aid in achieving precise focus. Yeah, many cameras have electronic rangefinders to aid in acquiring focus, but in fields like macro, they are of limited help. There are some viewfinder aids that offer some help and there are outfits that sell replacement focus screens cut down from older MF focus screens. As with most things the old idiom “practice makes perfect” sure applies here…