• Cart
  • Checkout
  • My Account

Infrared Conversions, IR Modifications & Photography Tutorials | Life Pixel IR

The world leader in infrared conversions, modifications & DIY IR conversion tutorials. Scratched sensor replacement, UV & Full spectrum conversions.

The world leader in infrared camera conversions

866.610.1710
  • Home
  • → Start Here ←
    • 1 – Introduction
    • 2 – Filter Choices
    • 3 – Focus Calibration
    • 4 – Lens Considerations
    • 5 – Camera Considerations
    • 6 – Start Shopping
  • Galleries
    • Infrared Photography
    • Infrared Time Lapse
    • Infrared Cinematography
    • Infrared Stop Motion
    • Ultraviolet Photography
    • Forensic Photography
  • Education
    • Training Sessions
    • How To Shoot Infrared
    • AR Coated Infrared Filters
    • Lens Hot Spot Database
    • Photoshop Video Tutorials
    • Infrared Issues & Solutions
    • IR Basics in Photoshop
    • Camera Quick Start Guide
    • DIY Conversion Tutorials
    • IR Photography Primer
    • Secondhand Cameras
    • Wall Of Shame
  • Workshops
  • FAQ
  • Blog
    • Tutorials
    • Inspiration
    • Locations
    • Gear
    • News
    • Other
  • Why Choose LifePixel?
    • Submit Your Review
  • Contact
  • Shop

Full Frame vs. Crop Sensors – What Are They And Which Should You Use?

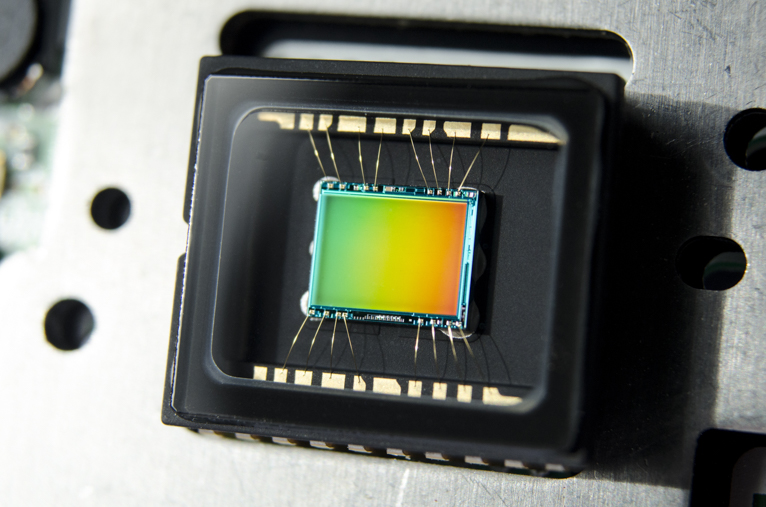
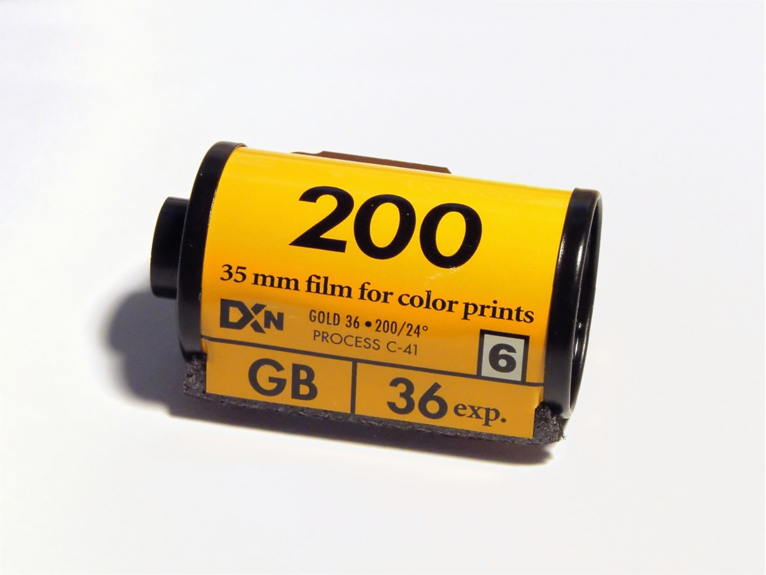
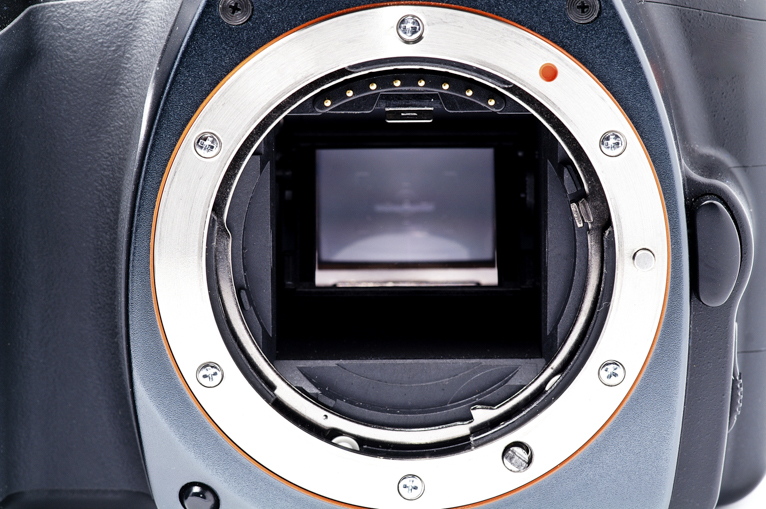
Full Frame and Crop Sensors are different camera types. A Full Frame camera has a sensor size that has the same extent as the 35mm film format or the standard film gauge of 36 x 24mm. A Crop Sensor camera has a sensor size that is smaller than a 35mm sensor.

Both types have their pros and cons, and it is an essential factor for you to consider before investing in a camera. Although Full Frame cameras are generally considered to be superior, there are features of a crop sensor camera that may better suit your needs or your personal preferences.

Full frame_vs_cropped_sensor

Crop sensor cameras

Until digital SLRs were invented, the film camera was shot on a 35mm reel. With the new DSLR technology, manufacturers made large 35mm sensors so that people could continue using their lenses on new cameras and make the transition easier. These larger sensors were expensive, so smaller, less costly sensors were made, which would work with older full-frame lenses. These were crop sensors. Camera manufacturers also started making cheaper lenses to go along with these smaller sensors, which mimicked the focal length of a full-frame camera.

There are two common types of a crop sensor, the micro 4/3 system and the ASP-C. However, manufacturers each have their own crop factor or naming systems. Canon, for example, has a crop sensor with a factor of 1.6x, and Nikon has a crop sensor with a factor of 1.5x, and Olympus and Panasonic use micro 4/3 systems that use crop factors of 2x.

Some professional photographers prefer crop sensor cameras because they better suit their workflow. They are also considered to be better cameras for amateur photographers because of their portability and price.

The crop factor of an image sensor is the ratio of the imaging area to a reference format, which is generally the 35mm format. Lenses are circular and, as such, have a circular field of view. A full-frame sensor records a rectangular crop of this view. A camera with a crop sensor produces a cropped area of view that is smaller than that of a full-frame.

Full frame_vs_cropped_sensor

Pros of a crop sensor camera

Affordability – Crop sensor cameras are far more affordable than full-frame cameras because a full-frame sensor costs so much more to produce. This affordability does not necessarily mean that a crop sensor camera cannot have quality images. A high-quality crop sensor camera can produce the same quality as a camera with a full-frame sensor and, as such, a crop sensor camera offers excellent value for money.

Telephoto capability – Telephoto photography can be instrumental with a crop sensor camera due to the extra reach gained from the crop sensor multiplier. With the use of an appropriate lens, you can effectively get up-close to your subject matter.

Portability – Crop sensor cameras are smaller due to the smaller size of the sensor, which means that they are smaller in size and weigh less. This smaller size makes it far more portable and a better option for photographers when they are travelling. The lenses for crop sensor cameras are also smaller and lighter, which reduces the overall weight of your camera gear.

Increased depth of field – Full frame cameras can take photographs with a shallow depth of field with less overall focus. A crop sensor camera can give you 2 stops more depth of field than a full-frame camera. The additional stops increase the overall focus one needs in certain types of photography like landscapes, architectural, or macro photography, where a more considerable depth of field is required.

Cons of a crop sensor camera

Cropped sensor – Although a crop sensor camera has many benefits, the smaller size of the sensor can be detrimental to the quality of your images in certain instances. The most significant disadvantage is that it physically crops the size of the picture because it captures the central part and not the periphery. This cropping results in the image being focused on a central spot and narrows the angle of the view, which reduces the control of the background.

Poor low light performance – The pixels in crop sensor cameras are closely packed together, which hinders light absorption and decreases exposure. A decrease in exposure results in the photographer needing a flash or external lamp when shooting in a low light situation.

Full Frame Cameras

A full-frame camera has a sensor that is the same size as the traditional 35mm film format or 36 x 24mm. The 35mm format has been the standard film gauge since 1909 due to the balance between quality and cost. High-quality DSLR cameras have full-frame sensors and are used by both professional and amateur photographers.

Full frame_vs_cropped_sensor

Pros of Full Frame Cameras

Improved lowlight capabilities and high ISO performance – A full-frame sensor, because it is more extensive, captures more light and makes it easier to focus and capture subjects in a low light environment. It also has larger pixels, which results in less digital noise at higher ISO levels.

More control over depth of field – The depth of field depends on the aperture, the focal length, and the distance of the subject. These aspects mean that with a full-frame camera, you can control your depth of field more by pairing it with a fast lens to create a shallow depth of field, for example. Depending on your settings and the lens you use, you have more control over your background and depth of field.

Larger dynamic range and colour depth – Due to the sensor being larger, a full-frame camera records a greater tonal range, which increases the detail and range of colour of the captured image. The broader angle view of a full-frame sensor camera also has an impact on the extent of the dynamic range and intensity of colour.

Cons of a full-frame sensor camera

Size and weight – The most significant disadvantage of full-frame cameras is that they tend to be larger and bulkier due to the size of the full-frame sensor. The lenses for full-frame cameras have more glass elements, which increase the overall weight of the camera.

Cost – A full-frame sensor camera is more expensive compared to a crop sensor camera. Plus, the high-quality lens that needs to be purchased and any other devices you may need are also more costly than the crop sensor camera counterparts.

No crop factor – The telephoto reach of a full-frame camera is reduced because there is no cropped sensor.

Full frame_vs_cropped_sensor

As you can see, there are many pros and cons to purchasing both a crop sensor camera and a full-frame camera. Ultimately the decision will rest on what your budget is as well as what type of photography for which you need it. Whichever you choose, make sure that it is a camera that inspires you to go out and explore your creativity through photography.

Photo credits: Kav Dadfar – All rights reserved. No usage without permission. Dreamstime.

Filed Under: Tutorials Tagged With: cropped sensor, full frame, full frame vs. cropped sensor, sensor size

Medium Format Lenses on a DSLR

It’s no surprise that photography equipment is expensive.  Think of the engineering and workmanship that goes into lenses and DSLR bodies.   As with everything, there are always levels of expense.   Lets examine lenses specifically.  The professional-class lenses tend to have fewer issues.  Yet, trade-off’s always exist with either professional or consumer glass.  So we spend our time and money looking for the best equipment for our hobby or profession. Sometimes the limitation is money and sometimes it’s just the lack of that ideal piece that we need.  For those willing to sacrifice some modern features there may be options to get top-quality glass at a fraction of the cost of similar modern equipment.

_mg_9861framex766
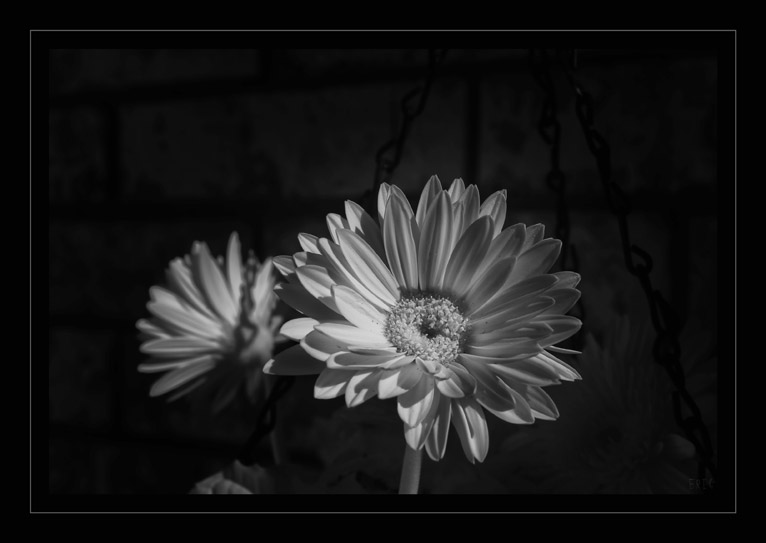
Here’s a Gerbera Daisy, shot with a medium format 55mm lens

As a photographer, I’m always looking for an edge, especially with my infrared images. As an engineer, I’m digging into the technical details of my photos & equipment.  I always look for ways to improve my set-up.  Many IR photographers have their cameras converted to dedicated IR use (with a fixed internal IR filter over the sensor).  These converted IR cameras can be calibrated to autofocus in IR so they shoot just like a stock camera.  The viewfinder can still be used for framing. However, for folks that use an external filter on full-spectrum cameras (like me) this is not an option. Longer wavelength filters block the viewfinder from transmitting visible light.  So I always use the camera in live-view mode and use the LCD and a loupe to focus my lenses manually. Since the same sensor that records the photo is also producing the live-view image, framing and focus are easily managed. I always manually focus my IR images using this LCD technique.  It gives me confidence that my images are, at least,  focused.

In addition to photography, I have spent many years doing serious astrophotography. Several years back I had read about astrophotographers coupling medium format lenses to cooled CCD cameras.  I wondered why these lenses so popular with astrophotographers.  Beyond the obvious point of getting a wider view of the sky, a quick examination of the physical layout quickly made it clear.  Medium format lenses are used primarily because of their longer flange-to-focal plane distance.  On many Astro CCD set-ups filters, guides and other equipment can lie between the telescope and the camera.   As an example, look at my wide-field (530mm) astrophotography set-up below.  See all the equipment between the camera (box on the LHS) and the telescope? If you remove the telescope and replace it with a lens, this lens would require a fair distance between where it mounted to where it focuses.

dscn5082-lnn-ax766

Below is an example of how a dedicated medium format astro set-up is constructed.  A custom machined the lens mount and motorized focus mounting bracket hold the medium format lens for coupling to the CCD.  This assembly is then attached to an equatorial mount, in place of or in addition to a telescope.

img_0909x766

(Image courtesy of Craig & Tammy Temple)

All the astrophotography work had me wondering how medium format lenses would work on a DSLR.  They work very well.  Some significant advantages exist when using medium format lenses on a DSLR.  The largest advantage is cost.  These lenses are seen as obsolete.  So many of the older manual focus, medium format lenses are available quite reasonably. With a little research and patience, some excellent deals can be had. I use the Pentax 67 format, but many others should work equally as well.

Another advantage has to do with the film size of medium format cameras.  Pentax 67 is a later version of the Pentax 6×7 format. This format came from the film size of 6 x 7cm. That’s a whopping 60 x 70mm. A standard DSLR full frame image format is 24 x 36mm. Medium format lenses will overfill a full frame sensor by a substantial amount. Why is that a big deal? Well, think about your lenses. Most of the bad things that happen to images occur on the fringes of the frame (chromatic aberration, coma, vignetting, etc). With a medium format lens, you’re shooting through the sweet spot.  I was pleasantly surprised at the image quality of the vintage medium format lenses that I tried. I have some decent professional DSLR glass.  But any of the medium format lenses that I’ve purchased give equal or better results. Here’s an example, a 2 frame panorama shot with a medium format 55mm prime lens.

_mg_0058framex766

This is a heavy snowfall in the desert of Far West Texas. In the distance are the Franklin Mountains that run through El Paso, Texas

Using a medium format lens has another advantage. If you understand how tilt-shift lenses work you may see where I’m going. With an OEM tilt/shift lens overfills the sensor. This allows the lens to be shifted and the image to still fall on the sensor.   With a normal lens, the image will shift off the sensor or become heavily vignetted.  For the price of one shifting adapter, you can shift any of your medium format lenses. If you read my blog last month you’ll know that I prefer to shoot panoramas with a shift lens. For fraction of what I paid for the spectacular Canon EF-24mm TS-E Tilt/Shift lens (also manual focus, by the way), I purchased an adapter and a small fleet of medium format prime lenses.

the-lonely-road-766

This is a 3 frame panorama of northern Norway, shot with my Canon 5DII, a 55mm Pentax 67 lens and a shift adapter (see below).

dscn7412x766

This is a Canon 5D Mk II coupled to a Pentax 67 55mm lens using a shift adapter.

_mg_0022a-x766
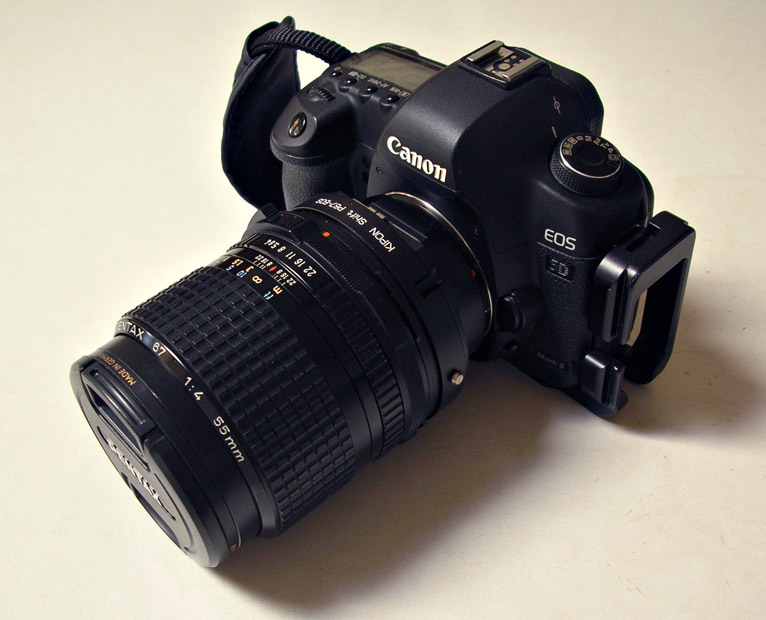
A test shot using my 150mm Pentax 6×7 lens (my oldest medium format lens)

It’s not all roses, though. Most medium format lenses are huge. I mean huge, and they are heavy. They are generally much larger than their 35mm format counterparts.  However, the size is what provides that impressive image circle.

dscn7413ax766
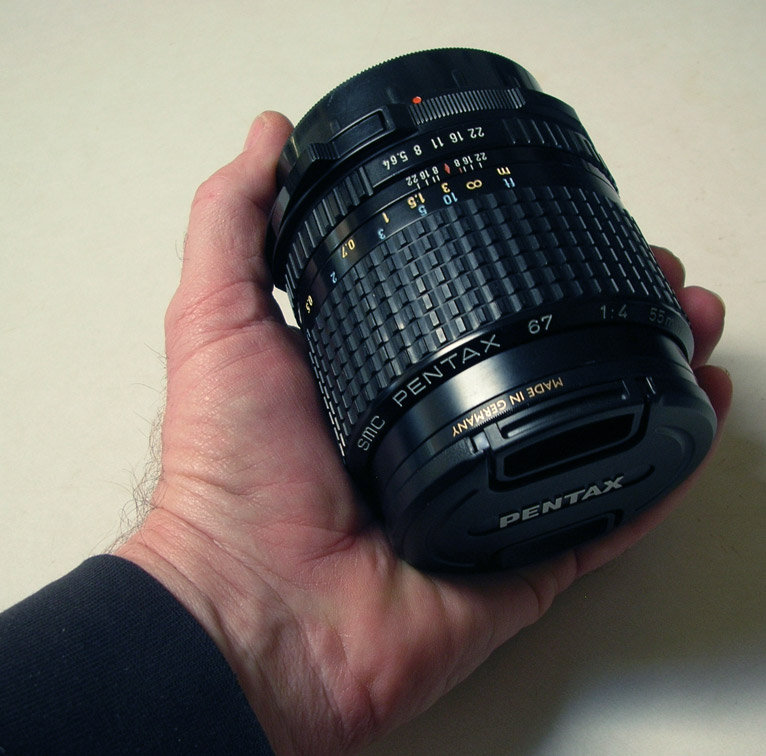
A monster of a 55mm lens and probably one of the sharpest lenses I’ve ever used, in any format.

A disadvantage (for some folks) is that the older medium format lenses are all manual focus. So you have to be comfortable with shooting manual focus on an IR camera (and understand manual camera operation if you plan to do Pano’s).  If you have an IR shooting style like mine, using a manual focus lens is inconsequential.  I manually focus my AF lenses for IR anyway.  You’ll also need to purchase an adapter (either fixed or shift) to interface to a DSLR.  Finding the proper adapter for your camera and preferred lens brand may also be difficult. You also have to do your research to get the lenses that have the best image quality. Just like modern AF lenses, some were lemons and some were stars. I only pick medium format lenses that have the best reviews for image quality or sharpness.  Finally, since many of these lenses are older you have to look out for dust, grease and fungus on the optics. I usually try to purchase the latest model of the particular focal length lens. So do your research, ask questions and shop carefully.

If you can get through all the details and decide to try shooting with medium format lenses, you’ll definitely have some seriously nice glass. You also get them for a fraction of what a similar modern lens might cost.  Hopefully, my experience will shine a light on the pros and cons of using medium format lenses on a DSLR.  If you’re up for a little challenge,  give a medium format lens a try.  You won’t be disappointed.

Filed Under: Gear Tagged With: Eric Chesak, full frame, medium format, Panorama

Blog Topics

  • Tutorials
  • Inspiration
  • Locations
  • Gear
  • News
  • Other/Misc

What our customers say:

Life Pixel has been a life-changer for me. Continue reading
Eric GConnecticut
Read more reviews
I am more than satisfied with the service I received Continue reading
Christopher JCanada
Read more reviews
I am more than pleased with the conversion job that you did Continue reading
LOUIS MWaco, Texas
Read more reviews
I am VERY impressed with his knowledge of your products and his patience in explaining it to a novice like me. Continue reading
Lynn FEssex, Maryland
Read more reviews
Things will only get better from here thanks to all of you. Continue reading
Phillip FRedding, California
Read more reviews
The Lifepixel newsletter reminds me of not having expressed my gratitude for the excellent job you made. Continue reading
Michael GGermany
Read more reviews
Your staff went above and beyond the call of duty to make sure everything was handled in an excellent manner. Continue reading
Paige RPearland, Texas
Read more reviews
It has given my old camera a new life, I will enjoy using it again. Continue reading
William PAustralia
Read more reviews
Excellent service and the camera works just great Continue reading
Hans FairhurstAustralia
Read more reviews
I just got my converted camera back from you guys. THANK YOU!!!! Continue reading
Anne CutlerForest Knolls, CA
Read more reviews
infrared_filter_choices_sidebar
ir_conversions_explained_sidebar
----------- Watch More Videos -----------
infrared_quick_start_guide

Ready to start shooting Infrared?

Convert My Camera

Subscribe To Our Newsletter

Receive updates, tips, cool tutorials, free stuff and special discounts.

Learn the Basics

  • Video
  • Start Here
  • Filter Choices
  • Focus Calibration
  • Lens Considerations
  • Camera Considerations
  • Place Your Conversion Order

Resources

  • Galleries
  • Lens Hot Spot Database
  • IR Tutorials
  • FAQ
  • Infrared Filter Choices
  • Infrared Photography Guide
  • Infrared DIY Tutorials

Company

  • Why Choose Us
  • Get In Contact
  • Job Openings
  • Write For Us
  • Affiliate Program
  • Terms of Use
  • Privacy Policy
  • Home
  • Start Here
  • Galleries
  • Tutorials
  • FAQ
  • Blog
  • Why Choose LifePixel?
  • Shop
  • Contact

Copyright © 2025 Life Pixel Infrared - All rights reserved - LifePixel Infrared Photography IR Conversion, Modification & Scratched Sensor Repair