Even as a seasoned photographer, you may not have heard of the term “Color banding”. It is a common issue that you may encounter and occurs when you push the boundaries of colors in your file. Don’t worry if you haven’t heard of the term. In this short article, we’ll discuss what it is, ideally how you can avoid it and how you can fix it if it does occur.
What is color banding?
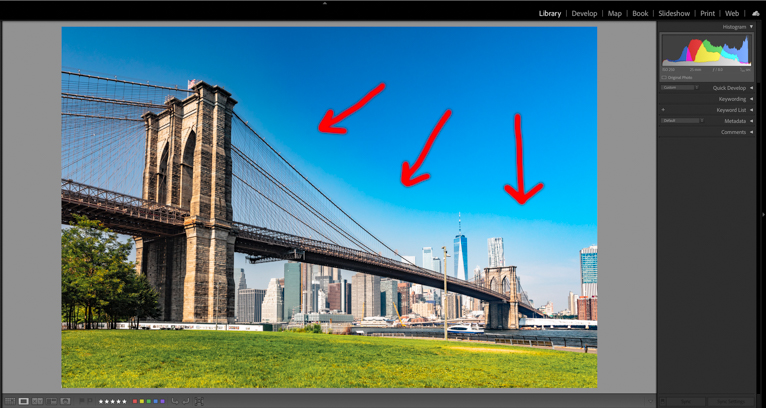
Color banding is the unpleasant, stark lines of color that appear in your picture. This issue usually occurs in photos with sizeable mono-colored sections like for example the sky, where the transitions between different colors become abrupt, harsh, and blatant enough to be easily noticeable.
On a typical photo, this transition is smooth, gradual, and unnoticeable. But sometimes this graduation in tones can be pushed too far to a point where the colors can not be displayed. So rather than a smooth transition from say a light blue to a darker blue, the colour jumps and give a harsh line between the tones.
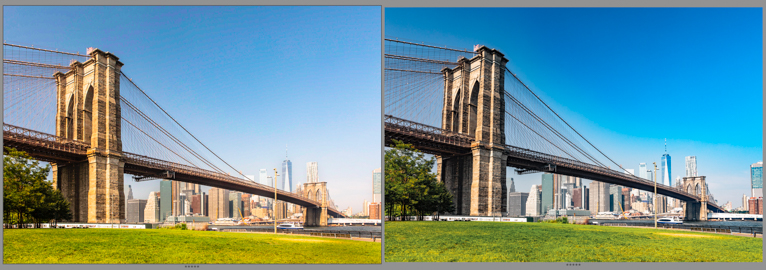
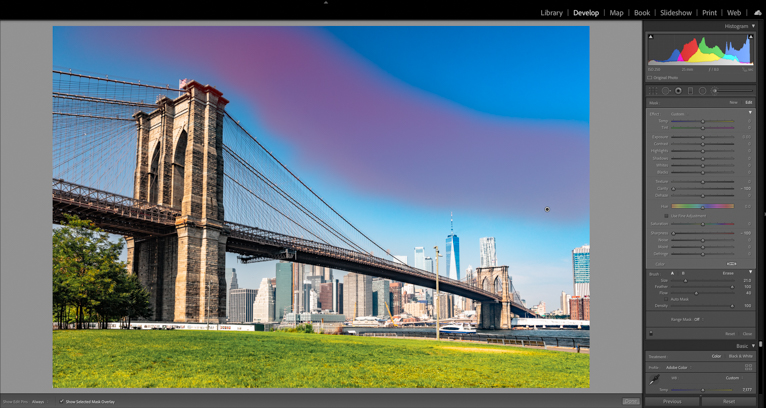
An example of how an image can be over-processed to suffer from color banding.
How to avoid color banding?
The biggest culprit for color banding occurring is over-processing an image in editing software. Things like too much saturation, vibrancy and dehaze (in Lightroom) can push the limits of colors beyond what is mathematically possible.
So the best way to avoid banding all together is to capture your shots as best as you can in-camera. This will negate having to push sliders to 100%. In scenarios where you have a scene with high dynamic range, either use things like filters to even out the contrast in the scene or bracket your shots. This will give you multiple exposures that you can merge together for a better-exposed shot overall.
You should also shoot in RAW and make your adjustments before converting to JPEG files. RAW files are much more forgiving due to the amount of information they contain. So always edit in RAW and then save in other file formats at the very end.
How to fix color banding?
This quickest and easiest way to fix color banding is to first see if you have over-processed your image. Check your sliders and pull them back and see if that makes a difference. If you have added a gradient make sure that you haven’t added too much saturation or dehaze.
If these settings are all OK and you are seeing banding in your shot, the only solution to disguise it. There are a few methods of doing this (note that you will need editing software like Adobe Photoshop). Below are two that I use effectively.
Adding noise to the area
What is noise? In photography terms, noise is virtually many, many multi-colored dots that appear in your photos. It can take the form of random splotches of color or abrupt changes in brightness in some cases. Usually, photographic noise is the bane of every photographer’s existence. It is a constant obstacle and nuisance that many photographers must overcome through editing or adjustments.
However, photographic noise can be your friend when dealing with the issue of banding. The “randomness” that photographic noise creates can counteract the appearance of banding. In just a few simple steps, you can eliminate banding from your photos by adding noise.
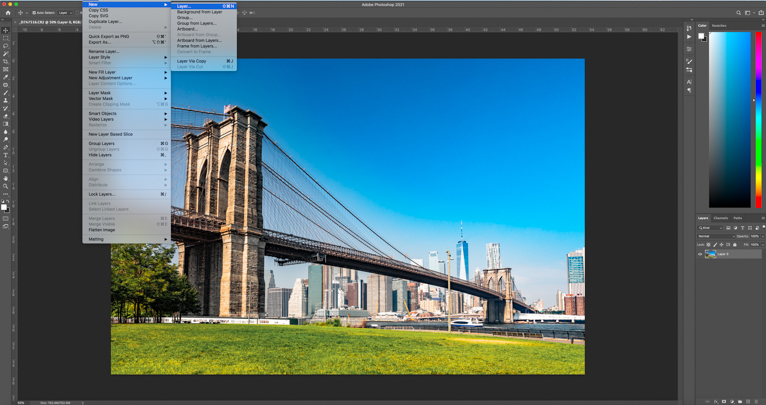
1. Add a new layer to your photo. In photoshop this will appear as a blank, grey layer; this is where you will add noise to your image.
On the new blank layer, press Ctrl + Shift + N (Apple+Shift+N on a Mac). A box should appear. Select “Overlay” under “Mode.” Ensure that the box for “Fill with Overlay-neutral color (50% gray)” is ticked. Finish by selecting “OK.”
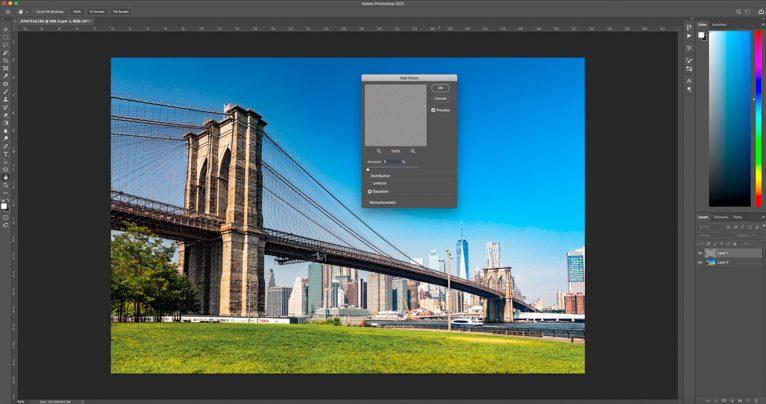
2. Add noise to your photo.
Select “Filter,” then “Noise,” then “Add Noise.” This step will apply the “Add Noise” filter to your overlay. A box should also appear. Select the percentage of noise you would like to apply to your photo. It is recommended that you begin by selecting somewhere in the range of 3% – 5%. There should also be a spot for you to choose a distribution at the bottom of the window. Select “Gaussian.”
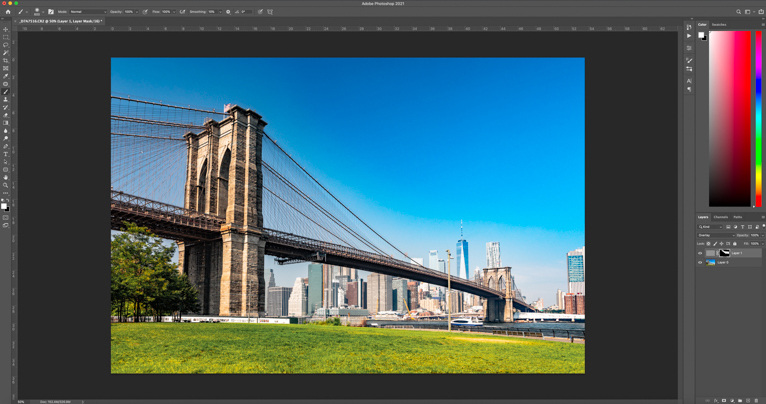
3. Utilize a mask. The previous step adds noise to your entire photo, rather than just your spot with banding. This step fixes this issue, which can be done by applying a mask that blocks off the unnecessary noise throughout your photo.
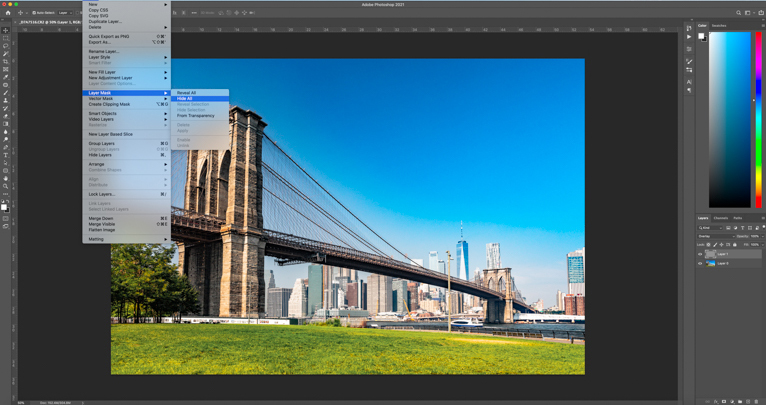
Select “Layer,” then “Layer Mask,” then “Hide All.” Now, the added noise should not be visible anywhere on your photo. Select your “Brush” tool by pushing ‘B’ on your keyboard. Change the brush’s color to white by pressing ‘D’ on your keyboard; this sets the color to default. Using the brush tool, brush the parts of your photo that contain banding. This step should add noise to the specified area. You should be left with an image without any banding!
Apply blur
The issue with banding is the harsh lines that appear in your area of colour. So another solution is to blur that area if possible. This would only work in some scenarios as for example if you have bold clouds in the sky, it would look strange if they are blurred. But for example, this technique works really well if you have a clear blue sky. The other great thing about this technique is that you can do it directly in Lightroom.
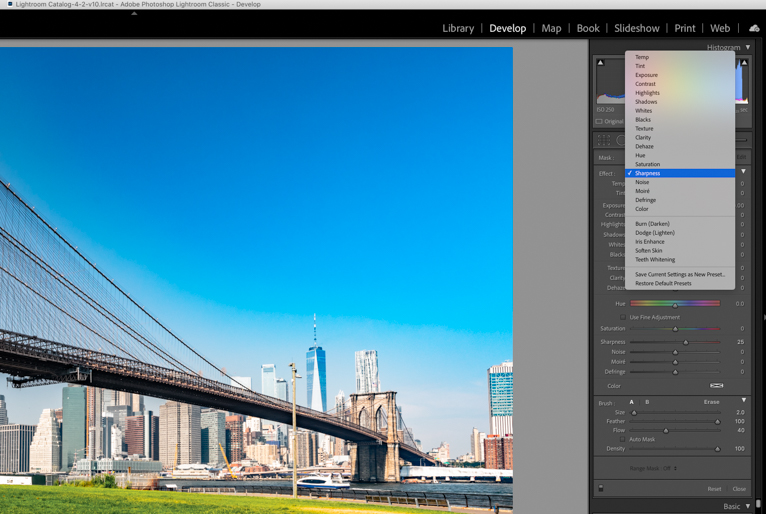
- On the “Develop” module in Lightroom select the adjustment brush (K).
- Select “Sharpness” in the “Effect” dropdown menu
- Press “O” on your keyboard. This will make things easier to see when you brush over the selected area as you’ll be able to see where you are “painting”.
- Move the “Clarity” and “Sharpness” sliders to the left so they are at 0
- If you find it’s not enough you can also reduce the amount of saturation which will also help.
- Have a look at your image and make further adjustments
Banding is a common side effect of over-processing. But usually, it can be easily fixed or even better avoided altogether. If you do find it on your images follow the tips above and you should be able to fix them.
Photo credits: Kav Dadfar – All rights reserved. No usage without permission.
Latest articles by Kav Dadfar (see all articles)
- How To Photograph Street Performers - April 26, 2022
- Profiled Photographers – Ben McKechnie - August 24, 2021
- Profiled Photographers – Jim Maher - August 24, 2021
is the founding editor of JRNY Travel Magazine as well as a professional travel photographer and writer based in the UK. His images have been used by clients such as Condé Nast, National Geographic, Lonely Planet, Rough Guides and many others. Kav is also the co-founder of That Wild Idea, a company specializing in photography workshops and tours both in the UK and around the world.
See All Articles by Kav Dadfar


Leave a Reply