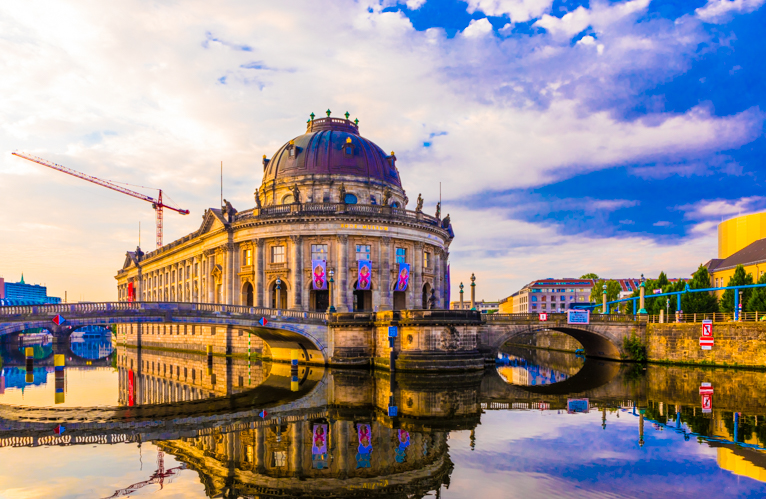
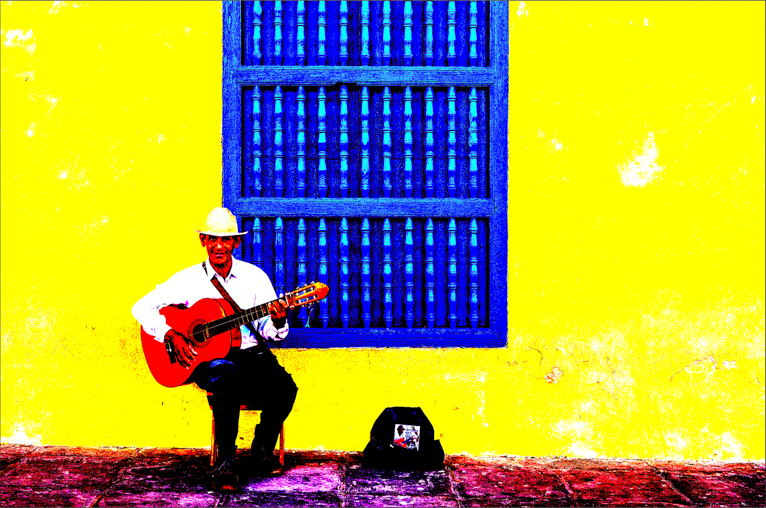
If the term “posterization” is unfamiliar to you, then the easiest way to visualize it, in a hyper-stylized form, is to look at the famous and iconic Obama “Hope” poster that became popular during 2008-2009. This poster spawned a decade of similarly distorted and abstract imitations and homages. So, if you weren’t already familiar with it, likely, you’ll already have seen photographs that have been stylized in this fashion without even realizing that it was posterization at which you were looking.
The process is so standard that most designers will have a posterize filter to transform the image into the style mentioned above automatically. Or possibly even use the Photoshop filter. Image posterization has been around for much longer than this. However, and posterization is undoubtedly not always intentional. A photograph can be posterized for a multitude of different reasons, and when done incorrectly or unintentionally, the result will be a muddy, low-quality looking picture. Pictures and images saved in a format suffering from severe compression come to mind first when thinking of the kind of accidental ruining of a photograph that you want to avoid.
What is posterization, however? Let’s have a closer look at the technical details.
Intentional posterization
When intentional, posterization is the process of altering a photograph or image to flatten out the colours. Where you would typically have a smooth gradient transitioning from colour to colour, posterization will split the colours into distinct regions. This technique is usually done by reducing the number of colours that the photograph has. When done intentionally, it will be carefully tweaked to create a composition that still maintains the clarity of the original image. At the same time, it opens access to the ability to create a highly stylized image that will also allow you to easily alter the colour scheme of the image in a variety of exciting ways.
However if it isn’t done right, you’ll end up with an image that looks grainy and washed out at best and unrecognizable at worst. Due to attempting to reduce the depth of colours, if an image has too many complex colour transitions, you’ll end up with messy obscure patches of colour.
Unintentional posterization
The unintentional posterization that you’ll see when working with a photograph can also go by another name, colour banding. Although you won’t often see it in an image that has come straight from a camera, this is very common when you are dealing with post-processing involving an image that has an incredibly complex gradient. The sky is a usual suspect when it comes to this issue, made even worse if the photograph hasn’t been saved in an incredibly high-quality format. It can be detrimental to the quality of the image in these kinds of situations to do too much post-processing, as big changes in saturation or colour levels/curves for colour correction will push the number of colours the image is attempting to use to unattainable levels. Eventually, you will hit the ceiling. Even if you can’t necessarily easily see posterization in the image you are working with, you’ll see it upon closer inspection or if you know how to examine the colour histogram of an image properly.
The one place where this will be far more of an issue is with images that have a complex colour range and are saved in a format like JPEG. Saved normally, a JPEG will have access to far fewer colours than other file types.
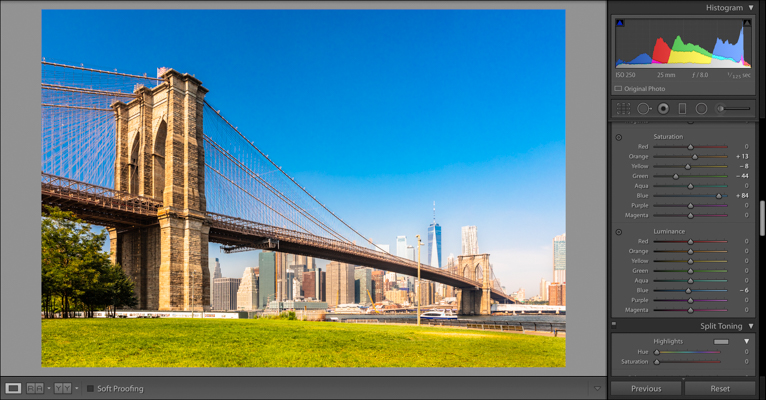
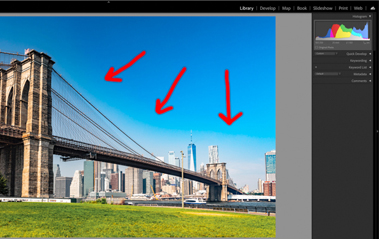
There is banding in the sky of this image
Bit depth
The range of colours that an image will have access to will be determined by bit depth. Bit depth is essentially the quantity of 0’s and 1’s that are available for storing colour information. The more of these, the better, when it comes to images with complex gradients, as the image will be able to save all of the colour information that it requires to reproduce smooth transitions of colour. You can view much of this information in the histogram of an image.
The histogram will show you how much of each colour is being used. Correctly using the histogram and the RGB histogram will allow you to investigate and control the amount of exposure that is on each colour channel. When you see a histogram that has been stretched out, containing a sea of colours spiking up and down at random intervals, you know that you’ve got a posterization problem. The extreme variance in the intensity of the colours forces the image to jump from colour to colour. Thus, creating the blocky regions or segments that you may see in a posterized picture.

Avoiding image posterization
Depending on the kind of image you are working with, there can be a few useful rules of thumb to follow that will help you avoid posterization. The simplest one that has already been mentioned is not to work in low-quality formats that put a ceiling on the amount of colour information that can be stored in the image. Some image editing software will even allow you to work in 16-bit, greatly expanding the amount of available storage for colour information. Generally, though, being careful with colour levels and the amount of exposure in an image is the best way to avoid posterization. As is not over-processing an image by adding too much saturation or de-hazing.

Image posterization or colour banding is a common problem that is often missed by amateur photographers. But if you supply your images to a stock library or and image editor they will almost always point them out. The best way to check for these is to zoom into your image and check it at a 100% view. Hopefully, now you have a better understanding of image posterization and how to avoid it in your images.
Photo credits: Kav Dadfar – All rights reserved. No usage without permission. Dreamstime.
Latest articles by Kav Dadfar (see all articles)
- How To Photograph Street Performers - April 26, 2022
- Profiled Photographers – Ben McKechnie - August 24, 2021
- Profiled Photographers – Jim Maher - August 24, 2021
is the founding editor of JRNY Travel Magazine as well as a professional travel photographer and writer based in the UK. His images have been used by clients such as Condé Nast, National Geographic, Lonely Planet, Rough Guides and many others. Kav is also the co-founder of That Wild Idea, a company specializing in photography workshops and tours both in the UK and around the world.
See All Articles by Kav Dadfar


Leave a Reply