The purpose of this article is to provide technical advice as a starting point for people who are looking to photograph the moon. The goal is to help people venturing into astrophotography save time by avoiding the trial and error process.
Methodology
- The same Canon 5DS R body was used for all of the photographs.
- All photographs were taken with a Canon EF 100-400mm f/4.5-5.6L IS II USM Lens set @ 400mm.
- All photographs were taken with a tripod. “IS” was off.
- Three photographs each were taken of the moon as follows;
- No filter utilized, note a Heliopan UV filter was on the lens for protection
- IDAS LPS-D1 light pollution reduction filter
- #80A Light Blue Filter
- Circular PL polarizing filter
- The sequence above was performed three different times;
- Photographing the moon during the daytime
- Photographing the moon at dusk
- Photographing the moon at night
- Focusing was performed utilizing the cameras autofocus prior to every shot.
- The best photograph from each sequence of three was selected for this article.
- No retouching / sharpening were performed on the photographs.
- Exposure Data:
- ISO 100
- f 5.6
- 1/200sec. no filter, others were 1/125sec., PL 1/100sec.
- 2 second time delay to dampen vibration
- Mirror lockup to dampen vibration
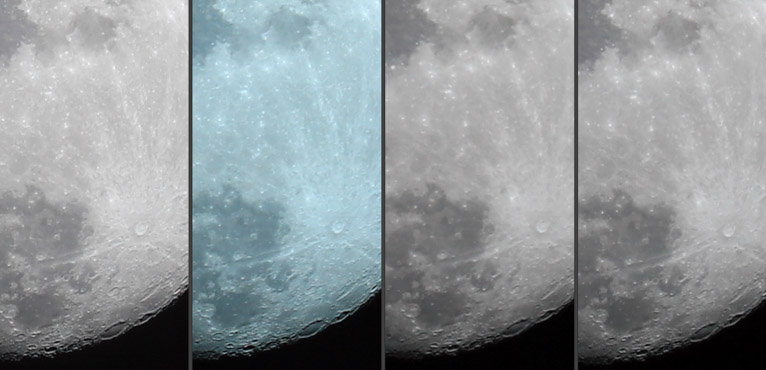
Test 1- the Moon at Night
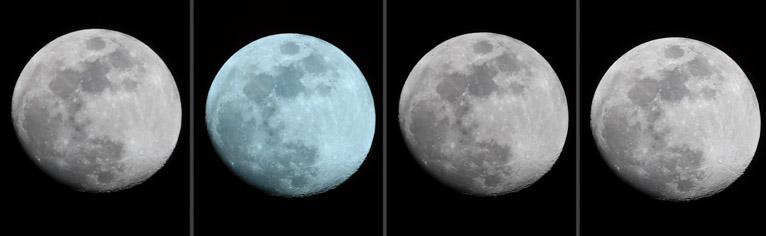
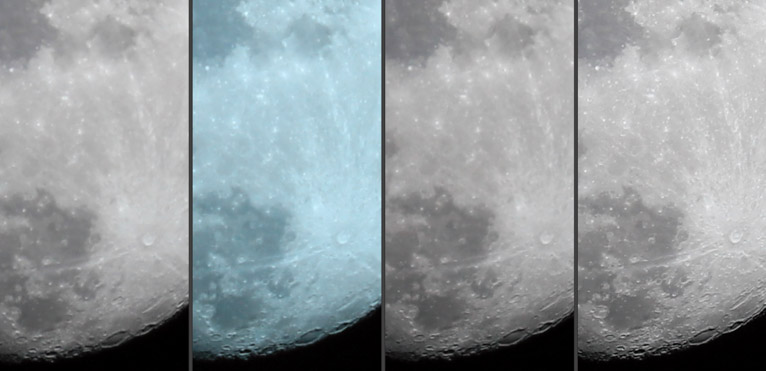
From left to right: no filter, LPS-D1, #80A, PL polarizing filter.
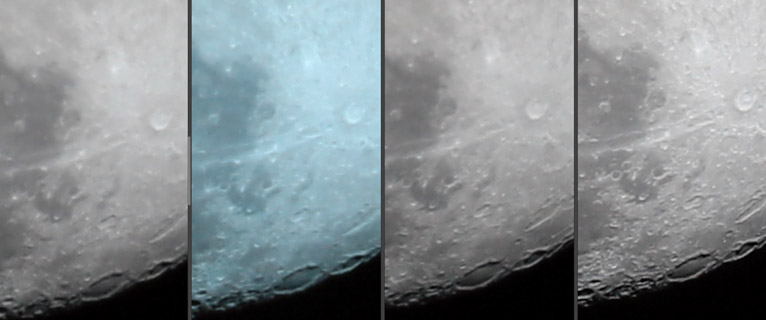
Test 2- the Moon at Dusk
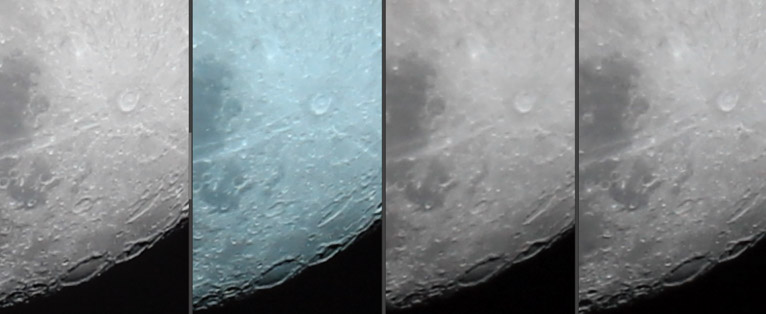
From left to right: no filter, LPS-D1, #80A, PL polarizing filter.
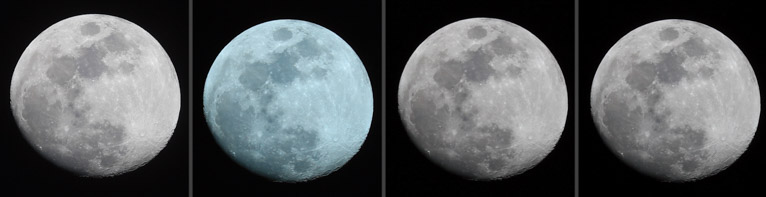
Test 3 – the Moon in Daylight
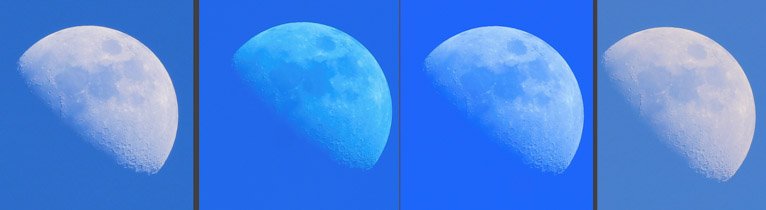

From left to right: no filter, LPS-D1, #80A, PL polarizing filter.
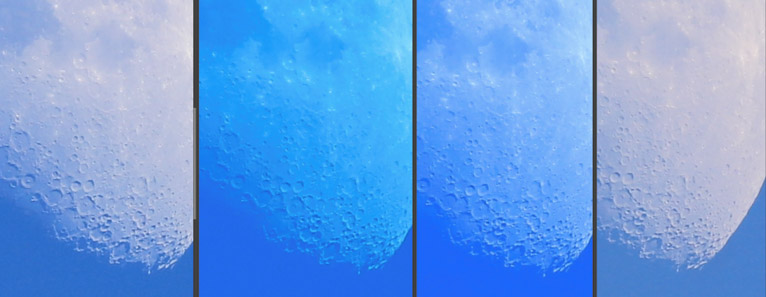
Images below adjusted with Photoshop and sharpened
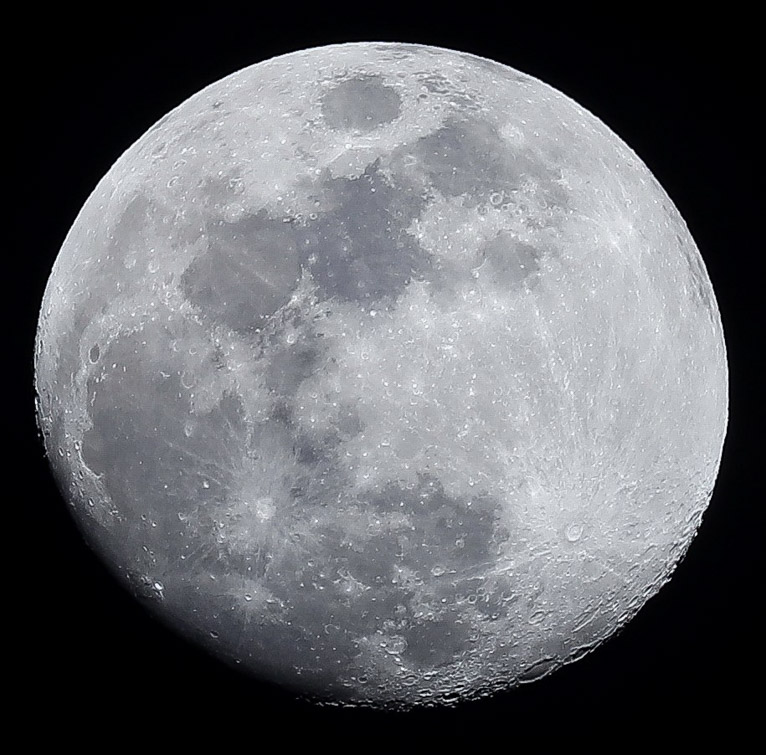
Daylight Moon No filter.
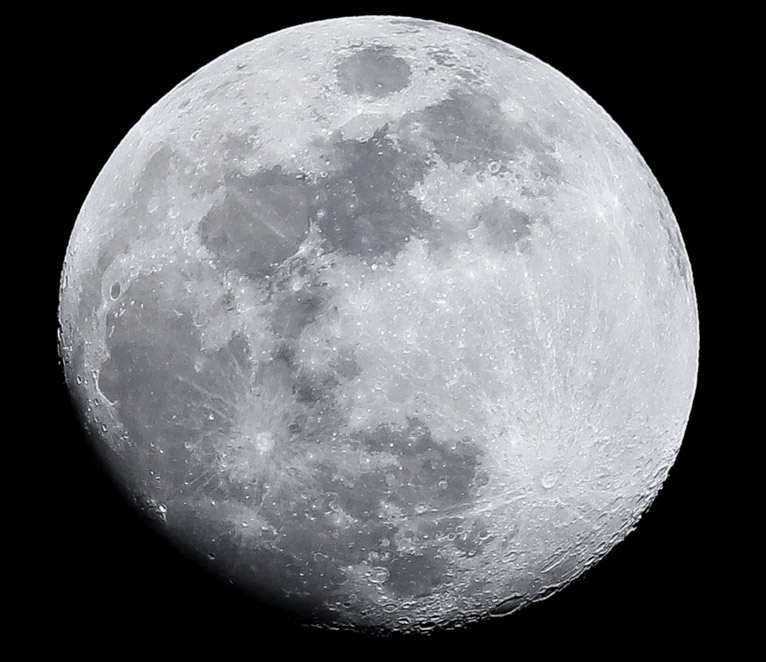
Night Moon with the PL filter.
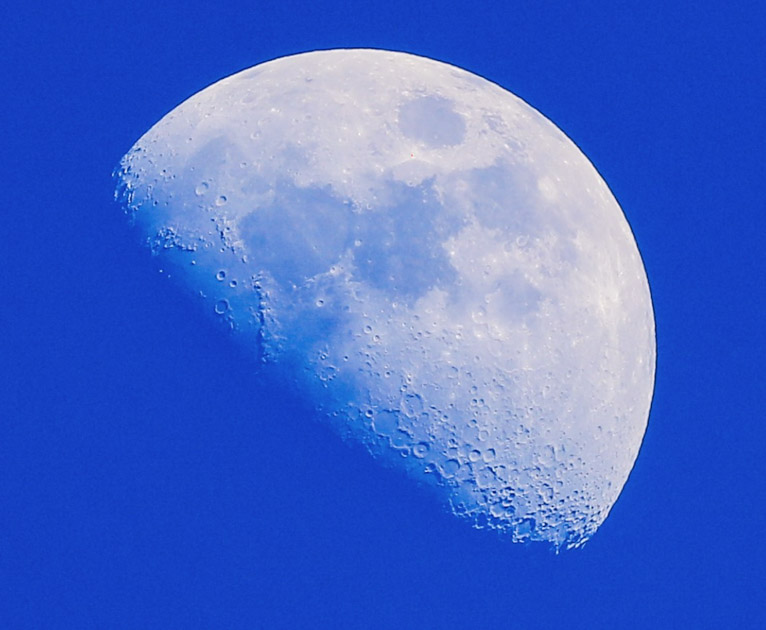
Moon at Dusk no filter.
Analysis
Photographing the moon at night produces the best results, followed by images taken at dusk, last are daytime images of the moon. In general filters tend to lessen the quality and should be avoided; the exception was the use of the polarizing filter at dusk. I do believe that this could have been an anomaly where the image taken without any filters may have been slightly blurred due to atmospheric conditions / distortion which are constantly changing.
Conclusion
Astrophotography is very challenging due to the large number of constantly changing variables. At the same time it can be one of the most rewarding fields of photography. While your results might vary due to differences in equipment and location generally exposures of 1/200sec, f5.6, at ISO 100, without any filters are a good starting point for photographs of the moon. Minor adjustments in Photoshop or Lightroom to the contrast and sharpness will produce excellent results.
Latest articles by Irv Schlanger (see all articles)
- Review of the IDAS LPS-D1 Light Pollution Suppression Filter - November 11, 2017
- Stacking to Increase Depth of Field - September 26, 2017
- Diffraction of Light – Creating an Artificial Rainbow - September 1, 2017
Irv Schlanger
Irv Schlanger worked as a professional photographer in the 80’s through the late 90s, photographing hundreds of weddings and many magazine covers. His formal training is in information systems, and security. He has a Master’s degree from Drexel University. Irv got back into photography as a way to relax, and now focuses primarily on landscapes, wildlife, and portrait photography.
See All Articles by Irv Schlanger


Leave a Reply