Photoshop’s sky replacement function has been a welcome addition to an already astonishing software. It gives photographers the opportunity to replace a sky in a photo effortlessly without the need to learn how to mask or use layers. And because Photoshop works so well with Lightroom, it means moving images back and forth between the two is quick and straightforward. But whilst the sky replacement function can be useful, if not used correctly it can actually ruin a photo. So here are 5 tips for when you are replacing skies in Photoshop.

Firstly, is it cheating?
The short answer is NO! There are of course purists who believe that photos shouldn’t be manipulated. But the way I see this process is that it really depends on what the purpose of the image is. For example, if you are a photojournalist, then the photos should be free of post-processing. But if you are going to be printing your photo to put on a wall in your home then why not change the sky? In the same way that a painter would change colours to produce their vision, you are doing the same thing, just digitally. So, don’t worry about post-processing and image manipulation being cheating, because it is not.
Find the right match
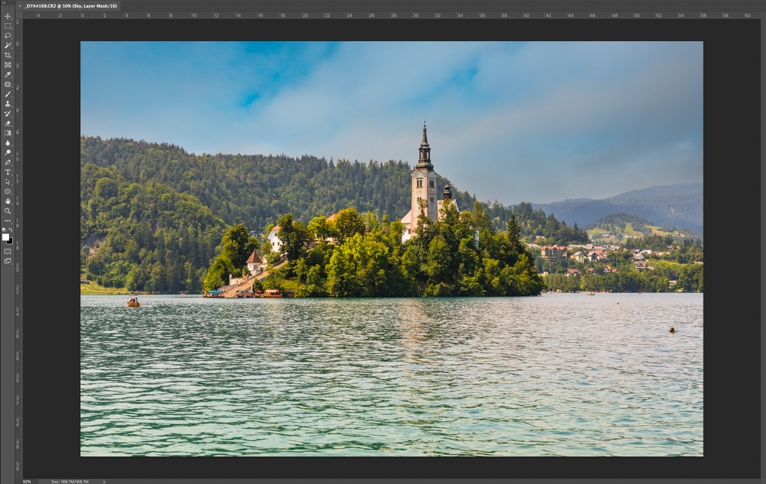
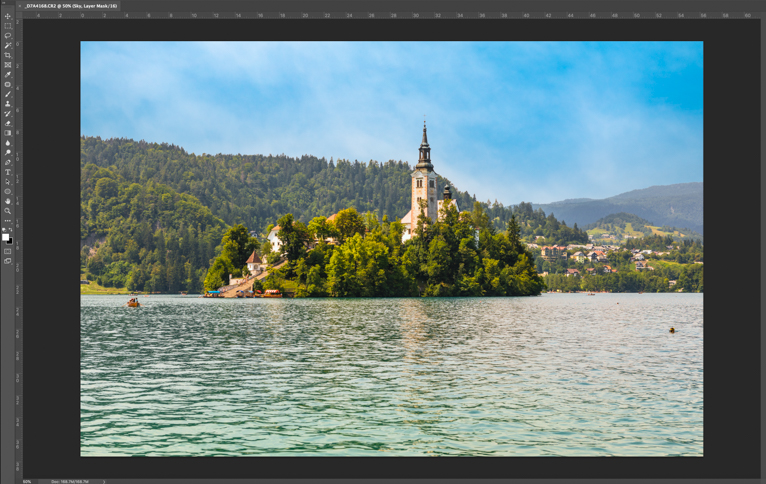
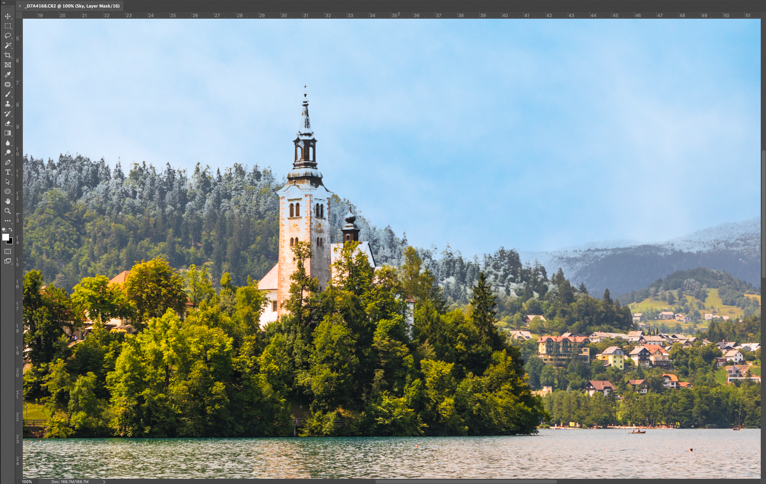
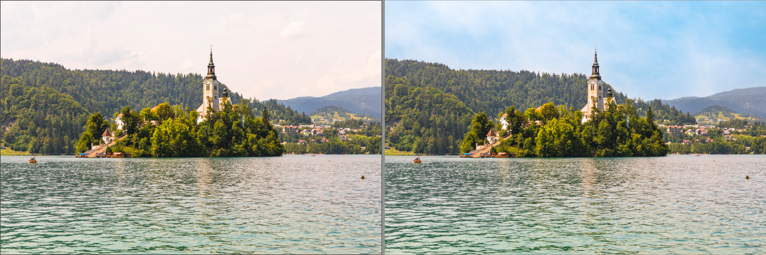
The biggest challenge in using sky replacement is being able to find the right sky to match your scene. Because if there isn’t a natural match, the photo will just not work. So, before deciding to replace the sky in a photo, you need to ensure you have the correct sky. Whether you purchase a pack or you take your own photos of skies, the important thing is to go through and look for a sky that has similar tones but also is what you would expect in those conditions. For example, if you have a bright but flat light, a dramatic sunset sky just wouldn’t match the tones in the scene. See the two images below and how even blue skies can differ and how the second sky works better (although still not perfect – we’ll come onto that next).
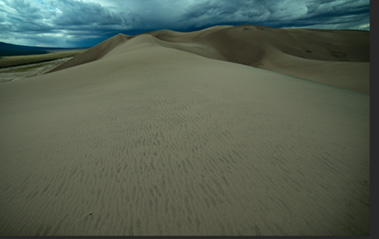
Tweak the sky
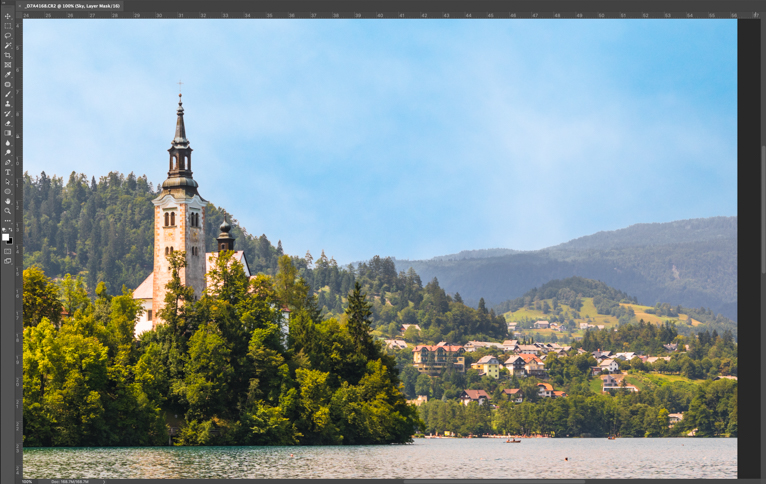
As you can see in the image above, even the blue sky still doesn’t quite feel natural. The photo has more brightness and tones of yellow in the scene which are not currently present in the sky. So the next step should be to tweak the colour of the sky for a better match of your original photo. Using the “Temperature” and “Brightness” sliders, tweak the sky until you have a more natural match between the foreground and sky.
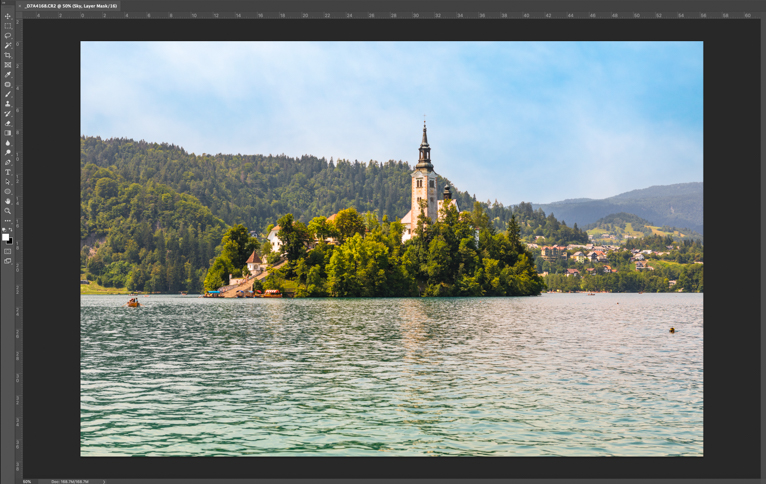
In the image below I have brightened the sky and added more yellow to it to match the scene better. At this point, you may also want to move your sky around to get the perfect placement of the clouds for the composition.
Check edges
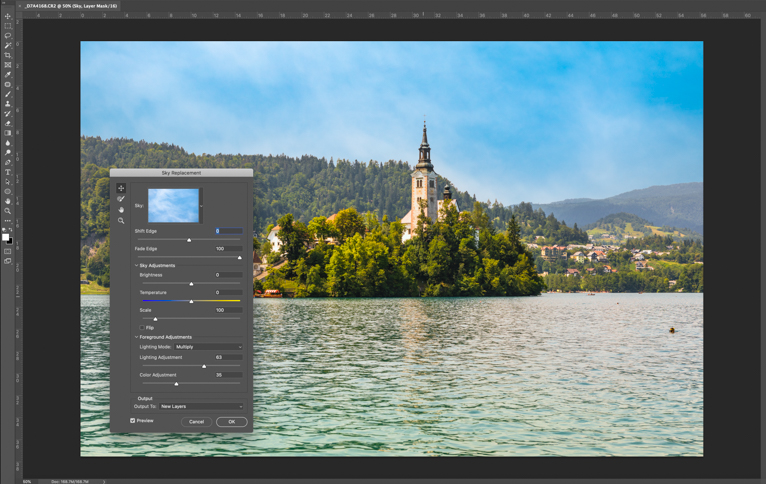
Before you save your sky you also need to take a look at the edges between your sky and where your image meets to ensure that there is a natural transition between the two. There are a couple of options on the sky replacement panel for tweaking this.
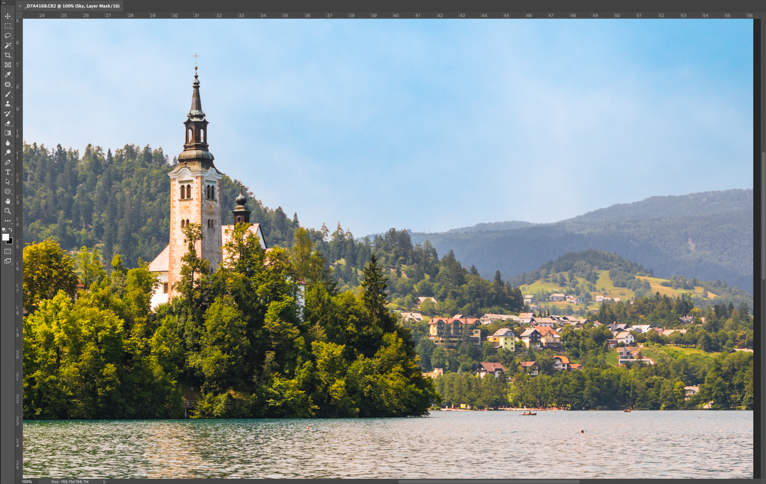
First is the “Shift Edge” slider. As the name implies, this moves the edge of the sky lower or higher depending on where the default – which is zero is. Pull the slider to the left and your sky move further up revealing more of your original sky. Move the slider to the right and it will move your sky lower covering the horizon line (see image below).
If around your horizon line is fairly clear, like for example there are no low clouds, you shouldn’t really need to change the value beyond zero. However, if you do have low clouds these will often show through the fade gradient of the sky to image transition. In these scenarios, you can move the edge of your sky up a little so that it clears these low clouds.
Fade edge
The next slider is the second part of checking your horizon line. The “Fade Edge” slider, does exactly as it implies. It fades more of the edge of the sky for a smoother blend into the horizon line. The default for this fade is the maximum which is 100 and the lowest is zero. This will usually mean a very sharp edge between sky and horizon which looks unnatural (see image below).
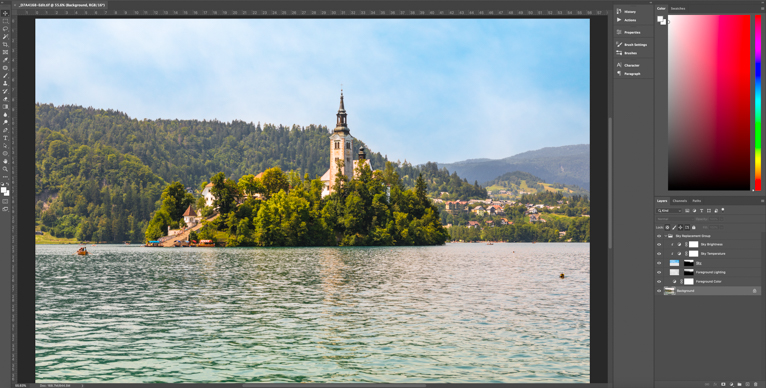
But you may also sometimes find that 100 is too much as you want less of a fade between the two (for example to cover some faint clouds). My suggestion would be to zoom into your image and then tweak the slider until you get the desired effect. Then click OK and you’ll notice your image adjustment layers appearing on the right. At this point, you can save your image or make further adjustments as required.
As I said earlier, the aim should be for a final image that looks natural and seamlessly blends those two elements of sky and foreground together.
Photoshop’s sky replacement is a great tool to use to manipulate your photos. Even if you are a complete beginner you will find the whole process incredibly quick, easy and enjoyable. But remember to use the tips above to make your finished photo look natural.
Photo credits: Kav Dadfar – All rights reserved. No usage without permission.
Latest articles by Kav Dadfar (see all articles)
- How To Photograph Street Performers - April 26, 2022
- Profiled Photographers – Ben McKechnie - August 24, 2021
- Profiled Photographers – Jim Maher - August 24, 2021
is the founding editor of JRNY Travel Magazine as well as a professional travel photographer and writer based in the UK. His images have been used by clients such as Condé Nast, National Geographic, Lonely Planet, Rough Guides and many others. Kav is also the co-founder of That Wild Idea, a company specializing in photography workshops and tours both in the UK and around the world.
See All Articles by Kav Dadfar

Leave a Reply