It’s hard to imagine that at one point the only photographs you could take were in black and white. Black and white photos are romantic, dramatic, and could have more impact than colour photos. Although we have collectively been shooting in black and white for longer, and it would seem that working in black and white would be less complicated than in colour, taking black and white photos that have that “WOW” factor is not as easy as one may think. To help you capture those amazing black and white photos, here are 12 tips.

Shoot in RAW
Always shoot in RAW. By shooting in RAW, you are covering your bases. Often you’ll take an excellent picture that doesn’t work in black and white but is stunning in colour. If you shoot in RAW, you can always change your mind if the black and white version didn’t turn out as well as you’d hoped. RAW format gives you the best quality photo with greater editing flexibility than anything else.
Lines, shadows and shapes
Pay attention to lines, shadows, and shapes when you are visualizing your picture. This process takes some practice, but once you get your eye in, it’s like riding a bicycle, and you’ll notice the number of quality black and white photos you take increases. So make sure you look out for geometric shapes or use leading lines within your black and white images.
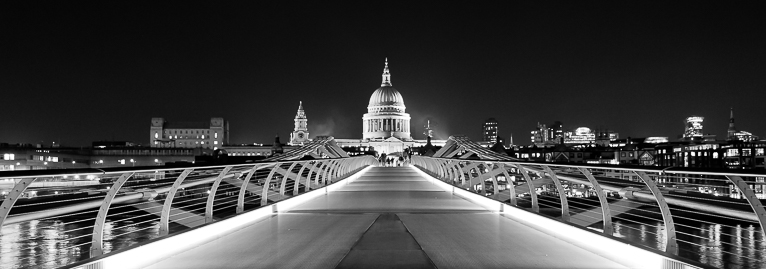
Add contrast to your image
Look for stark contrasts within the shades of grey. Most black and white photos that have that WOW factor will have some part of the photo that is almost pure white and a part that is almost pure black. Make sure you also have a wide range of greys to balance out the white and darker areas. If the greys are all similar, then the picture will look dull and uninteresting. This contrast is often what makes black and white photos so dramatic. Just be aware that your white areas and black areas are not clipped.
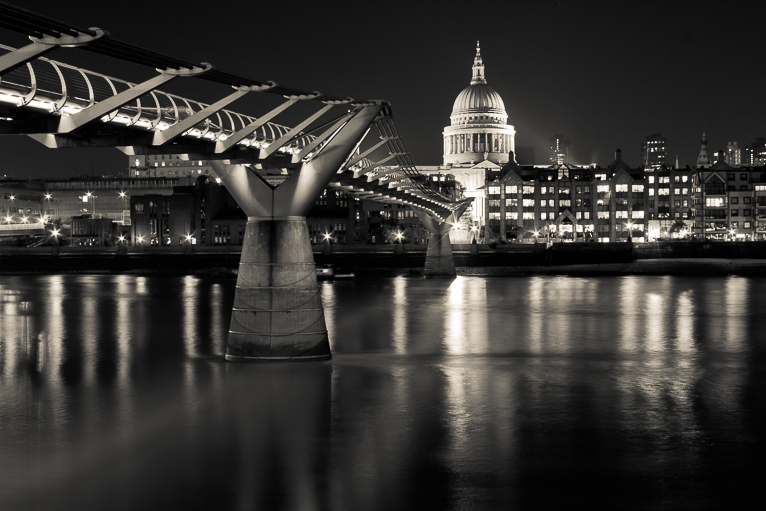
Pack your polarizer
If you are shooting near something reflective like water or metal, then you should use a polarizer. The polarizer will dull the reflection of sunlight. Without a polarizer, the highlights created by sunlight reflecting off a surface can be extreme and detract from the overall composition of the photo. This can become more noticeable in black and white photos than in colour ones.
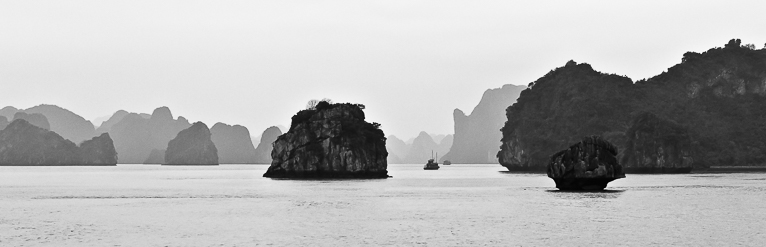
Look for textures
Black and white photos of textures can be striking because of the varying tones. As long as the surface is not front-lit, the finer details and contrasts of texture will be highlighted and create a compelling image.
Patterns, like texture, are also more interesting when shot in black and white. Patterns that are coloured do not command as much attention as when viewed in black and white. The ordered repetition of a pattern stands out more in black and white because the eye is not distracted by colour. You’ll start seeing patterns everywhere once you start photographing them.
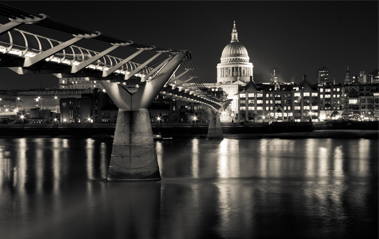
Try long exposure
Long exposures work brilliantly in black and white. Before you delete that colour photo that you think is worthless because of prolonged exposure, try taking the colour away and seeing what it looks like in black and white. You may be pleasantly surprised.
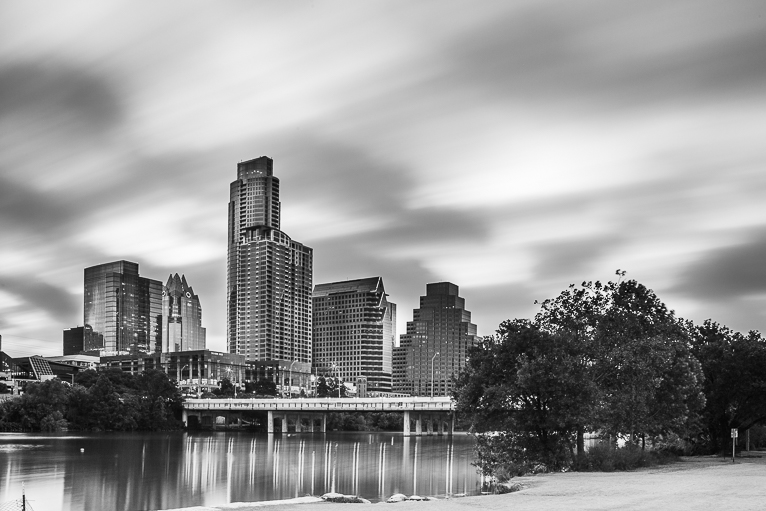
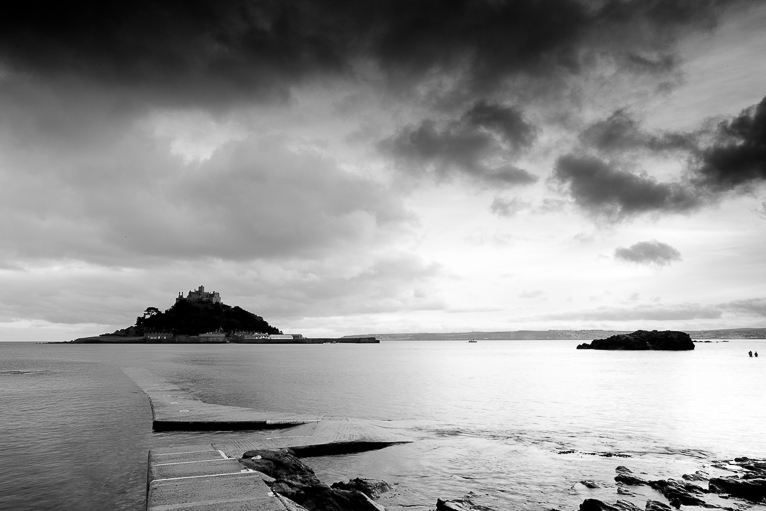
Bad weather is great for black and white
If you’re shooting landscapes, do it when the weather is terrible. Bad weather makes for superb black and white photos because there’s always contrast and a range of greys. You won’t get the same drama and interest when shooting on a perfect blue sky day when you’re working in black and white. If the wind is blowing and you use a long exposure, you’ll also benefit from creating motion blur in the clouds. This can look incredible in black and white.
The ideal lousy weather for taking black and white photos is when there are low lying clouds that are moving at speed through the sky. Use a neutral density filter and slow shutter speeds, and you’ll capture amazing dramatic landscapes.
Plan your shoot
Use a phone app to help you plan. There is a myriad of apps available that can do everything from telling you the weather forecast and wind speed to check the angle of the sun or moon in your location. If you’re shooting along the coast, then a weather app that includes tidal movement can come in very handy.
You’ll need the right equipment
Have the right equipment. A DSLR camera (or a mirrorless camera) that gives you complete control over your shutter speed, ISO and aperture are best. A wide-angle lens for landscape photography will give you the ability to capture more of the sky and anything unusual in the foreground. A cable release or wireless remote to trigger the shutter remotely can also be useful (but not a necessity).
A telephoto lens can also be useful for times when you need to get closer to the subject but physically can’t (such as wildlife photography). Last but not least, a sturdy tripod that strong enough to withstand some wind, and light enough to carry around is a piece of equipment you will never regret buying.
Edit your photo
Most modern digital cameras can be set to shoot black and white images. However, you will have far more control if you shoot in color and then convert to black and white using Lightroom or Photoshop. These programs have extensive editing options and are worth spending time experimenting with rather than just using the natural “Convert to Mono” command. You’ll very quickly be able to tweak every aspect of your image until you get a perfect balance.
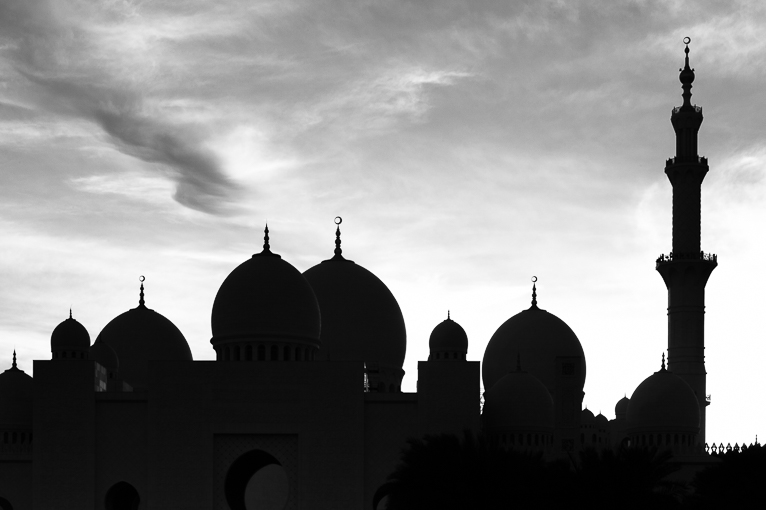
The Contre-jour technique
This is when you point your camera towards the light source when taking your picture. This technique captures interesting silhouettes and shadows, emphasizing lines and shapes, and adds a dramatic effect that will grab the attention of your audience. Keep your ISO at 100, narrow the aperture, and increase your shutter speed to capture those classic sharp ‘freeze-frame’ moments that work so well in black and white. The key here is to ensure that your silhouette is sharp.
Be creative
Black and white photography lends itself to creativity, so try taking photographs of your subject from different angles. Try focusing on elements within the frame like lines and shapes rather than the whole subject. Zoom in on negative space and experiment by capturing abstract shots.
With photography being so widespread most people automatically take photos in colour. But black and white photos not only have the ability to give you dramatic results, but they can also help you become a better photographer. By taking out colour from a photo you will be forced to think more about the composition and your subject. Use the tips above and you will be on your way to capturing stunning black and white photos.
Photo credits: Kav Dadfar – All rights reserved. No usage without permission.
Latest articles by Kav Dadfar (see all articles)
- How To Photograph Street Performers - April 26, 2022
- Profiled Photographers – Ben McKechnie - August 24, 2021
- Profiled Photographers – Jim Maher - August 24, 2021
is the founding editor of JRNY Travel Magazine as well as a professional travel photographer and writer based in the UK. His images have been used by clients such as Condé Nast, National Geographic, Lonely Planet, Rough Guides and many others. Kav is also the co-founder of That Wild Idea, a company specializing in photography workshops and tours both in the UK and around the world.
See All Articles by Kav Dadfar


Leave a Reply