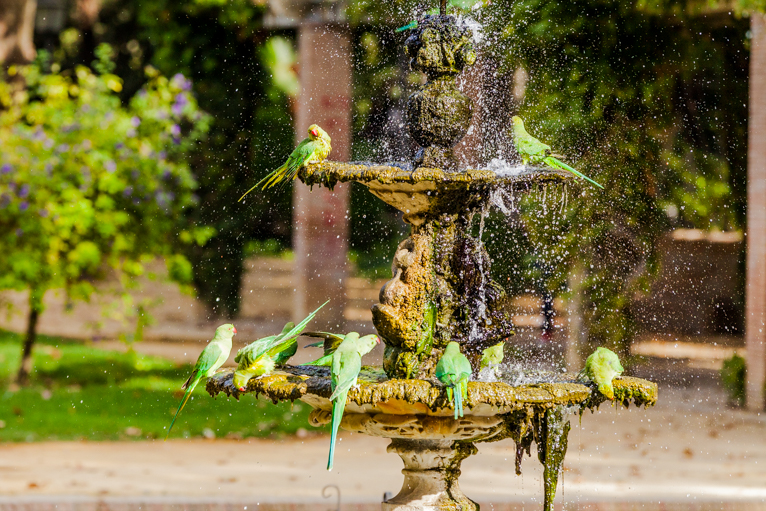
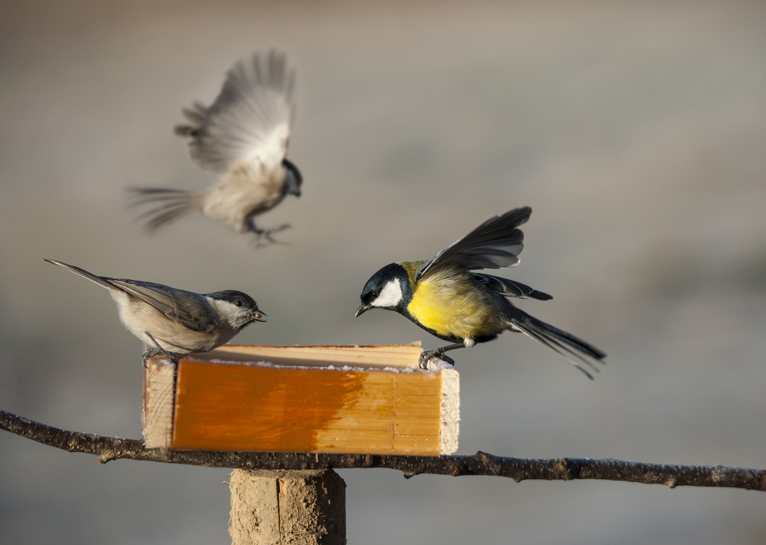
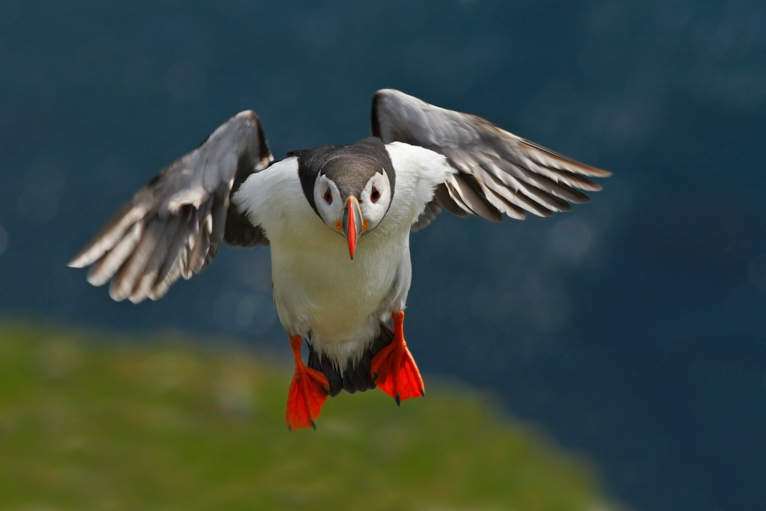
Photographing birds can be quite challenging and requires plenty of patience to execute, especially if you are photographing birds in the wild. It would certainly help your photography if you are already a fan of bird watching and have some knowledge of the different kinds of birds and their behaviours. These tips will help you set yourself up to capture beautiful photos of birds but it is also helpful for most types of wildlife photography as it will have some helpful tips on photographing fast-moving subjects.
1. Equipment
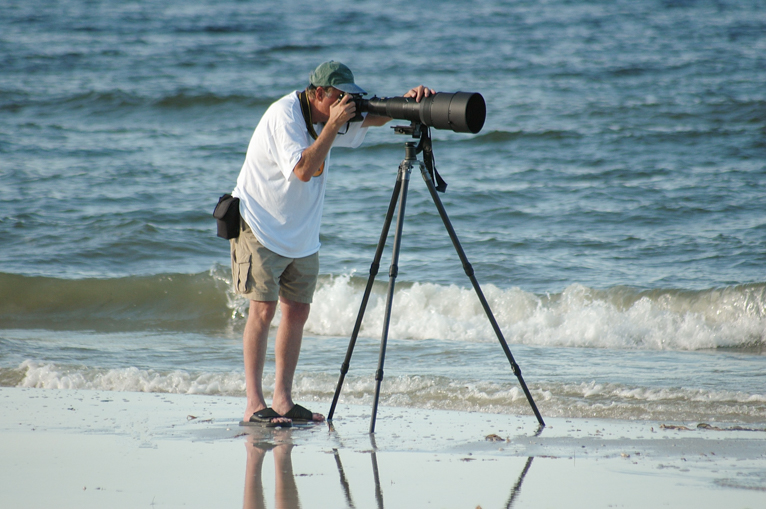
You’ll need a camera that can handle at least 1/2000 sec shutter speed with 6 to 9 fps (frames per second) and a camera buffer big enough to handle large bursts. It’s also essential to have a sound autofocus system for quick focus acquisition (especially for birds in flight). Preferably, you should invest in more professional high-end DSLR cameras like the Nikon D5 or the Canon EOS 1DX Mk II. Of course, these also come with a hefty price tag but will produce the best results. Because this type of camera works faster than an entry-level DSLR, your chances of capturing in-focus shots are greatly improved. This suggestion doesn’t mean that you have to ditch your entry-level in place for an expensive upgrade as long as you know it might take a few tries before capturing the perfect shot.
As for lenses, it depends on your budget. Professional bird photographers often shoot with 200-400mm, 400mm, 500mm, 600mm, or 800mm lenses. Some of these lenses can cost more than $10,000, the same as a downpayment on a house or a car! As a beginner aiming to produce professional-quality shots, look to add a 1.4x TC (TeleConverter) to your lens. It will give you the best performance outside of purchasing an expensive lens while not emptying your wallet.
When shooting birds, a sturdy tripod is also recommended to make sure your shots come out crystal clear, especially if shooting at slower shutter speeds. Plus it will make things easier on your arms as well not having to hold up heavy camera gear for long periods of time.
2. Camera settings
Make sure that you’re shooting in RAW to help you edit your photos in post-processing. Photographers prefer this setting because no information is compressed, and you can produce higher quality photos.
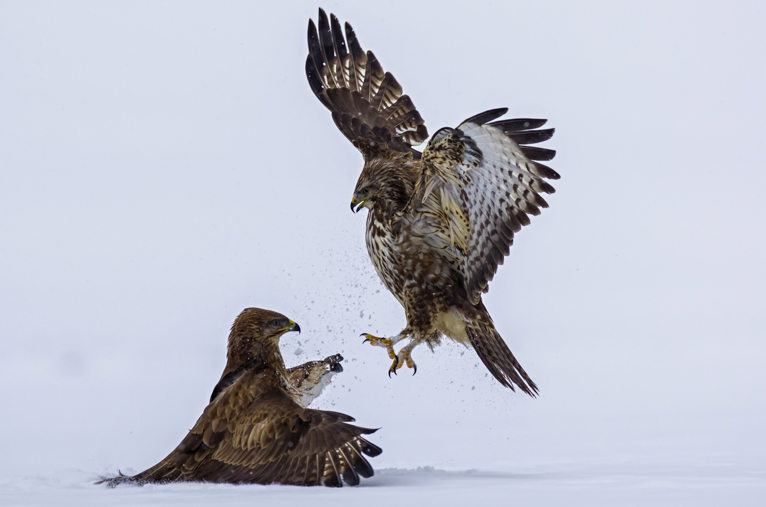
Fast shutter speeds are incredibly crucial in photographing birds. Aiming between 1/1000 to 1/1600 will often achieve a frozen subject (but going lower can also achieve a slightly blurred wingspan to capture movement). If your camera has auto-aperture and auto-ISO settings, these can help you focus on framing your shot and not miss the perfect picture.
If you’re not using a tripod, lowering your shutter speed can lead to camera shake and a blurry shot. It’s helpful to keep in mind the standard rule, keep the shutter speed to at least the focal length of the lens. For example, if you’re shooting on a 300mm lens, your shutter speed should be at least 1/300 of a second. If you’re mounted on a crop-factor sensor, then the shutter speed should equal the total focal length of the lens multiplied by the crop factor.
Now that we have the basics down for equipment and settings, here are some practical tips for photographing wild birds.
3. Approaching birds
All birds have great vision and will see you coming first, so if you get too close and birds feel threatened, they’ll fly away. The key is to make the bird feel safe and natural while you approach them. By having patience and not looking directly at the bird (as a predator would), you’re allowing the bird to feel comfortable about your presence while you frame your shot. Don’t make any sudden moves or wear bright colors and take some photos on approach, so the bird gets used to the sound of your shutter.
Another way to ensure the birds are comfortable with your presence is by visiting a location multiple times. If the birds have seen you there before and recognize that you’re not a threat to them or their habitat, they will get more comfortable around you. This strategy will allow you to approach them more closely and get those shots you’ve always envisioned. If you’re lucky enough to catch a juvenile bird (who may be more curious than older birds), then you can produce some fantastic shots by approaching them. Visiting the location frequently will also help you get familiar with the best vantage points as well as knowing where the birds will be, allowing you to plan your shots more efficiently.
But often the best way to capture great shots of birds is to set up and wait. So you may want to see if there is a hide near where you will be shooting. If not, maybe think about investing in a pop-up hide. This will allow you to stay hidden and not scare away birds around you.
Once you’ve gotten to the point where you want to take the shot, focus on the bird’s eye (whichever one is closest to you). The eyes are the most important element and if they are sharp you will likely see the head sharp as well.
4. Background
Choose your background carefully. Pictures with smooth backgrounds (as opposed to busy ones with other subject matters) will be better. To achieve the blurred background bokeh effect, keep your shutter speed around 1/250 of a second and your f/stop around f/6.3 or less. While birds won’t let you walk around to pick the best background, keeping your settings to get that bokeh effect will help create a smooth background and make the birds stand out more in your shots.
5. Editing
In post-production, play around with crops and colours. Because birds don’t give you the chance to frame precisely how you’d like, it’s important to crop your photo in afterwards for the best result. If you’re also shooting from afar, you might get a lot of unnecessary elements in your photo as well, especially around the edges of the photo. So it’s helpful to crop your photo to ensure the bird is the main focus of the photo and there are no distracting elements. Adobe Lightroom is an excellent tool for photographers and offers a great range of tools to help you edit your photos.
Now that you know the best equipment, settings, and some tips for shooting birds out in the wild, it’s your turn to go out and try it yourself! Good luck and happy birding!
Photo credits: Kav Dadfar – All rights reserved. No usage without permission. Dreamstime.
