Sometimes the epic landscape that you see in front of you cannot translate into a photo. It might be the scale or even the depth. At other times the scene might just be too big for your camera to capture in one photo. Even if you have never heard of stitched panorama shots you will no doubt have seen them. So fear not, capturing a panoramic shot isn’t difficult. Here is a step by step guide for you to follow.
Why not just crop?
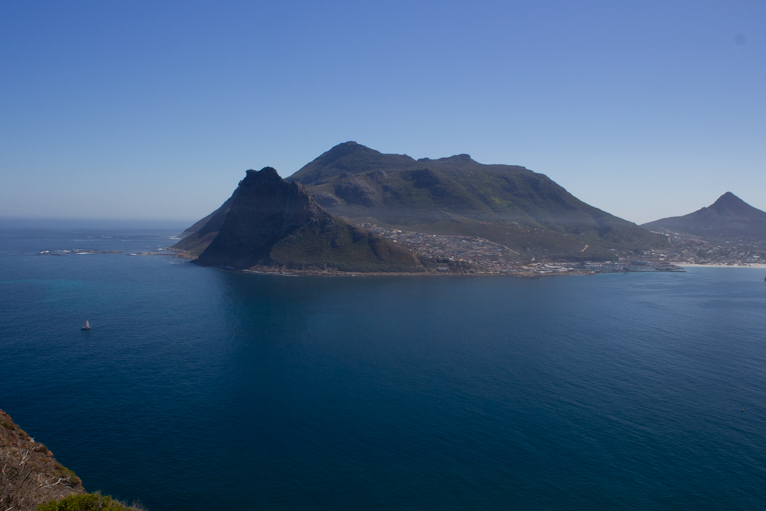
You may be wondering why you can’t just take a photo with a wide-angle lens and crop it to look panoramic. There’s no reason that you can’t do this and in fact, I would encourage you to crop your photos to bring the best out of them. The big issue with cropping a panoramic shot is to do with the size of the final outcome. This is because when you crop your photo you are removing pixels. So then if you wanted to make your photo much bigger the overall quality will be less. But the real reason is as mentioned above for times when you want a greater angle of view than what your lens can capture.

This a normal shot cropped. As you can see you don’t have the same wide-angle of view.
Step 1 – Focus your shot
The first step once you have a scene in front of you is to focus on your point of interest. For a landscape scene where you need a greater depth of field you need to select a small aperture (f/number). Now, this is the important part. When your camera has focused on your point of interest, select manual focus. This is so that the camera doesn’t then try to re-focus in between shots as typically you are going to need around 3 photos. So, you want to have the same plane of focus for all your shots. Once your camera is in manual focus mode take care not to change the focus.
Step 2 – Shoot your shots
Typically, you will need at least 3 shots for a panoramic photo. Start from the left and take a photo. Then the centre and finally the right. You should be looking to point your camera at 10 o’clock, 12 and 2. Ideally, you should aim for around one-third overlap from each image. You can, of course, take more shots if you want to but usually, three will work fine. It is important to remember that your angle of view should be roughly from 10 to 2 o’clock. Any wider and the distortion might too significant for the panoramic shot to work.
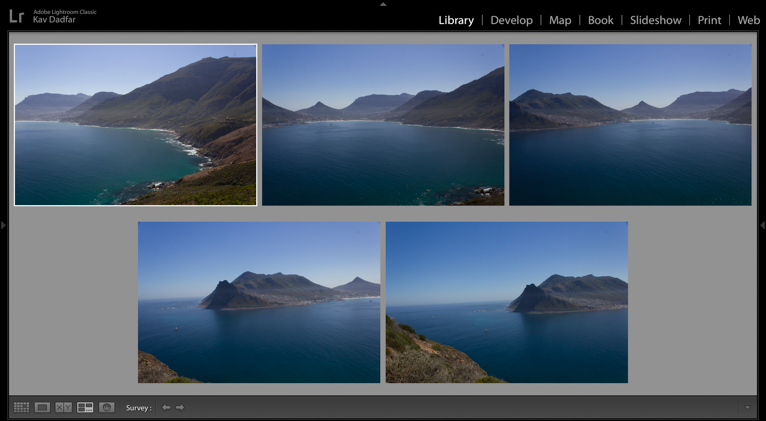
TIP: You might find it easier to find a set of photos for a panoramic shot in amongst all your other photos by bookending them. To do this take a picture of the ground before your first shot and after your last one. Then when you look at the set of photos you can easily see which sets belong together.
Step 3 – Merge the photos
The next step is to import your photos into Lightroom. Once you have them in Lightroom you have can either edit them by adjusting colours, brightness, contrast and so on each photo. They need to all be the same so edit one and copy your settings to the others. Or alternatively, you can create your panoramic shot and then edit your photo after.
Here’s the best part. Lightroom can create your stitched panorama straight in the application without you having to do much. Simply select all of the photos that are going to be in your panoramic shot by clicking the first photo, then holding “shift” and selecting the last photo.
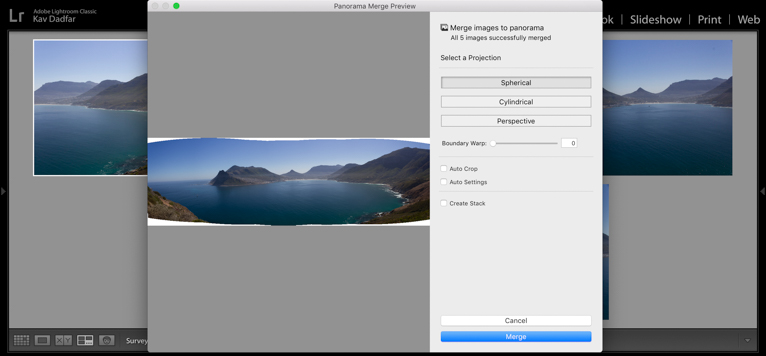
Then right-click on your photos and you will see a pop-up menu. Select “Merge to panorama” and you will see a further pop-up menu appear.
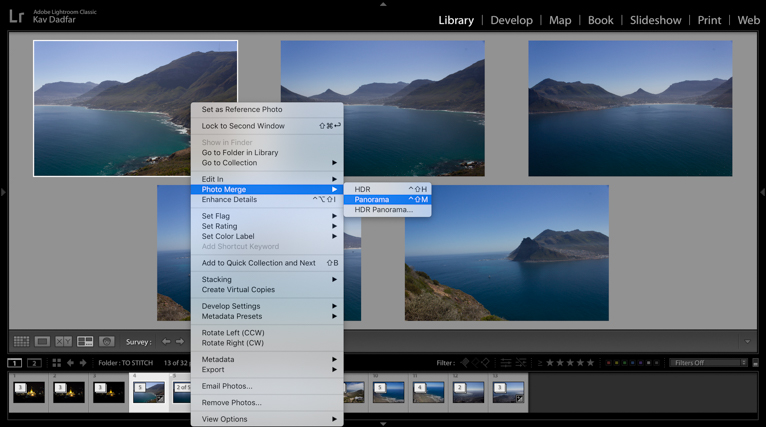
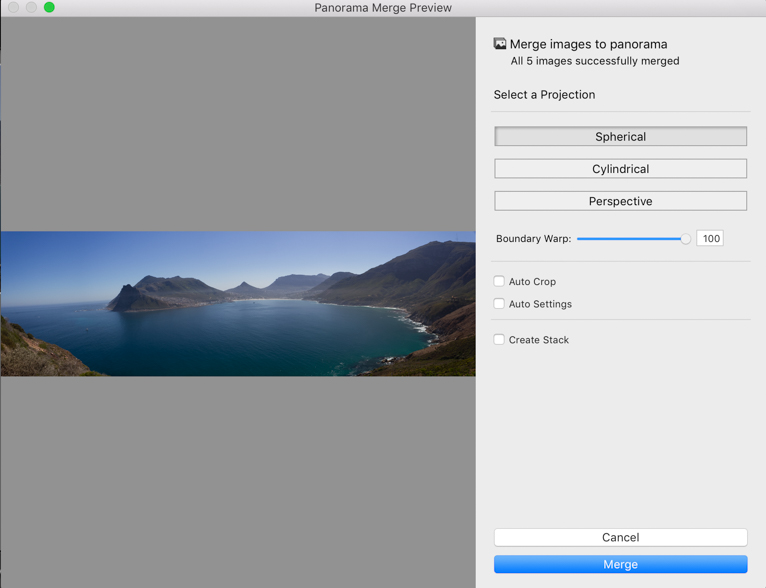
Select the type of stitching that you want Lightroom to apply. You can click through the different options to see which gives you the best result by looking at the preview. Once you have chosen the one that works the best press “OK”. Lightroom will then automatically merge the photos together to create your panoramic shot.
TIP: You can pull the “wrap to edges” slider for Lightroom to automatically extend the edges of your photo to give you a fuller image.
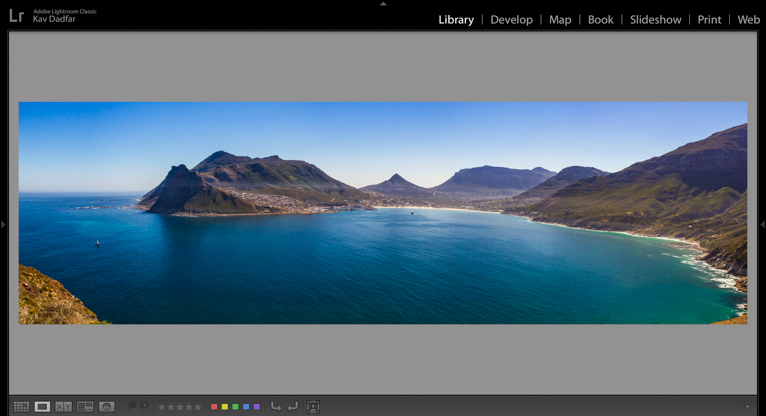
Once you have merged the photos together you can then edit the photo as you please (if you didn’t process the photos individually earlier).
You can also shoot vertical
Another good tip when you are taking your panoramic shots is to turn the camera and capture vertical image instead of horizontal shots. This will give you more height in your final image. But keep in mind that you are going to need to capture more photos (minimum of five to seven). This is a worthwhile technique when you have a high object such as building in your scene.
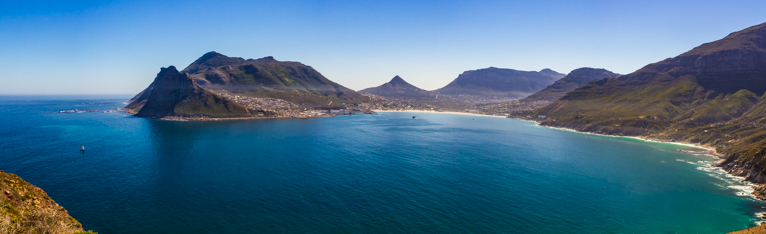
So, there you have it. How to create a stitched panoramic shot in just three steps using Lightroom. Try it next time you are looking at a beautiful vista or an epic scene. Because there is nothing that looks better in a panoramic shot than a beautiful wide-angle landscape scene to wow the viewer.
Photo credits: Kav Dadfar – All rights reserved. No usage without permission.
