• Cart
  • Checkout
  • My Account

Infrared Conversions, IR Modifications & Photography Tutorials | Life Pixel IR

The world leader in infrared conversions, modifications & DIY IR conversion tutorials. Scratched sensor replacement, UV & Full spectrum conversions.

The world leader in infrared camera conversions

866.610.1710
  • Home
  • → Start Here ←
    • 1 – Introduction
    • 2 – Filter Choices
    • 3 – Focus Calibration
    • 4 – Lens Considerations
    • 5 – Camera Considerations
    • 6 – Start Shopping
  • Galleries
    • Infrared Photography
    • Infrared Time Lapse
    • Infrared Cinematography
    • Infrared Stop Motion
    • Ultraviolet Photography
    • Forensic Photography
  • Education
    • Training Sessions
    • How To Shoot Infrared
    • AR Coated Infrared Filters
    • Lens Hot Spot Database
    • Photoshop Video Tutorials
    • Infrared Issues & Solutions
    • IR Basics in Photoshop
    • Camera Quick Start Guide
    • DIY Conversion Tutorials
    • IR Photography Primer
    • Secondhand Cameras
    • Wall Of Shame
  • Workshops
  • FAQ
  • Blog
    • Tutorials
    • Inspiration
    • Locations
    • Gear
    • News
    • Other
  • Why Choose LifePixel?
    • Submit Your Review
  • Contact
  • Shop

8 Tips For Capturing Food Photos At Home

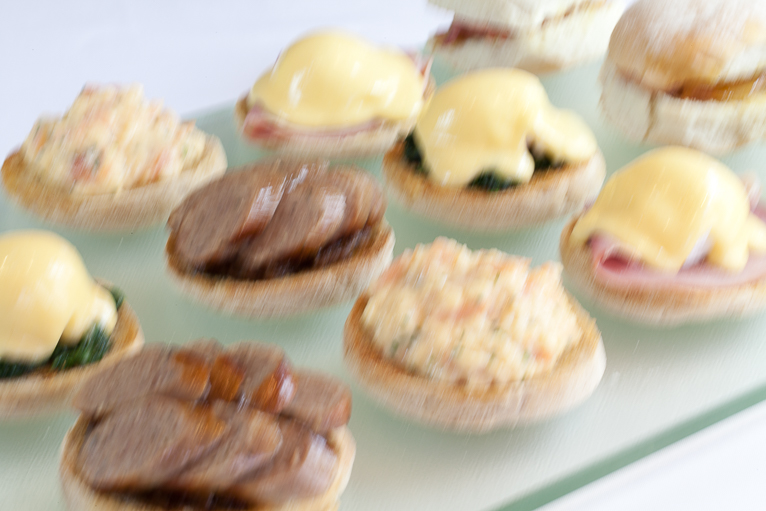
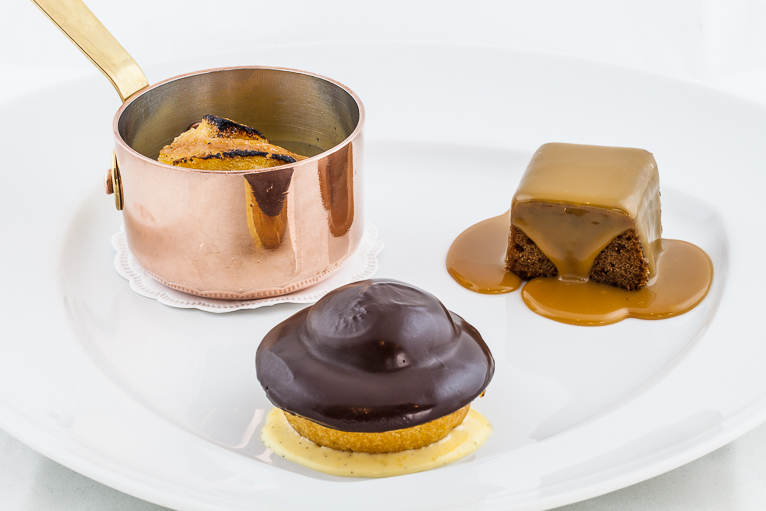
Food is a great subject to practice photographing at home. While you may not get the same results as when shooting in a studio with proper lighting, a stylist and fancy props, you can still take great photos of food at home. It is also good practice for when you are travelling as you will rarely have the luxury of carrying tons of equipment with you. To help you capture great food photos at home, follow these 8 easy tips.

home_food_photography-2

Make it a shoot

The first thing that I would advise is, if possible, avoid photograph something that you intend to eat. There are several reasons why. For one, if you are going to be eating the food, the last thing that you will want is for everything to get cold. So you will probably find yourself rushing to get the photos done. Food photography needs to be done quickly but also you need to be patient. You may have to tweak ingredients on a plate to make the composition work.

The other reason is that sometimes for the best results you have to try some food photography hacks…

home_food_photography-2

Cook to shoot

As mentioned above, sometimes for the best results you have to create the dish specifically for photography rather than taste. You might have heard stories of people using shoe polish to smear on steaks for the seared and charred look. Or using shaving foam when shooting a glass of beer to replicate the foam. These are of course valid and incredibly useful in professional food photography. But when photographing at home you don’t need to go to these lengths.

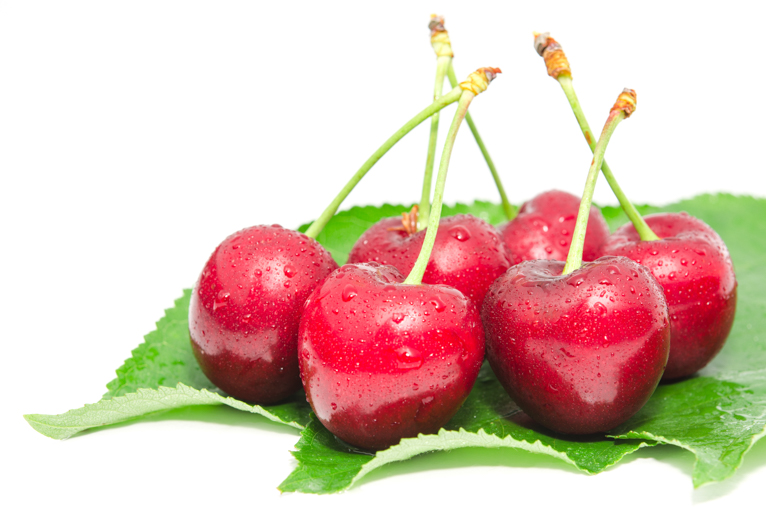
But for example, you may find that just charing vegetables will make them look more vibrant and appetizing in a photo than when they are fully cooked. Or you may even need to use things like cocktail sticks to make sure certain elements remain in place on a plate when you are taking photos.

home_food_photography-2

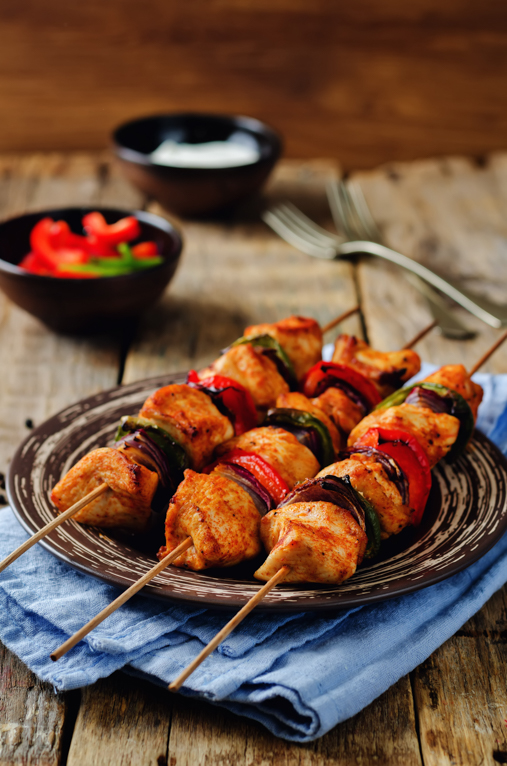
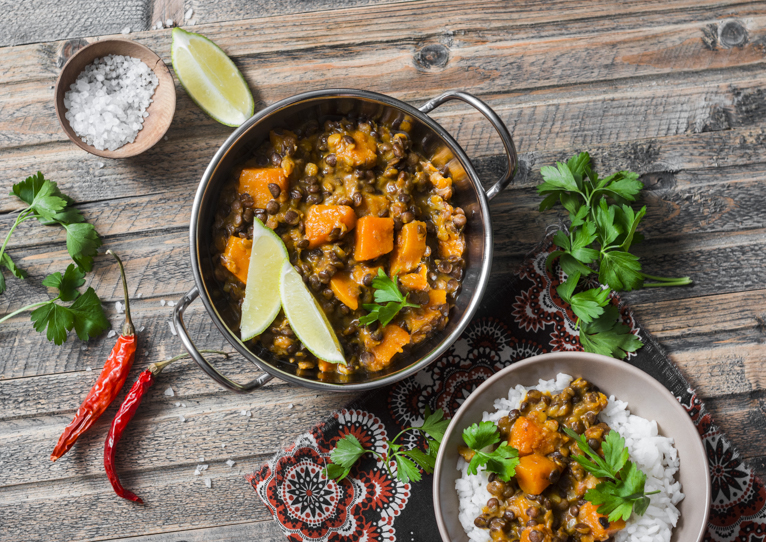
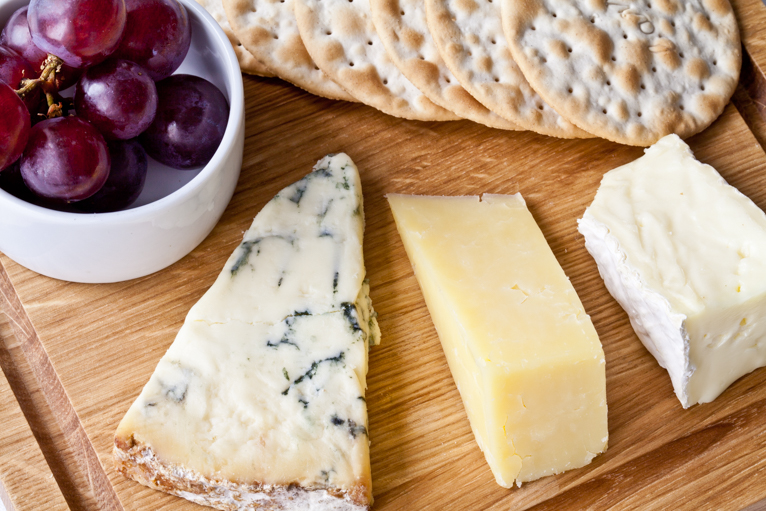
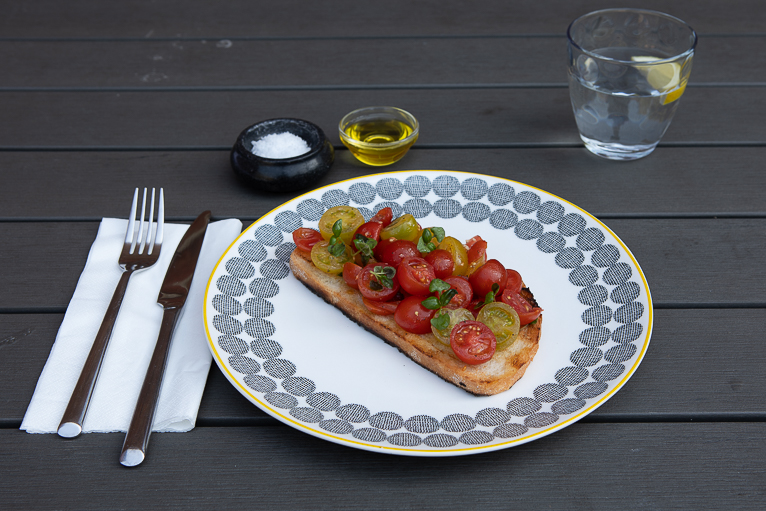
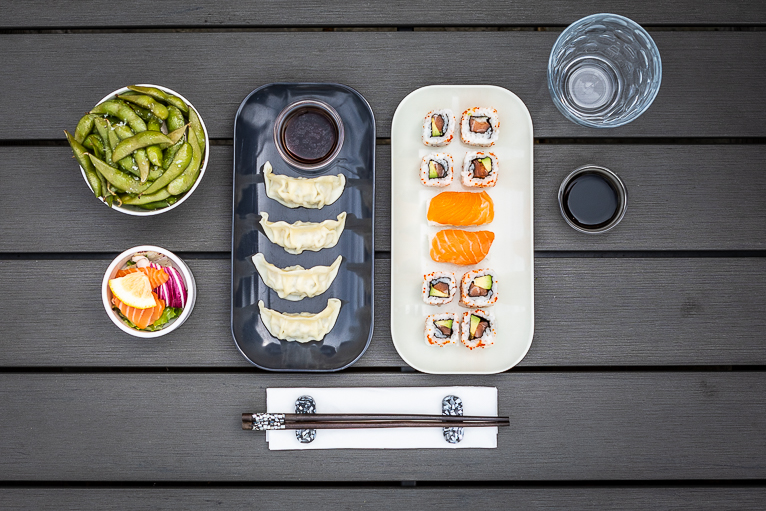
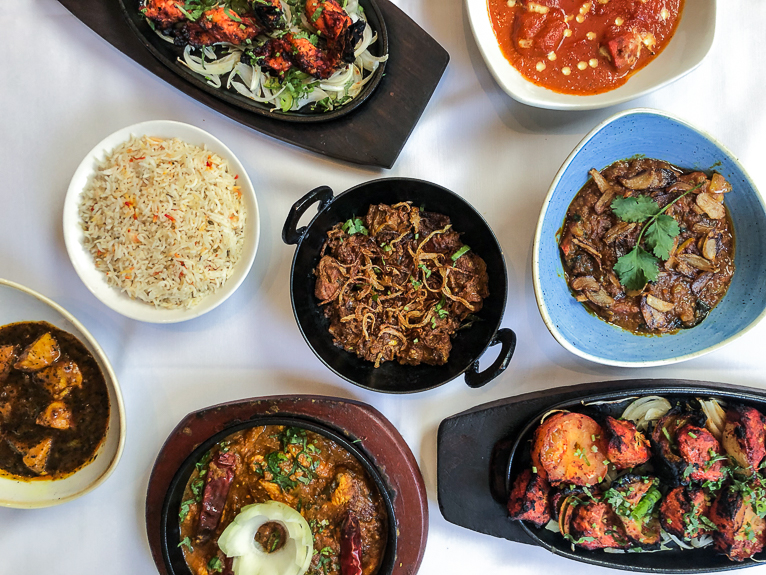
Think about the background

It might seem obvious to say that in food photography, your dish should be the hero. So the last thing that you need is for the viewer to be distracted by other elements in the background. This is why you really need to think about where you are placing your plate. The best backgrounds are simple textures or surfaces so avoid really bright or striking colours. If food photography is something that you are interested in, you may find it convenient to purchase a few backdrops that you can use. These are inexpensive and come in a whole array of effects and can be really useful for food photography.

home_food_photography-2

Set up for natural light

The best option for photographing food at home is to use natural light while avoiding direct sunlight. The problem with direct sunlight on a food plate is that it creates harsh shadows which don’t look great in food photography. If you do find that you are getting shadows across your dish use a light (i.e. like an LED light or even a torch with white light) to fill the shadows in. Ideally, look for a shady area either outside or near a window and turn off the lights in the room. This should give you natural light without colour casts from light bulbs.
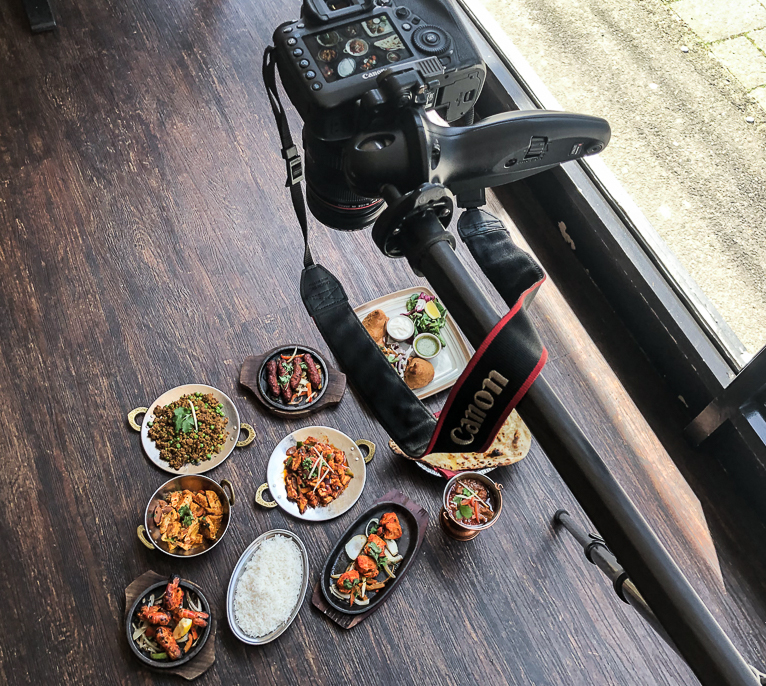
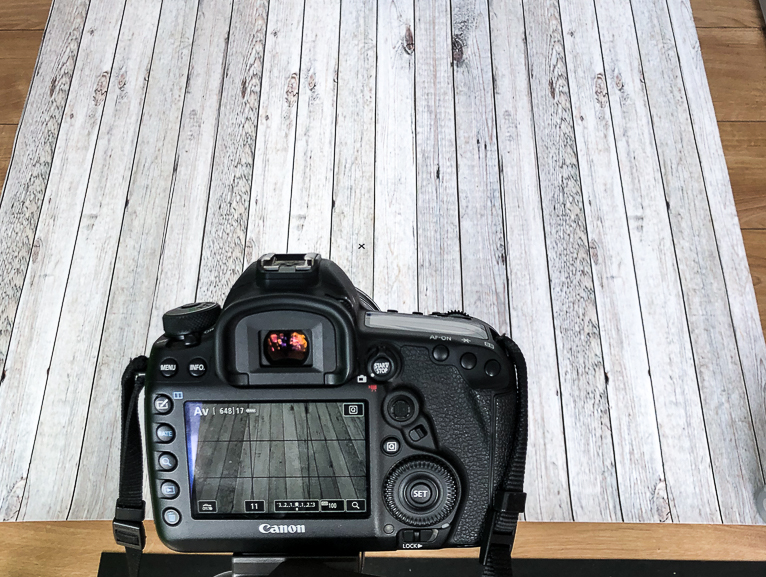
home_food_photography-2

Use a tripod

You are at home so there should be no excuse for not using a tripod for your food photography. The reason that this is important is that the ideal settings that you are going to have to use will likely mean a fairly slow shutter speed. A tripod will allow you to set the perfect settings and keep your ISO as low as possible to avoid noise in the photo. Another benefit of a tripod is that if you are planning on photographing multiple dishes, once you have your composition sorted you can simply swap plates in and out quickly without having to change your set up.
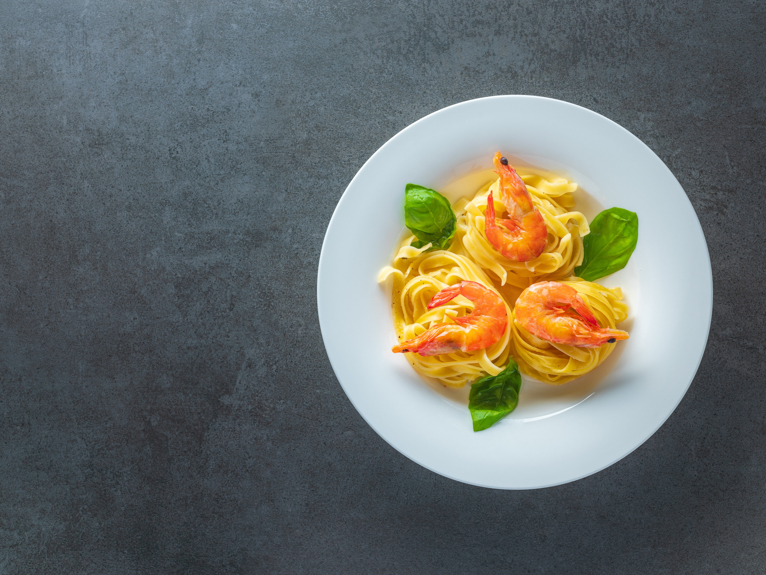
home_food_photography-2

Compositions

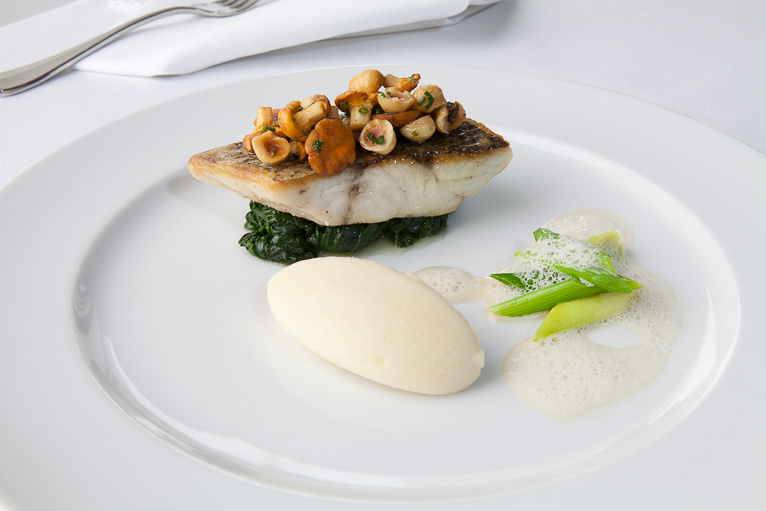
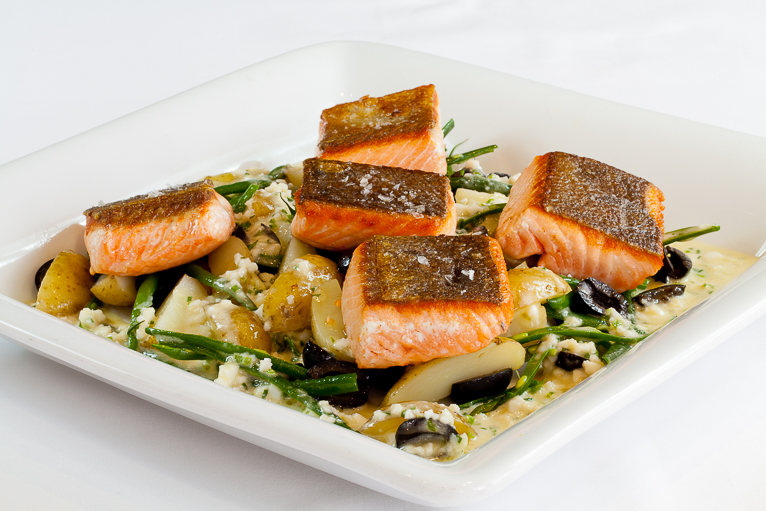
The natural compositions for food photos are either your camera being at a 45-degree angle to the dish or over the top looking down. But like anything in photography, this will come down to personal taste and also what you are photographing. So don’t be afraid to experiment with different compositions and angles but just be aware of your backgrounds. The last thing you want is for a pile of clothes in the background to show up in your shot when you are shooting at a low angle.

Your composition will also involve how you set your scene up. For example, look to add interesting cutlery, ingredients, spices, napkins and glasses filled with drinks to add context to the photo. Try to set your scene up first and then simply add the plate of food in at the last minute to avoid the dish sitting around. Food will deteriorate really quickly so add your main plate when you are ready to shoot.
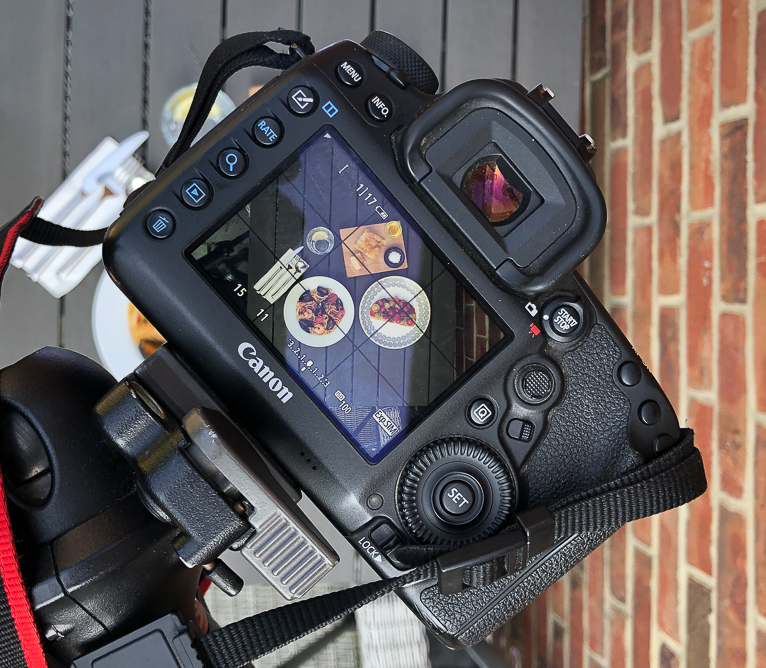
home_food_photography-2

Your settings

Unlike lots of other genres of photography, for this type of food photography, it’s fairly easy to determine your settings (especially so when using a tripod). Set your camera to aperture priority (or manual mode) and use the following settings:

  • ISO – you are using a tripod so your ISO can be as low as your camera offers (usually ISO 100). The only time you may need to raise your ISO is if you find that your shutter speed is really long and you want to shorten that slightly.
  •  Aperture – you can of course experiment with different depth of fields but generally, for food photography you will be looking at f/8 to f/11. The added benefit of this aperture range is that it also usually the sweet spot for most lenses when it comes to sharpness.

home_food_photography-2

  • Shutter speed – based on your aperture, ISO and amount of light available, your shutter speed will be determined by the camera. This can be anything as you are using a tripod.
  • Manual focus – to be absolutely sure that you are focusing on the right thing, it’s best to manually focus your camera. If you are using the recommended aperture settings above you don’t need to worry too much about where on the plate to focus as all of your dish will be sharp.
  • Remote release or timer – whatever you do, don’t make the mistake of touching the camera as the photo is being taken. Food photos need to be pin-sharp and any movement will cause the camera to shake. So either use a remote shutter release or set your camera on a timer.
home_food_photography-2

This is what might happen if you touch the camera instead of using a remote or a timer.

  • Live view or lock up the mirror – another important setting to remember is that you should either “lock up your mirror” using the relevant function in the camera’s menu or set your camera to “live view” mode. The reason for this is that in DSLR cameras when the mirror flips over the vibrations could cause blurry photos at slow shutter speeds.

Post-production

As always, post-production is incredibly important when it comes to getting a photo to look its best. Food photos shouldn’t need a lot of work but it’s essential to check the colour temperature and adjust if necessary. Beyond this, you may wish to tweak the brightness, contrast, vibrancy and crop the image slightly before saving it in your preferred file format.

home_food_photography-2

Food photography is one of the easiest genres of photography to practice at home. You don’t need any specialist equipment, anyone else and you also get to practice your cooking at the same time. So if you find yourself stuck for photoshoot ideas, try food photography at home.

Photo credits: Kav Dadfar – All rights reserved. No usage without permission.

Filed Under: Tutorials Tagged With: food photo tips, food photography, photographing food

7 Tips On Photographing Restaurants

In my early days as a photographer, I found great success in photographing restaurants. This was pre-Instagram and social media when many of these places were suddenly becoming aware that having good images online could help their presence. But photographing restaurants isn’t straightforward as you are often dealing with low light as well as people eating and moving around. There are also many different elements to consider when shooting a restaurant. To help you here are some tips on capturing photos of restaurants.

restaurant_photography

Look around and think

If possible, it’s a good idea to have a look around the venue before having to shoot it. Even if it’s only a few hours before, it’ll give you a chance to have a think about the shoot. If you don’t have the luxury of scouting out the venue beforehand, it’s still worth spending a few minutes looking around and thinking about the shoot before snapping away.

restaurant_photography

Agree on a shot list

As mentioned there are a whole host of different variables when shooting restaurants. From the type and style of photos to, dishes and the venue itself. So it’s important from the outset to understand the client’s requirements so that they are not disappointed in the results. This is why a shot list is so important for restaurant photography. For example, some of the types of shots that a restaurant might want would be:

  • The venue itself (i.e. the restaurant or bar area)
  • The staff
  • The dishes possible in situ (i.e. being cooked or in a lightbox)
  • The atmosphere (people eating, drinking and enjoying themselves)
  • The views (for example does the restaurant have an amazing rooftop view of the city?)
  • The kitchen including the chefs and food being prepped (also close-ups of ingredients)
  • The function rooms
  • Close-ups of details such as signage, artwork or even tableware
  • Drinks such as wine or cocktails

As you can see the set of shot you can capture can be vast so the only way to be sure that you have captured everything needed is to create your shot list and get the client to agree to it.

restaurant_photography

The venue

There are two options when it comes photographing the venue. This can either be done when the restaurant is empty (i.e. in between services) or during a service. As you might expect the former is somewhat easier as you’ll have free access to the whole restaurant. Even if there is enough light the best way to shoot these shots is with a tripod. This will allow you to have a maximum depth of field without having to worry about your shutter speed.

restaurant_photography

During service, it might be more difficult as the restaurant may not want a tripod around when they have customers. So you may be forced to shoot handheld which will likely mean raising your ISO. If you are allowed to use a tripod, try to find somewhere out of the way to capture the whole ambience of the place. Don’t get up close to someone whose eating as no one wants their meal spoilt with a camera thrust in their face. If the restaurant requires these types of shots it’s better to arrange this beforehand with possible models or even customers who agree to be photographed. It is also worth advising the restaurant to notify its customers when they arrive that there will be photography done.

restaurant_photography

Photographing the staff

Sometimes the restaurant may want photos of their staff. These types of shots will actually look great as they add a human element and a uniqueness to the restaurant. Photographing the staff – whether it is the bar staff, waiting staff or chefs will provide its own challenges. If the requirement is for head and shoulder portraits, this is much easier as you can set up an area that is well lit and shoot the portraits of the staff.

restaurant_photography

Most of the time, I was asked to photograph the staff in situ. In other words, while they are working. Again, there are two options here. You can either take these photos during service which can be a bit more challenging as the staff will be rushing around. Or again you can re-create the scenario in between services. For example, if a chef is preparing a meal in the kitchen, if it is for the benefit of the shoot rather than serving customers, they can hold their pose or even move slightly for better composition and lighting. How you photograph staff will come down to the restaurant and the shots that are needed. But again if you are shooting during the service it is best to stay out of the way.

restaurant_photography

Photographing the food

You will likely be asked to photograph some dishes in any given restaurant shoot. There are several ways that clients may want these types of shots. These could include standalone shots of the dishes in a lightbox or on a table or background of some sort. Or they may want shots that are captured in the kitchen of the food being prepared. These shots will have different ways that you need to utilise to photograph.

restaurant_photography

For example, kitchen shots can be taken during service or if the restaurant is happy to cook food especially for the shoot whilst they are being prepared. But standalone shots on backgrounds or in lightboxes will ideally be done when there are no customers in the restaurant. If the venue has an empty function room, this is the best place to take these types of shots and can feasibly be done when the restaurant is open. But keep in mind how busy the kitchen and staff will be.

Standalone shots are best taken with a tripod. Use natural lighting (avoid flashes) with a fairly narrow aperture (f/8 to f/11). Generally, food dishes look best either when the camera is at a 45-degree angle or over-the-top looking down. But this isn’t set in stone and sometimes lower angles or close-ups will also look great.

restaurant_photography

For kitchen shots, you will usually have to shoot handheld as they tend to be small and busy places. Make sure you have your shutter speed correct and fast enough (which might mean raising your ISO) so that you don’t get blurred photos.

restaurant_photography

The views

Some restaurants are also blessed with amazing views. It might be a roof-top bar or a beautiful setting next to a lake. It’s important to also allow time to capture these types of shots as well. As always, a tripod is the most surefire way to ensure you capture the best possible photos. However, depending on the time of day you may be able to shoot handheld. Treat these shots in the same way as capturing cityscapes or landscapes. Try to do them at the best time and use grad filters if necessary.

restaurant_photography

Capture the details

A really great way to add variety to your restaurant shoots is to also look to take some photos of the details. It might be a beautiful artwork or an interesting chair. It could even be a colourful bar or even the signage of the restaurant. These types of shots are important as they can bring out the small details that often people miss. They will also ensure that when their photos are online on their site, it adds much more variety.

restaurant_photography

Restaurant photography can be very rewarding but also challenging and stressful. Food as a subject isn’t always easy to capture and unless you are willing to use hacks to make dishes last longer, you won’t have long before it starts to lose its photography appeal. Other subjects are also tough to capture. The fast pace, the low light and often limited space all make restaurant photography difficult. Hopefully, the tips above can help you capture better photos.

Photo credits: Kav Dadfar – All rights reserved. No usage without permission.

Filed Under: Tutorials Tagged With: photographing food, Photographing restaurants, Restaurant photography

13 Quick Tips For Photographing Food

There will come a time where you’ll want to take photos of your food. Even if you are not a full-time food photographer, it is still worthwhile knowing some tips and trick for photographing food. Because it’s essential to make sure your photos are taken as nicely as possible to showcase the food. So here are 13 quick tips for photographing in kitchens that you can use to get those “instagrammable” food photos.

Quick_Food_Photography_Tips

1. Backlighting

Lighting plays a key part in getting your food to look appetizing and add texture. Steam and smoke will show up better when lit from behind, so find a place with natural backlighting (like in front of a window) or create this yourself using artificial lighting. Lamps and other sources of light can give you this effect in your kitchen!

2. Use simple props for styling

Make sure your food is the focus of the shot. Clear the clutter and place your dish down. You can add some accents to this with other pieces such as greenery, ingredients that you’ve used in the dish, cutlery, tea towels, and the like to give your dish some framing. Stick to non-patterned plates or bowls for a cleaner look and to not distract the viewer.

Quick_Food_Photography_Tips

3. Get a variety of shots

Don’t just focus on photographing the final project. Aim to get some photos of you preparing the ingredients, cooking the dish, plating it, and finally, the finished product. By adding a human element, a hand stirring the pot, you’re allowing people to connect with your photos in an appealing way.

4. Try to create a “visual recipe”

By framing your dish with some of the ingredients used in the recipe, you’re creating a visual recipe for your viewer. This technique allows them to see from the photo alone what some of the ingredients are that have gone into making the food. Spices work well for this as they add a great pop of colour. Other things that work well are berries, nuts, and fresh herbs.

Quick_Food_Photography_Tips

5. Vary your camera angle

If all of your shots are from directly above, it can get boring visually for the viewer. Try varying your images by going above, trying some photos on the side, and various other creative angles. Experiment with shooting just part of the plate and don’t be afraid to get creative with it! Interesting shots are what will bring people in to connect with your photo and the story it tells.

6. Add a bit of oil

This tip also works with adding a misting of water to a salad. This extra glisten will help make the food look fresher while you’re setting up the perfect shot. Combining glycerine and water and using a spray bottle is a great way of getting water beads on fresh foods or ingredients such and fruit and vegetables.

Quick_Food_Photography_Tips

7. Think about your colours

Colours will have a significant impact on your composition. Now is the time to get creative! Find colours that complement your food or are contrasting for a bit of a unique touch. For example, the contrast between red and green work wonderfully in food photography as it’s exciting and stimulating to the eye.

8. If Working in harsh light, use the shadows to your advantage

Generally, in food photography, a flat light works best. But shadows can add depth to a photo if used the right way. Arrange your plates in a manner that the shadows aren’t overtaking any elements of your set-up and try using them to your advantage. Get creative with placements, and you’ll be surprised at how much depth a shadow will add to your composition.

9. Find a neutral background

This tip may be difficult in a restaurant kitchen with the hustle and bustle of chefs creating food, but at home, it may be easier to find a neutral background. Place your food on a clean surface or in front of a plain backsplash. Having a neutral backdrop doesn’t mean your background needs to be plain, but just ensure that it’s not taking away from the subject of your photos. Anything with texture such as wooden sets, such as a chopping board or picnic table, always look fabulous no matter the food.

Quick_Food_Photography_Tips

10. Make sure to arrange your food neatly

When it’s time to photograph your dish, make sure it’s displayed neatly. The position of each element should have some thought to it. Get creative by cutting your fruits and vegetables in interesting shapes and aligning them differently on your plate to get the best composition. If you have spilt anything in the process, make sure to wipe it up to keep your plates looking clean.

11. Add some negative space

Close-up shots where your food takes up the entire frame are nice as this sometimes works to show the texture of food. But also consider taking some photos where there is negative space around your dish. Negative space will help not to overwhelm the frame and will often create a more pleasing composition. You’ll also get the chance to experiment with the placement of elements such as cutlery and cups!

Quick_Food_Photography_Tips

12. Use some non-edible elements

Flowers, leaves, and pinecones can add so much to a photo. For summer dishes, flowers add a lovely bit of colour and sunshine to the image. In the fall, colourful leaves and pinecones add a layer of warmth and set the tone for your recipe.

13. Tell a story

The most important thing is to remember to tell a story. By combining all of the tips and elements above, you can create engaging stories to draw the viewer into your image. Another way to do this is to take some photos of the preparation and cooking of the food. For example, someone looking at a recipe book or even chopping ingredients can all help add some variety to your shots.

Quick_Food_Photography_Tips

Using the tips above, you’ll be correctly set to photograph food in your kitchen. By using the lighting, elements, and storytelling techniques, you will able to draw your viewers into your narrative and allow them to imagine themselves enjoying your food.

Photo credits: Kav Dadfar – All rights reserved. No usage without permission. Dreamstime.

Filed Under: Tutorials Tagged With: Food, food photography, photographing food

Blog Topics

  • Tutorials
  • Inspiration
  • Locations
  • Gear
  • News
  • Other/Misc

What our customers say:

Life Pixel has been a life-changer for me. Continue reading
Eric GConnecticut
Read more reviews
I am more than satisfied with the service I received Continue reading
Christopher JCanada
Read more reviews
I am more than pleased with the conversion job that you did Continue reading
LOUIS MWaco, Texas
Read more reviews
I am VERY impressed with his knowledge of your products and his patience in explaining it to a novice like me. Continue reading
Lynn FEssex, Maryland
Read more reviews
Things will only get better from here thanks to all of you. Continue reading
Phillip FRedding, California
Read more reviews
The Lifepixel newsletter reminds me of not having expressed my gratitude for the excellent job you made. Continue reading
Michael GGermany
Read more reviews
Your staff went above and beyond the call of duty to make sure everything was handled in an excellent manner. Continue reading
Paige RPearland, Texas
Read more reviews
It has given my old camera a new life, I will enjoy using it again. Continue reading
William PAustralia
Read more reviews
Excellent service and the camera works just great Continue reading
Hans FairhurstAustralia
Read more reviews
I just got my converted camera back from you guys. THANK YOU!!!! Continue reading
Anne CutlerForest Knolls, CA
Read more reviews
infrared_filter_choices_sidebar
ir_conversions_explained_sidebar
----------- Watch More Videos -----------
infrared_quick_start_guide

Ready to start shooting Infrared?

Convert My Camera

Subscribe To Our Newsletter

Receive updates, tips, cool tutorials, free stuff and special discounts.

Learn the Basics

  • Video
  • Start Here
  • Filter Choices
  • Focus Calibration
  • Lens Considerations
  • Camera Considerations
  • Place Your Conversion Order

Resources

  • Galleries
  • Lens Hot Spot Database
  • IR Tutorials
  • FAQ
  • Infrared Filter Choices
  • Infrared Photography Guide
  • Infrared DIY Tutorials

Company

  • Why Choose Us
  • Get In Contact
  • Job Openings
  • Write For Us
  • Affiliate Program
  • Terms of Use
  • Privacy Policy
  • Home
  • Start Here
  • Galleries
  • Tutorials
  • FAQ
  • Blog
  • Why Choose LifePixel?
  • Shop
  • Contact

Copyright © 2025 Life Pixel Infrared - All rights reserved - LifePixel Infrared Photography IR Conversion, Modification & Scratched Sensor Repair