• Cart
  • Checkout
  • My Account

Infrared Conversions, IR Modifications & Photography Tutorials | Life Pixel IR

The world leader in infrared conversions, modifications & DIY IR conversion tutorials. Scratched sensor replacement, UV & Full spectrum conversions.

The world leader in infrared camera conversions

866.610.1710
  • Home
  • → Start Here ←
    • 1 – Introduction
    • 2 – Filter Choices
    • 3 – Focus Calibration
    • 4 – Lens Considerations
    • 5 – Camera Considerations
    • 6 – Start Shopping
  • Galleries
    • Infrared Photography
    • Infrared Time Lapse
    • Infrared Cinematography
    • Infrared Stop Motion
    • Ultraviolet Photography
    • Forensic Photography
  • Education
    • Training Sessions
    • How To Shoot Infrared
    • AR Coated Infrared Filters
    • Lens Hot Spot Database
    • Photoshop Video Tutorials
    • Infrared Issues & Solutions
    • IR Basics in Photoshop
    • Camera Quick Start Guide
    • DIY Conversion Tutorials
    • IR Photography Primer
    • Secondhand Cameras
    • Wall Of Shame
  • Workshops
  • FAQ
  • Blog
    • Tutorials
    • Inspiration
    • Locations
    • Gear
    • News
    • Other
  • Why Choose LifePixel?
    • Submit Your Review
  • Contact
  • Shop

Take Better Street Photos With These Tips

Street photography is one of the most popular genres of photography. It is one of the easier branches of photography to practice and it’s accessible for most people. But good street photography isn’t straightforward and often people struggle to capture street photos really well. So to help you, here are 6 street photography tips to implement on your next shoot.
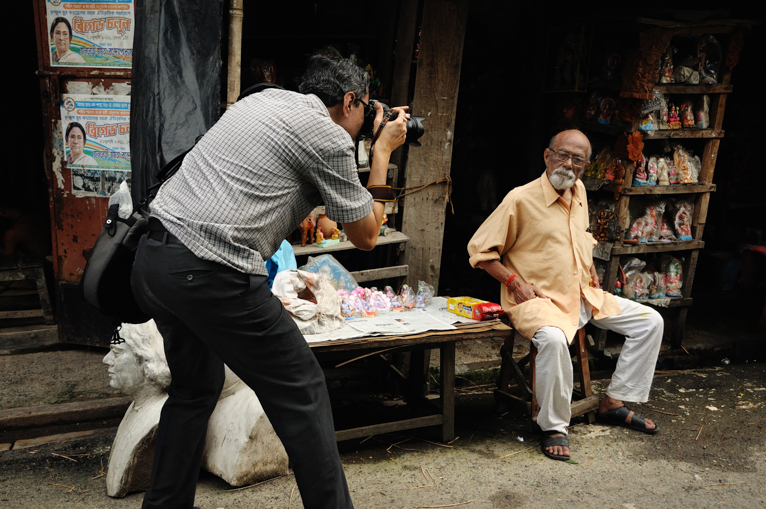
Better_street_photography

Don’t be shy

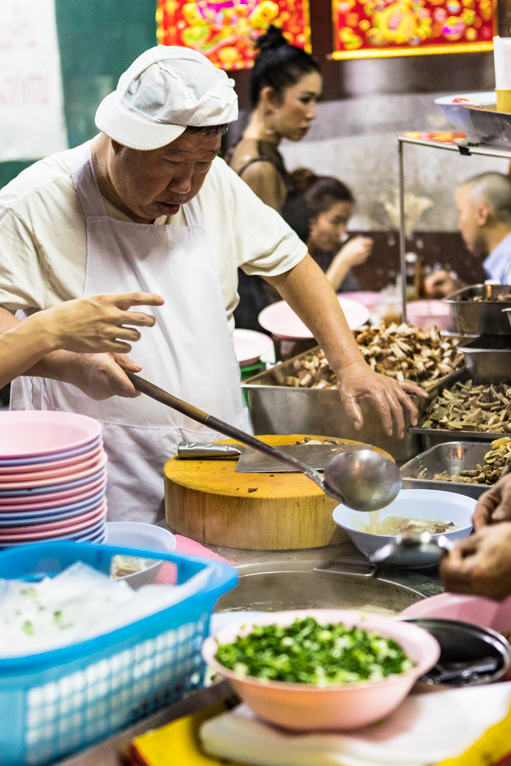
Unfortunately, street photography means having to interact with people. Sometimes people won’t notice that you are photographing them. At other times, they will. Or you may even have to get their attention so that you have that engagement between the subject and the photographer in the photo. There is no way around this, so to be a good street photographer you need to get over your shyness. This is often one of the biggest barriers for people in this genre of photography. There are no tricks or shortcuts, it is simply a case of the more people you photograph the more confident you will become. So set yourself a task of just photographing 1 person you don’t know a day. In time this will help you build confidence to photograph more and more people.

Better_street_photography

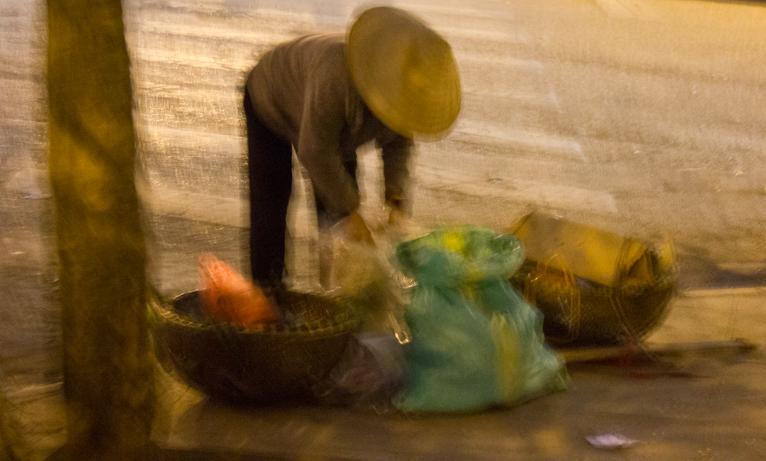
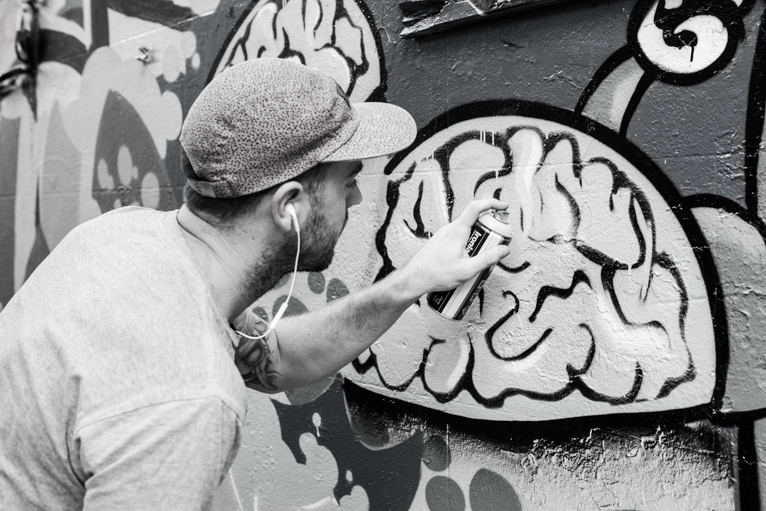
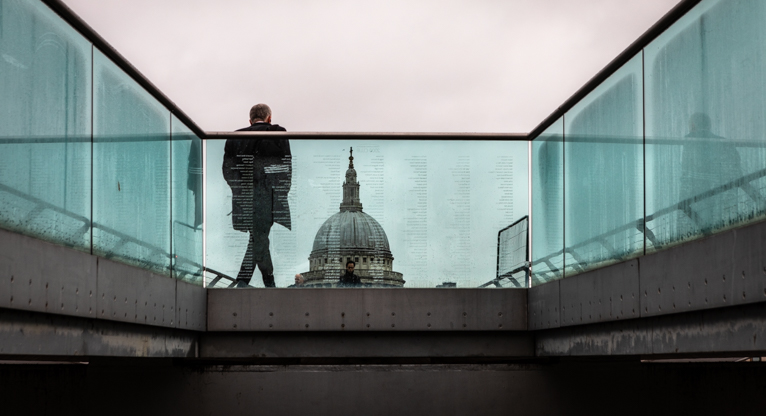
Be daring with your photos

A big part of street photography is about capturing unseen moments. But also to try and present these in new and exciting ways. So this means trying to look beyond just eye-level shots. Compose your shot with your camera close to the ground or high up in the sky and you will get a completely different look and feel than the same shot at eye level. You can also take this further and capture photos at angles and without looking through the viewfinder (a technique known as shooting from the hip). Street photography is more about capturing these stories and moments rather than a perfectly framed shot that you have deliberated over.

Better_street_photography

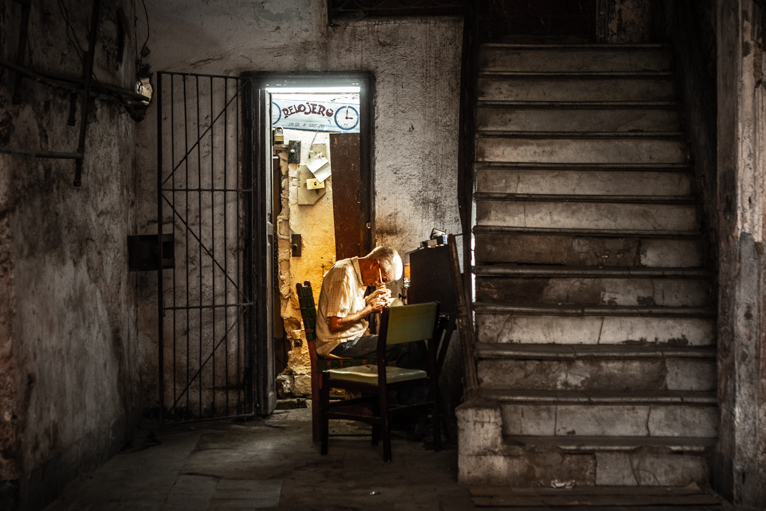
Don’t be afraid to just wait

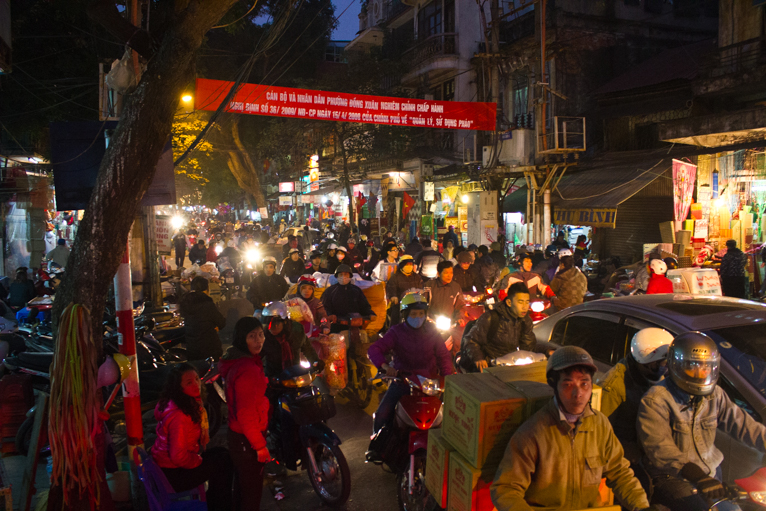
Like most genres of photography, sometimes you have to act fast. A fleeting moment might present itself that you simply have to capture. With street photography, this is often the case. But that doesn’t mean that sometimes you can’t wait at an interesting location for something to happen. Think of it like setting a “photography” trap. Find an interesting location and then just wait for the right elements to come together for you to take the shot. For example, this might be someone walking into your frame. Or it might be because you want the light to change so that you are getting a nice shadow across your shot. This is a really great technique for you to use to capture those unique street shots.

Better_street_photography

Stop chimping and keep shooting

Chimping is a phrase used to describe the habit of constantly checking the LCD on the back of your camera. There is nothing wrong with doing it for something like landscape photography. But for something like street photography where you might constantly be seeing interesting photo opportunities, every time you look at the back of your camera, you might be missing something in front of you. So try to avoid looking at your LCD and instead keep shooting away. You can always check the results later.

Better_street_photography

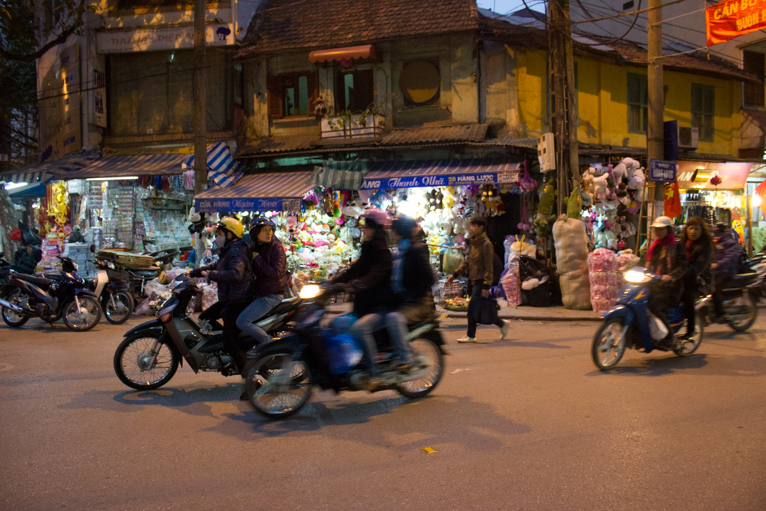
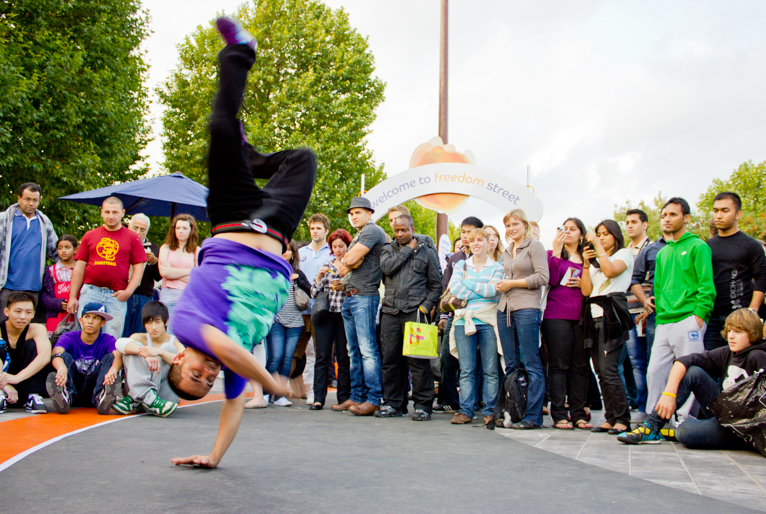
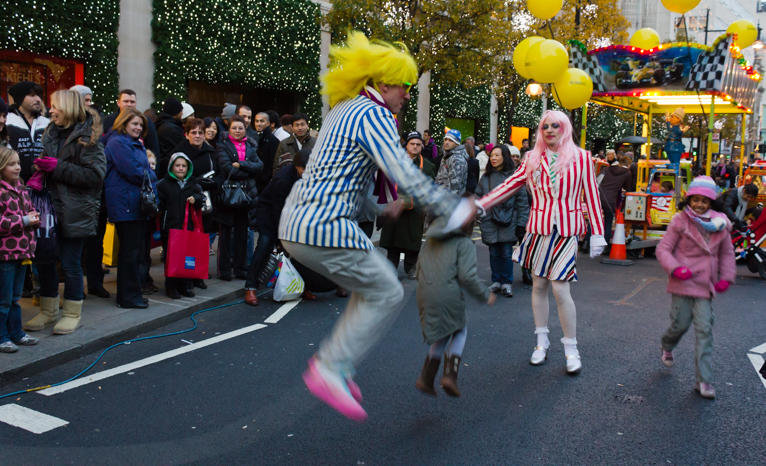
What settings should you use?

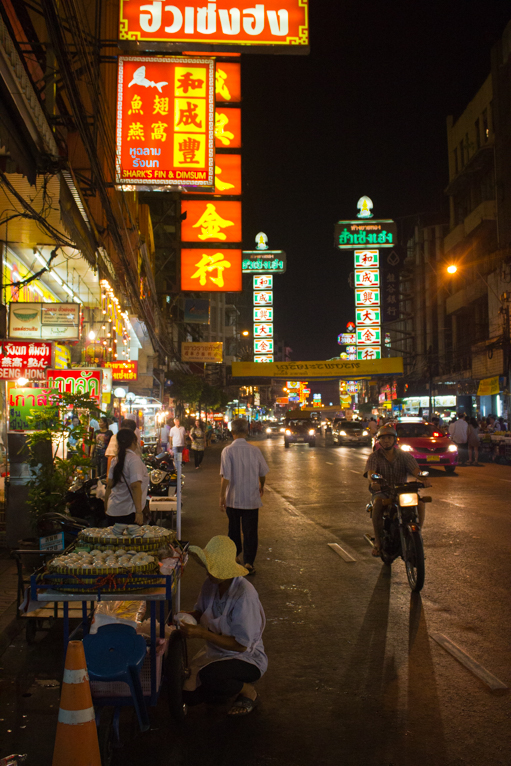
This is often the most common question that I get asked in regards to street photography. While there isn’t a magic formula in choosing your settings as every scene is different, there are some common settings that you will likely need to use. Firstly I would recommend using continuous focus mode as more often than not in street photography you will be dealing with moving subjects. I would also recommend setting your camera on burst mode rather than a single shot. It’s very difficult to nail the perfect moment in a moving scene with just one shot. Beyond these settings, everything else will come down to the subject and what creative effect you are hoping to achieve. As a general rule look for a wider aperture and a fairly fast shutter speed if photographing moving subjects. This might mean having to raise your ISO.
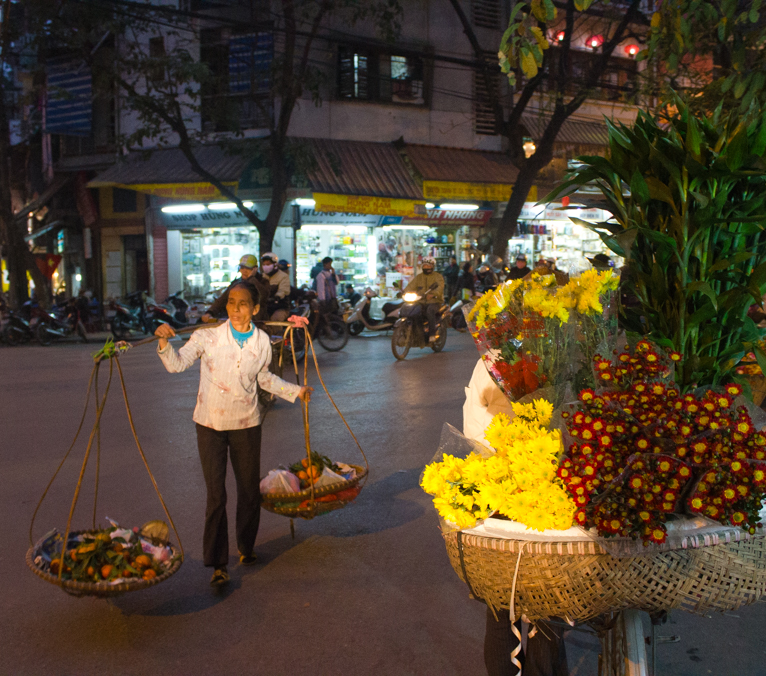
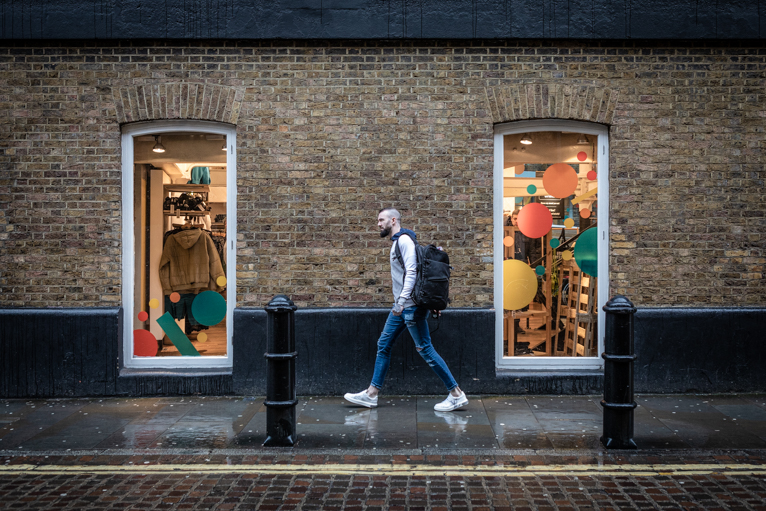
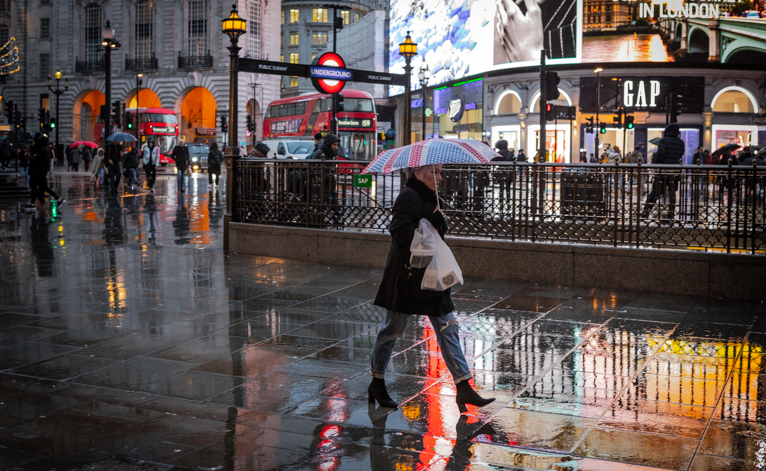
Better_street_photography

Embrace bad weather

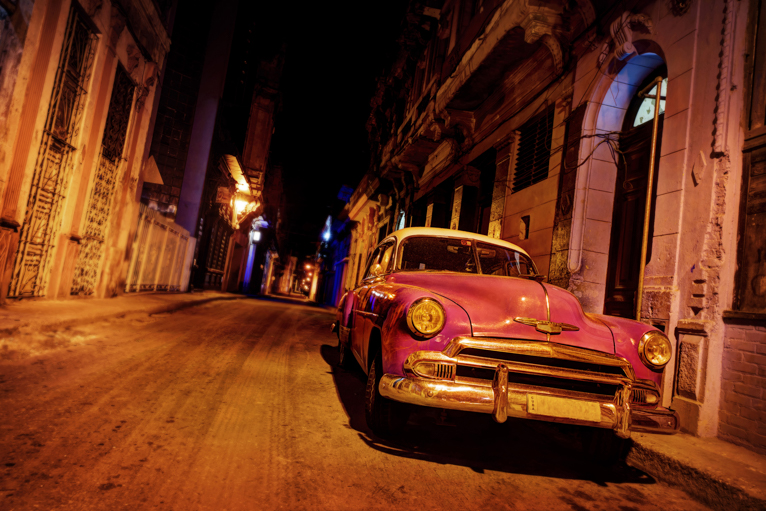
As a photographer, you are always told to look for great light and perfect conditions for photography. While both of these bits of advice are very valid for street photography as well, street photography does allow for a bit more leeway when it comes to conditions. For example one of the best times for street photography is after a rainfall where you will end up with some wonderful reflections. Or in cloudy conditions when the flat light makes it easier to manage harsh contrasts. You really can take street photos in any condition as it’s more about the story rather than the conditions. So when the weather isn’t ideal for those landscape shots, grab your camera and take street photos instead.

Better_street_photography

Street photography can produce some truly remarkable photos. These are often a great glimpse into everyday life that most people miss day-to-day. The great thing about street photography is that unlike say landscape photography, you have ample opportunity to practice and capture unique photos. With the tips above you’ll be on your way to capturing great street photos.

Photo credits: Kav Dadfar – All rights reserved. No usage without permission. Dreamstime.

Filed Under: Tutorials Tagged With: Night street photography, street photo tips, street photography

7 Tips For Better Street Photography At Night

Street photography is a great genre of photography to practice in. If done well the images you capture can tell amazing stories. The great thing about street photography is that most people can do it without having to travel too far and it doesn’t require as much equipment as say landscape photography. While street photography during the day can be tricky, at night it becomes much more difficult. The combination of low light and handholding a camera can play havoc with your settings and the sharpness of your images. Fear, not here are 7 tips to help you capture better street photos at night.

Night_street_photography

Avoid using a flash

The first bit of advice that I can give you is to not use your flash. Unless you are experienced with using lights and have proper lighting set up, a flash will make your photos look worse. The harsh light will wash out the scene and you’ll end with photos that look like family snaps from point and shoot cameras. If you are going to use a flash, get yourself a diffuser so that it softens the light a little. You might be better off using LED lights instead of a flash. These are relatively inexpensive and can be placed off-camera without the need for triggers. They will allow a bit more creativity as to your lighting.

Night_street_photography

Get your settings correct

A big part of street photography at night is ensuring that you capture images that are not blurred. I say “not blurred” because your street photos at night don’t necessarily have to be pin-sharp as they might need to be during the day. But an acceptable level of sharpness can be difficult to achieve in night photography without a tripod. The first unavoidable thing that you will need to do is to increase your ISO. You simply will not be able to avoid doing this if you are shooting handheld at night. Depending on the scene you may need to select a very high ISO, but that will depend on the scene, your camera and your ability to hold a camera steady. You’ll also need to select a wide aperture (f/4.5 or wider) to allow enough light to come into the camera.

Night_street_photography

Acceptable level of blurriness

As mentioned above, for night street photography there is an acceptable level of blurriness that you can expect in your shots. Unless you are using models and lighting equipment, no one is expecting pin-sharp photos at night. But the level of blurriness will come down to the subject you are photographing. For example, a portrait of someone needs to be sharper than a street scene where people are walking. So try to concentrate on finding interesting scenes and compositions rather than fretting over the sharpness of your images. Night street photography is as much about capturing the mood and feeling of a place as it is about the technical perfection of the shot.

Night_street_photography

This image is too blurred.

You will need some light

Your biggest challenge in night photography will be the limited light available. So try to find places where there is a source of light. That might be a street lamp, a shop window of even headlights from a car. The great thing is that in cities there are light sources everywhere so you can easily find places to compose your image around. Try to compose your image around the light source either as a focal point of your shot or as lighting for your subject. Also, be on the lookout for the colours of lights on show which can often look great at night. For example, a red glow on the ground from shop lights can give a wonderful photo.

Night_street_photography

Should you use a tripod?

In short, yes, of course, you can use a tripod. It comes down to the type of photo you want to capture. A tripod will mean you can set a long shutter speed without having to worry about the sharpness of your image. But this will give you a completely different photo than one that uses a fast shutter speed. With a slow shutter speed, you will capture light trails from cars and motion blur from people moving whereas a fast shutter speed will freeze the action. So it will come down to the type of shot you want to capture as to whether you use a tripod or not.

Night_street_photography

Shoot from the hip

This is a technique that you can use for street photography during the day as well. It involves having your settings selected and shooting without composing your shot by looking through the viewfinder. You would simply point the camera and shoot and hope that you have captured the scene correctly. If done well you can capture some great angles and shots that look completely natural and authentic. But the danger is you’ll miss your point of interest completely and focus on something in the background instead due to your shallow depth of field. For this reason, my suggestion would be to set your camera to autofocus if you are shooting from the hip. I would also recommend setting your camera to burst mode. Ensure you take plenty of memory cards as you’ll rattle through them quickly if shooting in burst mode.

Night_street_photography

Be careful

Needless to say that anyone walking around with expensive camera equipment at night should be careful. Use your common sense as to where and who you photograph and try to avoid walking around with lots of gear. The more understated that you can be the safer you’ll be. If you are using a tripod, be aware of where you have put your backpack.

Night_street_photography

Nighttime street photography can yield wonderful results. But it will take patience and practice to perfect as the conditions are not easy. The main thing to remember is to ensure your shutter speed will be just fast enough to capture an acceptable level of sharpness. This will no doubt mean raising your ISO to be able to get a good exposure. Use the tips above next time you are taking night street photos and see if it helps you capture better photos.

Photo credits: Kav Dadfar – All rights reserved. No usage without permission. Dreamstime.

Filed Under: Tutorials Tagged With: Night photography, Night street photography, night time street photography, Night-time Photography, street photography

Blog Topics

  • Tutorials
  • Inspiration
  • Locations
  • Gear
  • News
  • Other/Misc

What our customers say:

Life Pixel has been a life-changer for me. Continue reading
Eric GConnecticut
Read more reviews
I am more than satisfied with the service I received Continue reading
Christopher JCanada
Read more reviews
I am more than pleased with the conversion job that you did Continue reading
LOUIS MWaco, Texas
Read more reviews
I am VERY impressed with his knowledge of your products and his patience in explaining it to a novice like me. Continue reading
Lynn FEssex, Maryland
Read more reviews
Things will only get better from here thanks to all of you. Continue reading
Phillip FRedding, California
Read more reviews
The Lifepixel newsletter reminds me of not having expressed my gratitude for the excellent job you made. Continue reading
Michael GGermany
Read more reviews
Your staff went above and beyond the call of duty to make sure everything was handled in an excellent manner. Continue reading
Paige RPearland, Texas
Read more reviews
It has given my old camera a new life, I will enjoy using it again. Continue reading
William PAustralia
Read more reviews
Excellent service and the camera works just great Continue reading
Hans FairhurstAustralia
Read more reviews
I just got my converted camera back from you guys. THANK YOU!!!! Continue reading
Anne CutlerForest Knolls, CA
Read more reviews
infrared_filter_choices_sidebar
ir_conversions_explained_sidebar
----------- Watch More Videos -----------
infrared_quick_start_guide

Ready to start shooting Infrared?

Convert My Camera

Subscribe To Our Newsletter

Receive updates, tips, cool tutorials, free stuff and special discounts.

Learn the Basics

  • Video
  • Start Here
  • Filter Choices
  • Focus Calibration
  • Lens Considerations
  • Camera Considerations
  • Place Your Conversion Order

Resources

  • Galleries
  • Lens Hot Spot Database
  • IR Tutorials
  • FAQ
  • Infrared Filter Choices
  • Infrared Photography Guide
  • Infrared DIY Tutorials

Company

  • Why Choose Us
  • Get In Contact
  • Job Openings
  • Write For Us
  • Affiliate Program
  • Terms of Use
  • Privacy Policy
  • Home
  • Start Here
  • Galleries
  • Tutorials
  • FAQ
  • Blog
  • Why Choose LifePixel?
  • Shop
  • Contact

Copyright © 2025 Life Pixel Infrared - All rights reserved - LifePixel Infrared Photography IR Conversion, Modification & Scratched Sensor Repair