• Cart
  • Checkout
  • My Account

Infrared Conversions, IR Modifications & Photography Tutorials | Life Pixel IR

The world leader in infrared conversions, modifications & DIY IR conversion tutorials. Scratched sensor replacement, UV & Full spectrum conversions.

The world leader in infrared camera conversions

866.610.1710
  • Home
  • → Start Here ←
    • 1 – Introduction
    • 2 – Filter Choices
    • 3 – Focus Calibration
    • 4 – Lens Considerations
    • 5 – Camera Considerations
    • 6 – Start Shopping
  • Galleries
    • Infrared Photography
    • Infrared Time Lapse
    • Infrared Cinematography
    • Infrared Stop Motion
    • Ultraviolet Photography
    • Forensic Photography
  • Education
    • Training Sessions
    • How To Shoot Infrared
    • AR Coated Infrared Filters
    • Lens Hot Spot Database
    • Photoshop Video Tutorials
    • Infrared Issues & Solutions
    • IR Basics in Photoshop
    • Camera Quick Start Guide
    • DIY Conversion Tutorials
    • IR Photography Primer
    • Secondhand Cameras
    • Wall Of Shame
  • Workshops
  • FAQ
  • Blog
    • Tutorials
    • Inspiration
    • Locations
    • Gear
    • News
    • Other
  • Why Choose LifePixel?
    • Submit Your Review
  • Contact
  • Shop

Mirrorless vs. DSLR – Which Should You Buy?

If I were writing this article a few years ago, there wouldn’t really be any competition between high-end DSLR cameras and mirrorless cameras. DSLR cameras were so far ahead that buying a mirrorless would mean compromising on several factors including image size and quality. There was also the issue around the optical viewfinder versus a digital one in a mirrorless camera (more on this later). But these days the story is very different. So which should you buy? Our guide will help you decide.

DSLR_vs_mirrorless

What is a DSLR camera?

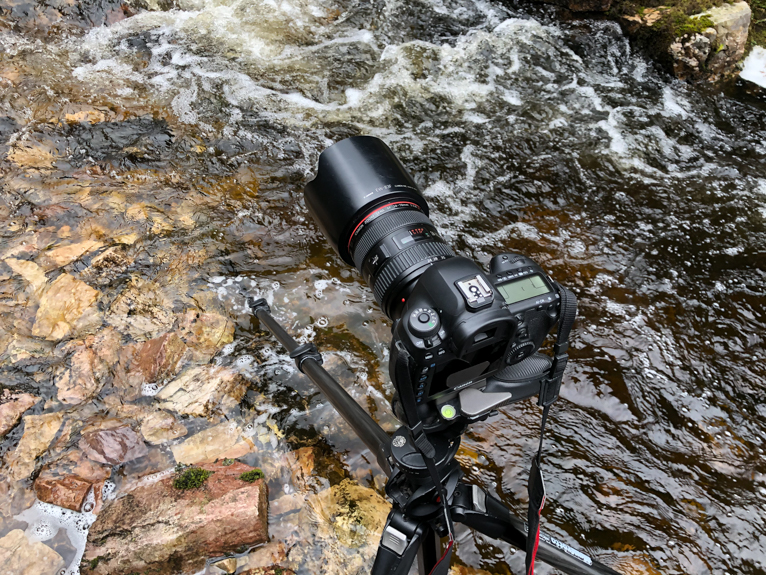
Before we talk about which is the right camera for you, it’s important to understand the differences between DSLRs and mirrorless cameras. A DSLR camera is a digital single-lens reflex camera. The way in which a DSLR works is that light enters the camera and reflects into the optical viewfinder via a mirror inside the camera body. So when you look through the viewfinder, you are seeing a real-life view of the scene in front of the camera. In other words, an actual reflection (this is the main difference between a DSLR and a mirrorless camera). Then when you press the shutter release button to take a photo, the mirror flips up which allows the light to hit the camera’s sensor and create the image.

When the mirror swings up, your view in the optical viewfinder goes dark momentarily until the mirror flips down again. The benefits of having a mirror in the camera are that you get to see an actual real-life view of the scene. It also gives an extra layer of protection for your sensor against dust and debris.

DSLR_vs_mirrorless

What is a mirrorless camera?

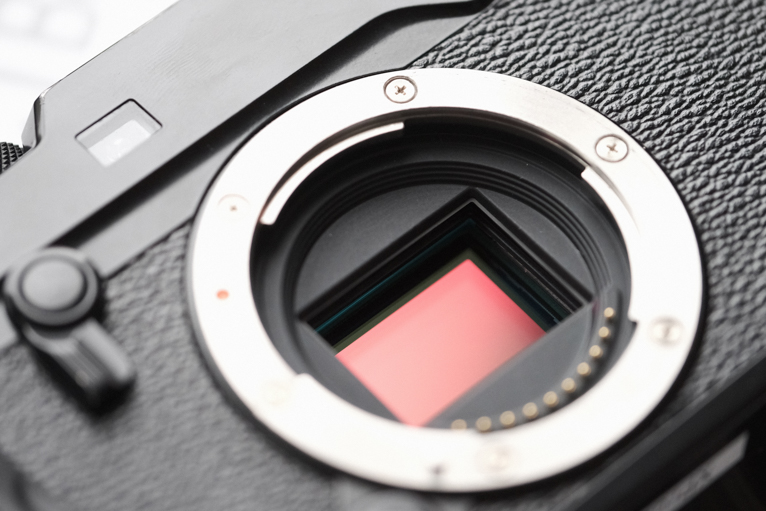
A mirrorless camera works in exactly the same way as a DSLR in that light enters the camera and creates an image by hitting the camera’s sensor. But the major difference between mirrorless cameras and DSLRs is the lack of a mirror in the former. Because there is no mirror you can’t see a reflection of the scene in front of you. So, what you see instead is a digital version of the scene. This is why a mirrorless camera viewfinder is known as a “digital viewfinder”. In essence, it is the same as if you were looking at the LCD screen on the back of your DSLR in “live view” mode.

DSLR_vs_mirrorless

What’s the big deal about a mirror?

You may be thinking what the whole point of a mirrorless camera is if it simply lacks the mirror of a DSLR. Well, there are a few big advantages to having no mirror in a camera. For one, because there is no mirror, the camera body can be smaller and lighter in weight than a high-end DSLR. But also from a photography point of view, without the need for a mirror to have to mechanically flip-up, mirrorless cameras allow for far more frames per second than DSLRs. In fact, DSLR cameras are no longer able to compete with high-end mirrorless cameras on that front.

DSLR_vs_mirrorless

Optical vs. digital viewfinder

The biggest impact of a lack of mirror to a photographer is what they see in the viewfinder. As mentioned above, without a mirror you will see a digital version of the scene in front of the camera. Again, a few years ago this was one of the biggest drawbacks of mirrorless cameras as there was a slight lag between what was happening in front of the camera and what the photographer was seeing in the viewfinder. So, for example for a wildlife or sports photographer, this would be hugely detrimental as it might mean missing the perfect moment with even a minute delay. However, the recent years this has pretty much been eliminated from top of the range mirrorless cameras. Having said that, sport and wildlife photographers still do prefer the optical viewfinders of DSLRs.

DSLR_vs_mirrorless

So, which should I buy?

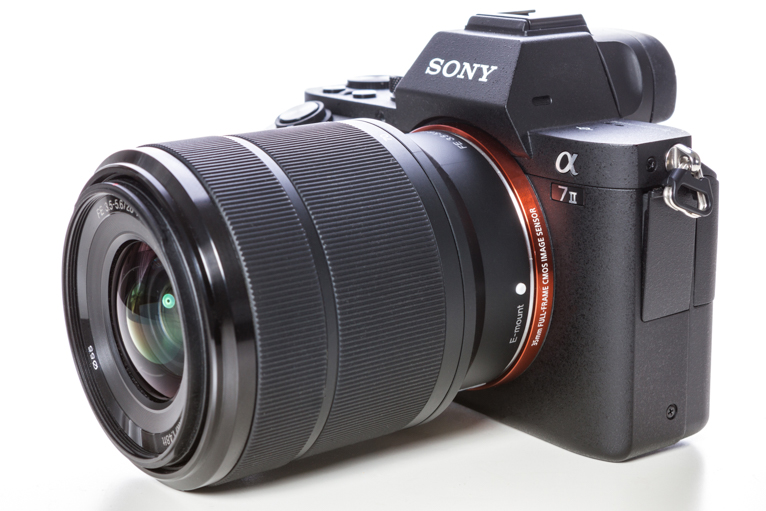
As a Canon DSLR shooter myself, it is getting increasingly more difficult to see the benefits of DSLR cameras over mirrorless. DLSRs are bigger, heavier and in most instances more expensive than an equivalent quality DSLR. Personally, I still do prefer the optical viewfinder of DSLRs but that is just because it is something that I’m used to. At the moment mirrorless cameras still don’t have the breadth of lenses and accessories available for them. But, then you have to ask yourself how many lenses do you actually need? The reality is that the market is moving increasingly towards mirrorless cameras. There are far more models of mirrorless cameras being released these days and far fewer DSLRs. But don’t worry, I believe that there is a long way to go before DSLRs are completely phased out.

So, to answer the question above as to which you should buy, it will ultimately come down to your budget, the type of photography that you do and what you are comfortable with.

DSLR_vs_mirrorless

Mirrorless cameras are here to stay and are probably the future of digital photography. As the technology improves more and more functions will be added which will make mirrorless cameras an even more attractive proposition versus DSLRs. Hopefully, this article will help you decide which is right for you.

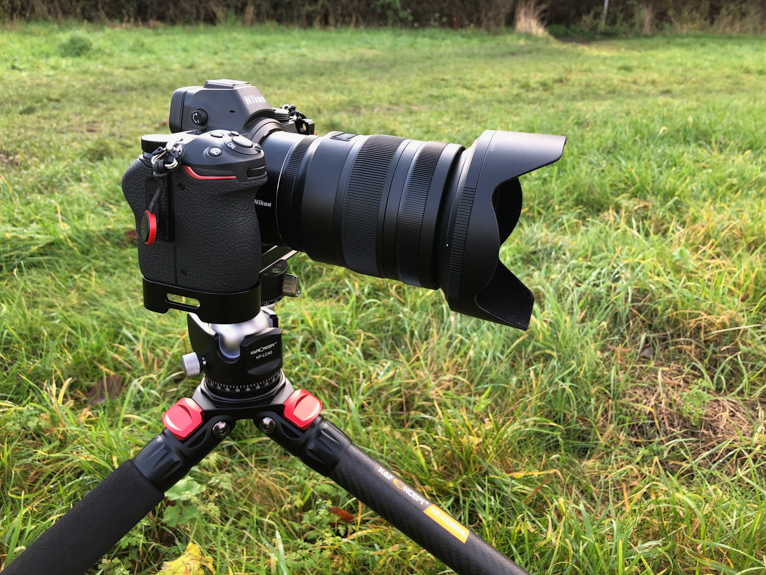
Photo credits: Kav Dadfar – All rights reserved. No usage without permission. Dreamstime.

Filed Under: Tutorials Tagged With: camera, digital camera, Digital cameras, DLSR vs Mirrorless, DSLR, mirrorless, mirrorless camera

3 Test To Do When You Buy A New Camera

A brand new camera can be an exciting purchase. If it’s an upgrade it will mean better quality images and more advanced settings. But buying a new camera also might mean getting used to new dials and controls as well as the camera itself. Cameras are not all the same and some perform better than others in different scenarios and at different settings. The only way to be sure is to test out your camera before heading out on a shoot. So here are 3 quick tests that you can do when you buy a new camera to help you get the most out of it.

Camera_test

ISO test

ISO is one of the most useful tools when it comes to photography. It can be the difference between being able to capture a shot and not. But it also requires careful use as high ISO will mean noise which can ruin the sharpness of a photo. But that doesn’t mean you should never raise your ISO really high, you just need to be aware of the consequences. So this is a test that I always run on any new camera that I buy.

Camera_test

A set of images taken at different ISOs.

Simply set up your camera on a tripod at home to take a photo of an object. Ideally, pick somewhere which isn’t too bright otherwise you may not be able to set your shutter speed fast enough. Set your camera to manual focus and ensure that your object is correctly focused. Set your ISO to the lowest it can go in your camera and adjust the shutter speed accordingly. With your camera on a timer, take a photo. Then raise your ISO by a stop or two and take another (you may have to adjust your shutter speed). Keep going, raising your ISO each time until you get as high as your ISO allows.

Once you have your set of photos, open them up on your editing software and zoom in to full size. Look at each photo at different ISOs to see at what point the noise becomes too much and your image begins to look too soft. On some cameras, this might be at ISO 1000 whereas others will be fine ISO 3200. The only way to know for sure is to test out your camera. This will then ensure that when you are out in the field you have an understanding of the limitation of your camera and how high you can set your ISO.

Camera_test

Left: image taken at ISO 100. Right: image was taken at ISO 102400. This shows the extremes of what high ISO can do to an image.

Image sharpness

Just like ISO, different cameras also produce different results when it comes to image sharpness at different shutter speeds. This is to do with in-camera image stabilization or lens image stabilization. But an additional factor that is often overlooked in this discussion is the weight of the camera. A heavier camera will naturally be more difficult to hold steady. When you combine this with image stabilization, you can begin to see why it’s important to test your camera before using it in a real-life scenario.

Camera_test

I always take a set of images like this with a new camera or lens to test its capabilities.

So for this test, you are going to use your camera and lenses at different shutter speeds to see how well it performs in capturing sharp images. Unlike the test above, you need to be outside for this one. Find something static like a building or statue (avoid trees and leaves that can be blown around in the wind), focus and then switch your camera to manual focus or lock your focus (you don’t want your focus point changing). Focus on the subject and look to set your shutter speed fast (i.e. 1/200 sec). Take a photo and then reduce the shutter speed and take another photo. Keep doing this until you get to a slow shutter speed.

You will have to play around with your aperture by making it smaller to be able to lower your shutter speed. Again, open your photo in your editing software and zoom in to check the image sharpness at different shutter speeds. You will then be able to get a good idea of what the capability of the camera is when it comes to different shutter speeds.

Camera_test

Shot at 1/200th sec. The image is sharp and in focus.

Camera_test

Shot at 1/8th sec. You can see that the edges are soft and not in focus.

Image Size

This test is about the actual image size that your camera produces. Why is this important you may ask? Because different cameras can produce different size files. This means that with bigger image sizes you will have more to play with in terms of cropping in post-production. For example, a full-frame sensor will produce a bigger image size as opposed to a crop sensor. So you will be able to crop an image taken with a full-frame camera more and it will still be big enough to print at larger sizes. Whereas with a smaller sensor camera you may have to rely more on actually zooming in or moving closer to your subject so that you are not cropping as much.

For this test, simply take a photo at the widest focal length of your lens. Try to do this on a bright day and outdoors and use a tripod if you can. Open the photo in your editing software and create several versions which are cropped to varying degrees. Export these as high res JPEG or TIFF files. Then open an A4 and A3 document in Photoshop and drop the different photos into the document. You may have to make the images bigger (or smaller) to fit the page. Zoom in to 100% view and check the image over. This will show you how much you are able to crop an image whilst still keeping its sharpness.

The reason for this test is that the more you stretch an image (i.e. make it bigger) the more resolution it will lose when viewed closely. This test will give you an idea of the cropping possibilities on your photos so that you can ensure you get them more accurate in-camera to avoid unnecessary cropping.

Camera_test

These 3 tests are pretty easy and quick to perform, but what you will learn from them will be invaluable when you are shooting for real. It will help you avoid those frustrating situations when you look at a photo and realise it’s not sharp. I do these 3 tests every time I buy a new camera which isn’t that often. So in reality you will only need to do this every few years.

Photo credits: Kav Dadfar – All rights reserved. No usage without permission.

Filed Under: Tutorials Tagged With: camera, Camera test, DSLR, mirrorless camera

Mirrorless Camera In-depth Review: YI M1

YI Technology are most known for their action camera and home camera range, but back in September they released their first mirrorless camera. It’s a competitive market to face, so it was essential that YI offered something that would set them apart from the mirrorless giants, who are already successfully fulfilling the mirrorless thirst that is passing the DSLR market.

Although I’ve been using the YI M1 mirrorless camera since December, I thought it was only fair that I gave it an in depth review after experimenting with all of its features. I’m by no definitive meaning a professional photographer, and that’s one of the main reasons I thought the YI M1 would be a handy camera side-kick to my amateur photography abilities. It’s essentially a micro four thirds mirrorless camera, and although it’s not cheap, it’s definitely affordable in comparison to its competitors, currently selling at $699 (Camera + two lenses) on Amazon.

mirrorless camera


Introduction

Let me start of by saying that if you’re professional photographer then it’s likely you’ll find a few flaws with the YI M1, or that it’s too simple to use. However, if you’re yet to step into the world of professional photography then this camera is definitely going to ease the way if in future you plan to buy a much more (expensive) professional camera. It would be outlandish to buy a Ferrari before you’ve learnt how to drive.

Firstly, let’s go through the nine image capture modes available on the YI M1.

P – Program Mode; on this setting you’re unable to change aperture or shutter speed, but have control over the EV (Exposure Value) and other settings. It works particularly well in low-lighting conditions; keep the ISO on auto and adjust the EV accordingly to achieve the best results.

A – Aperture priority mode; this setting is ideal for the slightly more experienced photographers as controlling aperture can often be tricky. Shutter speed is auto, but aperture and other settings are controlled by the user. Great for shooting outdoors.

S – Shutter priority mode; this is perfect if you want a long exposure time, particularly night time shots and shooting the night sky. User controls the shutter speed, aperture and other settings are on auto mode.

M – Manual mode; as a semi-amateur photographer it was a lot of fun experimenting on this mode. The user must set all the parameters manually, which might take some time to get a good shot, but when you do it will be great. Here’s one of Big Ben I took on Manual mode:

Panorama mode; quite self-explanatory as most smartphones now have this feature. It’s great for those scenic landscape shots.

C – Master Guide; this is a unique setting that I’ve only ever seen on the YI M1. Users can select a template and get their subject to pose accordingly, the camera will automatically set the parameters based on the template you choose. It’s great for beginners that want to improve their compositions, or take lovely shots of their girlfriend! You can also download new templates from the YI Mirrorless App.

SCENE mode; most cameras feature a similar setting. Your YI M1 will adjust the parameters according to the scene you choose, but doesn’t always produce the best images.

Finally is video mode, you can access it by pressing the red dot in the center of the mode dial, it will automatically begin recording, which actually comes in very useful when you don’t want to miss a moment of footage. More on that later.

mirrorless camera yi

Mirrorless Camera Highlights

Image quality

Let’s start with the YI M1’s self-proclaimed best feature that is the SONY IMX269 Image Sensor. Essentially, the image sensor is responsible for the quality of your images, whether that be video or still pictures. The SONY IMX269 is one of the more high-end image sensors mostly found in cameras with much heftier price-tags than the YI M1, such as the Panasonic GX8 (upwards of $1000).

The YI M1 certainly delivers when it comes to image quality; it’s capable of capturing 20MP pictures and can record 4K videos; just make sure you have an SD card with enough capacity to take full advantage. If you’re also into post-production of photos then the ability to shoot in RAW format will come in useful. It can give your images much more detail, but one downside of the M1 is that it can’t shoot in both JPEG and RAW simultaneously. Night time shots are a bit trickier as many pictures showed a bit of noise, but if you want long exposure photos you can just lower the ISO and lengthen the shutter speed.

Overall, you definitely won’t be disappointed with the image quality, so don’t assume that an expensive camera will always produce higher quality images.


Design

It’s a beautifully designed camera, and it isn’t at all intimidating to use, which is often the case with the more advanced DSLRs and mirrorless’. The YI M1 is simplistic, with just two core buttons and then the mode dial and control dial. Most the controls take place on the integrated LCD screen, which makes it easy and simple to navigate through the different screens and settings. The LCD UI can occasionally lag or seem slow to respond, but as that is a software problem I’m sure YI will address it in the next firmware update.

It’s comfortable to hold and extremely lightweight, which is really beneficial when you’re out and about. The common DSLRs can be really bulky and unless you’ve got a suitable carrying case they can be a pain to carry around. The YI M1 comes with a leather neck strap, and although it’s very fashionable, it’s not that secure and came undone at one time, so I recommend buying a sturdier one.

Connectivity

Another great highlight of the YI M1 is it’s connectivity. It has BLE (Bluetooth Low Energy) and Wi-Fi built-in, so it can connect to your smartphone enabling you to easily transfer your pictures to your phone and then upload to social media. The YI Mirrorless App can also give you access to other features such as picture editing, and a catalog of templates you can use in the master guide setting. Which brings me on to the next highlight…


Master Guide

It’s a really unique feature, any professional photographer would probably laugh at it, but if you’re a beginner then it’s the perfect tool to improve your composition. By switching to the Master Guide setting, users can select different templates that will show on the LCD screen, you can ask your subject to position themselves accordingly and your camera will automatically set all the parameters. With the Mirrorless app you can choose other templates to download, and each one comes with a short guide on how to take the best photo. I had some fun with it, and over time the templates subconsciously help you to build the right compositions without the Master Guide, so it’s definitely a great feature for the beginners.


Lenses

Although you can purchase the YI M1 as a body only, the two ‘xiaoyi’ lenses are actually very good, and worth the extra money.

Xiaoyi 12-40mm F3.5-5.6 lens

This is a standard zoom lens, it’s not an extremely wide angle but does the job, and it’s great for shooting landscape shots and scenery. It’s made up of 9 sets of 11 optical glasses, including two ED glasses and four aspheric lens, which essentially minimizes any distortion that might normally occur.

Xiaoyi 42.55mm F1.8 portrait lens

This should’ve been included in the highlights section, as the portrait lens makes it fantastically easy to capture really professional looking portrait and macro shots. It’s almost like having two lenses in one as you can switch between ‘Normal’ (0.5m/1.64ft – ∞) and ‘Macro’ (0.25mm/0.82ft – ∞). I’ll let the photos do the talking:

Other Features

81 AF points

Another great feature is the 81 AF points, which allow you to manually choose what you want to focus on by touching a focus point displayed on the LCD screen. The M1’s auto-focus isn’t great, particularly in low-lighting but this feature definitely makes up for it. You can also choose different focus points between shots.

Micro Four Thirds System

As you progress with your photography skills you’ll probably want to buy new lenses suitable for different shots. Micro Four Thirds system the M1 is compatible with over 50 lenses, so you’re bound to find a lens you want.


Mirrorless App

So the mirrorless app was mentioned before, and it’s especially great for downloading new firmware released by YI. With other cameras it can be a real hassle, to the point where people often don’t bother to update. With the YI M1 you only need to download via your smartphone and then connect your M1, so any software problems you might be experiencing are likely to be resolved in future updates.


Conclusion

Let me begin the end, with the flaws. It’s by no means a camera that was made for professional photographers, you just need to hand it to a semi-pro to find that out. There’s no viewfinder, which is annoying if you’re used to using one. So, if you already own a DSLR or other mirrorless, it’s likely the YI M1 will feel like a step-down. Also, the auto-focus isn’t as responsive as one would like it to be, so this can be frustrating at times. However,  I think all the other features make up for these flaws.

It does produce really high quality images, and with the two lenses you really won’t find a better deal. If you’re only familiar with using a smartphone or point-and-shoot to take pictures, then this is going to be a perfect step up. It’s got a good battery life, and it’s lightweight and portable, so it’s also a great travel companion.

If you’re not sure what you really want, and don’t want to spend so much money then the YI M1 is a good choice. It will pave the way to your first really professional camera, and is a good start to practice your composition and understanding of how a professional camera really works, in terms of exposure settings and parameters. If you know all the basics, and have experienced using another mirrorless or DSLR, then this would be a better purchase for a good friend or family member who wants to get in to photography.

Filed Under: Gear Tagged With: digital camera reviews, mirrorless camera

Blog Topics

  • Tutorials
  • Inspiration
  • Locations
  • Gear
  • News
  • Other/Misc

What our customers say:

Life Pixel has been a life-changer for me. Continue reading
Eric GConnecticut
Read more reviews
I am more than satisfied with the service I received Continue reading
Christopher JCanada
Read more reviews
I am more than pleased with the conversion job that you did Continue reading
LOUIS MWaco, Texas
Read more reviews
I am VERY impressed with his knowledge of your products and his patience in explaining it to a novice like me. Continue reading
Lynn FEssex, Maryland
Read more reviews
Things will only get better from here thanks to all of you. Continue reading
Phillip FRedding, California
Read more reviews
The Lifepixel newsletter reminds me of not having expressed my gratitude for the excellent job you made. Continue reading
Michael GGermany
Read more reviews
Your staff went above and beyond the call of duty to make sure everything was handled in an excellent manner. Continue reading
Paige RPearland, Texas
Read more reviews
It has given my old camera a new life, I will enjoy using it again. Continue reading
William PAustralia
Read more reviews
Excellent service and the camera works just great Continue reading
Hans FairhurstAustralia
Read more reviews
I just got my converted camera back from you guys. THANK YOU!!!! Continue reading
Anne CutlerForest Knolls, CA
Read more reviews
infrared_filter_choices_sidebar
ir_conversions_explained_sidebar
----------- Watch More Videos -----------
infrared_quick_start_guide

Ready to start shooting Infrared?

Convert My Camera

Subscribe To Our Newsletter

Receive updates, tips, cool tutorials, free stuff and special discounts.

Learn the Basics

  • Video
  • Start Here
  • Filter Choices
  • Focus Calibration
  • Lens Considerations
  • Camera Considerations
  • Place Your Conversion Order

Resources

  • Galleries
  • Lens Hot Spot Database
  • IR Tutorials
  • FAQ
  • Infrared Filter Choices
  • Infrared Photography Guide
  • Infrared DIY Tutorials

Company

  • Why Choose Us
  • Get In Contact
  • Job Openings
  • Write For Us
  • Affiliate Program
  • Terms of Use
  • Privacy Policy
  • Home
  • Start Here
  • Galleries
  • Tutorials
  • FAQ
  • Blog
  • Why Choose LifePixel?
  • Shop
  • Contact

Copyright © 2025 Life Pixel Infrared - All rights reserved - LifePixel Infrared Photography IR Conversion, Modification & Scratched Sensor Repair