• Cart
  • Checkout
  • My Account

Infrared Conversions, IR Modifications & Photography Tutorials | Life Pixel IR

The world leader in infrared conversions, modifications & DIY IR conversion tutorials. Scratched sensor replacement, UV & Full spectrum conversions.

The world leader in infrared camera conversions

866.610.1710
  • Home
  • → Start Here ←
    • 1 – Introduction
    • 2 – Filter Choices
    • 3 – Focus Calibration
    • 4 – Lens Considerations
    • 5 – Camera Considerations
    • 6 – Start Shopping
  • Galleries
    • Infrared Photography
    • Infrared Time Lapse
    • Infrared Cinematography
    • Infrared Stop Motion
    • Ultraviolet Photography
    • Forensic Photography
  • Education
    • Training Sessions
    • How To Shoot Infrared
    • AR Coated Infrared Filters
    • Lens Hot Spot Database
    • Photoshop Video Tutorials
    • Infrared Issues & Solutions
    • IR Basics in Photoshop
    • Camera Quick Start Guide
    • DIY Conversion Tutorials
    • IR Photography Primer
    • Secondhand Cameras
    • Wall Of Shame
  • Workshops
  • FAQ
  • Blog
    • Tutorials
    • Inspiration
    • Locations
    • Gear
    • News
    • Other
  • Why Choose LifePixel?
    • Submit Your Review
  • Contact
  • Shop

What Is The Exposure Triangle?

One of the most important concepts of photography is something known as the exposure triangle. But don’t worry it is not a mathematical equation and once you learn what it is, it’s actually pretty simple to understand. There are three components in the exposure triangle. These are shutter speed, aperture and ISO. It is called the exposure triangle because of the relationship these three variables have with each other that determine how a photo is taken and what it looks like. In any photograph, these three elements work together. Which means changing one affects the others. To help you understand this and be able to use these components correctly, here is a simple guide on the exposure triangle.

exposure_triangle

Shutter speed

This is an important aspect for anyone in photography. The shutter speed refers to how fast the aperture in your lens opens and closes. The faster this is the less light enters the camera. Which is why for example when you are photographing in low light conditions, you need a slower shutter speed. Because this opening and closing of the aperture will be slower it will allow more light to enter the camera.

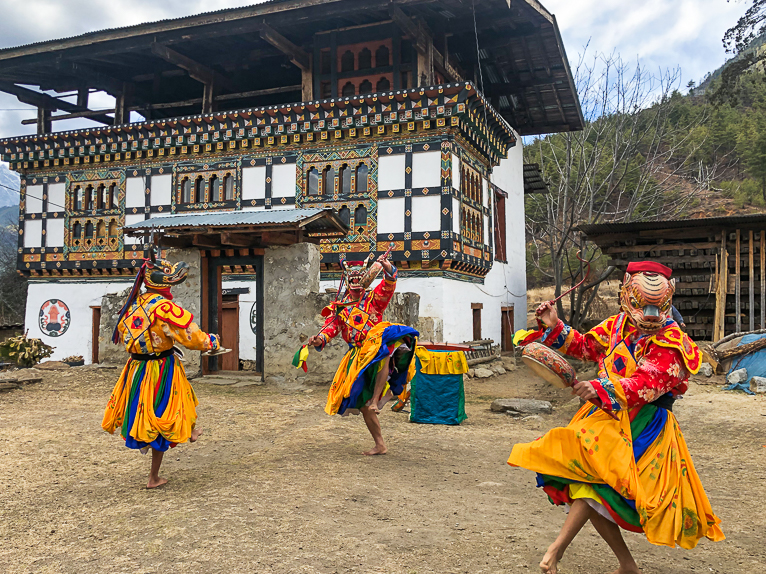
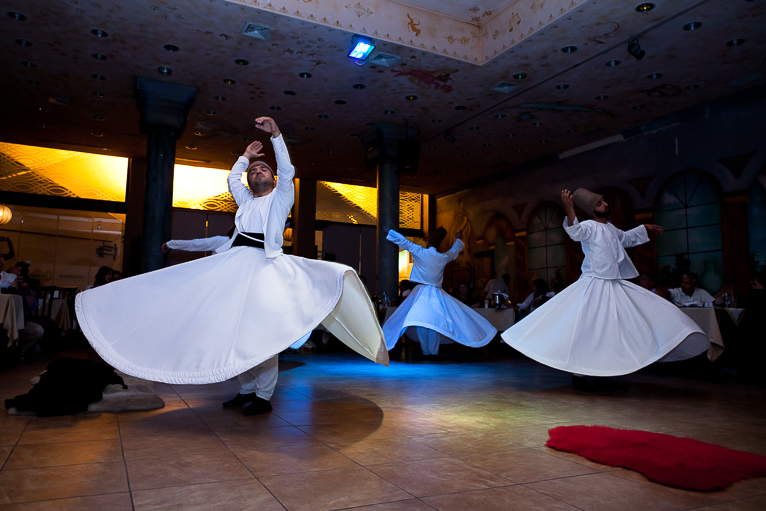
The shutter speed is also important in helping you be able to freeze motion in your photos. So the faster the movement of your subject the faster your shutter speed needs to be.

Why is shutter speed important?

The shutter speed will determine how the image will be captured. For example, as mentioned above when using a slow shutter speed the sensor of the camera is exposed for a significant time. So besides being able to capture darker scenes with the right level of exposure, it also has an effect on moving objects by creating motion blur. This is a creative technique that all photographers use to help show motion in images. Whether it’s waves crashing onto the beach, a dancer or even a light trails from cars, they are all possible through the shutter speed.

exposure_triangle

Aperture

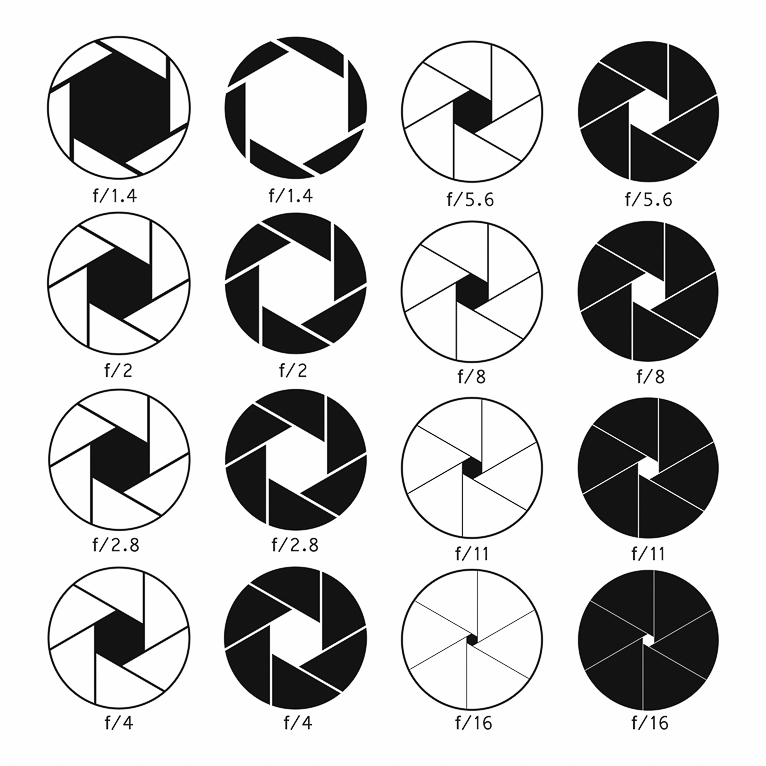
To understand aperture better, think of it as the pupils in your eyes. If you walk into a dark room, your pupils get bigger to allow more light to enter your eyes. If you then walk out into bright sunshine your pupils become smaller to limit the amount of light entering your eyes. The aperture on your camera works in exactly the same way. The only difference is that you will have to control the aperture on a camera.

Putting this concept into use for photography, it means that if you photographing in low light conditions, you need more light to enter the camera. So a wider aperture is needed in places like covered markets. But if you are photographing outdoors in bright conditions you will need a smaller aperture otherwise your photos will be too bright.

Why is aperture it important?

The aperture not only controls the amount of light that enters your camera but also your depth of field. In other words how much of your image is sharp from the foreground to the background. The wider or bigger your aperture is, the shallower your depth of field (smaller part will be in focus). The smaller the aperture the greater your depth of field will be. For example, in a landscape scene, you will generally want all of the image as sharp as possible. So a small aperture should be used. But for example, when you are taking a portrait of someone, you can use a wider aperture, as they are the only part of the image you need in focus.

exposure_triangle

ISO

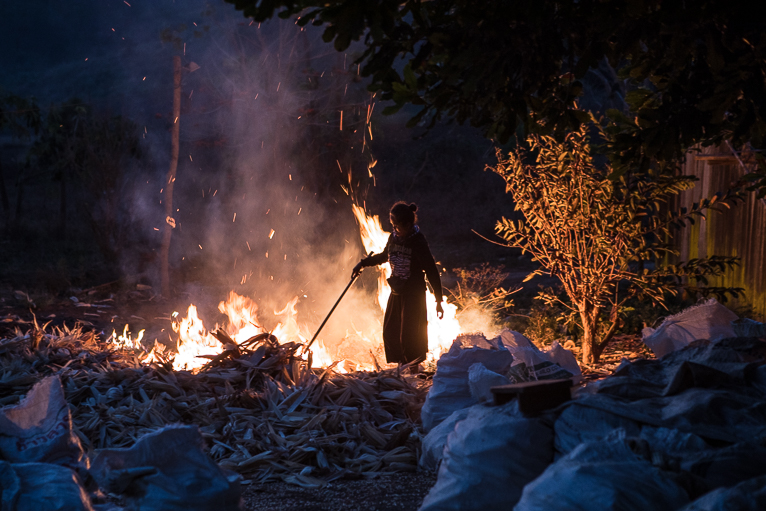
Back in the days of film, ISO would refer to the sensitivity of film to light. In digital photography, all that has happened is that film has been replaced by a digital sensor. ISO controls how sensitive your sensor will be to light. The higher the ISO the more sensitive your sensor will be which means you can take photos in darker conditions. But this comes at a price. The higher your ISO is the more noise you will see in your photo. This will have a negative effect on the overall quality of your photo by making it less sharp.

Why is ISO important?

The reason that ISO is so important is that there are times where you have no other option but raising your ISO. Because otherwise you simply will not be able to capture a photo because of the lack of light. The is especially important in situations where you have to shoot handheld and need to have a fast enough shutter speed to avoid a blurred photo.

exposure_triangle

They are all linked together

These three elements are all linked together and changing one will affect the others. But it also allows you far more flexibility in being able to choose the settings that you want. For example, as I mentioned earlier, in landscape photography, you will need a greater depth of field which means a smaller aperture. A small aperture will not allow as much light to enter the camera as a wider aperture. So to compensate for this, your shutter speed will need to be slower. A slower shutter speed will mean that even though your aperture is smaller, it will be open for longer allowing more light to enter the camera.

On in another example, let’s say you are photographing someone dancing indoors where there isn’t a lot of light. To be able to capture a sharp photo you will need a fast shutter speed. You can either achieve this by raising your ISO or by selecting a wider aperture. Because if your aperture is bigger, it won’t need to stay open as long as a small aperture. Allowing you to be able to use faster shutter speeds.

exposure_triangle

The relationships between these three elements in photography form the basis of any photo. If you want to take better photos, you should spend time learning and practising how to use the exposure triangle. Over time it will become second nature to you and you will quickly be able to select and change settings knowing the impact it will have on other elements in the exposure triangle.

Photo credits: Kav Dadfar – All rights reserved. No usage without permission. Dreamstime.

Filed Under: Tutorials Tagged With: aperture, Exposure triangle, ISO, Shutter Speed

A Quick Guide To ISO In Digital Photography

Even if you are new to photography, you have probably heard the term “ISO”. It is an incredibly useful and important setting in your camera that forms the exposure triangle along with aperture and shutter speed. Think of these three settings as the ingredients that allow you to capture a photo. Each one can be tweaked to give you a different outcome. But they are also linked so changing one will impact the others. In this quick guide to ISO in digital photography, you’ll learn what ISO is and why it is so important in digital photography?

What is ISO?

For anyone who began photography in the days of film, ISO (or ASA) was a film’s sensitivity to light. In other words the higher the ISO number of the film the more sensitive the film would be to light. So for example in low light conditions, you would use a higher ISO film to allow you to capture a photo. The reason that ISO is used is to standardize this sensitivity rating is so that you can shoot with different cameras and get a pretty close exposure value.

ISO in digital photography

In digital cameras, ISO basically means the same thing. But instead of film, it is the sensitivity of a sensor to light. Again, the higher your ISO is the more sensitive your sensor will be to light and thus allow to photograph in low light conditions.

The great thing about digital photography is that you are able to change the ISO whenever you want, even picture by picture. This feature is often taken for granted in digital photography and is one of the greatest benefits over using old analog cameras. If you are using film, you literally would have to change the film that was in your camera if you wanted a different ISO. Of course, you could only do this if the roll was finished so you were pretty much stuck with whatever you had in your camera for a while. Or you would have to carry around multiple cameras with different film in them. Sounds like a hassle and very expensive, right?

But with digital cameras you a have a whole range of ISO settings at your disposal. Most modern cameras will range from around 100 (or even 50 for some newer models) to 12,800 or even much greater.

The cost of raising your ISO?

Whilst it might be tempting to increase your ISO whenever you take a photo, it’s important that you understand the consequences of doing so. The higher that your ISO is the lower the quality of your image will be. This is because there will be more noise and grain in your photo which can mean the overall image will look soft. A lower ISO will not only mean a better quality image, but it will also mean a better dynamic range and better color as well.

But keep in mind that different cameras produce different levels of noise and grain at higher ISOs. So just because you can get an acceptable image with one at ISO 3200 doesn’t mean you will be able to with another one. The only way to know for sure is to test your camera out. Simply set up a shoot ideally on a tripod and photograph something at different ISO settings all the way to the maximum that your camera can take. Then zoom in to the photos in a post-processing software and check the result. This will give you a good indication of what you should expect. Don’t just rely on the LCD screen on the back of your camera. Even though an image might look fine on there, once zoomed in at a larger size you will notice the noise.

As a general rule, you should always keep your ISO as low as you are able to.

Taken at a very high ISO. You can see that there is considerable noise in the photo when zoomed in.

When to raise your ISO?

Even though raising your ISO comes at a price, there are times that you simply can not take the photo without doing so. The main reason that you often need to increase your ISO is to allow you to take the photo that you want to take at either the shutter speed that you need to (if there isn’t enough light) or at smaller apertures. For example, if you are photographing someone indoors where there isn’t much light if you do not raise your ISO you may not be able to use a fast enough shutter speed to freeze the action. Or if you are photographing a landscape scene handheld you will want to have a greater depth of field. But selecting a small aperture to allow you to achieve this will mean slower shutter speed if you don’t raise your ISO which will mean your image will suffer from camera shake.

But sometimes even during the day, you may have to increase your ISO to be able to freeze the action. For example, if you are photographing something that is moving very fast like horses running or a car, you’ll need to have a very fast shutter speed. This might only be achieved by raising your ISO.

The good news is that cameras are getting better at reducing the amount of noise in photos at high ISO settings. There are also options in most post-processing software to allow you to reduce the amount of noise in a photo at the expense of some detail.

Conclusion

ISO is a key component of photography and is something that you will need to learn about and understand to be able to utilize effectively. Doing so will give you much greater control over the photo taking process and allow you to photograph situations that wouldn’t be able to otherwise. But the key to using ISO is to do so only as much as you need to. So if you can get away without having to raise your ISO, then do so. Like anything else in photography, the more you learn and practice the better you will become. So go ahead and play around with your ISO setting and see how it can impact your images. In the meantime, this quick guide to ISO should help you.

Photo credits: Kav Dadfar – All rights reserved. No usage without permission. Dreamstime.


Filed Under: Tutorials Tagged With: ISO

Blog Topics

  • Tutorials
  • Inspiration
  • Locations
  • Gear
  • News
  • Other/Misc

What our customers say:

Life Pixel has been a life-changer for me. Continue reading
Eric GConnecticut
Read more reviews
I am more than satisfied with the service I received Continue reading
Christopher JCanada
Read more reviews
I am more than pleased with the conversion job that you did Continue reading
LOUIS MWaco, Texas
Read more reviews
I am VERY impressed with his knowledge of your products and his patience in explaining it to a novice like me. Continue reading
Lynn FEssex, Maryland
Read more reviews
Things will only get better from here thanks to all of you. Continue reading
Phillip FRedding, California
Read more reviews
The Lifepixel newsletter reminds me of not having expressed my gratitude for the excellent job you made. Continue reading
Michael GGermany
Read more reviews
Your staff went above and beyond the call of duty to make sure everything was handled in an excellent manner. Continue reading
Paige RPearland, Texas
Read more reviews
It has given my old camera a new life, I will enjoy using it again. Continue reading
William PAustralia
Read more reviews
Excellent service and the camera works just great Continue reading
Hans FairhurstAustralia
Read more reviews
I just got my converted camera back from you guys. THANK YOU!!!! Continue reading
Anne CutlerForest Knolls, CA
Read more reviews
infrared_filter_choices_sidebar
ir_conversions_explained_sidebar
----------- Watch More Videos -----------
infrared_quick_start_guide

Ready to start shooting Infrared?

Convert My Camera

Subscribe To Our Newsletter

Receive updates, tips, cool tutorials, free stuff and special discounts.

Learn the Basics

  • Video
  • Start Here
  • Filter Choices
  • Focus Calibration
  • Lens Considerations
  • Camera Considerations
  • Place Your Conversion Order

Resources

  • Galleries
  • Lens Hot Spot Database
  • IR Tutorials
  • FAQ
  • Infrared Filter Choices
  • Infrared Photography Guide
  • Infrared DIY Tutorials

Company

  • Why Choose Us
  • Get In Contact
  • Job Openings
  • Write For Us
  • Affiliate Program
  • Terms of Use
  • Privacy Policy
  • Home
  • Start Here
  • Galleries
  • Tutorials
  • FAQ
  • Blog
  • Why Choose LifePixel?
  • Shop
  • Contact

Copyright © 2025 Life Pixel Infrared - All rights reserved - LifePixel Infrared Photography IR Conversion, Modification & Scratched Sensor Repair