Caves are one of the most incredible natural phenomena on Earth. A great photo of a cave can leave the viewer stunning in awe. But make no mistakes, photographing caves is one of the most challenging scenarios in photography. Besides the obvious low light (or even no light) conditions, you are often dealing with wet and muddy conditions. Add to that the compositional challenges of actually making a shot of a cave seem interesting and you can see why good cave photos are so hard to come by. To help you here 7 tips for photographing caves.
Bring a tripod
The first and biggest challenge of photographing caves is the low light conditions. Without a tripod, you are going to find it almost impossible to capture photos of the cave. The only option that you will have for photographing inside caves without a tripod is to bump up your ISO. You may have to increase it to 12,800 or even greater. This will mean you will end up a lot of noise in your image which will affect the sharpness of the photo. One option will be to try and find somewhere like a rock to rest your camera on. Just be very careful that you don’t end damaging or even losing your camera.
If you are able to use a tripod keep your ISO as low as possible and make sure that you either use a remote trigger or the self-timer on the camera. You are going to be photographing with long exposures so even pressing the shutter button on your camera will cause camera shake.
Don’t forget lighting
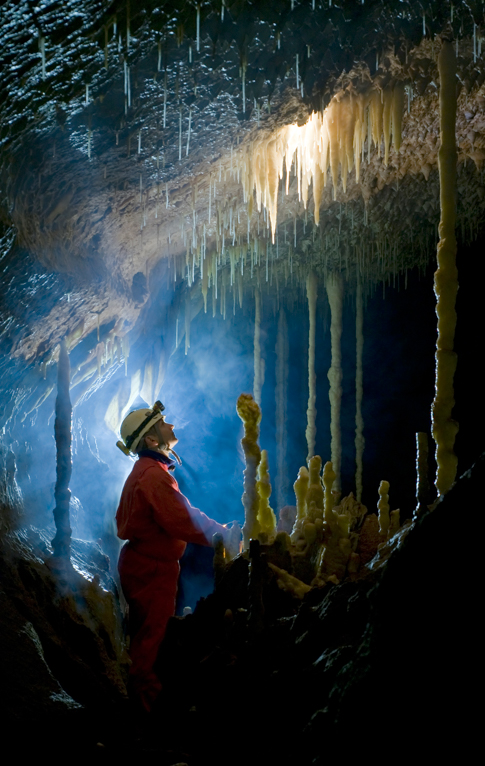
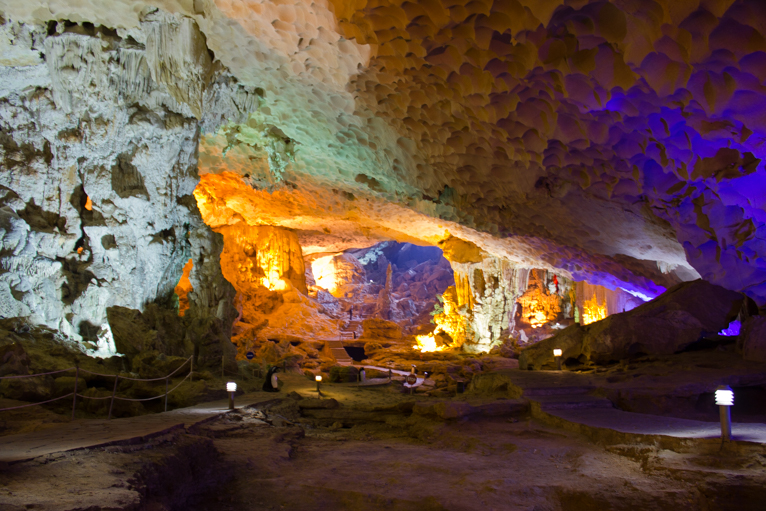
Sometimes you may find that some caves have some lighting installed. Even then it will still be pretty dark. If you are allowed, bringing some form of lighting can help you when photographing inside the cave. For example, an off-camera flash can allow you to experiment with some interesting lighting and compositions. Place the flash behind some rocks or to the side of some stalagmites for some interesting shadows. Another option is a simple LED light stand. They are compact and pretty cheap and can allow you to light specific points in your composition.
If you are not allowed any lighting or you don’t have any, at the very least take a torch with you. You can use it to illuminate specific areas of the scene. Select a longish exposure of at least a few seconds and whilst the shutter is open, paint the subject with the torchlight.
Protect your equipment
Needless to say, that in the dark, wet and muddy conditions of a cave, your camera can be at risk. Be sure that you don’t drop it into water or even on the rocks. It is also worth taking a couple of small hand towels to use to wipe your equipment dry and clean if gets wet or muddy. Also, keep in mind that there is a chance that when you leave the cave your lens might begin to steam up due to condensation. This is because often deep inside caves might be significantly colder than outside. Just give your camera 20 minutes or so to come to the temperature of the outside.
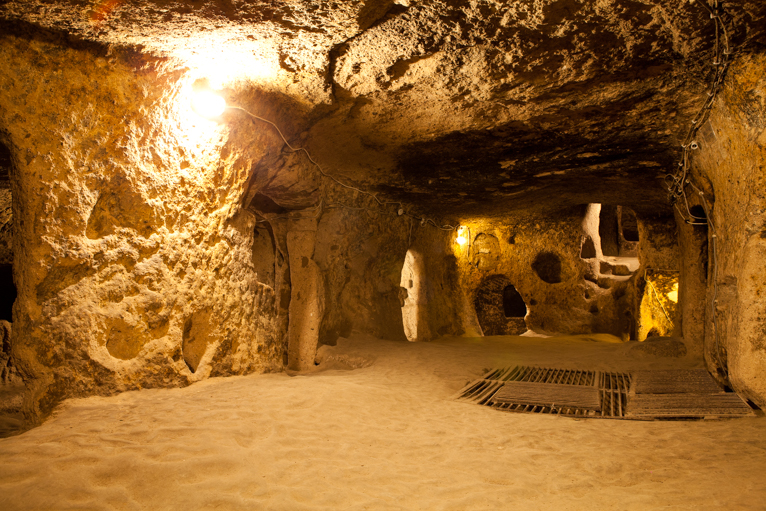
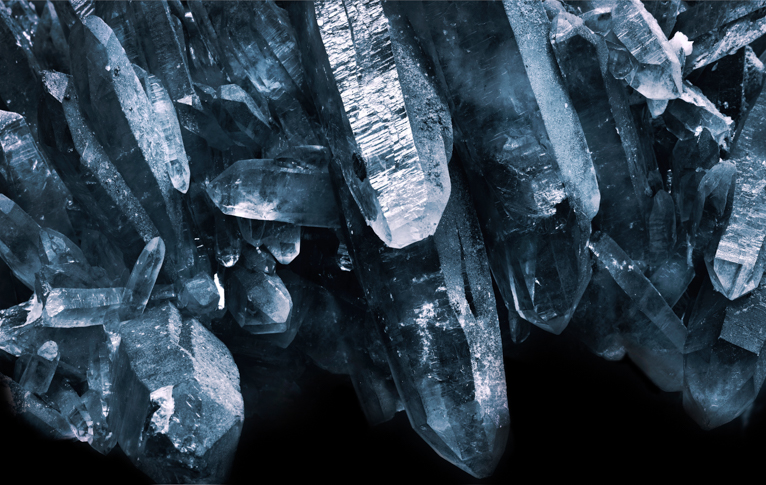
Capture the details
Stalagmites, stalactites, rock formations and even shadows can all be interesting subjects to photograph. So, make sure you look around and keep your eyes open for anything unusual or interesting. These close-up details can often make a huge difference to the overall set of images from the cave.
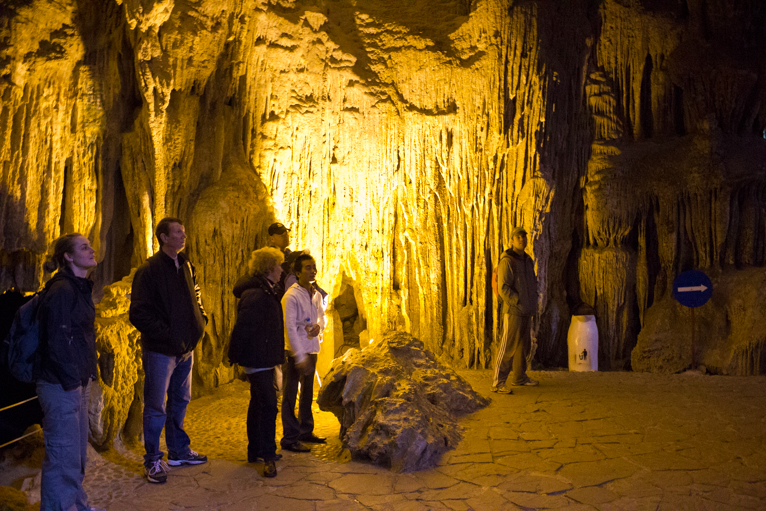
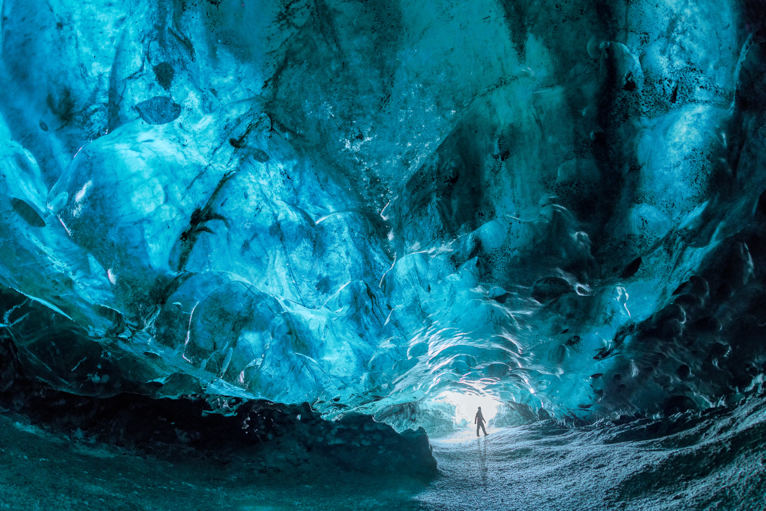
Give a sense of scale
You know that feeling when you set eyes on the vast cavern for the first time? That’s is what you should look to re-create for the viewer. The problem with cameras is that even though they are incredibly advanced, they are still no match for the human eye. When we see that gigantic cave, not only are we seeing it in 3D, but we are subconsciously aware of the scale of it. To achieve this in a photo you need to help the viewer by giving them something to compare against.
For example, take a photo of a giant tree and it will look like any other tree. But put a car next to the tree and suddenly we can see how big the tree is. This is the same principle for when photographing caves. If you want to show a sense of scale, try to incorporate a person into the photo.
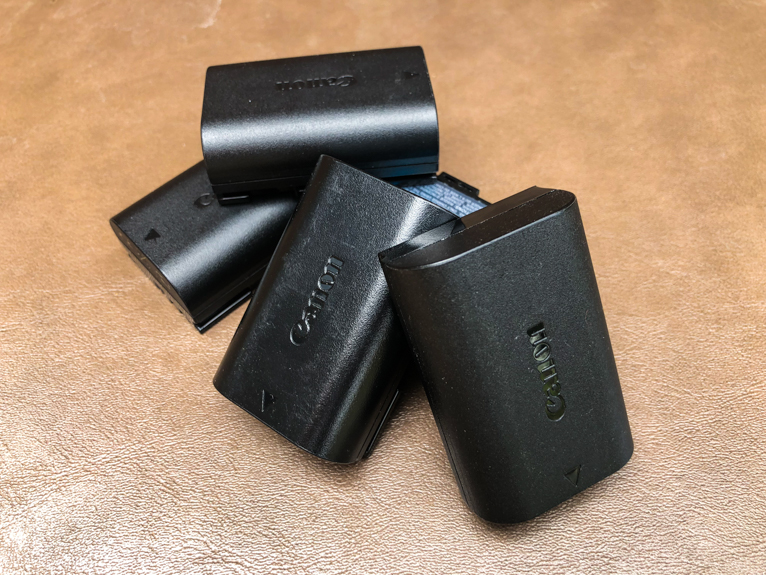
Have lots of batteries
Long exposure photography will use up a lot of battery power. It’s not unfeasible to go through 2 or 3 batteries in just one shoot. So, make sure you pack a lot of fully charged spares. It’s also worth packing them somewhere accessible. The last thing that you want to be doing in the dark is rummaging around in your backpack.
Be very careful
Caves are dangerous and should be treated with respect and caution. Unless you are an experienced caver do not venture into areas that are deep inside the cave. Getting lost inside a cave can have serious life-threatening consequences. But even in well-marked caves, there is still a danger of injuries by slipping and even hitting your head against the low rocks. Try to wear a hard hat and never take any unnecessary risks. No photo is worth risking your life.
Photographing caves can be very difficult to master. But if you can capture great photos of caves, it leaves people in awe. Follow the tips above and you will be on your way to capturing great photos of caves.
Photo credits: Kav Dadfar – All rights reserved. No usage without permission. Dreamstime.
