• Cart
  • Checkout
  • My Account

Infrared Conversions, IR Modifications & Photography Tutorials | Life Pixel IR

The world leader in infrared conversions, modifications & DIY IR conversion tutorials. Scratched sensor replacement, UV & Full spectrum conversions.

The world leader in infrared camera conversions

866.610.1710
  • Home
  • → Start Here ←
    • 1 – Introduction
    • 2 – Filter Choices
    • 3 – Focus Calibration
    • 4 – Lens Considerations
    • 5 – Camera Considerations
    • 6 – Start Shopping
  • Galleries
    • Infrared Photography
    • Infrared Time Lapse
    • Infrared Cinematography
    • Infrared Stop Motion
    • Ultraviolet Photography
    • Forensic Photography
  • Education
    • Training Sessions
    • How To Shoot Infrared
    • AR Coated Infrared Filters
    • Lens Hot Spot Database
    • Photoshop Video Tutorials
    • Infrared Issues & Solutions
    • IR Basics in Photoshop
    • Camera Quick Start Guide
    • DIY Conversion Tutorials
    • IR Photography Primer
    • Secondhand Cameras
    • Wall Of Shame
  • Workshops
  • FAQ
  • Blog
    • Tutorials
    • Inspiration
    • Locations
    • Gear
    • News
    • Other
  • Why Choose LifePixel?
    • Submit Your Review
  • Contact
  • Shop

Working with Textures and how to get FREE Textures Now!

Share
Pin
Tweet
Email
Share

We’ve all seen these interesting images done with texture and if you have created them before, you know it’s a fairly simple way to give an image a new look.  The reason I’m posting this today is that I found a way for you to get a free set of texture files.  And in case you think of it, no this isn’t a paid commercial for Lens Lab.  I received an email today on how to get a FREE set of textures and thought I would pass it on to you.  Lens Lab is giving away the Spirit Fine Art Texture pack for FREE. 

This collection includes:

  • 30 High-Resolution Textures
  • 300 DPI
  • 4500px X 4500px
  • JPEG format

I want to post this quickly so you can take advantage of this amazing offer. 

NOW . . .  This Is Important.   I do not know how long this offer will last, so if you want these, go right now  

Here’s the LINK

You’ll also need to Code to make them FREE.  The Code is FREESPIRIT

UPDATE:

This promotion has apparently ended,

however, there are many other sources

for Free Photoshop Textures. 

Just Google “Free Photoshop Textures” 


I’ll wait . . . . . . 

Okay, you’re back?


Now, once you have the textures, let me show you how to use them.

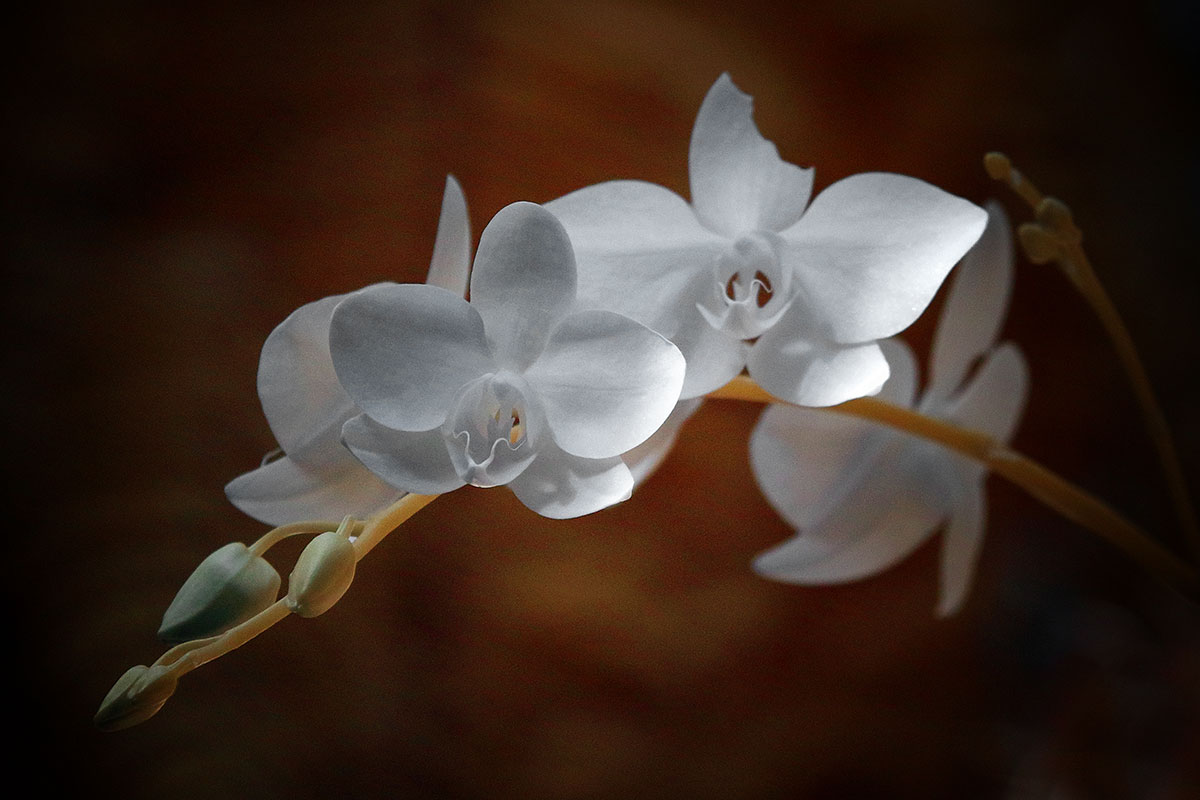
Let’s start with an image.  How about this?

I’ve got the image open in Photoshop, now let’s get a texture file.  I choose 2LO Spirt29

Now let’s put them together.  To do that. I just have to drop the texture file onto the orchid image.

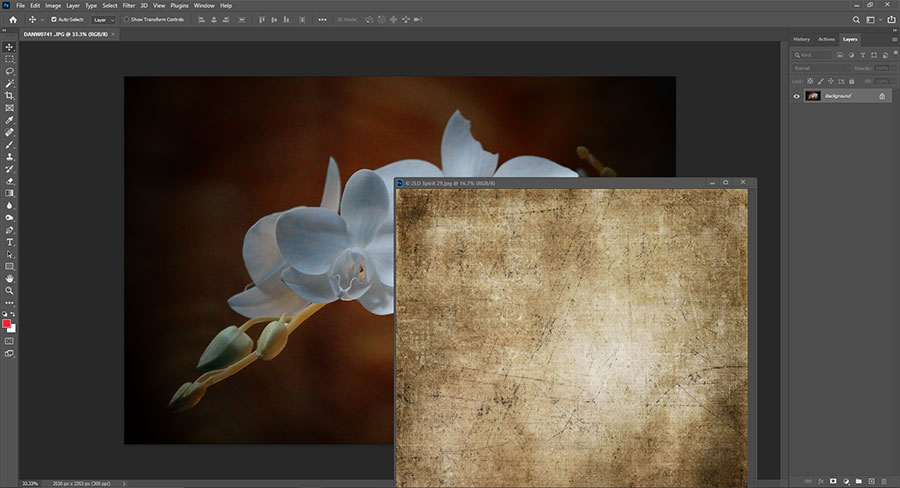
Then move the texture file to fill the image area of the orchid.

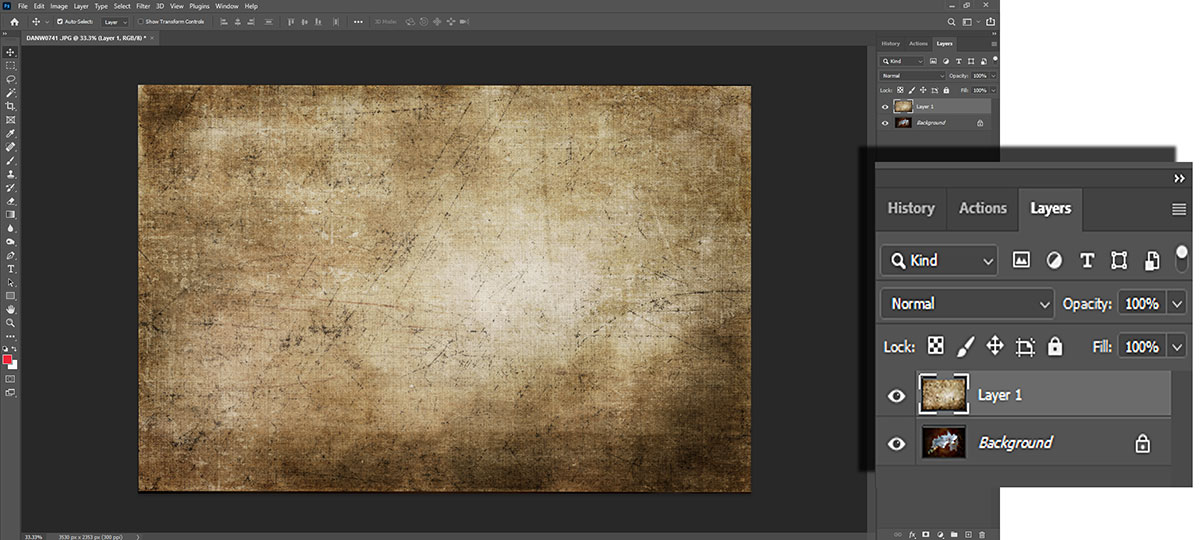
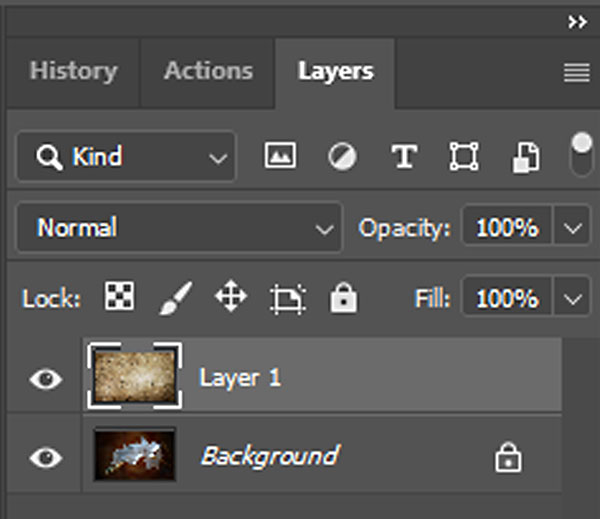
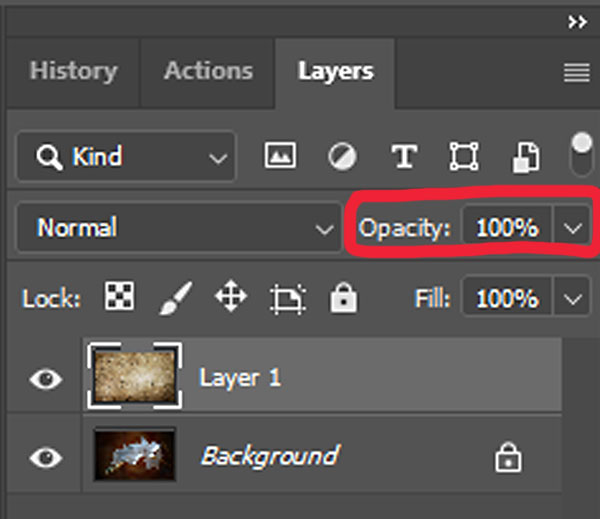
You’ll now see two layers displayed on your Layers Tab, one for the orchid image and one for the Texture file.


Now we are going to blend them.

First, make sure you have the top Layer, the Texture Layer highlighted.  

Now we are going to adjust the blending of the two Layers.  To do that, select the drop-down box marked Normal and all the possible Blending Options appear.

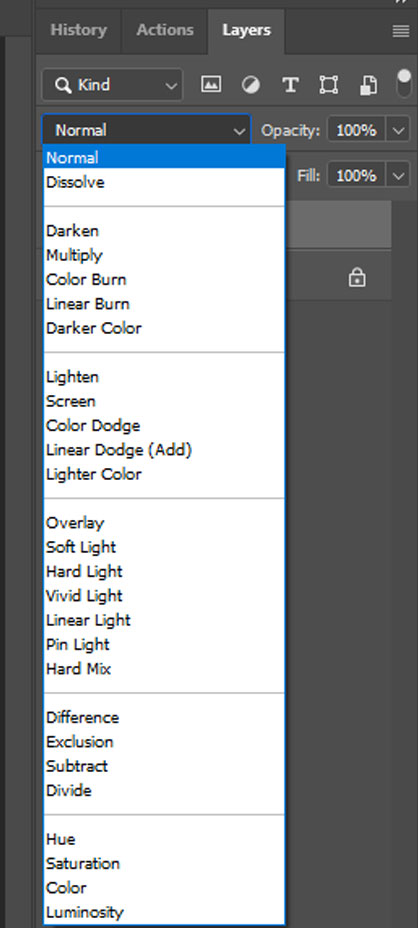
This next part is where you make the artistic decision on which Layer Blending option to use.

In this case, I choose Screen.  Then I adjusted the opacity on the Texture Layer until it looked the way I wanted.

 And here’s what I got.

The Texture and Orchid blended together well.

BUT,   

I want to add one more step. I want to remove some of the Texture from the Orchid petals.  So, I’m going to use the eraser tool.  The hardness is set to zero. 

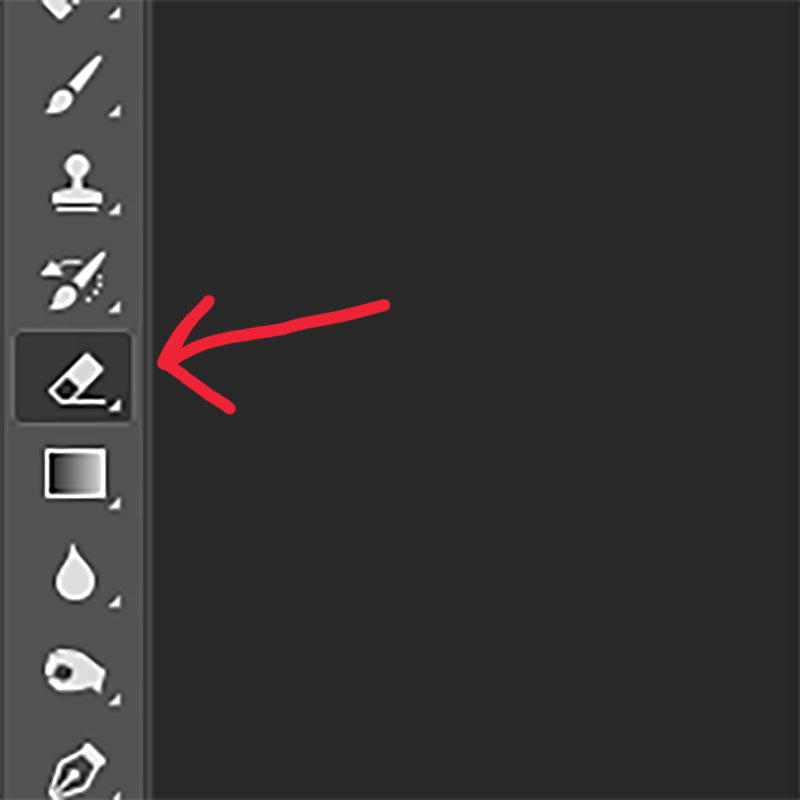
Then I just erase away the parts of the Texture I don’t want.   

And here’s what I ended up with.

One other option would be to use the Texture Layer as a Layer mask and paint the Texture in where ever you want it.

So, what do you think?  If you found this helpful, please leave a comment below.


  • Latest Articles
  • Author Bio
Dan Wampler

Latest articles by Dan Wampler (see all articles)

  • Seal Bay photoshoot - March 7, 2023
  • Major Copyright Infringement site Scroller.com - March 6, 2023
  • Kangaroo Island Wallabies and Roos - March 1, 2023
Dan Wampler

Dan Wampler

Dan Wampler is a digital artist from St Louis, MO. Having been interested in art and photography since childhood, he spent most of adult life working for Kodak and in the portrait photography industry. A student of the works of Ansel Adams, Any Warhol, and David Hamilton, Dan attempted to keep a wide range of artistic style.

As an early adopter of digital imaging, he found it gave him a way to completely incorporate art and photography. Began shooting Digital Infrared in 2004, and had first camera converted in 2006. His work has been seen in numerous gallery shows, is featured in an iTunes app. He produces Infrared and natural color digital art for sale and teaches his post-production techniques online.

Dan is LifePixel's Creative Director,  social media manager, lead blog author, main workshops and training sessions instructor. His images appear in this gallery and throughout the website.

If you have a topic suggestion or request feel free to shoot him an email at danwampler@lifepixel.com

Otherwise all LifePixel customer service inquires should be directed to service@lifepixel.com or by phone at 866-610-1710.

View more of Dan's work on his Website | Facebook


See All Articles by Dan Wampler
Share
Pin
Tweet
Email
Share

Related Posts

  • Infrared Photoshop Tutorials & Videos
    Infrared Photoshop Tutorials & Videos
  • Basic Infrared Photoshop Techniques Tutorial
    Basic Infrared Photoshop Techniques Tutorial
  • Life Pixel Modified Camera Quick Start Guide
    Life Pixel Modified Camera Quick Start Guide
  • The Wall Of Shame
    The Wall Of Shame

Filed Under: Inspiration, News, Tutorials

Comments

  1. Christina says

    February 22, 2021 at 7:02 pm

    Hi! Thanks so much for sharing this quick and simple tutorial. I too received the email for the “FREE” textures, but for some reason wasn’t able to get the link to work. When I connected with Lens Lab via email and explained I’d received a code but hadn’t been able to get it to work, the response was essentially “you’re s.o.l., but you can still buy them”.

    So I found your post kind of funny and am glad to know I’m not the only one who probably missed out on what I thought was a pretty cool deal.

    Good luck and keep up the good work!

    ~ cc

    Reply

Leave a Reply Cancel reply

Your email address will not be published. Required fields are marked *

Blog Topics

  • Tutorials
  • Inspiration
  • Locations
  • Gear
  • News
  • Other/Misc

What our customers say:

Life Pixel has been a life-changer for me. Continue reading
Eric GConnecticut
Read more reviews
I am more than satisfied with the service I received Continue reading
Christopher JCanada
Read more reviews
I am more than pleased with the conversion job that you did Continue reading
LOUIS MWaco, Texas
Read more reviews
I am VERY impressed with his knowledge of your products and his patience in explaining it to a novice like me. Continue reading
Lynn FEssex, Maryland
Read more reviews
Things will only get better from here thanks to all of you. Continue reading
Phillip FRedding, California
Read more reviews
The Lifepixel newsletter reminds me of not having expressed my gratitude for the excellent job you made. Continue reading
Michael GGermany
Read more reviews
Your staff went above and beyond the call of duty to make sure everything was handled in an excellent manner. Continue reading
Paige RPearland, Texas
Read more reviews
It has given my old camera a new life, I will enjoy using it again. Continue reading
William PAustralia
Read more reviews
Excellent service and the camera works just great Continue reading
Hans FairhurstAustralia
Read more reviews
I just got my converted camera back from you guys. THANK YOU!!!! Continue reading
Anne CutlerForest Knolls, CA
Read more reviews
infrared_filter_choices_sidebar
ir_conversions_explained_sidebar
----------- Watch More Videos -----------
infrared_quick_start_guide

Ready to start shooting Infrared?

Convert My Camera

Subscribe To Our Newsletter

Receive updates, tips, cool tutorials, free stuff and special discounts.

Learn the Basics

  • Video
  • Start Here
  • Filter Choices
  • Focus Calibration
  • Lens Considerations
  • Camera Considerations
  • Place Your Conversion Order

Resources

  • Galleries
  • Lens Hot Spot Database
  • IR Tutorials
  • FAQ
  • Infrared Filter Choices
  • Infrared Photography Guide
  • Infrared DIY Tutorials

Company

  • Why Choose Us
  • Get In Contact
  • Job Openings
  • Write For Us
  • Affiliate Program
  • Terms of Use
  • Privacy Policy
  • Home
  • Start Here
  • Galleries
  • Tutorials
  • FAQ
  • Blog
  • Why Choose LifePixel?
  • Shop
  • Contact

Copyright © 2025 Life Pixel Infrared - All rights reserved - LifePixel Infrared Photography IR Conversion, Modification & Scratched Sensor Repair