• Cart
  • Checkout
  • My Account

Infrared Conversions, IR Modifications & Photography Tutorials | Life Pixel IR

The world leader in infrared conversions, modifications & DIY IR conversion tutorials. Scratched sensor replacement, UV & Full spectrum conversions.

The world leader in infrared camera conversions

866.610.1710
  • Home
  • → Start Here ←
    • 1 – Introduction
    • 2 – Filter Choices
    • 3 – Focus Calibration
    • 4 – Lens Considerations
    • 5 – Camera Considerations
    • 6 – Start Shopping
  • Galleries
    • Infrared Photography
    • Infrared Time Lapse
    • Infrared Cinematography
    • Infrared Stop Motion
    • Ultraviolet Photography
    • Forensic Photography
  • Education
    • Training Sessions
    • How To Shoot Infrared
    • AR Coated Infrared Filters
    • Lens Hot Spot Database
    • Photoshop Video Tutorials
    • Infrared Issues & Solutions
    • IR Basics in Photoshop
    • Camera Quick Start Guide
    • DIY Conversion Tutorials
    • IR Photography Primer
    • Secondhand Cameras
    • Wall Of Shame
  • Workshops
  • FAQ
  • Blog
    • Tutorials
    • Inspiration
    • Locations
    • Gear
    • News
    • Other
  • Why Choose LifePixel?
    • Submit Your Review
  • Contact
  • Shop

How to work the Colors in a Hyper Color

Share
Pin
Tweet
Email
Share

With the introduction of the new Hyper Color Infrared, you now have the ability to create stunning IR images that do not require channel swapping.  For many photographers, this means they can easily go straight from the camera with many images.  In the past few months of experimenting with Hyper Color, I’ve also found a few easy ways to fine tune and change up a Hyper Color image.  

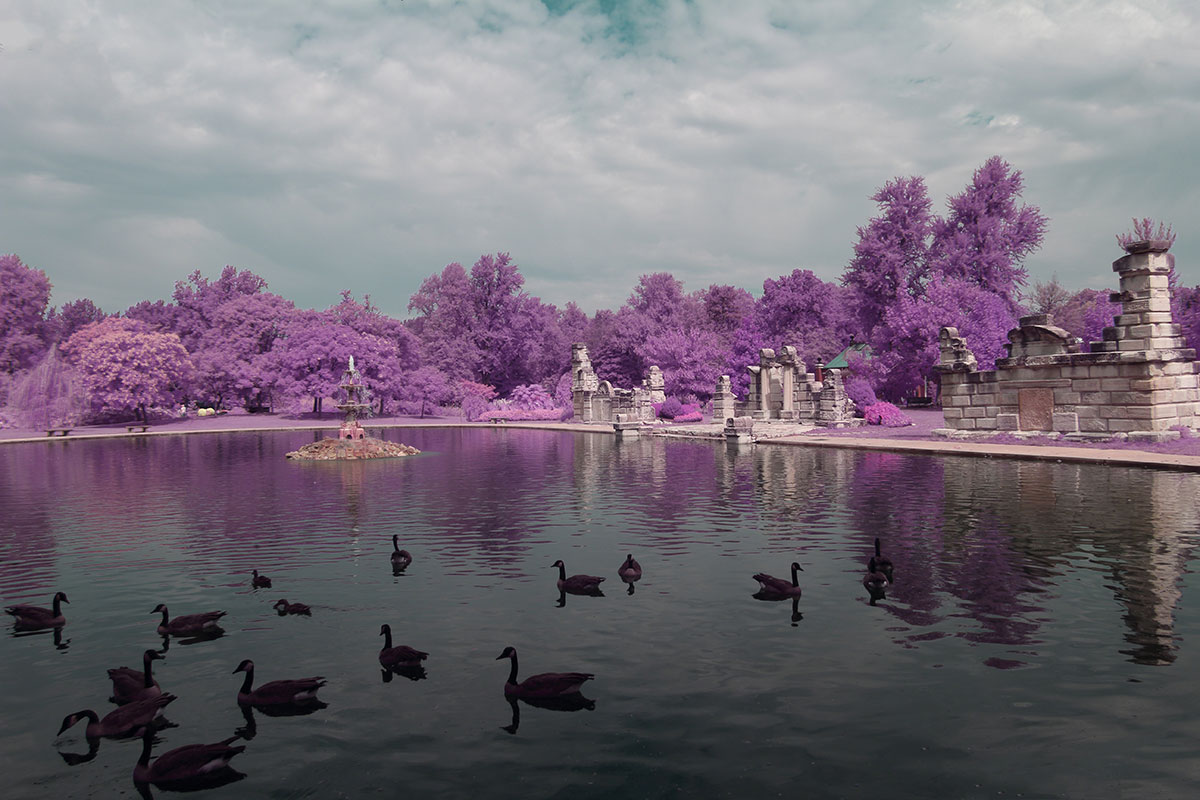
Here’s a Hyper Color landscape, straight out of the camera.  

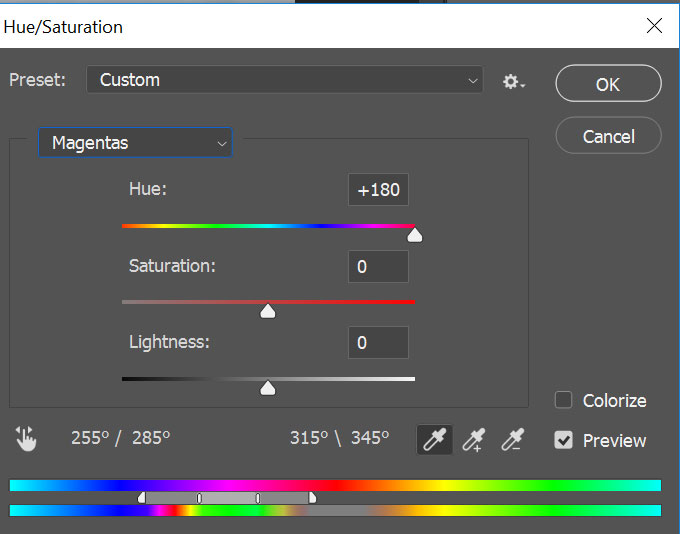
Let’s change the look of foliage.  For that, you just need to go to Hue/Saturation


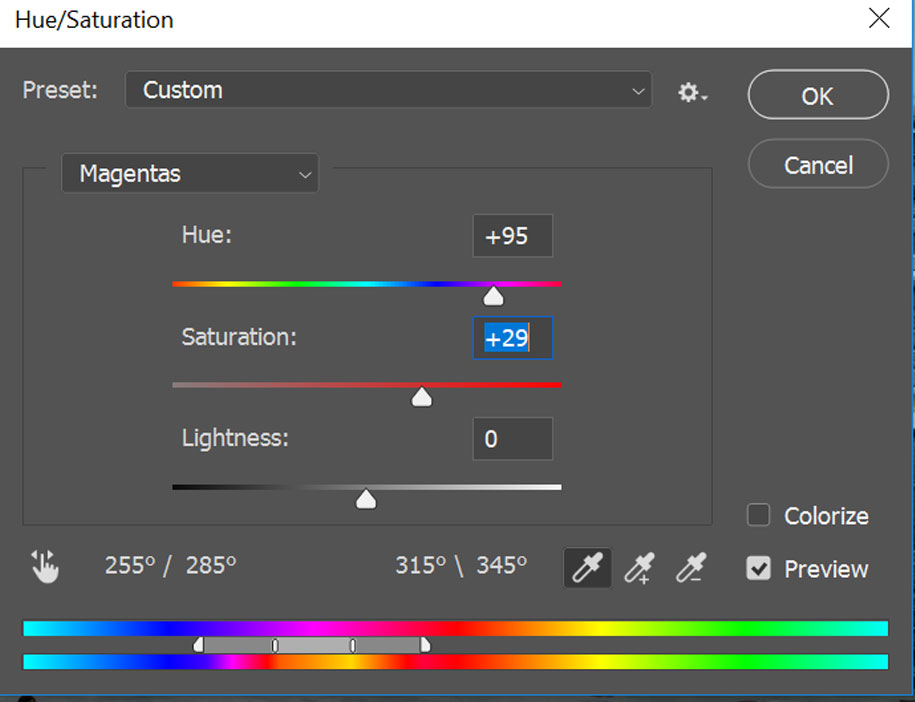
Once under Hue/Saturation, click on the box marked Master and select Magenta.  Then adjust the Hue slider to the right, and then adjust the saturation slider a bit to increase the saturation.  

This is the result.

Want to go a bit further?  Okay, go back to the Hue/Saturation slider.

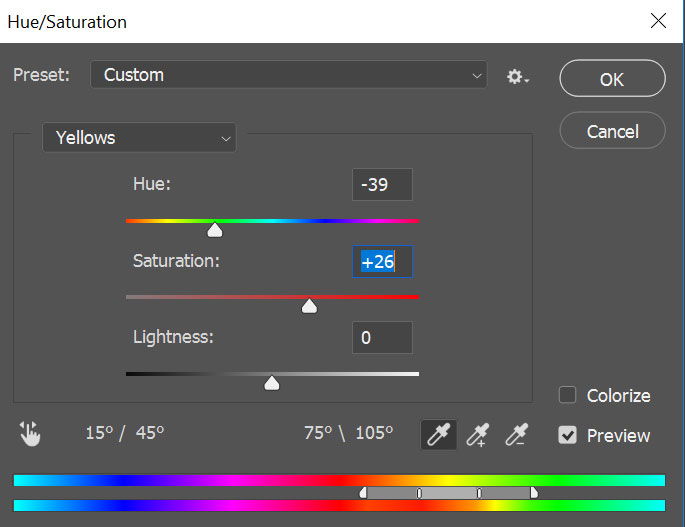
This time take select the Yellow color and move the Hue slider to the left, and increase the saturation a bit more too.  This is the result.

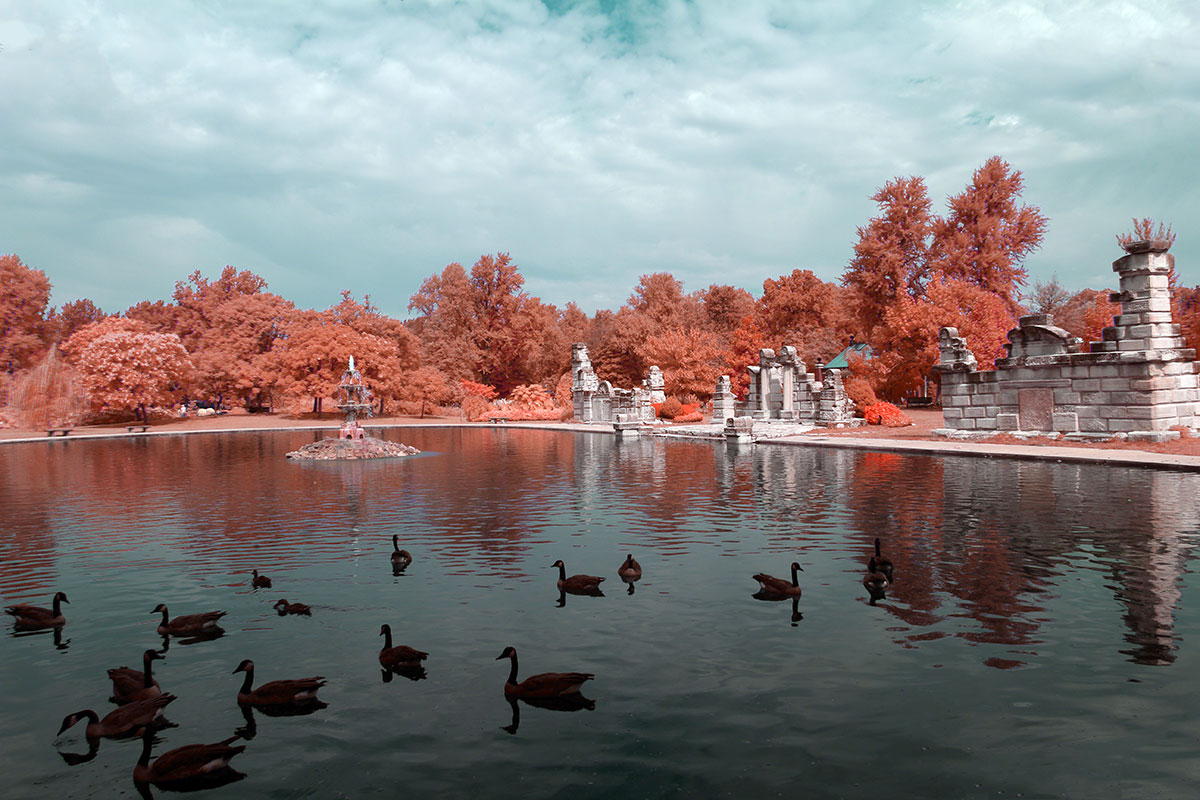
Now we have foliage that is all Red.  

Wanna go in a different direction?  Yeah, back to the Hue/Saturation slider

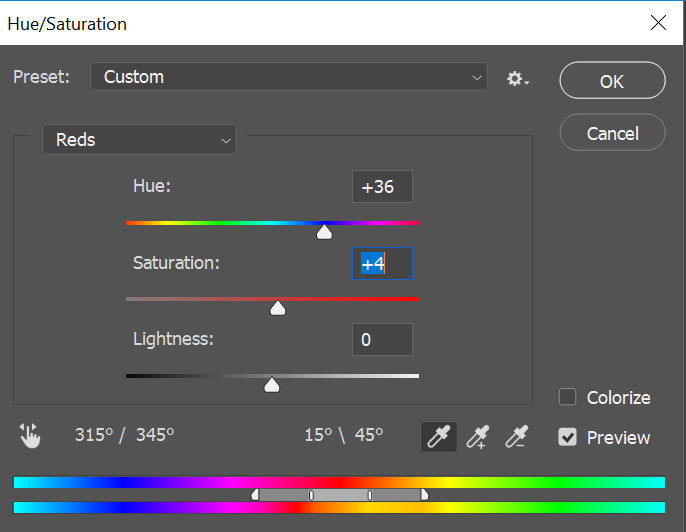
This time take the Red color tone and move the Hue Slider to the left, and add just a little Saturation.

Here’s the result.

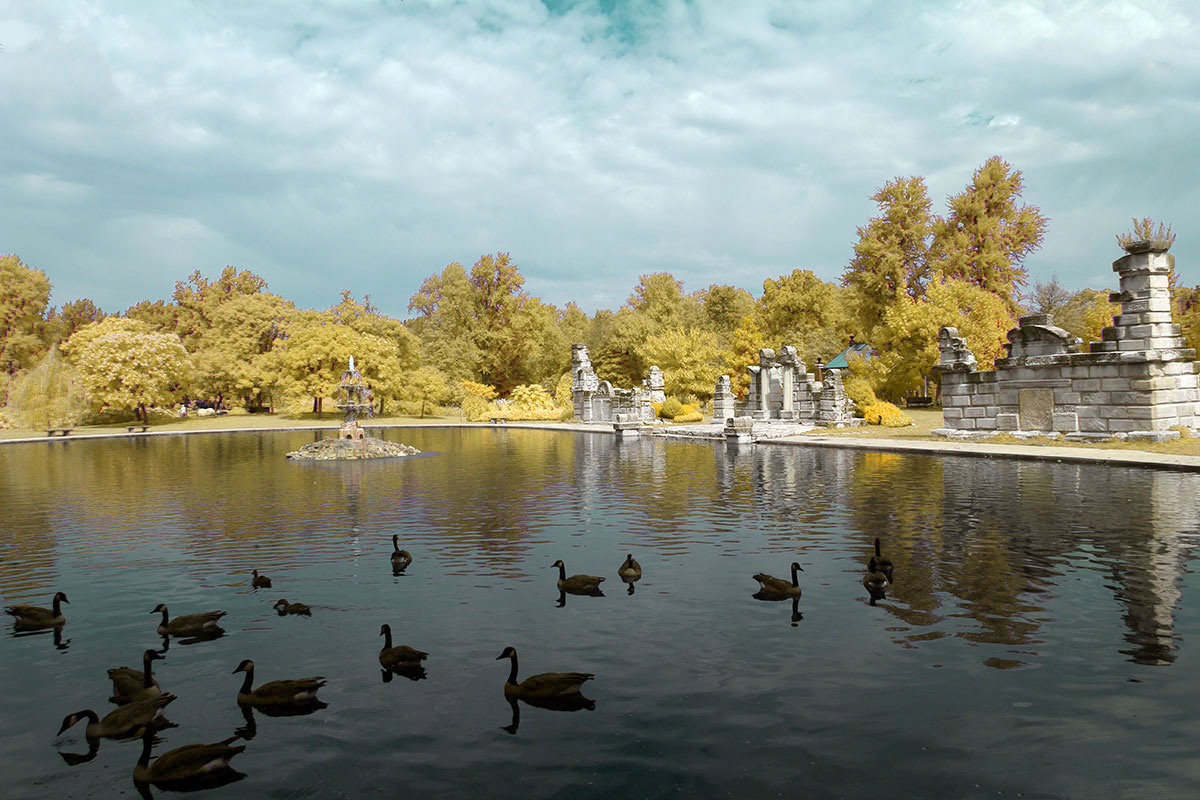
Want to sky to pop more and look Blue.  Go back to your Hue/Saturation slider.  You knew I was going to say that, didn’t you?

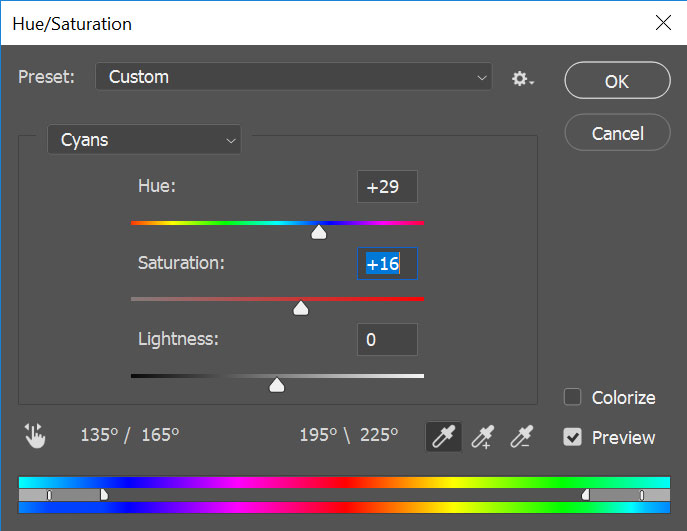
Now select the Cyan color tone and move the slider slowly to the right until you see the sky become Blue, and might as well increase the saturation a bit too. 

Here’s the result.

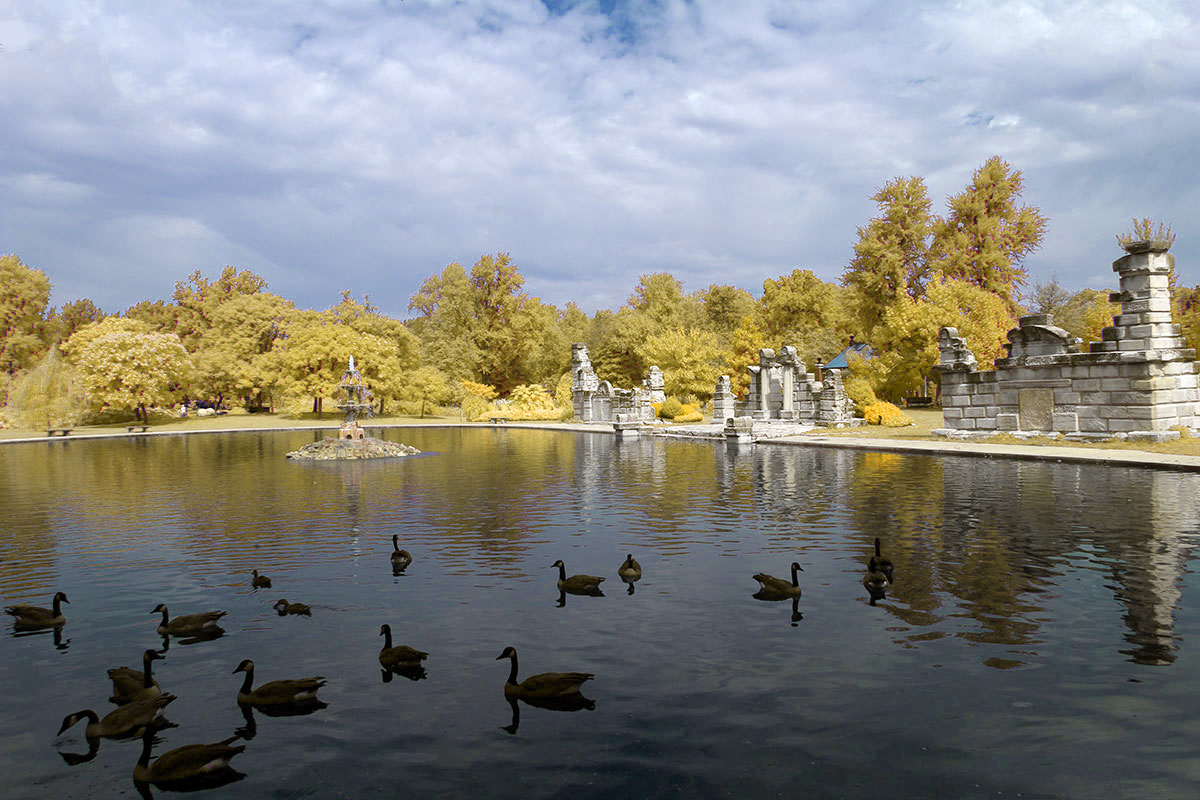
Now you have Yellow foliage and a blue sky.  

Using this method, you can create all sorts of interesting looks. 

Want your foliage to be green?

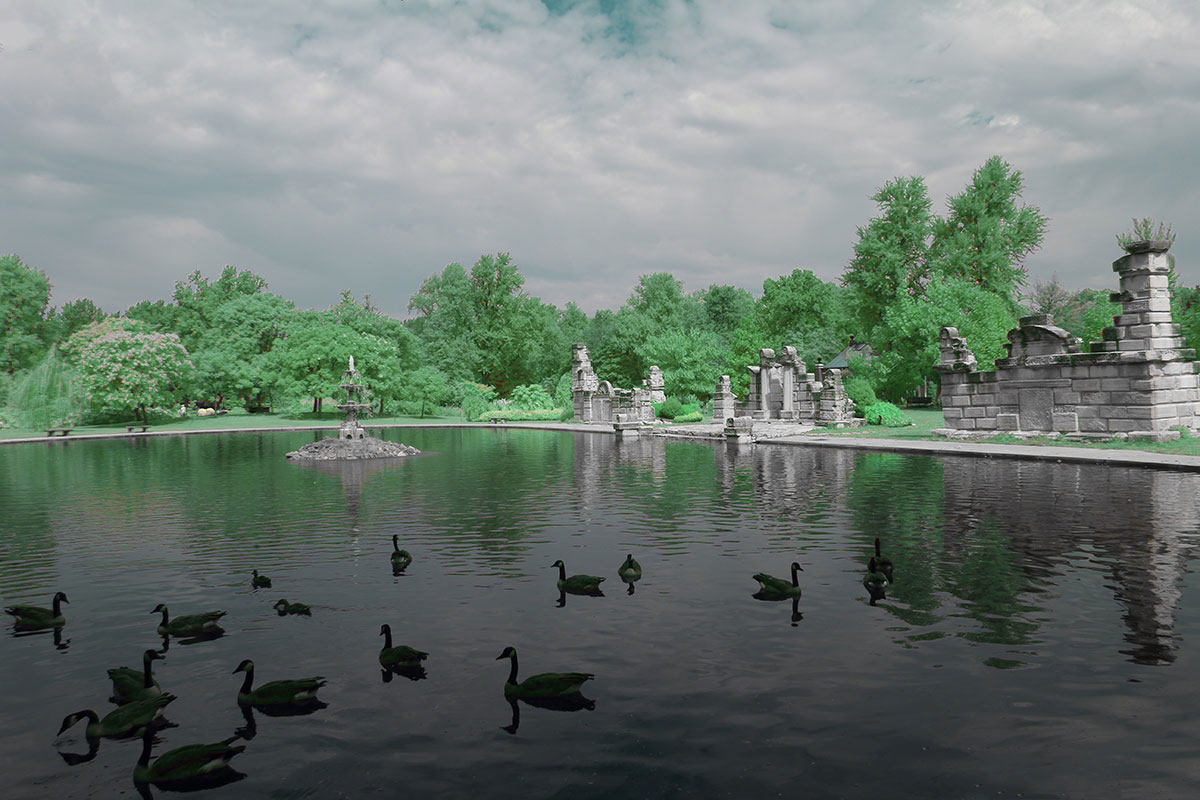
Simpy take your Magenta Hue slider far to the right.  

All of these looks can be created quickly and easily just by using Hue/Saturation.   

Hyper Color Infrared has quite a bit of possibilities  without too much work.

Next time, we’ll look at how easy it is to make a Monochrome IR from a Hyper Color image.   


  • Latest Articles
  • Author Bio
Dan Wampler

Latest articles by Dan Wampler (see all articles)

  • Seal Bay photoshoot - March 7, 2023
  • Major Copyright Infringement site Scroller.com - March 6, 2023
  • Kangaroo Island Wallabies and Roos - March 1, 2023
Dan Wampler

Dan Wampler

Dan Wampler is a digital artist from St Louis, MO. Having been interested in art and photography since childhood, he spent most of adult life working for Kodak and in the portrait photography industry. A student of the works of Ansel Adams, Any Warhol, and David Hamilton, Dan attempted to keep a wide range of artistic style.

As an early adopter of digital imaging, he found it gave him a way to completely incorporate art and photography. Began shooting Digital Infrared in 2004, and had first camera converted in 2006. His work has been seen in numerous gallery shows, is featured in an iTunes app. He produces Infrared and natural color digital art for sale and teaches his post-production techniques online.

Dan is LifePixel's Creative Director,  social media manager, lead blog author, main workshops and training sessions instructor. His images appear in this gallery and throughout the website.

If you have a topic suggestion or request feel free to shoot him an email at danwampler@lifepixel.com

Otherwise all LifePixel customer service inquires should be directed to service@lifepixel.com or by phone at 866-610-1710.

View more of Dan's work on his Website | Facebook


See All Articles by Dan Wampler
Share
Pin
Tweet
Email
Share

Related Posts

  • Infrared Photoshop Tutorials & Videos
    Infrared Photoshop Tutorials & Videos
  • Basic Infrared Photoshop Techniques Tutorial
    Basic Infrared Photoshop Techniques Tutorial
  • Life Pixel Modified Camera Quick Start Guide
    Life Pixel Modified Camera Quick Start Guide
  • The Wall Of Shame
    The Wall Of Shame

Filed Under: Tutorials

Comments

  1. J. C. Thrush says

    August 4, 2018 at 1:03 pm

    hi, I printed this out and followed it exactly and can’t get these results with my full spectrum camera and the hypercolor filter at all. I have a sony a7s and when I try to set a new white balance with a grey card it always gives me an error message. I do have the lavender trees to start with, but the other color settings don’t work. Is there a particular temperature setting for the white balance I can try so I get the exact colors you have, or do you know how to get around the a7s error messages? I read they commonly occur when setting the white balance but I didn’t see a solution for it. Thanks!

    Reply
    • Dan Wampler says

      August 5, 2018 at 10:50 am

      Hi J.C.,
      One of the stranges things about the SONY cameras is that they give an error message even though they set the in camera white balance. To get good results in post production, you need to use the RAW editor made for your camera. That is the only way to get access to all of your RAW file. With SONY, that software is called Capture One express for SONY. Just Google it and there is a free download. Also, keep in mind when you are adjusting the Kelvin settings, that the Kelvin scale only applies to the natural color spectrum, and not to the Infrared spectrum. That is why using Camera RAW or worse yet, DNG profile will never come close to the results you’ll get from using the RAW editor made for your camera.

      Reply
  2. Jeff larrick says

    August 1, 2018 at 1:20 pm

    Hi- great tutorial. Can this filter mimic Kodak Aerochrome?

    Thx

    Reply
    • Dan Wampler says

      August 1, 2018 at 1:36 pm

      Hi Jeff,
      Yes, if you work with the Magenta tones in the foliage, and Cyan tones in the sky in Photoshop, you can emulate the look of Aerechrome 1443

      Reply
  3. renakatinas says

    March 21, 2018 at 12:13 pm

    I sent my old Nikon D40 in last week for the Hyper Colir conversion and a Super Color screw on filter, so it will be a while before I get to try everything out. (I also have a Hoya 72 and Tiffen 89 A or B somewhere in my camera stuff which I haven’t used in years.) I was wondering if you had tried using any infrared screw on filters with your hyper color adjusted camera and what your results were like if you had.

    Also, will there be any updates to the tutorial or quick start sections for hyper color?

    Reply
    • Dan Wampler says

      March 21, 2018 at 12:32 pm

      I have shot my Hyper Color converted camera with other screw on filters, and they works just fine.

      Reply
  4. Keith Swalley says

    March 9, 2018 at 8:36 pm

    Thanks, for some reason, I did not set a custom WB.

    Reply
  5. Keith Swalley says

    March 9, 2018 at 6:29 pm

    Is the file a RAW or jpg? I just did a few test shots today and used Adobe Profile Editor in LR to get away from the red. I used auto white balance.

    Reply
    • Dan Wampler says

      March 9, 2018 at 6:55 pm

      The test shots I made were shot in RAW. I set a Custom White Balance in the camera using foliage for a WB reference image. I then processed the RAW files using the RAW editor made for my camera, in this case Digital Photo Professional.

      Reply

Leave a Reply Cancel reply

Your email address will not be published. Required fields are marked *

Blog Topics

  • Tutorials
  • Inspiration
  • Locations
  • Gear
  • News
  • Other/Misc

What our customers say:

Life Pixel has been a life-changer for me. Continue reading
Eric GConnecticut
Read more reviews
I am more than satisfied with the service I received Continue reading
Christopher JCanada
Read more reviews
I am more than pleased with the conversion job that you did Continue reading
LOUIS MWaco, Texas
Read more reviews
I am VERY impressed with his knowledge of your products and his patience in explaining it to a novice like me. Continue reading
Lynn FEssex, Maryland
Read more reviews
Things will only get better from here thanks to all of you. Continue reading
Phillip FRedding, California
Read more reviews
The Lifepixel newsletter reminds me of not having expressed my gratitude for the excellent job you made. Continue reading
Michael GGermany
Read more reviews
Your staff went above and beyond the call of duty to make sure everything was handled in an excellent manner. Continue reading
Paige RPearland, Texas
Read more reviews
It has given my old camera a new life, I will enjoy using it again. Continue reading
William PAustralia
Read more reviews
Excellent service and the camera works just great Continue reading
Hans FairhurstAustralia
Read more reviews
I just got my converted camera back from you guys. THANK YOU!!!! Continue reading
Anne CutlerForest Knolls, CA
Read more reviews
infrared_filter_choices_sidebar
ir_conversions_explained_sidebar
----------- Watch More Videos -----------
infrared_quick_start_guide

Ready to start shooting Infrared?

Convert My Camera

Subscribe To Our Newsletter

Receive updates, tips, cool tutorials, free stuff and special discounts.

Learn the Basics

  • Video
  • Start Here
  • Filter Choices
  • Focus Calibration
  • Lens Considerations
  • Camera Considerations
  • Place Your Conversion Order

Resources

  • Galleries
  • Lens Hot Spot Database
  • IR Tutorials
  • FAQ
  • Infrared Filter Choices
  • Infrared Photography Guide
  • Infrared DIY Tutorials

Company

  • Why Choose Us
  • Get In Contact
  • Job Openings
  • Write For Us
  • Affiliate Program
  • Terms of Use
  • Privacy Policy
  • Home
  • Start Here
  • Galleries
  • Tutorials
  • FAQ
  • Blog
  • Why Choose LifePixel?
  • Shop
  • Contact

Copyright © 2025 Life Pixel Infrared - All rights reserved - LifePixel Infrared Photography IR Conversion, Modification & Scratched Sensor Repair