Even if you have just started photography, the chances are that you are already using a lens hood. You probably already know that it is a small circular black piece of plastic that screws to the end of your camera lens. But what is it for and do you really need to keep it attached to your lens? The main purpose of a lens hood is to shield your image from unwanted light rays hitting the lens glass. In this short article, you’ll understand why you’ll want to avoid this happening and also some other benefits of using a lens hood.
What is lens flare?
You may have noticed when you have taken photos in bright sunshine or even with street lights in the scene, that sometimes you get polygon or hexigon-shaped marks or even streaks of white lines in your image. These are lens flares otherwise known as “artefacts” and occur when light that isn’t forming part of the image enters the lens from an angle and hits your digital sensor. Not only does it not look great, but it can also lower the overall contrast of an image. They tend to start from where the light source (i.e. the sun) is but can appear anywhere in the image and even when the light source is out of the angle of view.

How does it happen?
There are tons of detailed articles online that talk about the science behind lens flares. But in simple terms, it occurs when light passes through the lens glass and bounces around the internal components of the lens before hitting the sensor. But even though it happens inside the lens, it originates from a light source, to begin with. This could be the sun or even artificial lighting. Generally, if the light source is outside the angle of view than it wouldn’t cause lens flare, but it can still happen sometimes.

So, the lens hood stops this happening?
Yes and no. A good lens hood can eliminate much of the unwanted light rays entering your lens. But it won’t always stop it happening as no lens hood will extend far enough to block out all flares. There may also be instances where the light is reflected on a surface. So even if you use a lens hood you may still find that you get lens flares. But using a lens hood will certainly help minimise flares in your images.

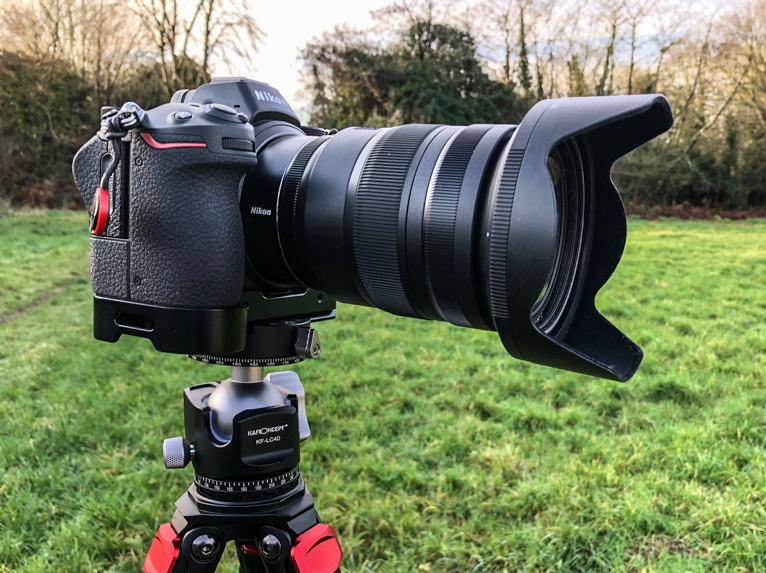
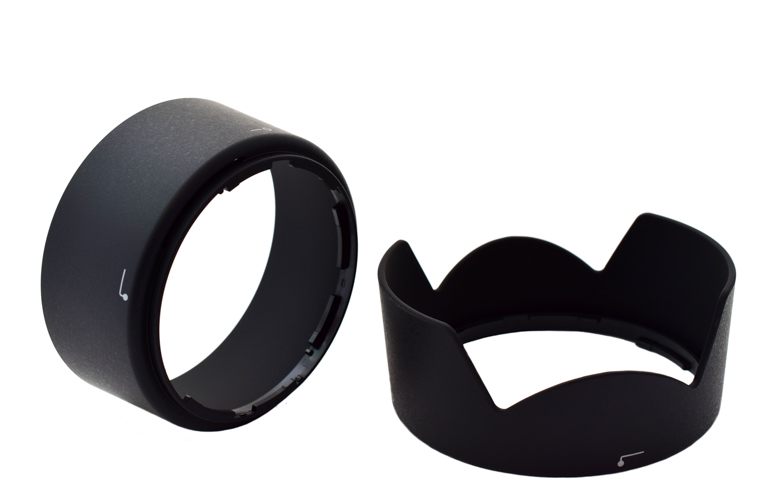
Round or Petal lens hoods
These are the two main types of lens hoods that are available. The reason for the unusual shape of the petal lens hoods is to allow for maximum width and height in an image. In other words, so can capture the corners of your photo without getting the lens hood in the shot. But one thing to be aware of is that for zoom lenses the hood is tailored for its widest focal length. Because if it wasn’t, every time you zoomed out you would see the hood in your shot. So this means that when you zoom in with a zoom lens, you may find that your hood doesn’t work as effectively. Round hoods are the same but without this extended area which makes them not as effective.
What are the other benefits of lens hoods?
Another benefit of using a lens hood is that it helps to protect your lens glass. Even the most careful of photographers will knock their camera around sometimes. Without a lens hood every time you catch your camera on a wall, door handle on even other people, you could end up with dirt or grease on the glass. Or worst still actually scratch or break the glass. It’s much cheaper and easier to replace a lens hood than a damaged lens.
Another useful benefit of using a lens hood is when you are shooting in the rain or near water such as a waterfall. Whilst the lens hood may not stop all water getting onto the glass, it can certainly help reduce it meaning you won’t end up having to constantly wipe your lens dry.
Is there any time I shouldn’t use a lens hood?
You will find that most photographers will have the lens hood on, 95% of the time. But there are times when you may wish to take the lens hood off. For example, if you want to capture a photo with lens flare in it as part of the composition. When lens flare is used correctly it can create a wonderful effect in photos.
Another time that you won’t be able to use a lens hood is if you are using square filters. You would need to detach your lens hood to be able to screw in the filter holder. There may also be times where you need to poke your camera through a narrow gap (i.e. a fence). Obviously with a lens hood on that wouldn’t be possible. But get into a habit of re-attaching your lens hood straight away after you have taken it off.

Hopefully, you now have a better idea of what lens hoods are and what their purpose is. These days when you buy a lens, the manufacturer will also provide you with a lens hood. That will be good enough to help reduce those unwanted flares in your images.
Photo credits: Kav Dadfar – All rights reserved. No usage without permission. Dreamstime.
Latest articles by Kav Dadfar (see all articles)
- How To Photograph Street Performers - April 26, 2022
- Profiled Photographers – Ben McKechnie - August 24, 2021
- Profiled Photographers – Jim Maher - August 24, 2021
is the founding editor of JRNY Travel Magazine as well as a professional travel photographer and writer based in the UK. His images have been used by clients such as Condé Nast, National Geographic, Lonely Planet, Rough Guides and many others. Kav is also the co-founder of That Wild Idea, a company specializing in photography workshops and tours both in the UK and around the world.
See All Articles by Kav Dadfar


LENS HOODS
My first camera was in 1946 at the age of 12.
Until recently, lens hoods actual shaded the front element very well.
With the advent of the modern zoom lens (with many more pieces of glass), I find the tulip hood to be totally inadequate – almost a joke.
My new bridge camera lens is 25mm to 400mm.
I solved the hood dilemma by modifying and marrying the original tulip hood (lots of plastic cutting and polishing and superglue) to a large rectangular video hood. Even at 25mm, there is no shading of the corners. This also provides more physical protection of the front element. I have pictures available.
By the way, I have learned much from your great, informative website. I will soon be sending my Nikon D3100 for conversion. Started with infrared film in the highlands of Scotland in the mid 60’s.