There’s just something magical about seeing rainbows. It’s even more magical being able to capture these rainbows perfectly in photos. The problem is that photographing rainbows can be a challenging thing to accomplish, especially if you are a novice photographer. This article will help you get those stellar rainbow shots that you want to capture.
Finding rainbows
The most difficult part of photographing rainbows is actually being in the right place when they appear. Unlike any other weather conditions, it is incredibly difficult to plan a shoot to capture rainbows. You have to either get lucky when you are at a location or keep going out in the right conditions in the hope of one appearing.
Natural rainbows typically only occur if moisture in the air and the sun or moon are at a 42-degree angle to the viewer. This means that you will likely be taking these images in cloudy, rainy or potentially in thunderstorm conditions. So if you are specifically looking to get a rainbow photograph, these are the weather conditions that you need to be looking for.
When the conditions are right, you can find a spot and hope that the sun shines through there and creates a rainbow. Or, you could drive around and see if you can find one. Remember that you will be looking in the opposite direction of the sun for rainbows.
Another essential thing to remember is that you will likely be taking photographs in wet weather conditions. This can be hazardous to your photography equipment, especially if they are not adequately weather-sealed. You can use protective options such as covers, which will help protect your gear while you take photos in wet conditions.
Type of lens to use
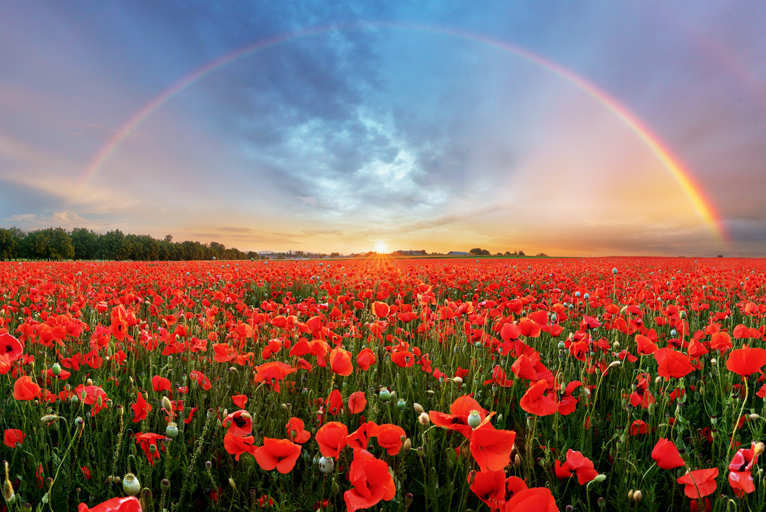
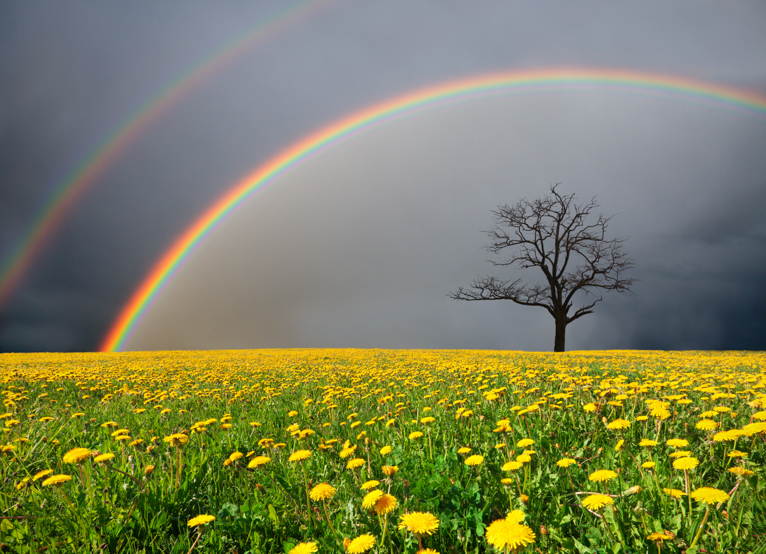
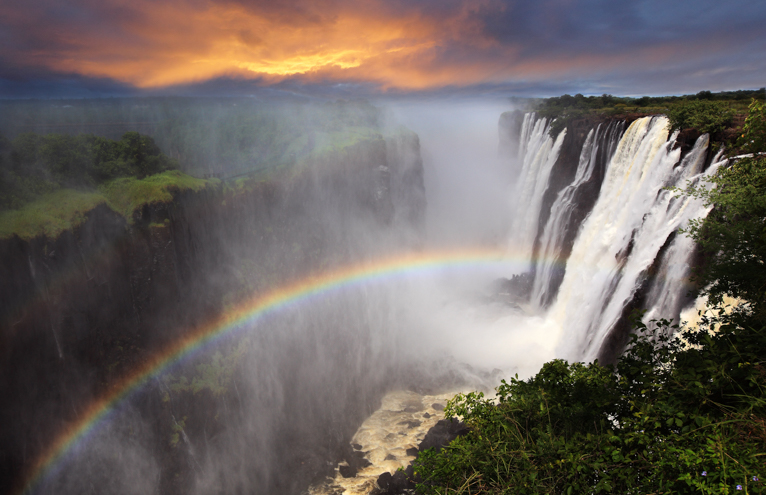
Full rainbows or multiple rainbow situations can span a great distance, which is why you’ll need a wide-angle lens if you want to capture the entire rainbow (even then you may not be able to). If you use a 24mm lens with a full-frame camera, this may get the entire rainbow, but not a double or other multiple rainbow scenes. A 16-35mm lens will give a wider view but you can also shoot multiple shots and stitch them together as a panoramic. You shouldn’t need a telephoto lens unless you want to capture a specific part of the rainbow.
Once you select the lens you want to use, it’s vital to get your ideal aperture. Most lenses work best at midrange f/stops of between f/5.6 and f/11. Because generally, your rainbow shots will be landscapes you’ll probably need to be more around the f/8 to f/11 aperture. You could use a smaller aperture, such as an f/22, but this could impact the image’s sharpness. Personally, I don’t ever go smaller than f/16 for my shots.
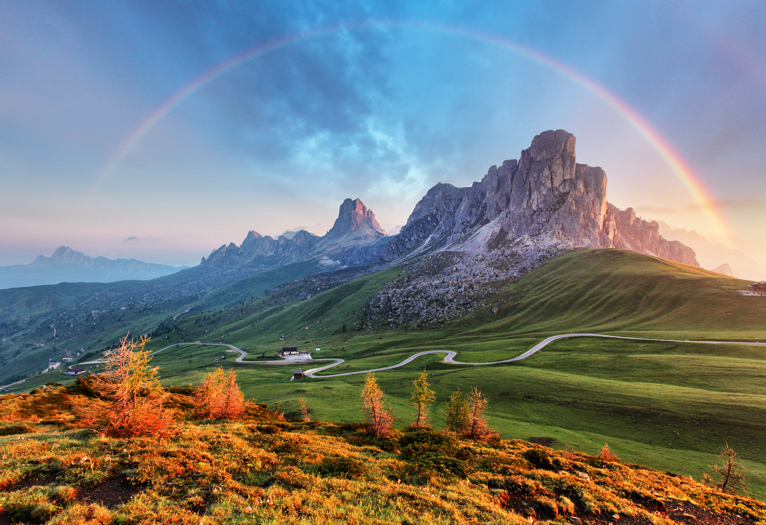
Backgrounds
You obviously can’t change the background for these photos, but you can optimize it. Find a place where the backdrop makes the rainbow stand out more in the images. For example, dark and stormy clouds can really help the colours of a rainbow pop out. The background should be as uncluttered as possible and even some darker elements to make the rainbow stand out more. You may have to move around slightly and try several different angles until you can get the best shot possible.
Foregrounds
The foreground is another important consideration in your photographs. Your foreground can help by adding more visual interest to the photos while highlighting the stunning rainbow. It’s essential to make sure there isn’t anything in the foreground that will distract from the rainbow, as the foreground should be a subtle way to add more interest to the photograph. You can also use elements in the foreground as leading lines to help the viewer navigate to the rainbow in the background.
Work fast
One of the toughest parts of photographing rainbows is that you won’t have ample time to compose and take your shot. In fact, on occasions, I have found them appearing and disappearing in a matter a couple of minutes. So you have to work fast and be ready to act quickly. With experience and practice, you will become more efficient in seeing the composition and taking shots quickly. But if you are a beginner, my biggest advice for photographing rainbows is to just go with your gut feeling and shoot away. There is no point spending time composing the perfect shot only for the rainbow to disappear.
Polarizing filter
A polarizing filter is an excellent tool to use for your rainbow photographs. It helps bring out levels of contrast, colour saturation, and limit reflections. All of these will help make the rainbow stand out more. Just be careful because if you make a mistake using this filter, you may actually make the rainbow disappear as it will block the reflections that light makes. Keep checking the sky visually in the viewfinder and you image on the LCD screen to see how much you need to adjust for your image.
Using a tripod
Whenever you take landscaping shots, it’s essential that you keep the camera as still as you possibly can. Because often you will be working with a smaller aperture and in low light. So a tripod is the only way to ensure you keep your ISO low and capture the best image possible. Rainbows are the same as often the light will be lower because of clouds covering the sky. Using a polarizing filter will also darken the shot further. So if you have a tripod and more importantly have the time to set it up, then do so!
With some practice, you can capture majestic images of rainbows. It won’t always go as planned and you’ll have to be patient to wait for the right conditions. But with a bit of planning and some luck, you may just end up with stunning one of a kind shots that you’ll be proud of.
Photo credits: Kav Dadfar – All rights reserved. No usage without permission. Dreamstime.
Latest articles by Kav Dadfar (see all articles)
- How To Photograph Street Performers - April 26, 2022
- Profiled Photographers – Ben McKechnie - August 24, 2021
- Profiled Photographers – Jim Maher - August 24, 2021
is the founding editor of JRNY Travel Magazine as well as a professional travel photographer and writer based in the UK. His images have been used by clients such as Condé Nast, National Geographic, Lonely Planet, Rough Guides and many others. Kav is also the co-founder of That Wild Idea, a company specializing in photography workshops and tours both in the UK and around the world.
See All Articles by Kav Dadfar


Leave a Reply