In the Caribbean Sea just south of Cuba is the island of Hispaniola. The island contains the nation of Haiti and the Dominican Republic. While I can’t suggest visiting Haiti, the Dominican Republic is a tropical paradise.
For a photographer, it’s a dream come true. For an infrared photographer even more so.
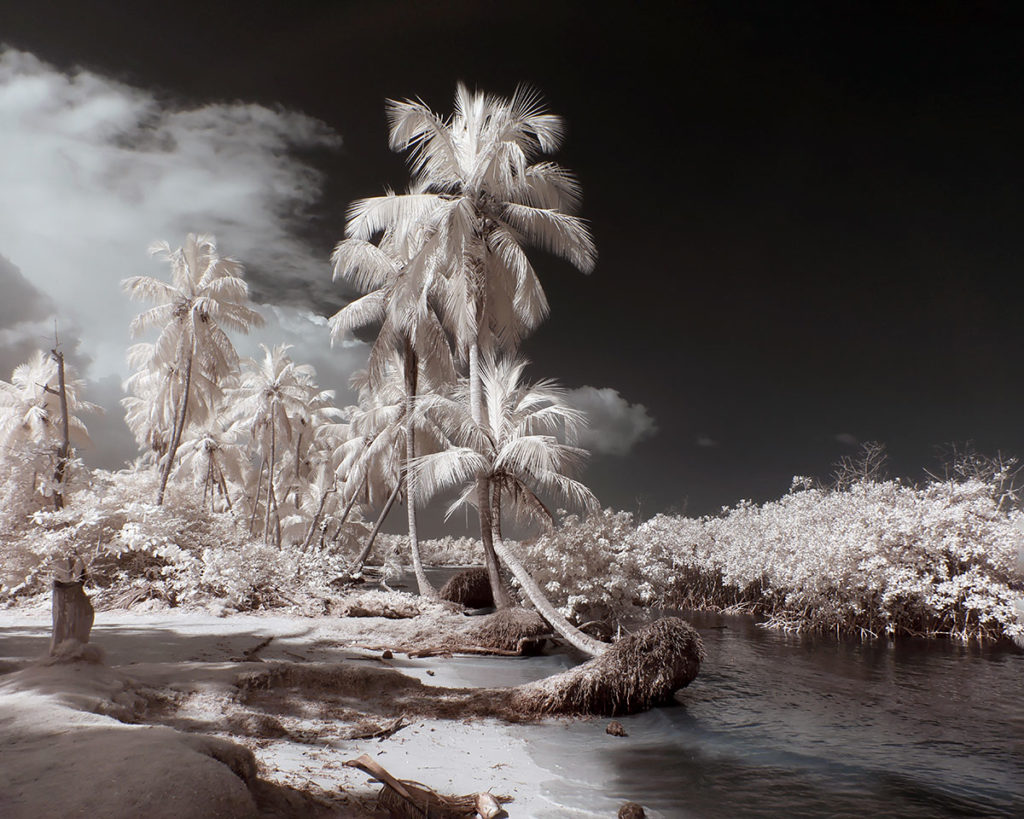
Super Color Infrared at 590nm, Canon R5, RF 16mm lens
I’ve made several trips to “The D.R.” and in case you’d like to consider a visit and photo shoot, I’d like to pass on a few suggestions.
#1. Do some research and plan your trip to meet your expectations.
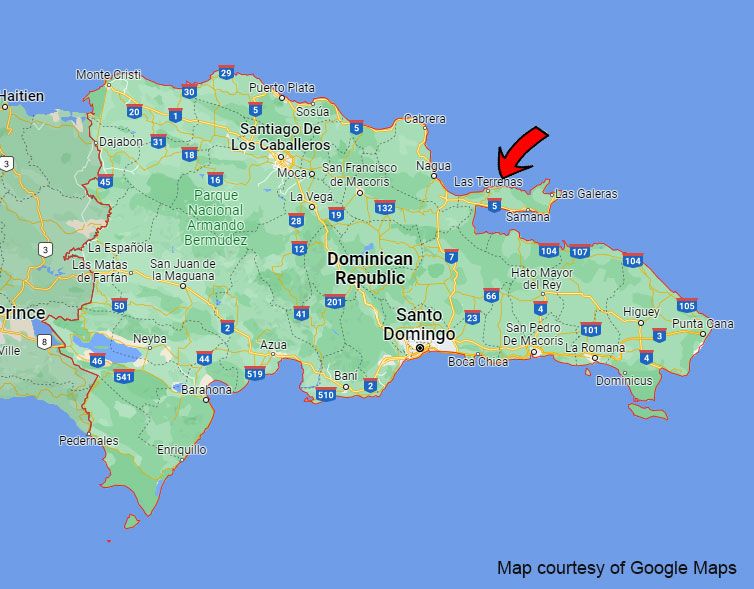
The DR is larger than you probably think. At roughly 18,704 square miles, it’s the equivalent of the US states of Vermont and New Hampshire combined. To drive around the island would take you about 35 hours, non-stop. Most tourists tend to go to Santo Domingo, or Punta Cana. These are both resort areas, which is great if you want breakfast buffets and unlimited drink options, but not so great if you want great shots of empty beaches. It is for that reason that I fly in, get a car and get far away from the resorts. In my case, I developed an affinity for Las Terrenas. Located 225 km from Santo Domingo, it is an easy drive to get there. Once there, you will find everything from small, out-of-way places to several large resort hotels.
#2 Don’t overthink your shooting, don’t overpack when out for the day.
There are a few obvious things; it’s a tropical climate, have plenty of bottled water, wear a good sunscreen.
When I did my first day-shoot in the DR I wore myself out because I had so much to carry. I had a large backpack full of lenses and a full-size tripod.
That was a mistake.
Since the majority of what you’ll be shooting is landscape-type images, I use an ultra-wide lens the most. In my case, as a Canon shooter, I went with a full-spectrum converted Canon R5 with the Canon RF 16mm f2.8 lens or the IRIX EF 15mm f 2.4 lens with the EF-RF converter ring. Both of these lenses work well for Infrared, posing no problems with hotspots. The IRIX lens is a personal favorite of mine, but the RF16mm is very small and easy to travel with. About 95% of what I shot was done with an ultra-wide lens, the rest was with a 24-105mm. Because I am shooting Infrared, I prefer the EF 24-105mm f4 L as it has no hotspots. The RF 24-105mm f4 L can be prone to hotspot issues. If you want to be certain you don’t miss any shot, consider a lightweight telephoto. In my case that was the Canon RF 100-400 f/5.6-8 is usm lens. This lens is very light, moderately priced, and has no hotspot issues.
Now I’ve gone from a big bulky backpack to the ThinkTank Photo Retrospective 15 backpack that is small and manageable and doesn’t look like a camera bag.
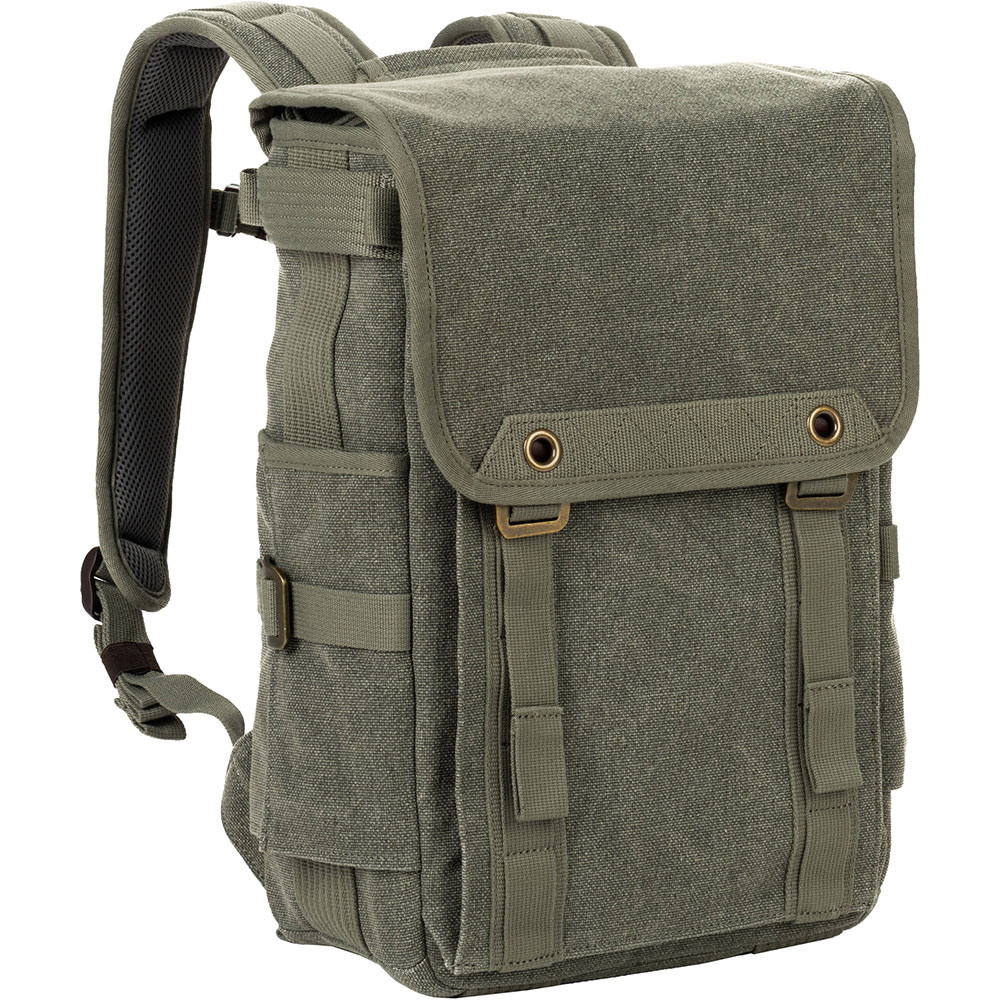
Because I trimmed down my gear to just what I really needed, I had space for other things like a poncho.
Which is a good idea. Like most tropical locales it’s not unusual for there to be s sudden, quick burst of rain.
I also brought extra batteries and memory cards. Nothing is worse than being in the perfect spot and then running out of battery or storage. This brings us to the next point.
#3 Don’t underthink it . . . . . Shoot everything!
I’m sure you’ve heard the saying the best time to shoot a vertical shot is right after a horizontal one.
Do it. You won’t regret it. There is no such thing as overshooting with digital photography. End up with images you don’t need? There’s a delete key for that.
Here we have a Standard IR image at 720nm and a Hyper Color image at 470nm
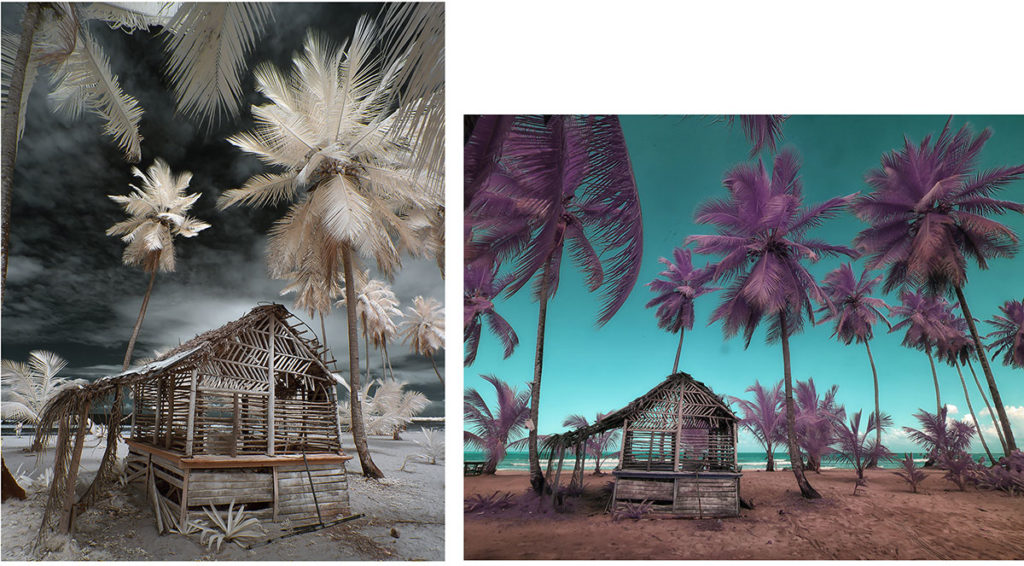
#4 If possible, try different types of Infrared
Along the same line as the previous one, try the same scene in Color and Infrared. Or, if you have the capability, try different wavelengths of IR. You will see a difference in the images. If you have a full-spectrum camera you just change the filters on the lens. If you have a dedicated conversion you can go up the spectrum. For example, if you are shooting Super Color Infrared at 590nm you can add a 665nm, or 720nm filter to capture IR images.
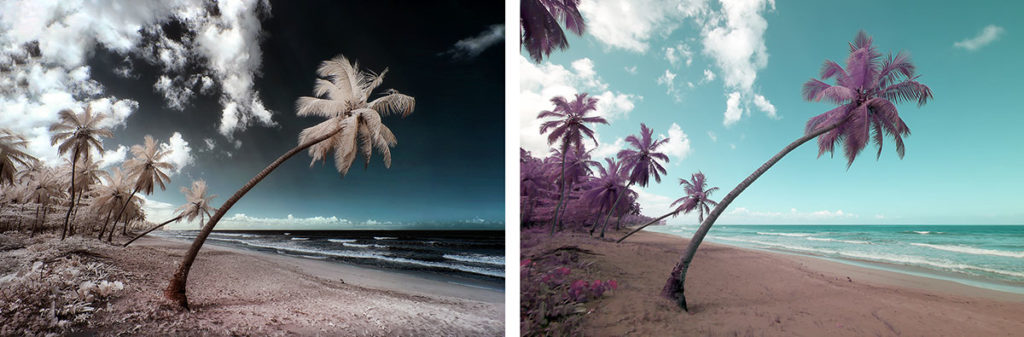
Here is the same scene in Super Color IR at 590nm, and Hyper Color IR at 470nm
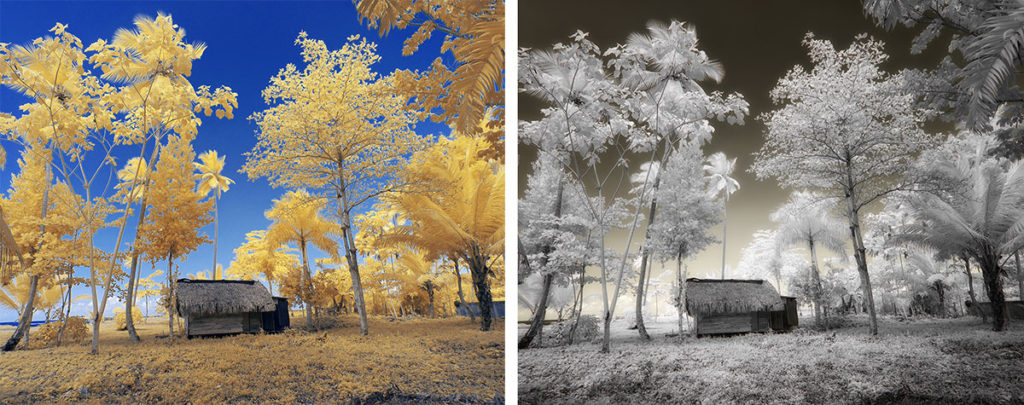
Super Color IR at 590nm, and Standard IR at 720nm
The same scene can have a different feel depending on the nanometer of Infrared you capture the image in.
#5 Budget yourself sufficient time to shoot
I often hear photographers say they wish they’d more time at a location. Plan for that.
Don’t pull up to a spot and say, “I’ll only be a minute”.
You are either going to miss some great shooting opportunities or irritate the person you are traveling with. I have found that the location I can park is often far away from the best image locations. Wander a bit, it will pay off.
This next part goes with this idea
#6 Get off the beaten path and explore
Ever drive along and think, “I wonder where that road goes?” Find out! Some of the best images I’ve made where taken in such locations. One of my favorite images from this year’s trip to DR is a spot I found by following a road until it ended and I was faced with this. Just a few horses among the palm trees.
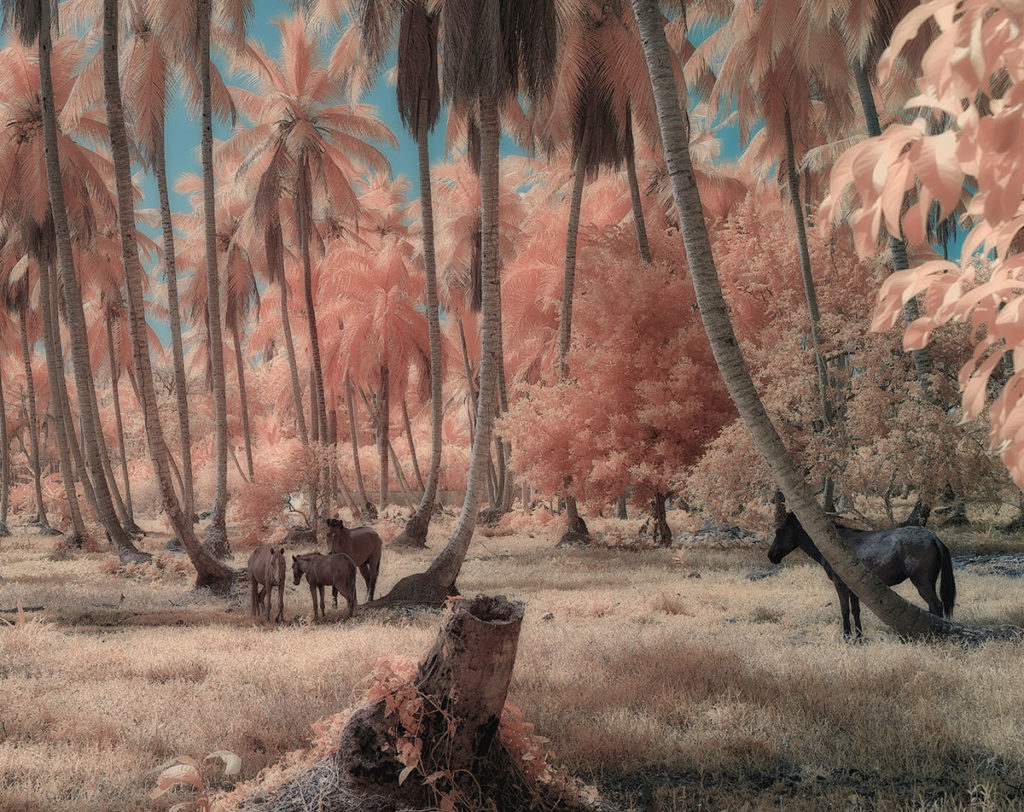
Super Color Infrared at 590nm
I never would have found this if I didn’t get off the beaten path.
and finally,
#7 Try something new
Don’t be afraid to experiment while you are shooting. I always carry a 5-stop ND filter whenever I go out to shoot. In bright conditions, it will often improve the contrast.
Since I had it, why not try some longer exposures?
So I did. And it worked out.
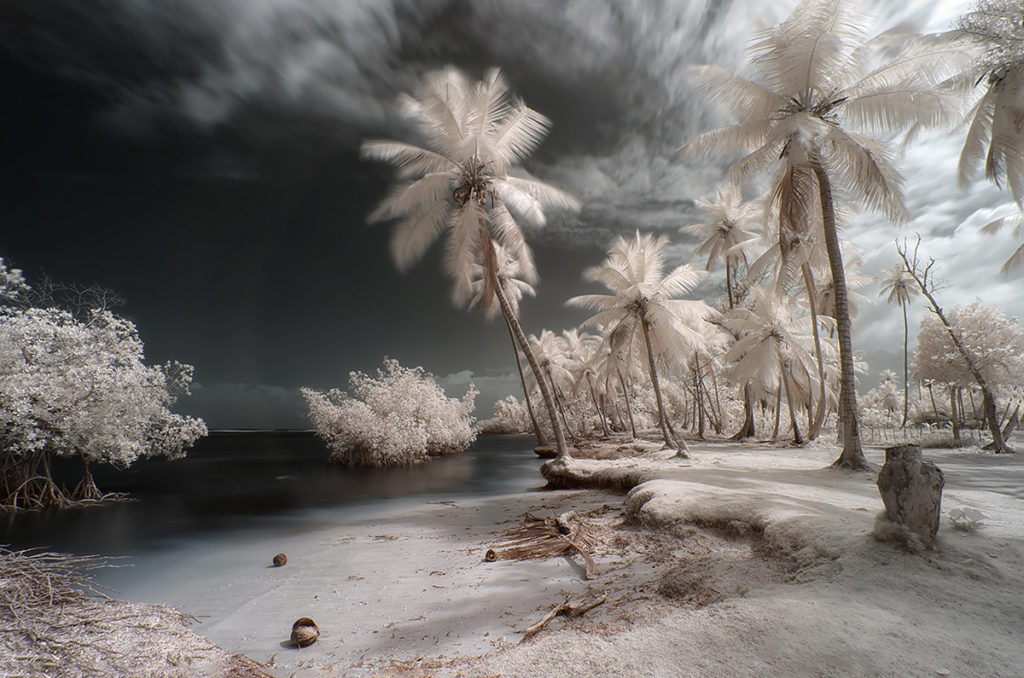
This is a Super Color IR image at 720nm, ISO 50, f11, 15 seconds
And without a tripod!
How? I used a fallen tree to balance the camera. The image was slightly unlevel, but that was easily corrected. I liked the blurred water and the movement of the palm fronds helped created the feeling of movement.
So, what do you think? If you are looking for a great place to shoot Infrared, consider the Dominican Republic.
If you’d like to see the entire series I made on the D.R. click here
Latest articles by Dan Wampler (see all articles)
- Seal Bay photoshoot - March 7, 2023
- Major Copyright Infringement site Scroller.com - March 6, 2023
- Kangaroo Island Wallabies and Roos - March 1, 2023
Dan Wampler
Dan Wampler is a digital artist from St Louis, MO. Having been interested in art and photography since childhood, he spent most of adult life working for Kodak and in the portrait photography industry. A student of the works of Ansel Adams, Any Warhol, and David Hamilton, Dan attempted to keep a wide range of artistic style.
As an early adopter of digital imaging, he found it gave him a way to completely incorporate art and photography. Began shooting Digital Infrared in 2004, and had first camera converted in 2006. His work has been seen in numerous gallery shows, is featured in an iTunes app. He produces Infrared and natural color digital art for sale and teaches his post-production techniques online.
Dan is LifePixel's Creative Director, social media manager, lead blog author, main workshops and training sessions instructor. His images appear in this gallery and throughout the website.
If you have a topic suggestion or request feel free to shoot him an email at danwampler@lifepixel.com
Otherwise all LifePixel customer service inquires should be directed to service@lifepixel.com or by phone at 866-610-1710.
View more of Dan's work on his Website | Facebook
See All Articles by Dan Wampler


Leave a Reply