The words “tack sharp” seems to be engrained into every photographer’s psyche. After all, we are all told that images should be sharp and in focus. Whilst this is true to a point, sometimes deliberately adding some blur to your photos can actually make them more dynamic. Sometimes you simply can not avoid motion blur and at other times it becomes essential to be able to tell a story. So if you have never tried to add motion blur to your photos, now is the time. In this article, you will learn how and why adding motion blur to your photos can be a good thing.
What is motion blur?
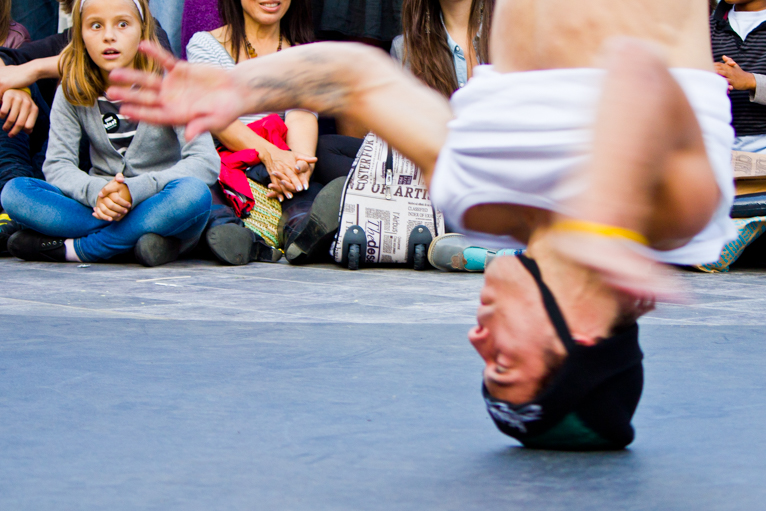
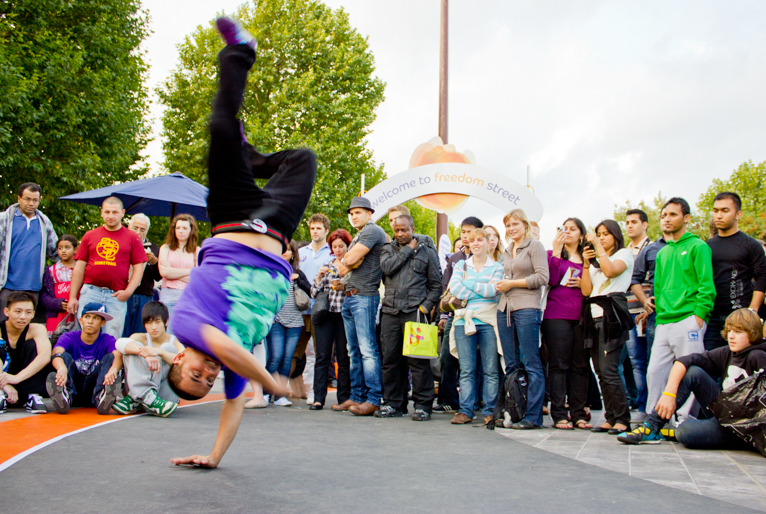
The important thing to remember is that there is a big difference between motion blur as opposed to a blur that is caused by something like camera shake. Firstly, the latter is a mistake and not something that you have deliberately added into your photo. Secondly, motion blur works best when there are parts of the image that are sharp. So, in other words, there is a contrast between the sharp and blurred parts of the image. Finally, the motion blur depicts something that is naturally moving and so we are familiar with the movement so can translate that in our brains. For example, motion blur showing dancing is something that we know happens. But a landscape scene of mountains should be sharp as we know mountains cannot move. This is what enables us to translate between motion blur and just blurred photos.
Why should you add motion blur to your photos?
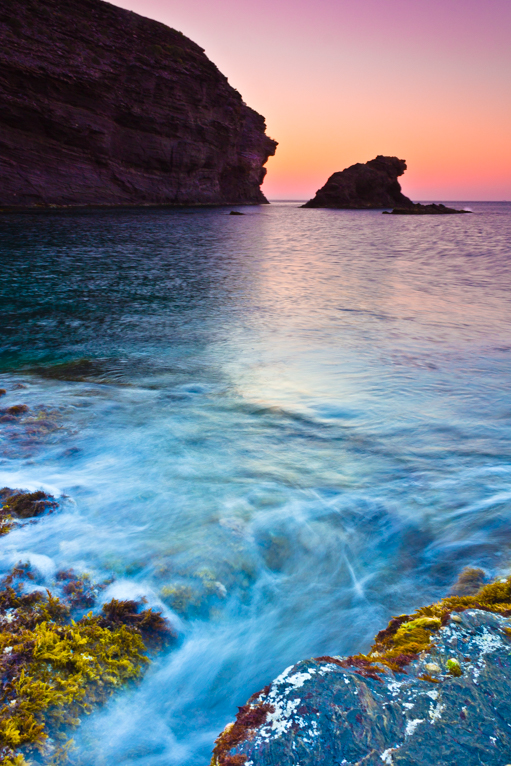
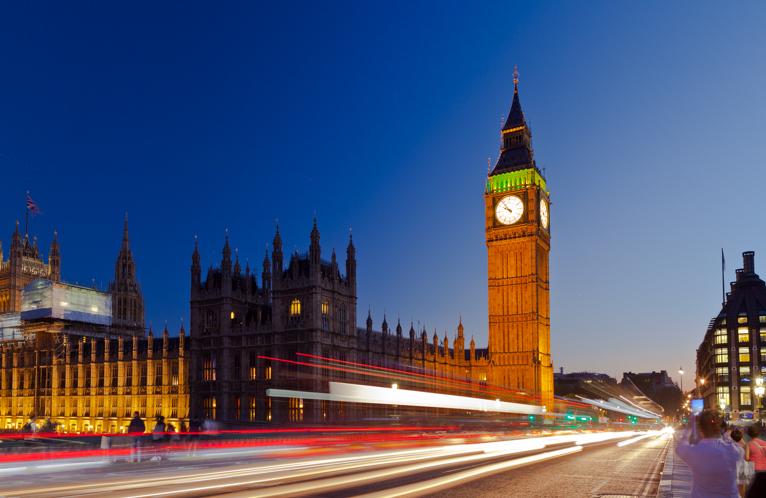
Like any other photography technique, motion blur helps tell the story to the viewer better. It can often translate the sense of the scene better than a static photo. For example, a photograph of a racing car when it’s frozen might look perfectly fine. But most people would look at the image and translate it as a “racing car”. But by adding motion blur to the image it suddenly not only says “racing car” but it also conveys the message of “speed”. Or for example, a landscape scene might be transformed when there is some motion blur showing the sky moving rather than a static image. By having a combination of different images like this it can give your portfolio more diversity and make it stand out more.
How to add motion blur to your photos?
By this point, you should hopefully be inspired to add motion blur to your set of photography techniques to try out. That doesn’t mean that it should be the only thing that you do, but when the conditions and scenario are right you can use it to bring your images to life.
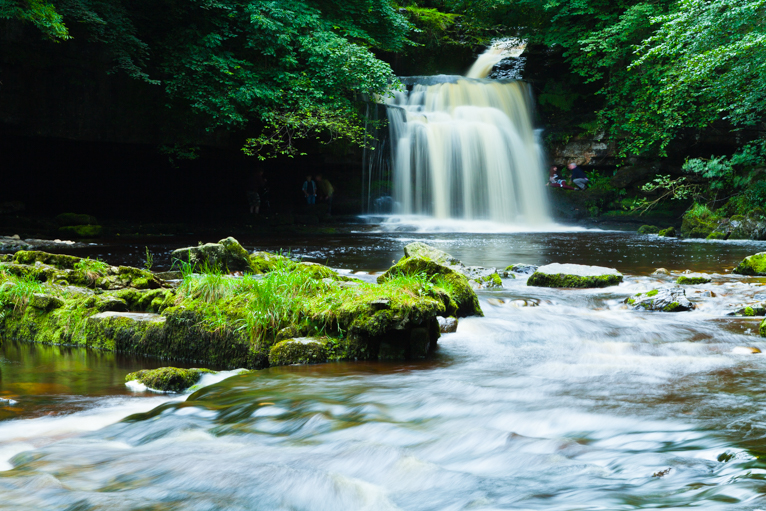
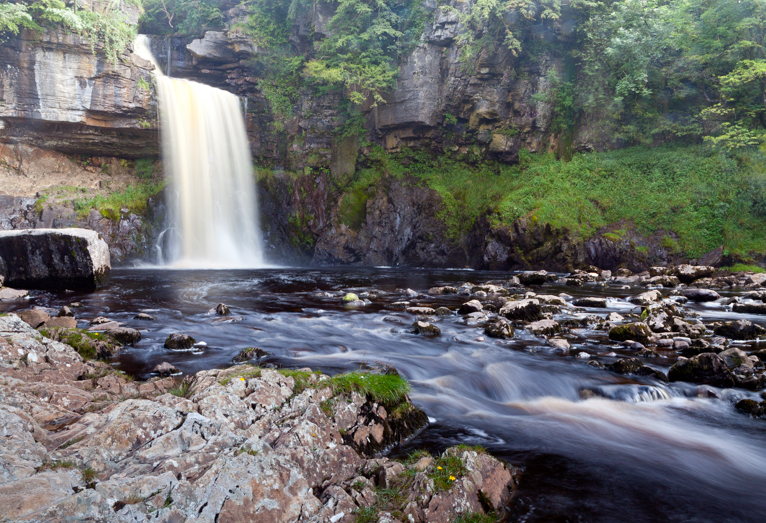
The first thing that you need to know is how to add motion blur to the photo. Simply put, by reducing your shutter speed you will be able to add motion blur to your image. But unfortunately it’s a little more complicated as different scenarios, the speed of movement and light conditions will require different shutter speeds to be able to capture motion blur. For example, a powerful waterfall will not need a shutter speed that is too slow to capture movement. On the other hand, someone walking will require a much slower shutter speed to be able to show that movement.
Slower shutter speeds will bring their own challenges when it comes to capturing motion blur. For one if your shutter speed is too slow you simply will not be able to hold the camera steady whilst handholding. In these scenarios, you will need to use a tripod to ensure that the parts of the image that need to be sharp are sharp. This isn’t a huge problem if, for example, if you are photographing a landscape scene. But what would you do if you are photographing a dancer inside a theatre where tripods are not allowed? This is where it gets a little tougher.
To add motion blur to your photos when you can’t use a tripod becomes a bit more of an experiment. You know that you have to reduce your shutter speed to capture the movement. But slowing it too much will mean the whole image will be blurred and won’t work. In these situations, you will need to experiment a little with different settings to see if you can capture the motion blur whilst keeping the image sharp. So, for example, you may need to raise your shutter speed a bit. By knowing your own limit of how slow you can set your shutter speed whilst handholding you will be able to gauge if you can capture the motion blur or not.
What to do when it’s too bright?
There are also times when you will want to capture motion blur when it’s too bright, like during the day. In these situations, you may not be able to have a shutter speed which is slow enough to capture that movement even if you use a small aperture and low ISO. The way to always think about your shutter speed is that you need to reduce light coming into the camera to be able to affect the shutter speed. So at times when it is simply too bright for slow shutter speeds, you will need to use a neutral density filter to reduce the amount of light coming into the camera. This will mean that you can reduce your shutter speed to the desired level to capture the motion blur that you want.
What is panning?
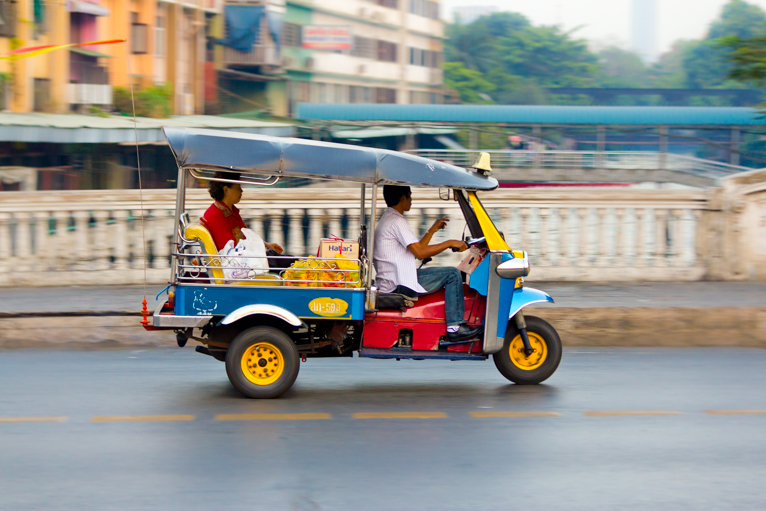
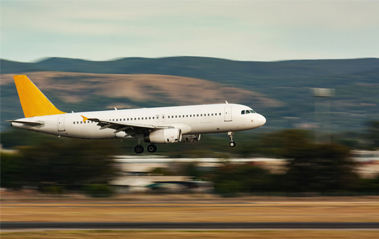
Another method for being able to capture motion blur is called “panning”. This really only works when photographing something that is moving pretty much in a straight line across the front of you. By selecting a slow shutter speed and moving the camera in relation to the speed of the subject you will be able to capture them sharp but blur the background. This is a tricky thing to master and will take a lot of practice and often a few attempts when trying to capture the photo. The key with panning is to ensure that you move the camera in sync with how fast the subject is moving.
Motion blur can transform a photo that looks static into something dynamic and different. Always remember that the most important element of motion blur is that it needs to look like it is deliberate rather than a mistake. The best way to achieve this is to ensure that some parts of the image are sharp so that it can create a contrast between the blurred areas. It will take some practice to master being able to add motion blur, but if you can add it your photos you will see a big difference.
Latest articles by Kav Dadfar (see all articles)
- How To Photograph Street Performers - April 26, 2022
- Profiled Photographers – Ben McKechnie - August 24, 2021
- Profiled Photographers – Jim Maher - August 24, 2021
is the founding editor of JRNY Travel Magazine as well as a professional travel photographer and writer based in the UK. His images have been used by clients such as Condé Nast, National Geographic, Lonely Planet, Rough Guides and many others. Kav is also the co-founder of That Wild Idea, a company specializing in photography workshops and tours both in the UK and around the world.
See All Articles by Kav Dadfar


Leave a Reply