Looking for something that will get your visitors talking at your next exhibition? Why not try placing a few anaglyph images around the room?
Anaglyph:
A stereoscopic picture consisting of two images of the same object, taken from slightly different angles, in two complementary colors, usually red and cyan (green-blue). When viewed through spectacles having one red and one cyan lens, the images merge to produce a stereoscopic sensation – simple to read and, as you will see, simple to create and quite glorious to look at.
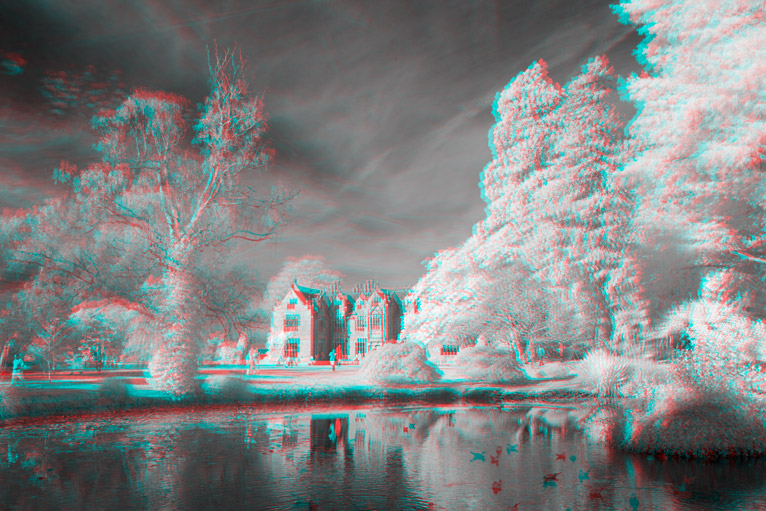
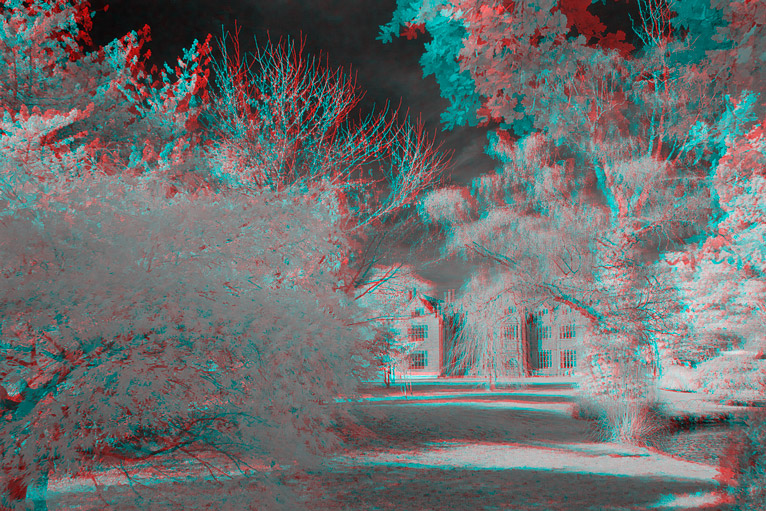
Wakehurst Place is owned by The National Trust in the UK and both the house and its beautiful gardens are open to the public
Stereoscopy Has Been Around for a Very Long Time
In 1943 RAF photo-interpreters found the first photographic evidence of the V1 flying bomb and V2 rocket at Peenemünde using this technique and another single stereo pair of a German radar on the French coast, shot from a low flying photo-reconnaissance Spitfire, gave much valuable information.
I have long been fascinated by 3D and stereoscopic images and how depth can show detail so much better than flat 2D images … but, although I was quite aware of the principles involved, I had never, until recently, actually bothered to find out how to make them even though all the information is out there on the web. One of the first real 3D images to make its mark on me was the Tom Hanks animated film ‘The Polar Express’ which I first saw in the IMAX cinema in London; the scene where the train slowed down and the ‘cow-catcher’ stopped just inches in front of my nose was most memorable. Later, Henry Selick’s ‘Coraline’ was also a great influence
Skip forward a few years to the stereoscopic images created by some of NASA’s recent Mars Rovers. Being a space buff, I obtained some red/cyan glasses so that I could see Mars in glorious stereographs on NASA’s website; these images of our nearest planetary neighbor were my introduction to Anaglyphs. All I knew about how to create those images was that two separate images, one red one cyan, were overlaid and you viewed it through those glasses; how it was actually done remained a mystery to me.
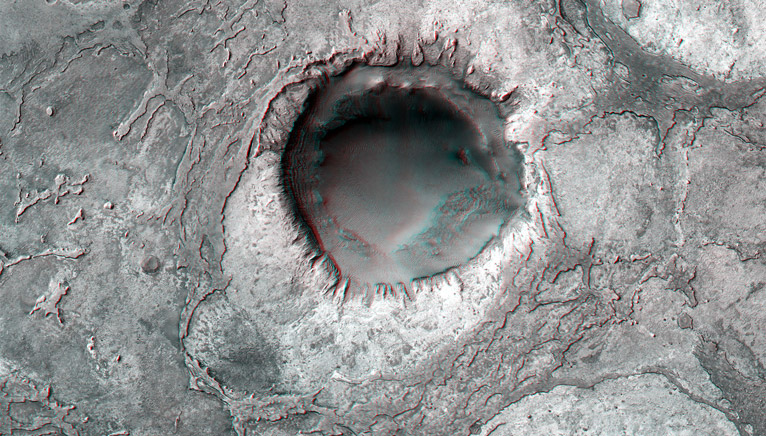
This NASA anaglyph lets you peer right into this Martian crater
Infrared Anaglyph Photography
Thumbing through a book on stop-motion animation one evening, I came across a chapter which included information on anaglyphs, how they worked and, more particularly, how to create them. Having read it I thought “Is that it? Is that all I have to do?” and decided I really ought to have a bash at this. My very next thought was “I wonder how well this would work with infrared images?”.
Next morning I grabbed my IR converted Canon 70D and popped into the back garden and shot a few frames hand-held, processed them and put on my red/blue glasses to see my garden in glorious Infrared 3D. In that instant a whole new area of photography had just opened up to me.
The distance between our eyes is referred to as the Interocular Distance, or ‘IO’. It is this distance that allows our brains to see in 3D as the left eye has a slightly different viewpoint than the right. The brain fuses these two images and provides us with a stereoscopic view of our surroundings. If we now take two images side-by-side with a camera we will have those two displaced images but the problem now is how to feed them to our brain. We can do this in a variety of ways. One way is to use polarizing filters to ensure that the left eye receives one image while the right eye receives a differently polarized image – then the brain gets to work. For our purposes, though, we will use red and cyan images viewed through red/cyan glasses.
The actual distance between the camera, or cameras, taking the images does not matter too much, though the farther apart they are the steeper the 3D effect until they get just too far apart and the brain can no longer fuse the images. For our purposes we will work with a distance of 3 – 6 inches between camera positions; that really is all you need.
There is a lot more information out there on the web; if you would like to read a whole load of really good techie stuff on 3D photography try this article by Steve Shaw. This is an archived site that no longer operates but has been left available for people to read.
Stereo Slider
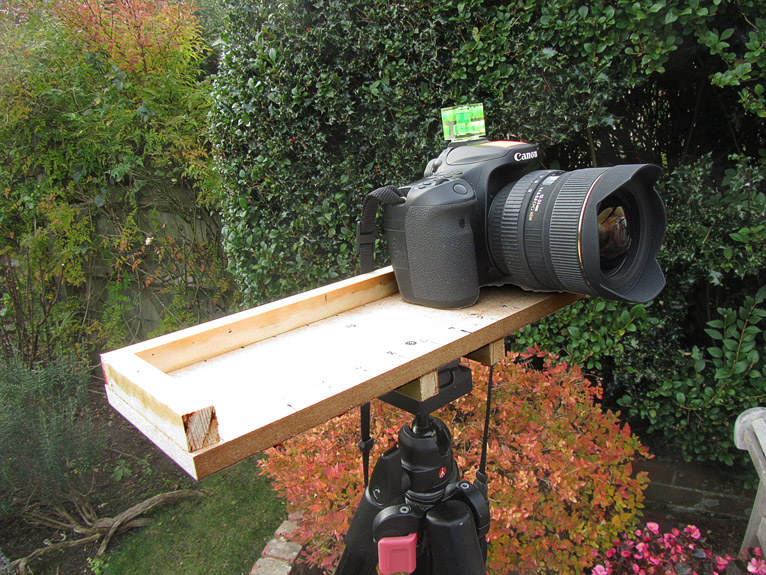
My first efforts were all hand-held and involved me taking a shot then leaning to my right a few inches for the second shot and hoping everything would be on the same level. Even though the images ‘worked’, I quickly realized that this was going to be a bit hit-and-miss so designed my own ‘stereo slider’. It is very simple to make and consists of a piece of, in this case, MDF board about 12 x 4 inches with a piece of wood on three sides to guide the camera and a tripod mount underneath, although I marked it with 1 inch distances, these are not really required. Of course you could just go out and buy one for a couple of hundred of whatever your currency is!
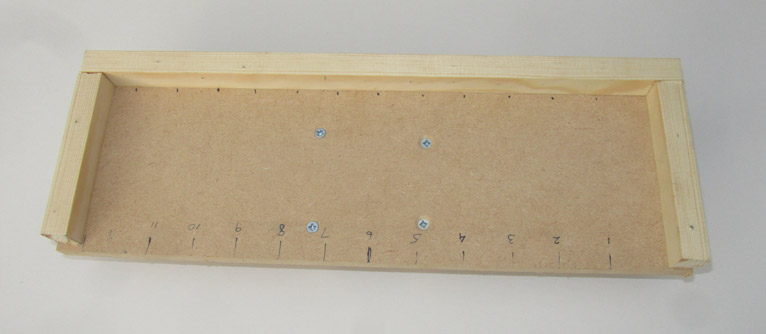
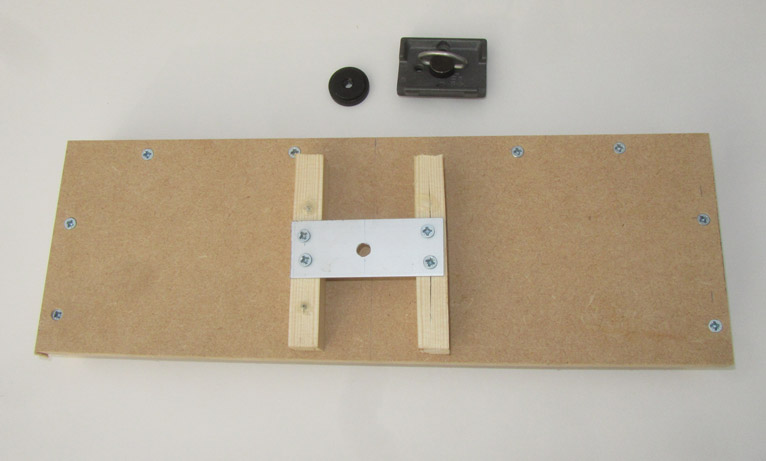
A couple of views of the slider. This really does not have to be hi-tech as all that is required is to move the camera a few inches to the right after the first shot and for it to be parallel to that first shot
To use it just put the camera on the board and take a shot. Then, making sure that both focus and focal length are locked in place, move the camera along a few inches and take a second shot. I use a small hot-shoe spirit level to make sure all is level before shooting. My method of working is to shoot the left hand image first followed by the right hand image. I take a shot of my hand before and after each couplet to act as a marker; it’s easy to get lost when trying to figure out which is the left and which the right if you don’t add markers.
The slider at work
Processing the Anaglyph Images
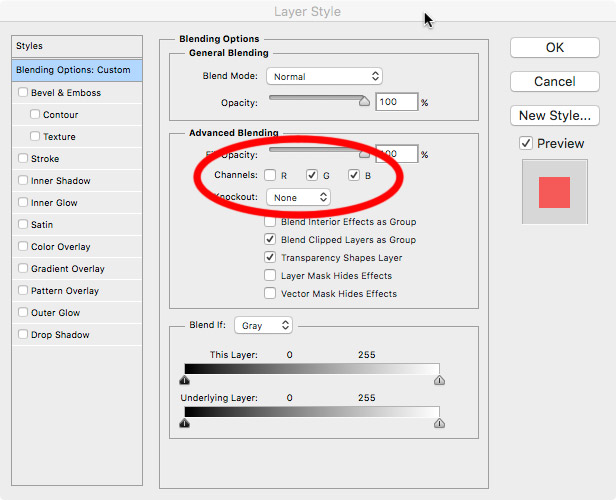
So we have taken our images – how do we process them? As I said earlier it really is extremely simple. If you are shooting infrared, process your images as you require making sure that both are treated identically. I normally use the left hand image as the starting point and, in Photoshop, drag the right hand image on top, making sure that it is centred. I also name the left and right images so that I know what is going on. Now double click the ‘right’ image in the Layers Palette to bring up the Layer Style window; here you will find the Advanced Blending Mode with check boxes for the Red, Green and Blue Channels. Untick the Red Channel … that’s it! – you’re all done!
You should now be able to see both Red and Blue images superimposed, but separated, on your photograph and it will look pretty weird – but don your glasses and be amazed at the transformation.
If you shoot hand-held, you can adjust the alignment of the top layer by using the cursor arrows to nudge the image around the screen until you get the perfect alignment.
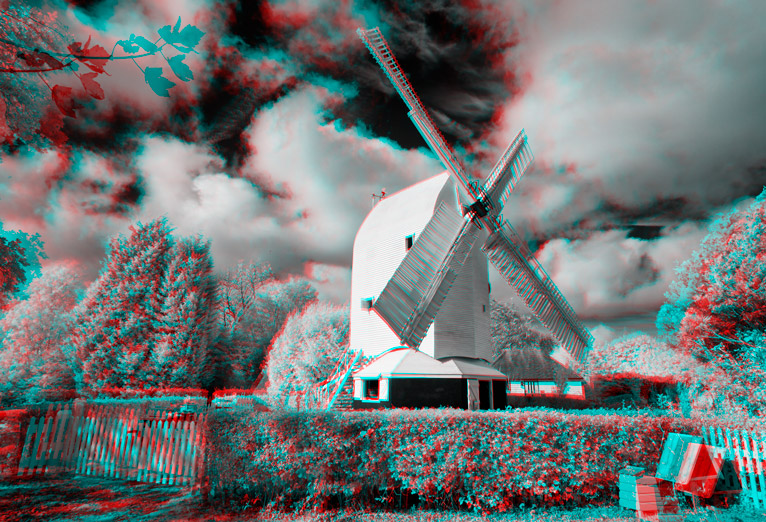
One issue to be aware of is anything that moves between shots or you might get a coloured ‘ghost’. This can be seen, albeit on a very small scale, with the wind-vane at the top of the Mill. It was a breezy day and the vane moved between shots. If it’s people that are in shot then you might have a bit of cloning to do to avoid red ghosts.
Conclusion
So this is a good party-trick but how to use it? I have had a couple of exhibitions of my Infrared work and really would have loved to have included a couple, or more, Anaglyphs for people to look at. I would have made them a good size, say, 20×16 inches or larger for effect. I’m sure that the added intrigue would have boosted sales of the 2D images as people got more involved with the photography.
After a while you might want to forget about counting the number of people you hear saying “Wow, look at that”.
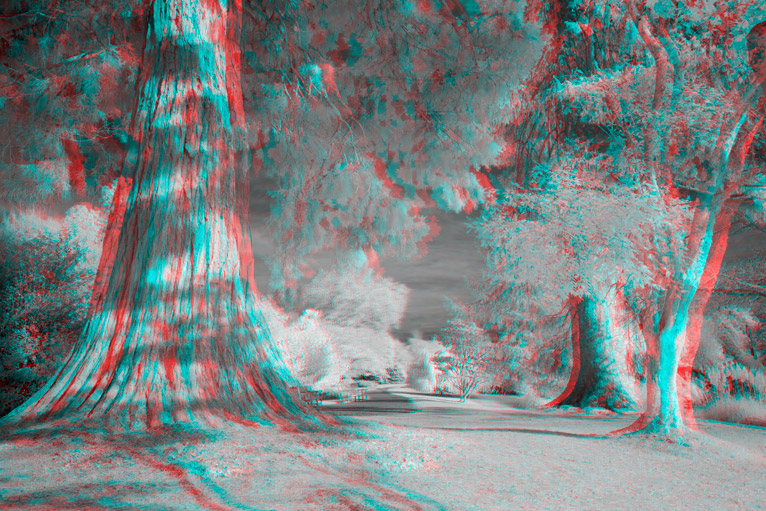
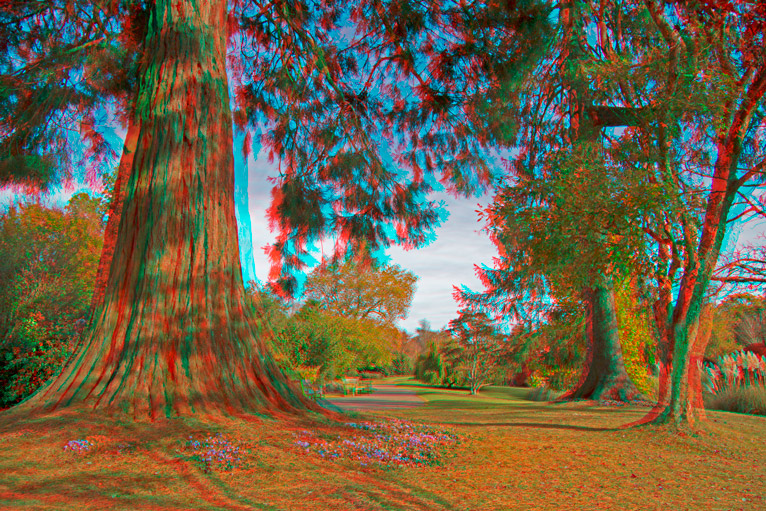
… and, of course, anaglyphs work just as well in visible light
Latest articles by Gordon Bain (see all articles)
- Infrared Heaven in the US Southwest - June 30, 2017
- Anaglyph Anyone? - November 23, 2016
- Returning To My B&W Roots With Infrared - October 21, 2016
Gordon Bain
Article and images by Gordon Bain. You can see more of his work on his website where he frequently adds images so check in often.
While there sure to peruse his Infrared Gallery.
See All Articles by Gordon Bain


Thanks for the reminder, IR x Anaglyph = A walk in Wonderland Park. I’m doing a walkabout (USA) starting in May 2017, with another great tool added to the collection.
Thank-You
Paul
Just thought that I should clarify that the RAF photo-interpreters used binocular-type stereoscopic viewers to see the 3D effect of stereoscopic pairs of images and not anaglyph techniques.